How Do I Sign North Dakota Claim

How Do I use Sign North Dakota Claim online. airSlate SignNow offers a powerful toolkit to create documents and add legally binding signatures. Save and share your custom forms securely via mobile. No installation needed.

Make the most out of your eSignature workflows with airSlate SignNow

Extensive suite of eSignature tools

Discover the easiest way to Sign North Dakota Claim with our powerful tools that go beyond eSignature. Sign documents and collect data, signatures, and payments from other parties from a single solution.

Robust integration and API capabilities

Enable the airSlate SignNow API and supercharge your workspace systems with eSignature tools. Streamline data routing and record updates with out-of-the-box integrations.

Advanced security and compliance

Set up your eSignature workflows while staying compliant with major eSignature, data protection, and eCommerce laws. Use airSlate SignNow to make every interaction with a document secure and compliant.

Various collaboration tools

Make communication and interaction within your team more transparent and effective. Accomplish more with minimal efforts on your side and add value to the business.

Enjoyable and stress-free signing experience

Delight your partners and employees with a straightforward way of signing documents. Make document approval flexible and precise.

Extensive support

Explore a range of video tutorials and guides on how to Sign North Dakota Claim. Get all the help you need from our dedicated support team.

Document type sign claim north dakota simple

hi everybody uh this is rich fredelosa uh welcome we will be talking about um uh billing today so that's the topic for this session so the majority of it will be kind of going through the process of converting that check in check out that ebv data that you're doing right now um converting into that into something that is billable so you all can um you all can get paid so i've got some folks with me um got some uh great folks from my side we have a representative from the north dakota aging division as well um from therap we got jeff covington um tony ann who is going to kind of drive most of this um um section as she is a billing specialist and also tracy linko is with us from the state team as well um also has an abundance of knowledge in uh billing so um we do have starting out um this disclaimer i'll give you just a couple of minutes to review this but this is basically um just the the things that we go over today and really all of our webinars we're really just kind of going through the functionality what sarah can and can't do in an evd um again we do have a representative from the aging division with us which is nice so if if somebody asks a question that is um better answered by them we certainly can get them involved in that discussion or of course hopefully they know they can jump in whenever so that's kind of our disclaimer um before we get to the faqs i just want everybody to know um if you haven't been in one of these sessions on the right side of your uh screen there you will see um the the go to webinar control panel everybody's been muted for this so if you just if you want to ask a question we do that because a really large group today and we're expecting even more actually so um really large group so if you got a question over there you've got a question box if you just click on that it'll open up and you can definitely go in there and in that box just type us a question we will be monitoring that as we go through the session so please if you got questions uh throw them out there we'll answer them in the the question uh section or things will come up that maybe it's great that everybody here so we might just yell at tony in to stop for a second and we'll answer it out loud because everybody may want to hear that so now that we've got through that we kind of wanted to start with and for those of you who were at the session this morning where we were just talking about support and answering any questions folks have so far um we do have some frequently asked questions we've been kind of grabbing as they've been popping up so i did want to get both those um what to do this first one what to do when i cannot log into thera if you're unable to log into your therap account um one of the things that you'll you'll need to do if you if you have that um provider that login the provider code password and you've tried it a few times and you just cannot get in um you'll need to contact north dakota aging for a password reset and you will do that through carechoicend.gov they are going to be the ones that will monitor that and be able to get your get you into your account and just so let everybody know when logging in your login name should be your seven digit medicaid id your password was sent to you via email and then when you go in you reset it to your own password upon that first login and then that provider code is again your seven digit medicaid id number um ending with and this time you'll end it with a dash indeed sony and can we go to the next one um why does it say nurse no service found when i uh check in um when you check in you must first acknowledge uh service authorization so we do have a guide for that we will be um looking at that moving forward um but in your account those will be in when you log into the whole account into your whole therap account uh those will be in your to do tab as pending admission and those just need to be acknowledged um so you'll log in you'll go to that to-do tab you'll click on the one on what says pending acknowledgement and you'll see all of those authorizations you'll click on them one by one to open them up you'll review it just look it over and make sure that everything is is correct what you're reviewing you're going to go all the way down to the bottom and there's a blue link blue button at the bottom right that says acknowledge you're going to click on acknowledge so if you are seeing no service found um that's generally the issue you just haven't acknowledged that authorization yet so once you acknowledge all of those uh authorizations that are in that to do tab you should be good and and again we're going to take a a look at that during this okay and that's you tony uh we're gonna do the poll first all right yeah we're gonna um hi everyone i'm just gonna put a quick pull up and give you a couple of minutes or about a minute or two to see if anybody is providing these services that are on this call and the reason why i am asking that is because i want to see if you have evv services if you have some services that would require the attendance functionality so that i could review that as well um so we just wanted to see what the majority of our audience has so go ahead and keep on voting we appreciate your feedback um and like i said i'm going to leave this open for just a couple more seconds all right it looks like majority of our individual our providers on here are doing personal care um and then we have some community community support services and adult day care so i'm going to go ahead and close this poll thank you everybody for participating um we're going to show you how to build through therap in beginning january 2021 as rich mentioned you are going to need to acknowledge the service authorization for those services that you will be providing you'll see that pending acknowledgement on your to-do tasks and you will go ahead and open that up and then acknowledge that service authorization you also have a section called billing service authorization that will show up in that service authorization which will contain that program site the billing provider the service code the funding source and the icd-10 you've already i'm sure are all familiar with this by acknowledging those service authorizations but we just wanted to reiterate what these fields are after acknowledging a service authorization and you plan on billing through therap users should create a claim template and we're going to discuss how to create a claim template today there is also a handout in the webinar um that you can that is an attachment that you can either download or save um that gives you step-by-step directions on how to create those claim templates in the claim template um you're going to have the individual's name and the place of service and you're going to have those service links checked off um at the bottom for those services that you provide so for your ebv services i kind of split this up into two different um way to show you so the ebv services this is how you would do your billing and we're gonna look at it in therap as well but i just want to show you the screenshots prior to us hopping into there there's three simple steps for billing the first step you would do is this billing conversion evv billing this step would be using that completed check-in and checkout time from ebv to calculate how much to build so really important here to uh remember that everything on that schedule should be completed prior to billing the billing process will go very smooth if you have everything completed if you have that check in and checkout complete and everything's green on your schedule once that's done you would go to that billing conversion and ebv billing the second step of ev billing would be the professional claim new using template that's that template that i was just talking about previously that you would create that new template that's a one-time setup but after you create that template you will use that professional claim new using template that will take the ebv billing information along with your agency's information to create a claim and then the last step would be to electronically send the claim to north dakota medicaid this step would take that ebv billing information and your agency's information on a professional claim to electronically send that to north dakota medicaid we have a couple of different reports within therap that you can utilize if you bill through us the agency beast utilization report this report shows the units that are generated per day from billing as well as the total dollar amount which i will show you on this call that's the one i'm going to show today the billing summary report is a little bit more advanced this shows the units generated per day from billing your total remaining units and if there is a claim attached to that billing information and another great report that you can run is called an unclaimed report what this report does is shows if there's any billing data that has been created but not attached to a claim or if there was not that claim template created that we discussed in the beginning okay so i'm going to just show you really fast on this demo account which i'm sure mostly everybody on this call has done this pre-authorization this pending acknowledgement if you have this on your to-do tab on on your to-do list i would suggest to go ahead and acknowledge that authorization because like rich said in those um frequent asked questions if you're not seeing that service it may be because you did not acknowledge that service authorization so you would simply just click on that number you would see your authorizations listed here go ahead and click on that authorization ensure that everything is correct on here look at it and then here is that billing service authorization section that everything is filled out and you would just simply click that acknowledge button at the bottom right that's pretty much how you would acknowledge the service authorization um again that should already be completed once you've acknowledged that service authorization um if some folks are confused on which method to use whether if it's evv or attendance like we asked with that poll a great way to check that is to do that service authorization search and you can scroll down towards the bottom here and where it says method of data collection you can select either attendance or evv i'm going to go ahead and select attendance and here this will show me my services that have attendance as my method of data collection so for example supportive employment right that one is attendance residential habilitation that one is attendance oops sorry i didn't mean to click on it but that's okay we'll just we'll show you right here um again residential habilitation that's showing you that that's attendance that would be a separate not the check-in checkout from ebv but that would be a separate way to collect your data and then you can see right here personal care that is going to be done through ebv so this determines how to collect data and how to bill okay any questions so far rich not yet we do have um a little bit of concern we might be going a little too quick so i just wanted to let everybody know we're kind of putting some information into this hour um i know tony answer we we went through the powerpoint she's also going to show you here on the computer so on her account so everything we're going to kind of go through a couple of different times we will also make available this session um recorded on the uh support site we'll give you information about how to find that also and i think um tony anne's got it towards the end of her uh presentation uh we'll be doing this um in a few different sessions this month so if you feel like you want to jump on again and and watch it again you'll certainly have that opportunity as well so we'll try to go through all this information as many times as we can okay and i'll try and slow down too because i get a little bit excited with billing and i apologize if i'm going too fast leave it to a billing person but i think other than that we're going we're going pretty good you're doing well okay so um that was the pre-authorization again the pending here make sure that that is that you have no pending and that other service authorization search that was just showing you the two differences between attendance and ebv if you have multiple services so what i'm going to start off in here um is to show you how to do that clean template this claim template is a one-time setup so you only have to set this up one time similar to those service authorizations where you're acknowledging them like you only acknowledge it one time for the month of january right so you're only setting up this claim template one time so you would go to claim template new you would select your individual's name and if you only have one individual that's all that would display here okay then you would select the place of service and i'm going to select home 12 home for my place of service and then you can skip all the way down to the very bottom and these service links are those service authorizations that you acknowledged that are stating that you're able to provide these services to that individual so for homemaker and personal care it's directly affiliated with roger so your this claim template is looking at that information for roger that you're able to provide homemaker services because you acknowledge that authorization and the personal care and again we have that guide attached in the handouts of this webinar and at the very bottom all you have to do is click submit so this very bottom just click submit and then that um claim template is created it's that one and done you have to create that one time and that will help with that billing because we're using those claim templates when we bill so now i'm going to go to my dashboard and i'm going to show evv billing and i know uh in the beginning you saw my slideshow and my presentation but i'm going to show you the actual steps in therap so the first step is to actually have that documentation collected so in that schedule you have that documentation already entered for the time and the time out and everything is green right because you want everything to be green on your schedule so once everything is completed and green and and ready to go for billing you would come here to billing conversion and ebv billing on here i'm going to select my service description code and that's the services that i am billing for the ones that i checked in and checked out for i'm going to select my service dates those are the dates that i intend to bill for and that i checked in and checked out for and that they are completed and i'm going to start this from the second because i've already built for the first and then i click search let me just go back real fast you can see there's a blue search button right here what this is going to do is this is going to search for those completed check and checkouts from that schedule from the ebb schedule they have to be complete in order to bill so go ahead and click search i'm going to build today for earl earl white is my individual that i provided services for and i know that he is completely done for december and he is ready to go so i'm going to simply select the little check box next to earl's name and click this generate billing data if i had multiple individuals i can select this box next to the individual if you had multiple individuals in your home but for today i'm just going to select earl and click generate billing data what this is going to do is it's going to calculate how much you can build based on the time and timeout that was completed from that scheduling evb check and checkout so once i do this i get my billing information my billing data generation results okay so this is giving me a summary of all my billing data of all those calculations that the system did for me because i had that completed check and check out so as you can see on 12 9 i was able to bill for 20 units based off of my check and checkout at five dollars per unit for a total of 100 now on 12 16 maybe i stayed a little bit later because there was 28 units here so i was able to bill for 140 dollars and you can see that it goes on for each uh subsequent week so for 12 24 um i was there for 24 units and billed for 120 dollars and again on 12 9 i was there for 20 units and billed for 100 so that is that first step with that evv billing okay now there's a a great report that will show you that information um it's called a utilization report and i'm just going to show you really quick this is optional but it's really great to see that information and that total dollar amount for your records as well so if i was to put earl's name in here and search for the month of december so i'm just putting in those december dates this is going to show me that quick summary that i just saw on that previous page so as you can see here's earl's name i told you i already billed for that 12-1 but here's 12 nine here's 12 16. here's 12 24 and here's 12 29 and if i scroll all the way over towards the right it gives me my total used uh units 112 for the month and my total dollar amount which is 560 for the month so this is called that agency based utilization report this is that report that i should that i said in the beginning i would show you again it's a great report to have um and to use when you're billing so that's that agency beast uh utilization report okay so now we're going to hop into professional claim new using template and as i said before you have to create that template that one time in order to do the professional claim new using template if you don't create that template then the individual's name will not appear on the list so when i go to click on new using template i'm going to go ahead and put in my code if i type in personal care unit and if you only have one code um then you're only going you're only going to see the one code if you have three codes then you'll see the three codes on this list but i have multiple codes on here for your service dates this is going to be the dates that you provided services for again these are the dates that we are planning on billing for this just has to be within the same month and you can type it or you can use this great calendar feature if you wanted to you know click on the calendar here and then you will click this next button when you scroll down you'll see the individual's name i'm looking for earl so earl is my individual that i want to create the claim for so you can simply click on the check box on the left hand side and this is going to attach your billing information the one that we just looked at from the report from that billing information for all of december and it's going to attach your agency's information along with the individual's information all on this electronic claim so when i click generate claims it's going to generate four separate claims one for each date of service so we had you know the first week of december the second week of december the third week of december and the fourth week of december so each of those dates of service is its own claim okay at last step for evv billing would be to do a claim submission and send here this is uh where you're sending that electronic claim so you would select the payer and you can put in the individual's name but if you do not put the individual's name in then it will grab all of your individuals if you have multiple individuals there again the service d is the dates that you're providing service from and two so you can type that in or use that calendar feature and then you can click this search and on the next page it will show all those claims that are waiting to be sent i'm just looking for earl's claims so i'm going to send the claims for earl if you scroll down to the very bottom you can see that there's a send claim button there's also information on here that tells you the individual's medicaid number and it tells you the total claim amount and when you created that claim so today i created that claim so um that's a quick summary of those claims and then you just simply click send once you click send you get this green check mark that states that it's been successfully placed in a queue and therap sweeps the claims and then it sends it electronically and it will change to a sense sent status are there any questions rich um i think we're kind of cranking through as we go okay um somebody asked why you were typing 12-2 instead of oh yeah i'm sorry i said that i already billed for 12-1 so it wouldn't have mattered anyways if i did 12 1 instead of 12 2 i apologize for that but i already had information in there for 12 1 that was billed so mariana you didn't miss anything she did that's would be in the case where you know she had already billed for 12-1 so that's why she started 12-2 yep um okay summer coming in good folks um send over your um billing questions so i see one that says do they need to send this report via s-com um i would say no because it just is telling you this information right here that it's just placed in queue um like i said earlier there is reports if you wanted to get that information on how many claims you sent or which claims were sent that you can you know generate those different reports but i don't i wouldn't recommend things i wouldn't recommend sending it to your s-com um do you do the same process with each service code a good question joan this process is done for your evv services um if you have any services like i said that would be under that attendance that um different service code the attendance is a little bit different when you generate instead of clicking ev billing you would generate from up here but that same process with the professional claim new using template and the claim submission send is exactly the same uh do we do the same anytime or once a month um you can generate these claims once a month or you can do it you know bi-weekly you can it just depends i see that terry asked that question yeah it looks like somebody's i don't know if you answered i don't know for you i'm sorry i didn't know if i was muted um i don't know if you answered this but could you could you show that template one more time again real quick the claim template yeah sure um i can't recreate the same template which is a great feature in therap like for this um individual but i'm just gonna search this time but you would go to new and let me just grab this individual real fast okay so you would select the individual's name when you're doing that claim template you would select that place of service and then you would select the service link or links if there's two and then there would be a submit button just because this one is already created i also have the guide pulled up here too so again you would go to new and then you would select the individual's name select that piece of service and then you would select those service links and then select submit perfect um so we're getting questions about a lot of information it is a lot of information you know i don't think any of us can can deny that so a couple of things one is we're gonna um you know the user guides like um tony ann is showing those those are available uh we are also again going to have a a recording of this session um and that registration link you got to get in here today we are doing more of these section so if you would like to come back and and and re-watch this go through it again ask other questions the other thing i'll add um is that we're also doing some support meetings for you all on tuesdays at 9 00 a.m so i'll get a link in your chat because some of these questions some other questions well they're all good questions but some of the questions uh about evv specific logging in checking in those kinds of things um we definitely go over those in that webinar that's really a support for how do you get your check in and check out how do you get that information in there um and do all of that so we also have that available um again that happens on every tuesday morning through february so again i'll get a link over there if you came this morning you can come back anytime if you haven't used the link and i'll put it in the chat so that you can come in there and ask those edv specific questions um and tony anne when whenever you're ready i would like to show folks how to uh maybe do some editing sure i'll send you over the screen or i stopped sharing my screen rich okay so again um indie support and therap services after today if you have um questions certainly send us questions via email uh in that indie support therapyservices.net we'll get you um we're all kind of monitoring that all day every day so we will definitely get back with you some folks have uh sent me emails because my email is on this session so you sure certainly shoot me something as well we'll get you um all the answers you need but again if you need to come back to to this session uh please do we'll go back to that screen before we go away um the dates but obviously you've got the registration link because you're here today go back in there and you'll have several options if you want to come to others just so you can get that information again the more you see it the better it is so what i want to know what i want to do now is um i'm going to show you something that that is kind of important at this point um it is we've had a couple of questions but also it is important as you um move forward and start thinking about your billing because tony ann showed you um kind of in the first part and it was in the powerpoint but also uh she was showing you on on her account that evd billing conversion so you're basically taking that that that data that check in check out data you know when you checked in when you checked out and how long you did it and those units that need to be billed that's just pulling right out of your evv so one of the first things you're going to want to do before you start that process and before you do the edv conversion for billing is you want to go through and you want to make sure that your check in checkout is is complete and accurate so if you need to do any editing you certainly can um and you want to do that uh it might be better to and you know if you are going to build once a month maybe um you know you might want to go in there weekly at least uh you could certainly do it more i mean it's all real-time data you could do it every day if you wanted to so you know you want to make sure you get in there if you know you forgot to check out at some point or you forgot to check in um that you go in and you can you can fix that um so that when you convert it and you go for it it will be accurate so to do that um of course i i'm i'm sure a lot of you if you're doing it via the web you know all of that is here um if you're doing it by mobile app and you're doing a self check in even better that's probably the easier way to do it so when you do need to go in and you need to fix excuse me you need to to fix because you either forgot to check out or maybe you just forgot all together uh you need to go in and fix that you need to be on your website so you got to get the full um the your full login on the web to be able to access editing you also have to come here for your service authorization so if you haven't acknowledged your service authorizations you'll need to do that from your account somebody asked me earlier about um all they just stated all they had was a phone they don't have a computer in that case you can certainly get to this account using a mobile app certainly if you're using a tablet an ipad maybe a samsung tablet uh makes it a little bit easier because the screen is is bigger but on your phone you can if you're using an android um you have google chrome there somewhere is your your web browser and you open up your bread your brand your web browser and you go to that secure.therapservices.net and you log in to get the full account of course with a phone you will have to certainly resize here on the dashboard but one of the great things about what our fantastic programmers are doing on the therap side is as we do updates uh what you'll notice is when you really after you pass through this uh dashboard most of where you're gonna go next uh has a user interface that knows you're on a mobile device it knows you're on a small screen and it's going to make everything fit your screen so for off service authorizations for editing you'll want to make sure you get to the web whether it's on a computer laptop desktop or on your phone with google chrome or if you're using an iphone you'd want to use safari so to make sure i'm in the right and i am not i want my account to kind of look like yours so what you'll see and this is where you're going to go and you're going to edit if you need to fix something you forgot to check in forgot to check out you'll go to your individual tab here on the left and once you're here down at the bottom you'll see the scheduling box here and then with your schedule uh what you have available is this quick i don't know if i can grab that or not this quick grid create an edit so um when you click that quick grid create edit it does take you right to your um scheduling query what you will see is anything that you've done so far so with this one here i do have a um something here it looks like tracy creek this is uh a slot for tracy so let's say i gotta um need to fix this for tracy i would uh open that up and since you went through your individual tab right here you'll see your name and you'll go over here to this action column you'll click edit this is where you will be able to fix anything that you have missed so for this one let's say i scheduled that and i just forgot to do everything this morning so i need to put a check in check out up here at the top i want to update that checking because there's nothing there best way to do this is click on the calendar because if you don't get all of that formatting right it's going to give you an error message and after a while it gets frustrating so the easiest way to do that is since i don't have a check in at all i want to make sure that i select the date so one five i also want to come down here in the bottom because i need to fix the time so down here at the bottom right of this box is a clock icon when i click on that now i got to put in the time that i checked and checked out or in this case crazy so i would come here and let's say it was uh 10 a.m to 1 p.m doing a service so i would click on the 10 again i i if i click on the number i get our increments there you can use the arrows up and down but keep yourself from getting some carpal tunnel if you just hit on the num on the number you can choose whatever number you want same with the minutes this one helps even more because if it was a 10 30 check in i can go right to the 30 instead of hitting this 30 right and then if i click outside the box it keeps it as 10 13. then i would want to fix my check out time i would come in here put the date in again the time and again let's say it was 3 p.m i can change that a.m because it's going to default a.m click on it changes to pm the checkout address chicken checkout address can put it in there it's really not collecting your your edd data because it's not grabbing that address via gps clocking clock out so i've got my my check and checkout time also have an exception code here it is required to remember everything in therap with a red asterisk is required so when i click on this please select in the exception code this is where i want to select the reason i had to manually put in the time so if you forgot to check in check out uh you can put that information in i can do other and i can put some information in there if i need to um and then once i get that information in there um i would just select update you do have to do a attestation that you know that you have some documentation to support the visit and you understand that that is um auditable and then once you put that in it will fix your checking check out time looks like my internet's moving a little bit slower so that's how you edit so to kind of link it back to what we're doing um here and if you mess up the time because it's not three o'clock yet you need to it'll tell you that and you go back and you fix it so if you do get an error that's what it looks like if you get it right it'll tell you it's been updated successfully and anything green means i've got to check in check out if it's got a red outline around it uh that just tells you and and who's looking at it that red outline means there's something there edited there's a comment uh exception code all that stuff so make sure you're keeping track of that fixing those reviewing so if you just want to review you come in the same way so you go to your individual tab and you click on that quick view create edit if you wanted to come in here and look at the week you can certainly look at it by week so what you're looking for is anything that is incomplete it would show as orange see if i have any in the month no we're doing pretty well you can also look at it by month green means you checked in you checked out red around that green means you um there's an exception code or you had to fix something you had to add it that's what that means um but the other thing you're really looking for is if any of these colors are orange again you've got this legend at the top that means that it's incomplete you're going to double click on that to open it you'll see your if you forgot to check out you'll see your check in you'll click that edit you'll go through that process that i can you so before you do that conversion this is one of those steps that you'll want to make sure that you go through and make sure that you don't see anything on and then you'll be ready to convert that down any questions on that process uh rich there is a question that came in that if your ebv address is not accurate uh where would you change that yeah um if i got this question earlier today from somebody um i think it was on the session this morning so if you're checking in um and the address um doesn't pinpoint you right and then sometimes it won't so the gps now phone tends to be a little bit closer but it may not pinpoint you exactly right it also may not grab the full address so somebody asked me earlier today well what happens if um when i check in there's no um there's no address in and and that could certainly be uh one of the things is the uh the phone if using the mobile app uh the satellite's gonna grab your position no matter where you are right so it's going to give you a latitude longitude so you will get your geo location that should be pretty close uh the question i got this morning had the street just not the house address um same thing but also if it's on the street and it's close um that's gonna happen so depending on what's going on with cellular depending on what's going on with satellite and just to let you know from my perspective um and i didn't show you here but for me um sometimes and here's one that i i would have needed to fix but if i were to check out for this slot so for me that is that is correct but sometimes when i try to check in especially if i'm on my computer because it's really not gps it's trying to find my router um i live in north myrtle beach south carolina so sometimes what what it will do is it'll it'll put me out here a couple of hundred yards out in the ocean so just it depends on a lot of things most of the time it's right but every once in a while it'll throw me out in the ocean um but still pretty close i'm i'm three blocks in it still got me within two or three blocks um that's pretty close and i think that that would confirm that yeah you're probably where you need to be i hope that answered the question and that's my check out for me and as you'll notice there that really fits anything but it's still got the red outline that's because i wrote a comment if you are pre-scheduling so if you say you know every day you know my hours are pretty much nine to three or nine to five or eight or whatever it is and you want to pre-schedule for the week that's fine if you do that you do have to do that from here in the account but what you'll notice from mine is um my shift should have ended a while ago so just know anything 15 minutes earlier late if you did pre-schedule it just want you to put a comment a comment of why you're checking in early or late or um checking out early early he's going to put a comment in there before it will allow you to check out so that's why you saw me put that test in that box you gotta write it other questions trying to look for my side yeah jackie i'm looking at yours so yeah um there is a procedure um for um checking in checking out especially for uh live-in providers where you know it's a it's a a way that you will um you're basically getting your monthly units and you're breaking that down to how many hours per day that is and when you start doing services and actually no check-in doing a self-check-in is the best way to do that um and then you're going to work those those average hours per day to capture those units for the month is there anybody out there that can explain that better than i just do i think um if you're kind of talking about the units i i kind of pasted an example for someone else the best example that i can give you of you know i know a lot of you are kind of focused on those units part of when you're doing that check-in in your checkout is when you're putting in that begin time and that end time so say you start at 9 a.m and then you finish at 10 a.m we're looking at that specific time range that you entered and that's how your units are being generated okay thank you so somebody asked about a phone number we do have a support phone number however generally those folks if they're not familiar with north dakota aging they're going to refer that to us you can certainly call there and they'll shoot us um some information and maybe a phone number we can call you back again i think the best best thing is to do that nd support services dot net um if i stop presenting um and turn it over to you tony can you bring up that powerpoint again so we can show those those links the email to us care choice and then i think the the support pages there as well but if you do that nd support again we're there watching it and there's a pretty large group of us with the state team who watch those uh watch for those emails um again all day every day we get we get pinged on our side when one comes in so um somebody will get back with you pretty quickly and if the phone call is needed or something else we can certainly walk that through you at the time um so that's probably your quickest way and it's right there nd support therapyservices.net again if you're if you're not able to log in right now you have trouble logging in maybe you've tried a few times and you just can't do it if you've tried a few times it's probably locked so you're gonna need to send an email to that care choice at ndm.gov and again if you if you look at that faradv.net slash indeed that's where you're going to find all the user guides you'll find webinars you'll find everything you'll need so for this group uh aging individuals you would um individual qsp you click on that link to the right and that would take you to your specific page give you some information here you can sign up for upcoming uh webinars we've got recorded webinars so that's where um we will be uh posting recordings of this webinars what as well as ones we'll be doing in the future if you click that that green cnd specific support materials that's going to take you to all of your user guides so as you scroll down you'll see user guides on um how to download the app how to scheduling ebv for android for apple um if you are using ivr how to do that fixed visit devices um also has some information about the web browser and then down at the bottom are specific training videos on how to do those specific things here's always somebody asked that earlier here are all those user guides if if you're someone that does better reading than something like this or videos there's your user guides and again there are training videos down there as all well well i've got maybe half a minute left anything else we can answer real quick all right well i've got 3 30 tony and anything else anybody else in farah i don't have anything else rich and i would just say like you said if you have any questions we're definitely here for support you can definitely email us we'll get back to you um attend another webinar if you feel like that's you know what you need um definitely let us know how we can all help and have a great day everyone thanks everybody

Keep your eSignature workflows on track

Make the signing process more streamlined and uniform
Take control of every aspect of the document execution process. eSign, send out for signature, manage, route, and save your documents in a single secure solution.
Add and collect signatures from anywhere
Let your customers and your team stay connected even when offline. Access airSlate SignNow to Sign North Dakota Claim from any platform or device: your laptop, mobile phone, or tablet.
Ensure error-free results with reusable templates
Templatize frequently used documents to save time and reduce the risk of common errors when sending out copies for signing.
Stay compliant and secure when eSigning
Use airSlate SignNow to Sign North Dakota Claim and ensure the integrity and security of your data at every step of the document execution cycle.
Enjoy the ease of setup and onboarding process
Have your eSignature workflow up and running in minutes. Take advantage of numerous detailed guides and tutorials, or contact our dedicated support team to make the most out of the airSlate SignNow functionality.
Benefit from integrations and API for maximum efficiency
Integrate with a rich selection of productivity and data storage tools. Create a more encrypted and seamless signing experience with the airSlate SignNow API.
Collect signatures
24x
faster
Reduce costs by
$30
per document
Save up to
40h
per employee / month

Our user reviews speak for themselves

illustrations persone
Kodi-Marie Evans
Director of NetSuite Operations at Xerox
airSlate SignNow provides us with the flexibility needed to get the right signatures on the right documents, in the right formats, based on our integration with NetSuite.
illustrations reviews slider
illustrations persone
Samantha Jo
Enterprise Client Partner at Yelp
airSlate SignNow has made life easier for me. It has been huge to have the ability to sign contracts on-the-go! It is now less stressful to get things done efficiently and promptly.
illustrations reviews slider
illustrations persone
Megan Bond
Digital marketing management at Electrolux
This software has added to our business value. I have got rid of the repetitive tasks. I am capable of creating the mobile native web forms. Now I can easily make payment contracts through a fair channel and their management is very easy.
illustrations reviews slider
walmart logo
exonMobil logo
apple logo
comcast logo
facebook logo
FedEx logo

Award-winning eSignature solution

Wondering about How Do I Sign Claim North Dakota? Nothing can be more comfortable with airSlate SignNow. Its an award-winning platform for your company that is easy to embed to your existing business infrastructure. It plays perfectly with preferable modern software and requires a short set up time. You can check the powerful solution to create complex eSignature workflows with no coding.

How Do I Sign Claim North Dakota - step-by-step guidance:

  • Sign up if you have no account yet. You can also log in with your social account - Google or Facebook.
  • Get started with a 30-day free trial for newcomers or check airSlate SignNow pricing plans.
  • Create your customized forms or use ready-to-use templates. The feature-rich PDF editor is always at your fingertips.
  • Invite your teammates and create an unlimited number of teams. Collaborate in a single shared workspace.
  • Easily understand How Do I Sign Claim North Dakota feature by self serve on our website or use the customer support.
  • Create document signing links and share them with your clients. Now you can collect signatures ten times faster.
  • Get instant email notifications about any user action.
  • Try out the free mobile application to be in touch on the go.

Improve your experience with airSlate SignNow. Creating your account, you get everything needed to close deals faster, enhance business performance, make your teammates and partners happier. Try out the advanced feature - How Do I Sign Claim North Dakota. Make sure it's the best solution for the company, customers, and each individual.

How it works

Find a template or upload your own
Customize and eSign it in just a few clicks
Send your signed PDF to recipients for signing

Rate your experience

4.4
67 votes
be ready to get more

Get legally-binding signatures now!

  • Best ROI. Our customers achieve an average 7x ROI within the first six months.
  • Scales with your use cases. From SMBs to mid-market, airSlate SignNow delivers results for businesses of all sizes.
  • Intuitive UI and API. Sign and send documents from your apps in minutes.

A smarter way to work: —how to industry sign banking integrate

Make your signing experience more convenient and hassle-free. Boost your workflow with a smart eSignature solution.

How to eSign and complete a document online How to eSign and complete a document online

How to eSign and complete a document online

Document management isn't an easy task. The only thing that makes working with documents simple in today's world, is a comprehensive workflow solution. Signing and editing documents, and filling out forms is a simple task for those who utilize eSignature services. Businesses that have found reliable solutions to how do i document type sign claim north dakota don't need to spend their valuable time and effort on routine and monotonous actions.

Use airSlate SignNow and how do i document type sign claim north dakota online hassle-free today:

  1. Create your airSlate SignNow profile or use your Google account to sign up.
  2. Upload a document.
  3. Work on it; sign it, edit it and add fillable fields to it.
  4. Select Done and export the sample: send it or save it to your device.

As you can see, there is nothing complicated about filling out and signing documents when you have the right tool. Our advanced editor is great for getting forms and contracts exactly how you want/need them. It has a user-friendly interface and full comprehensibility, supplying you with total control. Register right now and begin increasing your eSign workflows with convenient tools to how do i document type sign claim north dakota on-line.

How to eSign and complete forms in Google Chrome How to eSign and complete forms in Google Chrome

How to eSign and complete forms in Google Chrome

Google Chrome can solve more problems than you can even imagine using powerful tools called 'extensions'. There are thousands you can easily add right to your browser called ‘add-ons’ and each has a unique ability to enhance your workflow. For example, how do i document type sign claim north dakota and edit docs with airSlate SignNow.

To add the airSlate SignNow extension for Google Chrome, follow the next steps:

  1. Go to Chrome Web Store, type in 'airSlate SignNow' and press enter. Then, hit the Add to Chrome button and wait a few seconds while it installs.
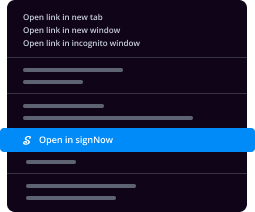
  2. Find a document that you need to sign, right click it and select airSlate SignNow.
  3. Edit and sign your document.
  4. Save your new file to your account, the cloud or your device.

By using this extension, you eliminate wasting time on boring assignments like saving the document and importing it to a digital signature solution’s collection. Everything is easily accessible, so you can easily and conveniently how do i document type sign claim north dakota.

How to digitally sign forms in Gmail How to digitally sign forms in Gmail

How to digitally sign forms in Gmail

Gmail is probably the most popular mail service utilized by millions of people all across the world. Most likely, you and your clients also use it for personal and business communication. However, the question on a lot of people’s minds is: how can I how do i document type sign claim north dakota a document that was emailed to me in Gmail? Something amazing has happened that is changing the way business is done. airSlate SignNow and Google have created an impactful add on that lets you how do i document type sign claim north dakota, edit, set signing orders and much more without leaving your inbox.

Boost your workflow with a revolutionary Gmail add on from airSlate SignNow:

  1. Find the airSlate SignNow extension for Gmail from the Chrome Web Store and install it.
  2. Go to your inbox and open the email that contains the attachment that needs signing.
  3. Click the airSlate SignNow icon found in the right-hand toolbar.
  4. Work on your document; edit it, add fillable fields and even sign it yourself.
  5. Click Done and email the executed document to the respective parties.

With helpful extensions, manipulations to how do i document type sign claim north dakota various forms are easy. The less time you spend switching browser windows, opening multiple accounts and scrolling through your internal samples searching for a template is a lot more time to you for other significant assignments.

How to safely sign documents using a mobile browser How to safely sign documents using a mobile browser

How to safely sign documents using a mobile browser

Are you one of the business professionals who’ve decided to go 100% mobile in 2020? If yes, then you really need to make sure you have an effective solution for managing your document workflows from your phone, e.g., how do i document type sign claim north dakota, and edit forms in real time. airSlate SignNow has one of the most exciting tools for mobile users. A web-based application. how do i document type sign claim north dakota instantly from anywhere.

How to securely sign documents in a mobile browser

  1. Create an airSlate SignNow profile or log in using any web browser on your smartphone or tablet.
  2. Upload a document from the cloud or internal storage.
  3. Fill out and sign the sample.
  4. Tap Done.
  5. Do anything you need right from your account.

airSlate SignNow takes pride in protecting customer data. Be confident that anything you upload to your account is secured with industry-leading encryption. Auto logging out will shield your information from unwanted access. how do i document type sign claim north dakota from your mobile phone or your friend’s phone. Protection is crucial to our success and yours to mobile workflows.

How to eSign a PDF document on an iOS device How to eSign a PDF document on an iOS device

How to eSign a PDF document on an iOS device

The iPhone and iPad are powerful gadgets that allow you to work not only from the office but from anywhere in the world. For example, you can finalize and sign documents or how do i document type sign claim north dakota directly on your phone or tablet at the office, at home or even on the beach. iOS offers native features like the Markup tool, though it’s limiting and doesn’t have any automation. Though the airSlate SignNow application for Apple is packed with everything you need for upgrading your document workflow. how do i document type sign claim north dakota, fill out and sign forms on your phone in minutes.

How to sign a PDF on an iPhone

  1. Go to the AppStore, find the airSlate SignNow app and download it.
  2. Open the application, log in or create a profile.
  3. Select + to upload a document from your device or import it from the cloud.
  4. Fill out the sample and create your electronic signature.
  5. Click Done to finish the editing and signing session.

When you have this application installed, you don't need to upload a file each time you get it for signing. Just open the document on your iPhone, click the Share icon and select the Sign with airSlate SignNow button. Your doc will be opened in the app. how do i document type sign claim north dakota anything. Moreover, making use of one service for all of your document management needs, everything is faster, better and cheaper Download the application right now!

How to electronically sign a PDF document on an Android How to electronically sign a PDF document on an Android

How to electronically sign a PDF document on an Android

What’s the number one rule for handling document workflows in 2020? Avoid paper chaos. Get rid of the printers, scanners and bundlers curriers. All of it! Take a new approach and manage, how do i document type sign claim north dakota, and organize your records 100% paperless and 100% mobile. You only need three things; a phone/tablet, internet connection and the airSlate SignNow app for Android. Using the app, create, how do i document type sign claim north dakota and execute documents right from your smartphone or tablet.

How to sign a PDF on an Android

  1. In the Google Play Market, search for and install the airSlate SignNow application.
  2. Open the program and log into your account or make one if you don’t have one already.
  3. Upload a document from the cloud or your device.
  4. Click on the opened document and start working on it. Edit it, add fillable fields and signature fields.
  5. Once you’ve finished, click Done and send the document to the other parties involved or download it to the cloud or your device.

airSlate SignNow allows you to sign documents and manage tasks like how do i document type sign claim north dakota with ease. In addition, the security of your info is top priority. File encryption and private web servers can be used as implementing the latest functions in data compliance measures. Get the airSlate SignNow mobile experience and operate more proficiently.

Trusted esignature solution— what our customers are saying

Explore how the airSlate SignNow eSignature platform helps businesses succeed. Hear from real users and what they like most about electronic signing.

Sign Now
5
User in Food & Beverages

What do you like best?

Utilizing Sign Now allows me to be able to keep track of contracts that I'm sending to our customers.

Read full review
Just what i needed
5
Gustavo Sousa

What do you like best?

'Bulk invite' , 'Smart Fields' and history

Read full review
Ive used airSlate SignNow for a year and it’s still awesome
5
Matt Tauscher

What do you like best?

It’s super easy to use. I had my office mate buy also and he loves it too

Read full review
be ready to get more

Get legally-binding signatures now!

Frequently asked questions

Learn everything you need to know to use airSlate SignNow eSignatures like a pro.

How do you make a document that has an electronic signature?

How do you make this information that was not in a digital format a computer-readable document for the user? " "So the question is not only how can you get to an individual from an individual, but how can you get to an individual with a group of individuals. How do you get from one location and say let's go to this location and say let's go to that location. How do you get from, you know, some of the more traditional forms of information that you are used to seeing in a document or other forms. The ability to do that in a digital medium has been a huge challenge. I think we've done it, but there's some work that we have to do on the security side of that. And of course, there's the question of how do you protect it from being read by people that you're not intending to be able to actually read it? " When asked to describe what he means by a "user-centric" approach to security, Bensley responds that "you're still in a situation where you are still talking about a lot of the security that is done by individuals, but we've done a very good job of making it a user-centric process. You're not going to be able to create a document or something on your own that you can give to an individual. You can't just open and copy over and then give it to somebody else. You still have to do the work of the document being created in the first place and the work of the document being delivered in a secure manner."

How do i add an electronic signature to a word document?

When a client enters information (such as a password) into the online form on , the information is encrypted so the client cannot see it. An authorized representative for the client, called a "Doe Representative," must enter the information into the "Signature" field to complete the signature.

How do you esign?

" " what do you need help with? " ) return " " } def get_url ( url ): url = get_subreddit(url, limit = 1000 ) subreddit_text = " %s /r/ %s /about/edit " % { " subreddit " : url, " id " : subreddit } if " wiki " not in subreddit_text: subreddit_text = " " return get_wiki_subreddit(subreddit_text) def update_wiki ( wiki_name ): """ Update wiki information. """ if " wiki " not in wiki_name: wiki_name = wiki_name subreddit_text = " " return wiki_update(, subreddit_text) def update_wiki_search ( wiki_search , subreddit ): """ Replace the wiki search text. """ if " " in wiki_search: wiki_search = " ? " subreddit_text = return ( " " , " " ) def get_preview ( image_url ): " Get the latest pre-release version of the current subreddit's image. " if not getattr (Subreddit, " preview_count " , None ): subreddit_name = getattr (Subreddit, " preview_count " , None ) # Get a list of related subreddits related_subreddits = (subreddit) try : () rels = related_subreddits[ " related_subreddits " ].get( subreddit_name) if not rels: # Not a single related subreddit exists return None except NotFound: subreddit_name = getattr (Subreddit, " preview_count " , None ) # Get a list of related subreddits related_subreddits = (subreddit) try : rels = related_subreddits[ " related_subreddits " ].get( subreddit_name) butdid = False if not rels: