Add Thank You Letter eSign with airSlate SignNow
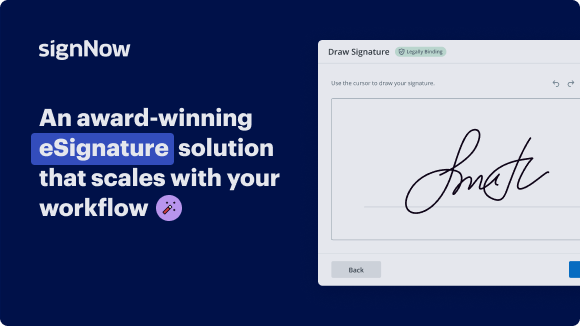
Award-winning eSignature solution


Do more online with a globally-trusted eSignature platform
Remarkable signing experience
Robust reporting and analytics
Mobile eSigning in person and remotely
Industry rules and compliance
Add thank you letter esign, quicker than ever
Helpful eSignature add-ons
See airSlate SignNow eSignatures in action


airSlate SignNow solutions for better efficiency
Our user reviews speak for themselves


Why choose airSlate SignNow
-
Free 7-day trial. Choose the plan you need and try it risk-free.
-
Honest pricing for full-featured plans. airSlate SignNow offers subscription plans with no overages or hidden fees at renewal.
-
Enterprise-grade security. airSlate SignNow helps you comply with global security standards.

Your step-by-step guide — add thank you letter esign
Using airSlate SignNow’s eSignature any business can speed up signature workflows and eSign in real-time, delivering a better experience to customers and employees. add Thank You Letter esign in a few simple steps. Our mobile-first apps make working on the go possible, even while offline! Sign documents from anywhere in the world and close deals faster.
Follow the step-by-step guide to add Thank You Letter esign:
- Log in to your airSlate SignNow account.
- Locate your document in your folders or upload a new one.
- Open the document and make edits using the Tools menu.
- Drag & drop fillable fields, add text and sign it.
- Add multiple signers using their emails and set the signing order.
- Specify which recipients will get an executed copy.
- Use Advanced Options to limit access to the record and set an expiration date.
- Click Save and Close when completed.
In addition, there are more advanced features available to add Thank You Letter esign. Add users to your shared workspace, view teams, and track collaboration. Millions of users across the US and Europe agree that a system that brings people together in one cohesive work area, is what businesses need to keep workflows functioning efficiently. The airSlate SignNow REST API enables you to integrate eSignatures into your app, internet site, CRM or cloud. Try out airSlate SignNow and get faster, easier and overall more productive eSignature workflows!
How it works
airSlate SignNow features that users love


Get legally-binding signatures now!
FAQs
-
How do I Esign my signature?
How to e-sign a document. Click the link in the document that tells you where to sign. A pop-up window will open so you can create your electronic signature in the signature field. Type your name, sign with the computer's mouse, or upload an image of your signature. ... Click Apply to add your signature to the document. -
How do I add a signature on airSlate SignNow?
Open your PDF with airSlate SignNow Reader DC. On the right-hand side, select Fill & Sign. Select Sign in the Fill & Sign menu. Choose Add Signature or Add Initials. -
How do I put my signature on eSign?
Click review and sign link in email. Click review and sign link in email. In the email you received from the sender of the document to sign, click the link labeled “Click here to review and sign...” ... Click prompt in document. ... Create electronic signature. ... Select signature option. ... Sign document. ... Finalize signature. ... Send. -
How do I send a document to e-sign?
Send documents for e-signature Open a PDF file and the airSlate SignNow tool. Open the Bodea Contract. ... Add recipient email addresses. Enter the email addresses of the people you want to e-sign the document. ... Confirm form fields. ... Click Send. ... Manage documents sent for signature. -
Is there a way to Esign a document?
To sign a document electronically, upload the document to an electronic signature tool, like eSignature, add your signature with a click, and email the signed document where it needs to go. -
How do you eSign a letter?
Open the email with a request to digitally sign your document. Click the link. ... Agree to electronic signing. ... Click each sign tag and follow the instructions to add your electronic signature where required to sign or initial. Adopt a signature to save your signature information. Confirm your signature by clicking FINISH. -
How do you Esign a letter in Word?
0:04 2:04 How to Add A Signature in a Word Document - YouTube YouTube Start of suggested clip End of suggested clip And then I'll click the insert tab. From here I'll select signature line and the signature set upMoreAnd then I'll click the insert tab. From here I'll select signature line and the signature set up menu will appear. -
How do you add multiple signers to airSlate SignNow?
How to add multiple signers to a document with airSlate SignNow. If you need more than one person to sign your document, simply add more signers to your eSignature invite and provide the necessary fields in the document for all your recipients to fill out.
What active users are saying — add thank you letter esign


Related searches to add Thank You Letter esign with airSlate SignNow

Add Thank You Letter esign
Hello and welcome to Craft with Sarah. Happy New Year to you! Here is to a hopefully wonderful 2021, and my first craft video of the year. Around this time of year there's only one kind of card that matters, and that is thank you cards. I always plan every year. I convince myself that I'm going to get all my thank you cards done before Christmas so that they're ready to go straight away. And every year, I fail at doing that, which means I usually end up making some simple thank you cards that are nice and quick to make in the rush after Christmas. This year, now that I have a Cricut machine, I have been using my Cricut to make some thank you cards and I'm going to show you how to design and make them in today's video. We're going to design three separate cards and then stick them all together to make a really good head start on those thank you cards. Here is the first one. This is a really simple design, but I think it is quite effective. I use the draw feature on my Cricut and a gold pen to make that lovely wreath and then put the thank you sentiment and a little mat of the same colour around the edge to make the card. Let's find out how to design this in Cricut Design Space. Open in my Design Space is the card which I've already designed because I did this just to test it before I started recording. I'm going to recreate it to show you how you can design your own thank you cards in Design Space. To start with, we're going to need to make the card base. When I made this, I used a pre-made card blank from my stash. That's why this one doesn't have a blank layer associated with it, but just in case you don't have one that you can use that you've already got, I'll show you how you can make them in Cricut. Go into ‘shapes’ and choose a square. This is going to be a square card front and I'm going to do a 6x6 inch card, but because you can't actually cut 12 inches on your Cricut mat, you can only do 11 and a half, I'm going to make this a 5.75 inch card front. I need to make my height 5.75 and then the width needs to be double that. I'm going to click the padlock icon at the top of the width and height box and then type 11.5 into the width. The reason this is double, is so that we can fold it in half down the middle and then that will create the base for our card. I'm going to make this white so that it'll be the colour that I'm actually going to use. What we want to do is add a score line down the middle of this so we know...
Show more