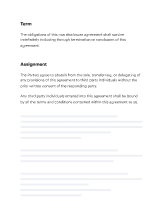
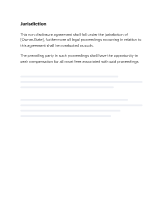
Adjust Your Document with Edit & Sign Fields
Award-winning eSignature solution


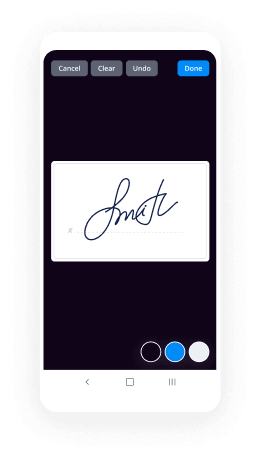
How to add your signature and text to airSlate SignNow documents
In most cases, eSigning a document assumes the presence of at least two signers, one of them can also be the document sender. In this case, before sending a document for eSigning, you can start by adding your own signature, text, and date of eSigning.
Intuitive editor
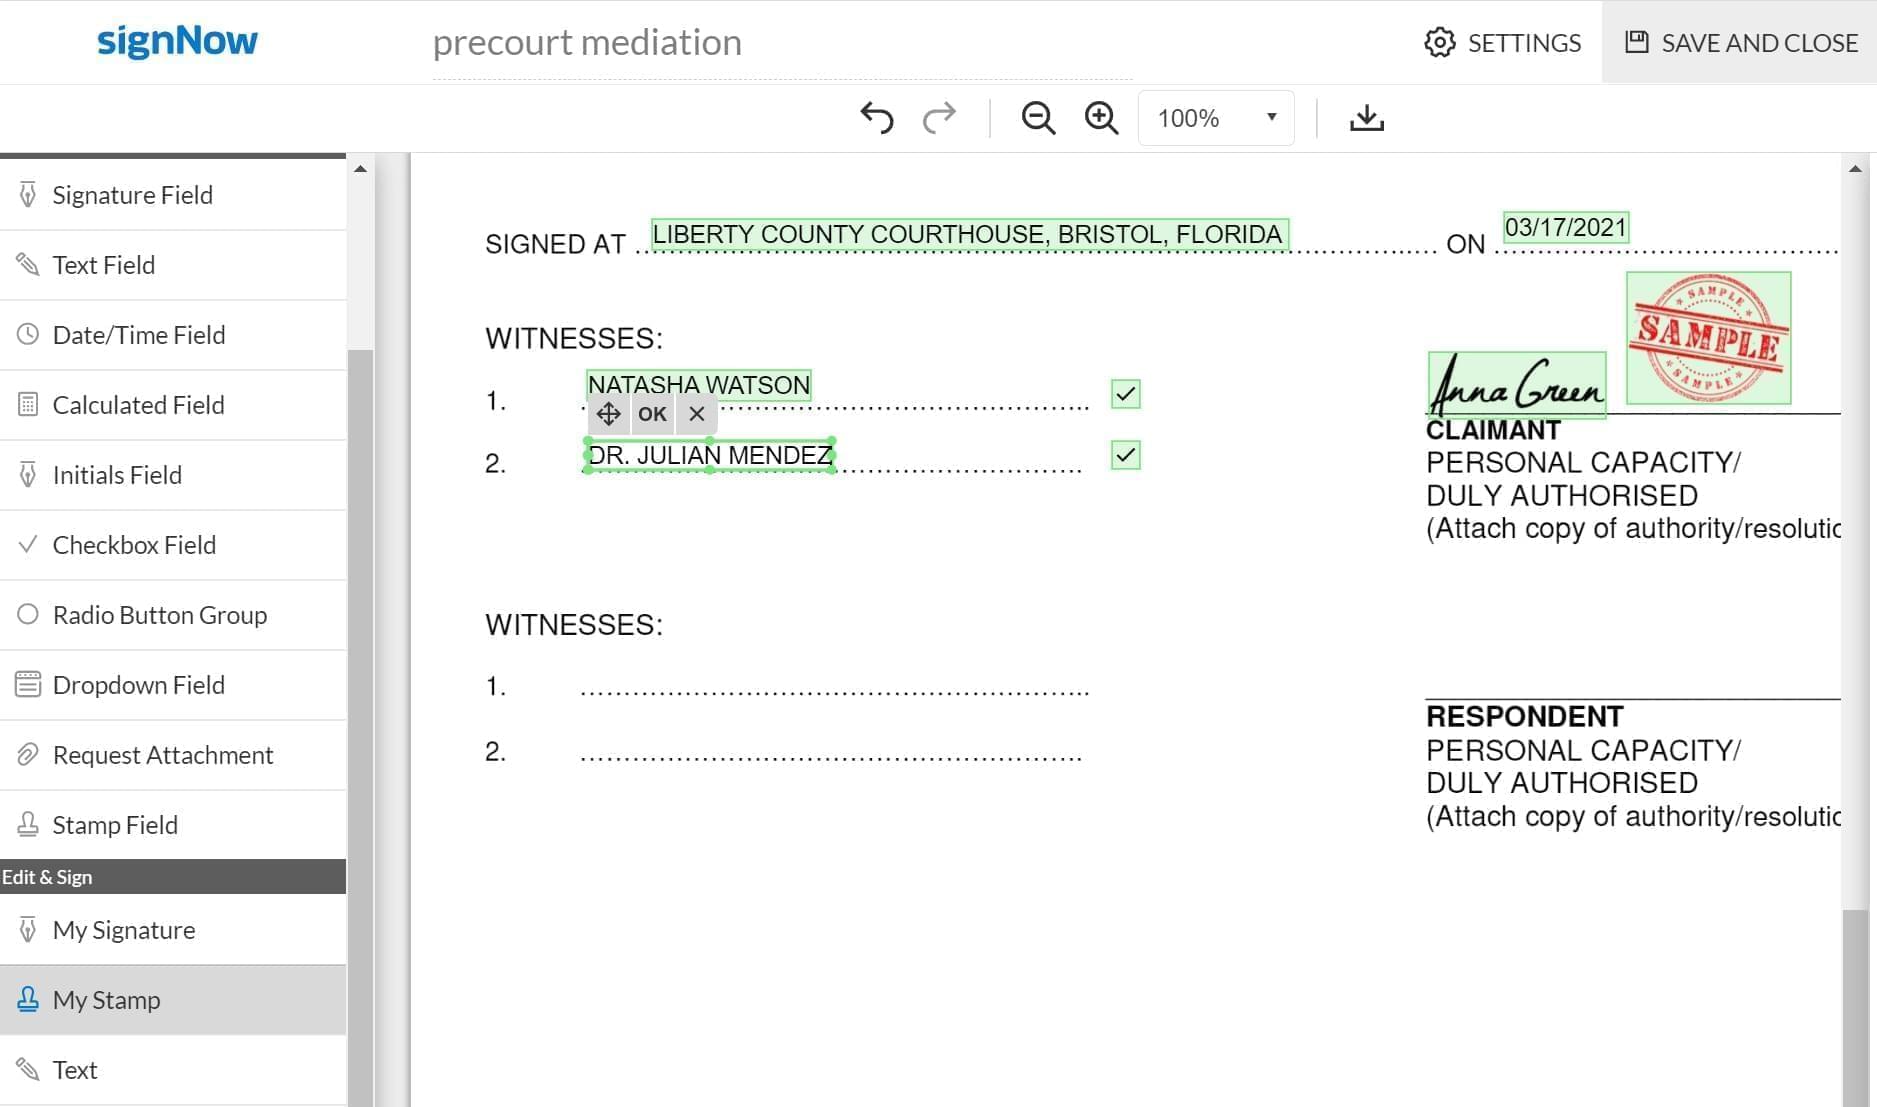
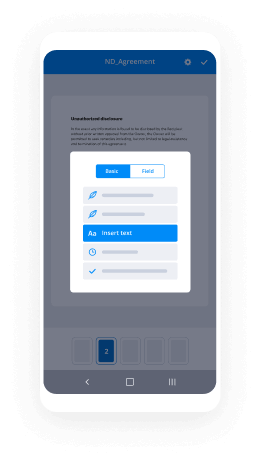
To start eSigning as the sender, go to the tab Edit & Sign in the menu on the left of the airSlate SignNow editor. The sender’s editing functionalities include: signature, stamp, text, today’s date, and a checkmark. All these fields can be added by means of the drag & drop tool. The size of each of these fields can also be adjusted directly in the document.

Any field you might need
Below you can see the full range of sender’s fields added to a document. The stamp is added as an image, colored, or black-and-white. When finished, your document is ready to be sent to other signers.
See airSlate SignNow eSignatures in action

Choose a better solution
Take routine paperwork off your plate with airSlate SignNow
Online signature service
Fillable form creator
Document templates
eSignature API
App-native integrations
Ability to adjust your document with edit and sign fields
Our user reviews speak for themselves


airSlate SignNow solutions for better efficiency
Why choose airSlate SignNow
-
Free 7-day trial. Choose the plan you need and try it risk-free.
-
Honest pricing for full-featured plans. airSlate SignNow offers subscription plans with no overages or hidden fees at renewal.
-
Enterprise-grade security. airSlate SignNow helps you comply with global security standards.

Your step-by-step guide — adjust your document with edit and sign fields
The crucial conceptual advantage of the airSlate SignNow eSignature software for business automation is really a uniform data field that extends the company but mirrors an original business process. You may add calculated fields to a document for eSignature, give an invite hyperlink to your companions, vendors or teammates. Our advanced service simplifies the control and analytical phases. It allows you to control the workflow much more flexibly without involving additional staff. You may indirectly strengthen the comminucation between partners and allow them to increase customer satisfaction.
How you can add calculated fields to a document for eSignature with airSlate SignNow:
- Create your account for free or sign in if you currently have one particular.
- You can sign in with the Single sign-on feature if you possess the airSlate SignNow user account.|If you have the airSlate SignNow profile, you may sign in with the Single sign-on functionality.
- Import the data file from your portable or desktop gadget.
- In addition, you can upload the necessary data file from your cloud storage. Our browser-based platform is compatible with the most suggested repositories: Google Drive, OneDrive, DropBox.
- Quickly make adjustments to your web template using our sophisticated but straightforward PDF Editor.
- Enter the textual content, include graphics, leave your annotations or comments, etc..
- You may configure fillable fields of various kinds: text or date, calculated or dropdown, and more.
- Arrange and put in place the attachment request.
- Insert the Signature Field for sending to sign and gather in-person or numerous eSignatures. If relevant, you can self-sign the template.
- Finish editing using the Done button and begin to add calculated fields to a document for eSignature.
airSlate SignNow is the perfect choice for automation of company procedures and solution to add calculated fields to a document for eSignature and fast issues concluding for organizations of all tiers when it comes to workers and complexity. Users can interact both externally and internally with clients and vendors. Try out each of the advantages now!
How it works


See exceptional results Adjust your Document with Edit & Sign Fields
How to fill in and sign a document online
Try out the easiest way to adjust your document with edit and sign fields. Steer clear of paper-based workflows and deal with PDF files right from airSlate SignNow. Complete and send your PDFs from your office or smoothly work on-the-go. No installation or additional software needed. All features are available online, go to signnow.com and make your own eSignature process.
A short manual on how to adjust your document with edit and sign fields in minutes
- Create an airSlate SignNow account (if you haven't registered yet) or log in using your Google or Facebook.
- Click Upload and select one of your documents.
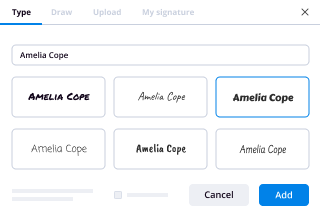
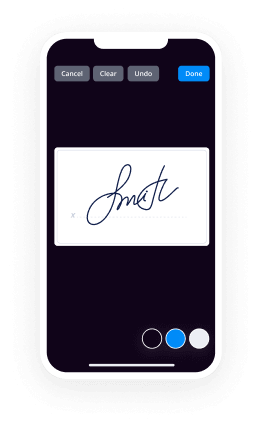
- Make use of the My Signature to generate your unique signature.
- Transform the template into a powerful PDF with fillable fields.
- Fill in your new form and click on Done.
Once completed, send an invite to sign to a number of recipients. Get an enforceable contract quickly employing any system. Check out far more functions for producing specialist PDFs; add fillable fields adjust your document with edit and sign fields and work together in groups. The eSignature solution offers a safe process and runs according to SOC 2 Type II Certification. Make sure that your records are protected and therefore no one can take them.
How to eSign a PDF file in Google Chrome
Do you need a service to adjust your document with edit and sign fields from Chrome? The airSlate SignNow extension for Google is here now to help. Get a PDF file and right from the web browser easily open it with the editor. Put fillable fields for textual content and signature. eSign the PDF and send out it securely based on GDPR, SOC 2 Type II Certification and more.
Employing this short how-to guide below, increase your eSignature process into Google and adjust your document with edit and sign fields:
- Go to the Chrome web store and select the airSlate SignNow extension.
- Just click Add to Chrome.
- Log in to the account or create a new one.
- Upload a PDF and then click Open in airSlate SignNow.
- Adjust the PDF file.
- Sign the PDF file using the My Signature instrument.
- Simply click Done to save the edits.
- Encourage other individuals to eSign by clicking Invite to Sign and choosing their email addresses/names.
Make a signature that's built-in to your workflow to adjust your document with edit and sign fields and get PDFs eSigned quickly. Forget the piles of paper reports on your desk and begin saving time and money for additional significant activities. Choosing the airSlate SignNow Google extension is a smart practical option with many different advantages.
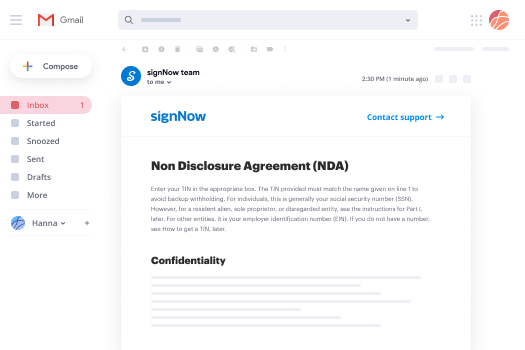
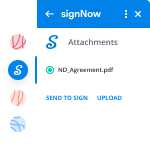

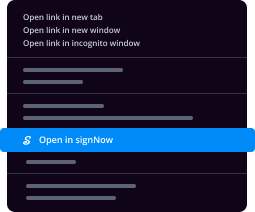
How to sign an attachment in Gmail
If you're like most, you're used to downloading the email attachments you receive, printing them out then putting your signature on them, correct? Fine, we certainly have fantastic news for you. Putting your signature on PDF files inside your inbox just became much easier. The airSlate SignNow add-on for Gmail lets you adjust your document with edit and sign fields without leaving your inbox. Do all you need; add fillable fields and send signing links in clicks.
The best way to adjust your document with edit and sign fields in Gmail:
- Choose airSlate SignNow for Gmail within the from the G Suite Marketplace and then click Install.
- Log in to the airSlate SignNow profile or create a new one.
- Open your message with the PDF file you should eSign.
- Simply click Upload if you want to save the PDF to the airSlate SignNow profile.
- Just click Open document to open the editor.
- eSign the PDF taking advantage of My Signature.
- Share a signing request to the other colleagues using the Send to Sign button.
- Put in their email and click OK.
As a result, all customers will receive notifications letting them know to sign the document. No requirement to download the attachment again and again, just adjust your document with edit and sign fields in a couple of clicks. This add-one is suitable for users who like concentrating on more essential aims instead of burning time for practically nothing. Increase your day-to-day monotonous tasks with the award-winning eSignature application.
How to eSign a PDF file on the go with no application
For most service, getting deals done on the go means installing an application on the smartphone. We're happy to say at airSlate SignNow we've made singing on the go faster and much easier by eliminating the need for an application. To eSign, open your browser (any mobile browser) and take direct access to airSlate SignNow and all sorts of its powerful eSignature tools. Modify docs, adjust your document with edit and sign fields and much more. No installation or additional software needed. Manage your contracts from anywhere.
Take a look at our step-by-step recommendations that show you the best way to adjust your document with edit and sign fields.
- Open up your internet browser and go to signnow.com.
- Sign in or create a new account.
- Add or open up the PDF you need to modify.
- Put fillable fields for textual content, eSignature and date/time.
- Draw, type or upload your eSignature.
- Click on Save and Close.
- Just click Invite to Sign and enter a recipient's email if you require others to sign the PDF file.
Working on documents with smartphone is no different than on a laptop: create a reusable template, adjust your document with edit and sign fields and manage the flow as you would typically. In a couple of clicks, get an enforceable commitment that you can download to the internal storage and share to others. Yet, if you really want a software, download the airSlate SignNow mobile app. It's secure, fast and has an incredible layout. Try out seamless eSignature workflows from your office, in a taxi or on a plane.

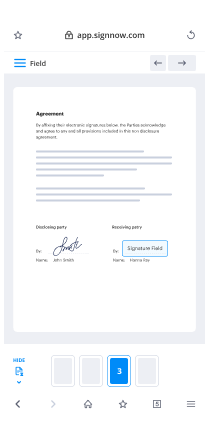
How to sign a PDF file using an iPad
iOS is certainly a popular operating system full of native tools. It allows you to sign and change PDFs making use of Preview with no additional application. Even so, as wonderful as Apple's solution is, it doesn't supply any automation. Improve your iPhone's abilities by taking advantage of the airSlate SignNow iPhone app. Use your iPhone or iPad to adjust your document with edit and sign fields and a lot more. Introduce eSignature automation to the mobile processes.
Putting your signature on an iPhone has never been so easy:
- Find the airSlate SignNow app from the AppStore and install it.
- Make a new account or sign in with your Facebook or Google.
- Simply click Plus and add the PDF file you would like to eSign.
- Tap on the PDF exactly where you would like to put your signature.
- Discover additional features: put in fillable fields or adjust your document with edit and sign fields.
- Click on Save button to make the adjustments.
- Send your PDFs via mail or a singing link.
Create a professional-looking PDFs straight from your airSlate SignNow iPhone app. Get the most out of your efforts and job from anyplace; at home, in your office, on a bus or airplane, and even at the beach. Deal with an entire document workflow effortlessly: create reusable templates, adjust your document with edit and sign fields and work on documents with business partners. Transform your device right into a highly effective company for executing deals.
How to sign a PDF file using an Android
For Android users to handle PDF files from their smartphone, they should install extra software program. The Play Market is huge and plump with alternatives, so finding a good program isn't a challenge when you have time for you to look through hundreds of software. To save time as well as protect against aggravation, we suggest airSlate SignNow for Android. Save and edit PDFs, make signing roles, and also adjust your document with edit and sign fields.
The 9 simple steps to amplifying your smartphone workflow:
- Open the app.
- Sign in with your Facebook or Google accounts or create a new if you haven't authorized yet.
- Simply click + to upload a new document making use of your camera, internal or cloud storages.
- Tap anywhere in your PDF and insert your eSignature.
- Just click OK to confirm and sign.
- Experience far more editing and enhancing tools; add pictures, adjust your document with edit and sign fields, design a reusable template, and so on.
- Click Save to make modifications when you complete.
- Download the PDf file or send it through email.
- Make use of the Invite to sign function in order to set And send out a signing link to clients.
Turn the mundane and monotonous work into simple and smooth together with the airSlate SignNow app for Android. Sign and send documents for eSignature from any place you're connected to the internet. Make professional PDFs and adjust your document with edit and sign fields with just a few clicks. Created a flawless eSignature process using only your mobile phone and improve your general productivity.
Get legally-binding signatures now!
FAQs
-
Can I eSign a document before sending it using my phone?
Yes, sure. For this, you would need the airSlate SignNow app (available for both iOS and Android). -
Can I add yesterday’s date for eSigning instead of today’s?
Today’s date automatically adds the current date to a document. Adding another date is no problem, however, you would need to use a regular text field for that and type in the date you need manually. -
How can I eSign and then send several documents to the same signer, preferably in one batch?
For this, you would need to form a Document Group. Then you can eSign the documents and send them together, to one or several signers. -
How can I add a small note of instructions for the signer?
You can add your instructions when customizing the text in your eSigning invite. When you add the emails of your future signers, there is an option to customize the subject and body of your email message. -
I have three signers in one document. Will they get the document at the same time or one after another?
This is totally up to you. If you place three signers into the same signing step - they will get the document simultaneously. And if you place three signers into three separate signing steps, one after another — they will receive the documents in that exact order. -
Can I create a default signature that would be added to all documents I sign?
Sure thing! You can either add your default signature in the Settings of your account, or you can simply save the eSignature you like for future re-use. -
What are the technical requirements for adding a stamp to my airSlate SignNow account?
Your stamp in airSlate SignNow is basically a picture/photo of your wet stamp, so it must be in JPG, GIF or PNG formats. And it must be less than 12 MB in size. -
I accidentally sent a document to the wrong recipient. How can I fix that?
You can either replace the signer (if the document has been sent but has not been eSigned) or you can cancel the eSigning invitation and redo it from scratch. -
How do I type on a scanned document?
Browse to the scanned document and double-click it, then click the \u201cOK\u201d button to insert it. Format the text in the text box the same way you would when typing text in a Word document, using the Font section of the ribbon. You can try to match the text in your text box with any text already on your scanned document. -
How do I edit a mail merge template in Word?
Open Client Hub from the home screen. Select Mail Merge from the left-hand menu. Click on Create New Mail Merge. Click Continue. Enter a Name and Description and click Continue.
What active users are saying — adjust your document with edit and sign fields


Frequently asked questions
How do you generate a document and apply an electronic signature to it?
How do I add an electronic signature to a Word document?
What do I need to sign a PDF file?
Get more for adjust your document with edit and sign fields
The ins and outs of eSignature


