Fillable Form Dhs Fema 086 0 26a 2014-2026


What is the Fillable Form DHS FEMA 086-0-26A?
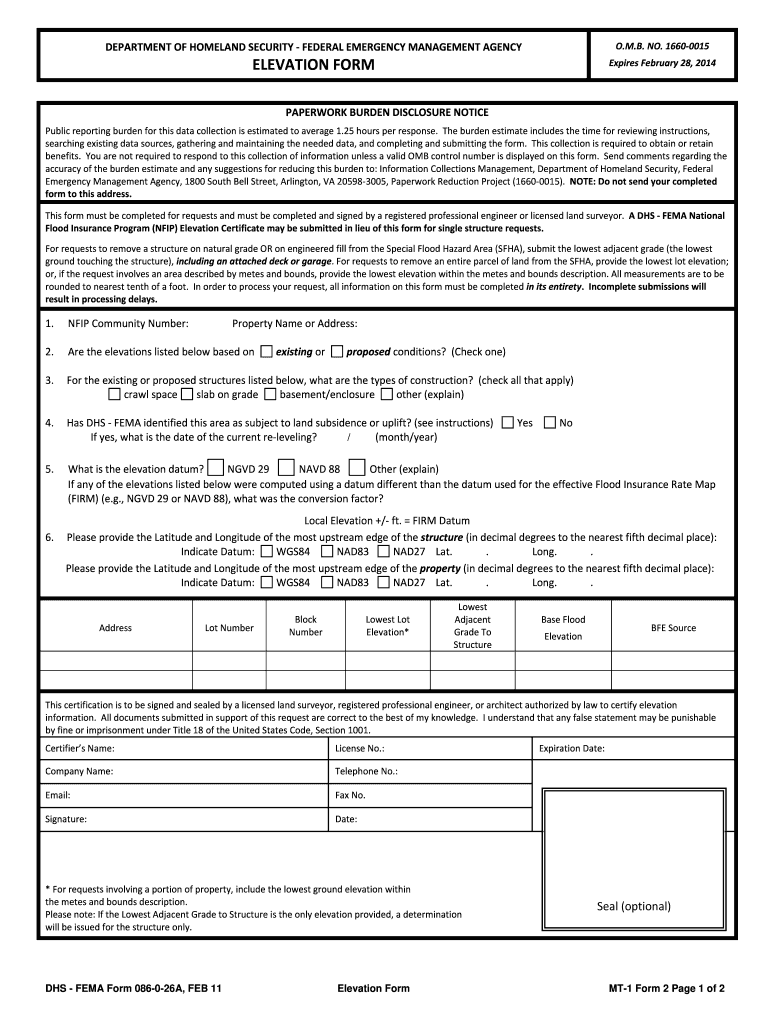
The DHS FEMA Form 086-0-26A is an official document used primarily for elevation certification in the context of flood insurance. This form is crucial for property owners seeking to establish the elevation of their buildings in relation to the base flood elevation. It is commonly utilized in floodplain management and insurance rating purposes. The form helps to determine eligibility for flood insurance discounts and is essential for compliance with federal regulations.
How to Use the Fillable Form DHS FEMA 086-0-26A
Using the fillable DHS FEMA Form 086-0-26A involves several steps to ensure accurate completion. First, download the form from an official source. Next, fill in the required information, including property details and elevation data. It is important to provide accurate measurements as they will impact flood insurance rates. Once completed, the form must be signed by a licensed surveyor or engineer to validate the information provided. After obtaining the necessary signatures, the form can be submitted to the appropriate authorities or insurance companies.
Steps to Complete the Fillable Form DHS FEMA 086-0-26A
Completing the DHS FEMA Form 086-0-26A involves a systematic approach:
- Download the fillable form from a reliable source.
- Gather necessary information, including property location and elevation data.
- Fill in the property owner's details, including name and address.
- Provide elevation measurements, ensuring they are accurate and comply with local regulations.
- Have the form signed by a licensed surveyor or engineer.
- Submit the completed form to your local floodplain administrator or insurance provider.
Legal Use of the Fillable Form DHS FEMA 086-0-26A
The DHS FEMA Form 086-0-26A is legally binding when completed and signed according to federal and state regulations. It serves as an official record of a property's elevation and is used to determine flood insurance premiums. To ensure its legal standing, the form must be filled out accurately and signed by a qualified professional. Compliance with local and federal laws is essential to avoid penalties and ensure the validity of the elevation certificate.
Key Elements of the Fillable Form DHS FEMA 086-0-26A
Several key elements are essential for the DHS FEMA Form 086-0-26A:
- Property Information: Details about the property, including address and ownership.
- Elevation Data: Accurate measurements of the building's elevation in relation to the base flood elevation.
- Professional Certification: Signature and seal of a licensed surveyor or engineer confirming the accuracy of the information.
- Submission Details: Instructions on where and how to submit the completed form.
Who Issues the Form DHS FEMA 086-0-26A?
The DHS FEMA Form 086-0-26A is issued by the Federal Emergency Management Agency (FEMA). This agency is responsible for coordinating the federal government's response to natural disasters and managing the National Flood Insurance Program (NFIP). The form is part of FEMA's efforts to assist communities in floodplain management and to provide guidance for property owners in flood-prone areas.
Quick guide on how to complete blenk flood apps for android form
Complete Fillable Form Dhs Fema 086 0 26a effortlessly on any device
Digital document management has gained traction among businesses and individuals. It serves as a perfect eco-friendly substitute for traditional printed and signed documents, as you can easily find the correct form and securely store it online. airSlate SignNow equips you with all the resources needed to create, modify, and eSign your documents quickly without delays. Manage Fillable Form Dhs Fema 086 0 26a on any device using airSlate SignNow’s Android or iOS applications and simplify any document-related task today.
How to modify and eSign Fillable Form Dhs Fema 086 0 26a with ease
- Find Fillable Form Dhs Fema 086 0 26a and click on Get Form to begin.
- Utilize the tools we offer to complete your document.
- Emphasize important sections of your documents or obscure sensitive information with tools specifically provided by airSlate SignNow for that purpose.
- Create your eSignature using the Sign tool, which takes just seconds and holds the same legal validity as a conventional wet ink signature.
- Review the details and click on the Done button to save your changes.
- Select your preferred method to share your form, by email, text message (SMS), or invitation link, or download it to your computer.
Eliminate concerns about lost or misplaced files, tedious form searching, or mistakes that necessitate printing additional document copies. airSlate SignNow addresses all your document management needs with just a few clicks from any device you choose. Alter and eSign Fillable Form Dhs Fema 086 0 26a while ensuring excellent communication throughout your form preparation process with airSlate SignNow.
Create this form in 5 minutes or less
FAQs
-
How can I make it easier for users to fill out a form on mobile apps?
I’ll tell you a secret - you can thank me later for this.If you want to make the form-filling experience easy for a user - make sure that you have a great UI to offer.Everything boils down to UI at the end.Axonator is one of the best mobile apps to collect data since it offers powerful features bundled with a simple UI.The problem with most of the mobile form apps is that they are overloaded with features that aren’t really necessary.The same doesn’t hold true for Axonator. It has useful features but it is very unlikely that the user will feel overwhelmed in using them.So, if you are inclined towards having greater form completion rates for your survey or any data collection projects, then Axonator is the way to go.Apart from that, there are other features that make the data collection process faster like offline data collection, rich data capture - audio, video, images, QR code & barcode data capture, live location & time capture, and more!Check all the features here!You will be able to complete more surveys - because productivity will certainly shoot up.Since you aren’t using paper forms, errors will drop signNowly.The cost of the paper & print will be saved - your office expenses will drop dramatically.No repeat work. No data entry. Time & money saved yet again.Analytics will empower you to make strategic decisions and explore new revenue opportunities.The app is dirt-cheap & you don’t any training to use the app. They come in with a smooth UI. Forget using, even creating forms for your apps is easy on the platform. Just drag & drop - and it’s ready for use. Anyone can build an app under hours.
-
Do military members have to pay any fee for leave or fiancee forms?
NOOOOOOO. You are talking to a military romance scammer. I received an email from the US Army that directly answers your question that is pasted below please keep reading.I believe you are the victim of a military Romance Scam whereas the person you are talking to is a foreign national posing as an American Soldier claiming to be stationed overseas on a peacekeeping mission. That's the key to the scam they always claim to be on a peacekeeping mission.Part of their scam is saying that they have no access to their money that their mission is highly dangerous.If your boyfriend girlfriend/future husband/wife is asking you to do the following or has exhibited this behavior, it is a most likely a scam:Moves to private messaging site immediately after meeting you on Facebook or SnapChat or Instagram or some dating or social media site. Often times they delete the site you met them on right after they asked you to move to a more private messaging siteProfesses love to you very quickly & seems to quote poems and song lyrics along with using their own sort of broken language, as they profess their love and devotion quickly. They also showed concern for your health and love for your family.Promises marriage as soon as he/she gets to state for leave that they asked you to pay for.They Requests money (wire transfers) and Amazon, iTune ,Verizon, etc gift cards, for medicine, religious practices, and leaves to come home, internet access, complete job assignments, help sick friend, get him out of trouble, or anything that sounds fishy.The military does provide all the soldier needs including food medical Care and transportation for leave. Trust me, I lived it, you are probably being scammed. I am just trying to show you examples that you are most likely being connned.Below is an email response I received after I sent an inquiry to the US government when I discovered I was scammed. I received this wonderful response back with lots of useful links on how to find and report your scammer. And how to learn more about Romance Scams.Right now you can also copy the picture he gave you and do a google image search and you will hopefully see the pictures of the real person he is impersonating. this doesn't always work and take some digging. if you find the real person you can direct message them and alert them that their image is being used for scamming.Good Luck to you and I'm sorry this may be happening to you. please continue reading the government response I received below it's very informative. You have contacted an email that is monitored by the U.S. Army Criminal Investigation Command. Unfortunately, this is a common concern. We assure you there is never any reason to send money to anyone claiming to be a Soldier online. If you have only spoken with this person online, it is likely they are not a U.S. Soldier at all. If this is a suspected imposter social media profile, we urge you to report it to that platform as soon as possible. Please continue reading for more resources and answers to other frequently asked questions: How to report an imposter Facebook profile: Caution-https://www.facebook.com/help/16... < Caution-https://www.facebook.com/help/16... > Answers to frequently asked questions: - Soldiers and their loved ones are not charged money so that the Soldier can go on leave. - Soldiers are not charged money for secure communications or leave. - Soldiers do not need permission to get married. - Soldiers emails are in this format: john.doe.mil@mail.mil < Caution-mailto: john.doe.mil@mail.mil > anything ending in .us or .com is not an official email account. - Soldiers have medical insurance, which pays for their medical costs when treated at civilian health care facilities worldwide – family and friends do not need to pay their medical expenses. - Military aircraft are not used to transport Privately Owned Vehicles. - Army financial offices are not used to help Soldiers buy or sell items of any kind. - Soldiers deployed to Combat Zones do not need to solicit money from the public to feed or house themselves or their troops. - Deployed Soldiers do not find large unclaimed sums of money and need your help to get that money out of the country. Anyone who tells you one of the above-listed conditions/circumstances is true is likely posing as a Soldier and trying to steal money from you. We would urge you to immediately cease all contact with this individual. For more information on avoiding online scams and to report this crime, please see the following sites and articles: This article may help clarify some of the tricks social media scammers try to use to take advantage of people: Caution-https://www.army.mil/article/61432/< Caution-https://www.army.mil/article/61432/> CID advises vigilance against 'romance scams,' scammers impersonating Soldiers Caution-https://www.army.mil/article/180749 < Caution-https://www.army.mil/article/180749 > FBI Internet Crime Complaint Center: Caution-http://www.ic3.gov/default.aspx< Caution-http://www.ic3.gov/default.aspx> U.S. Army investigators warn public against romance scams: Caution-https://www.army.mil/article/130...< Caution-https://www.army.mil/article/130...> DOD warns troops, families to be cybercrime smart -Caution-http://www.army.mil/article/1450...< Caution-http://www.army.mil/article/1450...> Use caution with social networking Caution-https://www.army.mil/article/146...< Caution-https://www.army.mil/article/146...> Please see our frequently asked questions section under scams and legal issues. Caution-http://www.army.mil/faq/ < Caution-http://www.army.mil/faq/ > or visit Caution-http://www.cid.army.mil/ < Caution-http://www.cid.army.mil/ >. The challenge with most scams is determining if an individual is a legitimate member of the US Army. Based on the Privacy Act of 1974, we cannot provide this information. If concerned about a scam you may contact the Better Business Bureau (if it involves a solicitation for money), or local law enforcement. If you're involved in a Facebook or dating site scam, you are free to contact us direct; (571) 305-4056. If you have a social security number, you can find information about Soldiers online at Caution-https://www.dmdc.osd.mil/appj/sc... < Caution-https://www.dmdc.osd.mil/appj/sc... > . While this is a free search, it does not help you locate a retiree, but it can tell you if the Soldier is active duty or not. If more information is needed such as current duty station or location, you can contact the Commander Soldier's Records Data Center (SRDC) by phone or mail and they will help you locate individuals on active duty only, not retirees. There is a fee of $3.50 for businesses to use this service. The check or money order must be made out to the U.S. Treasury. It is not refundable. The address is: Commander Soldier's Records Data Center (SRDC) 8899 East 56th Street Indianapolis, IN 46249-5301 Phone: 1-866-771-6357 In addition, it is not possible to remove social networking site profiles without legitimate proof of identity theft or a scam. If you suspect fraud on this site, take a screenshot of any advances for money or impersonations and report the account on the social networking platform immediately. Please submit all information you have on this incident to Caution-www.ic3.gov < Caution-http://www.ic3.gov > (FBI website, Internet Criminal Complaint Center), immediately stop contact with the scammer (you are potentially providing them more information which can be used to scam you), and learn how to protect yourself against these scams at Caution-http://www.ftc.gov < Caution-http://www.ftc.gov > (Federal Trade Commission's website)
-
How can I fill a web form from Android app without simply using a webview?
If you don’t want to use Webview then you should use API for that.First, make UI in XML for the form page like with all the fields like name, address etc. whatever your form is about. Then, make an HTTP rest API to send the data to the database. If you don’t know what rest API is, here is the link.What is RESTful API? - Definition from WhatIs.comThen you can communicate with the API using HTTP calls. And it can be done via either Retrofit or google/volley.Hope it helps :)
-
I want to make an app where a user fills out a form and then that form can be accessed through specific computers. The app development will be on Android. What kind of server do I need?
I simple "mysql" database should do. Most can hold thousands of text data/users and can be deployed via Amazon or VPS.
-
Structural Engineering: How long would it take for soil and fill to completely dry out after a flood?
The following are the unknowns:Soil permeabilitySoil expansion characteristicsRate of evaporation (dependent on ambient temp, sunlight, wind among others)Height of water tableSoil strengthIntended load...So, given that there are so many variables it is very unlikely that an existing model of these conditions exists that you can rely on to tell you if it is dry enough. You will have to test.
-
How do I get started with Android application development with only a very basic knowledge about programming?
Thanks for the A2A Rahul , It’s very easy to get start with Android Application Development. Few months back I read an Awesome article about Android Apps Development ,I thought it would be very helpful for a Beginner in Android App development. So , I have shared the article here. I hope so , sure It will be a very helpful Guide For Apps developing beginners.So you have a killer app idea and you’re ready to turn it into a reality and take it to market. No doubt you’re itching to start getting your first downloads, reviews and profits… But there’s just one problem: you don’t have a clue where to start!Learning to code is difficult enough on its own but with Android development it can be more complicated. Not only do you need to understand Java, you also need to install all the Android-specific software and learn all of the unique quirks of Android app development.In general, creating an Android app requires the SDK (Software Development Kit), an IDE (Integrated Development Environment) like Android Studio or Eclipse, the Java Software Development Kit (JDK) and a virtual device to test on. All this takes work to set up, and that’s before you’ve even started looking into things like Google Play Services, screen sizes, API levels…It’s just such a dense amount of information and it’s enough to put an awful lot of people off before they even begin. My aim with this article then, is to provide an approachable guide to try and make the whole prospect of creating an app a little less daunting… I’ll explain the bits you need to know and gloss over the rest and by the end you should have a basic app that you can start iterating on and experimenting with.Go and make yourself a cup of tea first though, this may take a while…Step 1: Download Android StudioTo program in most languages, you need a piece of software called an IDE or ‘Integrated Development Environment’. The most common IDE for Android development is Android Studio, which comes direct from Google itself. You can get it here.An IDE is what gives you the main UI where you’ll enter your code (you can’t just start typing into notepad). It also highlights things you get wrong, offers suggestions and lets you run and test your creations conveniently. It creates the files you need, it provides basic layouts and generally it saves you a lot of time and effort.What’s great about Android Studio is that it isdesigned specifically for Android development (unlike the second most popular option, Eclipse). This means that when you download the software, you’ll also get a lot of the other bits you need including the Android SDK (a selection of tools including the Android platform itself) and the Android Virtual Device, which is an emulator you can test your apps on. When you go through the installation, make sure you leave the boxes ticked to confirm that you want these additional components. You could manually add them later, but this will just complicate matters.As mentioned, there are some alternatives to Android Studio. Eclipse is an older IDE that can be used for developing other things too (such as iOS apps) and that is a bit more flexible overall. It’s also a much more fiddly to get started with though and not nearly as beginner-friendly. Another personal favorite of mine is Basic4Android. Basic4Android is an IDE that lets you code Android apps with the BASIC programming language. It makes things easier in a number of other ways too and is focused on ‘rapid development’.There are other options too, such as Unity3D and numerous app builders, each of which has specific strengths and weaknesses depending on what you’re planning on building. For the sake of simplicity though, we’re focusing on Android Studio because it has become the ‘main’ way to build basic apps and pretty much the industry standard. If you think you might ever sell your business, if you want to give yourself the most flexibility and control possible, or if you’d like to become a professional app developer, you’ll need this tool.That said, if you read through all this and you find it too much still, you might want to consider Basic4Android as a simpler approach and I’ll be covering that in a future post.Okay, just to recap: we now have Android Studio downloaded and installed. But, don’t run it until you read step two! So far so good… What could possibly go wrong?Step 2: Setting Up Android StudioNow you have Android Studio installed you’ve taken your first, bold step toward becoming a developer! A lot of people only manage it this far and then leave the software installed on their computer for months on end, feeling guilty every time they see it in the Start Menu. Eventually they end deleting it to make space for the next AAA title on Steam and so ends the whole sorry affair… Don’t end up like them – it’s time for some more affirmative action!Before you can get started, you also need to install Java on your machine to use Android Studio. Specifically, you’re going to need install the Java Development Kit (JDK). Java is the programming language you’re going to be using to build your apps in this instance and you need to install the JDK in order for Android Studio to be able to interpret and compile your code (compiling means turning the source into something that is understood by the CPU – machine code). You’ll find the Java Development Kit here. Just download and follow the instructions to install.Now you can click on Android Studio to launch it. Once it opens up, you’ll be presented with a menu where you’ll be able to get started or configure some options. The great thing is that everything is handled for you at this point, though you may want to familiarize yourself with the SDK Manager(Configure > SDK Manager) which is where you’ll update your Android SDK to support newer versions, as well as download things like code samples or support for Google Glass. But don’t worry about that now but if Android Studio says you’re missing something, this is where you’ll probably need to go to find it.So really there are three main things interacting when you use Android Studio to create your apps.Android Studio itself, which is an IDE that provides you with a nice interface for coding.The code you write in Java, which you installed a moment ago…And the Android SDK which you’ll access through your Java code in order to do Android-type thingsIf you find this all a bit complicated and daunting then… well, you don’t know you’re born. This used to be way worse.Maybe that offers some consolation…Step 3: Starting a New ProjectOnce you’ve installed your samples, you can go back to the first page you saw when you loaded up Android Studio. Now you want to choose Start a new Android Studio Project – it’s finally happening!Enter the name you want for your application and your ‘company domain’. Together these elements will be used to create your package name with the following format:com.companyname.appnameThe package will be the compiled file or APK (‘Android Package File’) that you’ll eventually upload to the Google Play Store. There are ways that people can see this, so if you’re planning on making something you’ll eventually release, try to stay away from using ‘funny words’.The last field to enter is the directory where you want to save all the files pertaining to your app. I like to save in DropBox to make sure I always have a backup of my code. Click Next again and guess what… More options! Huzzah! Don’t worry, we’re nearly there…Next you need to decide what type of device you’re going to be developing for and in this case we’ll start with the Phone and Tablet option. Other options are TV, Wear and Glass. It’s fine if you want to develop for a myriad of platforms in the future – that’s one of the wonders of Android – but let’s start with something a bit more straightforward to begin with, okay?The other choice you have to make at this stage is the ‘Minimum SDK’. This is the lowest version of Android you want to support. Why not just enter the latest version of Android in here? Well, because relatively few people actually have the latest version of Android installed on their device at any given time. You want to support phones that are still running older versions in order to signNow the largest possible audience – especially overseas.Why not just go with Android 1.1? Well, apart from this not being an option (Froyo is as low as you can go), that would also prevent you from using any of the fancy new features from the latest updates.The best bet at this stage is to go with the default option, so just leave this field as it is. On the next page, you’ll be given the option to pick the way you want your app to look at the start. This will be the look of your main ‘Activity Module’ which is basically the main page of your app. Think of these like templates; do you want to have the title of your app along the top of the screen, or do you want your UI to fill the whole display? Do you want to start off with some elements ready-designed for you? Is your app primarily going to use Google Maps (don’t go here for a bit, things get more complicated with Google Play Services).Bear in mind that an app can have multiple activities that act like separate pages on a website. You might have a ‘settings’ activity for instance and a ‘main’ activity. So the activity isn’t the app per say but rather one stand-alone page of your app.For your first creation though, you’ll probably do best to make something really simple that just displays a single, basic activity. Select ‘Basic Activity’ to keep things as simple as possible and for all intents and purposes, this will now be your app. Click Next again you get the last few options.Now you get to pick the name for your activity and the layout name (if you chose ‘Basic Activity’ you’ll also have the title option and the ‘menu_resource’ name). The activity name is how you’ll refer to your activities in your code, so call it something logical (good advice for coding generally) like ‘MainActivity’. Creative, I know.The layout name meanwhile describes a file that determines the layout of an activity. This is a separate piece of code that runs in concert with the main activity code to define where elements like images and menus go and what fonts you’ll use. This is actually not Java but XML – or Extensible Markup Language if you want to impress your friends.For anyone with a background in web development, your XML is going to work a little like HTML or a CSS style sheet. The Java code for the activity meanwhile says what the elements on the screen do when pressed etc. It’s fine to leave the default name here as ‘activity_main’. Lastly, choose a name for the menu and for the title. Pick something nice for the title, as your users will be able to see this at some points. Click next… and now you get to see your app!Your blank, useless app… All that just to get started! You see why people give up? But really we can break it down into the following very basic steps:Download and install Android Studio, making sure to include the Android SDKInstall Java SDKStart a new project and select the basic detailsSo it’s really not that bad… And remember: once you’ve done all this once, you can forget about it forever and focus on the fun stuff: creating apps! Your tea is probably cold at this point, so the next very important step, is to get more.Step 4: Making an Actual ThingOnce your app opens, you should see a directory tree on the left with all the different files and folders that make up your app and a picture of a phone displaying ‘Hello World!’ in the center. Well, hello to you as well!(A basic app that displays ‘Hello World’ is what most new developers make first when they learn to program in a new language. Android Studio cheats though, because it does it for you!)You might notice that the open tab (along the top) is ‘activity_main.xml’, which is what the big phone is showing on its display. You may recall that activity_main.xml is the XML code that defines the layout instructions for your main activity.If you selected ‘Basic Activity’ when you started your project, then you’ll see a second XML file too called ‘content_main.xml’. For the most part, these two do the same thing but the ‘acitvity_main.xml’ contains the basic layout that Android Studio created for you when you selected ‘Basic Activity’. The stuff you want to edit is in content_main.xml, so open that up and don’t worry about it for now.(If this isn’t what is open to start, then use the directory on the left to open it by choosing: app > res > content_main.xml.)The LayoutAndroid Studio is not showing the XML code itself here but rather a rendering of how the layout will appear on the screen. This is a visual editor a bit like Dreamweaver for web design and it makes life a little easier for us developers.You also have a bunch of options called ‘widgets’ down the left that you can add to your app. This is your basic app stuff; so for instance, if you want to add a button saying ‘OK’ to your activity, you can simply drag it over to the screen and drop it anywhere you like. Go ahead and dump an ‘OK’ button right underneath the ‘Hello World’.Something else you’ll find is that you can click on either of these elements in order to change the text and the ‘ID’. The ID is how you’re refer to each element (called a ‘view’) in your Java code, while the text is of course what you display to the user.Delete the ‘Hello World’ widget (or view) and change the text on the button to ‘Hello?’. Likewise, change the ‘id’ on the button to ‘button1’.I am now stealthily getting you to write a little program… Notice as well that when you select a view, you get options in the bottom right to change the text color and size etc. You can play around with these variables if you like to change the look of your button. We’re coming back here in a minute though so make a mental note!Now open up your MainActivity.java. The tab will be along the top but in case it isn’t, find it under:App > Java.This is the code that defines the behavior of your app. At this stage, you’re going to add in a little passage of code:public void buttonOnClick(View v) {
Create this form in 5 minutes!
How to create an eSignature for the blenk flood apps for android form
How to make an electronic signature for the Blenk Flood Apps For Android Form online
How to create an electronic signature for your Blenk Flood Apps For Android Form in Google Chrome
How to generate an electronic signature for putting it on the Blenk Flood Apps For Android Form in Gmail
How to generate an eSignature for the Blenk Flood Apps For Android Form from your mobile device
How to create an eSignature for the Blenk Flood Apps For Android Form on iOS devices
How to generate an eSignature for the Blenk Flood Apps For Android Form on Android
People also ask
-
What is the Fillable Form Dhs Fema 086 0 26a and how is it used?
The Fillable Form Dhs Fema 086 0 26a is a standardized form utilized for information collection by FEMA. It allows users to input data electronically, ensuring accuracy and efficiency. This form is essential for businesses and individuals seeking to comply with federal documentation requirements.
-
How can airSlate SignNow help with the Fillable Form Dhs Fema 086 0 26a?
airSlate SignNow provides an easy-to-use platform to electronically fill out and eSign the Fillable Form Dhs Fema 086 0 26a. Our solution streamlines the document management process, allowing users to complete forms quickly and securely, enhancing overall productivity.
-
Are there any costs associated with using airSlate SignNow for the Fillable Form Dhs Fema 086 0 26a?
Yes, airSlate SignNow offers various pricing plans to accommodate different business needs when using the Fillable Form Dhs Fema 086 0 26a. Each plan includes features such as unlimited eSigning, secure cloud storage, and integrations. Users can choose a plan that best fits their budget and requirements.
-
What features does airSlate SignNow offer for the Fillable Form Dhs Fema 086 0 26a?
With airSlate SignNow, users can fill out the Fillable Form Dhs Fema 086 0 26a electronically, utilize templates, and track document status in real-time. The platform also allows for secure sharing and collaboration, ensuring that all stakeholders can access and review the form efficiently.
-
Can I integrate airSlate SignNow with other applications while using the Fillable Form Dhs Fema 086 0 26a?
Absolutely! airSlate SignNow supports integrations with various applications, allowing users to streamline their workflow when handling the Fillable Form Dhs Fema 086 0 26a. You can connect with tools like Google Drive, Salesforce, and more to enhance your document management process.
-
Is it secure to use airSlate SignNow for the Fillable Form Dhs Fema 086 0 26a?
Yes, security is a top priority at airSlate SignNow. When using the Fillable Form Dhs Fema 086 0 26a, your data is protected with advanced encryption, ensuring that all sensitive information remains confidential and secure during the signing process.
-
How do I get started with the Fillable Form Dhs Fema 086 0 26a on airSlate SignNow?
Getting started is easy! Simply sign up for an airSlate SignNow account, then locate the Fillable Form Dhs Fema 086 0 26a within our template library. From there, you can customize the form, add necessary fields, and send it out for eSignature.
Get more for Fillable Form Dhs Fema 086 0 26a
- Math essentials 10 workbook pdf form
- Anything form
- Dental clearance letter form
- Zumper rental application pdf form
- Bid securing form
- Current events worksheet for middle school pdf form
- Form 6251 alternative minimum tax individuals overview
- Draft creditcardpurchaserequestpriorapprovalvisareceiptroutingform instruction division visa pre approval purchase request
Find out other Fillable Form Dhs Fema 086 0 26a
- eSign Alabama Real Estate Quitclaim Deed Mobile
- eSign Alabama Real Estate Affidavit Of Heirship Simple
- eSign California Real Estate Business Plan Template Free
- How Can I eSign Arkansas Real Estate Promissory Note Template
- eSign Connecticut Real Estate LLC Operating Agreement Later
- eSign Connecticut Real Estate LLC Operating Agreement Free
- eSign Real Estate Document Florida Online
- eSign Delaware Real Estate Quitclaim Deed Easy
- eSign Hawaii Real Estate Agreement Online
- Help Me With eSign Hawaii Real Estate Letter Of Intent
- eSign Florida Real Estate Residential Lease Agreement Simple
- eSign Florida Real Estate Limited Power Of Attorney Online
- eSign Hawaii Sports RFP Safe
- eSign Hawaii Sports Warranty Deed Myself
- eSign Louisiana Real Estate Last Will And Testament Easy
- eSign Louisiana Real Estate Work Order Now
- eSign Maine Real Estate LLC Operating Agreement Simple
- eSign Maine Real Estate Memorandum Of Understanding Mobile
- How To eSign Michigan Real Estate Business Plan Template
- eSign Minnesota Real Estate Living Will Free