Canada Post Mail Forwarding Form 2016


What is the Canada Post Mail Forwarding Form
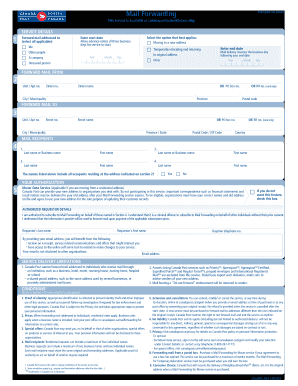
The Canada Post Mail Forwarding Form is a document used to request the redirection of mail from one address to another. This service is particularly useful for individuals or businesses that are temporarily relocating or have changed their permanent address. By completing this form, users can ensure that their mail is forwarded to their new location, avoiding missed correspondence and important documents. The form is designed to capture essential information, including the sender's previous address, new address, and the duration for which mail should be forwarded.
How to use the Canada Post Mail Forwarding Form
Using the Canada Post Mail Forwarding Form involves several straightforward steps. First, you need to obtain the form, which can be accessed online or at a local Canada Post outlet. After acquiring the form, fill it out with accurate details, including your name, old address, new address, and the forwarding duration. Once completed, you can submit the form either online or in person at a Canada Post location. It is important to ensure that all information is correct to avoid delays in mail redirection.
Steps to complete the Canada Post Mail Forwarding Form
Completing the Canada Post Mail Forwarding Form requires careful attention to detail. Follow these steps:
- Obtain the form from the Canada Post website or a local post office.
- Fill in your personal information, including your full name and previous address.
- Provide the new address where you want your mail forwarded.
- Select the duration for which you want the mail to be redirected, typically ranging from a few weeks to several months.
- Review the form for accuracy to prevent any issues with mail forwarding.
- Submit the completed form online or deliver it to a Canada Post office.
Legal use of the Canada Post Mail Forwarding Form
The Canada Post Mail Forwarding Form is legally recognized as a valid request for mail redirection. To ensure its legal standing, it is crucial to provide accurate and truthful information. Falsifying details on the form can lead to complications, including penalties or denial of mail forwarding services. Additionally, users should be aware of any state-specific regulations that might apply to mail forwarding services.
Key elements of the Canada Post Mail Forwarding Form
Several key elements must be included in the Canada Post Mail Forwarding Form to ensure its effectiveness. These elements include:
- Sender's Information: Full name, previous address, and contact details.
- New Address: The complete address where mail should be forwarded.
- Duration: The specific time frame for which the mail forwarding service is requested.
- Signature: The sender's signature to authorize the request.
How to obtain the Canada Post Mail Forwarding Form
The Canada Post Mail Forwarding Form can be obtained in multiple ways. Users can download the form directly from the Canada Post website, where it is available in a PDF format for easy printing. Alternatively, individuals can visit their nearest Canada Post outlet to request a physical copy of the form. Both methods ensure that users have access to the necessary documentation for mail forwarding.
Quick guide on how to complete ca mail forwarding 2016 2019 form
A concise guide on how to create your Canada Post Mail Forwarding Form
Finding the suitable template can be a hurdle when you need to submit formal international documentation. Even if you possess the necessary form, it may be cumbersome to swiftly prepare it in accordance with all the stipulations if you utilize paper formats instead of managing everything digitally. airSlate SignNow is the online electronic signature solution that assists you in overcoming those obstacles. It enables you to obtain your Canada Post Mail Forwarding Form and efficiently complete and sign it on-site without the need to reprint documents in case of mistakes.
Here are the actions you need to accomplish to create your Canada Post Mail Forwarding Form with airSlate SignNow:
- Click the Get Form button to immediately upload your document to our editor.
- Begin with the first empty field, enter your information, and proceed with the Next tool.
- Fill in the empty fields using the Cross and Check tools from the toolbar above.
- Select the Highlight or Line options to emphasize the key information.
- Click on Image and upload one if your Canada Post Mail Forwarding Form necessitates it.
- Utilize the right-side pane to add extra fields for yourself or others to complete if needed.
- Review your responses and validate the template by clicking Date, Initials, and Sign.
- Sketch, type, upload your eSignature, or capture it with a camera or QR code.
- Conclude the editing process by clicking the Done button and selecting your file-sharing preferences.
Once your Canada Post Mail Forwarding Form is prepared, you can share it in your preferred manner - send it to your recipients via email, SMS, fax, or even print it directly from the editor. You can also securely save all your completed documents in your account, organized in folders according to your liking. Don’t waste time on manual form filling; give airSlate SignNow a try!
Create this form in 5 minutes or less
Find and fill out the correct ca mail forwarding 2016 2019 form
FAQs
-
I am filling out an online mail forwarding form for USPS. Will my voter registration card and voting material be forwarded to my PO box?
In Oregon, we vote 100% by mail, and by law our ballots cannot be forwarded. The state needs to confirm that we are voting in the proper district and precinct, so the ballot will not be forwarded, and the citizen will not be allowed to vote again until they have re-registered at their new address.
-
How do I fill out 2016 ITR form?
First of all you must know about all of your sources of income. In Indian Income Tax Act there are multiple forms for different types of sources of Income. If you have only salary & other source of income you can fill ITR-1 by registering your PAN on e-Filing Home Page, Income Tax Department, Government of India after registration you have to login & select option fill ITR online in this case you have to select ITR-1 for salary, house property & other source income.if you have income from business & profession and not maintaining books & also not mandatory to prepare books & total turnover in business less than 1 Crores & want to show profit more than 8% & if you are a professional and not required to make books want to show profit more than 50% of receipts than you can use online quick e-filling form ITR-4S i.s. for presumptive business income.for other source of income there are several forms according to source of income download Excel utility or JAVA utility form e-Filing Home Page, Income Tax Department, Government of India fill & upload after login to your account.Prerequisite before E-filling.Last year return copy (if available)Bank Account number with IFSC Code.Form 16/16A (if Available)Saving Details / Deduction Slips LIC,PPF, etc.Interest Statement from Banks or OthersProfit & Loss Account, Balance Sheet, Tax Audit Report only if filling ITR-4, ITR-5, ITR-6, ITR-7.hope this will help you in case any query please let me know.
-
How can I fill out the BITSAT Application Form 2019?
BITSAT 2019 Application Forms are available online. Students who are eligible for the admission test can apply online before 20 March 2018, 5 pm.Click here to apply for BITSAT 2019Step 1: Follow the link given aboveStep 2: Fill online application formPersonal Details12th Examination DetailsTest Centre PreferencesStep 3: Upload scanned photograph (4 kb to 50 kb) and signature ( 1 kb to 30 kb).Step 4: Pay application fee either through online payment mode or through e-challan (ICICI Bank)BITSAT-2019 Application FeeMale Candidates - Rs. 3150/-Female Candidates - Rs. 2650/-Thanks!
-
How can I fill out the COMEDK 2019 application form?
COMEDK 2019 application is fully online based and there is no need to send the application by post or by any other method. Check the below-mentioned guidelines to register for the COMEDK 2019 exam:Step 1 Visit the official website of the COMEDK UGET- comedk.orgStep 2 Click on “Engineering Application”.Step 3 After that click on “Login or Register” button.Step 4 You will be asked to enter the Application SEQ Number/User ID and Password. But since you have not registered. You need to click on the “Click here for Registration”.Step 5 Fill in the required details like “Full Name”, “DOB”, “Unique Photo ID Proof”, “Photo ID Proof Number”, “Email ID” and “Mobile Number”.Step 6 Then click on the “Generate OTP”Step 7 After that you need to enter the captcha code and then an OTP will be sent to the mobile number that you have provided.Step 8 A new window having your previously entered registration details will open where you need to enter the OTP.Step 9 Re-check all the details, enter the captcha code and click on the “Register” button.Step 10 After that a page will appear where you will be having the User ID and all the details that you entered. Also, you will be notified that you have successfully registered yourself and a User ID and Password will be sent to your mobile number and email ID.COMEDK 2019 Notification | Steps To Apply For COMEDK UGET ExamCheck the below-mentioned guidelines to fill COMEDK Application Form after COMEDK Login.Step 1 Using your User ID and Password. Log in using the User ID and passwordStep 2 You will be shown that your application form is incomplete. So you need to go to the topmost right corner and click on the “Go to application” tab.Step 3 Go to the COMEDK official website and login with these credentials.Step 4 After that click on “Go to application form”.Step 5 Select your preferred stream and course.Step 6 Click on “Save and Continue”.Step 7 Carefully enter your Personal, Category and Academic details.Step 8 Upload your Photograph and Signature, Parents Signature, your ID Proof, and Declaration.Step 9 Enter your “Payment Mode” and “Amount”.Step 10 Enter “Security code”.Step 11 Tick the “I Agree” checkbox.Step 12 Click on the “Submit” button.
-
How do I fill out a CLAT 2019 application form?
Hi thereFirst of all, let me tell you some important points:CLAT 2019 has gone OFFLINE this yearBut the application forms for CLAT 2019 have to be filled ONLINEThe payment of the application fees also should be made onlineNow, kindly note the important dates:Note the details regarding the application fees:Here, if you want the Previous Year Question papers, Rs.500 would be added to the application fees.Apart from this, there would be bank transaction charges added to the application fees.The application fees is non-refundable.Note one important point here that before you fill the application form, check for your eligibility.To know the complete details of filling the application form along with other information like the eligibility - in terms of age, educational qualification, list of NLUs participating and the seats offered under each category, CLAT Reservation policies, CLAT exam pattern, marking scheme, syllabus, important documents required to be kept ready before filling the form, kindly go to the link below:How to fill CLAT 2019 Application form? Registration OPEN | All you need to knowTo know how to prepare for one of the very important section of CLAT exam, GK and Current Affairs, kindly go to the link below:How to prepare GK & Current Affairs for CLAT 2019To practice, daily MCQs on Current Affairs, kindly go to the link below:#CLAT2019 | #AILET2019 | #DULLB2019 | GK and Current Affairs Series: 5 in 10 Series: Day 12For any other queries, kindly write to us at mailateasyway@gmail.comThanks & Regards!
-
How do I fill out the NEET 2019 application form?
Expecting application form of NEET2019 will be same as that of NEET2018, follow the instructions-For Feb 2019 Exam:EventsDates (Announced)Release of application form-1st October 2018Application submission last date-31st October 2018Last date to pay the fee-Last week of October 2018Correction Window Open-1st week of November 2018Admit card available-1st week of January 2019Exam date-3rd February to 17th February 2019Answer key & OMR release-Within a week after examAnnouncement of result-1st week of March 2019Counselling begins-2nd week of June 2019For May 2019 Exam:EventsDates (Announced)Application form Release-2nd week of March 2019Application submission last date-2nd week of April 2019Last date to pay the fee-2nd week of April 2019Correction Window Open-3rd week of April 2019Admit card available-1st week of May 2019Exam date-12th May to 26th May 2019Answer key & OMR release-Within a week after examAnnouncement of result-1st week of June 2019Counselling begins-2nd week of June 2019NEET 2019 Application FormCandidates should fill the application form as per the instructions given in the information bulletin. Below we are providing NEET 2019 application form details:The application form will be issued through online mode only.No application will be entertained through offline mode.NEET UG registration 2019 will be commenced from the 1st October 2018 (Feb Exam) & second week of March 2018 (May Exam).Candidates should upload the scanned images of recent passport size photograph and signature.After filling the application form completely, a confirmation page will be generated. Download it.There will be no need to send the printed confirmation page to the board.Application Fee:General and OBC candidates will have to pay Rs. 1400/- as an application fee.The application fee for SC/ST and PH candidates will be Rs. 750/-.Fee payment can be done through credit/debit card, net banking, UPI and e-wallet.Service tax will also be applicable.CategoryApplication FeeGeneral/OBC-1400/-SC/ST/PH-750/-Step 1: Fill the Application FormGo the official portal of the conducting authority (Link will be given above).Click on “Apply Online” link.A candidate has to read all the instruction and then click on “Proceed to Apply Online NEET (UG) 2019”.Step 1.1: New RegistrationFill the registration form carefully.Candidates have to fill their name, Mother’s Name, Father’s Name, Category, Date of Birth, Gender, Nationality, State of Eligibility (for 15% All India Quota), Mobile Number, Email ID, Aadhaar card number, etc.After filling all the details, two links will be given “Preview &Next” and “Reset”.If candidate satisfied with the filled information, then they have to click on “Next”.After clicking on Next Button, the information submitted by the candidate will be displayed on the screen. If information correct, click on “Next” button, otherwise go for “Back” button.Candidates may note down the registration number for further procedure.Now choose the strong password and re enter the password.Choose security question and feed answer.Enter the OTP would be sent to your mobile number.Submit the button.Step 1.2: Login & Application Form FillingLogin with your Registration Number and password.Fill personal details.Enter place of birth.Choose the medium of question paper.Choose examination centres.Fill permanent address.Fill correspondence address.Fill Details (qualification, occupation, annual income) of parents and guardians.Choose the option for dress code.Enter security pin & click on save & draft.Now click on preview and submit.Now, review your entries.Then. click on Final Submit.Step 2: Upload Photo and SignatureStep 2 for images upload will be appeared on screen.Now, click on link for Upload photo & signature.Upload the scanned images.Candidate should have scanned images of his latest Photograph (size of 10 Kb to 100 Kb.Signature(size of 3 Kb to 20 Kb) in JPEG format only.Step 3: Fee PaymentAfter uploading the images, candidate will automatically go to the link for fee payment.A candidate has to follow the instruction & submit the application fee.Choose the Bank for making payment.Go for Payment.Candidate can pay the fee through Debit/Credit Card/Net Banking/e-wallet (CSC).Step 4: Take the Printout of Confirmation PageAfter the fee payment, a candidate may take the printout of the confirmation page.Candidates may keep at least three copies of the confirmation page.Note:Must retain copy of the system generated Self Declaration in respect of candidates from J&K who have opted for seats under 15% All India Quota.IF any queries, feel free to comment..best of luck
-
How can I fill out the application form for the JMI (Jamia Millia Islamia) 2019?
Form for jamia school have been releaseYou can fill it from jamia siteJamia Millia Islamia And for collegeMost probably the form will out end of this month or next monthBut visit the jamia site regularly.Jamia Millia Islamiacheck whether the form is out or not for the course you want to apply.when notification is out then you have to create the account for entrance and for 2 entrance same account will be used you have to check in the account that the course you want to apply is there in listed or not ….if not then you have to create the different account for that course .If you have any doubts you can freely ask me .
Create this form in 5 minutes!
How to create an eSignature for the ca mail forwarding 2016 2019 form
How to generate an electronic signature for your Ca Mail Forwarding 2016 2019 Form in the online mode
How to make an electronic signature for your Ca Mail Forwarding 2016 2019 Form in Chrome
How to make an eSignature for signing the Ca Mail Forwarding 2016 2019 Form in Gmail
How to generate an eSignature for the Ca Mail Forwarding 2016 2019 Form right from your smartphone
How to make an eSignature for the Ca Mail Forwarding 2016 2019 Form on iOS
How to make an eSignature for the Ca Mail Forwarding 2016 2019 Form on Android
People also ask
-
What is the Canada Post Mail Forwarding Form and how does it work?
The Canada Post Mail Forwarding Form is a document that allows individuals and businesses to redirect their mail to a new address. By filling out this form, you can ensure that your important correspondence signNowes you at your new location without interruption. It’s a straightforward process that can be completed online, making it convenient for users on the go.
-
How do I complete the Canada Post Mail Forwarding Form using airSlate SignNow?
To complete the Canada Post Mail Forwarding Form using airSlate SignNow, simply upload the document to our platform, fill in the required fields, and eSign it for authentication. Our user-friendly interface allows you to manage the entire process seamlessly from your computer or mobile device. Plus, you can easily track the status of your form after submission.
-
Is there a cost associated with using the Canada Post Mail Forwarding Form?
Yes, there is a fee associated with the Canada Post Mail Forwarding Form, which varies based on the duration and type of forwarding service you choose. However, using airSlate SignNow can help you save time and money by streamlining the signing process. We provide a cost-effective solution for businesses and individuals alike.
-
What are the benefits of using the Canada Post Mail Forwarding Form?
The Canada Post Mail Forwarding Form offers several benefits, including uninterrupted mail delivery, convenience, and the ability to manage your mail remotely. By using this form, you can ensure that you don’t miss important documents, bills, or packages while transitioning to a new address. It’s an essential tool for anyone moving or traveling.
-
Can I integrate the Canada Post Mail Forwarding Form with airSlate SignNow’s other features?
Absolutely! The Canada Post Mail Forwarding Form can easily be integrated with airSlate SignNow’s suite of features, including document templates and automated workflows. This integration allows you to create a comprehensive document management solution that enhances productivity and reduces errors in your mail forwarding process.
-
How long does it take for the Canada Post Mail Forwarding Form to take effect?
Typically, the Canada Post Mail Forwarding Form takes effect within 5 to 7 business days after submission. It’s advisable to submit your form ahead of your move to ensure a smooth transition. With airSlate SignNow, you can track your application and stay informed about its status.
-
What types of mail can be forwarded with the Canada Post Mail Forwarding Form?
The Canada Post Mail Forwarding Form allows you to forward all types of mail, including letters, packages, and parcels. However, certain restrictions may apply based on the sender's preferences or specific items. Be sure to check Canada Post’s guidelines or contact their customer service for more details.
Get more for Canada Post Mail Forwarding Form
- Va form 21 4192 download fillable pdf or fill online
- Pharmacy forms and criteria alabama medicaid
- Va form 24 0296 printable
- Image 162160402576012 999998868687012 httppbstwimgcom form
- Expiration date 05312021 form
- Request for determination of reasonable veterans affairs form
- Fillable online tax ohio it1040ez form 2014 fax email
- Certificate of affirmation of veterans affairs form
Find out other Canada Post Mail Forwarding Form
- eSignature Oregon Amendment to an LLC Operating Agreement Free
- Can I eSign Hawaii Managed services contract template
- How Do I eSign Iowa Managed services contract template
- Can I eSignature Wyoming Amendment to an LLC Operating Agreement
- eSign Massachusetts Personal loan contract template Simple
- How Do I eSign Massachusetts Personal loan contract template
- How To eSign Mississippi Personal loan contract template
- How Do I eSign Oklahoma Personal loan contract template
- eSign Oklahoma Managed services contract template Easy
- Can I eSign South Carolina Real estate contracts
- eSign Texas Renter's contract Mobile
- How Do I eSign Texas Renter's contract
- eSign Hawaii Sales contract template Myself
- How Can I eSign Washington Real estate sales contract template
- How To eSignature California Stock Certificate
- How Can I eSignature Texas Stock Certificate
- Help Me With eSign Florida New employee checklist
- How To eSign Illinois Rental application
- How To eSignature Maryland Affidavit of Identity
- eSignature New York Affidavit of Service Easy