Importar Documentos Para Firma Electrónica Usando Cámara
What it means to import documents using a camera
Why import documents with your camera
Camera import lets teams convert paper into actionable digital documents immediately, reducing delays from scanning, enabling faster signature cycles, and simplifying remote workflows without specialized hardware.
Common challenges when importing via camera
- Poor lighting and glare can reduce legibility and OCR accuracy, requiring retakes or manual corrections.
- Skewed or angled captures produce distorted pages that need perspective correction and cleanup.
- Low-resolution images increase file size after enhancement and may degrade printed text clarity.
- Sensitive documents captured in public or unsecured environments raise confidentiality and compliance concerns.
Representative user profiles for camera-based imports
Loan Officer
A loan officer uses mobile camera import to gather signed disclosures, ID scans, and pay stubs during home visits. They rely on automatic cropping and PDF conversion to prepare a single package for electronic signature and submission, reducing processing time and preserving a verifiable audit trail for underwriting.
HR Administrator
An HR administrator captures employee I-9 forms and signed policy acknowledgments with a phone camera, then attaches signature fields within the eSignature platform. This method streamlines onboarding paperwork, ensures consistent file formats, and keeps personnel records centralized and searchable for compliance reviews.
Who commonly uses camera import for document workflows
Field staff, small-business owners, and office teams use mobile capture to turn paper into signable files quickly.
- Field technicians capturing inspection reports and work orders for quick authorization.
- HR personnel collecting signed onboarding forms and IDs during in-person sessions.
- Real estate agents and loan officers capturing signed disclosures or property documents on site.
Camera import supports flexible, on-the-go workflows across functions that need fast document turnaround and auditability.
Elige una mejor solución
Key tools that make camera import effective
Auto-Capture
Automatic edge detection and auto-capture reduce retakes by sensing a stable document frame and snapping a correctly timed photo, improving consistency across users and lighting conditions while minimizing user input for repeatable scans.
OCR and Indexing
Optical character recognition converts visible text into searchable data fields that can populate form fields, speed document routing, and support downstream processing such as metadata tagging and quick retrieval in document management systems.
Image Correction
Automatic perspective correction, de-warping, and contrast enhancement produce legible PDFs from imperfect captures, ensuring signed documents are clear and acceptable for record-keeping and review.
Cloud Integration
Captured files can be saved directly to cloud storage or attached to signNow workflows, enabling consistent document retention, centralized access, and integration with CRM or case management systems.
How camera import integrates into eSignature workflows
-
Capture: Camera takes an image of the document pages.
-
Enhancement: Auto-crop, de-skew, and contrast adjustments apply.
-
Conversion: Image converted to PDF and optionally OCRed.
-
Preparation: Signature fields added and routing is configured.
Step-by-step: import documents using a camera
-
01Open capture: Launch the eSignature app camera function.
-
02Frame document: Align page, ensure good lighting and hold steady.
-
03Confirm scan: Review crop, rotate, and retake if needed.
-
04Save and prepare: Convert to PDF and add signature fields.
Por qué elegir airSlate SignNow
-
Prueba gratuita de 7 días. Elige el plan que necesitas y pruébalo sin riesgos.
-
Precios honestos para planes completos. airSlate SignNow ofrece planes de suscripción sin cargos adicionales ni tarifas ocultas al renovar.
-
Seguridad de nivel empresarial. airSlate SignNow te ayuda a cumplir con los estándares de seguridad globales.
Recommended workflow settings for camera imports
| Document Import Workflow Setting Name | Default Configuration and Timeout Values |
|---|---|
| Document OCR Language Preference Setting | English (United States) with fallback options |
| Automatic Image Correction Setting | Enabled with auto-contrast and de-skew |
| Maximum Image Resolution Setting | Limit to 300 DPI for balance |
| Temporary Upload Retention Setting | 48 hours before conversion |
| Signature Placement Automation Setting | Auto-place recommended fields |
Device and platform requirements for camera import
Supported platforms and minimum app versions ensure reliable capture performance across devices.
- iOS version: iOS 14 or later
- Android version: Android 8.0 or later
- Browser support: Modern Chromium and Safari
For enterprise deployments verify device policies, camera permissions, and managed app configurations to maintain security and consistent user experience across your organization.
Practical examples of camera import in use
Field Inspection
A technician captures completed inspection sheets on site using a phone camera, then the image is auto-cropped and converted to PDF
- The platform runs OCR to extract key values for reporting
- Extracted data populates the inspection record in the workflow
Leading to faster invoicing and documented completion.
Patient Intake
A clinic captures signed intake forms and insurance cards at registration using a tablet camera, then redacts sensitive fields within the record
- Images are stored with access controls and audit logs for HIPAA alignment
- Staff apply electronic signature fields and route forms to billing and records teams
Resulting in reduced administrative delay and stronger patient record integrity.
Best practices for secure and accurate camera imports
FAQs and troubleshooting when you import documents using camera
- Why is OCR failing to recognize text?
Ensure the captured image is in focus, well lit, and flat. High-contrast text on a contrasting background improves recognition. If handwriting is present, OCR accuracy will be limited; consider manual transcription or asking the signer to provide a typed form. Adjust the app’s OCR language setting to match the document language and retry the capture for better results.
- Images appear blurry or distorted after upload
Confirm the device camera lens is clean and the document was held steady during capture. Use automatic capture or stabilization features when available. If distortion persists, enable higher resolution capture in app settings, then compress the resulting PDF during conversion to keep file sizes manageable while preserving legibility.
- How do I manage personally identifiable information?
Limit who can access captured files by applying role-based permissions and storing documents in secured folders. Use built-in redaction tools to mask sensitive fields before sharing, and ensure retention policies align with compliance requirements such as HIPAA for healthcare or FERPA for education when handling protected records.
- Captured documents are rejected by signers or recipients
Standardize capture procedures and provide guidance on framing and lighting. Use templates to place signature fields consistently and include a preview step so recipients can verify document integrity before signing. Keep an audit trail of capture and edits to resolve disputes about document authenticity.
- Can I capture multiple pages into one document?
Yes; most mobile capture flows support multi-page documents. Capture each page sequentially, confirm ordering during review, and then convert the set into a single PDF. Use automatic page detection and reordering tools when available to streamline assembly and reduce manual adjustments before sending for signature.
- What if network connectivity interrupts the upload?
Use offline capture options when available to store images locally until a connection is re-established. Confirm your app is configured to retry uploads automatically and to encrypt temporary local files. For high-security workflows, avoid public Wi-Fi and use managed devices or VPNs to reduce exposure during upload.
Feature comparison: camera import across eSignature vendors
| Comparison Criteria | signNow (Featured) | DocuSign | Adobe Acrobat Sign |
|---|---|---|---|
| Mobile Camera Import | |||
| Automatic OCR | |||
| HIPAA-ready options | Available | Available | Available |
| Offline capture support | Limited | Limited | Limited |
¡Obtenga firmas legalmente vinculantes ahora!
Risks and penalties for improper camera imports
Plan and feature comparison across popular eSignature products
| Plan Name and Details | signNow (Featured) | DocuSign | Adobe Acrobat Sign | PandaDoc | Dropbox Sign |
|---|---|---|---|---|---|
| Free plan availability | No free plan, trial available | Trial only | Trial only | Free eSign plan available | Free tier available |
| Entry-level seat price | Lower-tier paid monthly plan | Market-leading price tier | Bundled with Acrobat subscriptions | Competitive business plan entry | Affordable individual plan |
| Bulk send capability | Included on selected plans | Available on business plans | Available on enterprise plans | Included on selected plans | Available on paid tiers |
| API access | Available via paid plans | Available via paid plans | Available via paid plans | Available via paid plans | Available via paid plans |
| HIPAA support option | BAA available for qualifying plans | BAA available for enterprise | BAA available for enterprise | BAA available for enterprise | BAA available on request |
Cómo subir una imagen de un documento a airSlate SignNow usando una cámara
La aplicación móvil de airSlate SignNow te permite capturar rápidamente un documento con tu cámara e importarlo a tu cuenta de airSlate SignNow. La imagen cargada puede ser editada, transformada en un formulario rellenable y enviada para firma directamente desde tu teléfono inteligente o tableta.
Comienza con un toque de tu dedo
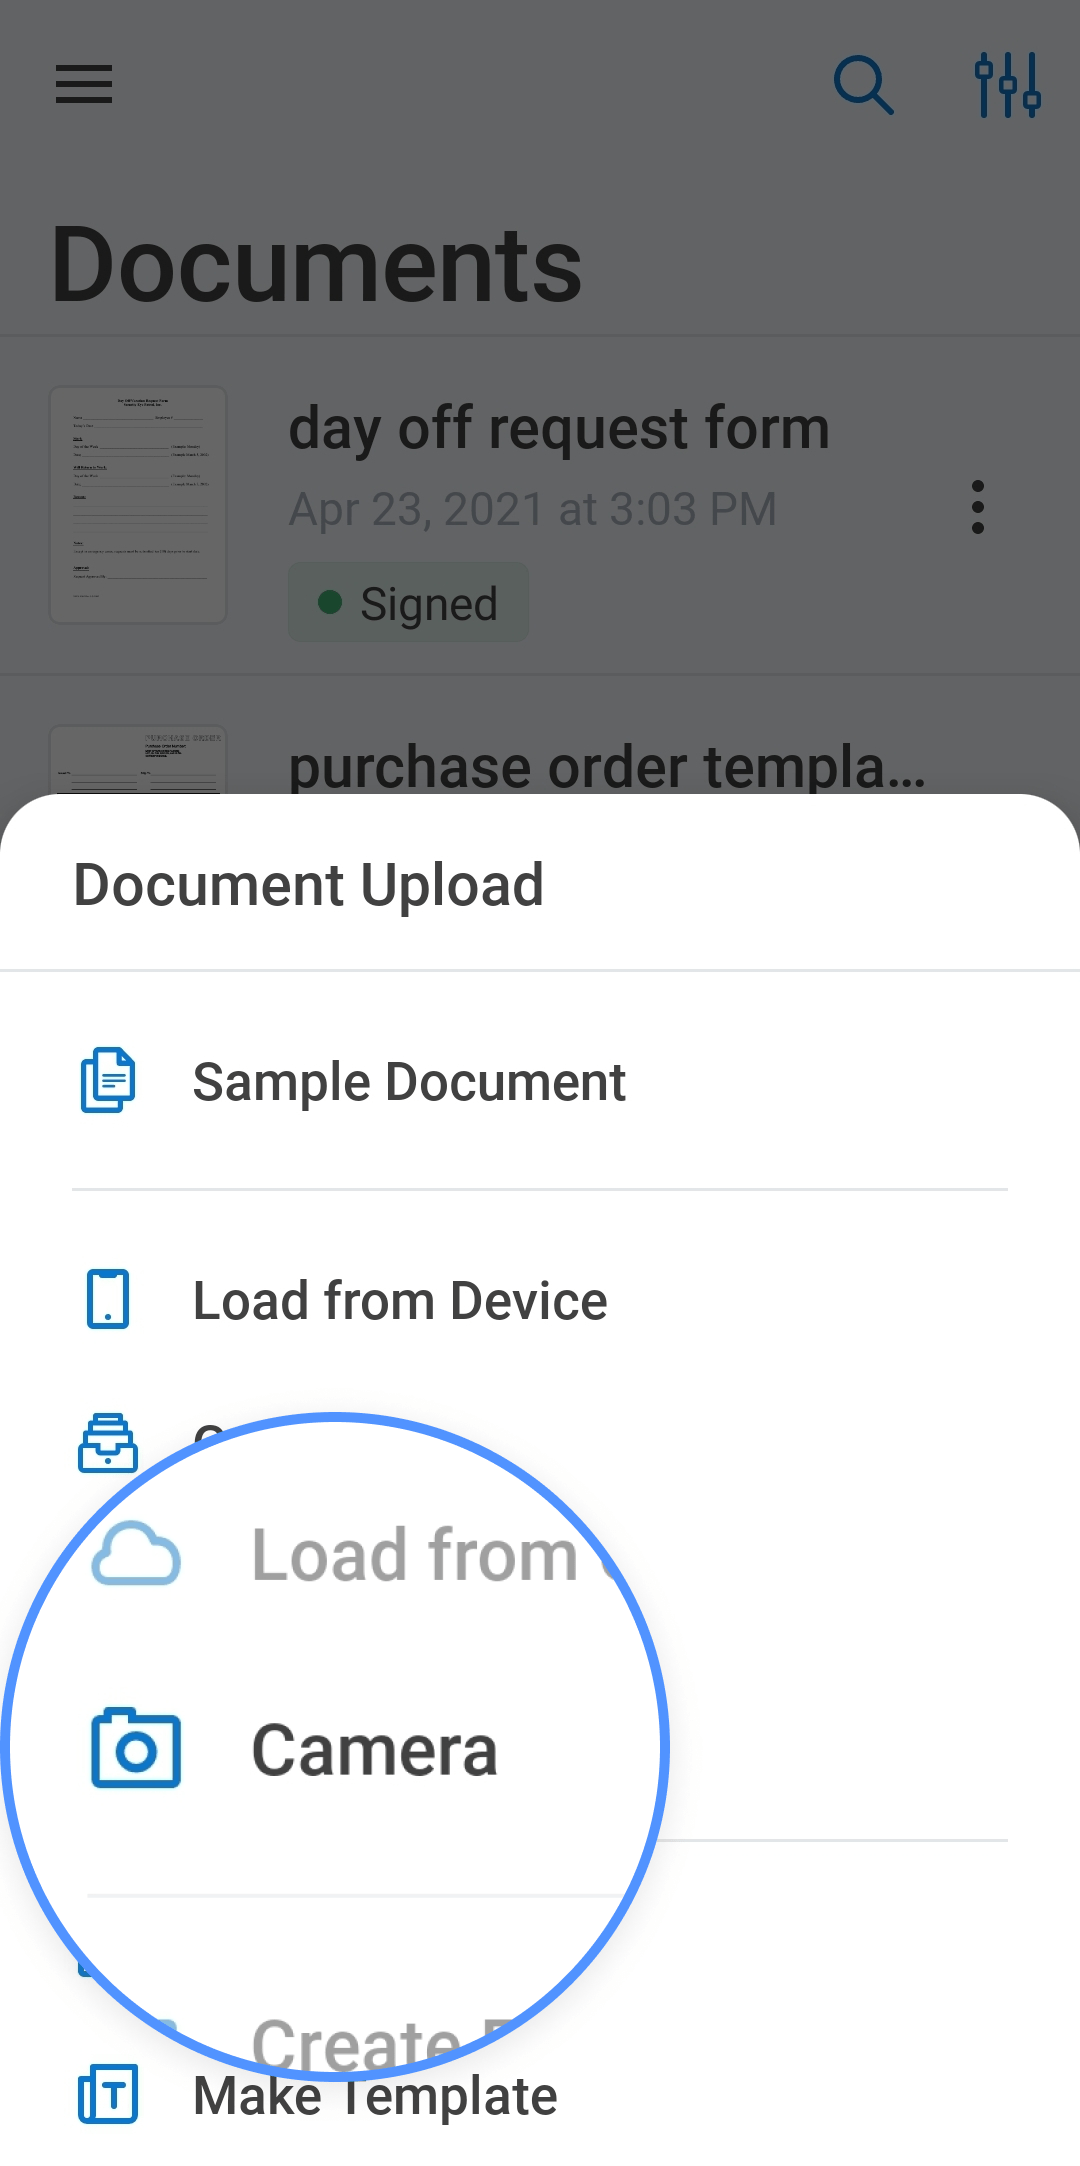
Toca el icono más en la esquina inferior derecha de la pantalla de inicio de la aplicación móvil de airSlate SignNow.
Selecciona Cámara en el menú de carga y permite que airSlate SignNow acceda a la cámara de tu dispositivo. Luego, toma una foto de tu documento.
Editar y guardar imágenes de documentos en segundos
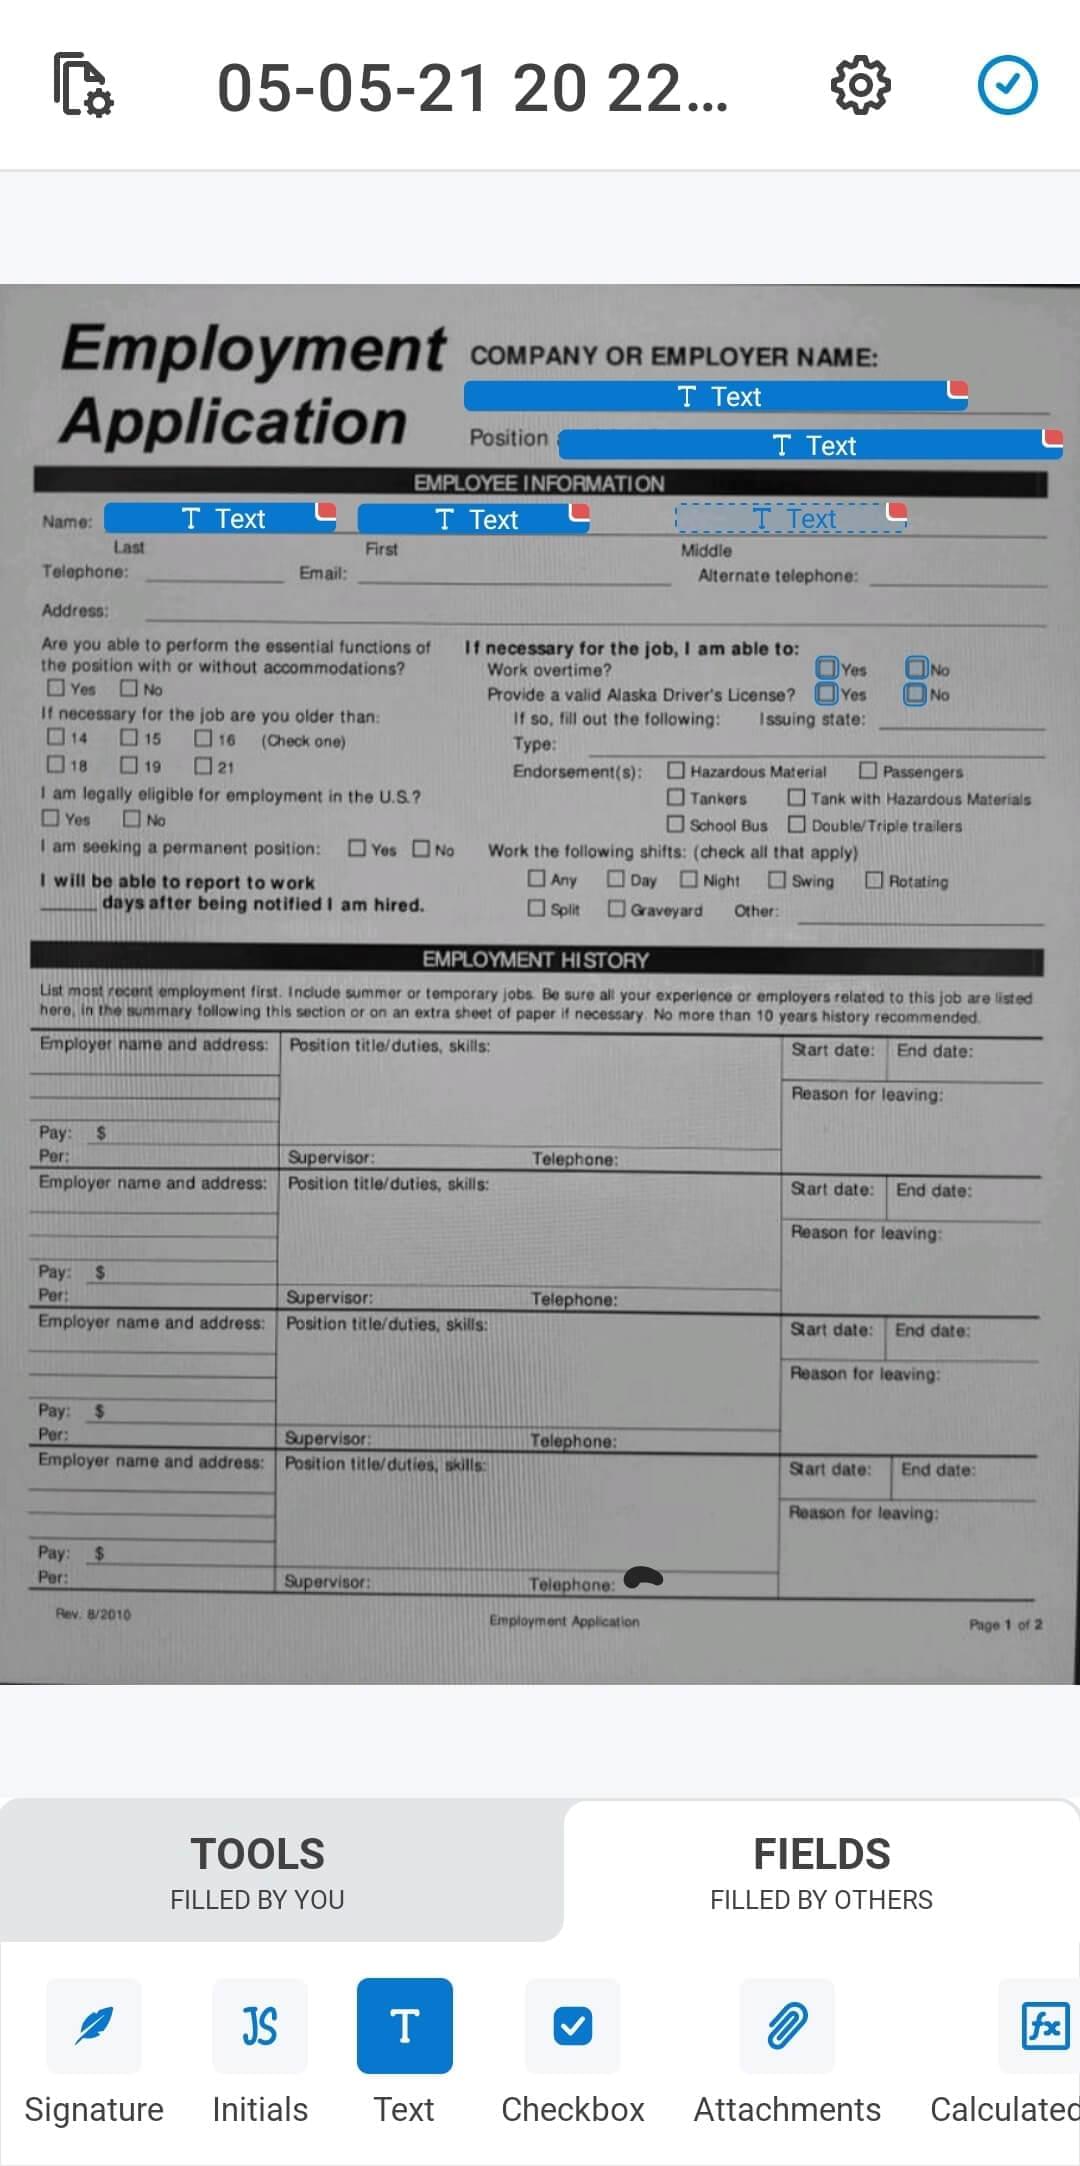
Después de tomar una foto, se abrirá en el editor de airSlate SignNow. Puedes agregar anotaciones y campos rellenables usando las herramientas en la parte inferior de la interfaz del editor.
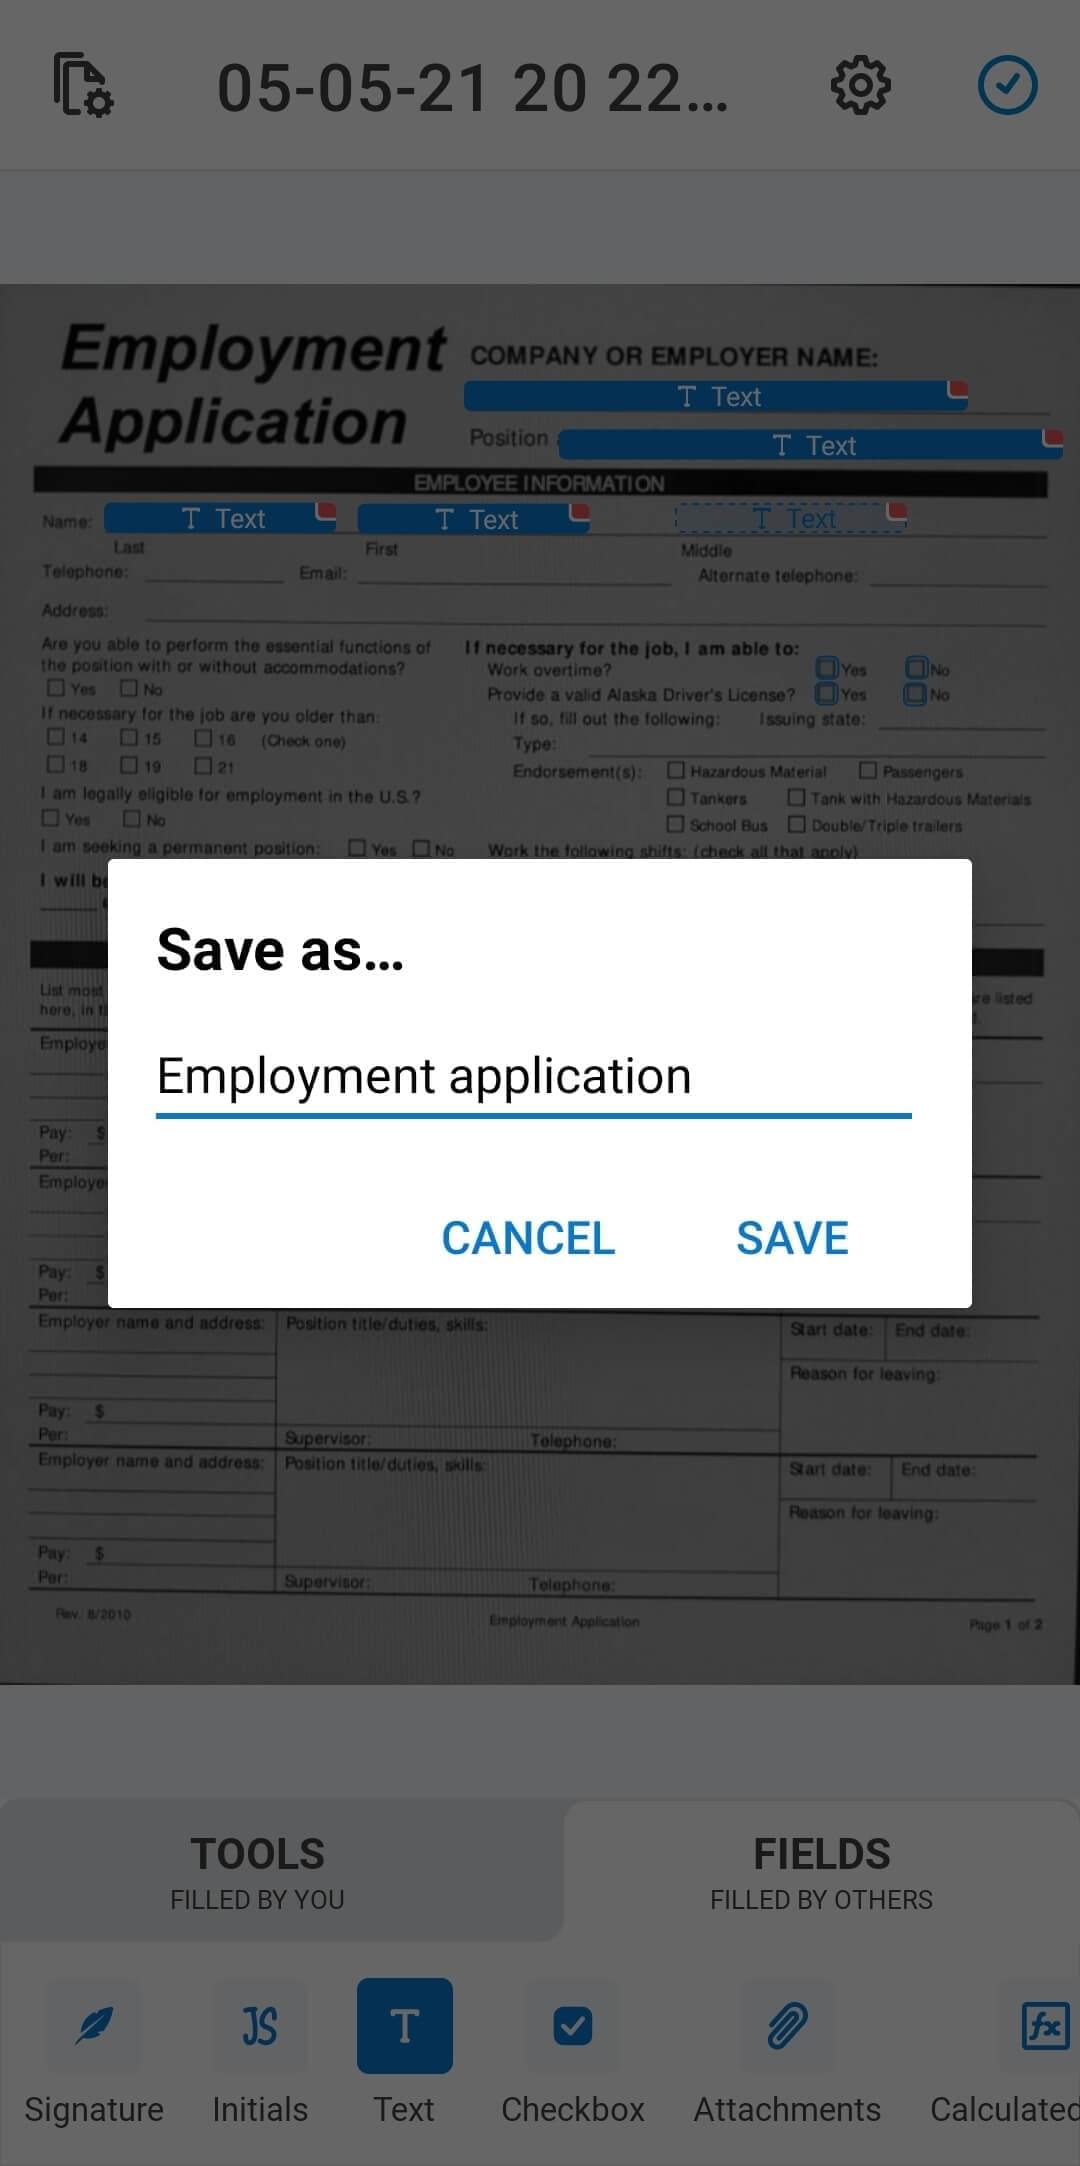
Una vez terminado, toca el icono de marca de verificación en la esquina superior derecha de la pantalla para guardar un documento.
Ingresa el título de tu documento en la ventana emergente y presiona Guardar.
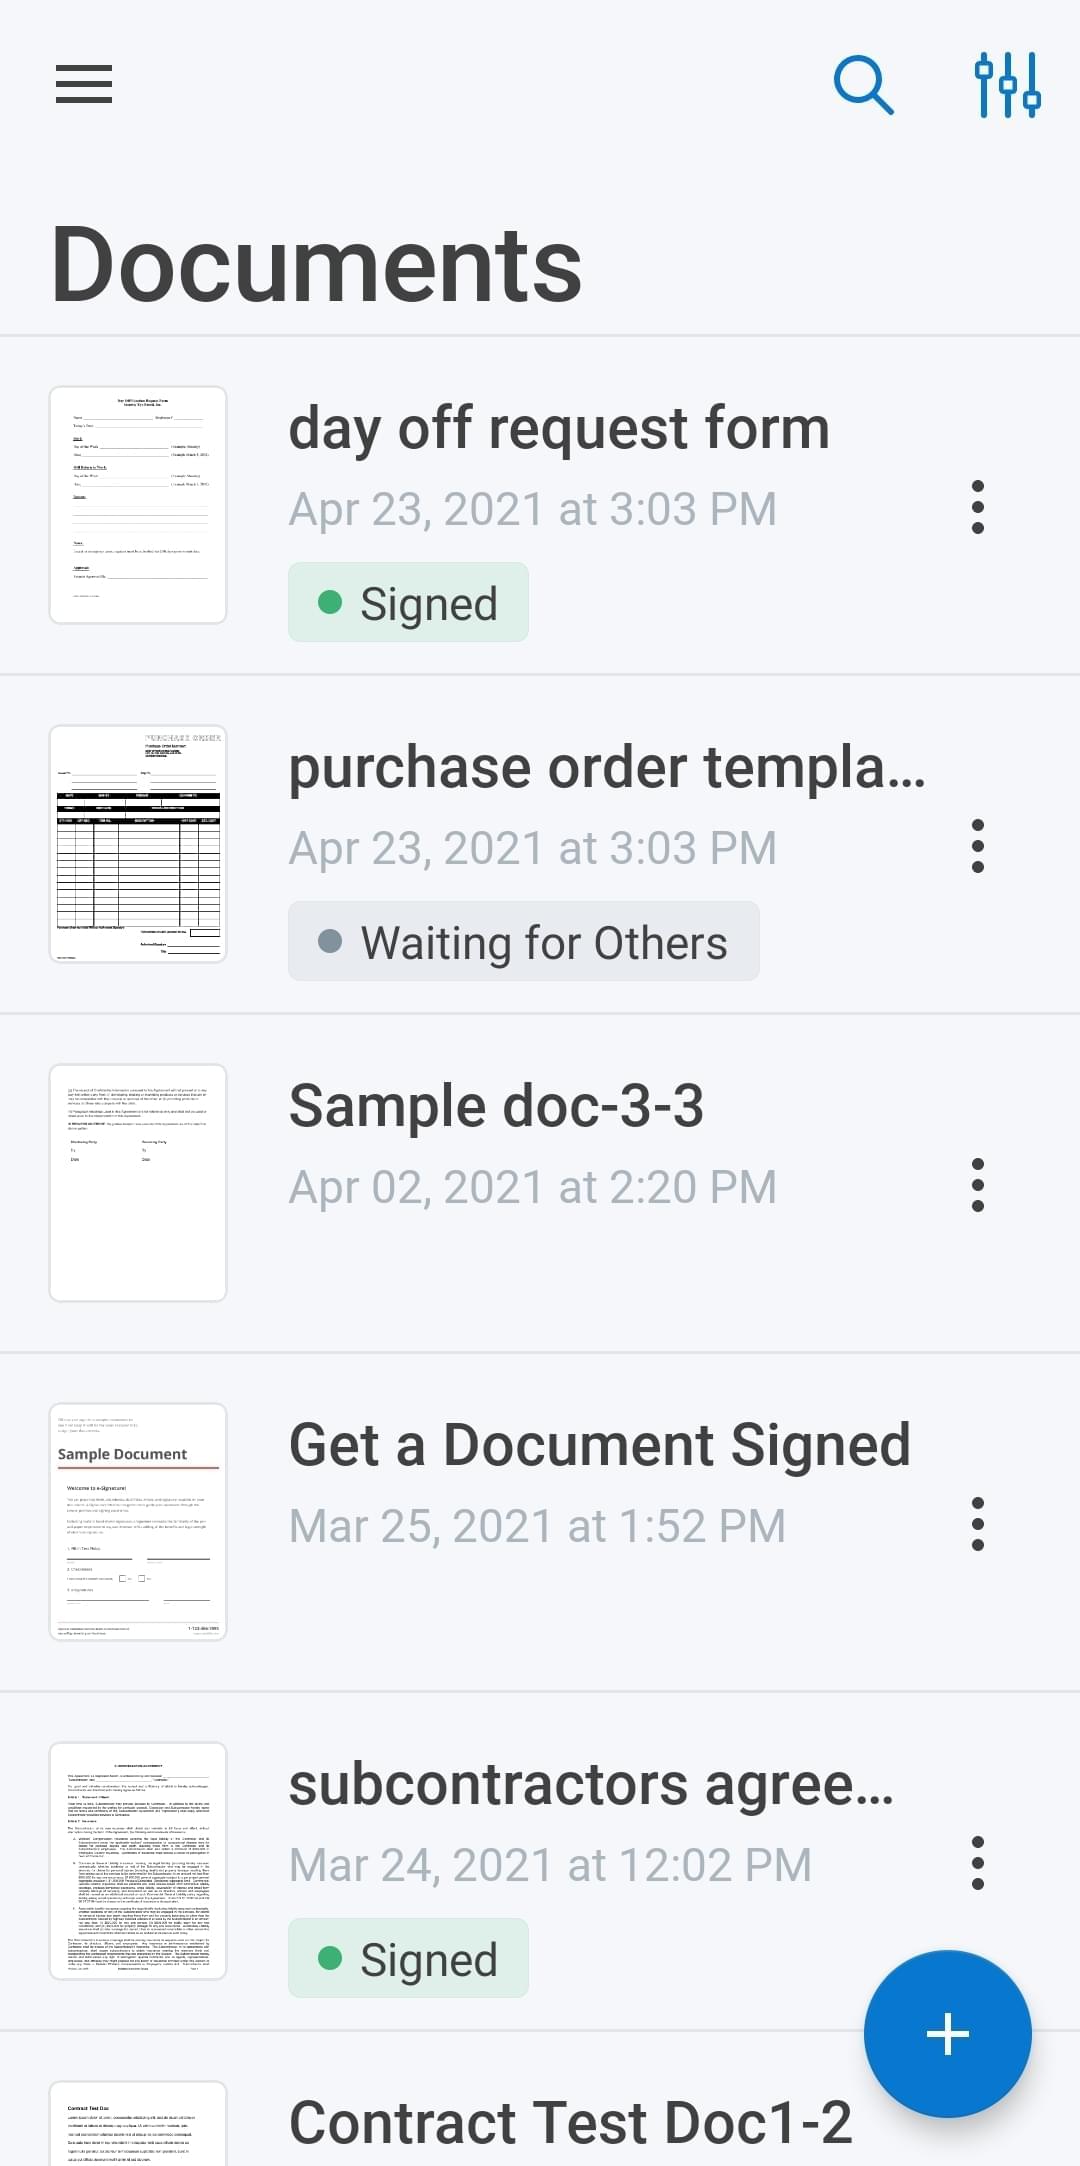
El documento que has subido usando tu cámara aparecerá en la parte superior de tu lista de 'recientes', dentro de la carpeta Documentos.
Explorar funciones avanzadas
Descubra más herramientas de firma electrónica
- Desbloquea la Legitimidad de la Firma Electrónica para ...
- Licitud de la firma electrónica para pequeñas ...
- Desbloquea el Poder de la Licitud de Firma Electrónica ...
- Desbloquea el Poder de la Legalidad de la Firma ...
- Desbloquea el Poder de la Legalidad de la eFirma para ...
- Desbloquee el Poder de la Legitimidad de la Firma ...
- Aumenta la legitimidad de la eFirma para la Política ...
- Asegura la Legalidad de la eSignature para Tu Affidavit ...
- Mejora tu Memorando de Entendimiento con la Legitimidad ...
- Legalidad de la Firma Electrónica para el Contrato de ...
- Asegura la Legalidad de la Firma Electrónica para el ...
- Aumenta la credibilidad de tu Acuerdo de Fabricación y ...
- Legalidad de la eFirma para el Poder General en Canadá
- Desbloquea la legalidad de la eFirma para el Acuerdo de ...
- Legalidad de la eFirma para el Informe de Inspección ...
- El Poder Legal de Firmar Electrónicamente el Poder ...
- Desbloquea la Legitimidad de la eFirma para el Acuerdo ...
- Desbloquea la Legitimidad de la eSignature para la ...
- Legalidad de la eFirma para el Acuerdo de No ...
- Asegura la Legalidad de la eSignature para el Acuerdo ...


