Batch targeting
Create and schedule multiple recipient batches with distinct templates and sending windows to manage load and timing across campaigns.


Bulk Send reduces repetitive manual sending, shortens signature cycles, and scales routine agreements across large recipient lists while keeping each transaction traceable and compliant under U.S. electronic signature law.

An HR Manager prepares onboarding templates, uploads new hire recipient lists, and monitors completion rates to ensure legal forms are signed and stored according to company retention policies.
Sales Operations configures recurring proposal templates, runs Bulk Send campaigns for renewals, and reconciles signed agreements with CRM records to maintain revenue recognition controls.
Bulk Send is used by functions that manage high-volume, repeatable agreements and need reliable tracking and efficiency.
Organizations prioritize Bulk Send when consistent delivery, auditability, and reduced manual steps are core operational requirements.
Create and schedule multiple recipient batches with distinct templates and sending windows to manage load and timing across campaigns.
Validate emails and required data fields during import to reduce bounce rates and incomplete transactions before dispatch.
Map CSV columns to document fields for name, address, or account-specific data to preserve individualized records for each signer.
Dashboard views show per-recipient status, outstanding actions, and batch completion metrics for operational oversight.
Configure scheduled reminder emails and expiry settings to improve completion rates without manual follow-up.
Export batch-level and recipient-level reports for reconciliation, audit, and archival retention purposes.
Integrates with Google Docs and Sheets to generate documents from templates and pull recipient lists directly from spreadsheets, enabling scheduled or one-off bulk sends without manual CSV exports.
Connects to CRM systems to automatically pull contact lists and contract fields, allowing bulk sends initiated from account or opportunity records with mapped data for personalization and reconciliation.
Works with common cloud repositories such as Dropbox and Google Drive to source templates and store signed copies, simplifying document lifecycle management and backup.
Supports reusable, role-aware templates with conditional fields, ensuring each bulk-sent document contains only relevant sections and required signature blocks for recipients.

| Setting Name | Configuration |
|---|---|
| Bulk Send Recipient CSV Mapping Template | Standard CSV |
| Reminder Frequency and Retry Policy | 48 hours |
| Signature Expiration and Retention Window | 30 days |
| Default Authentication Method for Signers | Email + SMS |
| Batch Concurrency and Throttling Limit | 200 recipients per hour |
Bulk Send can be managed from desktop browsers, mobile apps, or web interfaces; ensure your environment meets basic compatibility requirements before dispatching large batches.
For best results, prepare recipient files on desktop for validation and mapping, then monitor batch progress from either desktop or mobile; maintain secure networks and updated apps to protect data and ensure reliable delivery.
A national healthcare provider needed standardized onboarding forms for new hires
Leading to consistent records and faster new-employee access provisioning.
A university required annual FERPA-related policy acknowledgements for staff and adjunct faculty
Resulting in auditable evidence and simplified reporting for audits.
| eSignature Platform Feature Comparison Table | signNow (Recommended) | DocuSign | Adobe Acrobat Sign |
|---|---|---|---|
| Bulk Send Capability and Limits | Yes, high limits | Yes, limited templates | Yes, moderate limits |
| Per-request Recipient Limit | Up to 1,000 | Up to 1,000 | Up to 1,000 |
| API Bulk Send Support | Yes, documented | Yes, documented | Yes, documented |
| Audit Trail Availability | Full, exportable | Full, exportable | Full, exportable |
| Vendor Pricing Overview | signNow (Recommended) | DocuSign | Adobe Acrobat Sign | Dropbox Sign | PandaDoc |
|---|---|---|---|---|---|
| Monthly Starting Price (per user) | $8 per user/month | $10 per user/month | $14.99 per user/month | $15 per user/month | $19 per user/month |
| Per-signature or Transaction Cost | Low marginal cost | Variable by plan | Variable by plan | Low marginal cost | Variable by plan |
| Bulk Send Included in Plan | Yes, included | Limited to higher tiers | Included in business plans | Included in some plans | Add-on or higher plan |
| Maximum Recipients per Batch | Up to 1,000 | Up to 1,000 | Up to 1,000 | Up to 500 | Up to 1,000 |
| Advanced API Access | Available in business plans | Available with developer key | Available in enterprise plans | Available | Available in higher tiers |
Bulk inviting means you create a single template then upload a list of people you’d like to invite.
In order to make use of the Bulk Invite feature, you must be inviting from a template. If you have not yet uploaded a document, do so before proceeding.
After you’ve created the template, there are a few other requirements that must be met before the Bulk Invite feature is accessible. They are as follows:
There must be at least one role created in your template.
If you have added more than one role, you must ensure that you either:
If you have only entered a single role, then will automatically lock the signing order for you. If you have added more than one role, however, you MUST click on Save Settings (as shown above) to lock that signing order.
In Step 4 below you will choose a sub-folder within your Archive folder in which to store documents from the Bulk Invite. It can not be created at that time so if necessary please do so before beginning the Bulk Invite process.
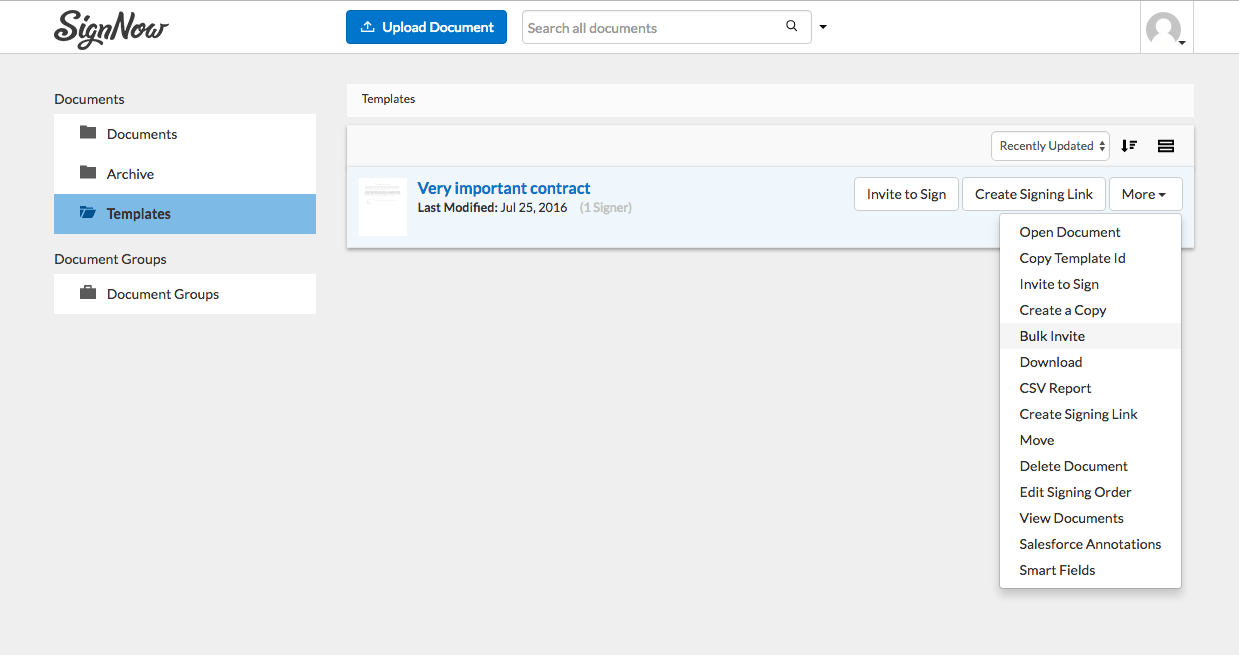
Navigate to your Templates folder, hover over the appropriate template and click on the More button on the far-right. Then select Bulk Invite to begin the process.
You can either upload a CSV (comma separated values) file that contains a column with all of the email addresses or enter them manually into the empty box.
You can also copy a list of email addresses there, and the following should all work:
The name you choose here will be prepended to the signer’s email address to create the document name. So if you invite t.sawyer@company.com to sign (and they are the first in the list), and enter BillOfSale the document name will become BillOfSale_0_t.sawyer. NOTE: The number increases with every additional invited signer.
Pick a folder that exists in your Archive folder, to store all of the signed documents. Ideally, you would select a folder that is unique to this set of invites so you can more easily view/track those documents. Creating a folder called “Bulk” in your Archive folder and choosing it every time will lead to an abundance of different documents in there, for example.
When you click on Send Now the invites immediately go out. You can also customize the message and/or the subject before sending.
1. You can navigate to the sub-folder that was created within your archive and see the status of each of your documents (document name, who was invited and whether they have signed)
2. You can click on the same More button that you used to access Bulk Invite and instead select View Documents. This allows you to see all of the documents that have been produced from that specific template.
3. There is an optional CSV that you can download that contains the following information for each document: document ID, document name, date created, date updated, invitee.
When you decide to digitize your business operations and make them full paperless, organizing your online workplace in the most convenient way becomes no less important than organization and design of your physical office. In a nutshell, you would want to have more free space and you wouldn't want to spend time on scrolling through dozens of the previously used documents.
Deleting older files for good is NOT an option for so many reasons, potential future use of the same documents as templates being only one of them.
Archiving documents is a handy alternative to deleting. In airSlate SignNow, archiving can be carried out for a separate document or in bulk, for multiple documents.
Archive in airSlate SignNow can be organized in multiple folders and sub-folders.
This means you can arrange your archives by years, or projects, or types of activities, or departments, or in any other way convenient for you.
Archiving one specific document is a one-click operation. See the screenshot.
However, when it comes to rearranging your digital workspace, you would probably prefer archiving multiple documents at the same time. In this case, go to Documents and click Bulk Archive button at the top of your Documents list.
Then you can select the folder for archiving and set the time range of the documents to be archived.
Whenever you need to return to an archived document, you can always unarchive it in one click.


