Support format
Import natif de .doc et .docx avec préservation de la plupart des éléments de mise en page et traitement des styles pour une conversion fidèle dans l'éditeur signNow.


Importer word documents to signnow accélère la préparation des documents tout en réduisant les erreurs manuelles et le temps consacré aux impressions.

Gère l'envoi et l'archivage de contrats d'embauche et d'annexes. Utilise l'import pour préremplir les champs, appliquer des modèles et conserver une piste d'audit conforme aux exigences internes.
Prépare des accords types et révise des clauses avant signature électronique. L'import facilite la création de modèles standardisés et le contrôle des versions des documents signés.
Utilisateurs variés tirent parti de l'import word documents to signnow pour standardiser la collecte de signatures et accélérer les processus.
Ces usages montrent comment l'import simplifie la transformation des documents Word en flux de travail signNow conformes et traçables.
Import natif de .doc et .docx avec préservation de la plupart des éléments de mise en page et traitement des styles pour une conversion fidèle dans l'éditeur signNow.
Identification contextuelle des champs à remplir et insertion automatique de signatures, dates et initiales basées sur des motifs textuels reconnus dans le document Word.
Conversion d'un document Word en modèle signNow avec champs dynamiques, variables et règles conditionnelles pour réutilisation et personnalisation rapide.
Capacité d'envoyer des documents importés à de nombreux destinataires simultanément, avec mappage de données par enregistrement et suivi des statuts individuels.
Points de terminaison REST permettant l'upload programmatique de fichiers Word, la création de modèles et le déclenchement de flux de signature automatisés.
Contrôles automatisés pour vérifier l'intégrité du document, la présence des champs obligatoires et la conformité avant envoi pour signature.
Identification automatique des emplacements probables de signatures et des champs de données basés sur le texte et la structure du document Word, réduisant le travail manuel de placement des champs.
Conversion d'un document Word en modèle signNow avec champs et paramètres enregistrés pour envois répétés, garantissant uniformité et gain de temps.
Import direct depuis Google Drive, Dropbox ou autres services cloud, permettant la centralisation des sources et l'accès aux versions les plus récentes des documents Word.
Envoi groupé de documents importés à plusieurs destinataires avec champs personnalisés, utile pour contrats multi-signataires ou envois en volume.

| Setting Name | Configuration |
|---|---|
| Reminder Frequency | 48 hours |
| Signature Order | Sequential |
| Field Auto-Mapping | Enabled |
| Retention Policy | 7 years |
L'import fonctionne sur navigateurs modernes et applications mobiles signNow, avec exigences minimales pour garantir stabilité et sécurité.
Pour de gros volumes, privilégiez la connexion filaire ou réseau d'entreprise et vérifiez les paramètres de pare-feu et d'authentification unique pour assurer des imports fiables et sûrs.
Une entreprise de distribution importe des contrats de vente standard depuis Word pour configurer automatiquement les champs de signature
Leading to une réduction mesurable des délais de signature et une meilleure traçabilité des accords commerciaux.
Un service des admissions importe des formulaires d'inscription Word pour les étudiants internationaux
Resulting in une gestion centralisée des dossiers et une piste d'audit claire pour chaque signature.
| Criteria | signNow (Recommended) | DocuSign |
|---|---|---|
| Formats pris en charge | DOCX, DOC | DOCX, DOC |
| Reconnaissance champs auto | Oui | Oui |
| Bulk Send | Oui | Oui |
| HIPAA prêt | Oui | Oui |
| Criteria | signNow (Featured) | DocuSign | Adobe Sign | PandaDoc | HelloSign |
|---|---|---|---|---|---|
| Starting price | From $8/user/month | From $10/user/month | From $14.99/user/month | From $19/user/month | From $15/user/month |
| API access | Included | Paid add-on | Included | Included | Paid add-on |
| Bulk Send capability | Yes | Yes | Yes | Yes | Limited |
| Enterprise options | Advanced | Advanced | Enterprise | Enterprise | Business |
| HIPAA compliance | Available | Available | Available | Available | Available |
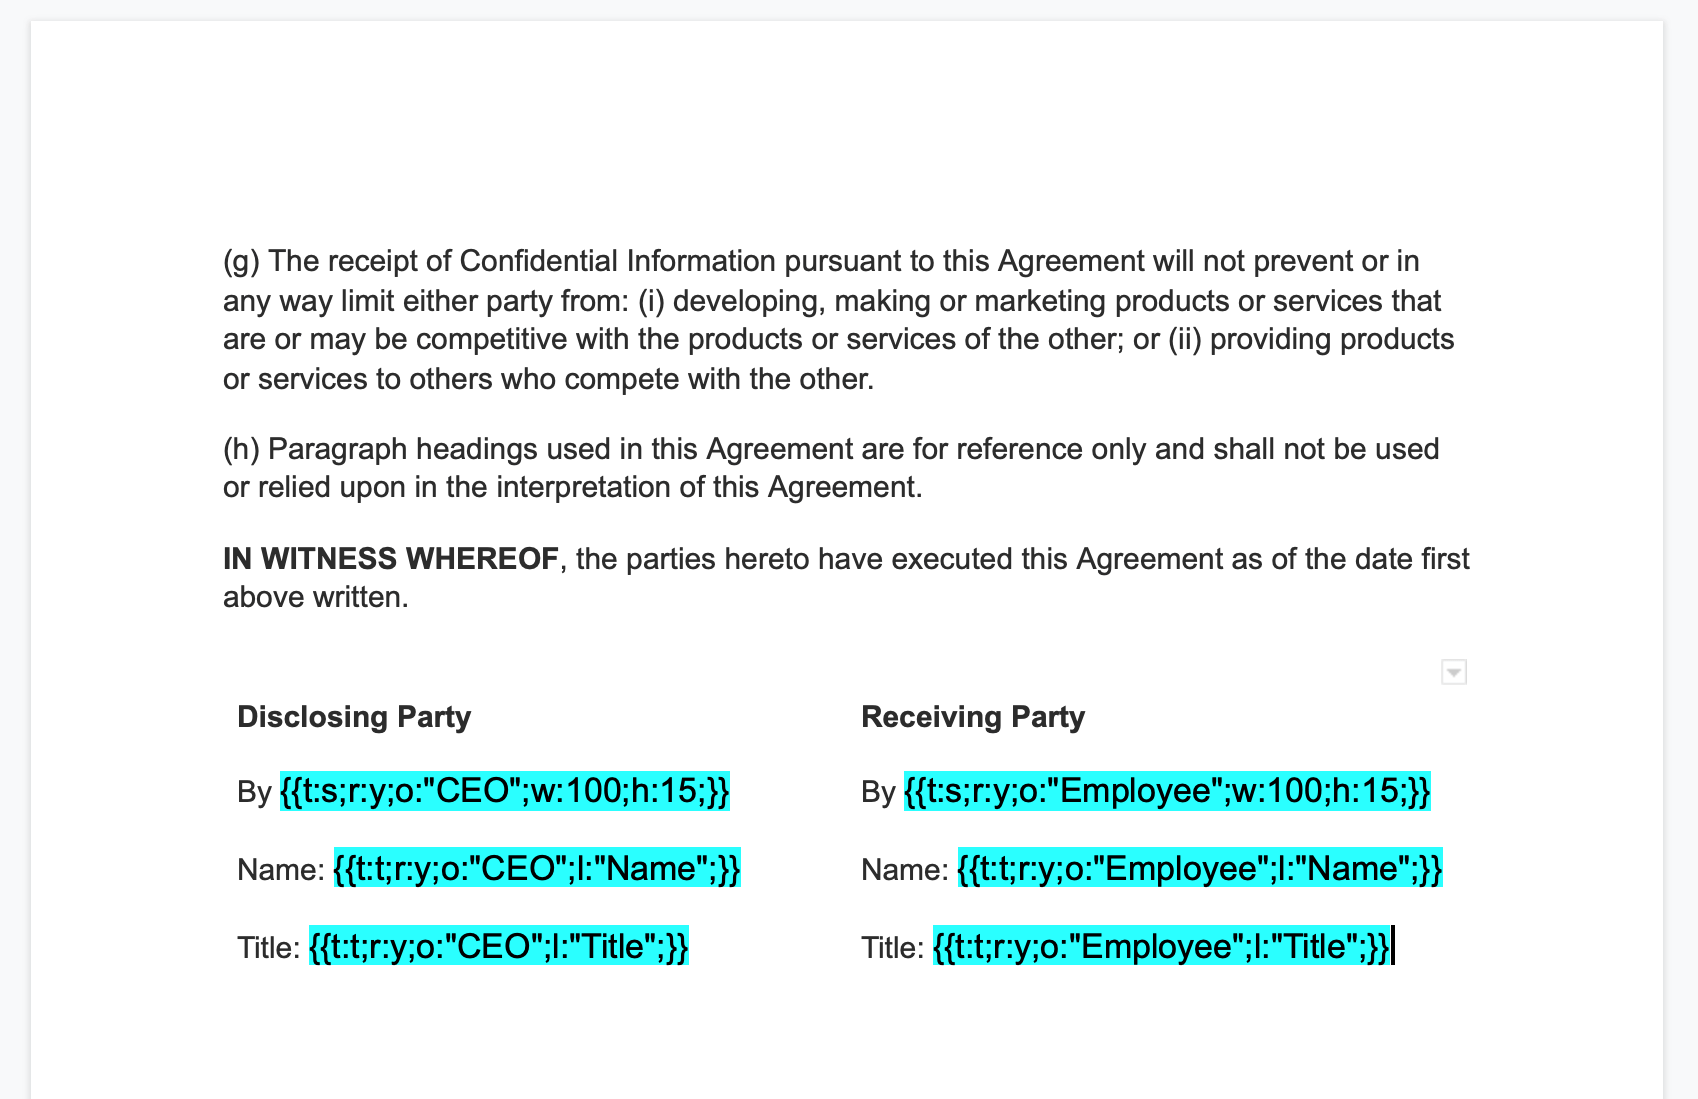
Avant de télécharger un fichier Word dans votre compte airSlate SignNow, envisagez d'y inclure des balises de texte générant des champs. Une fois le document téléchargé, ces balises se transformeront automatiquement en champs à remplir.
Alternativement, téléchargez un document Word tel quel, puis ajoutez des champs à remplir en utilisant l'éditeur glisser-déposer d'airSlate SignNow.
Ouvrez un document Word dans n'importe quel éditeur de texte et insérez les balises de texte suivantes à l'endroit où vous souhaitez faire apparaître des champs à remplir.
{{ t:t;r:y;o:"Signataire 1";l:"Texte"; }}
Dans cette balise, “Signataire 1” décrit le rôle du signataire, et “Texte” est l'étiquette du champ. Vous pouvez définir ces valeurs selon vos besoins.
Exemple : {{ t:t;r:y;o:"Client";l:"Nom"; }}
{{ t:s;r:y;o:"Signataire 1";w:100;h:15; }}
“Signataire 1” représente le rôle du signataire. Cette valeur peut être modifiée. L'étiquette du champ est “Champ de signature” par défaut. Vous pouvez ajuster la taille du champ en modifiant les valeurs “w:100” (largeur) et “h:15” (hauteur).
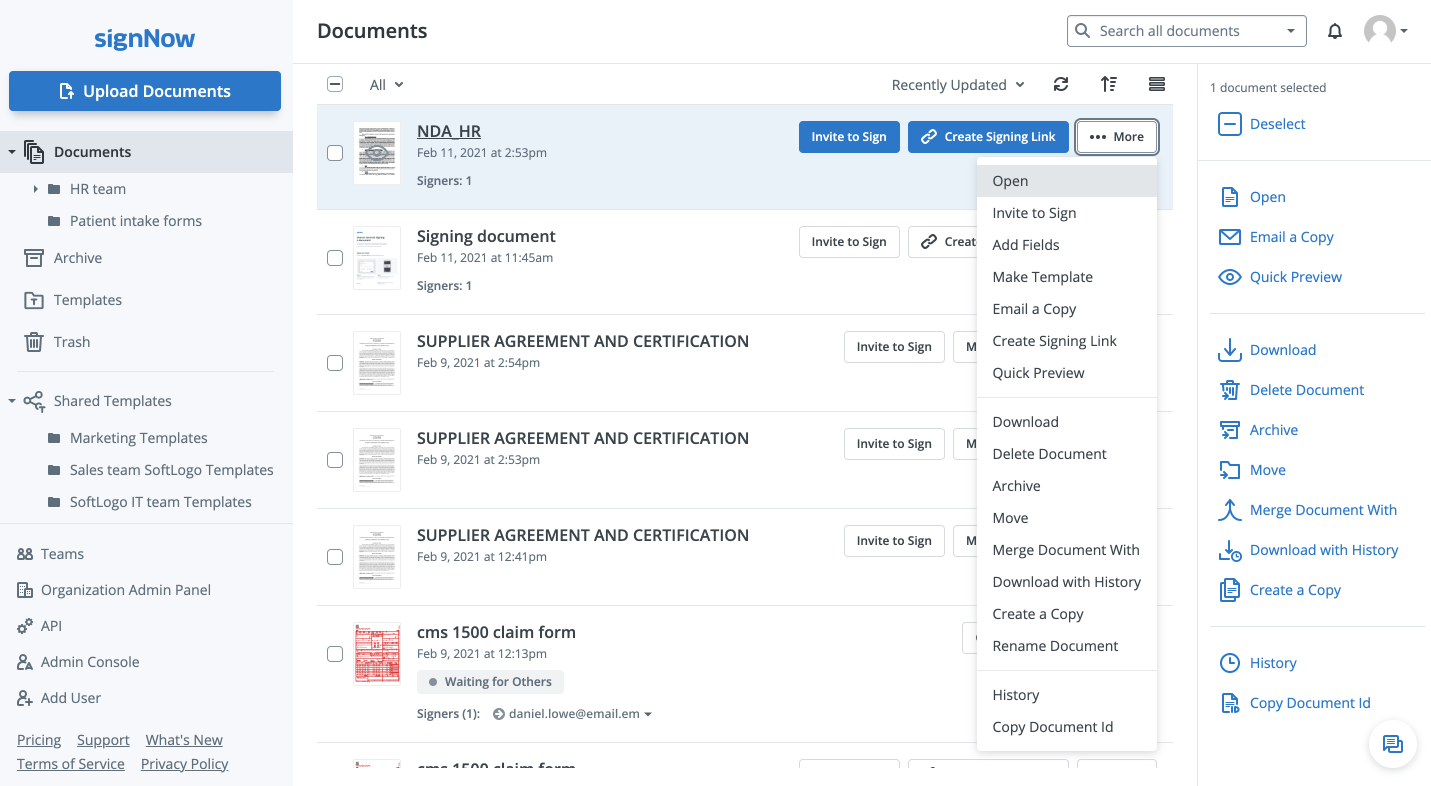
Cliquez sur Télécharger des documents et recherchez le fichier Word que vous venez d'éditer. Une fois téléchargé, ouvrez le dans l'éditeur airSlate SignNow.
Après avoir ouvert le document dans airSlate SignNow, vous verrez que les balises de texte que vous avez ajoutées sont devenues des champs à remplir.
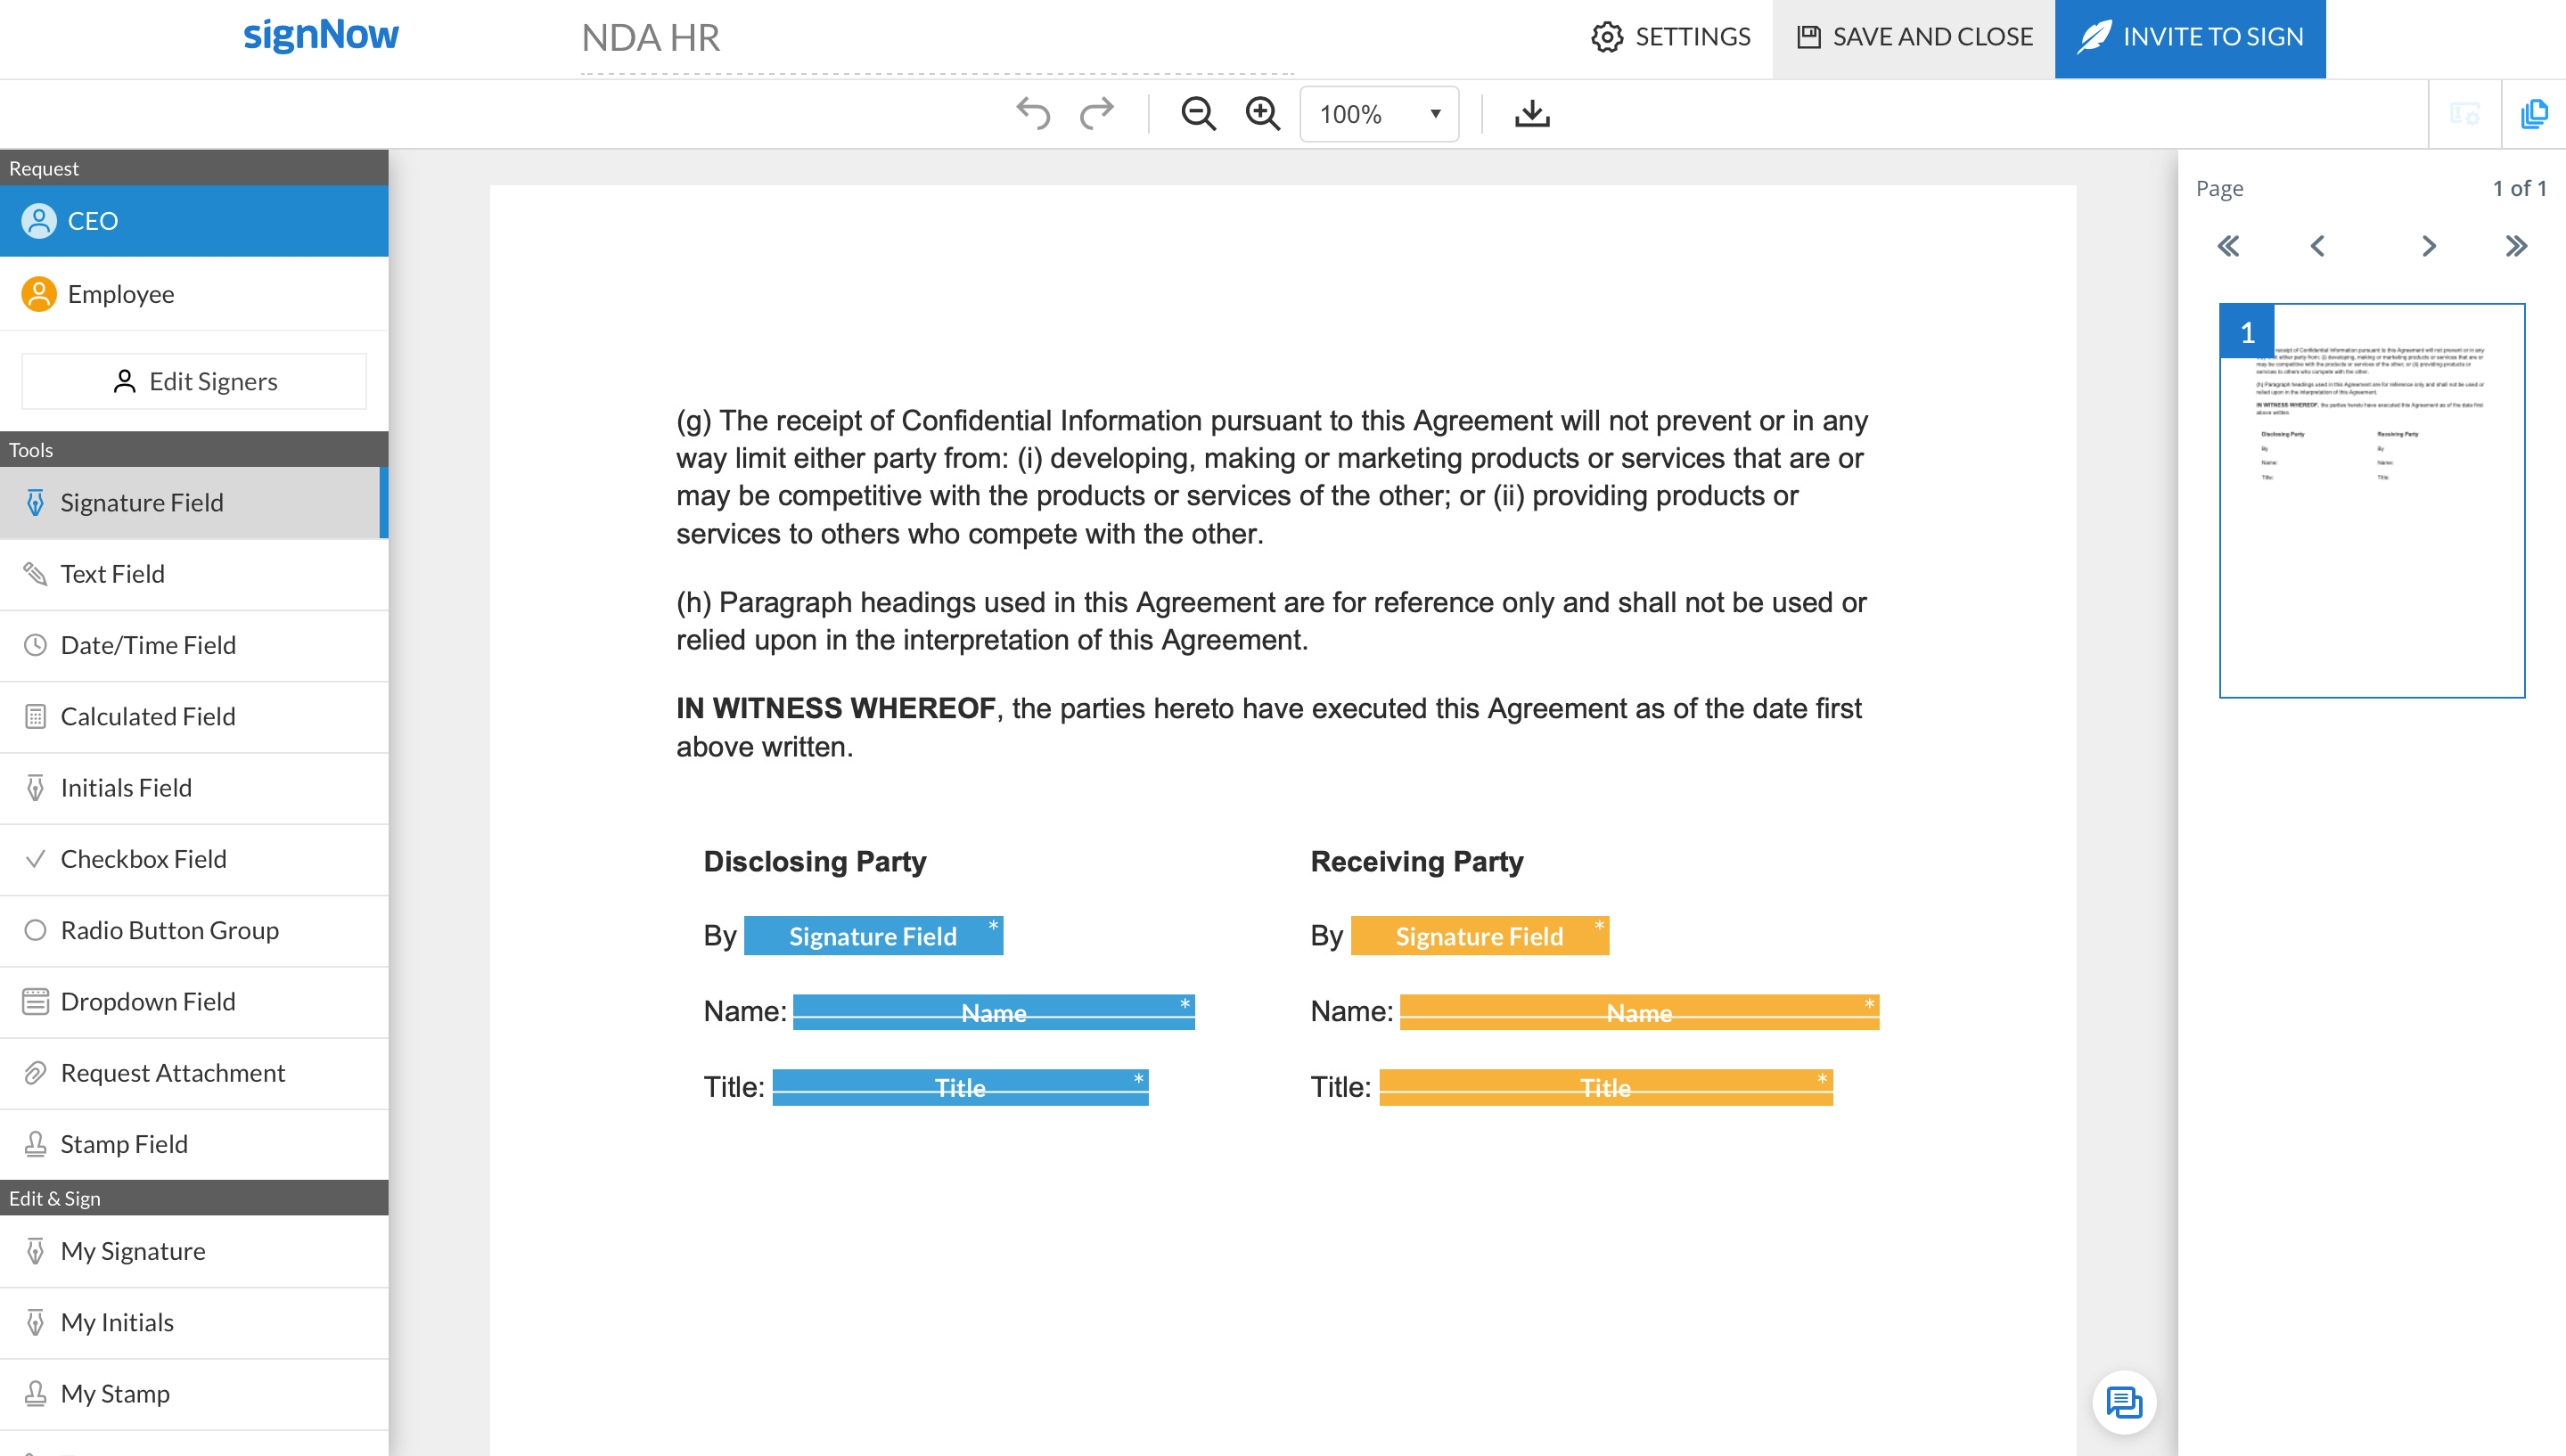
Vous pouvez maintenant enregistrer et fermer le document ou l'envoyer pour signature. Ou continuer à ajouter des champs en sélectionnant des éléments dans la barre d'outils à gauche, puis en cliquant sur le document à l'endroit où vous souhaitez placer un champ.


