Create a Receipt Template Google Sheets for it
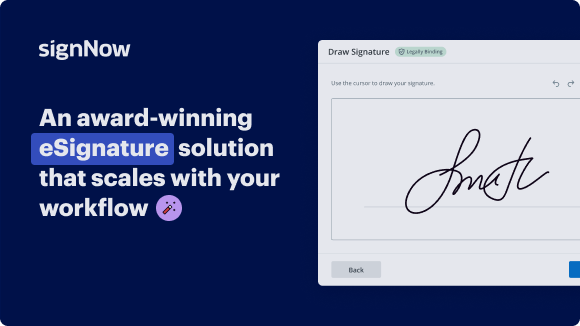
 Easily and Efficiently
Move your business forward with the airSlate SignNow eSignature solution
Add your legally binding signature
Integrate via API
Send conditional documents
Share documents via an invite link
Save time with reusable templates
Improve team collaboration
See airSlate SignNow eSignatures in action
airSlate SignNow solutions for better efficiency
Our user reviews speak for themselves
Why choose airSlate SignNow
-
Free 7-day trial. Choose the plan you need and try it risk-free.
-
Honest pricing for full-featured plans. airSlate SignNow offers subscription plans with no overages or hidden fees at renewal.
-
Enterprise-grade security. airSlate SignNow helps you comply with global security standards.
Using a receipt template google sheets for IT
Creating a streamlined process for document management can enhance efficiency and professionalism within your organization. airSlate SignNow is a powerful tool that allows businesses to sign and send documents electronically. It not only simplifies the signature process but also provides a wide range of features that can save time and reduce costs.
How to use a receipt template google sheets for IT
- 1. Open your web browser and navigate to the airSlate SignNow homepage.
- 2. Create a new account to start your free trial or log in to your existing account.
- 3. Upload the document you wish to sign or wish to send out for signatures.
- 4. Convert your document into a reusable template if you plan to use it multiple times.
- 5. Access the file and modify it: include fillable fields or necessary details.
- 6. Add your signature along with placing signature fields for other recipients.
- 7. Click 'Continue' to configure the eSignature invitation and dispatch it.
airSlate SignNow offers incredible value, boasting a rich array of features relative to the cost, making it a high ROI choice for businesses.
Designed to be user-friendly and adaptable, it caters specifically to small and mid-sized businesses, ensuring a smooth scaling process. Take advantage of transparent pricing with no unforeseen fees and enjoy superior 24/7 support on all paid plans. Start using airSlate SignNow today to optimize your document workflow!
How it works
airSlate SignNow features that users love
Get legally-binding signatures now!
FAQs
-
What is a receipt template for Google Sheets for IT?
A receipt template Google Sheets for IT is a pre-designed spreadsheet that allows IT professionals to create, manage, and track receipts efficiently. It streamlines the process of documenting expenses, making it easy to keep track of transactions. This template ensures accuracy and saves time for IT departments. -
How can using a receipt template Google Sheets for IT improve my workflow?
Using a receipt template Google Sheets for IT enhances your workflow by providing a standardized format for recording receipts. It reduces manual data entry errors and allows for easy data retrieval. This can signNowly boost your productivity and ensure that all transactions are well-organized. -
Is the receipt template Google Sheets for IT customizable?
Yes, the receipt template Google Sheets for IT is fully customizable to suit your specific needs. You can modify fields, formulas, and layouts to match your organizational requirements. This flexibility makes it an ideal solution for various IT expense tracking scenarios. -
Can I integrate the receipt template Google Sheets for IT with other tools?
Absolutely! The receipt template Google Sheets for IT can be integrated with various tools such as accounting software and project management applications. This integration helps consolidate financial data, enhancing reporting and tracking capabilities within your organization. -
What are the cost implications of using a receipt template Google Sheets for IT?
Using a receipt template Google Sheets for IT is a cost-effective solution since Google Sheets is free for anyone with a Google account. Companies can save on software costs while benefiting from a robust tool for expense tracking. It allows IT teams to manage their budgets without incurring additional expenses. -
Are there any features that come with the receipt template Google Sheets for IT?
The receipt template Google Sheets for IT typically includes features such as automated calculations, customizable fields, and easy sharing options. These features simplify expense reporting and allow for quicker approvals and processing. This can greatly enhance team collaboration and transparency. -
Who can benefit from using a receipt template Google Sheets for IT?
IT departments of businesses, freelancers, and consultants can greatly benefit from using a receipt template Google Sheets for IT. It is particularly useful for anyone who needs to track expenses and generate reports regularly. By using this template, users can ensure accurate financial management and record-keeping. -
How do I get started with the receipt template Google Sheets for IT?
Getting started with the receipt template Google Sheets for IT is straightforward. You can find a template in the Google Sheets template gallery or create one based on your requirements. Once set up, you can immediately start entering and managing your receipts efficiently.
What active users are saying — receipt template google sheets for it
Receipt template google sheets for IT
welcome to code with Curt in this video we are working on a project called invoice generator and what I'm doing here is I'm creating invoices and also storing some critical data that goes on invoices like customers like name company name address city state and zip also keeping track of items that you would put on a invoice with unit price and then from there I've taken all this information plus added information that would go on an invoice and creating an invoice that would look something like this and this is a provided Google sheets template they provide this to everybody you can download it and get this so how I started this project I started with a sheet and I thought how can I easily populate this and keep track of how I'm populating it with different customers and different parts and I'm also keeping a log of each time I print one so it keeps track of who I'm saying this out to for payment purposes so you can keep track of who's who's gonna send their payments back so I'll demonstrate how this works real quick so I go to invoices here let's select the customer I was like John Smith and this simply comes from my drop-down this table or this sheet here and I could list a whole bunch of customers so I'm gonna go back and we go payable to I'm just gonna say myself and in the project I'm just gonna put building you put anything or you can keep it blank here dates I'm gonna select it will put something out put some out in the future let's say June 20th a note if you want to add a note I'll just put test so you can see it adjustments this would be like discounts of your of your Parts I can put - one dollar just to see how that works I want to pick my items that I want on this say I want part one on here a quantity of say they ordered three I might add it it's gonna add it down here so I got this first part here and say I want to add another one say I want to add part five and we'll just keep the quantity so they ordered three apart one and three apart five now I'm going to create it so it's running I could go over to my print copy and here I got all my stuff in here I got an invoice number 102 my 620 my building table to me my two parts my total 30 adjustments - the dollar $29 and my notes have test over here so that's pretty simple and then this top part is where you could put your company and your information here just type it in easily here and then from down on it'll populate everything else and then this invoice number as I got it over here on my settings which is keeping track of the next number to use so we just used 102 this will be 103 next I might take you over to my invoice log and I want to show you the invoice record that was set in so you got your 102 John Smith with the due date the issue date and the total that was on the the invoice itself so this is just a simple way to keep track of the invoices you're sending out and a quick way to generating and you can keep track of your items and your customers I could take you through a step-by-step process of how I put this together I'll go through it pretty quick and if you're interested in videos like this with Google sheets and Google Apps Script subscribe to this channel to see future videos now I'll get started and showing you how to put this together okay I'm going to start on Google Drive I'm gonna select a new Google sheet when I select it here I'm going to select Google sheets I'm gonna come over this arrow I'm gonna hit from template because what I'm I do is I'm gonna grab this invoice template because that's the basis of this video is populating this sheet so I'm gonna click it and that's how I start I got my invoice sheet right here I can see it it's already semi populated and what you could do now is you can set your company name up you know you can change it to my company with the address here just these these things such a company up and the rest will populate through this program that we're gonna build so I'm going to call this sheet print so I come down here I'm going to call it print I hit that I'm gonna add some sheets here and invoices and it's important to get the if you're just trying to copy this it's important to get the sheet names just the way I have it because the script I write I call out all these names very specific but if you're just going to watch this and kind of build your own thing then don't you don't have to worry about that too much so I'm gonna keep adding sheets here so I got my invoice I'm gonna do my customers okay I have all my sheets set up here I got my customers items my invoice logo my settings and invoices is kind of my starting sheet so I'm gonna move this over here in front print and I got my invoice itself so I'm gonna start by this sheet here and I'm gonna start populating the stuff that is needed so I'm going to create a few buttons and do all the titles and everything so there I have my invoices sheet put together here the only two things I have to add is validation data validation of range here and items and when I set my date I'm gonna come in back after I set my customers and items and invoice log and settings sheets first so I'm gonna go through and do these four sheets kind of set all the titles up there's nothing special about these four just set in the titles and that's it so I'm going to do that next okay so I finished up setting up my customer customers items invoice log and settings now I'm going to start by setting my first invoice number I want to start with and then from there is just gonna increment by one so I'm going to start with a hundred thousand next time I go over to customers I'm I enter a customer start off with there you got one customer I might do another one so now I got two customers listed that I can use and choose from I might add a couple items next so I got a couple items listed with some unit prices so now I go back over to my invoice sheet and I'm going to set some data validations to bring in those ranges so I'm gonna start by customer I go to data data validation I click here I'm on the list for my range I'm gonna click here and I go to customers let's start highlighting this I'm gonna go down here and I'm going to change this to a thousand so basically I can have a thousand customers so I can hit okay save my go over to invoices and now I got my two customers listed I'm going to do the same thing for items and go data day validation list from a range click this go to items and then here highlight there change this to a thousand okay now I can have up to a thousand items I go by quarter invoices and now I got that populated and the next I want to just do a due date I want to do data validation on that data validation yeah I'm gonna do date I may hit OK save now that will do is when I double click here it will pop me up a nice little window where I could pick a date so that is it I set up all my sheets here with the proper data now next I'll have to move over to the script and we're going to add the script and what I'm gonna do is I'm just going to copy and paste it and just go through it kind of each function by itself and then after I go through that I'll attach the functions to these buttons so let's go ahead and do that go to tools we go to script editor we are now in the script editor I'm gonna name my project here keep it as invoice and now I'm gonna go ahead and paste all my script code in and then go through it go to the top here I'm gonna go ahead and save it so the first function we have is the add item and if I go back to my sheet that's gonna be this button the add item so basically I select apart the quantity I'm going to add and it's gonna list it below here and these things so the basic statements here is I'm getting my spreadsheet object I'm defining my invoice sheet and my item sheet I'm getting the last row my invoice sheet I'm getting the last row of my item sheet and here I'm grabbing my part in quantity from my invoice sheet and I'm going over to my Park sheet to grab the unit cost so I'm kind of going through each row trying to find out trying to find which equals the parts I select it and then from there I'm grabbing the unit cost and then the last thing I'm doing is going to the invoice sheet and populating populating into this table I got down here so I'm grabbing this field this field and the unit price field and then populating it below here so that's what this function does the next function is the create invoice now this is the main function this takes all the data that I have listed and populates the print sheet which is the actual invoice so in here I'm getting those the spreadsheet object I'm defining all these sheets the invoice sheet customer sheet the setting sheet to grab the invoice number and the print sheet first thing I'm doing I'm just grabbing the values off the invoice sheet so I'm getting name payables payable to project name invoice number of the invoice number I'm getting from the setting sheet then I'm taking that number and I'm adding one and I'm setting back the next value so for my next invoice then I'm grabbing due date note an adjustment from my invoice sheet so I'm grabbing all these fields from customer all the way down to adjustments going over to settings and grabbing my number here now I'm grabbing my when I get my customer my name here I need to go over to the customers sheet and get the rest of this info info company name street address city state and zip so that's what I'm doing next here so I'm getting the last row of my customer sheet I'm going through trying to find which row equals name and then I'm grabbing company name street address city state and zip so now I have all my customer data the invoice states I am generating the invoice date to from the current date so I'm going through this all these functions to get my data into a nice string text the way I want it so now I have my date field and the next part is I'm gonna go ahead and delete the row item rows that are currently in the print sheet so if I go over here to print you see these rows like item1 item2 from the template 0 0 I'm gonna go ahead and delete these off because I'm gonna add back the parts that I need so that's basically with this doing it's counting each row I need to delete off keep an account and then I got accounts I'm trying to find the starting period of 19 which is here so how many I have to delete and then this statement does the deleting delete rows until I run out depending on how many are populated so now I have a clean print sheet to populate so next I'm going to go ahead and start populating all the values I got like submitted to date name company name Street all this all the boxes I got all the cells I got needs to be populated and one of the final things I do is I need to repopulate the parts back on here with the right values and everything so that's this section I'm getting the last row so I'm getting whatever's populated down here and populating what's right here so that's basically what I'm doing I'm getting going through each of the invoice I'm finding it I'm inserting a road to the print sheet I'm getting my values from the invoice sheet I'm doing some totaling to populate the totals as well because I got to do the quantity x unit price to get my subtotal and now I'm populating my print sheet with those values a print a part quantity unit price and total price and down here I'm doing a subtotal so I'm adding up each line that I'm adding and putting a subtotal into that print sheet spot which is right here I'm doing this totaling right here and my adjustments comes from my invoice sheet and then the final prices this is done by formulas that was carried over from the template for the final price so that's done next I'm gonna do my invoice log call so before I do that I'm getting my total invoice dollars which is represented here I'm taking out over to the next function I got is the invoice log where I'm carrying these five values over I getting the spreadsheet object I'm getting the invoice log sheet I'm getting the last the next available row and now I'm populating these five fields into that row and then the last button is the clear invoice and basically what the clear invoice does is it doesn't do anything with clearing this it just clears this out so you can start fresh so I'm getting all those values setting them to blank or a null value and then I'm doing my parts table below I'm just clearing all those records out so those are the four functions I'm calling next I'll attach these functions to my buttons so I'll start with clear and boys I copy this right click click here sign hit okay go back up here great invoice and then add item so the last thing we got to do is just generate a invoice so I go over to customer pick my customer able to project due date will adjust that - $2 give them a break I pick her items item one quantity of four when we have to do a security check here pick our accounts go to advanced go ahead and hit unsaved and it would allow so we have to redo that call so I'm gonna hit it again now that's populated let's go ahead and add another item I had item three another quantity of four so we got those two things now we go ahead and create our invoice we got everything that we want on this invoice so let's go ahead and create it so it's finished let's go over to print so we got up here my company and voice on today with all the information with John Smith payable the invoice number building our due date our two items totaled up to four eighty four hundred that makes eight eighty minus two dollars eight seventy eight and then we go over invoice log it's listed here with our record with all our totals in there so that concludes this video please leave any questions or comments below the video until next time [Music] [Music]
Show moreGet more for receipt template google sheets for it
- Software Development Proposal for Production
- Software Development Proposal for Supervision
- Software Development Proposal for Product Quality
- Software Development Proposal for Inventory
- Software Development Proposal for Security
- Create Your Software Development Proposal for RD
- Software Development Proposal for Personnel
- Proposal Contract Software for Facilities
Find out other receipt template google sheets for it
- Transform your signing experience with Adobe Digital ...
- Secure your documents with a VeriSign certificate for ...
- Get your documents signed effortlessly on the signature ...
- Enhance your productivity with Microsoft 365 Learning
- Unlock the power of software-generated signature for ...
- Easily digitally sign PDF documents for your business
- Cultivate seamless document signing with airSlate ...
- Unlock the power of seamless document management with ...
- Unlock the potential of Power Platform for seamless ...
- Effortlessly add signature to PDF with airSlate SignNow
- Learn 365 to streamline your document management with ...
- Effortlessly streamline your workflow with the PDF sign ...
- Sign a document online effortlessly with airSlate ...
- E-sign documents seamlessly with airSlate SignNow
- Unlock your potential with Microsoft 365 courses
- Elevate your Relias Training experience with seamless ...
- Streamline your document workflow with Exchange Online
- Familiarize yourself with airSlate SignNow for ...
- Streamline your document workflow with SharePoint ...
- Seamlessly integrate Azure Active Directory with ...