Predeterminado Personalizado Avanzado Con airSlate SignNow
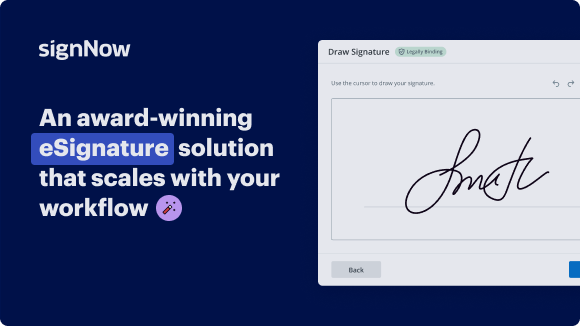
Obtenga las capacidades robustas de firma electrónica que necesita de la solución en la que confía
Elija la plataforma profesional diseñada para profesionales
Configure la API de firma electrónica rápidamente
Colabore mejor juntos
Predeterminado personalizado avanzado, en unos minutos
Reduzca el tiempo de cierre
Mantenga la información sensible segura
Vea las firmas electrónicas de airSlate SignNow en acción
Soluciones de airSlate SignNow para una mayor eficiencia
Las reseñas de nuestros usuarios hablan por sí mismas
Por qué elegir airSlate SignNow
-
Prueba gratuita de 7 días. Elige el plan que necesitas y pruébalo sin riesgos.
-
Precios honestos para planes completos. airSlate SignNow ofrece planes de suscripción sin cargos adicionales ni tarifas ocultas al renovar.
-
Seguridad de nivel empresarial. airSlate SignNow te ayuda a cumplir con los estándares de seguridad globales.
Tu guía paso a paso — forward custom default
Con la firma electrónica de airSlate SignNow, cualquier negocio puede acelerar los flujos de firma y firmar electrónicamente en tiempo real, brindando una mejor experiencia a clientes y empleados. predeterminado personalizado avanzado en unos pocos pasos sencillos. ¡Nuestras aplicaciones móviles permiten trabajar en movimiento, incluso sin conexión! Firme documentos desde cualquier parte del mundo y cierre tratos más rápido.
Siga la guía paso a paso para predeterminado personalizado avanzado:
- Inicie sesión en su cuenta de airSlate SignNow.
- Localice su documento en sus carpetas o cargue uno nuevo.
- Abra el documento y realice ediciones usando el menú de Herramientas.
- Arrastre y suelte campos rellenables, agregue texto y fírmelo.
- Agregue múltiples firmantes usando sus correos electrónicos y configure el orden de firma.
- Especifique qué destinatarios recibirán una copia ejecutada.
- Utilice Opciones Avanzadas para limitar el acceso al registro y establecer una fecha de expiración.
- Haga clic en Guardar y Cerrar cuando haya terminado.
Además, hay funciones más avanzadas disponibles para predeterminado personalizado avanzado. Agregue usuarios a su espacio de trabajo compartido, vea equipos y rastree la colaboración. Millones de usuarios en EE. UU. y Europa están de acuerdo en que una solución que integra todo en un entorno holístico, es lo que las empresas necesitan para mantener los flujos de trabajo funcionando fácilmente. La API REST de airSlate SignNow le permite integrar firmas electrónicas en su aplicación, sitio web, CRM o nube. Descubra airSlate SignNow y disfrute de flujos de firma electrónica más rápidos, suaves y en general más efectivos!
Cómo funciona
Funciones de airSlate SignNow que los usuarios adoran
¡Obtenga firmas legalmente vinculantes ahora!
Lo que dicen los usuarios activos — forward custom default
Búsquedas relacionadas con predeterminado personalizado avanzado con airSlate SignNow
Create proof default
Thank you for joining this quick How To Screencast, brought to you by Salesforce support. To see more content like this, hit subscribe. All right, let's talk about how you can default values when you create a brand new record. So if you always want the value to be default, and no matter where they click to create a new record or how the new record was created, you'd actually want to just set a default value right at the field level. So here, for example, I go into the Lead Object, and right where I create or edit that custom field, you can see that I can put in the name of the field, how long the field is, but at the very bottom there, there's a default value area. And so here, I can actually just put the default value I always want this field to have, and it can actually be a formula as well. So it doesn't just have to be one static value, you can put in some kind of formula and have it be dynamic based on some criteria that you want to put in here. But what would happen with this approach is that any time someone goes to create a new record, that field is going to have that default value. It doesn't matter what button they click, desktop, mobile, through an API call, that default value is set. Now, there's another way to do this as well, and that's through something called Actions. So with an Action, you can define that when someone clicks this particular button, we only want to see a particular set of fields and we want to default certain values. And you can have global actions or you can have actions on specific records. So on an account object, I can have a related button to create a case, for example. So here we go into Setup on the object where we want the action to be, and we create a new action. And in this case, I'm going to create a record. This will give you the options based on what records are related to the object we're talking about. So you'll have different options depending on your environment. But essentially, you create a new action, you decide what record it's going to create, and you give it a name. And then from here, you can actually decide the layout of the action. So what fields do you want to have show up, so when someone clicks that particular button, what fields should they be manually editing? And you can drag and drop, add, or remove fields. But the magic here is this Predefined Field Values. This is where you're going to set the different default values when someone clicks this button. And so those fields don't even need to be on the page, they could just be hidden off of the action but still have the right default field value. And again, these are formulas...
Show more