Factura Proforma Firmada De Manera Sencilla

Elimina papel y optimiza la gestión de documentos para mayor productividad y posibilidades infinitas. Explora una forma más eficiente de gestionar tu negocio con airSlate SignNow.

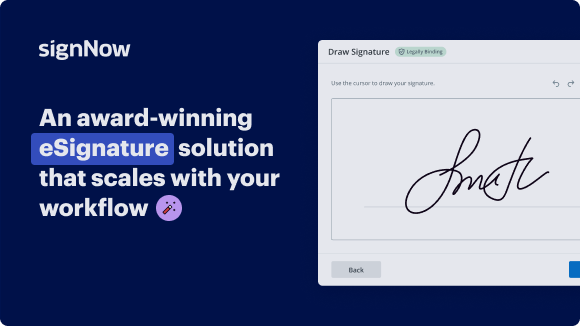
Solución de firma electrónica galardonada

Enviar mi documento para firma

Haz que tu documento sea firmado electrónicamente por varios destinatarios.
Enviar mi documento para firmar

Firmar mi propio documento

Agrega tu firma electrónica
a un documento en pocos clics.
Firmar mi propio documento

Obtén las funciones robustas de firma electrónica que necesitas de la solución en la que confías

Elige la plataforma profesional diseñada para profesionales

Ya sea que estés introduciendo firma electrónica a un equipo o en toda tu empresa, este proceso será sin problemas. Comienza rápidamente con airSlate SignNow.

Configura la API de firma electrónica con facilidad

airSlate SignNow funciona con las aplicaciones, soluciones y dispositivos que ya usas. Integra fácilmente en tus sistemas existentes y serás productivo al instante.

Mejora la colaboración

Aumenta la eficiencia y productividad de tus flujos de firma electrónica proporcionando a tus compañeros la capacidad de compartir documentos y plantillas. Crea y gestiona equipos en airSlate SignNow.

Factura proforma firmada, en minutos

Ve más allá de las firmas electrónicas y la factura proforma firmada. Usa airSlate SignNow para negociar contratos, recopilar firmas y pagos, y automatizar tu flujo de documentos.

Reduce el tiempo de cierre

Elimina papel con airSlate SignNow y reduce el tiempo de procesamiento de tus documentos a minutos. Reutiliza plantillas inteligentes y rellenables y entrégalas para firmar con solo unos clics.

Mantén los datos sensibles seguros

Gestiona firmas electrónicas legalmente válidas con airSlate SignNow. Gestiona tu negocio desde cualquier lugar del mundo en prácticamente cualquier dispositivo asegurando un alto nivel de seguridad y cumplimiento.

Vea las firmas electrónicas de airSlate SignNow en acción

Cree flujos de trabajo de firma electrónica seguros e intuitivos en cualquier dispositivo, rastree el estado de los documentos directamente en su cuenta y cree formularios rellenables en línea, todo en una sola solución.

Prueba airSlate SignNow con un documento de muestra

Completa un documento de muestra en línea. Experimenta la interfaz intuitiva de airSlate SignNow y sus herramientas fáciles de usar en acción. Abre un documento de muestra para agregar una firma, fecha, texto, subir archivos adjuntos y probar otras funciones útiles.

muestra
Casillas de verificación y botones de opción
muestra
Solicitar un archivo adjunto
muestra
Configurar la validación de datos

Soluciones de airSlate SignNow para una mayor eficiencia

Mantén los contratos protegidos
Mejora la seguridad de tus documentos y mantén los contratos a salvo de accesos no autorizados con opciones de autenticación de dos factores. Pide a tus destinatarios que demuestren su identidad antes de abrir un contrato para signed proforma invoice.
Mantente móvil mientras firmas electrónicamente
Instala la aplicación de airSlate SignNow en tu dispositivo iOS o Android y cierra acuerdos desde cualquier lugar, 24/7. Trabaja con formularios y contratos incluso sin conexión y signed proforma invoice más tarde cuando se restablezca tu conexión a internet.
Integra firmas electrónicas en tus aplicaciones empresariales
Incorpora airSlate SignNow en tus aplicaciones empresariales para signed proforma invoice rápidamente sin cambiar entre ventanas y pestañas. Aprovecha las integraciones de airSlate SignNow para ahorrar tiempo y esfuerzo al firmar formularios electrónicamente en solo unos clics.
Genera formularios rellenables con campos inteligentes
Actualiza cualquier documento con campos rellenables, hazlos obligatorios u opcionales, o añade condiciones para que aparezcan. Asegúrate de que los firmantes completen tu formulario correctamente asignando roles a los campos.
Cierra acuerdos y recibe pagos rápidamente
Recoge documentos de clientes y socios en minutos en lugar de semanas. Pide a tus firmantes que signed proforma invoice e incluye un campo de solicitud de pago en tu muestra para cobrar automáticamente durante la firma del contrato.
Recoger firmas
24x
más rápido
Reduce los costos en
$30
por documento
Guardar hasta
40h
por empleado / mes

Las reseñas de nuestros usuarios hablan por sí mismas

illustrations persone
Kodi-Marie Evans
Director de Operaciones de NetSuite en Xerox
airSlate SignNow nos brinda la flexibilidad necesaria para obtener las firmas correctas en los documentos correctos, en los formatos correctos, según nuestra integración con NetSuite.
illustrations reviews slider
illustrations persone
Samantha Jo
Socio de cliente Enterprise en Yelp
airSlate SignNow ha hecho mi vida más fácil. ¡Ha sido fundamental tener la capacidad de firmar contratos en cualquier lugar! Ahora es menos estresante hacer las cosas de manera eficiente y rápida.
illustrations reviews slider
illustrations persone
Megan Bond
Gestión de marketing digital en Electrolux
Este software ha aumentado el valor de nuestro negocio. Me he librado de las tareas repetitivas. Soy capaz de crear formularios web nativos para móviles. Ahora puedo hacer contratos de pago fácilmente a través de un canal justo y su gestión es muy sencilla.
illustrations reviews slider
walmart logo
exonMobil logo
apple logo
comcast logo
facebook logo
FedEx logo
prepárate para obtener más

Por qué elegir airSlate SignNow

  • Prueba gratuita de 7 días. Elige el plan que necesitas y pruébalo sin riesgos.
  • Precios honestos para planes completos. airSlate SignNow ofrece planes de suscripción sin cargos adicionales ni tarifas ocultas al renovar.
  • Seguridad de nivel empresarial. airSlate SignNow te ayuda a cumplir con los estándares de seguridad globales.
illustrations signature

Tu guía paso a paso — signed proforma invoice

Accede a consejos útiles y pasos rápidos que cubren una variedad de las funciones más populares de airSlate SignNow.

Adoptar la firma electrónica de airSlate SignNow puede acelerar los flujos de firma y firmar en línea en tiempo real, brindando una mejor experiencia a clientes y empleados. Usa la factura proforma firmada en unos pocos pasos sencillos. Nuestras aplicaciones móviles portátiles hacen posible trabajar en movimiento, incluso sin conexión a internet! Firma electrónicamente documentos desde cualquier lugar del mundo y cierra tratos más rápido.

Cómo completar y firmar un signed proforma invoice

  1. Inicia sesión en tu perfil de airSlate SignNow.
  2. Encuentra tu formulario necesario en tus carpetas o sube uno nuevo.
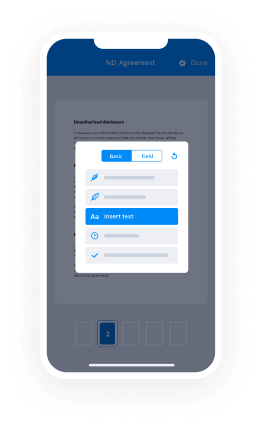
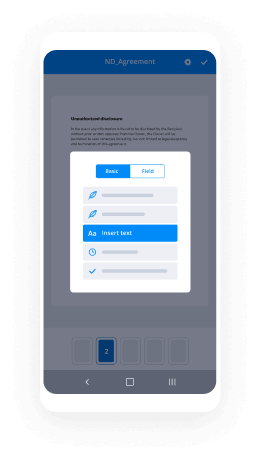
  3. Abre el documento y realiza ediciones usando el menú Herramientas.
  4. Arrastra y suelta áreas rellenables, escribe texto y firma.
  5. Añade múltiples firmantes usando sus correos electrónicos y establece la secuencia de firma.
  6. Especifica qué usuarios recibirán una versión completada.
  7. Utiliza Opciones avanzadas para limitar el acceso a la plantilla y establecer una fecha de expiración.
  8. Presiona Guardar y cerrar cuando termines.

Además, hay funciones más innovadoras disponibles para la factura proforma firmada. Incluye usuarios en tu espacio de trabajo digital común, visualiza equipos y monitorea la colaboración. Millones de usuarios en EE. UU. y Europa concuerdan en que una solución que integra todo en un solo lugar digital, es lo que las empresas necesitan para mantener los flujos de trabajo funcionando sin problemas. La API REST de airSlate SignNow te permite integrar firmas electrónicas en tu aplicación, sitio web, CRM o nube. Prueba airSlate SignNow y disfruta de flujos de firma electrónica más rápidos, fáciles y en general más eficientes!

Cómo funciona

Abre y edita tus documentos en línea
Sube un documento
Accede a la nube desde cualquier dispositivo y sube un archivo

Funciones de airSlate SignNow que los usuarios adoran

Acelera tus procesos en papel con una solución de firma electrónica fácil de usar.

Edita PDF
en línea
Genera plantillas de tus documentos más utilizados para firmar y completar.
Crea un enlace de firma
Comparte un documento mediante un enlace sin necesidad de añadir correos electrónicos de destinatarios.
Asigna roles a los firmantes
Organiza flujos de firma complejos añadiendo varios firmantes y asignando roles.
Crea una plantilla de documento
Crea equipos para colaborar en documentos y plantillas en tiempo real.
Agrega campos de firma
Obtén firmas precisas exactamente donde las necesitas usando campos de firma.
Archiva documentos en lote
Ahorra tiempo archivando varios documentos a la vez.

Vea resultados excepcionales signed proforma invoice

Obtenga firmas en cualquier documento, gestione los contratos de forma centralizada y colabore con clientes, empleados y socios de manera más eficiente.

How to Sign a PDF Online How to Sign a PDF Online

¿Cómo llenar y firmar un documento en línea?

Prueba la forma más rápida de firmar la factura proforma firmada. Evita flujos de trabajo en papel y gestiona documentos directamente desde airSlate SignNow. Completa y comparte tus formularios desde la oficina o trabaja sin problemas en movimiento. No se requiere instalación ni software adicional. Todas las funciones están disponibles en línea, solo ingresa a signnow.com y crea tu flujo de firma electrónica.

Guía rápida para firmar la factura proforma firmada en minutos

  1. Crea una cuenta en airSlate SignNow (si aún no te has registrado) o inicia sesión con tu Google o Facebook.
  2. Haz clic en Subir y selecciona uno de tus documentos.
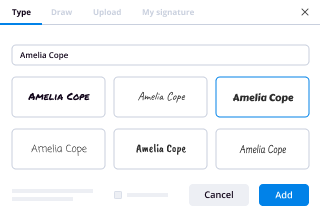
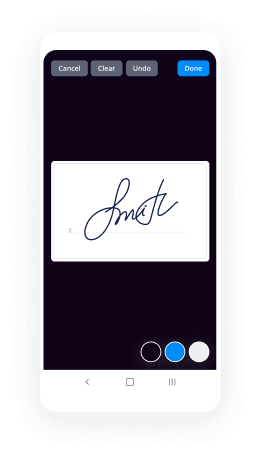
  3. Usa la herramienta Mi firma para crear tu firma única.
  4. Convierte el documento en un PDF dinámico con campos rellenables.
  5. Completa tu nuevo formulario y haz clic en Hecho.

Una vez terminado, envía una invitación para firmar a múltiples destinatarios. Obtén un contrato ejecutable en minutos usando cualquier dispositivo. Explora más funciones para crear PDFs profesionales; añade campos rellenables, firma la factura proforma firmada y colabora en equipos. La solución de firma electrónica ofrece un proceso seguro y funciona de acuerdo con la certificación SOC 2 Tipo II. Asegúrate de que tus datos estén protegidos y que nadie pueda acceder a ellos.

How to Sign a PDF Using Google Chrome How to Sign a PDF Using Google Chrome

¿Cómo firmar electrónicamente un archivo PDF en Google Chrome?

¿Buscas una solución para firmar la factura proforma firmada directamente desde Chrome? La extensión de airSlate SignNow para Google Chrome está aquí para ayudarte. Encuentra un documento y desde tu navegador ábrelo fácilmente en el editor. Añade campos rellenables para texto y firma. Firma el PDF y compártelo de forma segura según GDPR, certificación SOC 2 Tipo II y más.

Usando esta breve guía, expande tu flujo de firma electrónica en Google y firma la factura proforma firmada:

  1. Ve a la tienda web de Chrome y busca la extensión de airSlate SignNow.
  2. Haz clic en Agregar a Chrome.
  3. Inicia sesión en tu cuenta o crea una nueva.
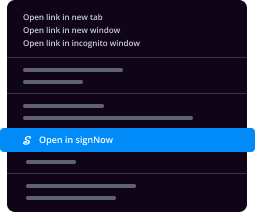
  4. Sube un documento y haz clic en Abrir en airSlate SignNow.
  5. Modifica el documento.
  6. Firma el PDF usando la herramienta Mi firma.
  7. Haz clic en Hecho para guardar tus cambios.
  8. Invita a otros participantes a firmar haciendo clic en Invitar a firmar y seleccionando sus correos electrónicos/nombres.

Crea una firma que esté integrada en tu flujo de trabajo para firmar la factura proforma firmada y obtener PDFs firmados en minutos. Di adiós a las pilas de papeles en tu oficina y comienza a ahorrar dinero y tiempo para actividades más importantes. Elegir la extensión de Google de airSlate SignNow es una opción muy práctica con muchas ventajas.

How to Sign a PDF in Gmail How to Sign a PDF in Gmail How to Sign a PDF in Gmail

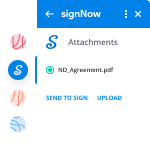
¿Cómo firmar un archivo adjunto en Gmail?

Si eres como la mayoría, estás acostumbrado a descargar los archivos adjuntos que recibes, imprimirlos y luego firmarlos, ¿verdad? Bueno, tenemos buenas noticias para ti. Firmar documentos en tu bandeja de entrada ahora es mucho más fácil. El complemento de airSlate SignNow para Gmail te permite firmar la factura proforma firmada sin salir de tu buzón. Haz todo lo que necesitas; añade campos rellenables y envía solicitudes de firma con unos clics.

Cómo firmar la factura proforma firmada en Gmail:

  1. Busca airSlate SignNow para Gmail en el Mercado de G Suite y haz clic en Instalar.
  2. Inicia sesión en tu cuenta de airSlate SignNow o crea una nueva.
  3. Abre tu correo con el PDF que necesitas firmar.
  4. Haz clic en Subir para guardar el documento en tu cuenta de airSlate SignNow.
  5. Haz clic en Abrir documento para abrir el editor.
  6. Firma el PDF usando Mi firma.
  7. Envía una solicitud de firma a los otros participantes con el botón Enviar para firmar.
  8. Ingresa su correo y presiona OK.

Como resultado, los otros participantes recibirán notificaciones indicándoles que deben firmar el documento. No es necesario descargar el archivo PDF una y otra vez, solo firma la factura proforma firmada con unos clics. Este complemento es adecuado para quienes prefieren centrarse en metas más importantes en lugar de perder tiempo en tareas casi inútiles. Mejora tu rutina diaria con el galardonado servicio de firma electrónica.

How to Sign a PDF on a Mobile Device How to Sign a PDF on a Mobile Device How to Sign a PDF on a Mobile Device

¿Cómo firmar una plantilla PDF en movimiento sin una aplicación?

Para muchos productos, cerrar tratos en movimiento significa instalar una aplicación en tu teléfono. Nos complace decir que en airSlate SignNow hemos hecho que firmar en movimiento sea más rápido y fácil eliminando la necesidad de una aplicación móvil. Para firmar electrónicamente, abre tu navegador (cualquier navegador móvil) y accede directamente a airSlate SignNow y todas sus potentes herramientas de firma electrónica. Edita documentos, firma la factura proforma firmada y más. No se requiere instalación ni software adicional. Cierra tu trato desde cualquier lugar.

Consulta nuestras instrucciones paso a paso que te enseñan cómo firmar la factura proforma firmada.

  1. Abre tu navegador y ve a signnow.com.
  2. Inicia sesión o registra una nueva cuenta.
  3. Sube o abre el documento que deseas editar.
  4. Añade campos rellenables para texto, firma y fecha.
  5. Dibuja, escribe o sube tu firma.
  6. Haz clic en Guardar y cerrar.
  7. Haz clic en Invitar a firmar e ingresa el correo electrónico del destinatario si deseas que otros firmen el PDF.

Trabajar en móvil no es diferente de hacerlo en un escritorio: crea una plantilla reutilizable, firma la factura proforma firmada y gestiona el flujo como lo harías normalmente. En unos pocos clics, obtén un contrato ejecutable que puedes descargar a tu dispositivo y enviar a otros. Sin embargo, si realmente quieres un software, descarga la aplicación móvil de airSlate SignNow. Es cómoda, rápida y tiene un diseño increíble. Disfruta de flujos de firma electrónica sin interrupciones desde la oficina, en un taxi o en un avión.

How to Sign a PDF on iPhone How to Sign a PDF on iPhone

¿Cómo firmar un PDF usando un iPad?

iOS es un sistema operativo muy popular equipado con herramientas nativas. Permite firmar y editar PDFs usando Preview sin software adicional. Sin embargo, por muy buena que sea la solución de Apple, no ofrece automatización. Mejora las capacidades de tu iPhone aprovechando la aplicación de airSlate SignNow. Utiliza tu iPhone o iPad para firmar la factura proforma firmada y más. Introduce automatización de firma electrónica en tu flujo de trabajo móvil.

Firmar en un iPhone nunca ha sido tan fácil:

  1. Busca la aplicación de airSlate SignNow en la App Store e instálala.
  2. Crea una cuenta nueva o inicia sesión con tu Facebook o Google.
  3. Haz clic en Plus y sube el archivo PDF que deseas firmar.
  4. Toca en el documento donde quieres insertar tu firma.
  5. Explora otras funciones: añade campos rellenables o firma la factura proforma firmada.
  6. Usa el botón Guardar para aplicar los cambios.
  7. Comparte tus documentos por correo electrónico o mediante un enlace de firma.

Haz PDFs profesionales directamente desde tu aplicación de airSlate SignNow. Aprovecha al máximo tu tiempo y trabaja desde cualquier lugar; en casa, en la oficina, en un autobús o avión, e incluso en la playa. Gestiona todo el flujo de documentos fácilmente: crea plantillas reutilizables, firma la factura proforma firmada y trabaja en documentos con socios. Transforma tu dispositivo en una empresa altamente eficiente para cerrar ofertas.

How to Sign a PDF on Android How to Sign a PDF on Android

¿Cómo firmar electrónicamente un PDF en Android?

Para los usuarios de Android, gestionar documentos desde su teléfono requiere instalar software adicional. La Play Market es amplia y está llena de opciones, por lo que encontrar una buena aplicación no es difícil si tienes tiempo para explorar cientos de apps. Para ahorrar tiempo y evitar frustraciones, sugerimos airSlate SignNow para Android. Almacena y edita documentos, crea roles de firma, e incluso firma la factura proforma firmada.

Los 9 pasos sencillos para optimizar tu flujo de trabajo móvil:

  1. Abre la aplicación.
  2. Inicia sesión con tus cuentas de Facebook o Google o regístrate si aún no has autorizado.
  3. Haz clic en + para añadir un nuevo documento usando tu cámara, almacenamiento interno o en la nube.
  4. Toca en cualquier parte de tu PDF para hacer cambios o añadir campos.
  5. Elige el menú de campo de firma.
  6. Dibuja tu firma electrónica personalizada en la pantalla con tu dedo.
  7. Editar el documento, guardar los cambios y/o enviar el formulario para que otros firmen.

Convertir lo rutinario en algo fácil y fluido con la aplicación de airSlate SignNow para Android. Firma y envía documentos para firma desde cualquier lugar con conexión a internet. Crea PDFs profesionales y firma la factura proforma firmada con unos pocos clics. Configura un flujo de firma electrónica perfecto usando solo tu teléfono móvil y mejora tu eficiencia general.

prepárate para obtener más

¡Obtenga firmas legalmente vinculantes ahora!

Preguntas frecuentes signed proforma invoice

Aquí hay una lista de las preguntas más comunes de los clientes. Si no encuentras respuesta a tu pregunta, no dudes en contactarnos.

¿Necesitas ayuda? Contactar con soporte

Lo que dicen los usuarios activos — signed proforma invoice

Accede a las reseñas de airSlate SignNow, los consejos de nuestros clientes y sus historias. Escucha a usuarios reales y lo que dicen sobre las funciones para generar y firmar documentos.

This service is really great! It has helped...
5
anonymous

This service is really great! It has helped us enormously by ensuring we are fully covered in our agreements. We are on a 100% for collecting on our jobs, from a previous 60-70%. I recommend this to everyone.

Leer revisión completa
I've been using airSlate SignNow for years (since it...
5
Susan S

I've been using airSlate SignNow for years (since it was CudaSign). I started using airSlate SignNow for real estate as it was easier for my clients to use. I now use it in my business for employement and onboarding docs.

Leer revisión completa
Everything has been great, really easy to incorporate...
5
Liam R

Everything has been great, really easy to incorporate into my business. And the clients who have used your software so far have said it is very easy to complete the necessary signatures.

Leer revisión completa

Búsquedas relacionadas con signed proforma invoice

proforma invoice template
proforma invoice for advance payment
proforma invoice template word
proforma invoice format
difference between proforma invoice and invoice
proforma invoice vs commercial invoice
proforma invoice vs tax invoice
proforma invoice vs quotation
signed proforma invoice
video background

Sign proforma invoice template

in this video we're going to talk about how to customize your invoices and estimates in QuickBooks Online let's start by clicking on the new button on the left hand side and let's go ahead and click on invoice so by default you're going to get the standard default template in QuickBooks Online for invoices there's a couple things you can change a lot of things you cannot change so you kind of have to be patient with it first thing that you see on the on the top right is the ad logo so if I click on ADD logo I go find my logo in my computer I can add the logo in there okay then you see your logo on the right hand side you can X out of that that's really all you can do it makes you feel like you can move it but you can't okay that's that's where the logo is going to be we're going to go through all the different settings now if you click on manage on the top of the screen it says manage you're going to see the drawer show up on the right hand side and then here's where you can do all your settings if I click on edit default settings this is going to to take me to uh the sales setting screen and I have an entirely different video where I talk about all of these uh settings uh but for now let's just talk about those in particular and then here when I click on edit I can turn on which of these fields I want enabled in my invoice templates or in my sales templates so if I want a shipping line if I want a service date if I want a discount if I want to deposit if I want to accept tips that sort of thing uh you have the option to add all those things so when I click on Save now it turned on all the settings and then we can always go back and and and turn them off so I'm going to ex out of that and then I'm going to go back into my invoice one more time and then I should go back into my template now when I click on customization all these things are turned on again I can turn any of these off so let's say I don't want to see a ship to address I do want to see a ship to address I don't want to see an invoice number I do want to see an invoice number notice this right here it shows it right here I want to see an invoice date I don't I want to see see a due date I don't I want to see terms I don't I want to see a service date that's going to be down here in the in the line items so the products and services that I'm selling so if you don't want to see a separate service date because the service date is irrelevant you turn that off if you want to see the skew number or not you would turn that on so you have all these different options of all the things you can turn off and on and then if you have any custom Fields here that you need we can click on manage that's going to take me to the screen for the custom fields for now let me just make sure that I I save then I'm going to click on manage leave without saving and then we're going to turn on the custom Fields so when I click on add custom Fields let's say I want to have a custom fields for a supervisor or salesperson or something like that and then I turn it on on the sales forms and then I can choose whether or not I want that printed not just showing on the screen what's cool about custom Fields is you could either just display them so the the accountant the QuickBooks user can see the information or you can actually print it if you want to so then I click on Save and that that turns off uh turns on my custom field and I can turn on a couple of custom Fields so let's say I want to have one that says uh region or something like that and I would turn that on let's say I don't want to print that and click on Save I add one more let's say I want to call this one uh delivery date uh preference you start thinking about all the things that matter to your business and what kind of what kind of things you would want to track or not and decide what kind of stuff you want to print or not that's up to you so you click on Save so I have my three Uh custom Fields this is the maximum you can do up to three custom Fields um total that's it so I go back into new and go into invoice and sorry I want to add one more thing if you're using QuickBooks online advanced Edition is the most expensive you can do up to 25 custom Fields so this limitation of three it's only for Simple Start essential and plus so the most advanced has a lot more than three custom Fields anyway so now that we have the custom Fields enabled notice that now they show up on the invoice template and the ones that say hidden are the ones that don't print so they're showing on the screen but they don't print on the payment options uh here's where we can uh enable whether or not we want our customers to be able to pay us with a credit card or pay us digitally now you do have to set up a merchant account and by the way um you can do this on your own here by using the the the regular process but if you are going to set this up you don't have a merchant account yet in QuickBooks Online email me and I'm going to put you in contact with a person that into it that QuickBooks that sets this up and it gives you a little bit better deal than you get by going retail uh because I am a um a reseller a QuickBook solution provider I can give my customers a better rate than the retail rate so don't set it up through the regular process wait a day email me and I'll have my quick QuickBooks person contact you it's exact same product it's just going to have a better rate anyway um so once you have that enabled you'll be able to choose whether somebody can pay you via V Mo PayPal Visa Apple pay once you have merchants or payments enabled you'll be able to choose um to to give the customer the option to pay you with that um and then uh when you go into uh the payment section this is where you would configure or or set anything up with that account so again that's showing up those buttons are showing up there because in this particular account that stuff is not enabled yet uh once that's enabled it's just going to be a checkbox for turning off and on then at the bottom you get to pick what you want to see so if you want to see all the way in the header invoice total if I turn that off you don't see the total I I guess most people want to see that um whether or not you want to have a deposits uh box and this this this manage button is really important because you have to pick you know what type what type of payment method and what type of account the deposit goes into when you get paid a deposit so sometimes that becomes kind of confusing to have deposits in the invoice screen I generally like to have a separate payment Maybe maybe a different topic for different video but if you want to see a deposit box in there uh you would turn that on if you want to see a discount box in there and you get to pick whether you want a straight dollar invoice or just a percentage invoice um here's you can set up your sales taxs if you have sales taxs and a shipping fee if you want to charge shipping separately again all these things discounts shipping deposits that could also be done online items if you configure the items correctly uh also different topic for different video and then anything with multicurrency you will set that up as well then under design um the current template is the modern template but if you want to do multiple templates you can click on manage and you can go into that screen we'll do that in a second on this particular template I get to choose a general color so if I want uh oranges or Reds or greens or purples whatever I get to pick what kind of colors I want to see I get to pick from a couple of options on fonts okay not not so many options unfortunately there's not you know it's not Photoshop okay um and then down here says automation uh we can turn on this invoice as a recurring invoice and also turn on invoice reminders and you can say whether you want the automatic reminders to happen three days before they're due three days after this stuff is really really neat it's more the automation part of it okay so once you're done uh doing this general part of the customization you can actually uh then start creating your invoice so I'm going to go ahead and create my new customer and let's call this customer a and then save that okay and then here's where I have my bill to and my ship to address assuming they're different again if I go to customization I can turn off that ship to address and just have a build to address so that's confusing you don't have to have those two boxes in there if you want to edit that customer you click on edit customer and it takes you into the customer edit screen which is pretty interesting uh and then here you would get you would pick all your things so you would pick uh 60-day terms you you would you can add your own invoice number if you turn that on there's actually a setting in the settings section where you can turn off invoice num manual numbering and then you just have to use the numbering that QuickBooks gives you but let's say you want to start with 14,000 501 and you want that to kind of be like the first invoice number the next one will be 14,000 502 etc etc then you put your uh information on your custom Fields okay whatever information you want to fill out here and and and then you start uh you know selecting all the transa all the transaction information so stuff like tags uh your product and service the the description if uh uh if you have one so we can put uh in home and then you can do your quantity so let's say 2 * 500 whatever it is there's my ,000 invoice again we can use Control Plus and control minus if I want to zoom in and out depending on the size of your screen resolution all that stuff you get to pick um you know what kind of Zoom settings you want to have uh and then down here you see your subtotals your Sal Stacks again we'll do an entirely different video with sales stack sales tax is more complex and then if you want to put a discount here so I want to do 15% or something like that that gets applied in there and then you get to see the total um the total invoice and then under edit totals this is where you get to again configure what you want those totals uh to look like so in a nutshell that's really all you do to configure um the general settings of your invoices you can add an attachment if you click on email view you get to see exactly what email is going to look like if you email the invoice from here if you see the PDF view you're going to see exactly what it's going to look like when somebody is going to print the invoice or or view it as a PDF and then the payr view it's what it looks like when somebody receives the invoice and they're about to pay you electronically when you turn on payments you get to see what their payment screen uh looks like when they receive uh the email and then they can actually view the invoice and pay uh electronically once that's uh set up so pretty simple um setup I'm going to go ahead and save this um this invoice and then I'm going to click on either review and send or uh or print and download so you kind of see that that workflow so if I click on print and download it's going to open up the PDF for me and there it is I gu zoom in and out and that's what it would look like if you print it so pretty straightforward um and that was the same thing we saw on the previous screen if you email it if you click on review and send you will be emailing this to your customer so make sure you put your uh customer email in here so customer email.com uh and uh and you just click on send and and you can customize the message or go back into the settings and set up the default message you want to see in there what's really cool if you click on manage online delivery settings it'll take take you straight into the settings uh section where you can uh manage uh this information and also in the messages part you can change what the default messages look like so we'll go back into invoice one more time and then I'm going to click on this little recent transactions button so I can go back and view the last invoice that I have and um and essentially that's it there's really not that much uh you can do from here but once the invoice is created if I click on manage the 's a little button here that says actions and then you can do a couple other things you can make a copy or a duplicate you can delete you can void you can look at the audit history if other users have been changing it you want to see what's been changed you can view the transaction Journal which will show you basically like a debit credit journal entry style of that uh transaction which is pretty neat we go back into the invoice under actions um that's how how you do sort of like the next step of the transactions receive payment obviously it's going to be um a very a very popular uh Next Step that we use and then here say status open you will actually see a history of every time your customer opens the invoice views it uh so if the customer tells you I never got your invoice you can actually view that here so that's a pretty awesome uh feature that you see uh built uh built in there now the only one thing I want to show you is I'm actually going to EXC out of is it's another section in QuickBooks Online where you can manage all your templates if I click on the gear menu and click on custom form Styles and I click on that all the templates that are created are going to be showing up in here and if I click on edit you're going to see a slightly different screen to configure your your template um and it kind of looks it looks looks similar but not the same so you can you can mess with the template in here but then you really really do need to go back into the into the um into the actual invoice and preview it to see what it's going to look look like but what what's significantly different on this screen versus the other screen is when you click on content you can actually get to choose which particular U Columns of data in the actual line item information you want to see so if you don't want to see description you don't want to see product and service you don't want to see quantity you don't want to see rate you want to see skew and let's say you you want to see um uh quantity and rate right on the description you get to do tweak you get to tweak a little bit of the actual sort of meat and potatoes of the line items of the invoice itself so if you go to preview PDF uh you get to see that this looks a little bit different than the the last template because this template actually um uh just just looks different so keep that in mind that if you use this uh sort of configurator and you click on done when you go and um and actually create the invoice so I'm just clarify something you create the invoice and go to manage under customization uh is it is it under design actually under design uh notice that there's the modern view which is the one that we're looking at the screen right now but if I actually click on standard what happens is I I still get to visually see sort of the new design but when I go print it um it's actually going to show me uh the let me just open up the the last invoice here so right now under wait until that loads right now under the sign under the modern view that's what I just showed you so if I go to print and download you get to see the the first sort of setting that we set up but if I go back into the invoice and then I I pick the older templates and I click on standard I'm going to save it and then I do a print and download you're going to notice that the the this the template will look different in PDF so keep that in mind that there's also there's sort of a legacy um invoice designer and then there's the modern which is the one that you see on this screen so this is probably more relevant for people that have uh older QuickBooks Online files where they've had the old old template but everything really it's moving towards this new modern view which is the one where everything is sort of live preview on the screen and the only drawback is that not all the settings that you had in the old uh designer are in this screen and QuickBooks is going to be continuously adding more stuff to this so uh that's it in nutshell that's how you uh set up your uh estimates and invoice the templates configure them add the logo all that stuff hopefully that's that was useful and that you have an enjoyable QuickBooks Online experience check the description below for all the other videos in this uh tutorial series and make sure you subscribe to the channel so you're notified uh next time I create a video just like this thank you and I'll see you on the next one

Show more

Preguntas frecuentes

Aprende todo lo que necesitas saber para usar las firmas electrónicas de airSlate SignNow como un profesional.

Ver más tutoriales de airSlate SignNow

¿Cómo puedo firmar electrónicamente un contrato?

Firmar electrónicamente un contrato con airSlate SignNow es rápido, fácil y seguro. Es una solución robusta para firmar y gestionar documentos, contratos y formularios electrónicamente. Todo lo que necesitas hacer es crear tu cuenta, importar un contrato, agregar campos de firma (Mi firma y/o Campo de firma), y enviar el contrato a los destinatarios. Cuando un destinatario recibe el contrato, solo tiene que abrir su correo, hacer clic en la invitación para firmar, crear su firma electrónica y ejecutar el campo que le asignaste. Después de que todas las partes hayan ejecutado sus campos de firma, airSlate SignNow enviará automáticamente una copia ejecutada del contrato a todos los involucrados.

¿Cómo firmo documentos que me envían por correo electrónico?

Si ya tienes una cuenta de airSlate SignNow, es muy fácil. Hay dos formas de firmar electrónicamente archivos desde tu bandeja de entrada. Instala nuestra extensión para Google Chrome e importa los archivos adjuntos directamente desde tu bandeja de entrada. Si prefieres un navegador diferente a Chrome, descarga el archivo adjunto, abre signnow.com y súbelo al sistema. airSlate SignNow hace que la firma electrónica de documentos sea rápida y sencilla.

¿Dónde debo firmar en un PDF?

En airSlate SignNow, puedes enviar una invitación de firma libre, en la cual el destinatario inserta la información que desee y una firma de su elección. Para mostrar claramente al firmante qué se requiere que complete, edita el documento usando el editor incorporado. Convierte tu archivo en un PDF inteligente agregando campos rellenables, especialmente para una firma, y configura una capa de validación para cada campo. Haz clic en Invitar a firmar, y después de ingresar el correo electrónico de tu destinatario, envía el formulario. Tu cliente verá áreas donde debe ingresar información y, si agregaste uno, un campo para insertar su firma electrónica.
esté listo para obtener más

¡Obtenga ahora firmas vinculantes desde el punto de vista jurídico!