Effortlessly Download the Bill Format for Inventory

Streamline your document workflows with airSlate SignNow's intuitive eSigning solution, designed to save you time and money.

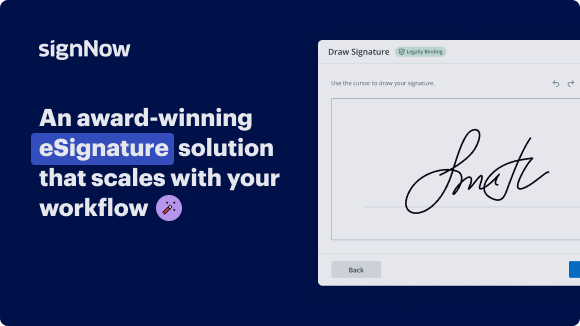
Award-winning eSignature solution

Send my document for signature

Get your document eSigned by multiple recipients.
Send my document for signature

Sign my own document

Add your eSignature
to a document in a few clicks.
Sign my own document

Move your business forward with the airSlate SignNow eSignature solution

Add your legally binding signature

Create your signature in seconds on any desktop computer or mobile device, even while offline. Type, draw, or upload an image of your signature.

Integrate via API

Deliver a seamless eSignature experience from any website, CRM, or custom app — anywhere and anytime.

Send conditional documents

Organize multiple documents in groups and automatically route them for recipients in a role-based order.

Share documents via an invite link

Collect signatures faster by sharing your documents with multiple recipients via a link — no need to add recipient email addresses.

Save time with reusable templates

Create unlimited templates of your most-used documents. Make your templates easy to complete by adding customizable fillable fields.

Improve team collaboration

Create teams within airSlate SignNow to securely collaborate on documents and templates. Send the approved version to every signer.

See airSlate SignNow eSignatures in action

Create secure and intuitive eSignature workflows on any device, track the status of documents right in your account, build online fillable forms – all within a single solution.

Try airSlate SignNow with a sample document

Complete a sample document online. Experience airSlate SignNow's intuitive interface and easy-to-use tools
in action. Open a sample document to add a signature, date, text, upload attachments, and test other useful functionality.

sample
Checkboxes and radio buttons
sample
Request an attachment
sample
Set up data validation

airSlate SignNow solutions for better efficiency

Keep contracts protected
Enhance your document security and keep contracts safe from unauthorized access with dual-factor authentication options. Ask your recipients to prove their identity before opening a contract to bill format download for inventory.
Stay mobile while eSigning
Install the airSlate SignNow app on your iOS or Android device and close deals from anywhere, 24/7. Work with forms and contracts even offline and bill format download for inventory later when your internet connection is restored.
Integrate eSignatures into your business apps
Incorporate airSlate SignNow into your business applications to quickly bill format download for inventory without switching between windows and tabs. Benefit from airSlate SignNow integrations to save time and effort while eSigning forms in just a few clicks.
Generate fillable forms with smart fields
Update any document with fillable fields, make them required or optional, or add conditions for them to appear. Make sure signers complete your form correctly by assigning roles to fields.
Close deals and get paid promptly
Collect documents from clients and partners in minutes instead of weeks. Ask your signers to bill format download for inventory and include a charge request field to your sample to automatically collect payments during the contract signing.
Collect signatures
24x
faster
Reduce costs by
$30
per document
Save up to
40h
per employee / month

Our user reviews speak for themselves

illustrations persone
Kodi-Marie Evans
Director of NetSuite Operations at Xerox
airSlate SignNow provides us with the flexibility needed to get the right signatures on the right documents, in the right formats, based on our integration with NetSuite.
illustrations reviews slider
illustrations persone
Samantha Jo
Enterprise Client Partner at Yelp
airSlate SignNow has made life easier for me. It has been huge to have the ability to sign contracts on-the-go! It is now less stressful to get things done efficiently and promptly.
illustrations reviews slider
illustrations persone
Megan Bond
Digital marketing management at Electrolux
This software has added to our business value. I have got rid of the repetitive tasks. I am capable of creating the mobile native web forms. Now I can easily make payment contracts through a fair channel and their management is very easy.
illustrations reviews slider
walmart logo
exonMobil logo
apple logo
comcast logo
facebook logo
FedEx logo
be ready to get more

Why choose airSlate SignNow

  • Free 7-day trial. Choose the plan you need and try it risk-free.
  • Honest pricing for full-featured plans. airSlate SignNow offers subscription plans with no overages or hidden fees at renewal.
  • Enterprise-grade security. airSlate SignNow helps you comply with global security standards.
illustrations signature

Bill format download for inventory

In today’s fast-paced business environment, managing documents efficiently is crucial. airSlate SignNow offers an easy way to sign and manage your documents, ensuring that your invoice and inventory processes are streamlined. This guide will help you navigate the bill format download for Inventory using airSlate SignNow's powerful features.

Bill format download for inventory

  1. Open your web browser and go to the airSlate SignNow website.
  2. Create an account for a free trial or login if you already have one.
  3. Select the document you wish to sign or send out for signatures.
  4. If necessary, save your document as a reusable template for future use.
  5. Access the uploaded document and make any required modifications: add fillable fields or pertinent information.
  6. Add your signature and designate fields for recipients to sign.
  7. Click ‘Continue’ to configure and dispatch your eSignature request.

By utilizing airSlate SignNow, companies can achieve a remarkable return on investment due to its extensive feature set relative to cost. It is designed with ease of use in mind, making it ideal for small to mid-sized businesses.

With transparent pricing and no unexpected support fees, airSlate SignNow offers excellent value. Their round-the-clock support for all paying users ensures peace of mind. Start your free trial today and transform how you manage your business documents!

How it works

Upload a document
Edit & sign it from anywhere
Save your changes and share

airSlate SignNow features that users love

Speed up your paper-based processes with an easy-to-use eSignature solution.

Edit PDFs
online
Generate templates of your most used documents for signing and completion.
Create a signing link
Share a document via a link without the need to add recipient emails.
Assign roles to signers
Organize complex signing workflows by adding multiple signers and assigning roles.
Create a document template
Create teams to collaborate on documents and templates in real time.
Add Signature fields
Get accurate signatures exactly where you need them using signature fields.
Archive documents in bulk
Save time by archiving multiple documents at once.
be ready to get more

Get legally-binding signatures now!

FAQs

Here is a list of the most common customer questions. If you can’t find an answer to your question, please don’t hesitate to reach out to us.

Need help? Contact support

What active users are saying — bill format download for inventory

Get access to airSlate SignNow’s reviews, our customers’ advice, and their stories. Hear from real users and what they say about features for generating and signing docs.

I've been using airSlate SignNow for years (since it...
5
Susan S

I've been using airSlate SignNow for years (since it was CudaSign). I started using airSlate SignNow for real estate as it was easier for my clients to use. I now use it in my business for employement and onboarding docs.

Read full review
Everything has been great, really easy to incorporate...
5
Liam R

Everything has been great, really easy to incorporate into my business. And the clients who have used your software so far have said it is very easy to complete the necessary signatures.

Read full review
I couldn't conduct my business without contracts and...
5
Dani P

I couldn't conduct my business without contracts and this makes the hassle of downloading, printing, scanning, and reuploading docs virtually seamless. I don't have to worry about whether or not my clients have printers or scanners and I don't have to pay the ridiculous drop box fees. Sign now is amazing!!

Read full review

Related searches to Effortlessly download the bill format for inventory

Simple bill format download for inventory
Bill format in Excel free download
Store inventory Excel sheet free download
Bill format download for inventory pdf
Simple bill format in Excel
Cash bill format in Excel
Invoice template free download
Invoice template Excel free download Word
video background

Bill format download for Inventory

[Music] welcome back to this new video tutorial in Microsoft Excel in this video I'm going to demonstrate a Inventory management template in Microsoft Excel this is a Tracker of inventory or stock in out and balance first of all I will explain the user interface of the system after that I will explain the operational guideline of this template and at the end of the video I will provide you the link to download this template which you can use in your business or work currently I here in this inventory management seat and here I have a button to initialize the system by clicking on this button I can open the inventory management template so let me click here in this button now here you see this is the stock inout balance tracker and management software first of all let's understand the user interface at the top the title of this software is written that is stuck in out balance tracker and management software here you can see a item Master button by clicking on this item Master you can add the new item in the system currently I have only four item added if I have to add a new item or product I have to go to this item Master this save WB means saving the workbook when you add some more record here then you have to click on this save workbook button to save the file here in the right section you can see the date selection pen by using this calendar control you can choose different dates and based on the from date and to date selected here other information will update ingly when you select different date here you have to click on this refresh button then the data will be updated now here in these boxes you can see the aggregation of purchase value sales value stock value stock unit and GP value GP means the gross profit value these values will automatically update as you enter the new records here and when you select different date range the purchase sales and gross profit will automatically change but this stock value and stock unit does not have any relation with the from and to date because this is the closing balance which is always from the last date or the current date now here in this transaction section you can enter the detail of the stock in or purchase and the stock out or sales by clicking on this calendar control you can choose the date of transaction here in the item name you have to select from different item or product in the quantity you have to put the value manually in the transaction type you have to select either stock in or stock out this price will be automatically updated when you choose the item name and transaction type after filling all these input box click on the add button then the record will be added in the system if you do some mistake in the entry then you can double click on the entry then correct the entry then click on the update button then the entry will be updated if you missed to input the value in any of these input box then while adding or updating the record it will give you a error message so that you can put the value in the Mist input box then add it now here in the show details section you can choose all transaction stock in transaction or stock out transaction if you click on stock in then only the detail of the purchase will be given if you click on stock out only the detail of the sales will be given if you click on all all the transaction detail will be given here by clicking on this export to excel you can export or extract this data to a new Excel file similarly here in another section you can see the closing stock information here I have only four products right now the balance stock is given here and this balance stock will dynamically update when you add the in and out details here if you have too many items here in the closing stock then here by using this box you can search any item here and by using this export to excel button you can explore the detail of the closing stock in a new Excel workbook like if I click here you can see the detail of the stock is exported here in the new seat so this is all about the user interface part now let's understand how to operate this template so let me close this and open a new blank template which I have here in my desktop so I'll open this and first of all to initialize the system click on this button now this is a completely blank system where I don't have any information yet I have only the system so first of all I need to add the item details in the item master so click on this item Master button this will open the item Master data window here you have to enter the detail of the productor items so let me add here the first item that is for example television then here I'm giving some model number of the television just for example now here in the ppppu we have to input the purchase price per unit for example the purchase price per unit of the television is 24,500 in the spu we have to put the selling price per unit suppose that it is 26,500 now click on the add button it says item successfully added to the item Master click on okay and here you see the item is added here to add another product follow the same method suppose that while entering this detail you did a mistake here in this case you can double click on this then here you can correct the entry suppose that if the purchase price per unit should be 2100 in this case you can correct it here then click on the update button then click on okay and here you see the record is updated now let me add here some more items so in this way you can add the items here in the item Master data and if you enter a duplicate item here for example fan f05 this is a duplicate item now if you click on the add button here you see the duplicate item found error message is given so here you cannot enter the duplicate because every item should be unique here in the item Master data let me change this here and make it a different model that is f900 for example then when I click on ADD now the item gets added here so here in the item Master data every item should be unique now after adding the items here in the item Master data you can close this window from here as soon as you close the window here in the closing stop you can see all the items are added and the balance stock is given as zero because we haven't made any transaction here it when we input the detail of the purchase then here you will see the balance stock so here let's add some transaction here in the date click on the calendar icon this will open this calendar and the current date is selected here that is 23rd of May here you can enter the transaction in back date also suppose that if you want to enter the transaction for 15th of May then click on 15 the date will be added here in the item name I'm going to choose this television quantity I'm taking 24 unit in the transaction type I'll select stock in the price is automatically given here when you click on the add button data has been added click on okay and here the data is not visible because in the date selection the current date is given which is 23rd of May but here we did a transaction in previous date so here in the date selection we have to take the older date let's say 1st of May now it will show the detail here from 1 of May to current date after selecting the date here click on this refresh button then then the detail will be shown here and also the balance stock is updated here this 24 unit purchase quantity is now given here in the balance stock similarly let me add here some more record of purchase after adding some detail of the purchase here here you can see the purchase value is automatically updated currently the sales value is given at zero because I haven't made any sales transaction here the stock value is also updated the balance stock is given here the stock unit total is 98 unit gross profit is given at zero because I don't have any sales record here now let me add a sales record so here in the date I'll choose this 23rd of May item name I'm going to take television quantity is suppose that 3 unit transaction type I select stock out which is the sales the selling price is auto updated here now click on the add button and here you see the sales transaction is updated here and here the sales value is also updated and the profit is also updated this is the gross profit given by the sales minus purchase and here after I updated three unit sales the balance stock of the television is now given is 21 we purchased 24 unit three unit is sold so the remaining is 21 unit here now let me add here some more record of the sales so as you keep on adding the detail of the stock in and out the balance is automatically calculated and all the purchase sales stock and gross profit value is automatically updated and after you enter the record here if you found that there is a mistake in the entry then you can correct the mistake by double clicking on the entry suppose that the quantity sold of laptop PC here should be 4 unit in this case you can double click on this then here you can correct this entry click on the quantity then make it po then you have to click on this update button so click on update then here you see data has been updated and here the four unit is given if you want to see the record here for a different date range then you have to set up the date range here first for example if you want to see the record here from 20 May to 23rd May then here you have to select the date that is 20 May 2024 to 23rd May then when you click on this refresh button here you see the data is is given for this selected date range and here if you want to see the detail of the stock in or purchase only you can click on this stock in then the detail of the purchase only will be given if you want to see the detail of the sales or stock out only click on this stock out this is the detail for stock out only if you want to see the all transaction click on the all button then you'll get all the transaction if you want to export this transaction in new Excel or sheeet simply click on this export to excel button then your data will be exported here in a new seat similarly if you want to export the detail of the inventory or closing stock you can click on this export Excel button then the detail of the stock will be exported here in the seat if you want to find a particular item for example laptop here in the Box you can search it then click on so button and here you see the detail of the laptop only is given to show all item simply remove this Source criteria from the box then click on so then you will see everything after you update the records here you have to click on this save workbook button when you click on this here you see workbook has been saved click on okay now the data is saved in your Excel workbook if this inventory management software is useful for you you can download this software from the link that is given in the screen or you can also go to the video description below and download so this is all about the user interface and the operation guideline of this system thank you very much for watching this we will again meet on next video tutorial [Music]

Show more
be ready to get more

Get legally-binding signatures now!