Easily Delete Signers. Try Advanced eSignature Features.
How to delete signing roles with airSlate SignNow
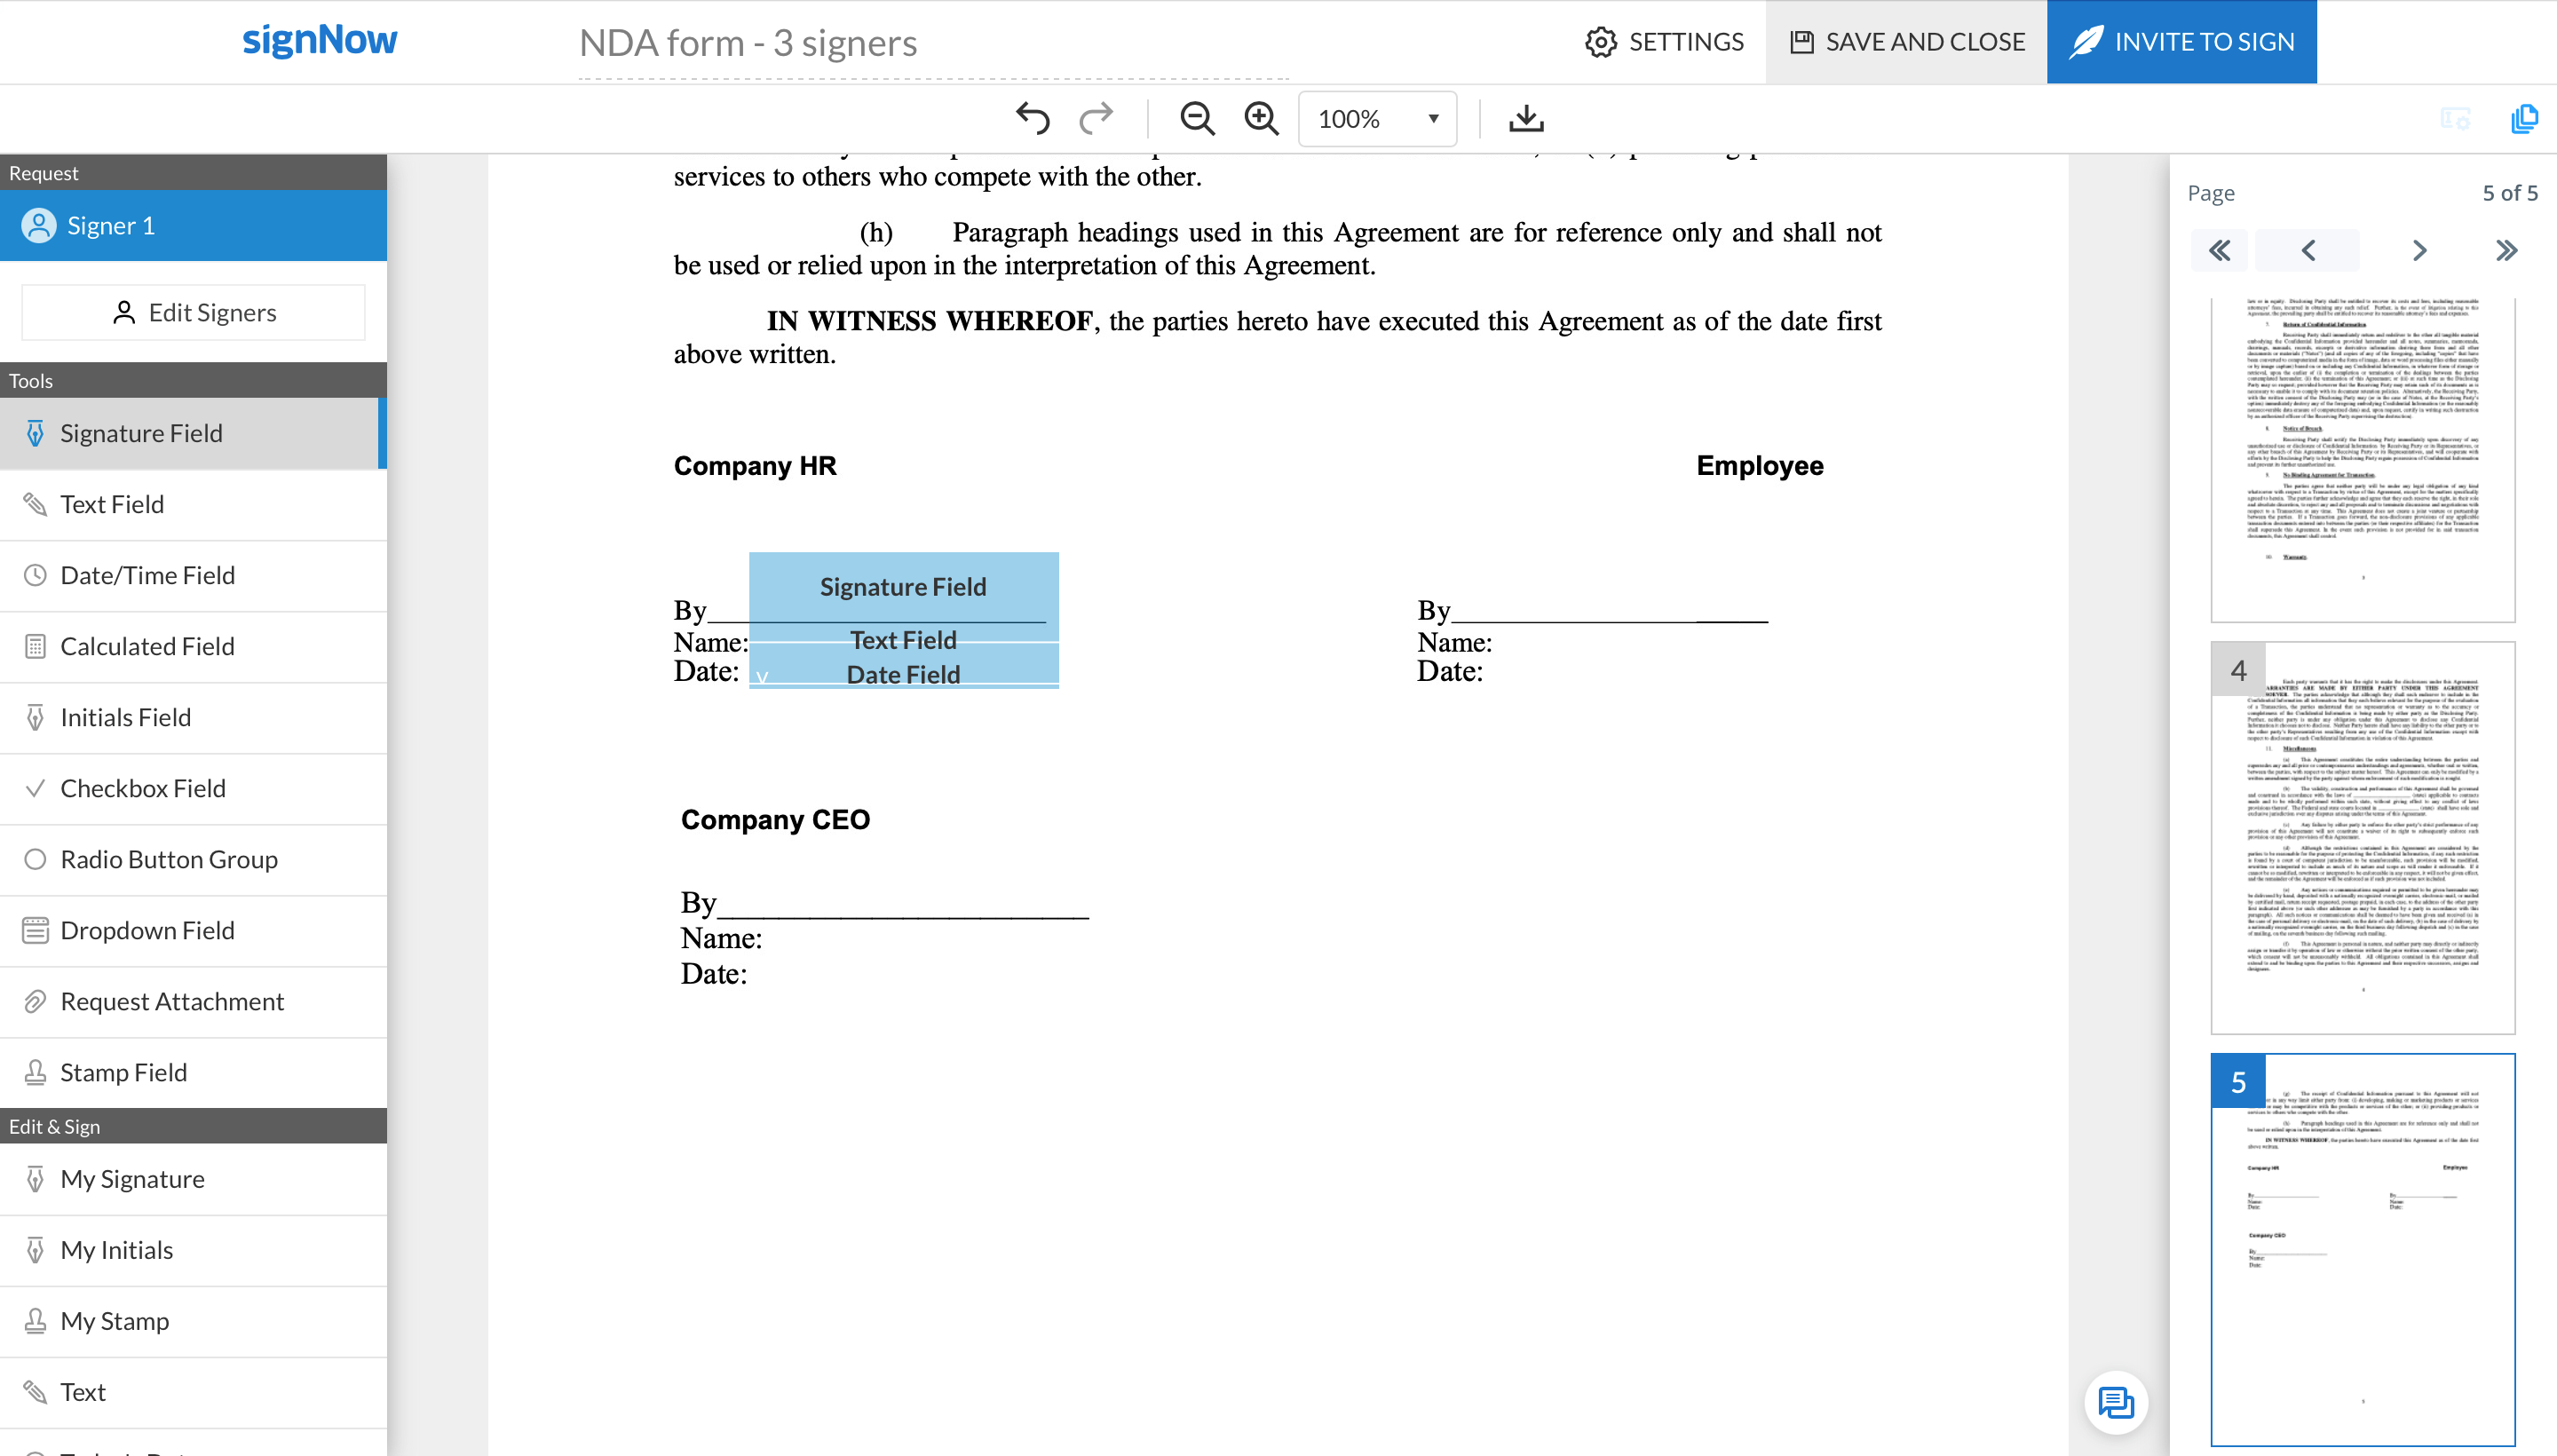
If you no longer need any of the signing roles added to a document, you can easily remove them in a couple of clicks along with the fields assigned to them.
Remove signers in the editor
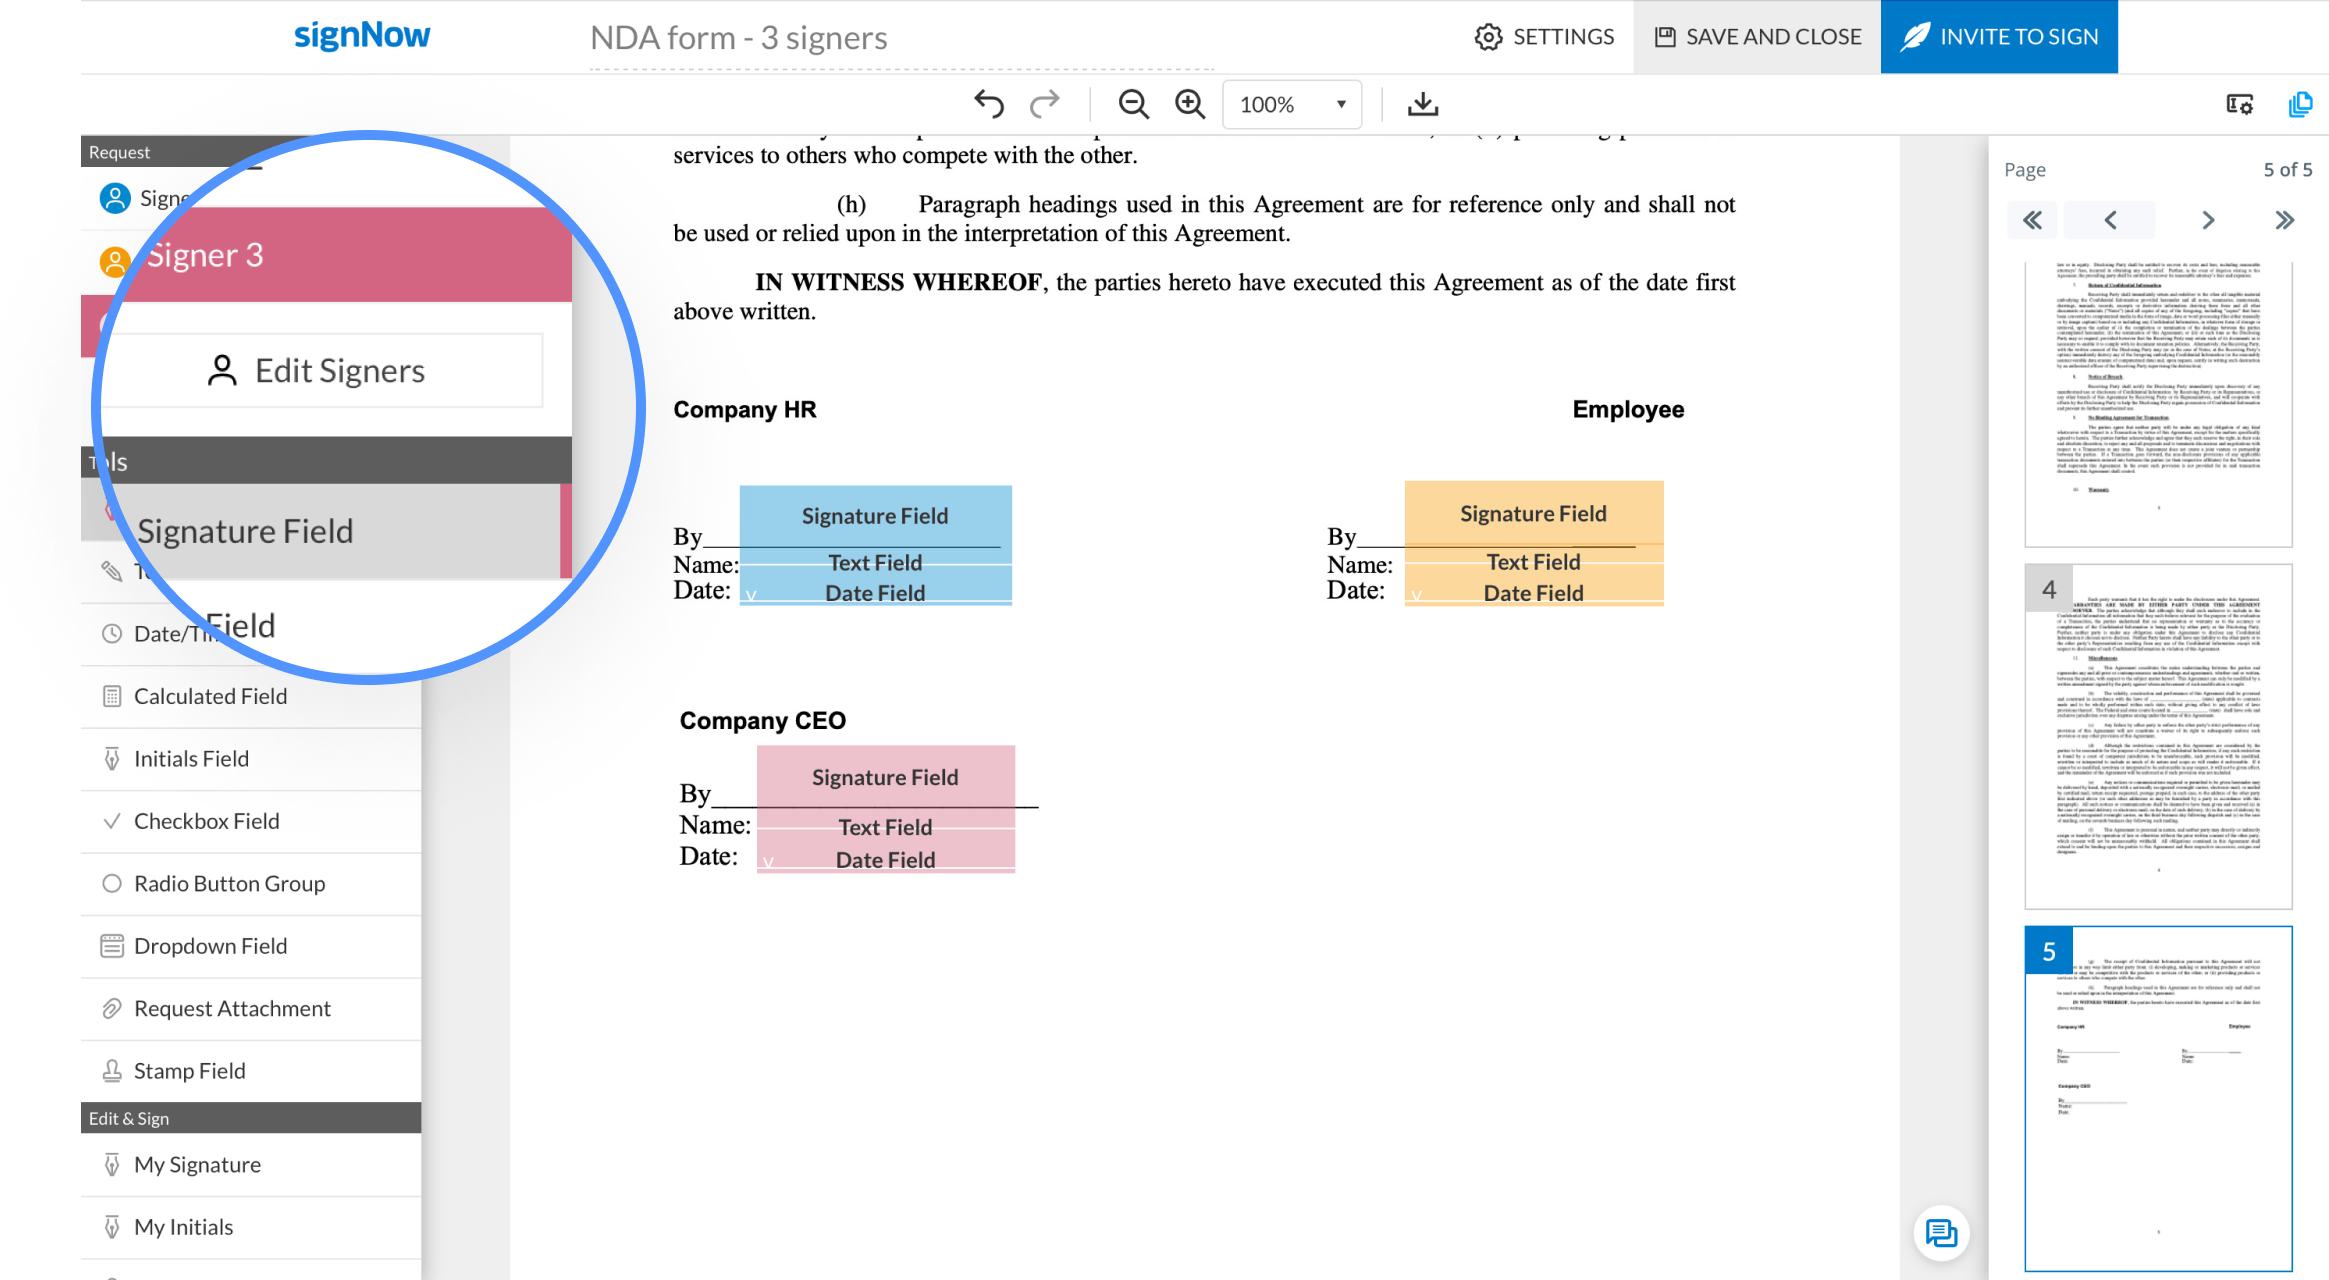
Open a document with multiple signer roles attached in the editor and click Edit Signers.

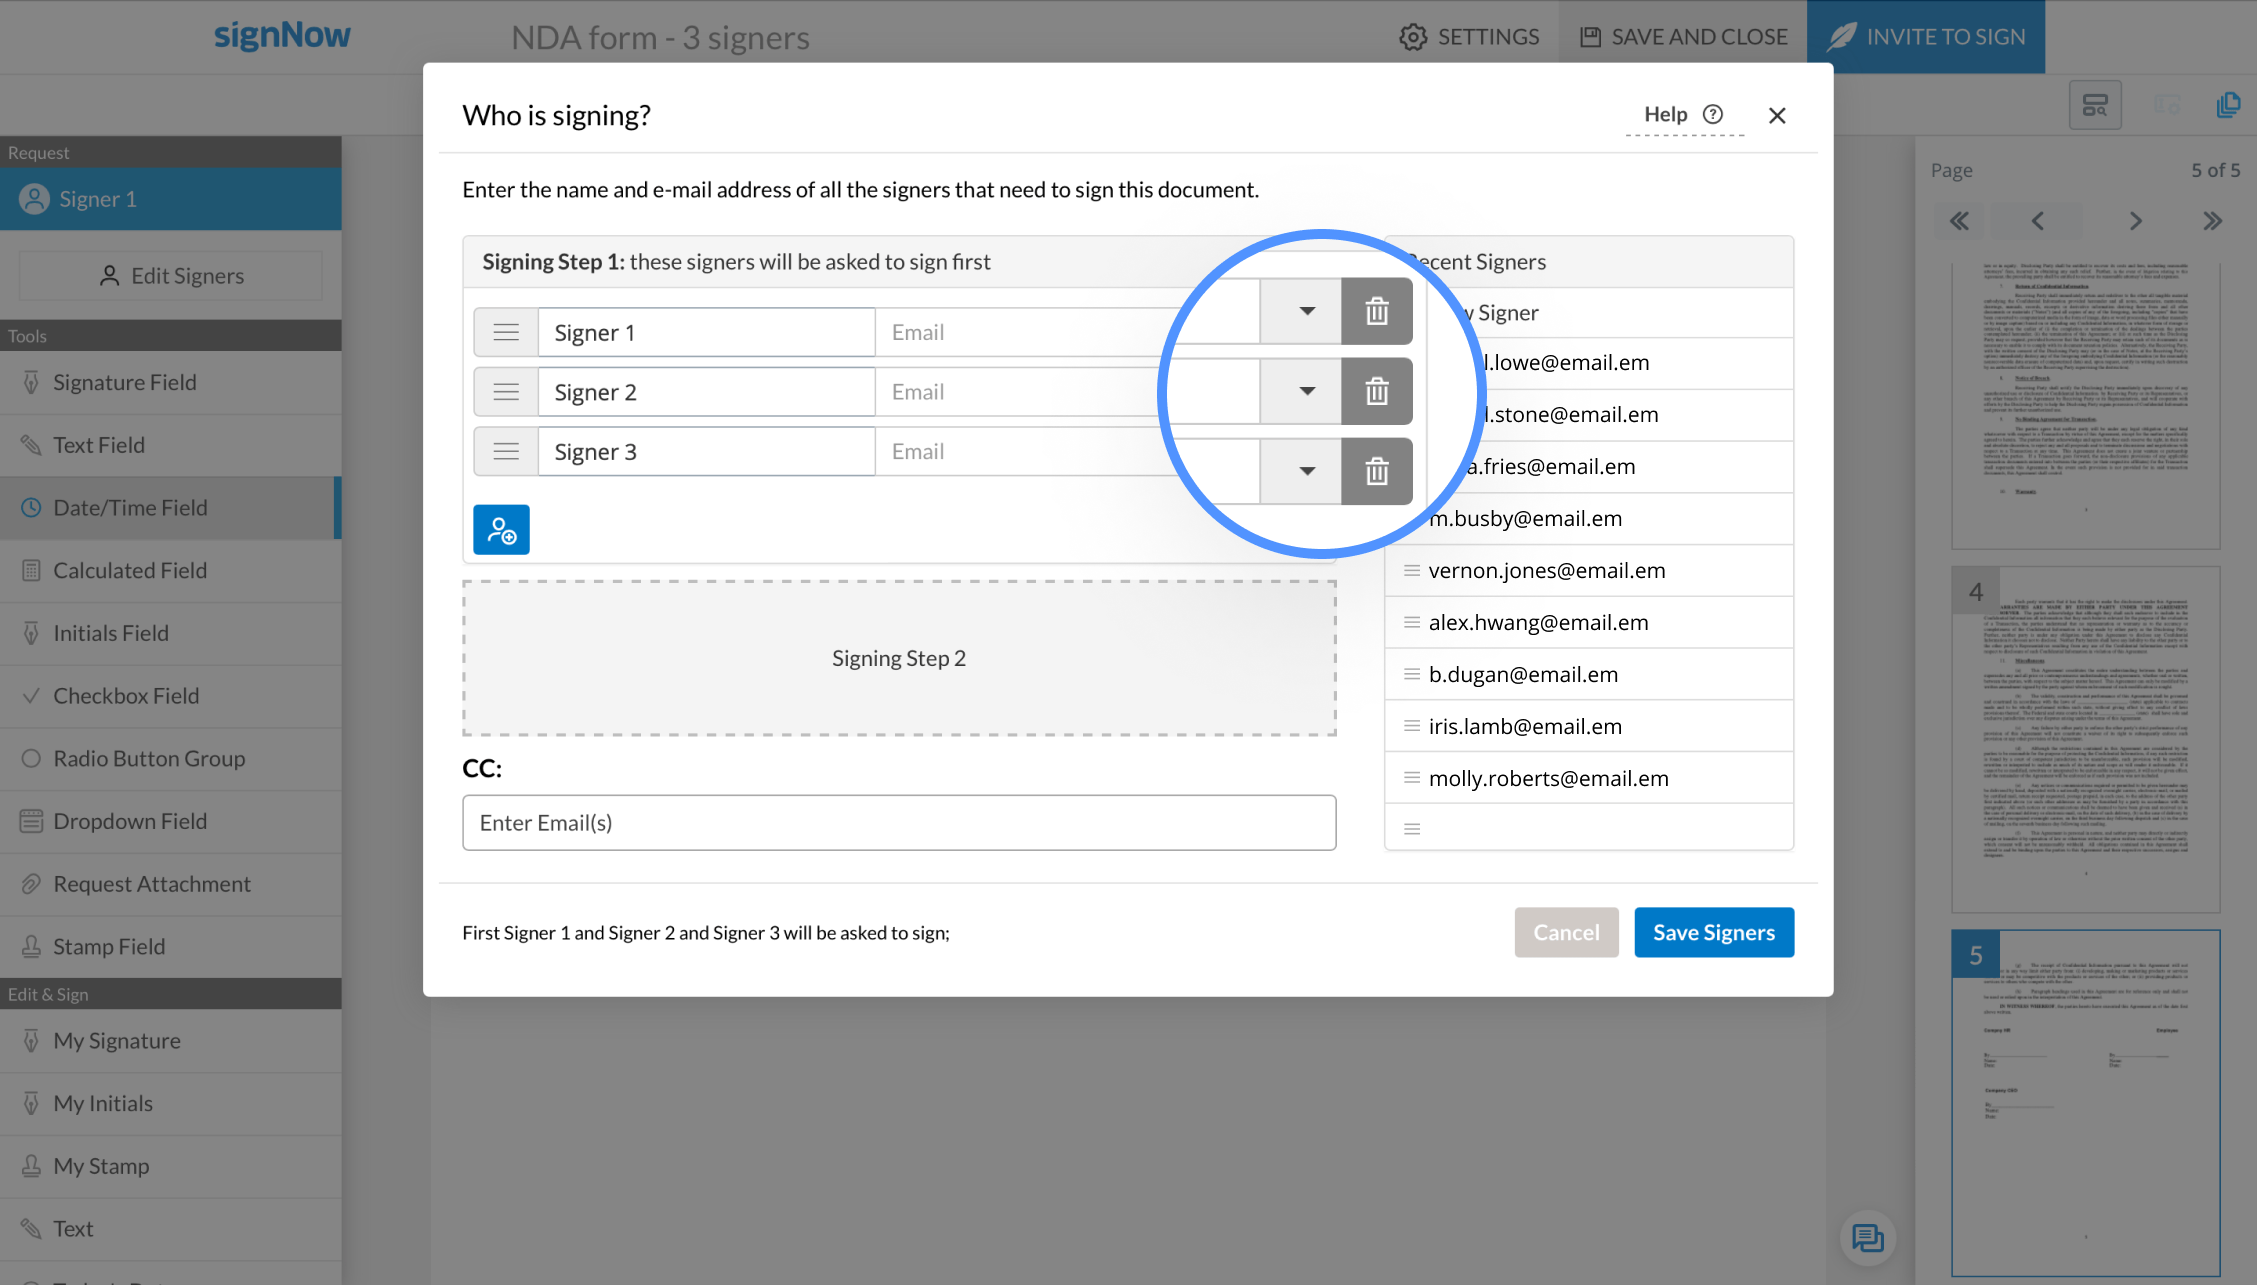
Click on the trash bin icon next to any of the roles to delete a signer. Then, click Save Signers.

You will see a pop-up notification informing you that the fields assigned to the signers you’ve just deleted will be removed from your document. Click Confirm to complete the action.

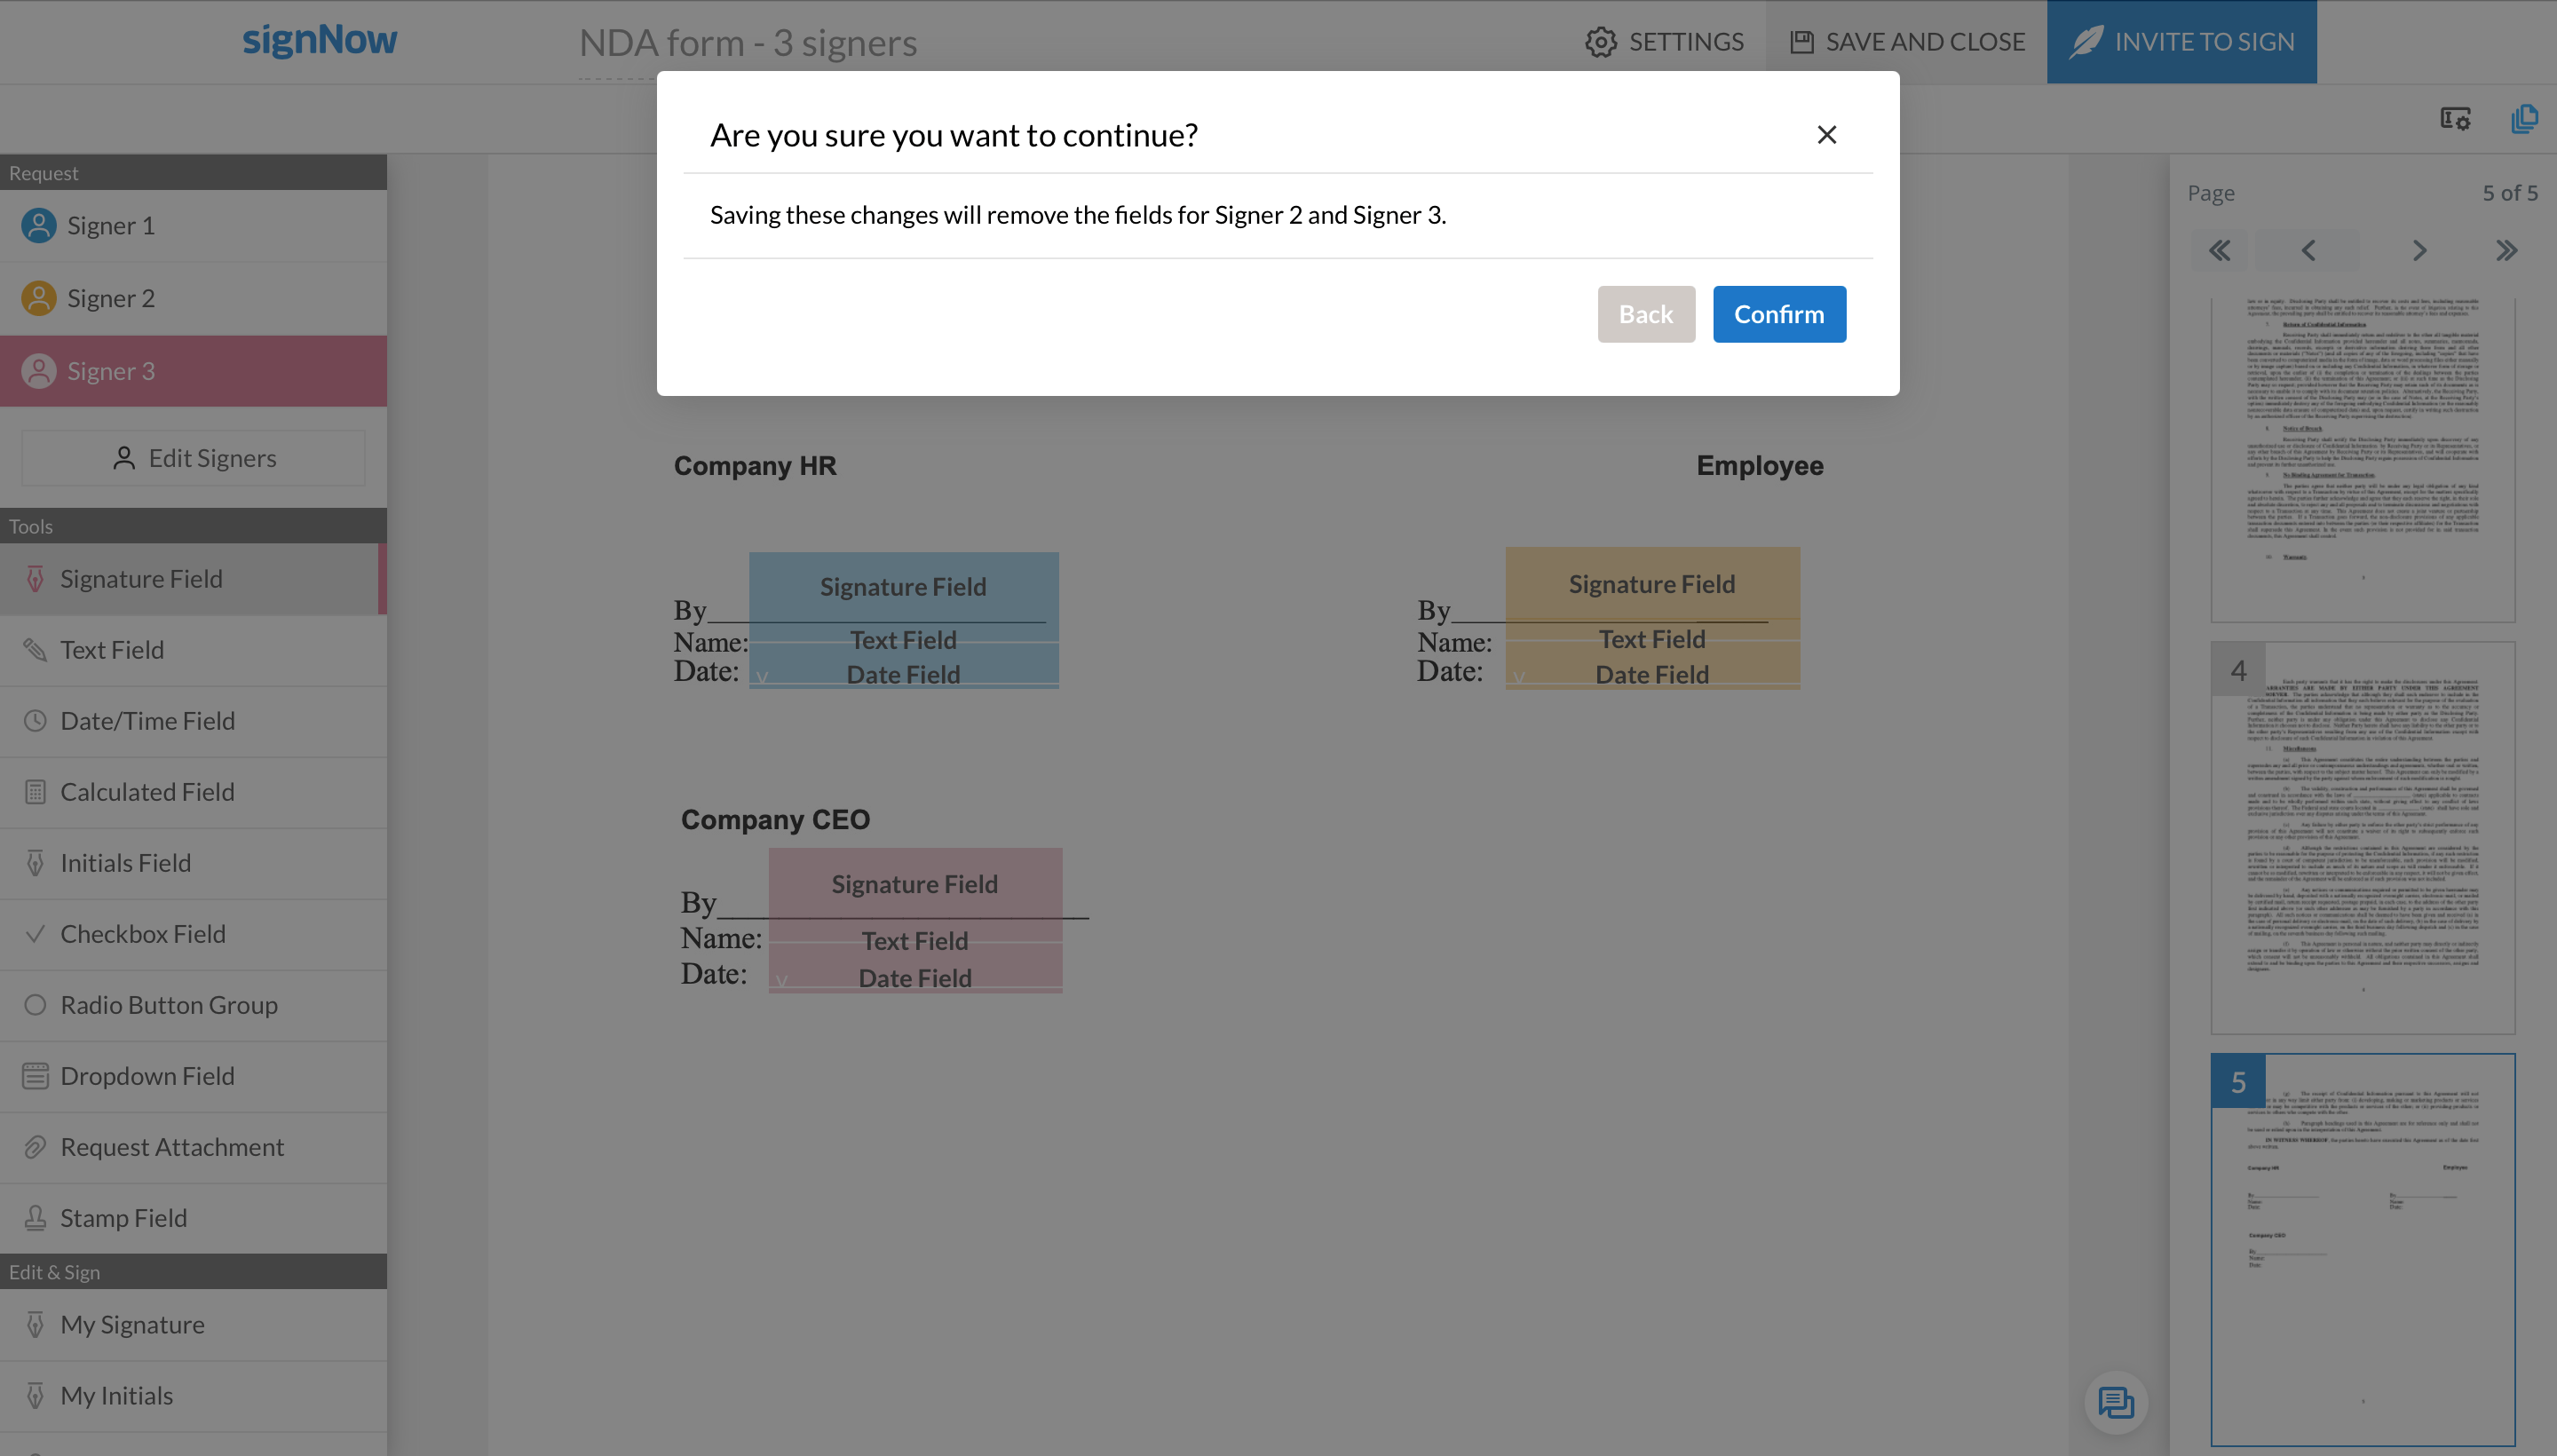
Signer roles are now deleted from your document along with the fields associated with them.

See airSlate SignNow eSignatures in action
Choose a better solution
Take routine paperwork off your plate with airSlate SignNow
Online signature service
Fillable template creator
Document templates
eSignature API
App-native integrations
Ability to easily delete signers
Our user reviews speak for themselves
airSlate SignNow solutions for better efficiency
Why choose airSlate SignNow
-
Free 7-day trial. Choose the plan you need and try it risk-free.
-
Honest pricing for full-featured plans. airSlate SignNow offers subscription plans with no overages or hidden fees at renewal.
-
Enterprise-grade security. airSlate SignNow helps you comply with global security standards.
Upgrade your eSignature workflow with the easily delete signers feature
With airSlate SignNow, you can easily elevate the collecting of electronic signatures by specifying a definite order for multiple recipients to sign. For example, you have an Expense Approval that should be signed by three people (Employee, Supervisor, and Accountant) one by one. Using the easily delete signers option and advanced eSigning tools, you can organize and customize a sequence of signatures. This lets you specify and track the order in which your recipients receive and certify your document. Thus, the Accountant receives the form only after the Supervisor certifies it.
How to use airSlate SignNow’s advanced feature - easily delete signers:
- Sign up for a free trial or log in to your airSlate SignNow account.
- Upload a template or a document and click on it to open it in the editor.
- Click Edit Signers at the top of the left-side toolbar.
- Type recipient data in the Signing Step 1 field (this signer(s) will sign first).
- Click the blue icon below the address line to add more recipients.
- Define who will certify the document next in the Signing Step 2 section. Repeat for all the following steps.
- Customize the signing order and change, or delete signers.
- Hit the Save Signers button when you’re done.
- Add clickable fields from the Tools menu by dragging and dropping and then assigning them to each signer accordingly.
- Apply Invite to Sign to proceed to send the form or Save and Close to save settings.
With the easily delete signers tool set up, you can create and adjust a recipient routing order. Specify several parties in each step with the blue icon, and you can even add multiple steps as well. Each person in a list receives an email notification once the previous users have completed their part. Send, eSign, and gather signatures your way with airSlate SignNow.
How it works
See exceptional results delete
Get legally-binding signatures now!
FAQs delete a signature from a pdf
-
How do I add signers to my document?
Open your document in the editor and click Edit Signers. Then, click on the blue silhouette icon to add a new signer. When finished adding roles, hit Save Signers. -
How will my recipients understand where to sign?
Each of your signers will be automatically guided to the fields they are required to complete. If they disable the Wizard, they will still be able to easily locate the boxes they need to fill and sign. Just make sure to assign your fields to correct signers. -
Can I send documents for eSignature without inserting fillable fields?
Yes, you can. In the airSlate SignNow dashboard, select the document you need to send and click Freeform Invite in the toolbar on the right. Add the email addresses of your signers and CC’d recipients, customize your email subject and message, and hit Send Invite. Your recipients will be able to sign your document anywhere they see fit without being confined to specific fillable fields. -
How do I add a fillable field to a document?
Open your document in the airSlate SignNow editor and select the fillable field you need from the toolbar on the left. Then, click anywhere on the document to place the field. You can adjust its size and placement as needed. When finished, click OK. -
How do I configure a signing order for my document?
Click Edit Signers in the editor. In the pop-up, click on the Signing Step 2 area to create a new signing step. To add a third signing step, click Signing Step 3, and so on. Enter signer emails for each signing step. Drag and drop signers to move them between signing steps. When finished, click Save Signers. -
How do I assign signer roles?
Open your document in the editor and click Edit Signers in the menu on the left. Then, click on the silhouette icon below the email field, enter a signer’s email address, and hit Save Signers. Alternatively, you can click on any field in a document, open the Role dropdown on the right, and select Add Role. In a new dialog box, enter another signer’s name and click Add New Role. -
How do I send a document to someone to sign?
Upload a document to your airSlate SignNow account and click Invite to Sign. You can also send a document for signing as a freeform (without fillable fields) or share it via a signing link. -
Will my recipient receive a document copy once they sign?
By default, they will. But you can set the action that will take place after signing by yourself. When configuring your signature invite, click the Actions on Completion button and select any option from the dropdown. -
How do I split a document in airSlate SignNow?
Within airSlate SignNow you have the ability to split your uploaded PDF's into multiple documents. This can be done through the document editor in the File menu. Click on File and choose the option Split Document from the drop down menu. -
How do I create a signature in airSlate SignNow?
airSlate SignNow will immediately place your electronic signature in each subsequent signature and/or initial field you click on within the document(s). When you've clicked everywhere you've been prompted to sign, airSlate SignNow will ask you to finish signing. Do this by simply clicking the FINISH SIGNING button. -
How do you copy a loop in airSlate SignNow?
Select your folder and hit Copy and you will have successfully copied the document! To copy multiple documents at once to a loop, start first by checking the check boxes to the left of each document you wish to copy. You will now see the option to 'Make A Copy' appear at the top right of your document list. -
How do you merge loops in airSlate SignNow?
Merge Loops. To merge two loops of the same deal or transaction begin by opening the VIEW DETAILS section of the loop you would like to merge into another. At the bottom of the details page is the MERGE LOOP function. This allows you to combine two of your loops into one. -
What is a field label?
Labels are best explained as field names or instructions for what should be added to a field (e.g., Last Name, State, Phone Number, etc.). With airSlate SignNow, signers can auto-fill identically labeled fields with one click throughout an entire document. Labels are available for Text fields, Date/Time fields, and Dropdown fields. -
How do I enable signers to auto-fill similar fields?
The auto-fill feature uses field labels to identify the similarity of fields. For example, if two fields in your form are labeled “Full Name”, your recipient will only need to type their full name once. The second identical field will be filled automatically. In addition to identically labeled fields, airSlate SignNow auto-fills Signature and Date fields by default. -
Can I edit PDF documents with airSlate SignNow?
You can add text, signatures, initials, stamps, checkmarks, and the current date to your documents. Besides, it is possible to add various fillable fields, e.g., text fields, dropdowns, radio buttons, attachment fields, conditional fields, and more. -
How do I change the size and position of a fillable field?
Once your fillable field is on a document, you can drag it across the page until you find the proper position for it. Drop the field wherever you see fit. To adjust its size, drag the field by its edges (anchor points). -
What kind of fields can I add to my documents with airSlate SignNow?
airSlate SignNow allows you to add different types of fillable fields to your documents, including text fields, signature fields, date/time fields, calculated fields, initials fields, checkbox fields, radio button groups, dropdown fields, and attachment fields. -
What is pre-filled text?
With airSlate SignNow, you can prefill documents with information you already know. For example, if you know your signer’s name, you can add it as pre-filled text to the corresponding field in a document. As a result, your signer won’t have to complete this field but will be able to edit the information inside if needed. You can customize pre-filled text for text fields, date/time fields, checkbox fields, radio button groups, and dropdown fields.
What active users are saying — delete document
Frequently asked questions
How do you generate a document and apply an electronic signature to it?
How do I add an electronic signature to a Word document?
How do I eSign scanned documents?
Get more for clear signatures from pdf
- Create templates, Attach additional documents and eSignature
- Create templates, Import Word documents and Sign
- Create templates, Import Word documents and eSign
- Create templates, Import Word documents and eSignature
- Create templates, Add signers and Sign
- Create templates, Add signers and eSign
- Create templates, Add signers and eSignature
- Create templates, Assign roles and Sign
The ins and outs of eSignature


Find out other clear role
- Online Signature Legitimateness for Business Plan ...
- Boost Your Business with Legitimate Online Signatures ...
- Boost your Business with Legitimate Online Signatures ...
- Boost your Business Plan with Legit Online Signature ...
- Unlock the Power of Legitimate Online Signatures for ...
- Boost Your Business with Online Signature ...
- Utilize online signature legitimateness for Business ...
- Unlock Online Signature Legitimateness for Business ...
- Online Signature Legitimateness for Business ...
- Empower Your Business with Online Signature ...
- Boost Your Business with Legitimate Online Signatures ...
- Online Signature Legitimateness for Business ...
- Unlock the Power of Online Signature Legitimateness for ...
- Experience Online Signature Legitimateness for ...
- Online Signature Legitimateness for Franchise Contract ...
- Unveil The Legitimacy of Online Signatures for ...
- Enhance your Franchise Contracts in Canada with our ...
- Unlock the Power of Legitimate Online Signatures for ...