Demande De Réservation De Voyage Signée Facilement

Éliminez la paperasserie et améliorez le traitement numérique des documents pour plus de performance et d'opportunités illimitées. Explorez la manière parfaite de faire des affaires avec airSlate SignNow.

Solution eSignature primée

Envoyer mon document pour signature

Faites signer électroniquement votre document par plusieurs destinataires.
Envoyer mon document pour signature

Signer mon propre document

Ajoutez votre signature électronique
à un document en quelques clics.
Signer mon propre document

Améliorez votre flux de travail documentaire avec airSlate SignNow

Flux de travail eSignature polyvalents

airSlate SignNow est une plateforme évolutive qui s'adapte à vos équipes et à votre entreprise. Créez et personnalisez des flux de signature électronique qui répondent à tous vos besoins d'entreprise.

Visibilité instantanée sur l'état du document

Visualisez et enregistrez l'historique d'un document pour suivre toutes les modifications apportées. Recevez des notifications immédiates pour savoir qui a modifié quoi et quand.

Configuration d'intégration simple et rapide

airSlate SignNow s'intègre facilement à vos systèmes existants, vous permettant de commencer immédiatement. Utilisez les puissantes fonctionnalités de signature électronique d'airSlate SignNow avec des centaines d'applications populaires.

Signer la demande de réservation de voyage sur n'importe quel appareil

Éliminez les goulots d'étranglement liés à l'attente des signatures électroniques. Avec airSlate SignNow, vous pouvez signer des documents immédiatement en utilisant un ordinateur de bureau, une tablette ou un smartphone

Traçabilité d'audit détaillée

Pour votre protection juridique et vos besoins d'audit de base, airSlate SignNow inclut un journal de toutes les modifications apportées à vos enregistrements, avec horodatages, e-mails et adresses IP.

Exigences de sécurité rigoureuses

Nos priorités absolues sont la sécurisation de vos enregistrements et données sensibles, et la garantie de l'authentification de la signature électronique et de la défense du système. Restez conforme aux normes et réglementations du marché avec airSlate SignNow.

Découvrez les signatures électroniques airSlate SignNow en action

Créez des workflows de signature électronique sécurisés et intuitifs sur n'importe quel appareil, suivez le statut des documents directement dans votre compte et créez des formulaires en ligne, le tout dans une seule solution.

Essayez airSlate SignNow avec un document d'exemple

Complétez un document d'exemple en ligne. Découvrez l'interface intuitive de airSlate SignNow et ses outils faciles à utiliser en action. Ouvrez un document d'exemple pour ajouter une signature, une date, du texte, télécharger des pièces jointes et tester d'autres fonctionnalités utiles.

exemple
Cases à cocher et boutons radio
exemple
Demander une pièce jointe
exemple
Configurer la validation des données

Solutions airSlate SignNow pour une meilleure efficacité

Gardez les contrats protégés
Améliorez la sécurité de vos documents et protégez vos contrats contre tout accès non autorisé grâce à l'authentification à deux facteurs. Demandez à vos destinataires de prouver leur identité avant d'ouvrir un contrat pour sign travel booking request.
Restez mobile lors de la signature électronique
Installez l'application airSlate SignNow sur votre appareil iOS ou Android et concluez des accords de n'importe où, 24h/24 et 7j/7. Travaillez avec des formulaires et des contrats même hors ligne et sign travel booking request plus tard lorsque votre connexion Internet est rétablie.
Intégrez les signatures électroniques dans vos applications métier
Intégrez airSlate SignNow dans vos applications métier pour sign travel booking request rapidement sans changer de fenêtres ou d'onglets. Profitez des intégrations airSlate SignNow pour gagner du temps et de l'effort lors de la signature électronique de formulaires en quelques clics.
Générez des formulaires remplissables avec des champs intelligents
Mettez à jour n'importe quel document avec des champs remplissables, rendez-les obligatoires ou facultatifs, ou ajoutez des conditions pour leur apparition. Assurez-vous que les signataires remplissent correctement votre formulaire en attribuant des rôles aux champs.
Concluez des accords et soyez payé rapidement
Collectez des documents auprès de clients et partenaires en quelques minutes au lieu de semaines. Demandez à vos signataires de sign travel booking request et ajoutez un champ de demande de paiement à votre exemple pour collecter automatiquement les paiements lors de la signature du contrat.
Collecter les signatures
24x
plus rapide
Réduire les coûts de
$30
par document
Économisez jusqu'à
40h
par employé / mois

Les avis de nos utilisateurs parlent d'eux-mêmes

illustrations persone
Kodi-Marie Evans
Directeur des opérations NetSuite chez Xerox
airSlate SignNow nous offre la flexibilité nécessaire pour obtenir les bonnes signatures sur les bons documents, dans les bons formats, grâce à notre intégration avec NetSuite.
illustrations reviews slider
illustrations persone
Samantha Jo
Partenaire Entreprise Client chez Yelp
airSlate SignNow m'a facilité la vie. C'est énorme de pouvoir signer des contrats en déplacement ! Il est désormais moins stressant de faire les choses efficacement et rapidement.
illustrations reviews slider
illustrations persone
Megan Bond
Gestion du marketing numérique chez Electrolux
Ce logiciel a ajouté de la valeur à notre entreprise. J'ai éliminé les tâches répétitives. Je peux créer des formulaires web natifs mobiles. Maintenant, je peux facilement établir des contrats de paiement via un canal équitable et leur gestion est très facile.
illustrations reviews slider
walmart logo
exonMobil logo
apple logo
comcast logo
facebook logo
FedEx logo
soyez prêt à en obtenir plus

Pourquoi choisir airSlate SignNow

  • Essai gratuit de 7 jours. Choisissez le forfait dont vous avez besoin et essayez-le sans risque.
  • Tarification honnête pour des forfaits complets. airSlate SignNow propose des abonnements sans frais supplémentaires ni frais cachés lors du renouvellement.
  • Sécurité de niveau entreprise. airSlate SignNow vous aide à respecter les normes de sécurité mondiales.
illustrations signature

Votre guide étape par étape — sign travel booking request

Accédez à des conseils utiles et à des étapes rapides couvrant une variété des fonctionnalités les plus populaires de airSlate SignNow.

En utilisant la signature électronique d'airSlate SignNow, toute entreprise peut accélérer ses flux de signature et signer en ligne en temps réel, offrant une expérience améliorée aux clients et aux employés. Utilisez la demande de réservation de voyage signée en quelques étapes simples. Nos applications mobiles-first rendent le travail en déplacement possible, même hors ligne ! eSignatures de n'importe où dans le monde et accélèrent les tâches.

Comment remplir et signer un sign travel booking request

  1. Connectez-vous à votre profil airSlate SignNow.
  2. Trouvez votre document dans vos dossiers ou importez-en un nouveau.
  3. Ouvrez le document et apportez des modifications à l'aide de la liste Outils.
  4. Faites glisser et déposez des champs remplissables, tapez du texte et signez-le.
  5. Listez plusieurs signataires par e-mails, configurez l'ordre de signature.
  6. Spécifiez quels destinataires recevront une copie signée.
  7. Utilisez Options avancées pour restreindre l'accès au modèle, ajouter une date d'expiration.
  8. Cliquez sur Enregistrer et Fermer une fois terminé.

De plus, il existe d'autres fonctionnalités innovantes disponibles pour la demande de réservation de voyage signée. Ajoutez des utilisateurs à votre espace de travail commun, visualisez les équipes et suivez la collaboration. Des millions de clients aux États-Unis et en Europe conviennent qu'une solution qui rassemble les gens en un seul endroit numérique unifié est exactement ce dont les entreprises ont besoin pour faire fonctionner les flux de travail sans problème. L'API REST d'airSlate SignNow vous permet d'intégrer les signatures électroniques dans votre application, site web, CRM ou cloud. Essayez airSlate SignNow et obtenez des flux de signature électronique plus rapides, plus faciles et globalement plus productifs !

Comment ça marche

Créez des eSignatures juridiquement contraignantes
Éditez et signez-le depuis n'importe où
Éditez et eSign à distance

Fonctionnalités airSlate SignNow appréciées par les utilisateurs

Accélérez vos processus papier grâce à une solution de signature électronique facile à utiliser.

Modifiez des PDF
en ligne
Générez des modèles de vos documents les plus utilisés pour la signature et la complétion.
Créez un lien de signature
Partagez un document via un lien sans avoir à ajouter d'adresses e-mail de destinataires.
Attribuez des rôles aux signataires
Organisez des workflows de signature complexes en ajoutant plusieurs signataires et en attribuant des rôles.
Créez un modèle de document
Créez des équipes pour collaborer sur des documents et des modèles en temps réel.
Ajoutez des champs de signature
Obtenez des signatures précises exactement là où vous en avez besoin grâce aux champs de signature.
Archivez des documents en masse
Gagnez du temps en archivant plusieurs documents à la fois.

Découvrez des résultats exceptionnels sign travel booking request

Obtenez des signatures sur n'importe quel document, gérez les contrats de manière centralisée et collaborez plus efficacement avec les clients, les employés et les partenaires.

How to Sign a PDF Online How to Sign a PDF Online

Comment remplir et signer un PDF en ligne

Essayez la méthode la plus rapide pour signer la demande de réservation de voyage. Évitez les flux de travail basés sur le papier et gérez vos documents directement depuis airSlate SignNow. Remplissez et partagez vos formulaires depuis le bureau ou travaillez sans effort en déplacement. Aucune installation ou logiciel supplémentaire requis. Toutes les fonctionnalités sont disponibles en ligne, il suffit d'aller sur signnow.com et de créer votre propre flux de signature électronique.

Guide bref pour signer la demande de réservation de voyage en quelques minutes

  1. Créez un compte airSlate SignNow (si vous ne vous êtes pas encore inscrit) ou connectez-vous avec votre Google ou Facebook.
  2. Cliquez sur Importer et sélectionnez l'un de vos documents.
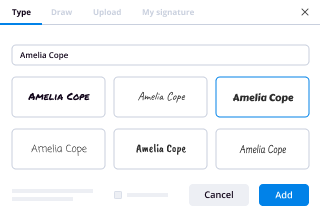
  3. Utilisez l'outil Ma Signature pour créer votre signature unique.
  4. Transformez le document en un PDF dynamique avec des champs remplissables.
  5. Remplissez votre nouveau formulaire et cliquez sur Terminé.

Une fois terminé, envoyez une invitation à signer à plusieurs destinataires. Obtenez un contrat exécutoire en quelques minutes avec n'importe quel appareil. Explorez plus de fonctionnalités pour créer des PDF professionnels ; ajoutez des champs remplissables, signez la demande de réservation de voyage et collaborez en équipe. La solution de signature électronique offre un flux de travail sécurisé et fonctionne conformément à la certification SOC 2 Type II. Assurez-vous que toutes vos données sont protégées et que personne ne peut les modifier.

How to Sign a PDF Using Google Chrome How to Sign a PDF Using Google Chrome

Comment signer un PDF dans Google Chrome

Vous cherchez une solution pour signer la demande de réservation de voyage directement depuis Chrome ? L'extension airSlate SignNow pour Google est là pour vous aider. Trouvez un document et ouvrez-le facilement dans l'éditeur directement depuis votre navigateur. Ajoutez des champs remplissables pour le texte et la signature. Signez le PDF et partagez-le en toute sécurité conformément au RGPD, à la certification SOC 2 Type II, et plus encore.

En suivant ce guide rapide, étendez votre flux de signature électronique dans Google et signez la demande de réservation de voyage :

  1. Allez sur le Chrome Web Store et trouvez l'extension airSlate SignNow.
  2. Cliquez sur Ajouter à Chrome.
  3. Connectez-vous à votre compte ou inscrivez-vous en un nouveau.
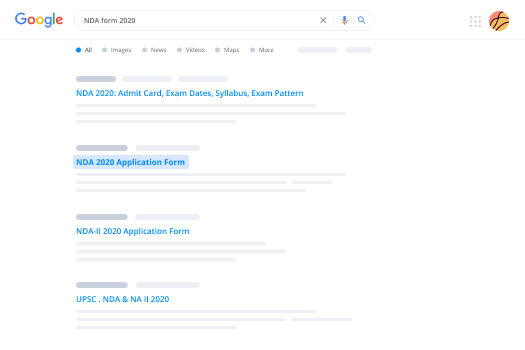
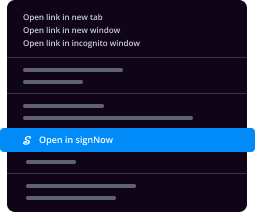
  4. Importez un document et cliquez sur Ouvrir dans airSlate SignNow.
  5. Modifiez le document.
  6. Signez le PDF en utilisant l'outil Ma Signature.
  7. Cliquez sur Terminé pour enregistrer vos modifications.
  8. Invitez d'autres participants à signer en cliquant sur Inviter à Signer et en sélectionnant leurs e-mails/noms.

Créez une signature intégrée à votre flux de travail pour signer la demande de réservation de voyage et obtenir des PDFs signés électroniquement en quelques minutes. Dites adieu aux piles de papiers sur votre bureau et commencez à économiser de l'argent et du temps pour des tâches plus importantes. Choisir l'extension Google airSlate SignNow est une décision pratique avec de nombreux avantages.

How to Sign a PDF in Gmail How to Sign a PDF in Gmail How to Sign a PDF in Gmail

Comment signer un document joint dans Gmail

Si vous êtes comme la plupart, vous avez l'habitude de télécharger les pièces jointes que vous recevez, de les imprimer puis de les signer, n'est-ce pas ? Bonne nouvelle : signer des documents dans votre boîte mail devient beaucoup plus facile. L'add-on airSlate SignNow pour Gmail vous permet de signer la demande de réservation de voyage sans quitter votre boîte de réception. Faites tout ce dont vous avez besoin ; ajoutez des champs remplissables et envoyez des demandes de signature en quelques clics.

Comment signer la demande de réservation de voyage dans Gmail :

  1. Recherchez airSlate SignNow pour Gmail dans le G Suite Marketplace et cliquez sur Installer.
  2. Connectez-vous à votre compte airSlate SignNow ou créez-en un nouveau.
  3. Ouvrez votre e-mail avec le PDF que vous devez signer.
  4. Cliquez sur Importer pour enregistrer le document dans votre compte airSlate SignNow.
  5. Cliquez sur Ouvrir le document pour ouvrir l'éditeur.
  6. Signez le PDF en utilisant Ma Signature.
  7. Envoyez une demande de signature aux autres participants avec le bouton Envoyer pour Signature.
  8. Entrez leur e-mail et appuyez sur OK.

Les autres participants recevront des notifications leur demandant de signer le document. Plus besoin de télécharger le PDF encore et encore, signez la demande de réservation de voyage en quelques clics. Cet add-on est adapté à ceux qui préfèrent travailler sur des tâches plus importantes plutôt que de perdre du temps inutilement. Améliorez vos tâches quotidiennes monotones avec la plateforme de signature électronique primée.

How to Sign a PDF on a Mobile Device How to Sign a PDF on a Mobile Device How to Sign a PDF on a Mobile Device

Comment signer un PDF en déplacement sans application

Pour de nombreux produits, conclure des affaires en déplacement signifie installer une application sur votre téléphone. Nous sommes heureux de vous dire qu'avec airSlate SignNow, la signature en déplacement est plus rapide et plus facile en éliminant le besoin d'une application mobile. Pour signer électroniquement, ouvrez votre navigateur (n'importe quel navigateur mobile) et accédez directement à airSlate SignNow et à tous ses puissants outils de signature électronique. Modifiez des documents, signez la demande de réservation de voyage et plus encore. Aucune installation ou logiciel supplémentaire requis. Concluez votre affaire de n'importe où.

Consultez nos instructions étape par étape pour apprendre à signer la demande de réservation de voyage.

  1. Ouvrez votre navigateur et allez sur signnow.com.
  2. Connectez-vous ou inscrivez-vous avec un nouveau compte.
  3. Importez ou ouvrez le document que vous souhaitez modifier.
  4. Ajoutez des champs remplissables pour le texte, la signature et la date.
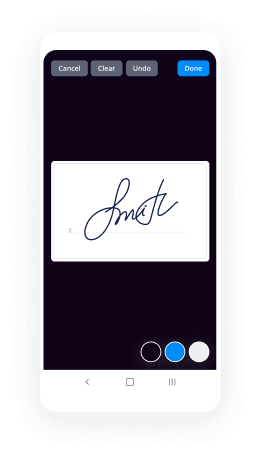
  5. Tracez, tapez ou téléchargez votre signature.
  6. Cliquez sur Enregistrer et Fermer.
  7. Cliquez sur Inviter à Signer et entrez l'e-mail d'un destinataire si vous souhaitez que d'autres signent le PDF.

Travailler sur mobile n'est pas différent de sur un ordinateur de bureau : créez un modèle réutilisable, signez la demande de réservation de voyage et gérez le flux comme d'habitude. En quelques clics, obtenez un contrat exécutoire que vous pouvez télécharger sur votre appareil et envoyer à d'autres. Cependant, si vous souhaitez vraiment une application, téléchargez l'application mobile airSlate SignNow. Elle est sécurisée, rapide et possède une excellente interface. Essayez des flux de signature électronique fluides depuis votre bureau, dans un taxi ou dans un avion.

How to Sign a PDF on iPhone How to Sign a PDF on iPhone

Comment signer un PDF en utilisant un iPhone

iOS est un système d'exploitation très populaire doté d'outils natifs. Il vous permet de signer et d'éditer des PDFs avec Preview sans logiciel supplémentaire. Cependant, aussi géniale que soit la solution d'Apple, elle ne propose pas d'automatisation. Améliorez les capacités de votre iPhone en utilisant l'application airSlate SignNow. Utilisez votre iPhone ou iPad pour signer la demande de réservation de voyage et plus encore. Introduisez l'automatisation de la signature électronique dans votre flux de travail mobile.

Signer sur un iPhone n'a jamais été aussi facile :

  1. Trouvez l'application airSlate SignNow dans l'App Store et installez-la.
  2. Créez un nouveau compte ou connectez-vous avec votre Facebook ou Google.
  3. Cliquez sur Plus et importez le fichier PDF que vous souhaitez signer.
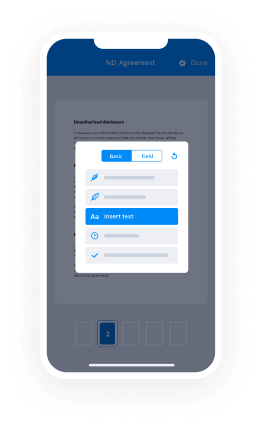
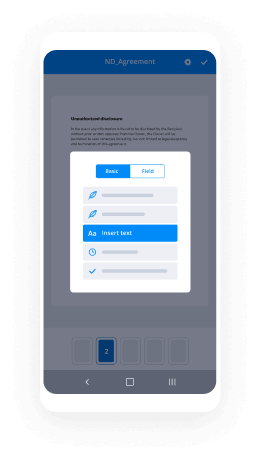
  4. Appuyez sur le document où vous souhaitez insérer votre signature.
  5. Explorez d'autres fonctionnalités : ajoutez des champs remplissables ou signez la demande de réservation de voyage.
  6. Utilisez le bouton Enregistrer pour appliquer les modifications.
  7. Partagez vos documents par e-mail ou via un lien de signature.

Réalisez des PDFs professionnels directement depuis votre application airSlate SignNow. Optimisez votre temps et travaillez de n'importe où ; à la maison, au bureau, dans un bus ou dans un avion, et même à la plage. Gérez un flux de documents complet sans effort : créez des modèles réutilisables, signez la demande de réservation de voyage et travaillez sur des fichiers PDF avec des partenaires commerciaux. Transformez votre appareil en un outil d'affaires puissant pour conclure des affaires.

How to Sign a PDF on Android How to Sign a PDF on Android

Comment signer un PDF avec un Android

Pour les utilisateurs Android, pour gérer des documents depuis leur téléphone, ils doivent installer un logiciel supplémentaire. Le Play Market est vaste et regorge d'options, donc trouver une bonne application n'est pas trop difficile si vous avez le temps de parcourir des centaines d'applications. Pour gagner du temps et éviter la frustration, nous suggérons airSlate SignNow pour Android. Stockez et modifiez des documents, créez des rôles de signature, et même signez la demande de réservation de voyage.

Les 9 étapes simples pour optimiser votre flux de travail mobile :

  1. Ouvrez l'application et lancez-la.
  2. Connectez-vous avec votre compte Facebook ou Google ou inscrivez-vous si vous ne l'avez pas encore fait.
  3. Cliquez sur + pour ajouter un nouveau document en utilisant votre caméra, stockage interne ou cloud.
  4. Appuyez n'importe où sur votre PDF et insérez votre signature électronique.
  5. Cliquez sur OK pour confirmer et signer.
  6. Essayez plus de fonctionnalités d'édition ; ajoutez des images, signez la demande de réservation de voyage, créez un modèle réutilisable, etc.
  7. Cliquez sur Enregistrer pour appliquer les modifications une fois terminé.
  8. Téléchargez le PDF ou partagez-le par e-mail.
  9. Utilisez la fonction Inviter à signer si vous souhaitez définir et envoyer un ordre de signature aux destinataires.

Transformez la routine en une tâche facile et fluide avec l'application airSlate SignNow pour Android. Signez et envoyez des documents pour signature depuis n'importe quel endroit connecté à Internet. Créez des PDFs professionnels et signez la demande de réservation de voyage en quelques clics. Créez un processus de signature électronique impeccable avec seulement votre smartphone et augmentez votre productivité globale.

soyez prêt à en obtenir plus

Obtenez des signatures juridiquement contraignantes dès maintenant !

Ce que disent les utilisateurs actifs — sign travel booking request

Accédez aux avis sur airSlate SignNow, aux conseils de nos clients et à leurs témoignages. Écoutez les utilisateurs réels et ce qu'ils disent des fonctionnalités de génération et de signature de documents.

This service is really great! It has helped...
5
anonymous

This service is really great! It has helped us enormously by ensuring we are fully covered in our agreements. We are on a 100% for collecting on our jobs, from a previous 60-70%. I recommend this to everyone.

Lire la revue complète
I've been using airSlate SignNow for years (since it...
5
Susan S

I've been using airSlate SignNow for years (since it was CudaSign). I started using airSlate SignNow for real estate as it was easier for my clients to use. I now use it in my business for employement and onboarding docs.

Lire la revue complète
Everything has been great, really easy to incorporate...
5
Liam R

Everything has been great, really easy to incorporate into my business. And the clients who have used your software so far have said it is very easy to complete the necessary signatures.

Lire la revue complète

Recherches associées à sign travel booking request

air ticket booking request letter
travel agent reservation form
travel booking form
travel agency booking form template
travel reservation form in html
booking card for travel
travel registration form in html
travel booking format
sign travel booking request
video background

Sign travel booking request

hi in this video tutorial I'm going to show you how to create a travel booking wordpress website using travel is in the wordpress theme this is the demo of travel as in see what Kristin you can see here these are social media icons the logo phone number search bar this is the navigation menu this is the banner section with our search form and about a section with TripAdvisor code these is adventure activities section where you can list out different activities and this is a slider our best seller packages where you can list down different packages and this is also a slider why book with our section where you can list down different region why a traveler should book with your company future trip section where you can list down six packages stats counter section this is a discount section where you can list down three packages a call to action and latest articles followed by footer section this is the demo of homepage now let's take a look at demo of inner pages the first interface that we will take a look at is destination so this is the destination page where you can see there are different countries or different destination listed when you click on any of these destination for example let's click on Nepal you'll be taken to individual destination page so within the pub there are four different kind of trip activities so under cultural tools there are six packages under hiking there are three packages jungle safari there are six packages and so on so this is an example of destination pairs similarly let's take a look at activity speech it lists down all the activities that a company has to offer so here it activities are listed down when you click on one of these activities you'll be taken to inner page where you can see what are the packages under that activities for example under cultural tools there are six packages similarly there is trip types so you can see different kind of trip types offered by company for example budget travel child-friendly cultural dog-friendly or weekend trips volunteer trips nature walk homestay so these are different kind of trip activities and when you click on one of these activities you are taken to detail page where different trips that belong to tip type is listed and then let's take a look at a single trip is we take a look at every space country let's go here so this is the title of Everest base camp trek and how many how long is the trip you can see here 15 days this is a slider this is the form where you can make the booking we'll come back to this here some information about the truth different tabs here you can see overview tab then itenary where you can list um day-by-day itenary what does cost and fuel and what it doesn't include then FAQ which you can close and expand and inquiry form you can also see here is tree fact where you can list out different facts about the company or different facts about the tree for example what is the group size what is a maximum altitude destination arrival meals accommodation and so on tripadvisor code some menu if you want to add and this is the booking form where you can select how many version you want to book this trip for if you want to book this for to automatically the price I just get it just it so let's pick up a date here and this is the checkout page where you feel that in your booking information and complete the booking process so this is overall demo of travel agency WordPress theme and we are going to create our website exactly like this using travel agency WordPress theme you do not need to know any coding you can build this website without writing even a single line of code so let's get started the first thing that we need to do is download and install travel agency WordPress theme you can download travel is in seawater SC from rotten calm so let's go to Rotten calm then go to themes from here you can download travelers and see what pristine once the theme has been downloaded you need to install it for the purpose of this tutorial we are going to install the theme add tutorial dot VM com I have already downloaded the theme and it's on my desktop so let's go ahead and install it so click on add new this will only take a few seconds to install the theme now the theme has been installed let's go ahead and activate it you can see here that it recommends to install these two plugins Travel Agency companion and WP travel engine let's go ahead and begin the installation process now let's activate them now let's take a look at how the homepage looks okay so you can see the default WordPress theme that is provided by WordPress had changed and travel agency theme has been activated however this doesn't look like the demo here so in the next step we are going to set up the home page like the demo the second step is to set up a static front page or home page for that let's go to appearance customize combi settings static front page create a page here let's give you the name and let's create another page here and save the changes you can see here that the layer has changed and we have the D we have the website exactly like the demo however these are dummy content and you need to know how to change content of each of this section so in the next step we are going to learn how to change content of each of this section now I'm going to show you how to change content of the header section the header section includes social media icons logo search bar phone number and the navigation menu so let's go ahead and change them for that lets go to customizer logo and other settings to add a logo click on select local I have already the logo imported so I'll select from here in case if you haven't uploaded your logo you can upload emails file from here and then click on site files so now I'll go and select the logo from the media library skip cropping ok so you can see the logo had changed now let's change the site title also notice that when you make the changes you can see the demo live you can also add site icon and save the changes so logo had changed now let's go and change the social media icons if you want to disable it you just have to unselect this and save the changes and it will be gone for now let's select this there are already a couple of social media icons in case you want to change them you can just open them and then add or make the modification for example for Facebook I can add here product team HQ that's our Facebook page URL if you want to edit Twitter you can add Twitter or if you want to add any other social media link for example let's add Foursquare and then you can add the link here you can see the link has appeared you can also change the order of the social icon but just dragging and dropping them so this is how you can set up the social icon now let's save the changes now we are going to change the phone number you can click here or here to directly take you to the option panel for example if I click here it automatically open the option panel so you can change this let's say for here 1 2 3 you can also change this 1 you can see here it has also changed for now I will delete this perfect so the next step that we are going to do is see how to change the menu for that let's go back to dashboard we can do to dashboard or you can also click here to add a menu let's create a primary menu and we can add different pages you can create more pages and you can add over here for now I will just add two pages I'll also put a link in the description below for how to setup a menu in WordPress there are many many tutorials which you can take a look at so I'll save this change here then go to manage location and select the primary menu now let's go and take a look okay so you can see the menu has also changed we have a logo phone number and social media icon this is how you can change header information in Travelers and see what insane now we are going to take a look at how to change banner information the title the description search bar and the background image for that lets go to customizer again then go to front page settings banner section you can add a new image here to change the banner image for now let's select a random image see this is how you can change you can also change the title from here and the description and if in case you want to enable or disable the search from you can do it from here so changing the banner is extremely easy we are now going to take a look at how to change about information and how to add supervisor image or code for that let's go back to customize it again font is setting so for title you can go from click a borrow section or you can also click from here and then you can change the title similarly you can change the description from here you can change the bottom label and you can add a link this section can be changed from here if you have an image of your TripAdvisor excellency a bar or anything like that you can add the image or if you have the code you can go up to text and you can add the code here the changing the About section is also very easy now let's take a look at how to change activity sections you can click here to go to the activity section or you can come back to the panel and then go to adventure section and if you want to disable you can click uncheck this if you want to change the title it you can change it from here the description from here and the background image from here we already have a few travel adventure activities if you want to change them you can click then add a title description you can also add a link and then a thumbnail image if you want to remove the thumbnail image you can click over here if you want to add more adventure activities click on add adventure then provide a title description so let's let's go ahead and do that now and let's copy description then you can add a link add an image you can see the activities has been added over here you can also change the order of the activities for example if you want to display hiking on top then cycling skiing you can see the order has also changed hiking cycling skiing white very often so this is how you can change adventure activities now I'm going to show you how to create or change content of our best seller packages for this you can go to home base settings bestseller packages or you can click here you can change the title from here the description from here these these are dummy content you can disable by unchecking this you can see the dummy content has gone for now let's enable this now I'm going to show you how to create three packages like this and then we will replace the if the dummy content with with the original content for that let's go to dashboard then trip had new trip we are going to create a trip like this so let's go ahead and take a look at how this trip looks this is the title number of days slider some text information for tabs with different kind of information and inquiry form trip price with the booking form three facts TripAdvisor code and two menu for the trip that we are going to create let's copy some information from here this is the title let's add some description and for the slider let's go ahead and build the slider so we need to enable the gap gallery first it is enabled now let's add some images click on the images that you want to add example you can add this here you can click more you can also change the position of the images let's go and save this okay so we have the title we have the slider and we have some information now let's add more information for the pricing very is regular price and there is sales price which you can enable for regular price let's add the regular price from here that's $1,300 and the sales prices is $1,200 fourteen hundred and twelve hundred the tip duration is hit days and night can be seven nights let's update this and also update here okay so we have grease tool it is we have the pricing we have the slider we have the information now we are going to add three facts trip facts can be added from trip info from here you can see there are some dropdowns there are only three dropdowns you can add more of them by going to settings tree fact so let's add some tree facts from the demo here let's add destination here choose an icon and it would be takes type let's add more arrival on next time you can add more meals takes time let's add one more accommodation and Save Changes now let's go back to the trip and edit it so you can see more option in the drop-down let's select destination and add fab tripping for destination could be Greece let's add arrival on crash mangle meals we can copy meal information from here similarly let's add accommodation now let's update this and take a look at the demo here okay so you can see we have three facts destination arrival meals accommodation now let's go ahead and add information in different tabs the first tab is overview tab which you can access from overview simply copy the information or you can write your own and paste this for the itinerary you can add different itenary so let's add a 1980 here for day one this is the title and this is the description day two let's add a few more so we have added four days of itinerary for the cost let's go to the cost so there is the title this is a title for cost include and what does cost or the price include can be written here so let's go ahead and do that similarly this is the title for cost excludes okay so let's go ahead and save the changes and take a look here so we have three tabs overview height nearly and cost now let's go ahead and set up the FAQ for that let's go back to the editor FAQ so you can write a title for you thank you if you want to for example frequently asked questions then you can write your question here and answer here so let's add some question and answer how long is this trip we can copy information from here another question how difficult till this trip for now I'll copy the same answer but of course you can change it let's add another one now let's go ahead and save the changes and refresh the fish okay so we have fa Q's as well and you can see here we have a VQ if you want to expand door closes you can do it from here so we have the four tabs however there is something missing from this tab let's take a look at that so you can see there is icon for each of this tab if you want to add an icon you can go to settings trip facts and you can add an icon for example let's say book so I clearly here we add calendar cost can be something chick and ltq can be questions and save the changes if you want to add more cabs you can add from here for now we have added the icons so let's go ahead and refresh the page so we have now icons as well so let's compare our page with the demo page so we'll have title slider description for tabs and inquiry form okay so this is the demo we have title slider information for tabs and inquiry form we also have on the sidebar booking information tree facts we also have here booking information and tree facts now there you can see here is recent post recent comments archived however on the demo we have something else so let's go ahead and learn how to achieve how we can change that so this we need to go to appearance and widgets any widget that you add to this widget sidebar is displayed here on every single trip sidebar so let's go ahead and delete this and let's add Trip Advisor image for this let's search for image wizard so have image visit let's add to the sidebar you can give you the title a lot give a title because I don't think it is required so I'll just add an email then select the image and save it let's go ahead and check how this looks okay so we have TripAdvisor image if you want to add TripAdvisor code for that you can go to who is it again and add text visit and then paste the TripAdvisor code here and that also on the sidebar for now we'll delete this you can see there are there is some menu so we are going to add an menu for that let's go back to the widget area and search for custom menu I was going to search here navigation menu initially we had created a menu this so I'm going to add the same menu here and in the video in the video description below I'll include a link how to create menu so that you can create different kind of menu and display on the sidebar for now let's go and add the menu that we have already created give it a title and select a menu save the changes let's go and refresh the page so we have menu as well so this is how you can create a trip page we need to add a few more information to the trip in order to display on the home page for that let's go back to our dashboard and edit our trip first we need to add a feature image and then we need to add activity so let's say hiking had this and update now let's go back to customizer frontpage hitting and bestseller packages first we need to disable this so disable the demo content had hiking category or any other category that you have selected add some tools since we have created only one trip you can see the same trip is being displayed twice so what I'm going to do next is I'm going to create few more trips and I'm going to come back to this section and we are going to change this so for now I will publish this we have created six strips which you can see here two of them have same activity so now let's go back to customizer again conversating bestseller packages let's select different two packages and you can change the label here and you can add a link and publish so you can see here now this slider and we have four packages so this is how you can change content in our bestseller packages section now we are going to take a look at how to change content in Y book with our section for that let's go back to customizer again and Y book with us you can change the title from here and the description from here and you can cheat you can change the background image from here you can either remove or change it you can update these points from here you can select an icon then give it a title and description you can also add a link if you want to if you want to add more points you can click on add new points and then you can search for an icon then add a title for example Simon publish so you can see we have added the seventh point so this is how you can change content in this section for now I will delete this and we'll move to the next section that is how to edit our feature tree for this we need to go back to the customizer again on future section you can change the title this title from here or you can also click directly from here to take you from where it can be changed again you can disable demo content so let's go ahead and do that so the arrow content has been disabled and you need to choose a category or trip in order for the trip to display for example if I choose hiking so two trips that belongs to hiking category will be display let's publish this and let's go back to our trip and add category to all of them now cancel them out of the category let's refresh the page so you can see now it has six trips so this is how you can change content in our future trip section now let's go ahead and take a look how we can change content in stacks counter for that we need to go back to customizer again on this sitting status counter you can change the title from here and the description from here similarly you can remove the background or you can change the image you get if you want to edit a stat counter you can click here and then select an icon give it a title and then add a number if you want to add more than four if you have to click on add new counter for example let's select an icon it's a group number of trips that's a 99 so you can see we have a status counter here as well so you can add as many stars counter as you want to for now I'll also delete this and save the changes now we'll take a look at how to change content in deals and discount section for this you can click here it will automatically take you to the tales and discount section or you can go back to the customizer and then go to till side section you can change the title from here and the description from here we have demo content so let's disable the demo content and add some tricks so you can see that we have added different trips if you want to change the level of this you can change it from here if you want to change the level of this you can change it from here and you can add a link save and publish now we'll take a look at how to change content of this call to action section for this again you can click directly here or you can go back to customizer and call to action section you can change the title from here a description from here and this call to action button label from here and then add a link and add a background image similarly you can change latest article title from here description and the call to action bottle label from here you might have noticed that there is only one article here it is because only one blog post has been published if you create more blog post which are going to do right now title let's cover this some text information and a feature image let's go to the home page so we have two blog post here if you add more it will also have three this is how we can change content in latest article section now we are going to take a look at how to add information like this in the footer for this we need to go back to dashboard appearance and wizard this is footer area one so we are going to add a wizard in footer area one so let's add text and then copy this information and past it and of course you can write this information yourself you can also give a title like this contact information save it let's refresh the page so you can see now we have the contact information similarly let's add more information like this for this we go back to widget again let's search for meaning the navigation menu will add this in footer to footer three and Sutra for this is between one you can give any title here since we have only created only one menu and just selecting the same menu for the demo purpose and refresh the page and we have mainly a DMA as well so with this we have successfully created the homepage exactly like the demo next I am going to show you how to create other pages for example destination page entre page activities page single activity page similarly trip types and single trip types now I'm going to show you how to create destination pairs like this so we have a title of future image description and different destination hundred for this we need to first create a fish with destination base template for that let's go back to dashboard pages add new destination had a feature image and add some description select destination type and hop date so we have Korea destination fish however it doesn't have other location or - tenesha under it for that we need to create this mission again from here so let's add a few destination for example let's add a t-bird some description 40 bit an image hard destination similarly this and more about India and let's go back again this ad Japan now let's go back and refresh the page you will still see there is no destination display and the reason is there is no trip assigned to the destination so in order for the destination to so you need to assign them certain truths for example let's go to trips and let's do a quick edit and let's assign this trip to for destination just for example and refresh you'll see the four destination in case if you unselect in the empty bed and DIF this page there will only see two destination so it is very important that after you create certain destinations you assign sudden trips to the destination so let's go ahead and do this just for the demo purpose what I'm also going to do is I'm going to select all of these and add all the trips to all the destinations okay now let's click on Nepal so you can see under Nepal this is the description and there is a hiking category and there are certain trips under it now you might have remember from a few minutes ago we had created hiking category and we had assigned some trips if you create activities and assign them to some trips they are displayed on their country page so let's go ahead and create more activities so let's put cultural truce description had an image let's give another one rafting had some description add an image now let's go back to trip again and assign some of this trip to the destiny to the activities that we just created so this gives interrupting and this too we do put them in cultural chores now let's go ahead and let's press the page so you can see under cultural tools we have three trips under hiking we have six trips and under rafting we have three now this is just for demo what we have done is we have assigned different activities to the same trip that might not be the case in your scenario but this is just for the demo purpose so this is how you can create a destination page and country page now I'm going to show you how to create activity speech this is an example of activity speech title or feature image description and different activities like this for this we need to create a page with activities page template for that let's go back to dashboard pages add new activities let's add some description feature image and then select activist template publish now remember that we created some activities here so we have like cultural tools hiking rafting we can add few more activities for example let's add jungle safari some description let's copy from here and publish now let's go back to our page the activity page that we just created is here so let's click it here and open so you can see here we have different activities we have cultural tools who have hacking but it doesn't have an image and I'll explain you why it is because we haven't added any image in hiking activities and there's rafting and we just created another activities that is under Safari and that doesn't so that is because it doesn't have any trip so we are going to do two things we are going to add an image to hacking category and then we are going to add some trips to jungle safari so let's go ahead and do that so you can add some description if you want to and then knobbed it let's refresh the page so you can see we have feature image now for this let's go ahead and go to all our trips and assign them to the jungle safari as well now let's refresh so you can see now we have jungle safari as well if you click on any of these activities you'll be taken to inner page where you can see all the trips that belong to the activity for example all these six trips belong to hiking activities similarly if you go back and click click on jungle safari you can see that these three trips belong to jungle safari so this is how you can create activities page now I'm going to show you how to create ship type page this is an example of trip type page this is the title a switcher image some description and different types of trip type or in other word different kind of categories for trip type in order to create this page we need to create a page with trip type template for that let's go to dashboard page add new add some description select an image and select trip types template so we have a title we have the feature image and we'll have description in order to display these trip types we need to create them for that let's go to tree-shaped right and let's add a few of them for example both the travel you can add some description they said another child from you ultimate cultural and dog-friendly now let's refresh the page you can see the trip types are not displayed it is because no trip has been added to the trip type so let's fix that by going to all trips and assign a few of them into different trip type let's refresh the page now you can see we have four trip types when you click on any of them you are taken to detail page and you can see what are the trips that belong to the trip type for example all these six trips belong to for the travel if you go back and click on child friendly you can see only two trips belong to child friendly trip time so this is how you can create trip type page with this we have come to the end of this tutorial if you have any question you can refer to the documentation of travel agency what proceed you can go to violation comm slash documentation slash travel agency documentation or you can also write to us at support ticket so you can fill this form and our support team will get back to you as soon as possible thank you and have a nice day

Show more

Questions fréquemment posées

Découvrez tout ce que vous devez savoir pour utiliser les signatures électroniques airSlate SignNow comme un pro.

Voir plus de guides airSlate SignNow

Comment puis-je permettre à mes clients de signer électroniquement des contrats ?

Pour conclure des affaires plus rapidement, téléchargez votre contrat dans votre compte airSlate SignNow. Ajoutez des champs remplissables pour les signatures électroniques, le texte et les initiales, puis cliquez sur Inviter à signer. Si vous avez plusieurs destinataires, assignez à chacun un rôle (un champ) et définissez un ordre de signature. Une fois que vous l'envoyez, vos clients recevront des emails avec des invitations à signer électroniquement l'accord. Ils n'ont pas besoin de comptes airSlate SignNow pour le faire. Selon la loi ESIGN, airSlate SignNow est conforme et produit des signatures électroniques juridiquement contraignantes pour les auteurs et destinataires de documents.

Comment puis-je faire une signature électronique sans scanner ?

Éliminez les étapes inutiles lors de la signature d'un document. Appliquez votre signature en ligne à un PDF sans avoir à imprimer ou scanner des documents. Commencez dès maintenant et inscrivez un compte airSlate SignNow. Téléchargez les documents que vous souhaitez signer et ouvrez-les dans l'éditeur intégré. Cliquez sur Ma Signature et signez sans souci. Choisissez comment vous souhaitez signer : taper, dessiner ou télécharger votre signature. airSlate SignNow est conforme à toutes les réglementations étatiques et fédérales relatives à la signature électronique, ce qui signifie que chaque eSignature que vous appliquez est juridiquement contraignante et admissible en cour.

Comment puis-je signer virtuellement un fichier PDF ?

Signer des documents en ligne est très pratique et efficace. Essayez airSlate SignNow, une solution d'eSignature professionnelle reconnue. Vous devez créer un compte pour l'utiliser si vous prévoyez d'envoyer des demandes de signature. Connectez-vous et téléchargez votre PDF. Cependant, si vous signez un document qui vous a été envoyé par quelqu'un avec airSlate SignNow, vous n'avez pas besoin d'un compte. Depuis un document que vous avez déjà ouvert dans l'éditeur, choisissez Ma Signature dans le menu de gauche et déposez-la à l'endroit où vous souhaitez signer. Dans la fenêtre contextuelle, cliquez sur Ajouter une nouvelle signature et choisissez la méthode pour signer électroniquement le document. Vous pouvez télécharger une image de votre signature manuscrite, la dessiner ou simplement taper votre nom.
être prêt à en obtenir plus

Obtenez dès maintenant des signatures juridiquement contraignantes !