Facture Proforma Signée Facilitée
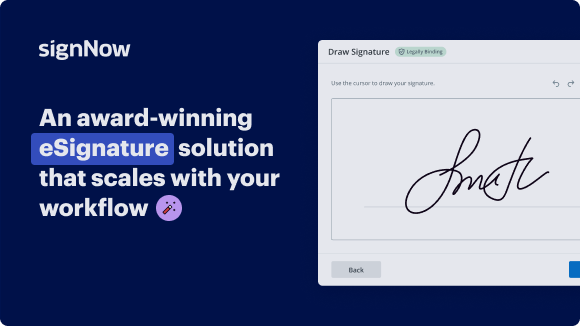
Solution eSignature primée


Obtenez les fonctionnalités eSignature robustes dont vous avez besoin avec la solution en laquelle vous avez confiance
Choisissez la plateforme professionnelle conçue pour les pros
Configurez l'API eSignature facilement
Collaborez mieux ensemble
Facture proforma signée, en quelques minutes
Réduisez le délai de clôture
Gardez les données sensibles en sécurité
Découvrez les signatures électroniques airSlate SignNow en action


Solutions airSlate SignNow pour une meilleure efficacité
Les avis de nos utilisateurs parlent d'eux-mêmes


Pourquoi choisir airSlate SignNow
-
Essai gratuit de 7 jours. Choisissez le forfait dont vous avez besoin et essayez-le sans risque.
-
Tarification honnête pour des forfaits complets. airSlate SignNow propose des abonnements sans frais supplémentaires ni frais cachés lors du renouvellement.
-
Sécurité de niveau entreprise. airSlate SignNow vous aide à respecter les normes de sécurité mondiales.

Votre guide étape par étape — signed proforma invoice
En adoptant la eSignature d'airSlate SignNow, toute entreprise peut accélérer les flux de signature et signer en ligne en temps réel, offrant une meilleure expérience aux clients et aux employés. Utilisez la facture proforma signée en quelques étapes simples. Nos applications mobiles portables rendent le travail en déplacement possible, même hors ligne! eSign documents from anywhere in the world and close deals faster.
Guide étape par étape pour utiliser la facture proforma signée :
- Connectez-vous à votre profil airSlate SignNow.
- Trouvez le formulaire dont vous avez besoin dans vos dossiers ou téléchargez-en un nouveau.
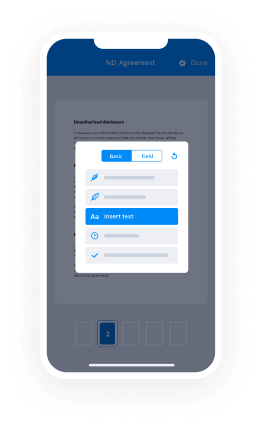
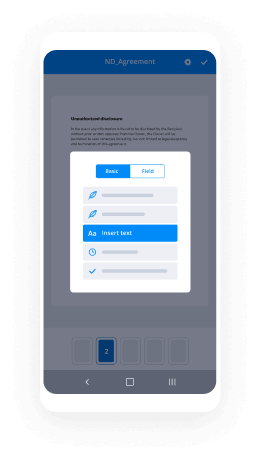
- Ouvrez le document et apportez des modifications à l'aide du menu Outils.
- Faites glisser & déposez des zones à remplir, tapez du texte et signez-le.
- Ajoutez plusieurs signataires en utilisant leurs e-mails et définissez la séquence de signature.
- Spécifiez quels utilisateurs recevront une version complétée.
- Utilisez Options avancées pour limiter l'accès au modèle et définir une date d'expiration.
- Appuyez sur Enregistrer et Fermer lorsque vous avez terminé.
De plus, d'autres fonctionnalités innovantes sont disponibles pour la facture proforma signée. Ajoutez des utilisateurs à votre espace de travail numérique commun, visualisez les équipes et surveillez la collaboration. Des millions d'utilisateurs aux États-Unis et en Europe conviennent qu'une solution qui rassemble tout en un seul endroit numérique unifié est ce dont les entreprises ont besoin pour que les flux de travail fonctionnent facilement. L'API REST airSlate SignNow vous permet d'intégrer des signatures électroniques dans votre application, site web, CRM ou cloud. Essayez airSlate SignNow et profitez de flux de travail eSignature plus rapides, plus simples et globalement plus efficaces!
Comment ça marche
Fonctionnalités airSlate SignNow appréciées par les utilisateurs


Découvrez des résultats exceptionnels Facture Proforma signée facilitée

Comment remplir et signer un document en ligne
Essayez la méthode la plus rapide pour la facture proforma signée. Évitez les flux de travail papier et gérez les documents directement depuis airSlate SignNow. Remplissez et partagez vos formulaires depuis le bureau ou travaillez sans effort en déplacement. Aucune installation ou logiciel supplémentaire requis. Toutes les fonctionnalités sont disponibles en ligne, il suffit de se rendre sur signnow.com et de créer votre propre flux eSignature.
Guide rapide pour signer une facture proforma en quelques minutes
- Créez un compte airSlate SignNow (si vous ne vous êtes pas encore inscrit) ou connectez-vous avec votre Google ou Facebook.
- Cliquez sur Importer et sélectionnez l'un de vos documents.
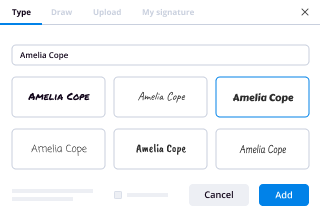
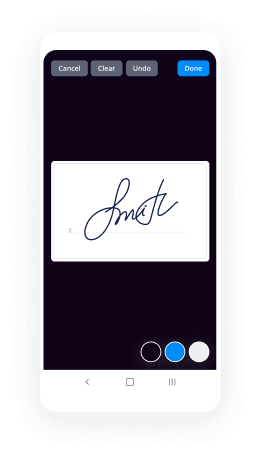
- Utilisez l'outil Ma Signature pour créer votre signature unique.
- Transformez le document en un PDF dynamique avec des champs à remplir.
- Remplissez votre nouveau formulaire et cliquez sur Terminé.
Une fois terminé, envoyez une invitation pour signer à plusieurs destinataires. Obtenez un contrat exécutoire en quelques minutes avec n'importe quel appareil. Explorez plus de fonctionnalités pour créer des PDF professionnels ; ajoutez des champs à remplir pour la facture proforma signée et collaborez en équipe. La solution eSignature offre un processus sécurisé et fonctionne conformément à la certification SOC 2 Type II. Assurez-vous que vos données sont protégées et que personne ne peut les voler.
Comment eSigner un fichier PDF dans Google Chrome
Vous cherchez une solution pour signer la facture proforma directement depuis Chrome ? L'extension airSlate SignNow pour Google Chrome est là pour vous aider. Trouvez un document et ouvrez-le facilement dans l'éditeur directement depuis votre navigateur. Ajoutez des champs remplissables pour le texte et la signature. Signez le PDF et partagez-le en toute sécurité conformément au RGPD, à la certification SOC 2 Type II, et plus encore.
En utilisant ce guide rapide ci-dessous, étendez votre flux eSignature dans Google et la facture proforma signée :
- Accédez au Chrome Web Store et recherchez l'extension airSlate SignNow.
- Cliquez sur Ajouter à Chrome.
- Connectez-vous à votre compte ou inscrivez-vous en créant un nouveau.
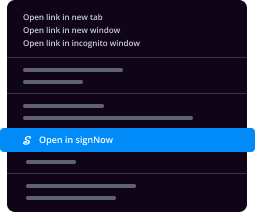
- Importez un document et cliquez sur Ouvrir dans airSlate SignNow.
- Modifiez le document.
- Signez le PDF en utilisant l'outil Ma Signature.
- Cliquez sur Terminé pour enregistrer vos modifications.
- Invitez d'autres participants à signer en cliquant sur Inviter à Signer et en sélectionnant leurs e-mails/noms.
Créez une signature intégrée à votre flux de travail pour la facture proforma signée et obtenez des PDFs signés électroniquement en quelques minutes. Dites adieu aux piles de papiers sur votre bureau et commencez à économiser de l'argent et du temps pour des activités plus importantes. Choisir l'extension Google airSlate SignNow est une option pratique avec de nombreux avantages.
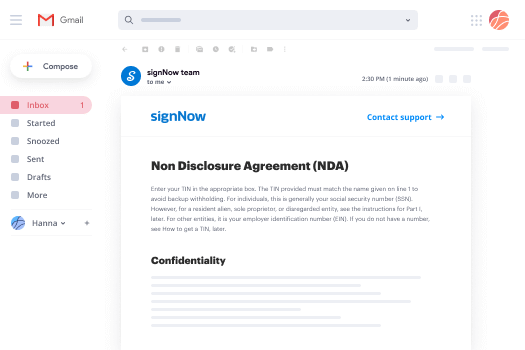
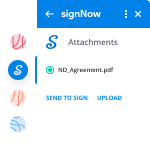

Comment signer une pièce jointe dans Gmail
Si vous êtes comme la plupart, vous avez l'habitude de télécharger les pièces jointes que vous recevez, de les imprimer puis de les signer, n'est-ce pas ? Bonne nouvelle : signer des documents dans votre boîte mail devient beaucoup plus facile. L'add-on airSlate SignNow pour Gmail vous permet de signer la facture proforma sans quitter votre boîte de réception. Faites tout ce dont vous avez besoin ; ajoutez des champs à remplir et envoyez des demandes de signature en quelques clics.
Comment signer une facture proforma dans Gmail :
- Recherchez airSlate SignNow pour Gmail dans le G Suite Marketplace et cliquez sur Installer.
- Connectez-vous à votre compte airSlate SignNow ou créez-en un nouveau.
- Ouvrez votre email avec le PDF que vous devez signer.
- Cliquez sur Importer pour enregistrer le document dans votre compte airSlate SignNow.
- Cliquez sur Ouvrir le document pour ouvrir l'éditeur.
- Signez le PDF en utilisant Ma Signature.
- Envoyez une demande de signature aux autres participants avec le bouton Envoyer pour Signer.
- Entrez leur email et appuyez sur OK.
En conséquence, les autres participants recevront des notifications leur demandant de signer le document. Plus besoin de télécharger le PDF encore et encore, il suffit de signer la facture proforma en quelques clics. Cet add-on est adapté à ceux qui aiment se concentrer sur des objectifs plus importants plutôt que de perdre du temps inutilement. Améliorez votre routine quotidienne avec le service eSignature primé.

Comment signer un modèle PDF en déplacement sans application
Pour de nombreux produits, conclure des affaires en déplacement signifie installer une application sur votre téléphone. Nous sommes heureux de dire qu'avec airSlate SignNow, la signature en déplacement est plus rapide et plus facile en éliminant le besoin d'une application mobile. Pour eSigner, ouvrez votre navigateur (n'importe quel navigateur mobile) et accédez directement à airSlate SignNow et à tous ses puissants outils eSignature. Modifiez des documents, signez la facture proforma et plus encore. Aucune installation ou logiciel supplémentaire requis. Concluez votre affaire de n'importe où.
Consultez nos instructions étape par étape pour apprendre à signer la facture proforma.
- Ouvrez votre navigateur et allez sur signnow.com.
- Connectez-vous ou inscrivez-vous avec un nouveau compte.
- Importez ou ouvrez le document que vous souhaitez signer.
- Ajoutez des champs à remplir pour le texte, la signature et la date.
- Tracez, tapez ou téléchargez votre signature.
- Cliquez sur Enregistrer et Fermer.
- Cliquez sur Inviter à Signer et entrez l'email du destinataire si vous souhaitez que d'autres signent le PDF.
Travailler sur mobile n'est pas différent de sur un ordinateur de bureau : créez un modèle réutilisable, signez la facture proforma et gérez le flux comme d'habitude. En quelques clics, obtenez un contrat exécutoire que vous pouvez télécharger sur votre appareil et envoyer à d'autres. Cependant, si vous souhaitez vraiment un logiciel, téléchargez l'application mobile airSlate SignNow. Elle est confortable, rapide et possède un design incroyable. Profitez de flux de travail eSignature sans couture depuis le bureau, dans un taxi ou dans un avion.

Comment signer un PDF avec un iPad
iOS est un système d'exploitation très populaire doté d'outils natifs. Il vous permet de signer et d'éditer des PDFs avec Preview sans logiciel supplémentaire. Cependant, aussi géniale que soit la solution d'Apple, elle ne propose pas d'automatisation. Améliorez les capacités de votre iPhone en utilisant l'application airSlate SignNow. Utilisez votre iPhone ou iPad pour signer la facture proforma et plus encore. Introduisez l'automatisation eSignature dans votre flux de travail mobile.
Signer sur un iPhone n'a jamais été aussi facile :
- Recherchez l'application airSlate SignNow dans l'App Store et installez-la.
- Créez un nouveau compte ou connectez-vous avec votre Facebook ou Google.
- Cliquez sur Plus et importez le fichier PDF que vous souhaitez signer.
- Tapez sur le document où vous souhaitez insérer votre signature.
- Explorez d'autres fonctionnalités : ajoutez des champs à remplir ou signez la facture proforma.
- Utilisez le bouton Enregistrer pour appliquer les modifications.
- Partagez vos documents par email ou via un lien de signature.
Créez des PDFs professionnels directement depuis votre application airSlate SignNow. Optimisez votre temps et travaillez de n'importe où ; à la maison, au bureau, dans un bus ou un avion, et même à la plage. Gérez tout le flux de documents facilement : créez des modèles réutilisables, signez la facture proforma et travaillez sur des documents avec des partenaires. Transformez votre appareil en une entreprise très efficace pour conclure des offres.
Comment eSigner un PDF sur Android
Pour les utilisateurs Android, pour gérer des documents depuis leur téléphone, ils doivent installer un logiciel supplémentaire. Le Play Market est vaste et regorge d'options, donc trouver une bonne application n'est pas trop difficile si vous avez le temps de parcourir des centaines d'applications. Pour gagner du temps et éviter la frustration, nous suggérons airSlate SignNow pour Android. Stockez et modifiez des documents, créez des rôles de signature, et même signez la facture proforma.
Les 9 étapes simples pour optimiser votre flux de travail mobile :
- Ouvrez l'application.
- Connectez-vous avec vos comptes Facebook ou Google ou inscrivez-vous si vous ne l'avez pas encore fait.
- Cliquez sur + pour ajouter un nouveau document en utilisant votre caméra, stockage interne ou cloud.
- Tapez n'importe où sur votre PDF pour insérer votre signature électronique.
- Cliquez sur OK pour confirmer et signer.
- Essayez plus de fonctionnalités d'édition ; ajoutez des images, signez la facture proforma, créez un modèle réutilisable, etc.
- Cliquez sur Enregistrer pour appliquer les modifications une fois terminé.
- Téléchargez le PDF ou partagez-le par email.
- Utilisez la fonction Inviter à signer si vous souhaitez définir et envoyer un ordre de signature aux destinataires.
Transformez la routine monotone en une procédure simple et fluide avec l'application airSlate SignNow pour Android. Signez et envoyez des documents pour signature depuis n'importe quel endroit connecté à Internet. Créez des PDFs professionnels et signez la facture proforma en quelques clics. Assemblez un flux de signature électronique parfait en utilisant uniquement votre téléphone mobile et améliorez votre efficacité globale.
Obtenez des signatures juridiquement contraignantes dès maintenant !
FAQ
-
Une facture proforma doit-elle être signée?
Valeur de la facture proforma La facture proforma est utilisée pour créer une vente, et non pour générer un paiement pour une vente (la facture commerciale est utilisée à des fins de paiement). ... Une fois que la facture proforma finale est acceptée par l'acheteur, elle doit être signée par l'acheteur/importateur autorisé et renvoyée à l'exportateur. -
Une facture proforma est-elle juridiquement contraignante?
Une facture proforma est une cotation juridiquement contraignante émise dans le même format qu'une facture originale. C'est un document juridique que l'acheteur peut utiliser pour : Décrire complètement les articles cotés, leurs prix et toutes les conditions de vente. -
Une facture proforma est-elle juridiquement contraignante au Royaume-Uni?
Une facture pro forma, souvent orthographiée proforma, est un type de facture qui indique la valeur des biens ou services que vous n'avez pas encore livrés. ... Essentiellement une étape au-dessus d'un devis, la pro forma est presque exactement la même qu'une facture standard mais n'est pas juridiquement contraignante. -
Quand une facture proforma doit-elle être émise?
Une facture proforma est généralement envoyée lorsqu'un client s'est engagé à un achat mais ne peut pas recevoir une facture officielle car les détails finaux n'ont pas été confirmés. D'autre part, un devis est envoyé à un client qui a fait une demande de renseignements mais souhaite plus d'informations avant de s'engager à acheter quoi que ce soit. -
Quelle est la différence entre une facture et une facture proforma?
La facture proforma est utilisée pour la création de ventes, tandis que la facture est utilisée pour confirmer la vente. La facture proforma est fournie par le vendeur, à la demande de l'acheteur, avant la passation de la commande. Contrairement à la facture, qui est émise par le vendeur à l'acheteur pour demander le paiement des biens livrés. -
Quelle est la différence entre une facture et une facture commerciale?
La principale différence entre une facture commerciale et une facture d'expédition est que le prix doit être indiqué sur la facture commerciale. La facture doit également indiquer tous les frais de fret, frais d'emballage spéciaux, coûts d'assurance ou autres éléments qui doivent être payés par le client. -
À quoi sert une facture proforma pour la douane?
Une facture pro forma est une facture préliminaire envoyée aux acheteurs avant l'expédition ou la livraison des marchandises. ... Pro forma, du latin « en tant que forme » ou « pour la forme », les factures entrent souvent en jeu dans les transactions internationales, notamment à des fins douanières à l'importation. -
Les Incoterms sont-ils obligatoires sur une facture commerciale?
Leur utilisation n'est pas légalement obligatoire, mais convenir d'un Incoterm avec votre acheteur étranger peut aider à prévenir les malentendus. Pour une discussion plus détaillée sur les conditions de paiement et de livraison, voir l'article, Termes de commerce : Code commercial uniforme et Incoterms 2010.


