If there are similar fields for name, can I autofill the other name fields?
Signers in airSlate SignNow can autofill three types of fields:
Date fields are designed for the current date to appear automatically in any document by default when you click on them. The same is true for signatures, but only if you have signed documents in airSlate SignNow before, and your signature is already saved. If it’s the first time you are signing a document in airSlate SignNow, you’ll have to create your signature from scratch. To autofill text fields, the sender has to create labeled fields prior to sending the document out.
How to create labeled fields for autofilling
Labels are text field parameters that help to not only make document completion easier for signers but also saves their time when working with repetitive information while avoiding errors. Follow the steps below to create your labeled fields.
- Open the document or template you need from your account or upload one by clicking the Upload Documents button in the header of your account.
- Add fillable fields to the document by dragging and dropping them on the page.
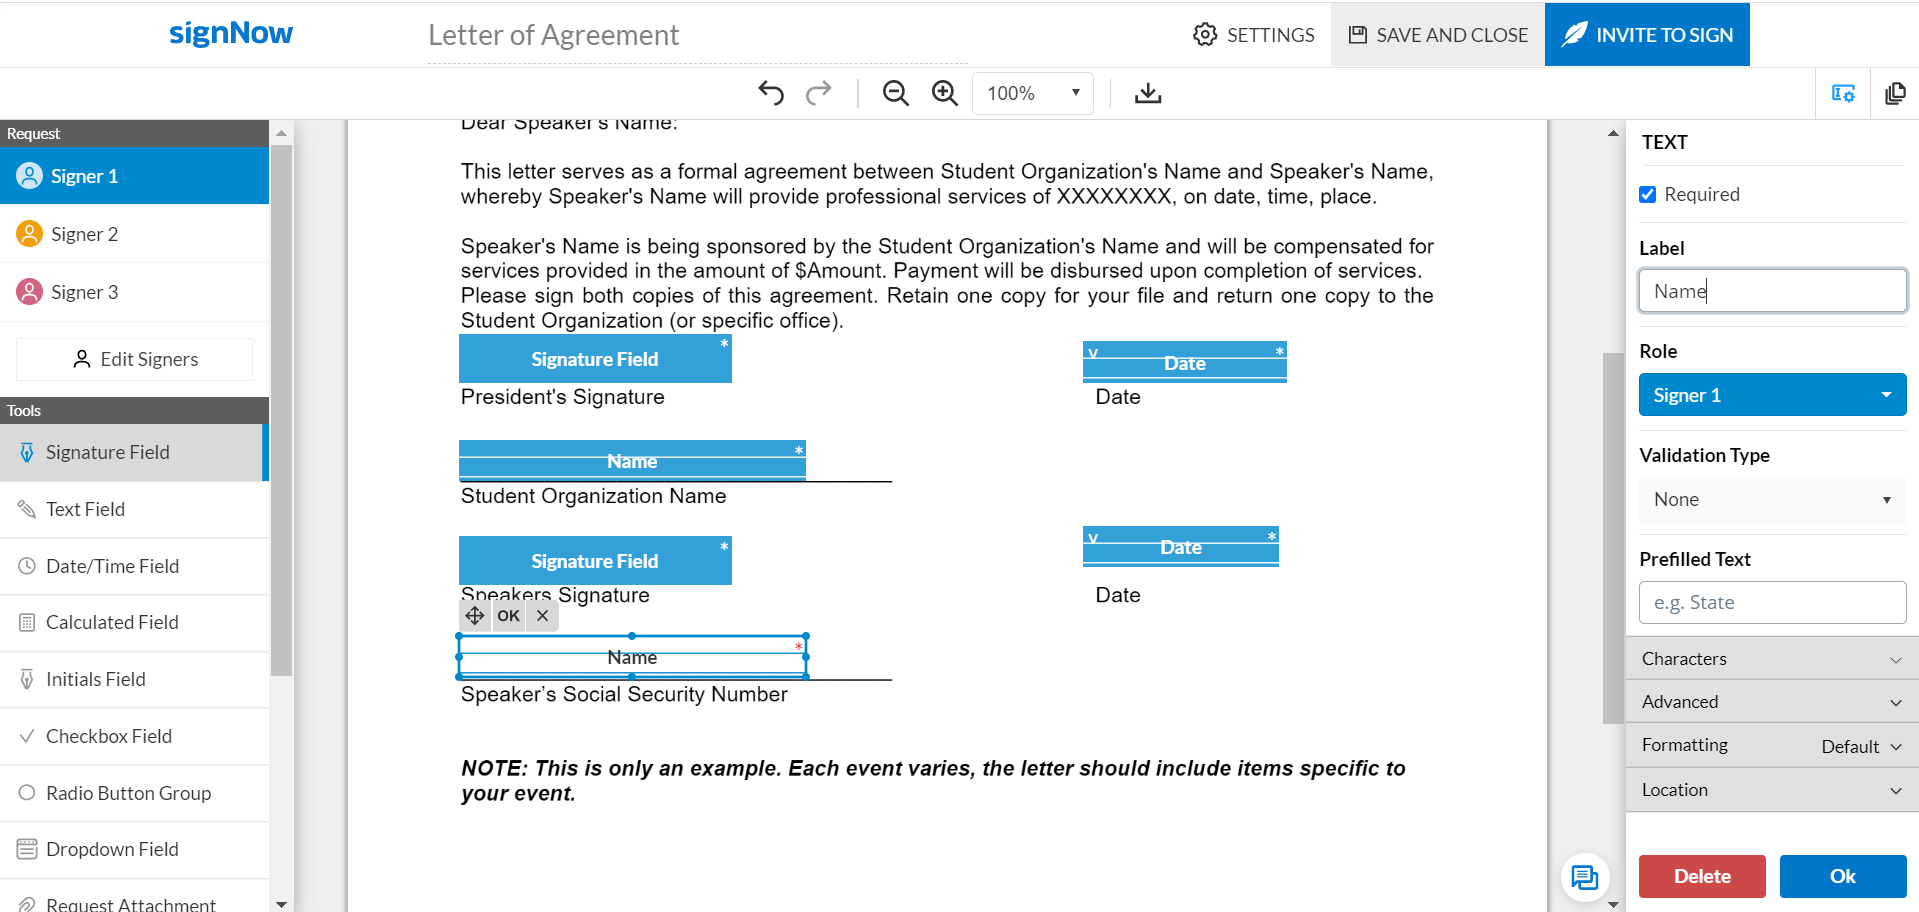
- Label similar fields. Click on the text field and find the Label section. Type the label for the field, for example, Name, Position, Title, and so on. Keep in mind that the labels have to be identical to each other.
- You can create several groups of labeled fields containing different information.
- Once you’ve finished editing, send the document out.
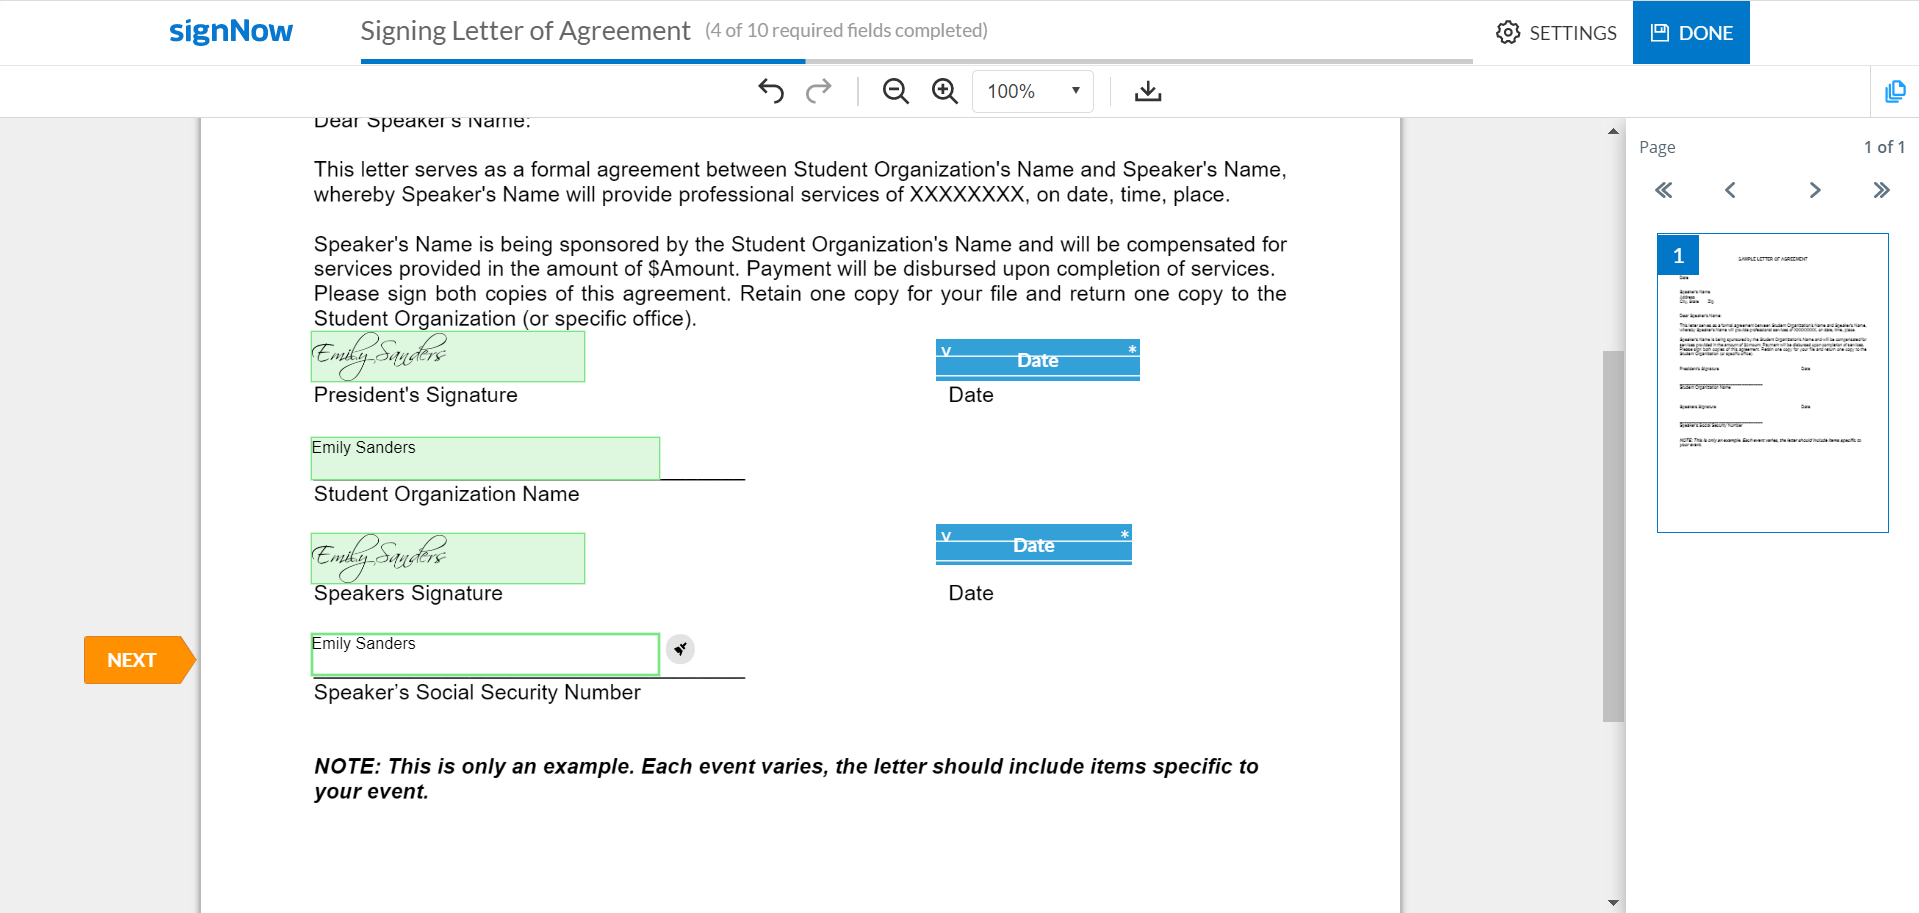
When a signer opens the document containing multiple similar fields, they’ll be prompted to complete the first one. Then, the fields will be filled automatically as they click on them.
How to autofill documents on mobile
The autofill option is available on mobile devices as well. Senders can prepare a document while on the go, and signers can complete them in the same way. Learn how to add fields with labels on your smartphone or tablet.
- Open the airSlate SignNow application on your mobile device and find the document you need.
- To start adding fillable fields, tap on the document page and select which fields you’d like to add from the Field tab.
- As you select the Text field, it’s settings will appear on your screen.
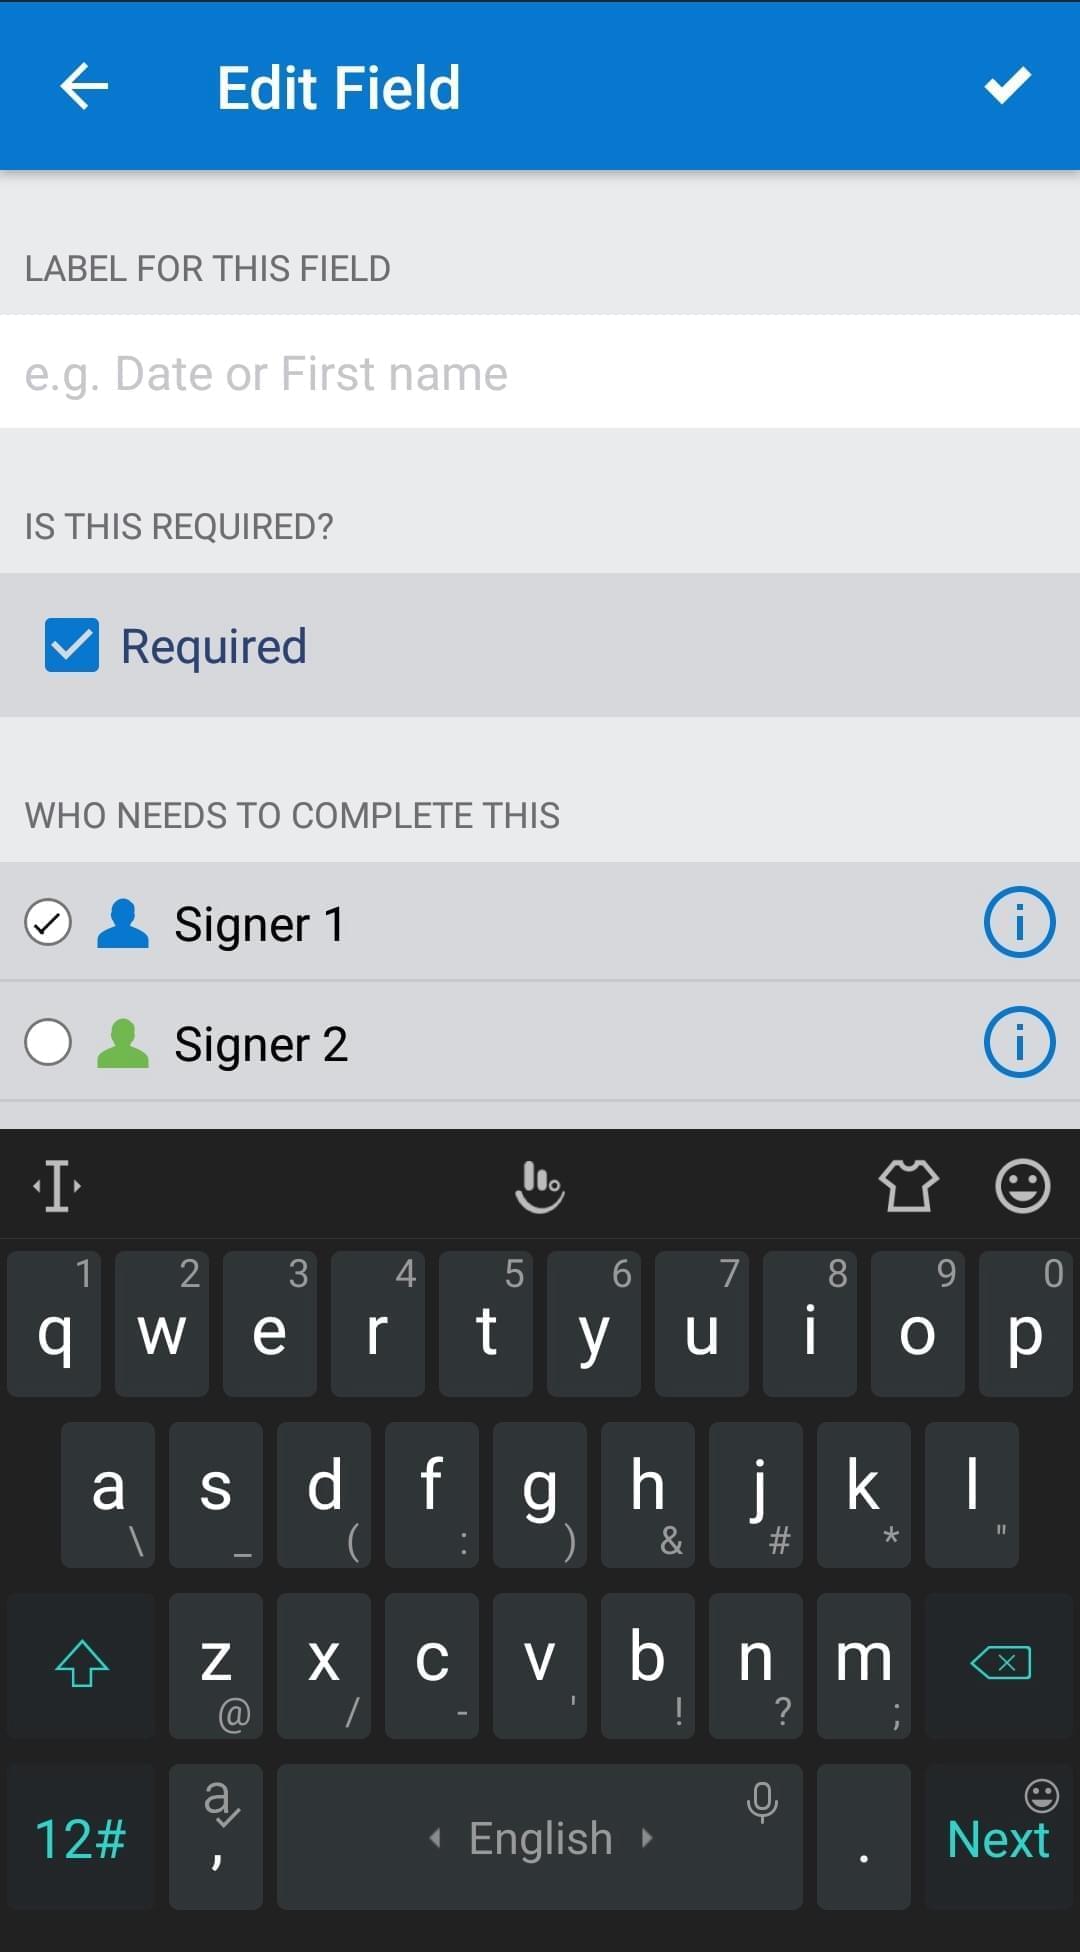
- Type the label in the Label for This Field section. Customize other settings if needed and tap the tick in the upper right corner.
- Add labels for each field that will require similar data.
- When the document is ready, send out the signing invite.
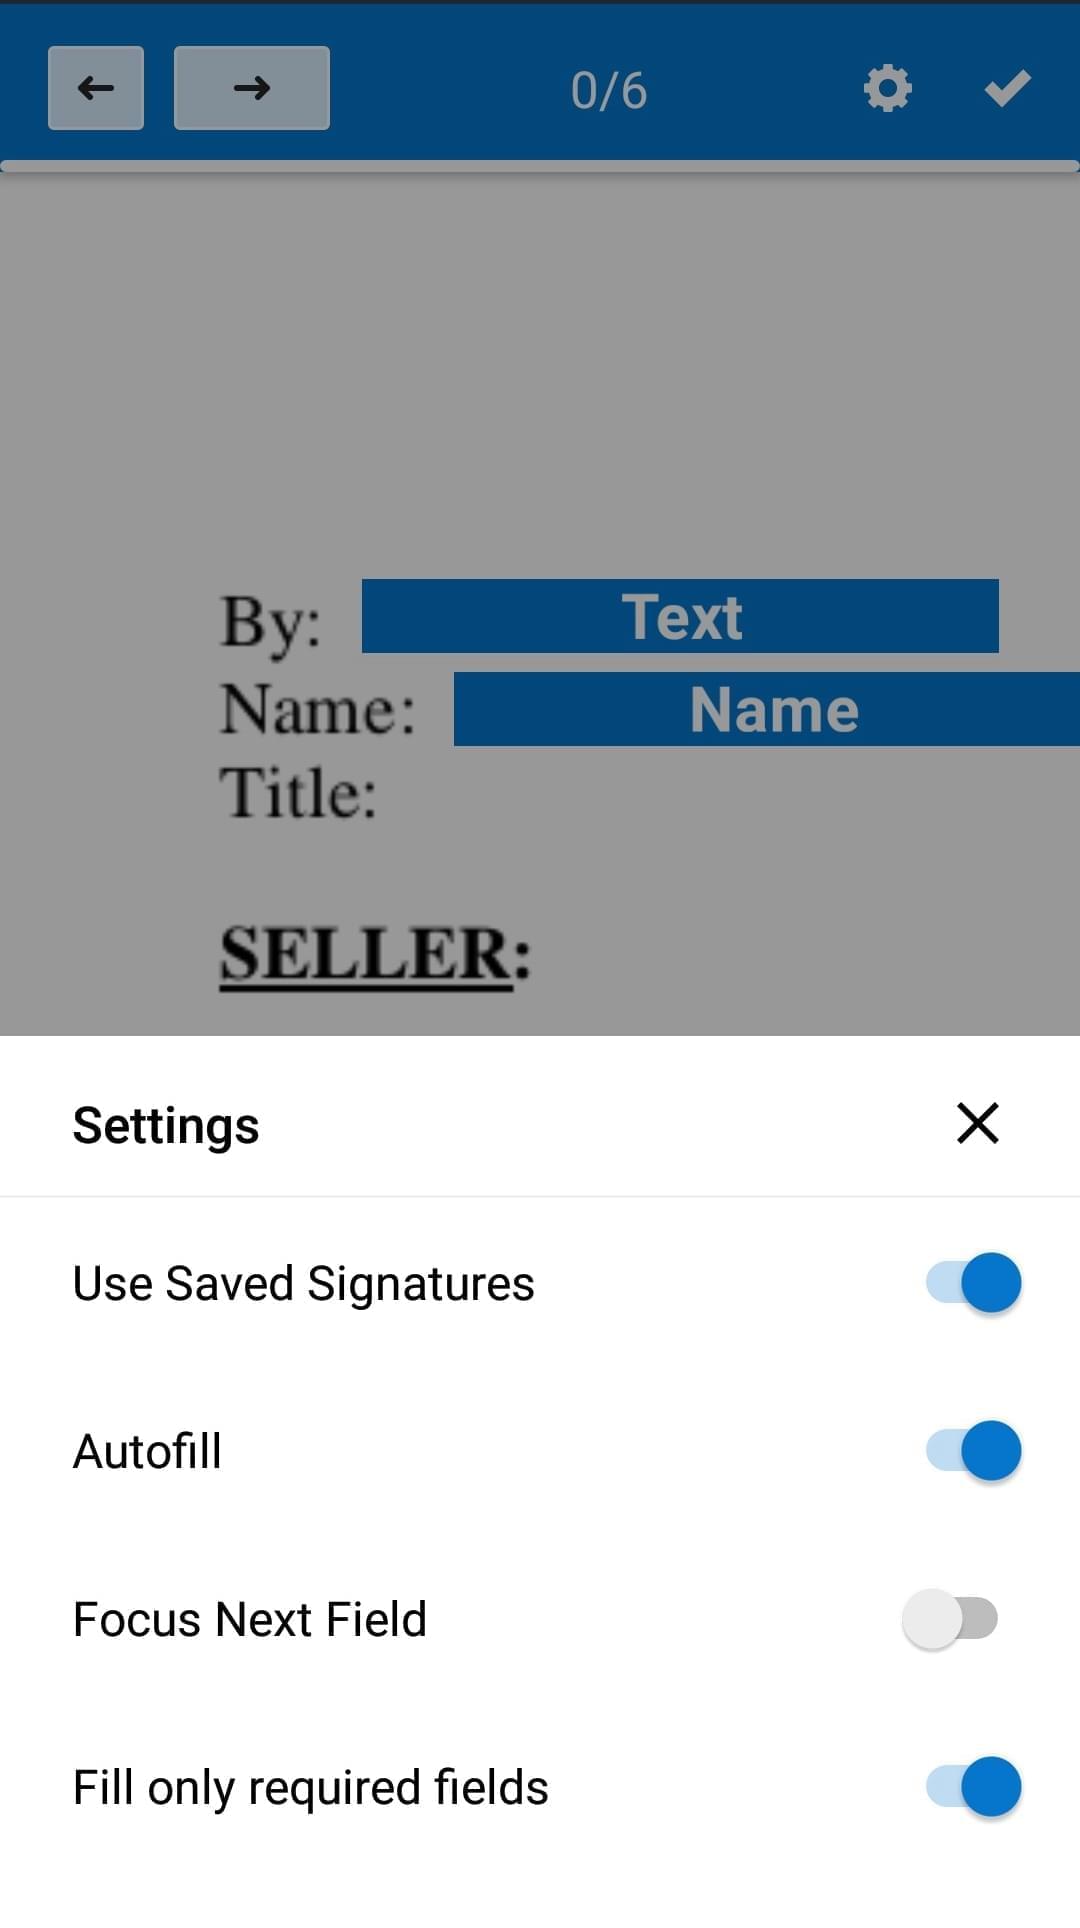
When a recipient opens the document on their mobile device, it is important that they turn on the autofill option. To do so, they’ll need to tap the gear icon in the upper right corner, move the Autofill toggle, and close the settings. Then, the signer can continue working and completing the fields. As they complete the first labeled field in the document, other similar fields will be automatically filled out as they tap on them.