Can I Use eSign in Android
Contact Sales
Make the most out of your eSignature workflows with airSlate SignNow
Extensive suite of eSignature tools
Robust integration and API capabilities
Advanced security and compliance
Various collaboration tools
Enjoyable and stress-free signing experience
Extensive support
Keep your eSignature workflows on track
Our user reviews speak for themselves


Award-winning eSignature solution


Can I utilize eSign on Android?
If you're asking, "Can I utilize eSign on Android?" the reply is affirmative! With airSlate SignNow, Android users can effortlessly handle electronic signatures while on the move. This effective platform enables you to optimize your document signing workflow, making it easy for both individuals and companies.
Can I utilize eSign on Android? Here's how to begin
- Launch your web browser and go to the airSlate SignNow website.
- Create a free trial account or log in to your existing account.
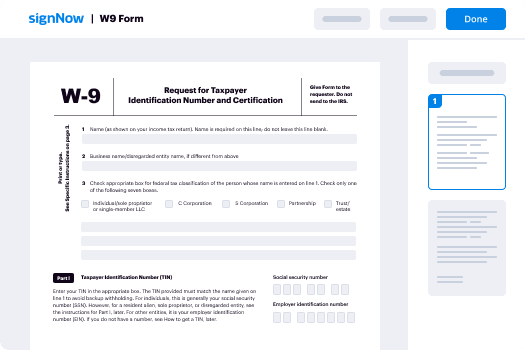
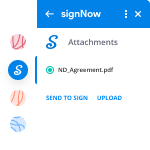
- Select the document you want to sign or prepare for signing by uploading it.
- If you intend to use this document regularly, think about saving it as a template for future reference.
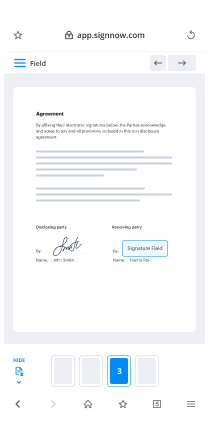
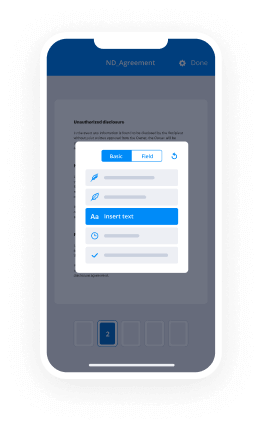
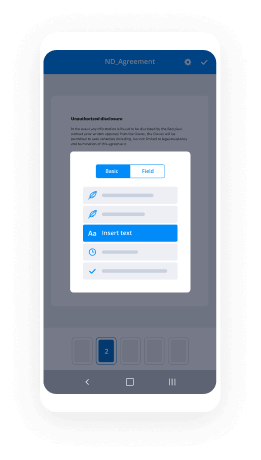
- Access your document to make necessary modifications, like adding fillable fields or entering information.
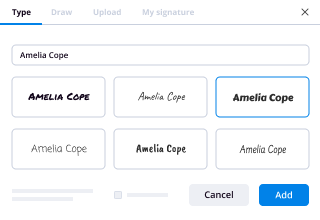
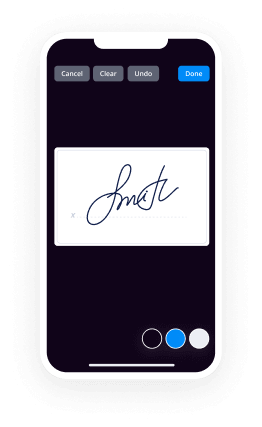
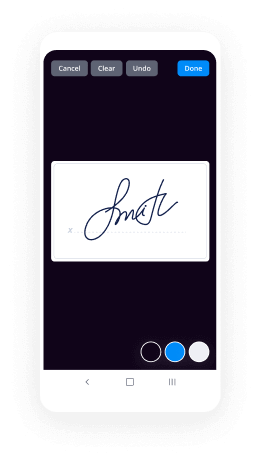
- Sign the document and set up signature fields for any recipients involved.
- Click on 'Continue' to complete and dispatch your eSignature invitation.
In summary, airSlate SignNow offers a convenient way to handle eSignatures directly from your Android device. With its user-friendly design and powerful features, you can easily manage document signing requirements.
Ready to streamline your eSignature process? Discover airSlate SignNow today and enjoy the advantages for yourself!
How it works
Rate your experience
-
Best ROI. Our customers achieve an average 7x ROI within the first six months.
-
Scales with your use cases. From SMBs to mid-market, airSlate SignNow delivers results for businesses of all sizes.
-
Intuitive UI and API. Sign and send documents from your apps in minutes.
A smarter way to work: —how to industry sign banking integrate
How to eSign and complete a document online
Document management isn't an easy task. The only thing that makes working with documents simple in today's world, is a comprehensive workflow solution. Signing and editing documents, and filling out forms is a simple task for those who utilize eSignature services. Businesses that have found reliable solutions to can i integration e sign use android don't need to spend their valuable time and effort on routine and monotonous actions.
Use airSlate SignNow and can i integration e sign use android online hassle-free today:
- Create your airSlate SignNow profile or use your Google account to sign up.
- Upload a document.
- Work on it; sign it, edit it and add fillable fields to it.
- Select Done and export the sample: send it or save it to your device.
As you can see, there is nothing complicated about filling out and signing documents when you have the right tool. Our advanced editor is great for getting forms and contracts exactly how you want/need them. It has a user-friendly interface and full comprehensibility, offering you full control. Create an account today and begin increasing your digital signature workflows with effective tools to can i integration e sign use android on-line.
How to eSign and complete forms in Google Chrome
Google Chrome can solve more problems than you can even imagine using powerful tools called 'extensions'. There are thousands you can easily add right to your browser called ‘add-ons’ and each has a unique ability to enhance your workflow. For example, can i integration e sign use android and edit docs with airSlate SignNow.
To add the airSlate SignNow extension for Google Chrome, follow the next steps:
- Go to Chrome Web Store, type in 'airSlate SignNow' and press enter. Then, hit the Add to Chrome button and wait a few seconds while it installs.
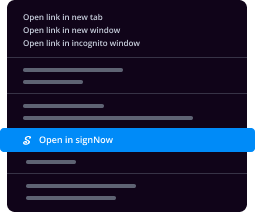
- Find a document that you need to sign, right click it and select airSlate SignNow.
- Edit and sign your document.
- Save your new file to your account, the cloud or your device.
By using this extension, you prevent wasting time on dull actions like downloading the data file and importing it to an eSignature solution’s collection. Everything is easily accessible, so you can easily and conveniently can i integration e sign use android.
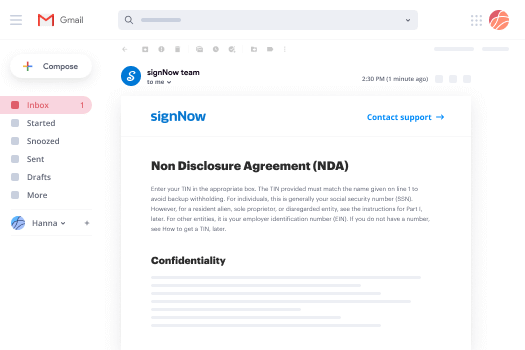
How to digitally sign forms in Gmail
Gmail is probably the most popular mail service utilized by millions of people all across the world. Most likely, you and your clients also use it for personal and business communication. However, the question on a lot of people’s minds is: how can I can i integration e sign use android a document that was emailed to me in Gmail? Something amazing has happened that is changing the way business is done. airSlate SignNow and Google have created an impactful add on that lets you can i integration e sign use android, edit, set signing orders and much more without leaving your inbox.
Boost your workflow with a revolutionary Gmail add on from airSlate SignNow:
- Find the airSlate SignNow extension for Gmail from the Chrome Web Store and install it.
- Go to your inbox and open the email that contains the attachment that needs signing.
- Click the airSlate SignNow icon found in the right-hand toolbar.
- Work on your document; edit it, add fillable fields and even sign it yourself.
- Click Done and email the executed document to the respective parties.
With helpful extensions, manipulations to can i integration e sign use android various forms are easy. The less time you spend switching browser windows, opening several profiles and scrolling through your internal records seeking a doc is more time to you for other essential duties.
How to safely sign documents using a mobile browser
Are you one of the business professionals who’ve decided to go 100% mobile in 2020? If yes, then you really need to make sure you have an effective solution for managing your document workflows from your phone, e.g., can i integration e sign use android, and edit forms in real time. airSlate SignNow has one of the most exciting tools for mobile users. A web-based application. can i integration e sign use android instantly from anywhere.
How to securely sign documents in a mobile browser
- Create an airSlate SignNow profile or log in using any web browser on your smartphone or tablet.
- Upload a document from the cloud or internal storage.
- Fill out and sign the sample.
- Tap Done.
- Do anything you need right from your account.
airSlate SignNow takes pride in protecting customer data. Be confident that anything you upload to your account is secured with industry-leading encryption. Auto logging out will protect your information from unauthorised entry. can i integration e sign use android from the mobile phone or your friend’s phone. Protection is crucial to our success and yours to mobile workflows.
How to sign a PDF file on an iOS device
The iPhone and iPad are powerful gadgets that allow you to work not only from the office but from anywhere in the world. For example, you can finalize and sign documents or can i integration e sign use android directly on your phone or tablet at the office, at home or even on the beach. iOS offers native features like the Markup tool, though it’s limiting and doesn’t have any automation. Though the airSlate SignNow application for Apple is packed with everything you need for upgrading your document workflow. can i integration e sign use android, fill out and sign forms on your phone in minutes.
How to sign a PDF on an iPhone
- Go to the AppStore, find the airSlate SignNow app and download it.
- Open the application, log in or create a profile.
- Select + to upload a document from your device or import it from the cloud.
- Fill out the sample and create your electronic signature.
- Click Done to finish the editing and signing session.
When you have this application installed, you don't need to upload a file each time you get it for signing. Just open the document on your iPhone, click the Share icon and select the Sign with airSlate SignNow button. Your doc will be opened in the app. can i integration e sign use android anything. Additionally, using one service for all your document management requirements, everything is faster, better and cheaper Download the application right now!
How to electronically sign a PDF document on an Android
What’s the number one rule for handling document workflows in 2020? Avoid paper chaos. Get rid of the printers, scanners and bundlers curriers. All of it! Take a new approach and manage, can i integration e sign use android, and organize your records 100% paperless and 100% mobile. You only need three things; a phone/tablet, internet connection and the airSlate SignNow app for Android. Using the app, create, can i integration e sign use android and execute documents right from your smartphone or tablet.
How to sign a PDF on an Android
- In the Google Play Market, search for and install the airSlate SignNow application.
- Open the program and log into your account or make one if you don’t have one already.
- Upload a document from the cloud or your device.
- Click on the opened document and start working on it. Edit it, add fillable fields and signature fields.
- Once you’ve finished, click Done and send the document to the other parties involved or download it to the cloud or your device.
airSlate SignNow allows you to sign documents and manage tasks like can i integration e sign use android with ease. In addition, the security of your info is priority. File encryption and private web servers can be used for implementing the most up-to-date features in data compliance measures. Get the airSlate SignNow mobile experience and operate more proficiently.


FAQs
-
Can I Use eSign in Android?
Yes, you can use eSign in Android with airSlate SignNow. Our mobile app is fully optimized for Android devices, allowing you to eSign documents easily from anywhere. With just a few taps, you can send, receive, and sign documents securely on your smartphone.
-
What features does airSlate SignNow offer for Android users?
airSlate SignNow offers a range of features for Android users, including document signing, template creation, and real-time collaboration. You can easily track the status of your documents and send reminders directly from your Android device. This makes it a powerful tool for managing your documents on the go.
-
Is there a cost associated with using airSlate SignNow on Android?
Yes, there is a cost associated with using airSlate SignNow on Android, but we offer various pricing plans to meet different needs. You can start with a free trial to explore the features before committing to a plan. Our pricing is competitive, making it an affordable eSigning solution for businesses of all sizes.
-
Can I integrate airSlate SignNow with other apps on my Android device?
Absolutely! airSlate SignNow can integrate seamlessly with various applications on your Android device, such as Google Drive, Dropbox, and CRM systems. This allows for a streamlined workflow where you can access and sign documents directly from your preferred apps, enhancing your productivity.
-
What benefits can I expect from using eSign in Android?
Using eSign in Android with airSlate SignNow provides numerous benefits, including increased efficiency and mobility. You can sign documents on the go, reducing the time spent on paperwork. Additionally, the secure cloud storage ensures your documents are safe and accessible anytime, anywhere.
-
How secure is airSlate SignNow for eSigning on Android?
Security is a top priority at airSlate SignNow. Our eSigning solution for Android uses advanced encryption protocols to protect your documents and personal information. You can confidently eSign on your Android device, knowing that your data is secure.
-
Can multiple users eSign documents using the Android app?
Yes, multiple users can eSign documents using the airSlate SignNow Android app. You can invite team members or clients to sign documents, making it easy to collaborate on contracts and agreements. The app facilitates a smooth signing process for all parties involved.
-
Where can I find my Skype ID?
Your skype ID will be provided by one of the system admins or by the one who provides you your credentials for your company ID.In most of the companies, e-mail ID and skype ID will be the same.But if the admin doesn’t prefer this option, they may be different.
-
How can I promote an e-commerce website?
Would you think twice to buy from a store that has been recommended by a friend? NO!Word of mouth or referral marketing is when you entice your existing customers to signNow out and refer other customers in exchange for a lovely reward. Referrals can be done through social media such as Facebook, Twitter, Instagram, through chat apps such as WhatsApp and Facebook Messenger and by email invites. Such engagement will create a warm community around your e-commerce store that will nurture future leads until they eventually buy from you.Dollar Shave Club as a prime example of referral marketing…What do they do?Everything you need in the bathroom – from razor blades to grooming products – automatically delivered to your door.Referral program strategyOnly Dollar Shave Club members (that is those paying the monthly subscription fee) can refer their friends. On successfully referring a friend, you will get credit points that can be redeemed in future purchases from Dollar Shave Club.The Dollar Shave Club referral campaign was set in place as from the get-go. When launching back in 2012. Dollar Shave Club got a ton of publicity through their sarcastic and funny intro video featuring CEO Michael Dubin. The referral program helped in creating a viral loop, making sure converted customers tell their friends about their latest subscription. In fact, in a week Dollar Shave Club got over 25,000 paying users.What we really liked, about Dollar Shave Club referral program is how easy it is to understand what you will get back. Basically, when you refer a friend you will be getting credit which can spend at the store. That simple. The more you refer the more discounted stuff you will be getting any time you need them. This is a very important point to keep in mind when designing a referral campaign. KISS - keep it simple stupid.What strategies can you use to boost sales through referrals?Here are some of the advice we give out to our customers at EarlyParrot. EarlyParrot is a referral marketing platform that can be easily integrated within your existing e-commerce sales funnel.Strategy #1: Invite past buyersPast buyers have already converted. So they are already convinced of the quality of your products and of the excellent service you provide. Buying again from your store might be just an email away.It would be great to give them a discount and get them to buy again from your store. But it would be even better if you can get them to bring along a friend to purchase from your store. For instance, a very common reward is“10% off your next purchase for referring afriend who will get $10 off the first purchase”The aim of this kind of referral campaign is to make it easy for your referrers to convince their friends to by from your store and hence benefiting from a discount themselves. After all who does not like a free $10 off when being referred to a store!!!Strategy #2: Pitch in Thank You pageHow much time have you invested in designing you Thank You page? Let me guess? NADA. The thank you page is yet another opportunity to push your referral program, by offering enough incentive to your newly acquired customer to share their latest purchase with friends.But what can you offer to a converted customer? Think of a minor upgrade that you can add to their purchase in exchange for a referral. Minor upgrades can be:Priority shipping at no extra costComplimentary product added to shipment for free.Samples of complimentary products for free. Usually used by fragrances and beauty products.Voucher with discounts on future purchasesMake sure you make good use of your thank you pages. Don’t do like 99% of the stores who simply waste precious real estate space by not pushing to get referrals in their thank you page.Strategy #3: Referral link with every newsletter email you sendAlmost 100% sure that you are sending some kind of newsletter, highlighting new products to be released or currently being sold at your Ecommerce store. Newsletters are a great way how to keep in touch with your existing and future customers who have shown interested in your store.Make sure to always include two very important links in each email you send out:Share Page URL: The share page URL is where your newsletter subscribers can go to share with their friends and acquittances via email invites, social media shares or else by sending private messages on chatting apps!Unique Referral URL: The unique referral URL is associated with the referrer. This link is tracked so that if someone visits your Ecommerce store through it and converts, a referral is attributed to the associated referrer.By always including these two very important URLs and highlighting the rewards waiting to be redeemed in exchange for referrals, you will ensure you are constantly giving enough exposure to your referral marketing campaign through your email list.Strategy #4: Referrals integrated within your Ecommerce AccountMost Ecommerce platforms have a logged in area. Becoming a customer involves filling in important information such as first name, last name and email. This is enough for an Ecommerce platform to create a profile for a customer, keeping on file information such as shipping and billing addresses and payment information.Having a logged in area for your customers gives you plenty of room how you can integrate and promote your referral marketing campaign. You can add a section, which is totally dedicated to referral marketing, making it easy for your existing customers to refer their friends. Through this referral section, your referrers will also be able to track how far are they from getting their next reward.Strategy #5: Repeat purchase through referral marketingWhen planning your referral marketing campaign for your Ecommerce store, make sure you are witty with your choice of rewards. Do not give out a reward in one chunk such as $50 off your next purchase. Buyers will dispose off the voucher and might not come back to your store. Spread the reward out for both the referrer and the referral onto multiple purchases. For instance, $20 off your next 3 purchases, instead of $60 off discount. This will push for repeat purchase from both the referrer and the referral.We see a lot of stores offering a reward along these lines:“$10 off for you and your friend”Such referral marketing campaign will not give out the best results possible. New referrals will most likely redeem their first-time referral voucher and will not come back. We recommend you give out more say $20 to both referrer and referral but split into 2 purchases. This way you are giving the same discount per purchase but you are signNowly increasing your chances of getting repeat purchases.Strategy #6: Fear Of Missing Out (FOMO) for upcoming productsWe are sure you are aware how much FOMO is important to sell, especially when you would like to promote upcoming products. We have helped Ecommerce store to continuously, week after week, use FOMO to push for new leads by making upcoming products exclusively available to those who refer at least one friend.Think of this strategy as a VIP customer who is able to pre-order or buy upcoming products before anyone else just because they have been loyal to your Ecommerce store and referred at a lead to your store. This technique requires a bold decision to make upcoming products exclusively available only to a set of customers. But according to our experience, such technique drastically improves your chances of getting new leads to your eCommerce store which will signNowly increase your store’s revenue.
-
What is the most asked question on Quora (by the number of questions merged into it)?
As someone who writes mostly technology-related answers, I see the following question so much it makes me want to tear my hair out:“Can iCloud Activation Lock be Bypassed?”For those who don’t know, Apple devices that have an iCloud account active on them with Find My iPhone enabled will lock the device to that Apple ID even if it is restored to factory defaults. This is designed to prevent thievery, since stolen devices (typically iPhones) are useless without the Apple ID password they are locked with to unlock it. It is incredibly common for people to sell devices without removing the lock beforehand (likely because they don’t know it exists, or how to remove it) or because it is stolen. Either way, the lock cannot be bypassed without that password… but that doesn’t stop everyone and their mother from asking if it can be done as if the rules somehow don’t apply to them.Instead of viewing the answers on an existing question, or even asking new people to answer that existing question, they make a new one. Every. Single. Time. Quora is absolutely flooded with these questions, and I get A2A requests for them more than anything else.
-
What are the best productivity tools?
My TOP list is as follows:1. Communication tool - SlackOur team has been successfully using Skype for quite a while, and this is a way out for some teams, both small and bigger ones, but Slack is more convenient to use for IT teams, for marketers, sales people, and other industry-specific teams.2. Time tracking tool - ClockifyI like Clockify – it’s very simple, you create a task, you start tracking your time, you stop when you’re done, AND you can also check how much time you spent weekly on each working task.3. To do list – Trello boardsThe next tool I LOVE is Trello. This is a perfect one for outlining your day to day tasks, your future tasks, mapping out your ideas, sharing them with your team members, and so on.4. G Suite.No comments - couldn’t do without it.5. CalendlyIF you have a large number of meetings daily.6. Project management toolThroughout my years in IT I have met and used different PM tools, like Jira, YouTrack, Asana, and TeamGantt. And I must say that each one is good for its own purpose – so you simply choose the one that work best for you.7. Reporting tool - ExcelI have not used any specific reporting tool: I use Excel tables, both on Google drive and offline Excel files.8. CanvaNo comments :) Saves a fortune on a designer for those SMW owners whose budget is limited.See the full version of my tips here:8 BEST Tools for Remote Professionals
-
What can I learn in one minute that will be useful for the rest of my life?
* Sometimes, girls don't need advice, they just want someone to listen. * Don't be the guy who tells a kid that Santa Claus doesn't exist. * Grammar is sexy. * ***If you owe a friend money, pay them back before you start spending on yourself. * *Never trust someone who always takes forever to text you back, but is always texting "someone" when you're around them. * At least once in your life, have a job that you don't do for the money. * If you want your kids to trust you with anything, don't overreact when they do tell you. * The handsome, royal gentleman/the gorgeous, intelligent woman that you want to find so hard, won't be in the nightclubs. * Take her somewhere different. Movies and dinners are played out. She wants to tell her friends great stories. (Thank you, ladies.) * **Now that you've decide where to take her on a date, don't kill it by giving her roses. Give her an orchid. Girls love orchids. * **Girls, if a boy asks you out or proposes to you, and you're not interested in him, tell him nicely. Don't create a scene out of it. * *Choose any day and treat it like a Valentine's Day. Just ask her out ... before someone else does. * **If you can't make her your wife, don't make her a mother. Remember Jon Snow from GOT? * **You can't be old and wise if you were never young and crazy. Live your life. * **Being in a beautiful relationship %3E Being single %3E%3E%3E%3E Being in a shitty relationship. * *Winning an argument isn't worth losing a bro(1). * *Fall in love with someone's eyes. It's the one thing that never changes. Well done, Shakira(2). * ***If you don't understand an article on Wikipedia, change 'en.Wikipedia.org' to 'simple.Wikipedia.org'. A much simpler and clearer version will be available. * *Don't wait for something bad to happen for you to become a good person. * ***Your children follow your example, not your advice. Be the kind of person you want them to be. * *Be an adult when you have to be, be a kid when you can be. * Never lie to your doctor. * Chrome freezes and you can't close a tab? Press 'Shift+Esc', Chrome has its own Task Manager. * Unless you're in the first row at a concert, don't try to record it with your phone. The video and audio would be crap and you'll never watch it again. * Be careful what you wish for. Remember Simba? He couldn't wait to become the new king ... his Dad got kissing dealt with. * "No matter what you do in this life, it won't be legendary unless your friends are there to see it." - Barney Stinson, HIMYM * Spend time with your Father as often as you can. You'll miss Him when you can't anymore. * ***You know, those times in life where you have a grand thought, a fantasy, a wild gesture, a silly prank, anything really, anything that peaks your senses and makes you feel like you are living? If so, then take advantage of such moments. When your brain is telling you to call it a night, but your heart says to keep going, listen to your heart and do something new, do something fun, do something legendary and your brain will thank you for it later. You're welcome. * ***"You're given one little spark of madness, you must not lose it." - Robin Williams Most of the aforementioned advices are from various sources, some are from me. (I wish to be someone's wingman.) Footnote: (1) A girl can be a bro, bro. (2) Shakira married Pique. Pique, who? The most handsome footballer (according to me). P.S. Want more? I have a bevy. Edit (*): Initially, there were 13 (my most favourite number) advices as a part of this answer, I added six more (to make it 19, one of my favourite numbers). Want more? :p Edit 2 (**): Added five more, to make it 24 (another favourite number). Want more? Edit 3 (***): Added five more, to make it 29 (another favourite number).
-
Can I login to Instagram with my Facebook account?
Instagram login with FB on Web/PCOpen Facebook site and use your login credentials to sign in your Facebook account.Once you are logged in your FB account go to Instagram. If you already own an Instagram account, you will see Continue with xyz (username). In case it is your first time on Instagram click Log in with Facebook to sign up with your Facebook account.When signing up, it will ask you to enter your E-Mail address or username which will be visible to the Instagram public. You can then set your display profile and start uploading pictures on Instagram.Instagram login with Facebook on MobileFirst of all, you need to download the Instagram application from App store (iOS) or Google Play Store (Android).Once the app is installed, click on the Instagram app icon to open it. If you’ve Facebook application installed on your phone with account signed in, It will show Continue with xyz (username). Simply click Log in with Facebook to sign up with your Facebook account.If you do not have Facebook app installed, to login Instagram with FB, you will need to enter your login details once you are in the Instagram Application.When signing up, it will ask you to enter your E-Mail address or username which will be visible to the Instagram public. You can then set your display profile and start uploading pictures on Instagram.
-
How can I protect my important documents in my android phone?
Digital Locker is one of the key initiatives under the Digital India Programme- External website that opens in a new window. A beta version of the same has been already released by the Department of Electronics and Information Technology (DeitY), Govt. of India. Digital Locker is aimed at minimizing the usage of physical documents and enable sharing of e-documents across agencies.With the help of this Portal, the sharing of the e-documents will be done through registered repositories thereby ensuring the authenticity of the documents online. Residents can also upload their own electronic documents and digitally sign them using the e-sign facility. These digitally signed documents can be shared with Government organizations or other entities.Digital Locker system has the following objectivesEnable digital empowerment of residents by providing them with Digital Locker on the cloudEnable e-Signing of documents and make them available electronically and online Minimize the use of physical documentsEnsure authenticity of the e-documents and thereby eliminate usage of fake documentsSecure access to Govt. issued documents through a web portal and mobile application for residentsReduce administrative overhead of Govt. departments and agencies and make it easy for the residents to receive servicesAnytime, anywhere access to the documents by the residentOpen and interoperable standards based architecture to support a well-structured standard document format to support easy sharing of documents across departments and agenciesEnsure privacy and authorized access to residents' data.COMPONENTS OF DIGITAL LOCKER SYSTEMRepository is a Collection of e-Documents which are uploaded by issuers in a standard format and exposing a set of standard APIs for secure real-time search and access.Access Gateway provides a secure online mechanism for requesters to access e-documents from various repositories in real-time using e-Document URI (Uniform Resource Indicator). The URI is a link to the e-Document uploaded by an issuer in a repository. The gateway will identify the address of the repository where the e-Document is stored based on the URI and will fetch the e-Document from that repository.
-
How do I get started with Android application development with only a very basic knowledge about programming?
Thanks for the A2A Rahul , It’s very easy to get start with Android Application Development. Few months back I read an Awesome article about Android Apps Development ,I thought it would be very helpful for a Beginner in Android App development. So , I have shared the article here. I hope so , sure It will be a very helpful Guide For Apps developing beginners. So you have a killer app idea and you’re ready to turn it into a reality and take it to market. No doubt you’re itching to start getting your first downloads, reviews and profits… But there’s just one problem: you don’t have a clue where to start! Learning to code is difficult enough on its own but with Android development it can be more complicated. Not only do you need to understand Java, you also need to install all the Android-specific software and learn all of the unique quirks of Android app development. In general, creating an Android app requires the SDK (Software Development Kit), an IDE (Integrated Development Environment) like Android Studio or Eclipse, the Java Software Development Kit (JDK) and a virtual device to test on. All this takes work to set up, and that’s before you’ve even started looking into things like Google Play Services, screen sizes, API levels… It’s just such a dense amount of information and it’s enough to put an awful lot of people off before they even begin. My aim with this article then, is to provide an approachable guide to try and make the whole prospect of creating an app a little less daunting… I’ll explain the bits you need to know and gloss over the rest and by the end you should have a basic app that you can start iterating on and experimenting with. Go and make yourself a cup of tea first though, this may take a while… Step 1: Download Android Studio To program in most languages, you need a piece of software called an IDE or ‘Integrated Development Environment’. The most common IDE for Android development is Android Studio, which comes direct from Google itself. You can get it here [ http://developer.android.com/sdk/index.html?gclid=Cj0KEQiAm-CyBRDx65nBhcmVtbIBEiQA7zm8lWCaBd9n9KYYunFXxXsQCPojBVHk5eIH4p9CWM1eLfUaAmd28P8HAQ ]. An IDE is what gives you the main UI where you’ll enter your code (you can’t just start typing into notepad). It also highlights things you get wrong, offers suggestions and lets you run and test your creations conveniently. It creates the files you need, it provides basic layouts and generally it saves you a lot of time and effort. What’s great about Android Studio is that it is designed specifically for Android development (unlike the second most popular option, Eclipse). This means that when you download the software, you’ll also get a lot of the other bits you need including the Android SDK (a selection of tools including the Android platform itself) and the Android Virtual Device, which is an emulator you can test your apps on. When you go through the installation, make sure you leave the boxes ticked to confirm that you want these additional components. You could manually add them later, but this will just complicate matters. As mentioned, there are some alternatives to Android Studio. Eclipse [ https://eclipse.org/downloads/ ] is an older IDE that can be used for developing other things too (such as iOS apps) and that is a bit more flexible overall. It’s also a much more fiddly to get started with though and not nearly as beginner-friendly. Another personal favorite of mine is Basic4Android [ http://www.b4x.com/ ]. Basic4Android is an IDE that lets you code Android apps with the BASIC programming language. It makes things easier in a number of other ways too and is focused on ‘rapid development’. There are other options too, such as Unity3D and numerous app builders, each of which has specific strengths and weaknesses depending on what you’re planning on building. For the sake of simplicity though, we’re focusing on Android Studio because it has become the ‘main’ way to build basic apps and pretty much the industry standard. If you think you might ever sell your business, if you want to give yourself the most flexibility and control possible, or if you’d like to become a professional app developer, you’ll need this tool. That said, if you read through all this and you find it too much still, you might want to consider Basic4Android as a simpler approach and I’ll be covering that in a future post. Okay, just to recap: we now have Android Studio downloaded and installed. But, don’t run it until you read step two! So far so good… What could possibly go wrong? Step 2: Setting Up Android Studio Now you have Android Studio installed you’ve taken your first, bold step toward becoming a developer! A lot of people only manage it this far and then leave the software installed on their computer for months on end, feeling guilty every time they see it in the Start Menu. Eventually they end deleting it to make space for the next AAA title on Steam and so ends the whole sorry affair… Don’t end up like them – it’s time for some more affirmative action! Before you can get started, you also need to install Java on your machine to use Android Studio. Specifically, you’re going to need install the Java Development Kit (JDK). Java is the programming language you’re going to be using to build your apps in this instance and you need to install the JDK in order for Android Studio to be able to interpret and compile your code (compiling means turning the source into something that is understood by the CPU – machine code). You’ll find the Java Development Kit here [ http://www.oracle.com/technetwork/java/javase/downloads/jdk8-downloads-2133151.html ]. Just download and follow the instructions to install. Now you can click on Android Studio to launch it. Once it opens up, you’ll be presented with a menu where you’ll be able to get started or configure some options. The great thing is that everything is handled for you at this point, though you may want to familiarize yourself with the SDK Manager(Configure %3E SDK Manager) which is where you’ll update your Android SDK to support newer versions, as well as download things like code samples or support for Google Glass. But don’t worry about that now but if Android Studio says you’re missing something, this is where you’ll probably need to go to find it. So really there are three main things interacting when you use Android Studio to create your apps. * Android Studio itself, which is an IDE that provides you with a nice interface for coding. * The code you write in Java, which you installed a moment ago… * And the Android SDK which you’ll access through your Java code in order to do Android-type things If you find this all a bit complicated and daunting then… well, you don’t know you’re born. This used to be way worse. Maybe that offers some consolation… Step 3: Starting a New Project Once you’ve installed your samples, you can go back to the first page you saw when you loaded up Android Studio. Now you want to choose Start a new Android Studio Project – it’s finally happening! Enter the name you want for your application and your ‘company domain’. Together these elements will be used to create your package name with the following format: com.companyname.appname The package will be the compiled file or APK (‘Android Package File’) that you’ll eventually upload to the Google Play Store. There are ways that people can see this, so if you’re planning on making something you’ll eventually release, try to stay away from using ‘funny words’. The last field to enter is the directory where you want to save all the files pertaining to your app. I like to save in DropBox to make sure I always have a backup of my code. Click Next again and guess what… More options! Huzzah! Don’t worry, we’re nearly there… Next you need to decide what type of device you’re going to be developing for and in this case we’ll start with the Phone and Tablet option. Other options are TV, Wear and Glass. It’s fine if you want to develop for a myriad of platforms in the future – that’s one of the wonders of Android – but let’s start with something a bit more straightforward to begin with, okay? The other choice you have to make at this stage is the ‘Minimum SDK’. This is the lowest version of Android you want to support. Why not just enter the latest version of Android in here? Well, because relatively few people actually have the latest version of Android installed on their device at any given time. You want to support phones that are still running older versions in order to signNow the largest possible audience – especially overseas. Why not just go with Android 1.1? Well, apart from this not being an option (Froyo is as low as you can go), that would also prevent you from using any of the fancy new features from the latest updates. The best bet at this stage is to go with the default option, so just leave this field as it is. On the next page, you’ll be given the option to pick the way you want your app to look at the start. This will be the look of your main ‘Activity Module’ which is basically the main page of your app. Think of these like templates; do you want to have the title of your app along the top of the screen, or do you want your UI to fill the whole display? Do you want to start off with some elements ready-designed for you? Is your app primarily going to use Google Maps (don’t go here for a bit, things get more complicated with Google Play Services). Bear in mind that an app can have multiple activities that act like separate pages on a website. You might have a ‘settings’ activity for instance and a ‘main’ activity. So the activity isn’t the app per say but rather one stand-alone page of your app. For your first creation though, you’ll probably do best to make something really simple that just displays a single, basic activity. Select ‘Basic Activity’ to keep things as simple as possible and for all intents and purposes, this will now be your app. Click Next again you get the last few options. Now you get to pick the name for your activity and the layout name (if you chose ‘Basic Activity’ you’ll also have the title option and the ‘menu_resource’ name). The activity name is how you’ll refer to your activities in your code, so call it something logical (good advice for coding generally) like ‘MainActivity’. Creative, I know. The layout name meanwhile describes a file that determines the layout of an activity. This is a separate piece of code that runs in concert with the main activity code to define where elements like images and menus go and what fonts you’ll use. This is actually not Java but XML – or Extensible Markup Language if you want to impress your friends. For anyone with a background in web development, your XML is going to work a little like HTML or a CSS style sheet. The Java code for the activity meanwhile says what the elements on the screen do when pressed etc. It’s fine to leave the default name here as ‘activity_main’. Lastly, choose a name for the menu and for the title. Pick something nice for the title, as your users will be able to see this at some points. Click next… and now you get to see your app! Your blank, useless app… All that just to get started! You see why people give up? But really we can break it down into the following very basic steps: * Download and install Android Studio, making sure to include the Android SDK * Install Java SDK * Start a new project and select the basic details So it’s really not that bad… And remember: once you’ve done all this once, you can forget about it forever and focus on the fun stuff: creating apps! Your tea is probably cold at this point, so the next very important step, is to get more. Step 4: Making an Actual Thing Once your app opens, you should see a directory tree on the left with all the different files and folders that make up your app and a picture of a phone displaying ‘Hello World!’ in the center. Well, hello to you as well! (A basic app that displays ‘Hello World’ is what most new developers make first when they learn to program in a new language. Android Studio cheats though, because it does it for you!) You might notice that the open tab (along the top) is ‘activity_main.xml’, which is what the big phone is showing on its display. You may recall that activity_main.xml is the XML code that defines the layout instructions for your main activity. If you selected ‘Basic Activity’ when you started your project, then you’ll see a second XML file too called ‘content_main.xml’. For the most part, these two do the same thing but the ‘acitvity_main.xml’ contains the basic layout that Android Studio created for you when you selected ‘Basic Activity’. The stuff you want to edit is in content_main.xml, so open that up and don’t worry about it for now. (If this isn’t what is open to start, then use the directory on the left to open it by choosing: app %3E res %3E content_main.xml.) The Layout Android Studio is not showing the XML code itself here but rather a rendering of how the layout will appear on the screen. This is a visual editor a bit like Dreamweaver for web design and it makes life a little easier for us developers. You also have a bunch of options called ‘widgets’ down the left that you can add to your app. This is your basic app stuff; so for instance, if you want to add a button saying ‘OK’ to your activity, you can simply drag it over to the screen and drop it anywhere you like. Go ahead and dump an ‘OK’ button right underneath the ‘Hello World’. Something else you’ll find is that you can click on either of these elements in order to change the text and the ‘ID’. The ID is how you’re refer to each element (called a ‘view’) in your Java code, while the text is of course what you display to the user. Delete the ‘Hello World’ widget (or view) and change the text on the button to ‘Hello?’. Likewise, change the ‘id’ on the button to ‘button1’. I am now stealthily getting you to write a little program… Notice as well that when you select a view, you get options in the bottom right to change the text color and size etc. You can play around with these variables if you like to change the look of your button. We’re coming back here in a minute though so make a mental note! Now open up your MainActivity.java. The tab will be along the top but in case it isn’t, find it under:App %3E Java. This is the code that defines the behavior of your app. At this stage, you’re going to add in a little passage of code: [code]public void buttonOnClick(View v) { Button button1 = (Button) v; ((Button) v).setText("Hello!"); } [/code]This is going to go right underneath the first lone closed bracket ‘}’, just before the “@Override, Public Boolean”. It should look like this: What does it all mean? Well basically, anything following “void buttonOnClick” will be carried out when someone clicks on the button. We’re then finding the button with the “Button button1 = (Button) v;” code and then changing the text. Yes, there are other ways you could achieve the same thing but I feel like this keeps it nice and simple and thus easy to understand. Spend some time reading it and try to get your head around what is doing what… At the top of the page is the word ‘import…’. Click on that to expand it and make sure that somewhere there is the line: “import android.widget.Button;”. It should have appeared on its own when you typed out the last bit (Android Studio is smart like that) but you can add it yourself if it didn’t. (Notice as we type that lines end in “;”. This is basic Java formatting and if you forget one, it will throw up an error. Get used to searching around for them!) Now go back to your content_main.xml and click on the button. In the right corner, where you have your parameters for the button, you should be able to find an option called ‘onClick’. Click on this and then select the ‘onClick’ line of code you just wrote from the drop down menu. What you’ve just done, is told Android Studio that you want to associate the section of code with the button you created (because you’ll have lots of buttons in future). Now all that’s left to do is run the app you just made. Simple go to ‘run’ along the top and then select ‘run app’ from the drop down menu. You should already have your AVD (Android Virtual Device) installed but if not, you can go to: tools %3E Android %3E AVD Manager %3E + Create Virtual Device. Don’t forget you also need to install an Android version onto the device. Follow the steps to launch the emulator running your app. Be patient, it can sometimes take an age to load up… If it neverloads up, you can consider ‘packaging’ the app in order to create an APK. Drag this onto your Android device and double click on it to install and run it. Once it’s finally up and running you can have a go with this fun, fun app. What you should find is that when you click the button, the text from ‘Hello?’ to ‘Hello!’. We’re going to be rich… (If it doesn’t work… something has gone wrong. It wasn’t me, my one works! Look for red text in your code and hover your mouse over it to get suggestions from Android Studio.) Step 5: How to Get Better At App Development Okay, so that was a lie. We’re probably not going to be rich. At the moment the app we’ve made is pretty lame. You can try and sell it sure but you probably won’t get that many good reviews. The reason I talked you through this basic app creation though is because it teaches you the very fundamentals of programming. You have an action and a reaction – pressing on a button doessomething. Throw in some variables and some math, add some pretty images and a useful function and that’s genuinely enough to make a very basic app. So where do we go from here? There’s so much more to learn: we haven’t looked at the Android Manifest yet, we haven’t talked about your private keysign (or how fun it is when you lose that) and we haven’t even studied the Android app ‘lifecycle’ (nothing to do with The Lion King). There’s issues with supporting different screen sizes and there’s just so much more to learn. Unfortunately, it would take an entire book to teach you the entirety of Android app development. So that’s a good place to start: buy a book! But more important is just to play around and try things. Don’t set out to make your world-changing app on day one. Instead, focus on making something simple and straightforward and then build on that. Try changing the layout of the text and try adding in more buttons and more rules to make your app actually useful. Eventually, you’ll find there’s something you want to do that you can’t figure out on your own. Maybe you want a sound to play when someone clicks on your button, for example. This is where the real learning starts. Now all you need to do is search in Google: “How to play sound onClick Android” You’ll find a bunch of complicated answers but eventually someone, probably on Stack Overflow [ http://stackoverflow.com/ ], will break down the answer simply for you. Then what you do is you copy that code and you paste it into your app, making a few changes as you go. Likewise, try out some of the code samples available through Android studio. See how they work, try changing things and just experiment. Things will go wrong and error messages will come up but for the most part, if you just follow the instructions, it’s easy enough to handle. Don’t panic! And that’s pretty much how you learn to make apps. A lot of it boils down to reverse engineering and copying and pasting. Once you have the main program in place, the rest you pick up as you go. If you want the absolute easiest way to start, then just find some sample code that’s close to what you make and change it. No one is going to be able to explain all this to you in a way that makes any sense and if you worry about not grasping everything to begin with, you’ll never get anywhere. So instead, dive in, get your hands dirty and learn on the job. It’s complicated and it’s frustrating but ultimately it’s highly rewarding and more than worth the initial effort. EDIT: Added Source : http://www.androidauthority.com/android-app-development-complete-beginners-658469/
Trusted esignature solution— what our customers are saying


Get legally-binding signatures now!
Frequently asked questions
How do i add an electronic signature to a word document?
How to know if an electronic signature was actually signed?
Pdf xchange editor plus how to sign?
Get more for Can I Use eSign in Android
- How To Implement Electronic signature in 1Password
- How Do I Implement Electronic signature in 1Password
- How To Set Up Electronic signature in 1Password
- How Do I Set Up Electronic signature in 1Password
- Help Me With Set Up Electronic signature in 1Password
- How Can I Implement Electronic signature in 1Password
- How To Set Up Electronic signature in MacApp
- How Can I Set Up Electronic signature in 1Password
Find out other Can I Use eSign in Android
- Project management practices form
- Project management practices and their accompanying templates form
- The value of social networking form
- Minutes from the october 27 cdc advisory committee to the cdc form
- Cdc advisory committee meeting minutes april 12 cdc advisory committee meeting minutes april 12 cdc form
- Cdc healthy aging program form
- Hospital survey centers for disease control and prevention form
- Cancer registry management reports design and interpretation cdc form
- Report on the reporting pathology protocols for colon and rectum cancers project cdc form
- Doe jane cdc form
- Testpoleng2008 doc cdc form
- National diabetes fact sheet form
- Centers for disease control and prevention cdc invites middle and high school cdc form
- Science ambassador application cdc form
- Pets and people cdc form
- Take the lead get the lead out cdc form
- Child development does early intervention make a difference form
- Science teachers nationwide to compete for the chance to work with scientists cdc form
- Last first name cdc form
- Cdc disease detective camp cdc form