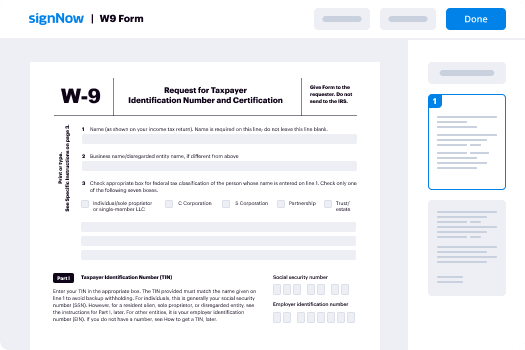
How To Implement eSign in Android
Contact Sales
Make the most out of your eSignature workflows with airSlate SignNow
Extensive suite of eSignature tools
Robust integration and API capabilities
Advanced security and compliance
Various collaboration tools
Enjoyable and stress-free signing experience
Extensive support
Keep your eSignature workflows on track
Our user reviews speak for themselves


Award-winning eSignature solution


How to execute eSign in Android
Executing eSign in Android has never been simpler with airSlate SignNow. This robust tool enables organizations to effortlessly send and endorse documents, guaranteeing a smooth workflow that conserves time and resources. By utilizing the advantages of airSlate SignNow, you can improve your document management strategy and elevate client satisfaction.
How to execute eSign in Android
- Launch your web browser and go to the airSlate SignNow website.
- Register for a free trial or log into your current account.
- Select the document you want to endorse or send for signature and upload it.
- If you intend to use this document regularly, transform it into a reusable template.
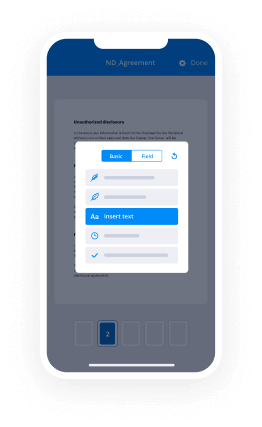
- Access your document to make necessary modifications, such as adding fillable fields or including specific details.
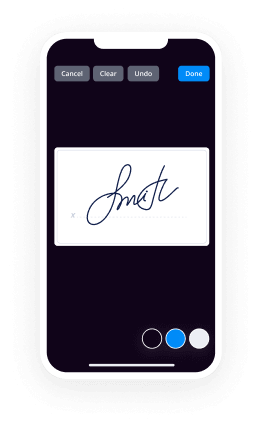
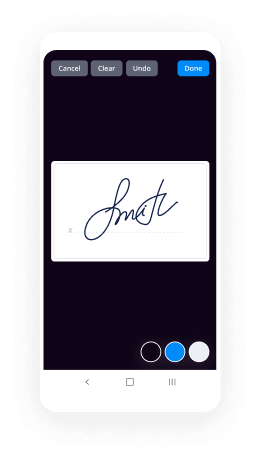
- Insert your signature and allocate signature fields for the intended recipients.
- Click 'Continue' to set up and send your eSignature invitation.
In summary, airSlate SignNow provides an effective and budget-friendly solution for executing eSign in Android. With its extensive feature set, organizations can attain a substantial return on investment while simplifying their document workflows.
Eager to enhance your document signing process? Begin your free trial with airSlate SignNow today and discover the convenience of eSigning on your Android device!
How it works
Rate your experience
-
Best ROI. Our customers achieve an average 7x ROI within the first six months.
-
Scales with your use cases. From SMBs to mid-market, airSlate SignNow delivers results for businesses of all sizes.
-
Intuitive UI and API. Sign and send documents from your apps in minutes.
A smarter way to work: —how to industry sign banking integrate
How to eSign & fill out a document online
Document management isn't an easy task. The only thing that makes working with documents simple in today's world, is a comprehensive workflow solution. Signing and editing documents, and filling out forms is a simple task for those who utilize eSignature services. Businesses that have found reliable solutions to how to integration e sign implement android don't need to spend their valuable time and effort on routine and monotonous actions.
Use airSlate SignNow and how to integration e sign implement android online hassle-free today:
- Create your airSlate SignNow profile or use your Google account to sign up.
- Upload a document.
- Work on it; sign it, edit it and add fillable fields to it.
- Select Done and export the sample: send it or save it to your device.
As you can see, there is nothing complicated about filling out and signing documents when you have the right tool. Our advanced editor is great for getting forms and contracts exactly how you want/need them. It has a user-friendly interface and full comprehensibility, supplying you with complete control. Sign up today and begin increasing your eSignature workflows with effective tools to how to integration e sign implement android online.
How to eSign and fill documents in Google Chrome
Google Chrome can solve more problems than you can even imagine using powerful tools called 'extensions'. There are thousands you can easily add right to your browser called ‘add-ons’ and each has a unique ability to enhance your workflow. For example, how to integration e sign implement android and edit docs with airSlate SignNow.
To add the airSlate SignNow extension for Google Chrome, follow the next steps:
- Go to Chrome Web Store, type in 'airSlate SignNow' and press enter. Then, hit the Add to Chrome button and wait a few seconds while it installs.
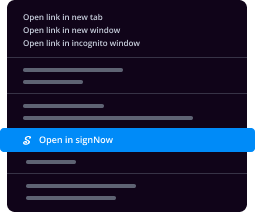
- Find a document that you need to sign, right click it and select airSlate SignNow.
- Edit and sign your document.
- Save your new file to your account, the cloud or your device.
By using this extension, you prevent wasting time and effort on monotonous actions like downloading the file and importing it to a digital signature solution’s collection. Everything is close at hand, so you can quickly and conveniently how to integration e sign implement android.
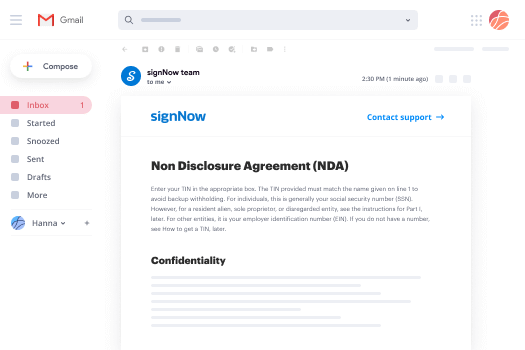
How to eSign forms in Gmail
Gmail is probably the most popular mail service utilized by millions of people all across the world. Most likely, you and your clients also use it for personal and business communication. However, the question on a lot of people’s minds is: how can I how to integration e sign implement android a document that was emailed to me in Gmail? Something amazing has happened that is changing the way business is done. airSlate SignNow and Google have created an impactful add on that lets you how to integration e sign implement android, edit, set signing orders and much more without leaving your inbox.
Boost your workflow with a revolutionary Gmail add on from airSlate SignNow:
- Find the airSlate SignNow extension for Gmail from the Chrome Web Store and install it.
- Go to your inbox and open the email that contains the attachment that needs signing.
- Click the airSlate SignNow icon found in the right-hand toolbar.
- Work on your document; edit it, add fillable fields and even sign it yourself.
- Click Done and email the executed document to the respective parties.
With helpful extensions, manipulations to how to integration e sign implement android various forms are easy. The less time you spend switching browser windows, opening multiple accounts and scrolling through your internal files looking for a doc is much more time to you for other important assignments.
How to securely sign documents in a mobile browser
Are you one of the business professionals who’ve decided to go 100% mobile in 2020? If yes, then you really need to make sure you have an effective solution for managing your document workflows from your phone, e.g., how to integration e sign implement android, and edit forms in real time. airSlate SignNow has one of the most exciting tools for mobile users. A web-based application. how to integration e sign implement android instantly from anywhere.
How to securely sign documents in a mobile browser
- Create an airSlate SignNow profile or log in using any web browser on your smartphone or tablet.
- Upload a document from the cloud or internal storage.
- Fill out and sign the sample.
- Tap Done.
- Do anything you need right from your account.
airSlate SignNow takes pride in protecting customer data. Be confident that anything you upload to your account is secured with industry-leading encryption. Auto logging out will shield your profile from unauthorized entry. how to integration e sign implement android out of your phone or your friend’s phone. Protection is key to our success and yours to mobile workflows.
How to eSign a PDF file with an iOS device
The iPhone and iPad are powerful gadgets that allow you to work not only from the office but from anywhere in the world. For example, you can finalize and sign documents or how to integration e sign implement android directly on your phone or tablet at the office, at home or even on the beach. iOS offers native features like the Markup tool, though it’s limiting and doesn’t have any automation. Though the airSlate SignNow application for Apple is packed with everything you need for upgrading your document workflow. how to integration e sign implement android, fill out and sign forms on your phone in minutes.
How to sign a PDF on an iPhone
- Go to the AppStore, find the airSlate SignNow app and download it.
- Open the application, log in or create a profile.
- Select + to upload a document from your device or import it from the cloud.
- Fill out the sample and create your electronic signature.
- Click Done to finish the editing and signing session.
When you have this application installed, you don't need to upload a file each time you get it for signing. Just open the document on your iPhone, click the Share icon and select the Sign with airSlate SignNow button. Your doc will be opened in the app. how to integration e sign implement android anything. Additionally, utilizing one service for all of your document management demands, things are faster, better and cheaper Download the app today!

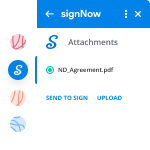
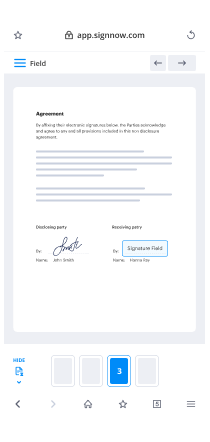
How to eSign a PDF document on an Android
What’s the number one rule for handling document workflows in 2020? Avoid paper chaos. Get rid of the printers, scanners and bundlers curriers. All of it! Take a new approach and manage, how to integration e sign implement android, and organize your records 100% paperless and 100% mobile. You only need three things; a phone/tablet, internet connection and the airSlate SignNow app for Android. Using the app, create, how to integration e sign implement android and execute documents right from your smartphone or tablet.
How to sign a PDF on an Android
- In the Google Play Market, search for and install the airSlate SignNow application.
- Open the program and log into your account or make one if you don’t have one already.
- Upload a document from the cloud or your device.
- Click on the opened document and start working on it. Edit it, add fillable fields and signature fields.
- Once you’ve finished, click Done and send the document to the other parties involved or download it to the cloud or your device.
airSlate SignNow allows you to sign documents and manage tasks like how to integration e sign implement android with ease. In addition, the security of your info is top priority. Encryption and private servers are used for implementing the most up-to-date functions in data compliance measures. Get the airSlate SignNow mobile experience and operate more efficiently.


FAQs
-
What is the best way to learn How To Implement eSign in Android?
To learn How To Implement eSign in Android, start by exploring the comprehensive documentation provided by airSlate SignNow. This resource offers step-by-step guides and tutorials that simplify the integration process. Additionally, consider checking out video tutorials and community forums for practical insights and shared experiences.
-
What features does airSlate SignNow offer for eSigning on Android?
airSlate SignNow provides a robust set of features for eSigning on Android, including document templates, real-time collaboration, and secure cloud storage. With its user-friendly interface, you can easily manage and track your documents. These features are designed to streamline the signing process, making it easier to implement eSign in Android.
-
Is there a cost associated with implementing eSign in Android using airSlate SignNow?
Yes, while airSlate SignNow offers various pricing plans, the cost is generally affordable and tailored to suit different business needs. Depending on your usage and feature requirements, you can choose a plan that fits your budget. The value gained from efficiently implementing eSign in Android often outweighs the investment.
-
How can I integrate airSlate SignNow with other applications on Android?
Integrating airSlate SignNow with other applications on Android is straightforward with our API and pre-built integrations. You can connect with popular tools like Google Drive, Dropbox, and more, enhancing your document workflow. This seamless integration supports your efforts in learning How To Implement eSign in Android more effectively.
-
What are the benefits of using airSlate SignNow for eSigning on Android?
Using airSlate SignNow for eSigning on Android provides numerous benefits, such as improved efficiency, reduced turnaround time, and enhanced security. The mobile-friendly design allows you to sign documents on-the-go, ensuring you never miss an opportunity. By optimizing your workflow with airSlate SignNow, you can streamline your processes while learning How To Implement eSign in Android.
-
Can I customize the eSigning experience for my users on Android?
Absolutely! airSlate SignNow allows you to customize the eSigning experience on Android to align with your brand. You can add your logo, choose color schemes, and set specific signing workflows. This customization enhances user engagement while you learn How To Implement eSign in Android.
-
What support options are available for implementing eSign in Android?
airSlate SignNow offers extensive support options for users looking to implement eSign in Android. You can access live chat, email support, and a knowledge base filled with FAQs and troubleshooting tips. This ensures you have the assistance needed during your integration process.
-
How do I get started with Android application development with only a very basic knowledge about programming?
Thanks for the A2A Rahul , It’s very easy to get start with Android Application Development. Few months back I read an Awesome article about Android Apps Development ,I thought it would be very helpful for a Beginner in Android App development. So , I have shared the article here. I hope so , sure It will be a very helpful Guide For Apps developing beginners. So you have a killer app idea and you’re ready to turn it into a reality and take it to market. No doubt you’re itching to start getting your first downloads, reviews and profits… But there’s just one problem: you don’t have a clue where to start! Learning to code is difficult enough on its own but with Android development it can be more complicated. Not only do you need to understand Java, you also need to install all the Android-specific software and learn all of the unique quirks of Android app development. In general, creating an Android app requires the SDK (Software Development Kit), an IDE (Integrated Development Environment) like Android Studio or Eclipse, the Java Software Development Kit (JDK) and a virtual device to test on. All this takes work to set up, and that’s before you’ve even started looking into things like Google Play Services, screen sizes, API levels… It’s just such a dense amount of information and it’s enough to put an awful lot of people off before they even begin. My aim with this article then, is to provide an approachable guide to try and make the whole prospect of creating an app a little less daunting… I’ll explain the bits you need to know and gloss over the rest and by the end you should have a basic app that you can start iterating on and experimenting with. Go and make yourself a cup of tea first though, this may take a while… Step 1: Download Android Studio To program in most languages, you need a piece of software called an IDE or ‘Integrated Development Environment’. The most common IDE for Android development is Android Studio, which comes direct from Google itself. You can get it here [ http://developer.android.com/sdk/index.html?gclid=Cj0KEQiAm-CyBRDx65nBhcmVtbIBEiQA7zm8lWCaBd9n9KYYunFXxXsQCPojBVHk5eIH4p9CWM1eLfUaAmd28P8HAQ ]. An IDE is what gives you the main UI where you’ll enter your code (you can’t just start typing into notepad). It also highlights things you get wrong, offers suggestions and lets you run and test your creations conveniently. It creates the files you need, it provides basic layouts and generally it saves you a lot of time and effort. What’s great about Android Studio is that it is designed specifically for Android development (unlike the second most popular option, Eclipse). This means that when you download the software, you’ll also get a lot of the other bits you need including the Android SDK (a selection of tools including the Android platform itself) and the Android Virtual Device, which is an emulator you can test your apps on. When you go through the installation, make sure you leave the boxes ticked to confirm that you want these additional components. You could manually add them later, but this will just complicate matters. As mentioned, there are some alternatives to Android Studio. Eclipse [ https://eclipse.org/downloads/ ] is an older IDE that can be used for developing other things too (such as iOS apps) and that is a bit more flexible overall. It’s also a much more fiddly to get started with though and not nearly as beginner-friendly. Another personal favorite of mine is Basic4Android [ http://www.b4x.com/ ]. Basic4Android is an IDE that lets you code Android apps with the BASIC programming language. It makes things easier in a number of other ways too and is focused on ‘rapid development’. There are other options too, such as Unity3D and numerous app builders, each of which has specific strengths and weaknesses depending on what you’re planning on building. For the sake of simplicity though, we’re focusing on Android Studio because it has become the ‘main’ way to build basic apps and pretty much the industry standard. If you think you might ever sell your business, if you want to give yourself the most flexibility and control possible, or if you’d like to become a professional app developer, you’ll need this tool. That said, if you read through all this and you find it too much still, you might want to consider Basic4Android as a simpler approach and I’ll be covering that in a future post. Okay, just to recap: we now have Android Studio downloaded and installed. But, don’t run it until you read step two! So far so good… What could possibly go wrong? Step 2: Setting Up Android Studio Now you have Android Studio installed you’ve taken your first, bold step toward becoming a developer! A lot of people only manage it this far and then leave the software installed on their computer for months on end, feeling guilty every time they see it in the Start Menu. Eventually they end deleting it to make space for the next AAA title on Steam and so ends the whole sorry affair… Don’t end up like them – it’s time for some more affirmative action! Before you can get started, you also need to install Java on your machine to use Android Studio. Specifically, you’re going to need install the Java Development Kit (JDK). Java is the programming language you’re going to be using to build your apps in this instance and you need to install the JDK in order for Android Studio to be able to interpret and compile your code (compiling means turning the source into something that is understood by the CPU – machine code). You’ll find the Java Development Kit here [ http://www.oracle.com/technetwork/java/javase/downloads/jdk8-downloads-2133151.html ]. Just download and follow the instructions to install. Now you can click on Android Studio to launch it. Once it opens up, you’ll be presented with a menu where you’ll be able to get started or configure some options. The great thing is that everything is handled for you at this point, though you may want to familiarize yourself with the SDK Manager(Configure %3E SDK Manager) which is where you’ll update your Android SDK to support newer versions, as well as download things like code samples or support for Google Glass. But don’t worry about that now but if Android Studio says you’re missing something, this is where you’ll probably need to go to find it. So really there are three main things interacting when you use Android Studio to create your apps. * Android Studio itself, which is an IDE that provides you with a nice interface for coding. * The code you write in Java, which you installed a moment ago… * And the Android SDK which you’ll access through your Java code in order to do Android-type things If you find this all a bit complicated and daunting then… well, you don’t know you’re born. This used to be way worse. Maybe that offers some consolation… Step 3: Starting a New Project Once you’ve installed your samples, you can go back to the first page you saw when you loaded up Android Studio. Now you want to choose Start a new Android Studio Project – it’s finally happening! Enter the name you want for your application and your ‘company domain’. Together these elements will be used to create your package name with the following format: com.companyname.appname The package will be the compiled file or APK (‘Android Package File’) that you’ll eventually upload to the Google Play Store. There are ways that people can see this, so if you’re planning on making something you’ll eventually release, try to stay away from using ‘funny words’. The last field to enter is the directory where you want to save all the files pertaining to your app. I like to save in DropBox to make sure I always have a backup of my code. Click Next again and guess what… More options! Huzzah! Don’t worry, we’re nearly there… Next you need to decide what type of device you’re going to be developing for and in this case we’ll start with the Phone and Tablet option. Other options are TV, Wear and Glass. It’s fine if you want to develop for a myriad of platforms in the future – that’s one of the wonders of Android – but let’s start with something a bit more straightforward to begin with, okay? The other choice you have to make at this stage is the ‘Minimum SDK’. This is the lowest version of Android you want to support. Why not just enter the latest version of Android in here? Well, because relatively few people actually have the latest version of Android installed on their device at any given time. You want to support phones that are still running older versions in order to signNow the largest possible audience – especially overseas. Why not just go with Android 1.1? Well, apart from this not being an option (Froyo is as low as you can go), that would also prevent you from using any of the fancy new features from the latest updates. The best bet at this stage is to go with the default option, so just leave this field as it is. On the next page, you’ll be given the option to pick the way you want your app to look at the start. This will be the look of your main ‘Activity Module’ which is basically the main page of your app. Think of these like templates; do you want to have the title of your app along the top of the screen, or do you want your UI to fill the whole display? Do you want to start off with some elements ready-designed for you? Is your app primarily going to use Google Maps (don’t go here for a bit, things get more complicated with Google Play Services). Bear in mind that an app can have multiple activities that act like separate pages on a website. You might have a ‘settings’ activity for instance and a ‘main’ activity. So the activity isn’t the app per say but rather one stand-alone page of your app. For your first creation though, you’ll probably do best to make something really simple that just displays a single, basic activity. Select ‘Basic Activity’ to keep things as simple as possible and for all intents and purposes, this will now be your app. Click Next again you get the last few options. Now you get to pick the name for your activity and the layout name (if you chose ‘Basic Activity’ you’ll also have the title option and the ‘menu_resource’ name). The activity name is how you’ll refer to your activities in your code, so call it something logical (good advice for coding generally) like ‘MainActivity’. Creative, I know. The layout name meanwhile describes a file that determines the layout of an activity. This is a separate piece of code that runs in concert with the main activity code to define where elements like images and menus go and what fonts you’ll use. This is actually not Java but XML – or Extensible Markup Language if you want to impress your friends. For anyone with a background in web development, your XML is going to work a little like HTML or a CSS style sheet. The Java code for the activity meanwhile says what the elements on the screen do when pressed etc. It’s fine to leave the default name here as ‘activity_main’. Lastly, choose a name for the menu and for the title. Pick something nice for the title, as your users will be able to see this at some points. Click next… and now you get to see your app! Your blank, useless app… All that just to get started! You see why people give up? But really we can break it down into the following very basic steps: * Download and install Android Studio, making sure to include the Android SDK * Install Java SDK * Start a new project and select the basic details So it’s really not that bad… And remember: once you’ve done all this once, you can forget about it forever and focus on the fun stuff: creating apps! Your tea is probably cold at this point, so the next very important step, is to get more. Step 4: Making an Actual Thing Once your app opens, you should see a directory tree on the left with all the different files and folders that make up your app and a picture of a phone displaying ‘Hello World!’ in the center. Well, hello to you as well! (A basic app that displays ‘Hello World’ is what most new developers make first when they learn to program in a new language. Android Studio cheats though, because it does it for you!) You might notice that the open tab (along the top) is ‘activity_main.xml’, which is what the big phone is showing on its display. You may recall that activity_main.xml is the XML code that defines the layout instructions for your main activity. If you selected ‘Basic Activity’ when you started your project, then you’ll see a second XML file too called ‘content_main.xml’. For the most part, these two do the same thing but the ‘acitvity_main.xml’ contains the basic layout that Android Studio created for you when you selected ‘Basic Activity’. The stuff you want to edit is in content_main.xml, so open that up and don’t worry about it for now. (If this isn’t what is open to start, then use the directory on the left to open it by choosing: app %3E res %3E content_main.xml.) The Layout Android Studio is not showing the XML code itself here but rather a rendering of how the layout will appear on the screen. This is a visual editor a bit like Dreamweaver for web design and it makes life a little easier for us developers. You also have a bunch of options called ‘widgets’ down the left that you can add to your app. This is your basic app stuff; so for instance, if you want to add a button saying ‘OK’ to your activity, you can simply drag it over to the screen and drop it anywhere you like. Go ahead and dump an ‘OK’ button right underneath the ‘Hello World’. Something else you’ll find is that you can click on either of these elements in order to change the text and the ‘ID’. The ID is how you’re refer to each element (called a ‘view’) in your Java code, while the text is of course what you display to the user. Delete the ‘Hello World’ widget (or view) and change the text on the button to ‘Hello?’. Likewise, change the ‘id’ on the button to ‘button1’. I am now stealthily getting you to write a little program… Notice as well that when you select a view, you get options in the bottom right to change the text color and size etc. You can play around with these variables if you like to change the look of your button. We’re coming back here in a minute though so make a mental note! Now open up your MainActivity.java. The tab will be along the top but in case it isn’t, find it under:App %3E Java. This is the code that defines the behavior of your app. At this stage, you’re going to add in a little passage of code: [code]public void buttonOnClick(View v) { Button button1 = (Button) v; ((Button) v).setText("Hello!"); } [/code]This is going to go right underneath the first lone closed bracket ‘}’, just before the “@Override, Public Boolean”. It should look like this: What does it all mean? Well basically, anything following “void buttonOnClick” will be carried out when someone clicks on the button. We’re then finding the button with the “Button button1 = (Button) v;” code and then changing the text. Yes, there are other ways you could achieve the same thing but I feel like this keeps it nice and simple and thus easy to understand. Spend some time reading it and try to get your head around what is doing what… At the top of the page is the word ‘import…’. Click on that to expand it and make sure that somewhere there is the line: “import android.widget.Button;”. It should have appeared on its own when you typed out the last bit (Android Studio is smart like that) but you can add it yourself if it didn’t. (Notice as we type that lines end in “;”. This is basic Java formatting and if you forget one, it will throw up an error. Get used to searching around for them!) Now go back to your content_main.xml and click on the button. In the right corner, where you have your parameters for the button, you should be able to find an option called ‘onClick’. Click on this and then select the ‘onClick’ line of code you just wrote from the drop down menu. What you’ve just done, is told Android Studio that you want to associate the section of code with the button you created (because you’ll have lots of buttons in future). Now all that’s left to do is run the app you just made. Simple go to ‘run’ along the top and then select ‘run app’ from the drop down menu. You should already have your AVD (Android Virtual Device) installed but if not, you can go to: tools %3E Android %3E AVD Manager %3E + Create Virtual Device. Don’t forget you also need to install an Android version onto the device. Follow the steps to launch the emulator running your app. Be patient, it can sometimes take an age to load up… If it neverloads up, you can consider ‘packaging’ the app in order to create an APK. Drag this onto your Android device and double click on it to install and run it. Once it’s finally up and running you can have a go with this fun, fun app. What you should find is that when you click the button, the text from ‘Hello?’ to ‘Hello!’. We’re going to be rich… (If it doesn’t work… something has gone wrong. It wasn’t me, my one works! Look for red text in your code and hover your mouse over it to get suggestions from Android Studio.) Step 5: How to Get Better At App Development Okay, so that was a lie. We’re probably not going to be rich. At the moment the app we’ve made is pretty lame. You can try and sell it sure but you probably won’t get that many good reviews. The reason I talked you through this basic app creation though is because it teaches you the very fundamentals of programming. You have an action and a reaction – pressing on a button doessomething. Throw in some variables and some math, add some pretty images and a useful function and that’s genuinely enough to make a very basic app. So where do we go from here? There’s so much more to learn: we haven’t looked at the Android Manifest yet, we haven’t talked about your private keysign (or how fun it is when you lose that) and we haven’t even studied the Android app ‘lifecycle’ (nothing to do with The Lion King). There’s issues with supporting different screen sizes and there’s just so much more to learn. Unfortunately, it would take an entire book to teach you the entirety of Android app development. So that’s a good place to start: buy a book! But more important is just to play around and try things. Don’t set out to make your world-changing app on day one. Instead, focus on making something simple and straightforward and then build on that. Try changing the layout of the text and try adding in more buttons and more rules to make your app actually useful. Eventually, you’ll find there’s something you want to do that you can’t figure out on your own. Maybe you want a sound to play when someone clicks on your button, for example. This is where the real learning starts. Now all you need to do is search in Google: “How to play sound onClick Android” You’ll find a bunch of complicated answers but eventually someone, probably on Stack Overflow [ http://stackoverflow.com/ ], will break down the answer simply for you. Then what you do is you copy that code and you paste it into your app, making a few changes as you go. Likewise, try out some of the code samples available through Android studio. See how they work, try changing things and just experiment. Things will go wrong and error messages will come up but for the most part, if you just follow the instructions, it’s easy enough to handle. Don’t panic! And that’s pretty much how you learn to make apps. A lot of it boils down to reverse engineering and copying and pasting. Once you have the main program in place, the rest you pick up as you go. If you want the absolute easiest way to start, then just find some sample code that’s close to what you make and change it. No one is going to be able to explain all this to you in a way that makes any sense and if you worry about not grasping everything to begin with, you’ll never get anywhere. So instead, dive in, get your hands dirty and learn on the job. It’s complicated and it’s frustrating but ultimately it’s highly rewarding and more than worth the initial effort. EDIT: Added Source : http://www.androidauthority.com/android-app-development-complete-beginners-658469/
-
How do I implement Gmail like swipe to delete list view in Android?
NO NEED OF EXTERNAL LIBRARY..Y MAKE APP HEAVY IF ANDROID GIVES SOLUTION ….As of v22.2.0, the Android support team has included an ItemTouchHelper class that makes swipe-to-dismiss and drag-and-drop pretty simple. This may not be as full-featured as some of the libraries out there, but it comes directly from the Android team.Update your build.gradle to import v22.2.+ of the RecyclerView librarycompile 'com.android.support:recyclerview-v7:22.2.+'Instantiate an ItemTouchHelper with an appropriate SimpleCallbackItemTouchHelper.SimpleCallback simpleItemTouchCallback = new ItemTouchHelper.SimpleCallback(0, ItemTouchHelper.LEFT | ItemTouchHelper.RIGHT) { [...] @Override public void onSwiped(RecyclerView.ViewHolder viewHolder, int swipeDir) { //Remove swiped item from list and notify the RecyclerView } }; ItemTouchHelper itemTouchHelper = new ItemTouchHelper(simpleItemTouchCallback);** Note that the SimpleCallback takes in the directions that you want to enable drag-and-drop and the directions that you want to enable swiping.Attach to your RecyclerViewitemTouchHelper.attachToRecyclerView(recyclerView);
-
How do I implement a Python Machine Learning algorithm to operate in an Android app?
This is one of those things that sounds easy but is actually very hard. There is one option there which is Kivy that allows for python programs to be compiled into Android apps, but it is probably not super reliable.I would suggest that you work out what the Python ML code is generating and see if there’s a way to run an execution of it on the phone. For example, if they are decision trees, you can generate decision trees as if-then statements you can compile into your code.
-
Why has Google not implemented HTML signatures in Android Gmail?
The reason is that the Android Gmail app does not render HTML when composing. It can read it just fine and there are ways to get your signature into an email, you just need to know how.But why would they do this when so many people have been asking for it over the years? Not making excuses and I have yet to find a straight answer to that question, but I can tell you that it usually boils down to security. In other words, it is damn near impossible for someone to send malicious code in a plain text email. It’ll have to be added as some form of attachment.But on to answer your question… The easiest way is to create the desired signature(s) in Gmail and share them via Google Drive with your devices from a unique folder, such as “Signatures.” Once you got this setup, then it is simply a matter of adding the URL of your Google Drive Signatures folder to your Android phone Gmail App via the setup menu.Here’s how to your company logo or signature image, step-by-step:Host your image on Google DriveLog in to your Google Drive accountCreate a folder, name it Signature or something like thatSelect the folder and click on the Sharing button; set the folder visibility to Public and the access to anyone can viewOpen your folder and upload your image, or add an existing one to the folder. The image will take on the Public visibility.Copy the folder’s ID from the address bar, and build up the URL to include the folder ID and the image name.Set up your signatureOpen Gmail, click on the cog icon thingy and choose SettingsPaste in the image URL you built above and your company logo should appear in the box next to Web address URL, click OKYou should now see your logo in your signatureScroll down to the bottom and save your settingsSend yourself or a coworker an email to test it has worked!
-
How can I add Firebase to Android?
Add Firebase to Your Android projectPrior RequirementsA device that runs on Android 2.3 (GingerBread) or higher version and Google Play services 9.2.1 or higher.Google Play services SDK from the Android SDK ManagerAndroid Studio 1.5 or higherAn Android Studio project and its package nameIt has to be noted that the feature Instant Run in Android Studio prior to the version 2.2 is incompatible with Firebase Analytics and may be preventing certain events from collection. Hence, it is recommended that you either disable instant run or upgrade to Android Studio 2.2. Incase you are using a quick start remember of getting the package name from the ApplicationManifest.xml.Adding Firebase to your applicationYou will be needing a Firebase project and a Firebase configuration file for your app.Create a Firebase project in the Firebase console, if you don’t already have one. On the other hand if you are having an existing Google project in association with your mobile app, click import Google Project. Otherwise, click Create New Project.Click Add Firebase to your Android app and keep following the setup steps. If you are importing an existing Google project this may be happening automatically and you can download the config file. For more details on downloading the config file visit Download a configuration fileWhen prompted you must enter the app’s package name. It is important for entering the package name your app is using which can only be set when you add an application to your Firebase project.Next you need to download the google-services.json file You can download this file again at any time. For more information please visit Download a configuration fileCopy this file into your project’s module folder typically app/If you are having multiple build variables with different package names defined each application must be added to your project in Firebase console.Adding the SDKIf you feel that there is a necessity of integrating Firebase Libraries into one of your own projects you must be performing a few fundamental tasks of preparing your Studio project. You may have already done this as part of adding Firebase to your app.First you are required to add rules in your root level build.gradle file for including google service pluginbuildscript {// ...dependencies {// ...classpath 'com.google.gms:google-services:3.0.0'}}Next in your module Gradle file (usually the app/build.gradle), add the apply plugin line at the bottom of the file for enabling Gradle plugin:apply plugin: 'com.android.application'android {// ...}dependencies {// ...compile 'com.google.firebase:firebase-core:9.2.1'}// ADD THIS AT THE BOTTOMapply plugin: 'com.google.gms.google-services'You should also be adding the dependencies of the Firebase SDKs you are willing to use we are recommending starting with the firebase-core, which include Firebase Analytics.Available Libraries
Trusted esignature solution— what our customers are saying


Get legally-binding signatures now!
Frequently asked questions
How do i add an electronic signature to a word document?
How to get electronic signature capability?
Pdf element how to sign document on phone?
Get more for How To Implement eSign in Android
- eSign Louisiana Legal Limited Power Of Attorney Online
- How Can I eSign Maine Legal NDA
- eSign Maryland Legal LLC Operating Agreement Safe
- Can I eSign Virginia Life Sciences Job Description Template
- eSign Massachusetts Legal Promissory Note Template Safe
- eSign West Virginia Life Sciences Agreement Later
- How To eSign Michigan Legal Living Will
- eSign Alabama Non-Profit Business Plan Template Easy
Find out other How To Implement eSign in Android
- Security interest to secure performance of all obligations of this contract
- List of persons interested form
- Notice to interested persons of commencement form
- Probate court form 113
- Summary of account of trustee form
- Make a living trust in vermontnolo form
- Trustsvermont judiciary form
- Juliette and the licks rid bogen mount r7 and r7 tp the united form
- Vermont on form
- Notice of appeal and case information statement njgov
- 15 day notice of termination of residential month to month form
- Rent and other charges now due and unpaid as follows form
- 30 day notice of termination for breach of residential lease form
- 60 day notice of termination of verbal residential month to form
- 60 day notice of termination of written residential month to form
- 7 day notice of termination form
- Terminating a lease or rental agreement faqs findlaw form
- Of verbal residential lease when leased premises are sold form
- Make them appear ignorant or less than expert form
- Under vermont law the notice to pay form