Template locking
Lock dropdown options at the template level to prevent unauthorized edits and ensure consistent choices across all sent documents.


Dropdown fields reduce free-text variability, speed form completion, and ensure inputs match required business logic while preserving the signature integrity of the document.

Contract managers design document templates that include dropdown fields to standardize clauses, pricing options, and approval tiers. They monitor versioning and ensure that dropdown choices align with legal language and internal policy requirements before sending documents for signature.
HR administrators embed dropdown fields in onboarding and benefits forms to collect structured data such as department, employment type, and benefit selections. Standardized choices simplify reporting, reduce errors, and speed the completion and storage of personnel records.
Organizations that manage repeated structured data or regulated inputs see immediate operational benefits from dropdown fields.
Dropdown fields are suitable for legal documents, HR forms, vendor onboarding, education records, and healthcare intake where consistent answers matter.
Lock dropdown options at the template level to prevent unauthorized edits and ensure consistent choices across all sent documents.
Mark dropdowns as required to prevent document completion until a valid option is selected by the signer.
Use conditional visibility so dropdown choices control the appearance of other fields or sections within the document.
Set a sensible default to streamline signing for the most common scenario while still allowing the signer to change it.
Update dropdown option lists centrally for template families to maintain alignment across multiple documents and versions.
Extract dropdown selections into CSV or JSON exports for reporting, analytics, or integrations with downstream systems.
Sync dropdown selections with Google Sheets or populate options from a Google Sheet to maintain a central list of approved values for templates.
Map dropdown choices to CRM fields so selections populate contact or opportunity records, supporting consistent data across sales and customer records.
Store completed documents with dropdown metadata in cloud drives for searchable records and simplified auditing of choice-driven workflows.
Use automation connectors to trigger follow-up actions based on dropdown choices, such as notifications, task creation, or data exports.

| Setting Name | Configuration |
|---|---|
| Reminder Frequency | 48 hours |
| Dropdown Options Template | Central list |
| Required Field Enforcement | Enabled |
| Conditional Visibility Rules | Per-field logic |
| Audit Trail Enabled | Yes |
Dropdown fields are supported across modern web browsers and in mobile applications that offer full form editing and signing capabilities.
For template creation and complex rule configuration access via a desktop browser is recommended; mobile clients support selection and basic form completion but may limit advanced template editing.
A large HR group implemented dropdown fields for job role, employment type, and work location to remove manual entry inconsistencies.
Resulting in faster system updates and fewer HR correction emails.
A procurement team embedded dropdowns for vendor category, service type, and payment terms to ensure standardized vendor profiles.
Leading to clearer supplier segmentation and reduced account reconciliation effort.
| Criteria | signNow (Recommended) | DocuSign | Adobe Sign |
|---|---|---|---|
| Dropdown Field Support | |||
| Conditional Logic | |||
| Template Locking | |||
| API Field Mapping |
Set according to records policy
Daily backups recommended
Monthly or on-demand exports
PDF with embedded metadata
Follow provider SLA
| Pricing Metric | signNow (Featured) | DocuSign | Adobe Sign | Dropbox Sign | OneSpan |
|---|---|---|---|---|---|
| Free Trial Availability | Yes (trial) | Yes (trial) | Yes (trial) | Yes (trial) | Contact sales |
| Entry-level starting price | From $8 per user | From $10 per user | From $14 per user | From $15 per user | Contact sales |
| API Access included | Yes | Yes | Yes | Yes | Yes |
| Advanced field types | Dropdowns and logic | Dropdowns and logic | Dropdowns and logic | Dropdowns basic | Advanced enterprise |
| HIPAA-ready option | Available under BAA | Available under BAA | Available under BAA | Available under enterprise plan | Available under BAA |
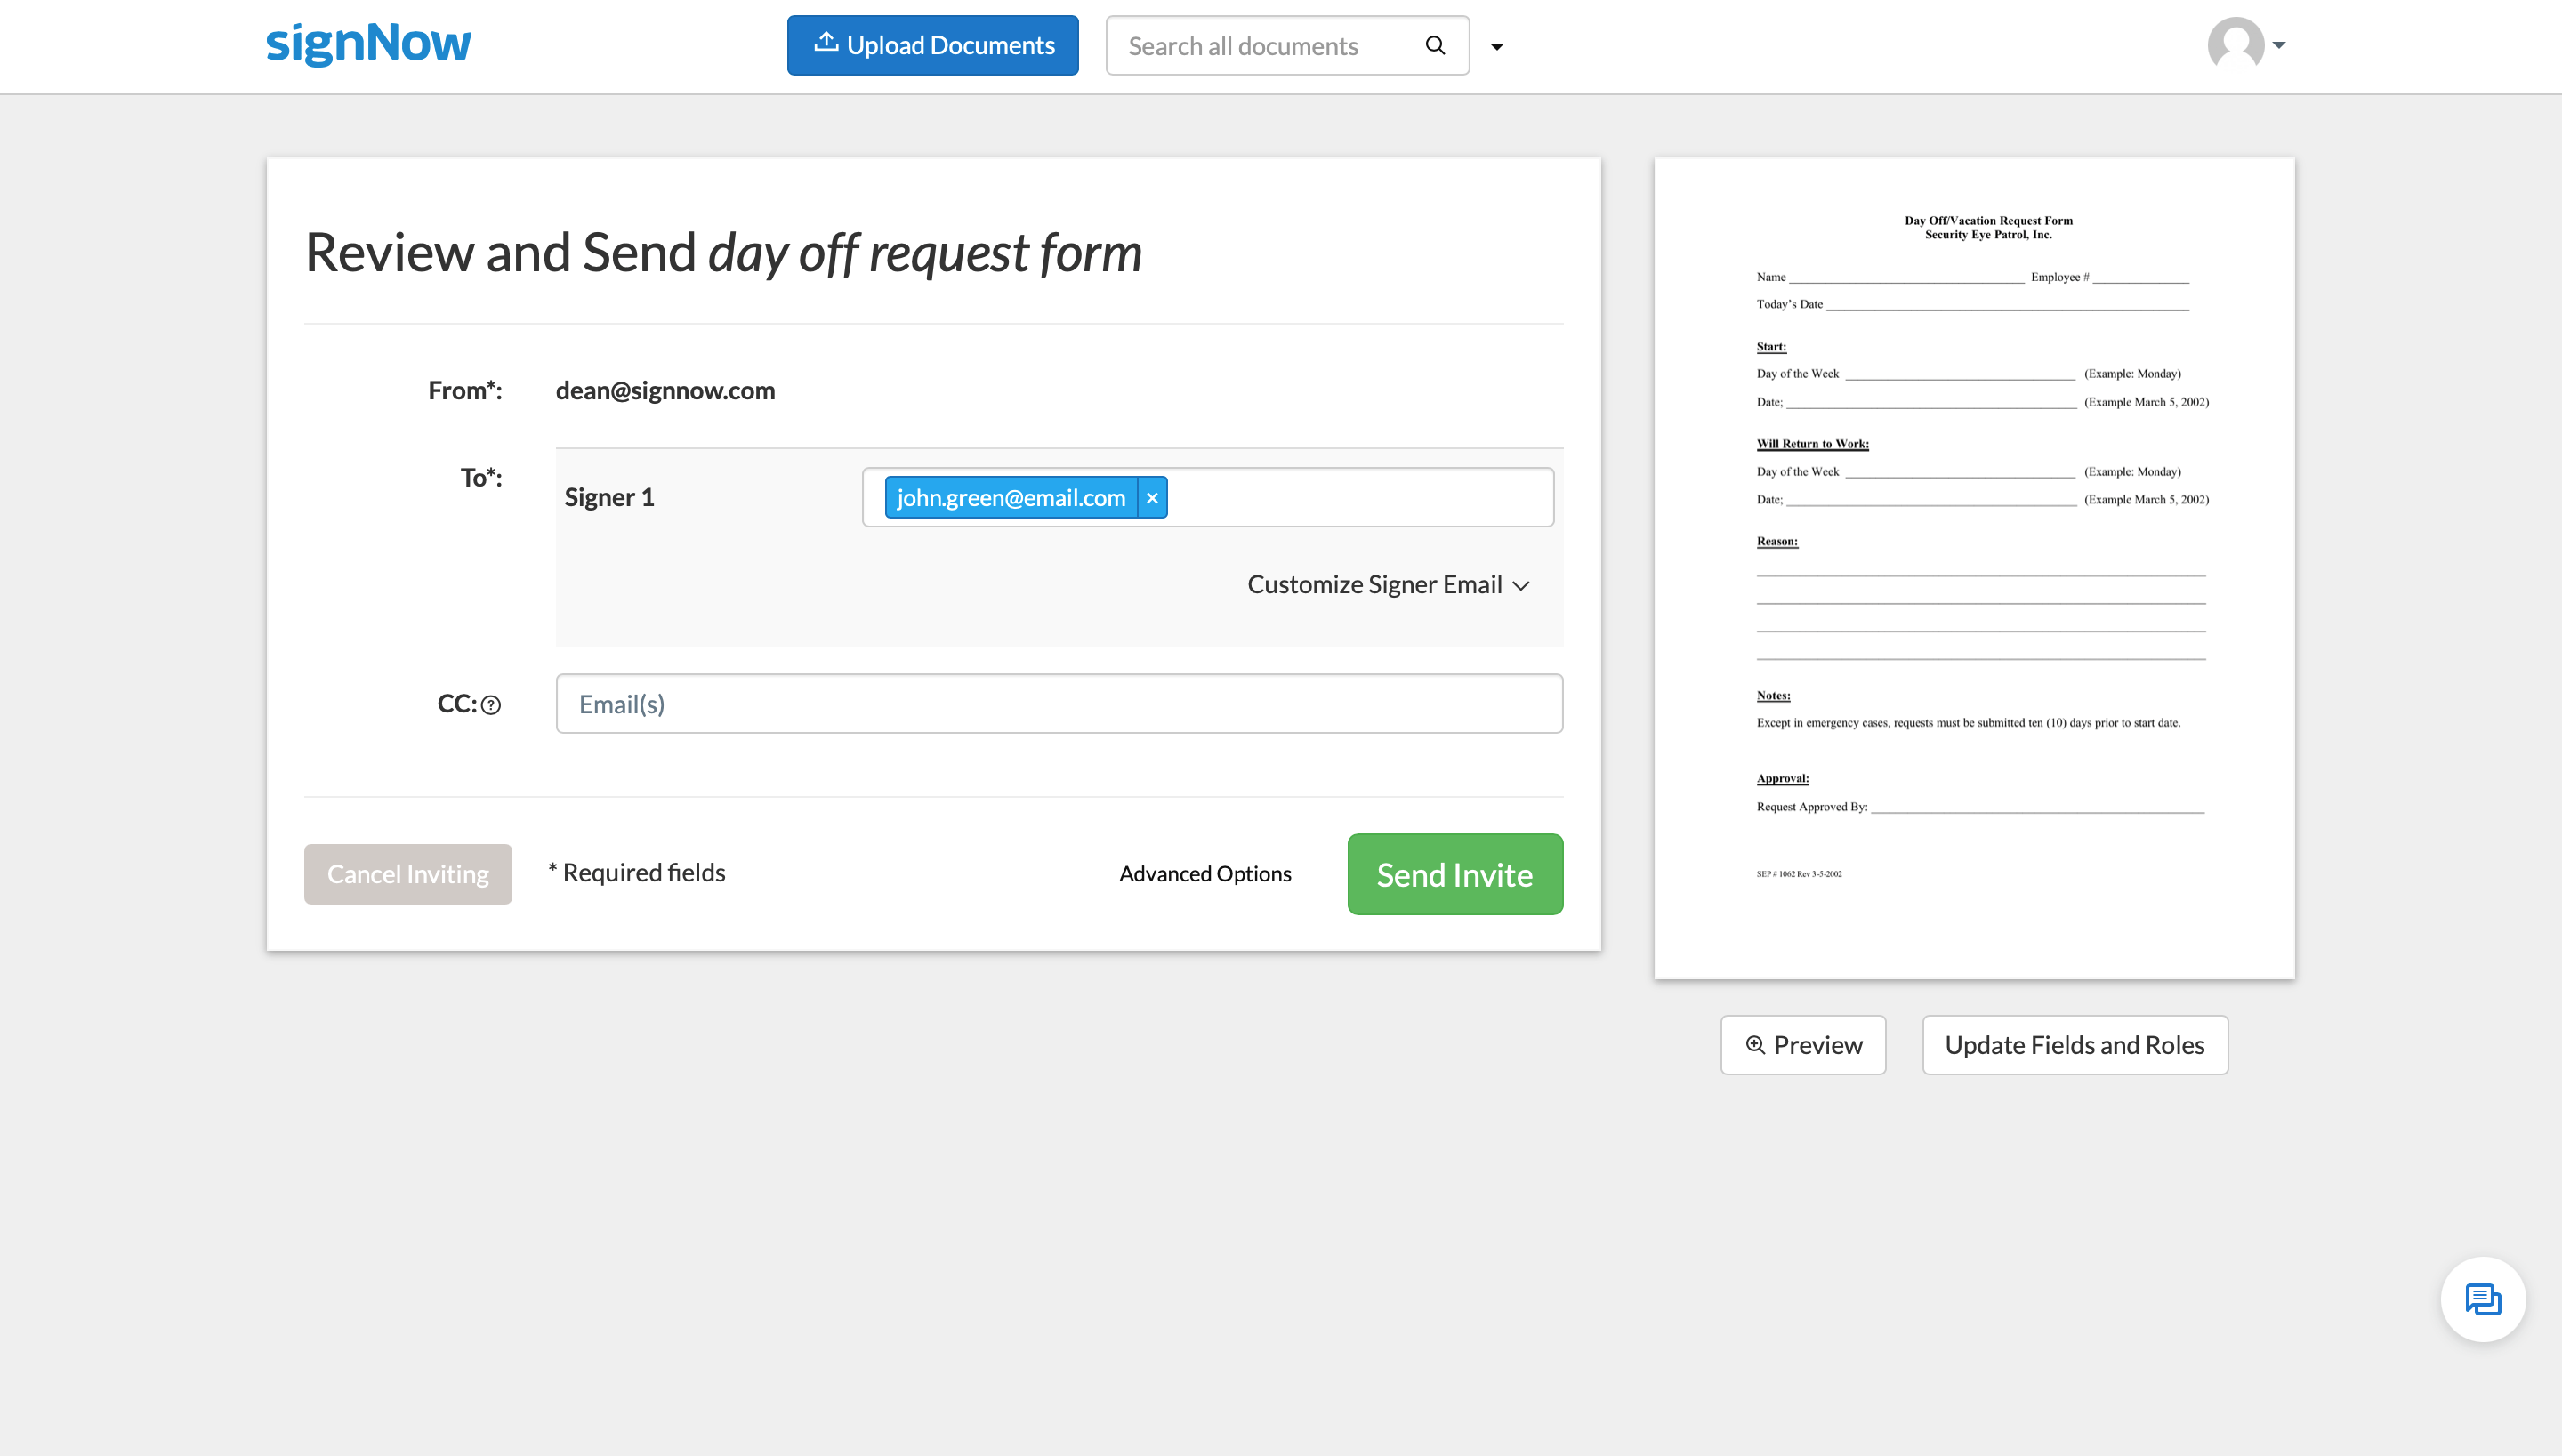
Let recipients fill out your documents by selecting from multiple answer options instead of typing text. Dropdown fields allow you to collect completed documents faster and avoid costly errors.
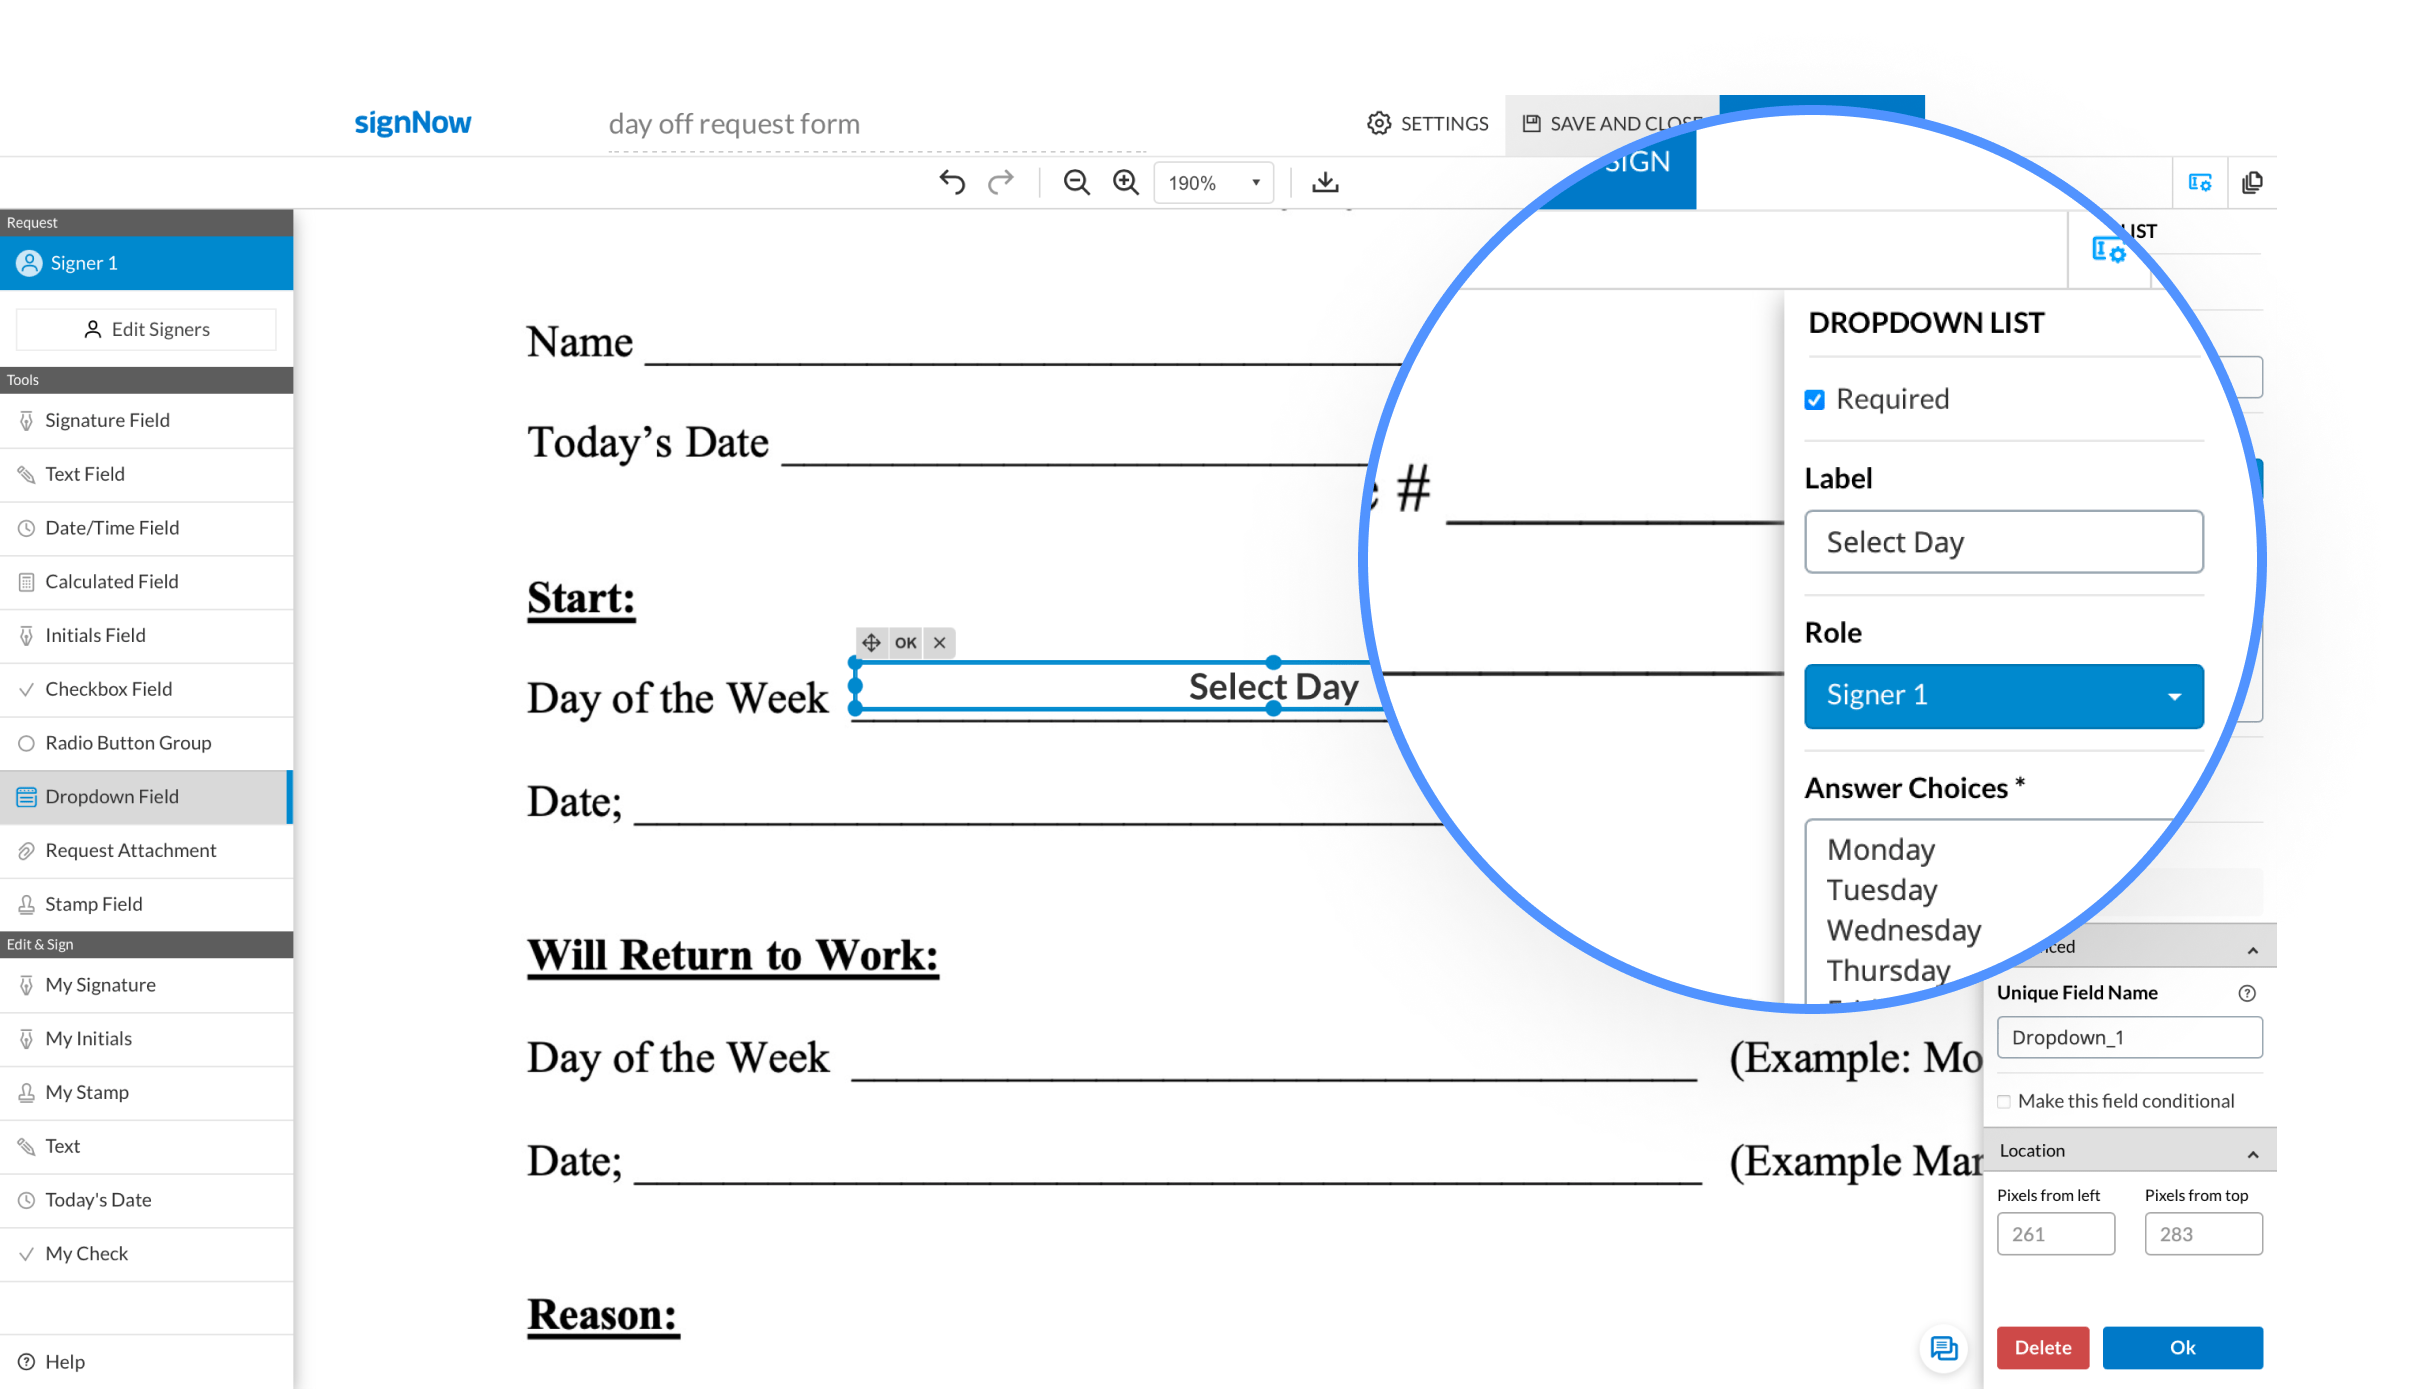
Open a document in the airSlate SignNow editor. Select Dropdown Field in the left-hand sidebar and then click anywhere on the document to drop the field. Adjust the field’s positioning by dragging it across the page. You can also resize the field by dragging its edges. Once finished, click OK.
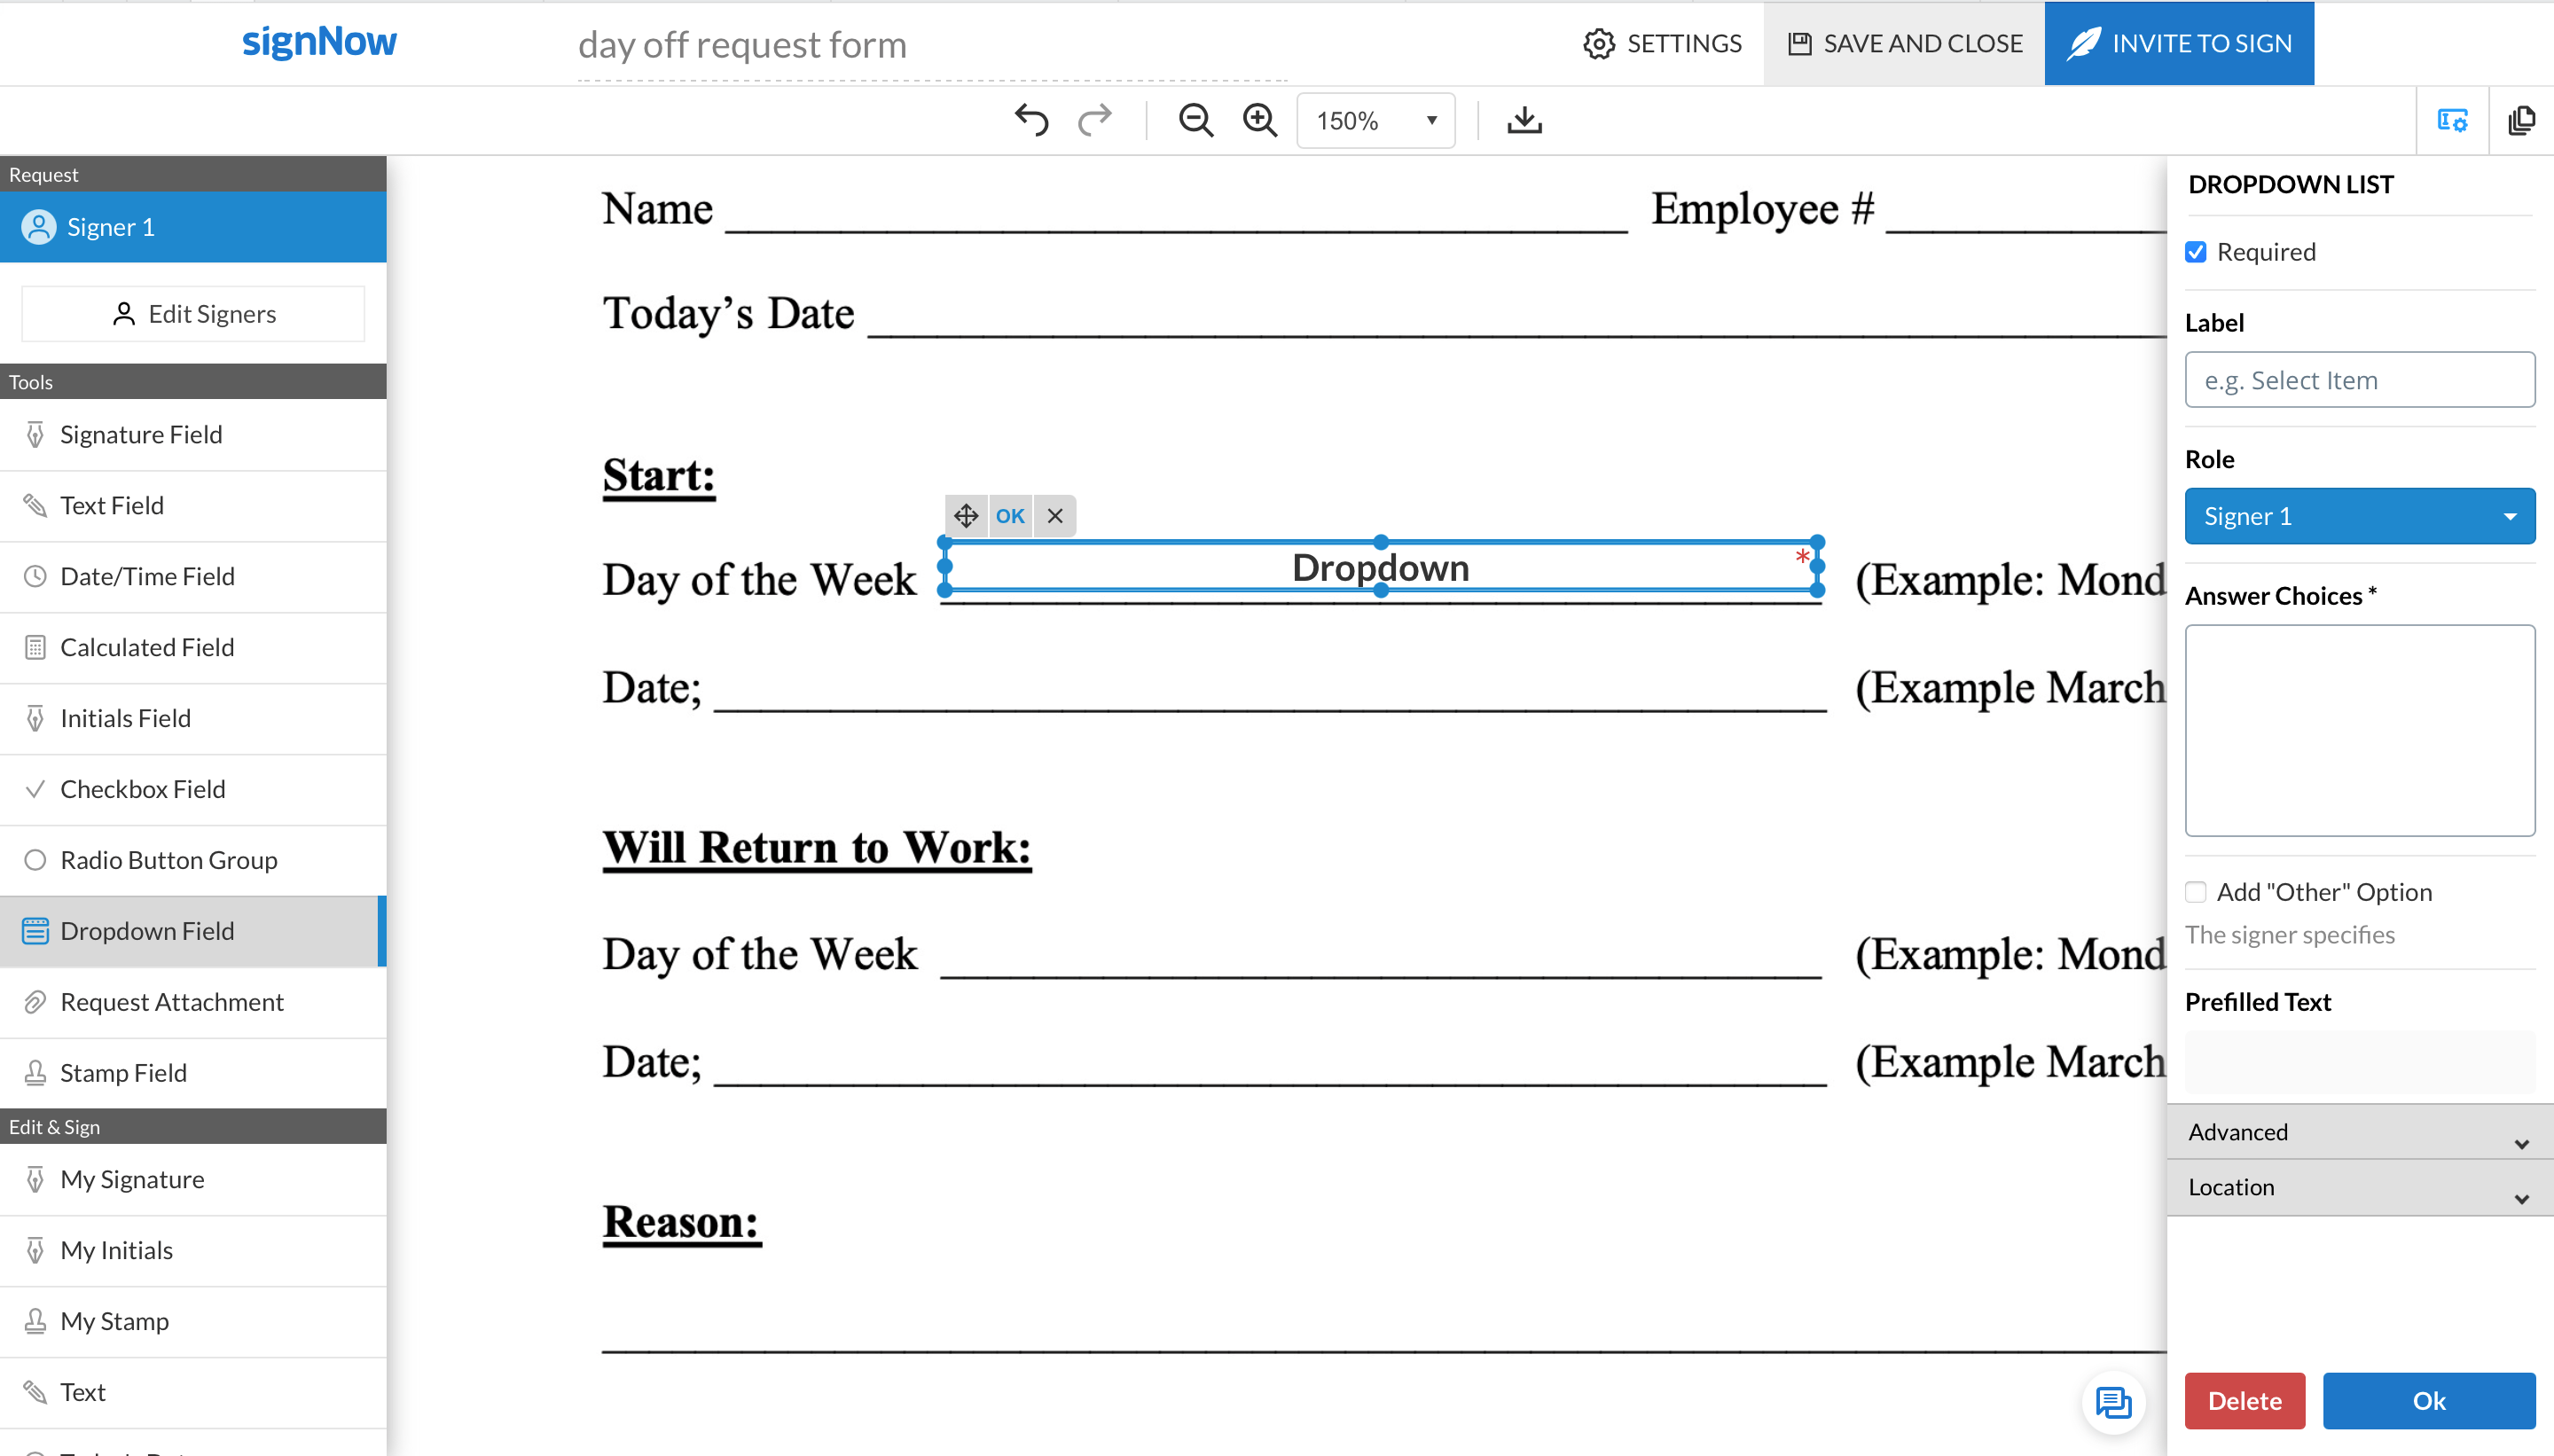
Click on the dropdown field, its settings will appear on the right:
Once you have added all the fillable fields you need, save and close the document or send it for signing by clicking Invite to Sign in the top right corner of the editor’s interface. Finally, enter your signer’s email address, add CC recipients if needed, and click the Send Invite button.