Field Validation
Set patterns and required inputs to prevent malformed data and enforce business rules such as numeric ranges, date constraints, and email formats before submission.


Inserted fields standardize where recipients provide information, improve form completeness, and reduce downstream processing time while enabling validation, conditional logic, and integration with recordkeeping systems.

Manages multiple templates and places signature, initial, and date fields to ensure contracts are complete and auditable. Routinely maps fields to a contract repository and configures reminders to close outstanding signatures on schedule.
Prepares onboarding packets with required data fields, checkboxes, and signature blocks. Uses validation and conditional fields to adapt forms for full-time, part-time, and contractor hires and ensure regulatory compliance.
Teams across legal, HR, sales, and operations use inserted fields to collect standardized data and capture approvals.
These roles benefit from field templates, validation rules, and integrations that reduce manual work and support compliance.
Set patterns and required inputs to prevent malformed data and enforce business rules such as numeric ranges, date constraints, and email formats before submission.
Display or require fields only when certain answers are selected, reducing signer confusion and tailoring forms to specific scenarios or roles.
Automatically populate fields from CRM records, user profiles, or CSV imports to reduce signer effort and ensure consistency across documents.
Save and share field arrangements as templates to ensure consistent placement, naming, and validation across teams and document types.
Apply template-based field placement to send personalized, field-complete documents to many recipients in parallel, preserving tracking for each recipient.
Programmatically create, place, and modify fields via API to integrate document assembly, data prefill, and automated post-signature processing into enterprise workflows.
A visual editor with snap-to-grid alignment, resize handles, and quick duplication to place signature blocks, initials, dates, text inputs, checkboxes, and dropdowns precisely on any document page.
Save field arrangements as templates to reuse across similar documents, maintain consistency, and accelerate batch sending while ensuring the same data mapping and validation settings persist.
Show or hide fields based on recipient responses or prior answers; useful for optional addenda, supplemental disclosures, or role-specific inputs to keep forms concise.
Bind fields to external data sources or CRM fields to prefill known values and export signed form data consistently for automated processing and recordkeeping.

| Configuration | Typical default and recommended values |
|---|---|
| Field Assignment Logic | Assign by role or recipient email automatically |
| Reminder Frequency | Every 48 hours until completion |
| Field Validation Rules | Enable email, phone, and date formats |
| Data Export Mapping | Map to CRM fields on completion |
| Retention and Archive | Move signed documents to secure storage |
Inserted fields work across modern browsers and native mobile apps, but there are minor differences to test before wide deployment.
Always validate templates on target devices and screen sizes, test mobile touch targets for signature and checkbox fields, and confirm behavior in the native app versus a mobile browser to ensure consistent signer experience.
A clinic converted paper intake to digital forms with designated text, date, and checkbox fields to capture patient details and consents efficiently.
Resulting in faster check-in, fewer transcription errors, and a clearer HIPAA-compliant audit trail for each patient visit.
A commercial sales team used templates with signature, pricing, and dropdown fields to standardize contract terms and speed approvals.
Leading to shorter sales cycles, fewer post-signature corrections, and consistent data feeding into billing systems.
| Feature and Capability Comparison Matrix | signNow (Recommended) | DocuSign | Adobe Sign |
|---|---|---|---|
| Field Types Supported | All common types | All common types | All common types |
| Conditional Logic | Limited conditional rules | Advanced rules | |
| Bulk Field Placement | |||
| Mobile Field Editing |
| Plan and Pricing Comparison | signNow (Recommended) | DocuSign | Adobe Sign | HelloSign | PandaDoc |
|---|---|---|---|---|---|
| Free or entry-level option | Free trial available | Limited free plan for individuals | Free trial only | Free tier with limited sends | Free trial available for small teams |
| Starter plan pricing | Plans often start near $8–$15 per user monthly | Entry plans around $10–$25 per user monthly | Entry plans from $14.99 per month | Starter around $15 per user monthly | Entry from $19 per user monthly |
| Advanced field features | Included in mid-tier and up | Available on business plans | Included with higher-tier subscriptions | Business plans include advanced fields | Available on higher plans |
| Enterprise capabilities | Custom quotes, SSO, admin controls | Enterprise-level controls and SSO | Enterprise solutions and integrations | Enterprise with advanced APIs | Enterprise with advanced workflow features |
| Typical contract terms | Monthly and annual billing options | Annual preferred for volume discounts | Annual and volume pricing available | Monthly or annual billing | Annual contracts with custom terms |
airSlate SignNow allows you to turn your documents into interactive, fillable forms in seconds. Just drag and drop fillable fields anywhere on your document to ensure fast and error-free completion.
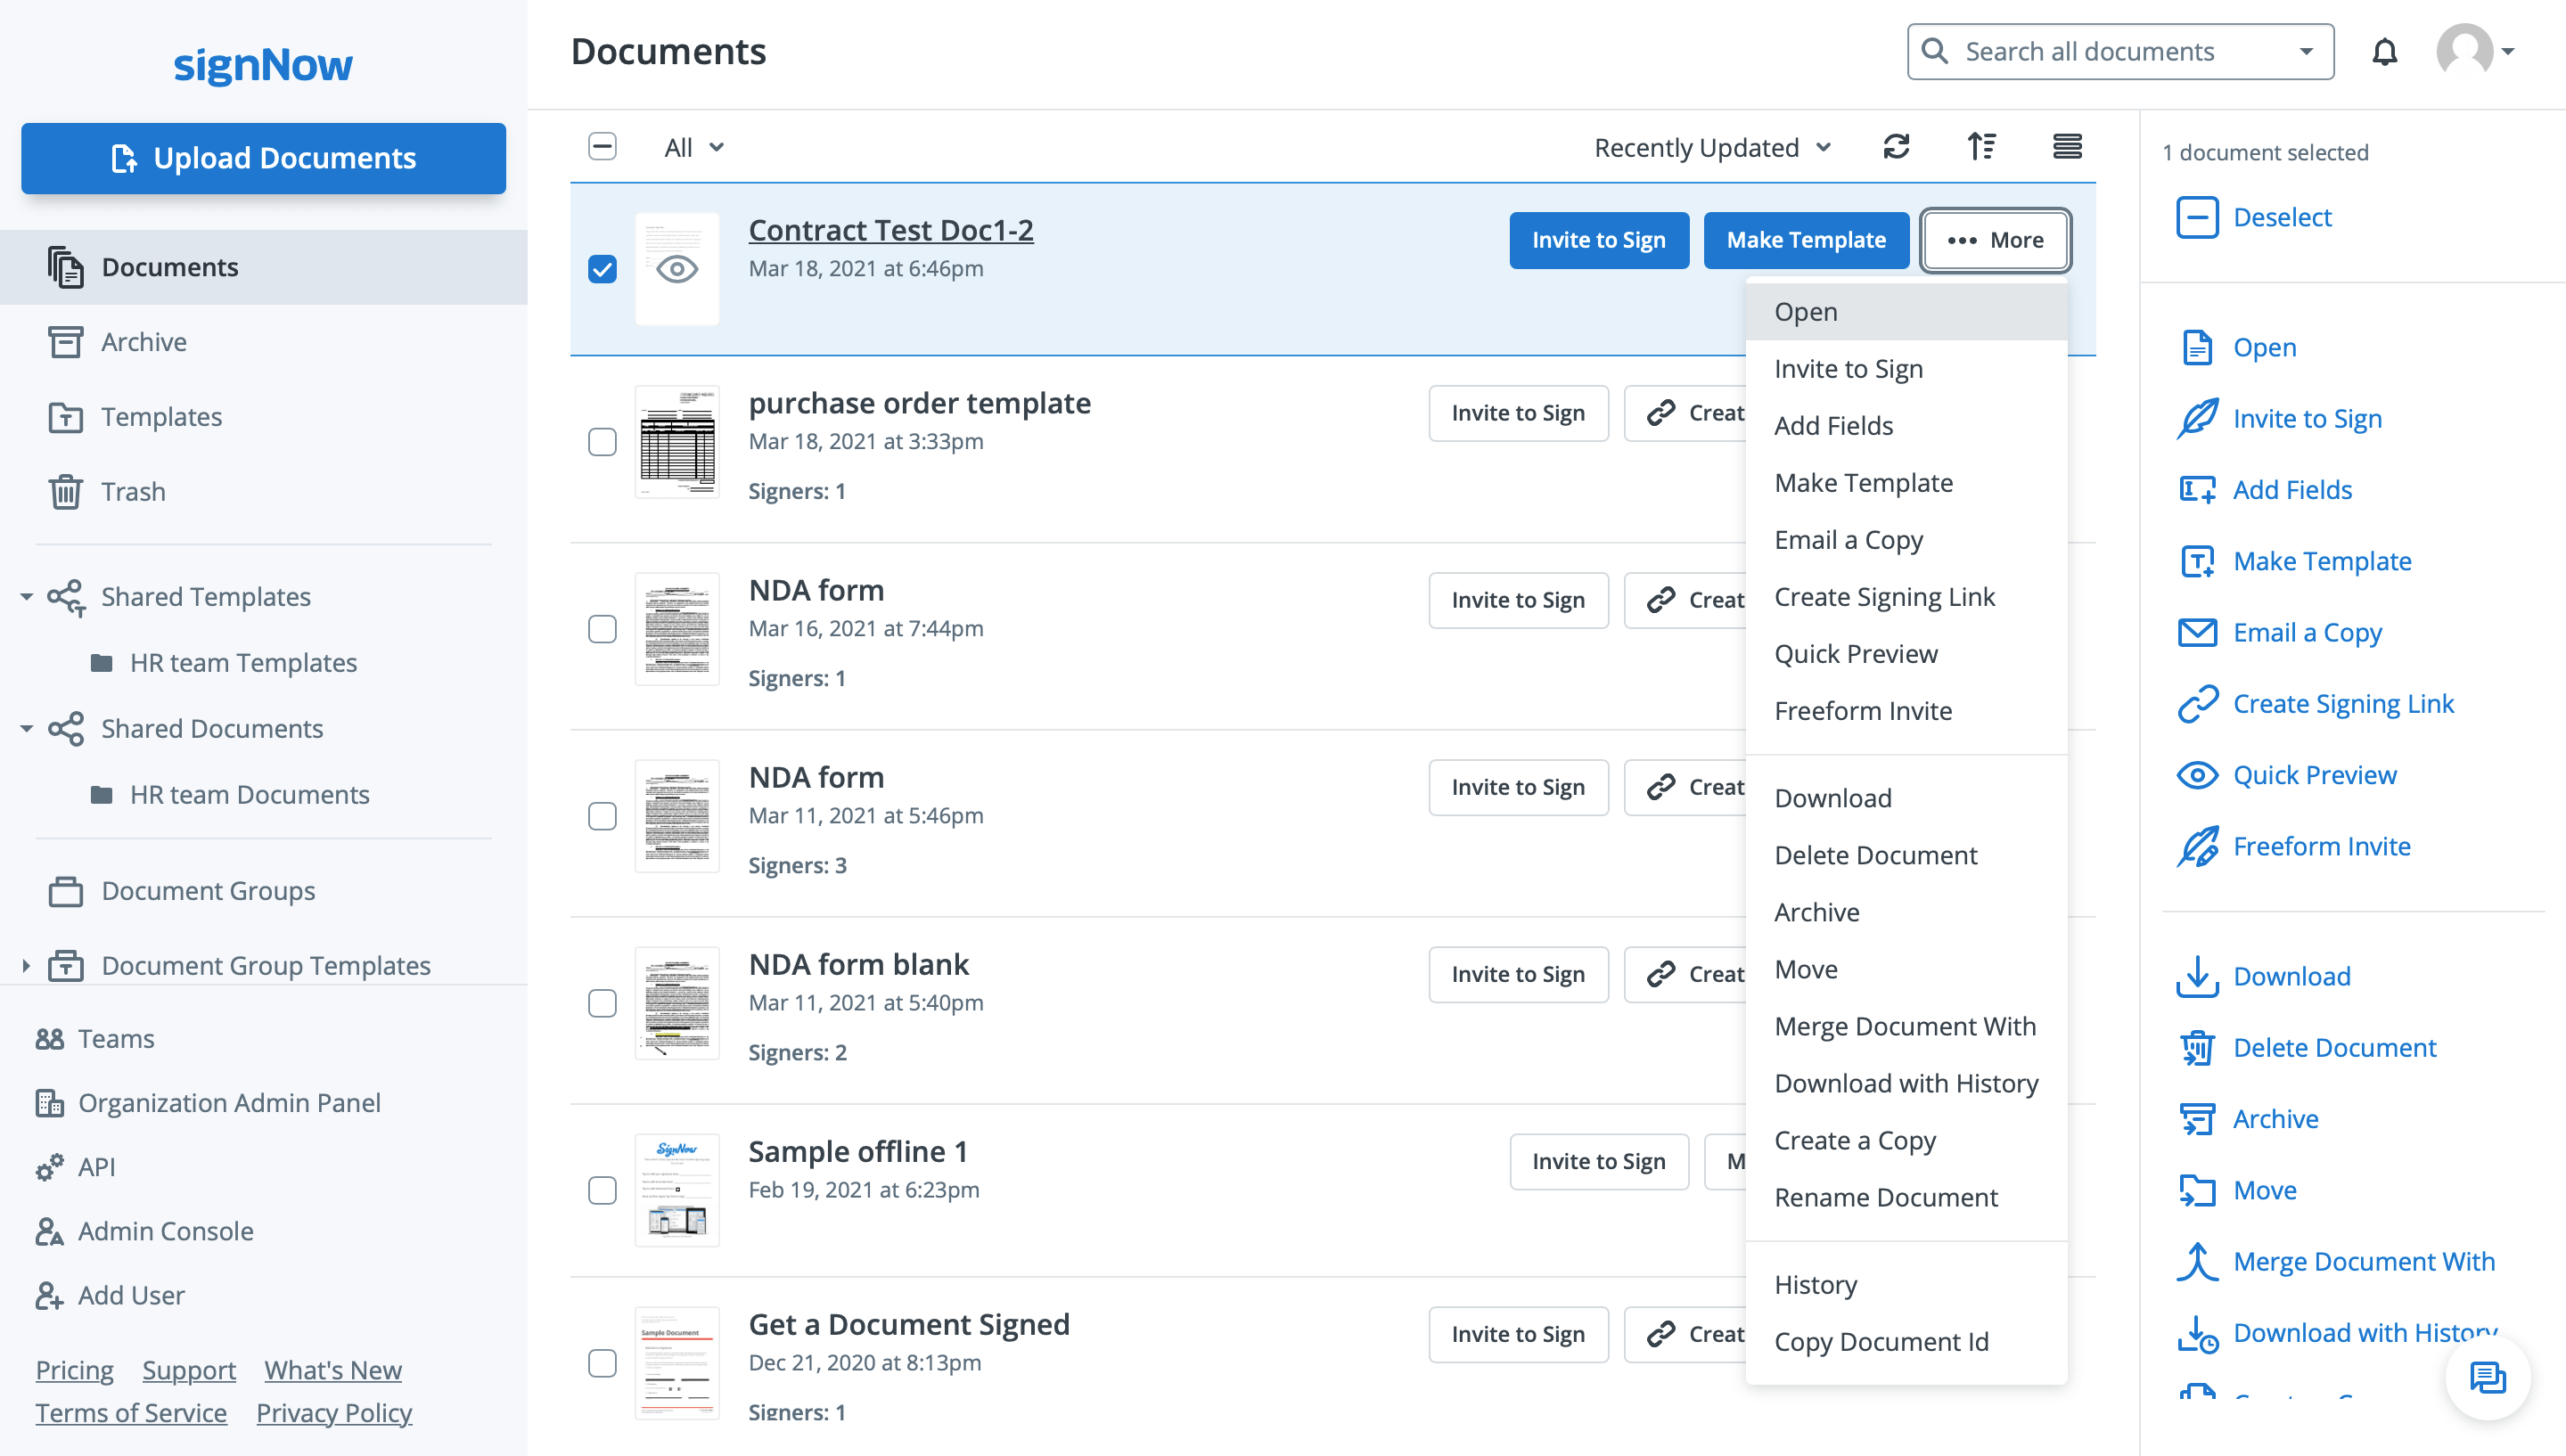
In the airSlate SignNow web app, click the Upload Documents button and browse your device for the document you need to be signed. Then, open it in the editor by clicking More > Open.
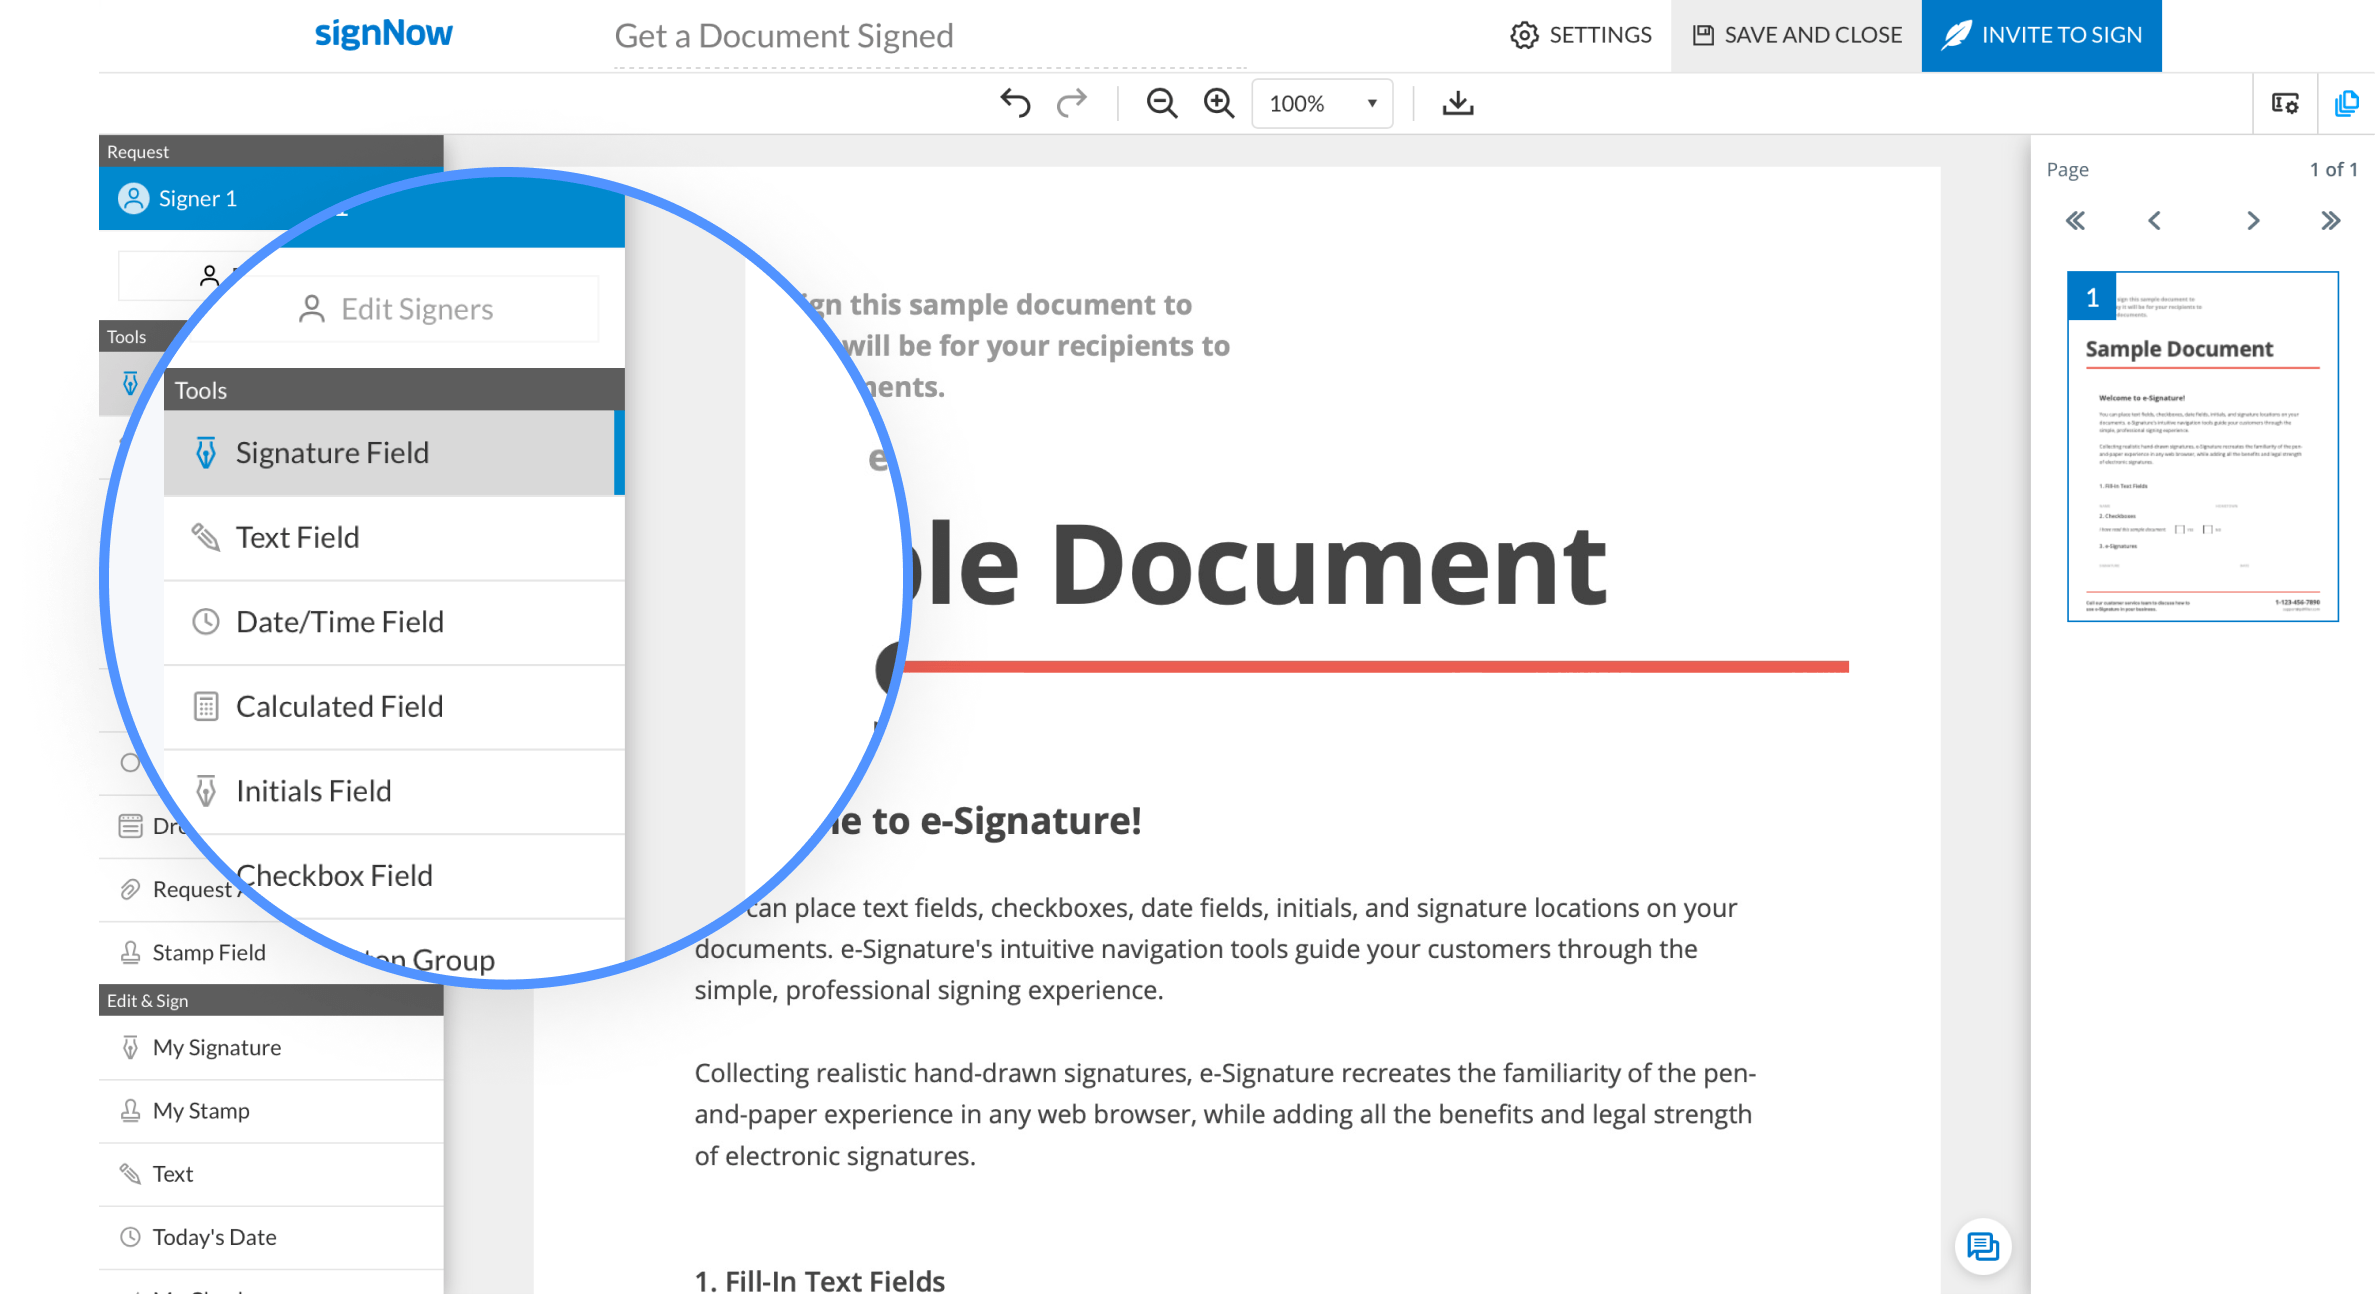
airSlate SignNow allows you to insert various types of fillable fields in your documents, including text fields, signature fields, date/time fields, calculated fields, initials fields, checkbox fields, radio button groups, dropdown fields, and attachment request fields. Find all these options in the left-hand toolbar of the airSlate SignNow editor (the Tools section).
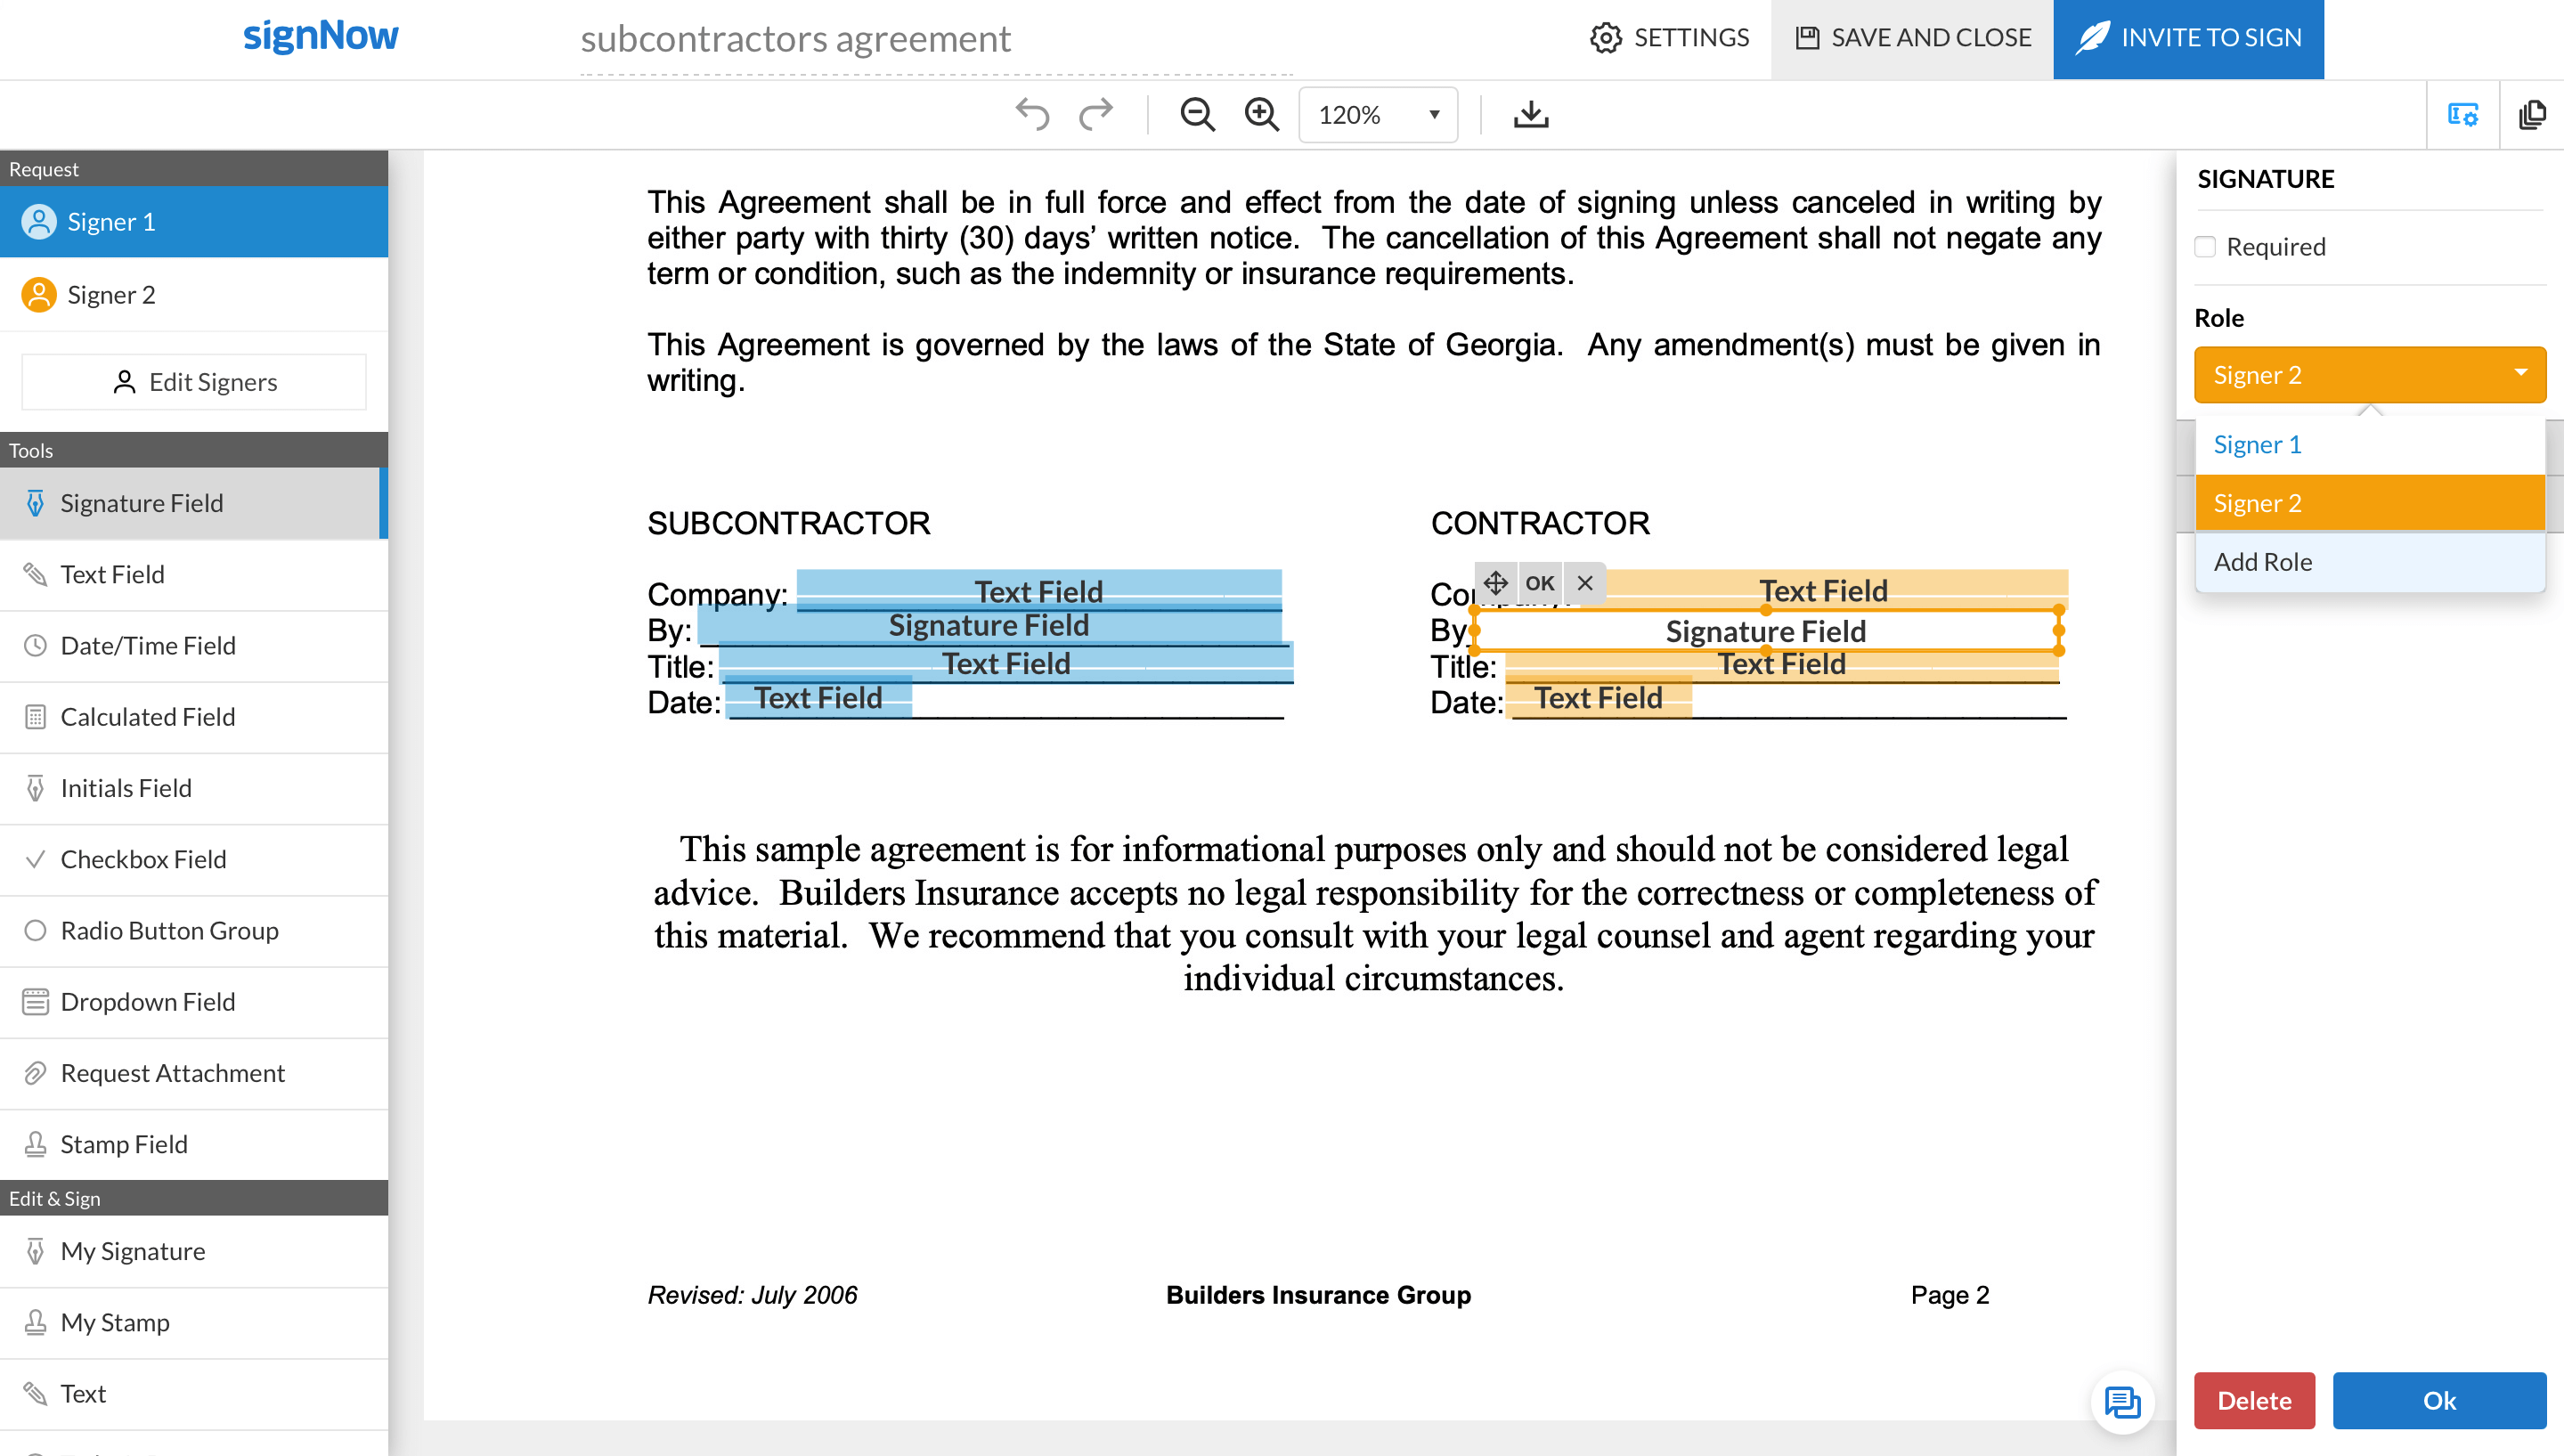
To place a fillable field on a document, simply select the type of field you need from the toolbar on the left and click on the document where you need the field to appear. Alternatively, drag and drop fields in your document.
Once a field is in place, you can adjust its position by dragging it across the page. Resize a field by dragging its anchor points (dots at the edges). When finished, click OK.
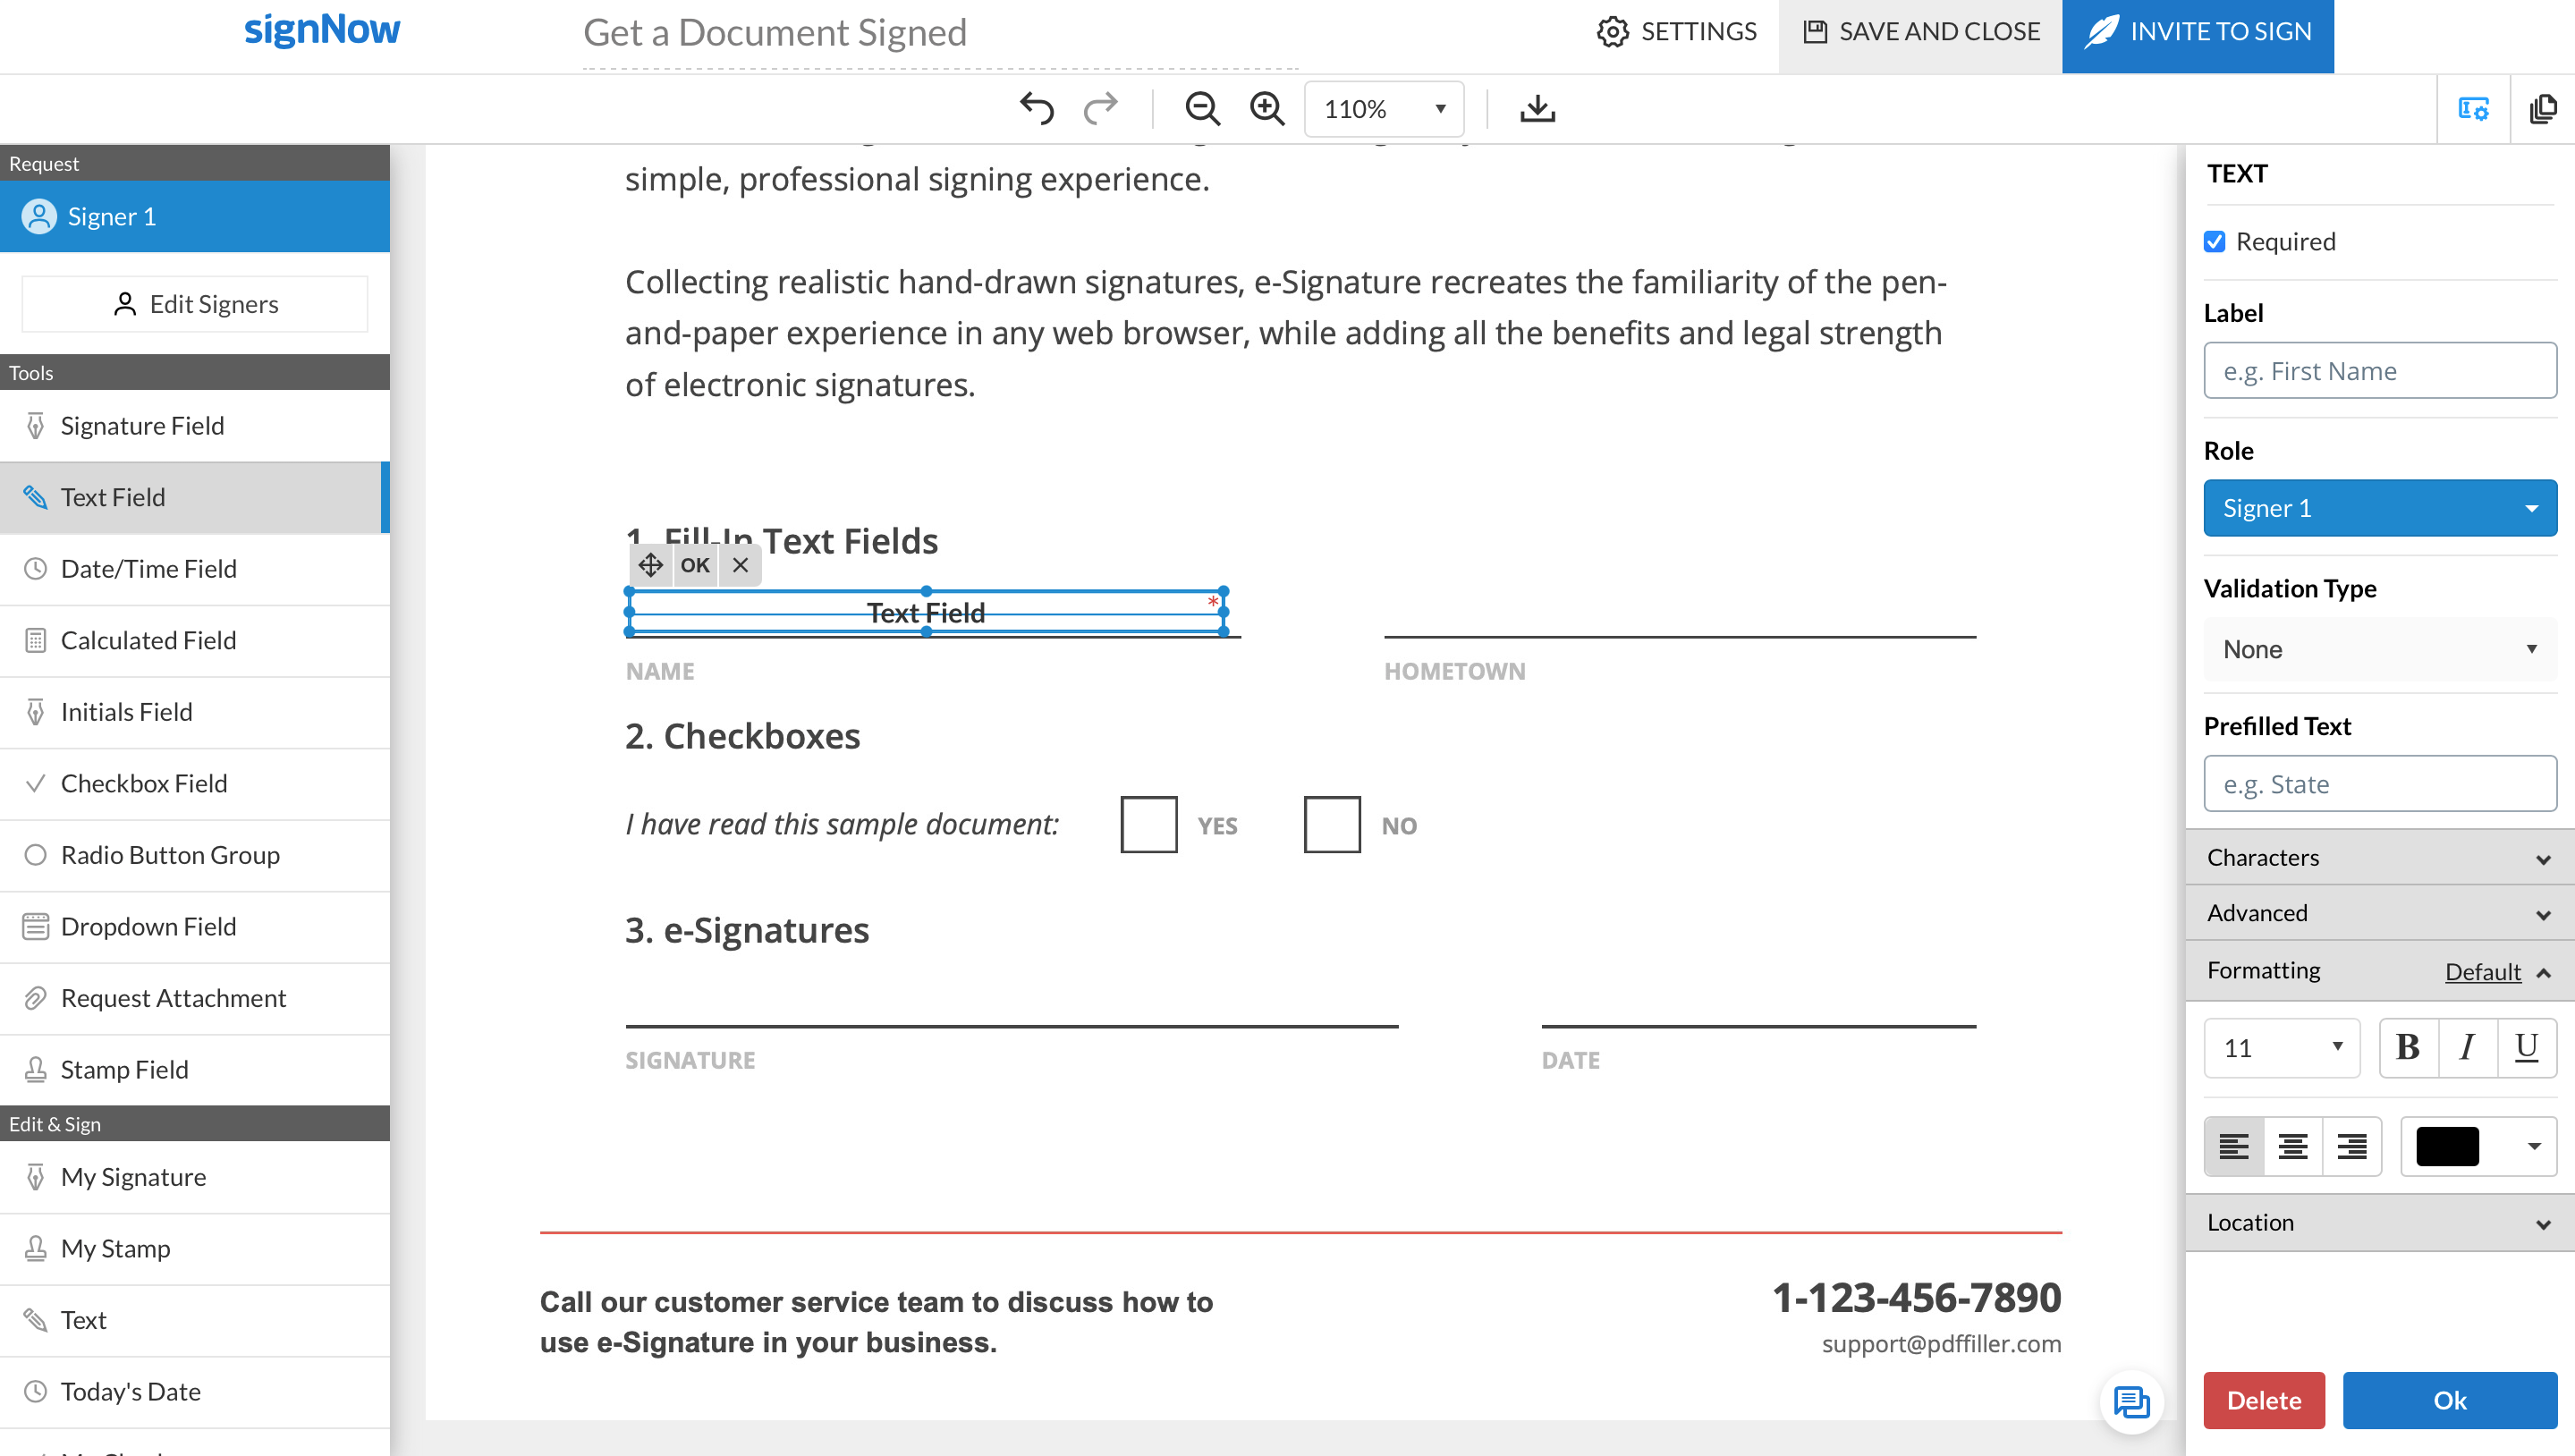
When clicking on a field, the settings panel appears on the right. Use it to customize your fillable fields. Note that different fields may have slightly different settings. For example, you can customize a field’s label, pre-filled text, and unique ID; set data format validation, character limits, text formatting, and so on.
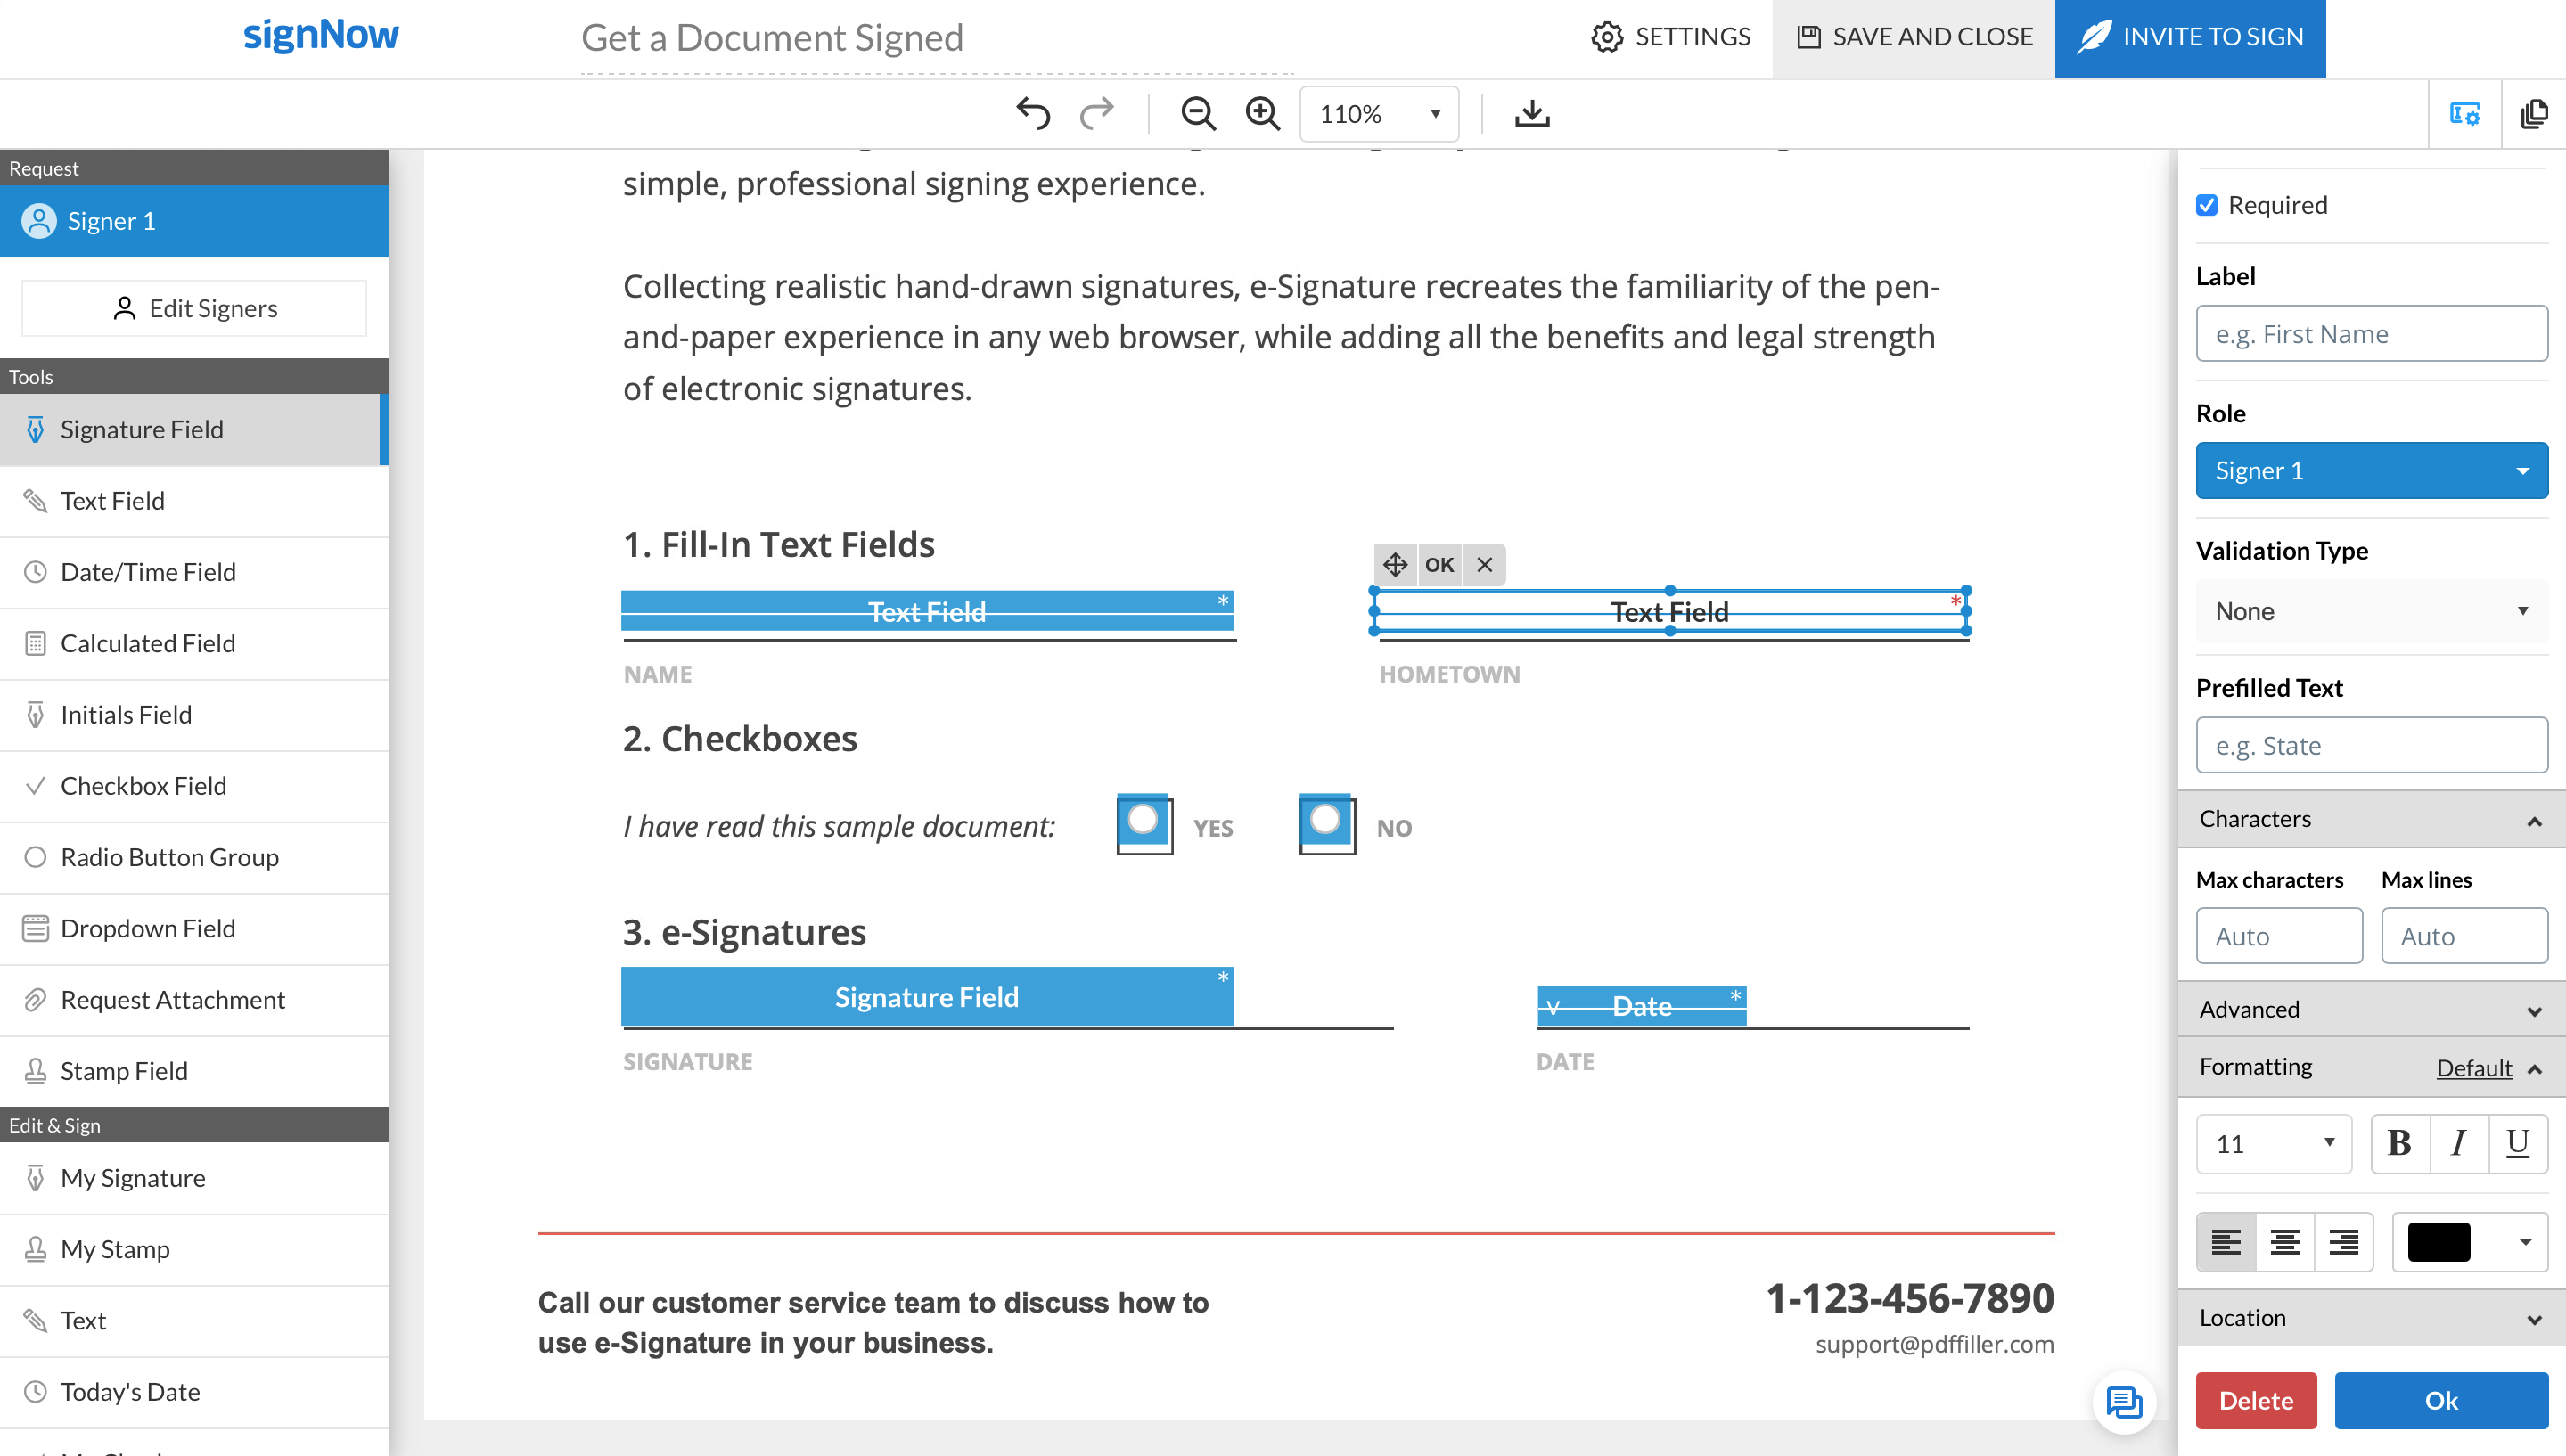
To set a proper signing order and direct your signers to the fields you need filled out, assign signing roles to each field in your document. To do so, click on a field and open the Role dropdown in the right-hand sidebar. If you have more than one signer, select which of them is entitled to complete the field. To add a signer, click Add Role in the dropdown and enter a role name in the new popup window.