Discover Many Receipt Formats for Teams with airSlate SignNow

Empower your business with seamless document sending and eSigning. Enjoy an easy-to-use and affordable solution designed for team collaboration.

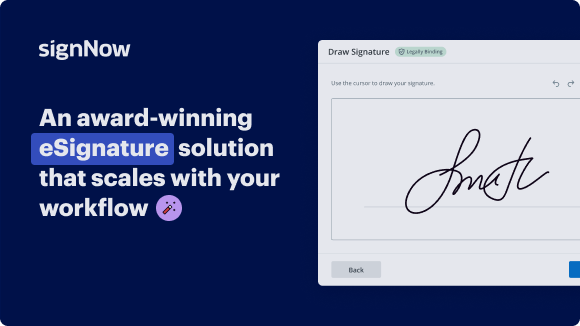
Award-winning eSignature solution

Send my document for signature

Get your document eSigned by multiple recipients.
Send my document for signature

Sign my own document

Add your eSignature
to a document in a few clicks.
Sign my own document

Move your business forward with the airSlate SignNow eSignature solution

Add your legally binding signature

Create your signature in seconds on any desktop computer or mobile device, even while offline. Type, draw, or upload an image of your signature.

Integrate via API

Deliver a seamless eSignature experience from any website, CRM, or custom app — anywhere and anytime.

Send conditional documents

Organize multiple documents in groups and automatically route them for recipients in a role-based order.

Share documents via an invite link

Collect signatures faster by sharing your documents with multiple recipients via a link — no need to add recipient email addresses.

Save time with reusable templates

Create unlimited templates of your most-used documents. Make your templates easy to complete by adding customizable fillable fields.

Improve team collaboration

Create teams within airSlate SignNow to securely collaborate on documents and templates. Send the approved version to every signer.

See airSlate SignNow eSignatures in action

Create secure and intuitive eSignature workflows on any device, track the status of documents right in your account, build online fillable forms – all within a single solution.

Try airSlate SignNow with a sample document

Complete a sample document online. Experience airSlate SignNow's intuitive interface and easy-to-use tools
in action. Open a sample document to add a signature, date, text, upload attachments, and test other useful functionality.

sample
Checkboxes and radio buttons
sample
Request an attachment
sample
Set up data validation

airSlate SignNow solutions for better efficiency

Keep contracts protected
Enhance your document security and keep contracts safe from unauthorized access with dual-factor authentication options. Ask your recipients to prove their identity before opening a contract to many receipt format for teams.
Stay mobile while eSigning
Install the airSlate SignNow app on your iOS or Android device and close deals from anywhere, 24/7. Work with forms and contracts even offline and many receipt format for teams later when your internet connection is restored.
Integrate eSignatures into your business apps
Incorporate airSlate SignNow into your business applications to quickly many receipt format for teams without switching between windows and tabs. Benefit from airSlate SignNow integrations to save time and effort while eSigning forms in just a few clicks.
Generate fillable forms with smart fields
Update any document with fillable fields, make them required or optional, or add conditions for them to appear. Make sure signers complete your form correctly by assigning roles to fields.
Close deals and get paid promptly
Collect documents from clients and partners in minutes instead of weeks. Ask your signers to many receipt format for teams and include a charge request field to your sample to automatically collect payments during the contract signing.
Collect signatures
24x
faster
Reduce costs by
$30
per document
Save up to
40h
per employee / month

Our user reviews speak for themselves

illustrations persone
Kodi-Marie Evans
Director of NetSuite Operations at Xerox
airSlate SignNow provides us with the flexibility needed to get the right signatures on the right documents, in the right formats, based on our integration with NetSuite.
illustrations reviews slider
illustrations persone
Samantha Jo
Enterprise Client Partner at Yelp
airSlate SignNow has made life easier for me. It has been huge to have the ability to sign contracts on-the-go! It is now less stressful to get things done efficiently and promptly.
illustrations reviews slider
illustrations persone
Megan Bond
Digital marketing management at Electrolux
This software has added to our business value. I have got rid of the repetitive tasks. I am capable of creating the mobile native web forms. Now I can easily make payment contracts through a fair channel and their management is very easy.
illustrations reviews slider
walmart logo
exonMobil logo
apple logo
comcast logo
facebook logo
FedEx logo
be ready to get more

Why choose airSlate SignNow

  • Free 7-day trial. Choose the plan you need and try it risk-free.
  • Honest pricing for full-featured plans. airSlate SignNow offers subscription plans with no overages or hidden fees at renewal.
  • Enterprise-grade security. airSlate SignNow helps you comply with global security standards.
illustrations signature

Many receipt format for teams

In today's fast-paced business environment, having an efficient way to handle e-signatures is crucial. airSlate SignNow is designed to streamline the signing process, enabling teams to create and manage documents with ease. This guide will walk you through the steps to leverage airSlate SignNow for your signing needs.

Many receipt format for teams

  1. Open the airSlate SignNow website in your preferred browser.
  2. Create a new account with a free trial or log into your existing one.
  3. Choose the document you wish to sign or prepare for signatures and upload it.
  4. If you plan to use this document later, save it as a template for future access.
  5. Access your uploaded file to make necessary revisions: add fillable areas or input data as needed.
  6. Complete the signing of your document and include signature fields for the individuals who need to sign.
  7. Press Continue to configure and dispatch your eSignature request.

airSlate SignNow provides a robust solution for businesses looking to enhance their document workflows. With its rich feature set, this platform offers excellent return on investment, making it a cost-effective choice for small to mid-sized businesses. Transparency in pricing ensures you won't encounter hidden fees or unexpected costs.

Moreover, airSlate SignNow offers exceptional 24/7 support for all its paid plans, making it an ideal partner for your e-signature needs. Discover how airSlate SignNow can streamline your document processes today!

How it works

Upload a document
Edit & sign it from anywhere
Save your changes and share

airSlate SignNow features that users love

Speed up your paper-based processes with an easy-to-use eSignature solution.

Edit PDFs
online
Generate templates of your most used documents for signing and completion.
Create a signing link
Share a document via a link without the need to add recipient emails.
Assign roles to signers
Organize complex signing workflows by adding multiple signers and assigning roles.
Create a document template
Create teams to collaborate on documents and templates in real time.
Add Signature fields
Get accurate signatures exactly where you need them using signature fields.
Archive documents in bulk
Save time by archiving multiple documents at once.
be ready to get more

Get legally-binding signatures now!

FAQs

Here is a list of the most common customer questions. If you can’t find an answer to your question, please don’t hesitate to reach out to us.

Need help? Contact support

What active users are saying — many receipt format for teams

Get access to airSlate SignNow’s reviews, our customers’ advice, and their stories. Hear from real users and what they say about features for generating and signing docs.

I've been using airSlate SignNow for years (since it...
5
Susan S

I've been using airSlate SignNow for years (since it was CudaSign). I started using airSlate SignNow for real estate as it was easier for my clients to use. I now use it in my business for employement and onboarding docs.

Read full review
Everything has been great, really easy to incorporate...
5
Liam R

Everything has been great, really easy to incorporate into my business. And the clients who have used your software so far have said it is very easy to complete the necessary signatures.

Read full review
I couldn't conduct my business without contracts and...
5
Dani P

I couldn't conduct my business without contracts and this makes the hassle of downloading, printing, scanning, and reuploading docs virtually seamless. I don't have to worry about whether or not my clients have printers or scanners and I don't have to pay the ridiculous drop box fees. Sign now is amazing!!

Read full review

Related searches to Discover many receipt formats for teams with airSlate SignNow

Many receipt format for teams pdf
Payment receipt Word format
Payment receipt Word format free download
Many receipt format for teams excel
Many receipt format for teams free download
Many receipt format for teams free
Simple receipt template
Simple receipt template Word
video background

Many receipt format for teams

Hi everyone, Kevin here. Today I want to show you how you can  use Microsoft Teams in under 10 minutes. What is Microsoft Teams? Well, it has all of your chats,  meetings, files all in one place,   and in a moment, I'll show you  exactly what all of that means. If you want to jump around this video,  feel free to use the timestamps down below   in the description. Now we only have 10 minutes,  so let's jump on the PC and let's get started. To join this happy group of people  and start using Microsoft Teams. Well, first off, your organization  needs Microsoft Teams. If your school or workplace does not yet have  Microsoft Teams, you can sign up for free. However, chances are you're just trying  to get access to Microsoft Teams,   in which case you can simply click on sign  in. To make it even easier to sign in,   you could simply head to the website  teams.microsoft.com and when you go there,   that'll bring you to the sign in page where you  can sign in with your school or workplace account.   Next, you'll likely see a screen that  prompts you to get the Teams desktop app. The teams desktop app is more feature rich,   and it also has all of the latest  and greatest functionality. If you're going to be using teams  a lot, I recommend getting the app. However, you can also use the Web app. For the rest of this tutorial, I'm  going to be using the desktop app.   If you decide to use the web app, you'll  have most of the core functionality.   If you want to update to the  desktop experience at any time,   over in the bottom left-hand corner,  there's a download desktop app icon. You can simply click on that and then you can  download the desktop app. Now that we have   Microsoft Teams, I want to take a moment to orient  you to the experience. Over on the left-hand side,   this is called the navigation bar and in a moment  we're going to go through each one of these to see   what they can do. Now this one here is called  Teams and the app itself is called Teams,   so why don't we start with this one,  it's probably a pretty important one. Now you might be wondering, what is a team? Well, the simplest way to describe it is  a team is simply a collection of people,   content, and also tools, and that'll be based  on a project or group, and in a moment, we'll go   through an example and see what that is. But first  off, we need to add a new team. To add a new team,   at the very bottom of this pane here, you'll  see an icon that says join or create a team. Let's click on that. Within join or create a  team, I can create my very own team or I can   join an existing team. In this example,  let's go ahead and create a new team. Next week and create a new team  from scratch or from an existing   team. Down below, you'll see a whole bunch of  templates that you can start a new team from   and this will also help you  better understand what a team is. You can have a team to manage a  project, or maybe you want another   team to onboard new employees for your  organization, to manage an upcoming event. For this example, we need to onboard some new  employees to the Kevin Cookie Company, so I'm   going to use this template to set up my new team.  By using a template, it'll automatically create   channels for you and in a moment we'll  see what these different channels are. It also adds some apps to this team. All of this looks good, so let's  click on start. On the next screen,   you can define whether it's  a private or a public team. As a private team, only those people who you   invite can participate in your team.  If you set it to public, anyone in   your organization is able to join. Now I'm all  about transparency, so let's go with public. Next I need to type in some details  about my new team and a description. All of that looks good, so I'll click on create.   Now that I've finished adding my  team, over on the left-hand side,   I see my new team in this list. If I click on  the ellipsis, I can add members to my team. I can even get a link to the team  that I can then share with others. Once the project's over and I no longer  need the team, I can even delete it. Within my new team, I have a set  of four different channels and   what are channels? Well it allows you to  organize by specific topics and projects. So here with my new employee onboarding, we have  a channel where employees can come together and   they can chat, and I can keep that separate from  my training channel, where I'm going to upload all   of our training materials. So once again, simply  a way to organize content and conversations. Now that we know the basics of teams and channels,  why don't we jump into the employee chat channel   to see if there are any conversations. Within the  employee chat channel, here at the very bottom,   I can kick off a new conversation, but here  I see that Nestor, one of our new employees,   already posted something and I can click on reply  and this will create a threaded conversation. Let me go ahead and type in a response to Nestor. Now that I've typed in my response, if I  really want to get Nestor’s attention or   anyone else’s attention, I can type in the  @ symbol and then I can select a person. So here if I type in @ Nestor, he's going to  get a notification that there is a chat message   waiting for him. Along with @ mentioning  an individual, I could also type in @ and   I can @ mention the entire channel, so here I  could simply say employee chat and anyone who's   part of this channel will get a notification.  Here on Nestor’s screen, we can see an icon   indicating that there's a message for him and  here we see this red @ symbol indicating that   he was @ mentioned in the conversation, so  it's an easy way to get someone's attention. As I'm having a conversation with Nestor,   I can also format my text to make  it stand out a little bit more. Here again, I'll click on reply and  there's the format text icon down here,   and you can use all of the  different standard formatting tools. I've now formatted some text and I want to make  sure Nestor checks out our training document   and I'm not just limited to typing in text. Here,  I can also drag and drop files over and then I   can include a file as part of this conversation.  To access this file, Nestor can click on it here   within the conversation and he could also go up  above and he could click on files where here too   you can see all of the different files from  across all of the different conversations. Within the files view you can also  create a new document directly from here,   and you can also upload an existing document. Every single channel has its own files tab, and it  also has its own posts tab. So once again, using   channels is simply a way to organize different  conversations and files. To stay on top of the   Teams and the channels that matter to you, you can  reorganize Teams by simply dragging and dropping. Also, if there's a Team that  no longer matters to you, you   can click on the ellipsis, and you could hide it. Here I want to make sure I stay on top of the  employee chat. I can click on that Channel, click   on the ellipsis and then I could pin it to the  top so I have easy access back to that Channel. Back over on the navigation bar on the left-hand  side of the, the top icon is for activity. This is where you get notifications  about any recent activity from Teams,   meetings, files, or apps. Here I see that Nestor @ mentioned  me twice and I can follow up on that. Over here, I can also filter all of my activity  if I click on the ellipsis here I can filter   down to specific types of activity. Over on  the left-hand side in the navigation bar,   the next icon is for chat and a chat is ideal  for communicating and sharing in smaller groups.   Up here on the top, I can kick off a new  conversation by clicking on this icon. Here,   I'll type in Patty and then down  below I can type in my message. Now that I’ve kicked off a chat with  Patty, I can turn this into a video call. I can also simply set it into a voice  call and here I can share my screen. I could add additional people to the conversation  and here I could even pop out the chat,   so let's say I want to jump into a team and  continue chatting, I can do that here. On the   navigation bar, the next icon is for calendar, and  here's where I can review my upcoming calendar. All of this is synced with Outlook. If I  want to schedule a new meeting, up in the   top right-hand corner, I can click on this icon  that says new meeting. Within meeting details,   I can type in a subject for my meeting. I  could also include participants for my meeting,   type in a description. It's pretty much  the same flow as within Microsoft Outlook. Once I'm all done, I can click on the send button. This will automatically include a join link for  Microsoft Teams so we can all meet virtually.   Here now I see the new event on my calendar and  when I click on it, I can now join the meeting.   Before joining the meeting, I can configure  my video and audio options. Here, for example,   I'm going to turn on my webcam hello. I can  also turn on different background filters. For example, I could blur my background  or I could throw in a locker room here. Nothing like having a meeting from a locker room. I could also go through and configure all of my   audio settings and once I'm ready to  join, I can simply click on Join Now. Now that I'm in the meeting, I have a few  different options here across the top bar. Here I can see the participants to see  everyone else who's already in the session. I can also have a chat with all  of the different participants. I can raise my hand. Within the ellipsis,   one of the more interesting ones is I  can kick off a recording of this meeting. Also over on the right-hand  side, I can share content with   all the participants. I could share  my whole desktop, a specific window,   and I even get access to a whiteboard. Once  I'm all done with my meeting, I simply go to   this red button right here and I can click  on leave. Back over on the left-hand side,   back in the Navigation Pane there are two more  different icons that we're going to look at. The first one is calls and this is where you  can call other people in your organization. You'll see a history of all of  your calls. You can go through   and look at your contacts and you could even  listen to voicemail. Down underneath that,   there's also the files view. Here you can  see all of your files within OneDrive,   and you can see all of the files that you  have access to within Microsoft Teams. All right, well, if you learned  how to use Microsoft Teams,   please give this video a thumbs up. To see more videos like this in the  future, hit that subscribe button. And also if you want to see me cover any other  topics in the future, leave a note down below. All right, well that's all I had for you today. I hope you enjoyed and as always,  I hope to see you next time, bye.

Show more
be ready to get more

Get legally-binding signatures now!