Sequential Routing
Define strict numeric order so each recipient waits for prior parties to complete signing before gaining access to their assigned fields and responsibilities.


A defined signing order reduces errors, prevents missed signatures, and creates a single authoritative audit trail for compliance and records management.

The contract manager configures sequential routing for multi-party agreements, assigns roles, and uses templates to enforce consistent signing order across similar contracts. They review audit reports to verify execution and resolve any routing exceptions reported by signNow.
The HR director sets a two-step signing order for offer acceptance and executive countersignature, uses conditional routing for remote hires, and relies on the platform's notifications and records for compliance and onboarding audits.
Legal, HR, sales, procurement, and operations teams commonly control signing order to ensure compliance and predictable approval flows.
Defining order centrally reduces administrative overhead, clarifies responsibilities, and speeds execution across organizational processes.
Define strict numeric order so each recipient waits for prior parties to complete signing before gaining access to their assigned fields and responsibilities.
Allow multiple recipients to sign at the same stage simultaneously to shorten execution time while preserving a clear audit trail of who signed when.
Route documents based on response data or role selection so only relevant signers receive requests, reducing unnecessary approvals and manual branching.
Assign groups where any member can sign on behalf of the group, with configurable order relative to other signers and fallback options.
Save signing order configurations as templates for repeatable transactions, ensuring consistent workflows across teams and document types.
Programmatically set or change signing order through the signNow API to support automated business processes and system integrations.
Create documents in Google Docs and use signNow to set signing order, map recipients, and apply signature fields without manual downloads or uploads, preserving document fidelity and metadata.
Connect to Salesforce or other CRMs to pull contact data, automatically populate signer information, and trigger preconfigured signing orders from within the CRM workflow.
Link Dropbox, Google Drive, or OneDrive so executed documents follow a routing order that ends with archival into a designated folder for retention and compliance.
Create template records that include predefined signing order, fields, and conditional logic so teams can send standardized, correctly ordered documents quickly.

| Setting Name | Configuration |
|---|---|
| Routing Mode | Sequential or Parallel |
| Reminder Frequency | 48 hours |
| Expiration Window | 30 days |
| Default Authentication | Email and optional SMS |
| Template Enforcement | Required for team templates |
Setting signing order is supported on web, iOS, and Android apps and functions consistently across modern browsers for senders and signers.
For best results, use current browser versions and the latest mobile app; ensure recipients can receive email or SMS notifications for ordered workflows.
A property manager sends leases to a tenant then to a legal reviewer
Resulting in a complete, auditable lease record with clear signing chronology suitable for enforcement and recordkeeping.
HR initiates the onboarding packet to a new hire and then to the HR director for countersignature
Leading to consistent onboarding records and quick verification for benefits activation and payroll setup.
| Criterion / Vendor | signNow (Recommended) | DocuSign | Adobe Sign |
|---|---|---|---|
| Supports Sequential Routing | |||
| Supports Parallel Routing | |||
| API Routing Control | |||
| Bulk Send Availability |
| Plan / Feature | signNow (Featured) | DocuSign | Adobe Sign | Dropbox Sign | PandaDoc |
|---|---|---|---|---|---|
| Free tier availability | Limited free plan available | Trial only | Included with Acrobat subscription | Free limited plan | Free eSignature plan |
| Entry-level monthly price per user | $8 per user per month | $10 per user per month | $14.99 per user per month | $15 per user per month | $19 per user per month |
| Business-level monthly price per user | $15 per user per month | $25 per user per month | $24.99 per user per month | $25 per user per month | $30 per user per month |
| Advanced authentication included | Email + SMS and SSO options | SMS and ID verification options | Enterprise MFA available | SMS and SSO options | ID verification add-ons |
| API access included | Available on paid plans | Available on paid plans | Available with enterprise plans | Available on paid plans | Available on paid plans |
| Annual discount availability | Discounts for annual billing | Discounts for annual billing | Annual billing discounts | Annual billing discounts | Annual billing discounts |
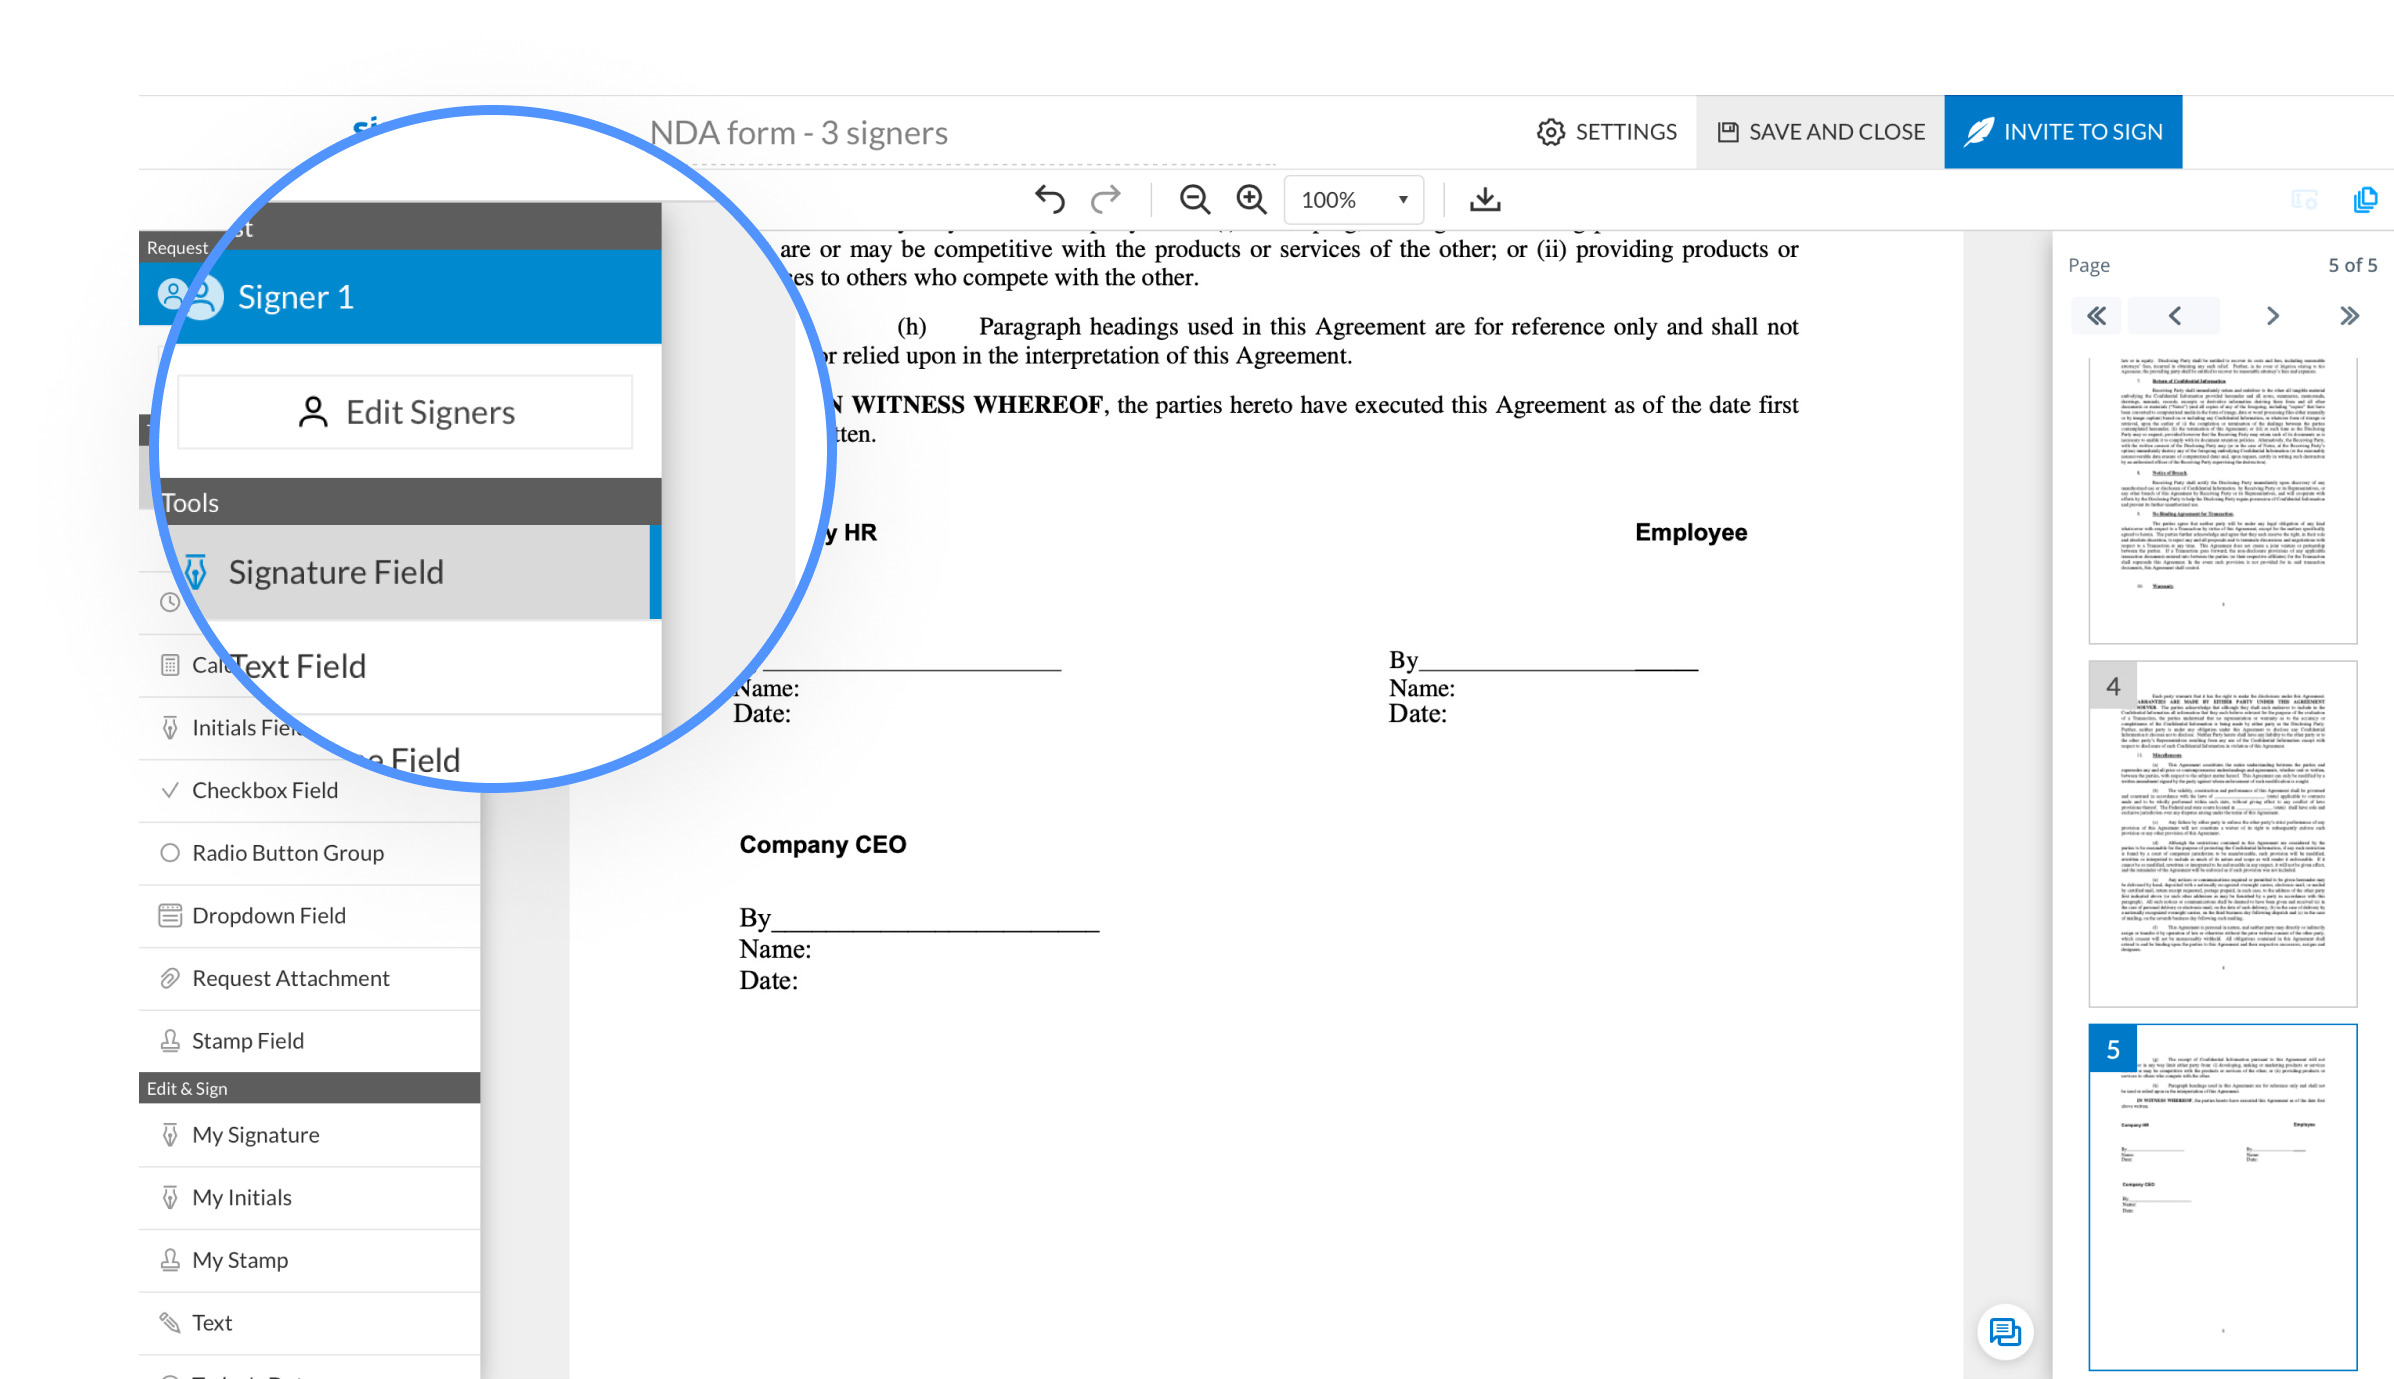
Need your document signed by multiple parties one after the other? Create several signer roles and set a signing order to ensure that your document is automatically delivered to the designated recipients once it's their turn to sign.
Open your document in the editor and click Edit Signers.
Create a new signing step by clicking on the Signing Step 2 area. To add a third signing step, click Signing Step 3, and so on.
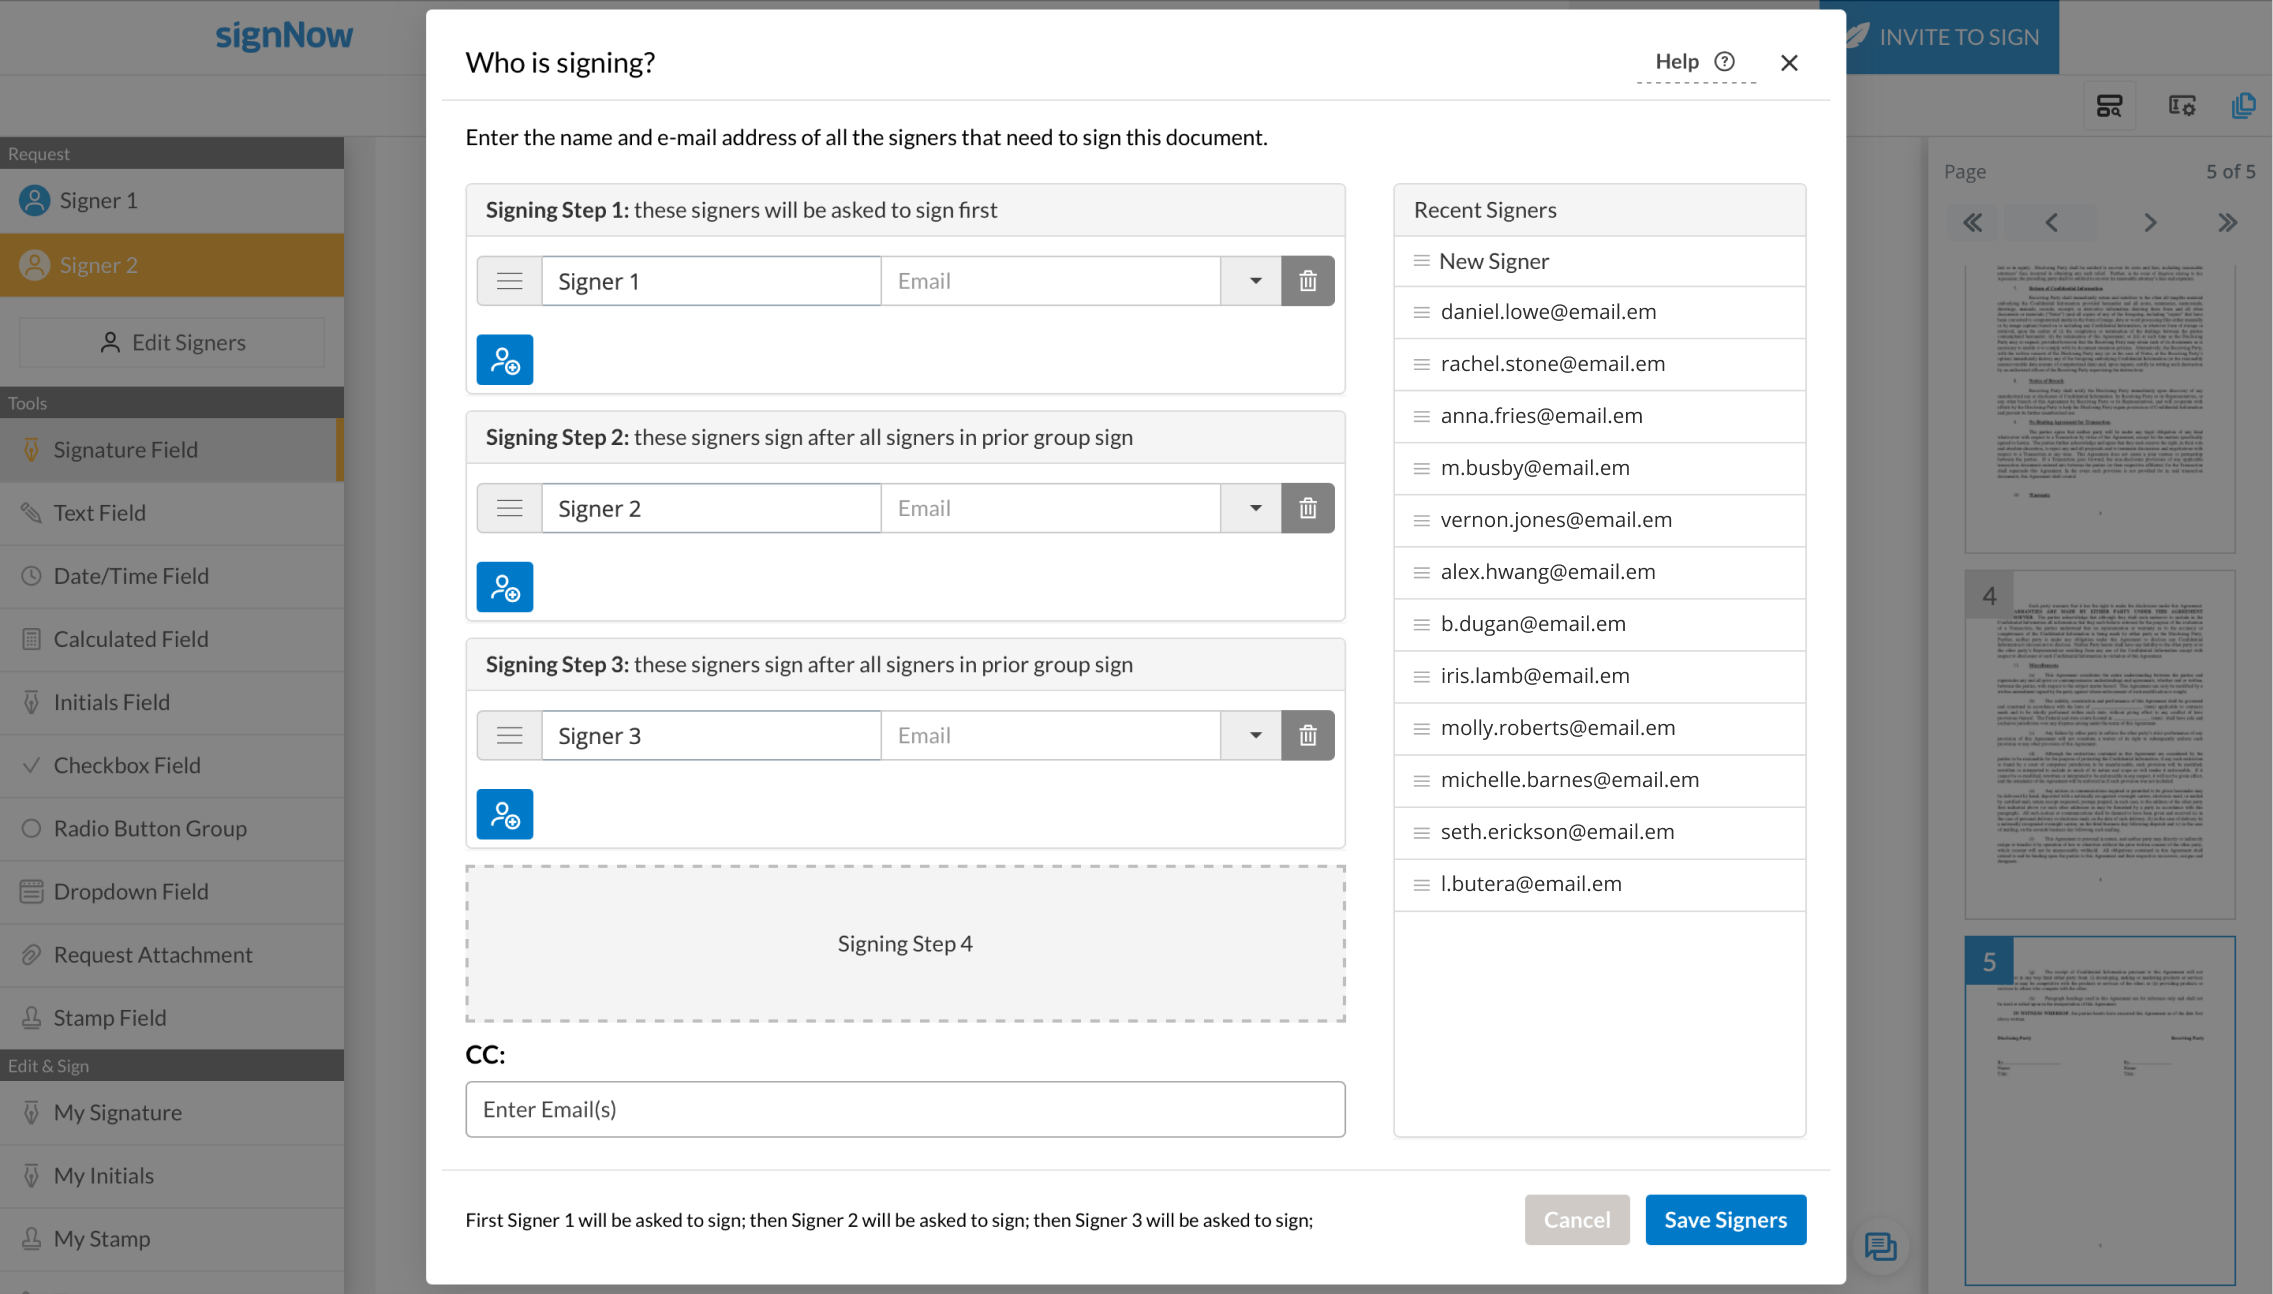
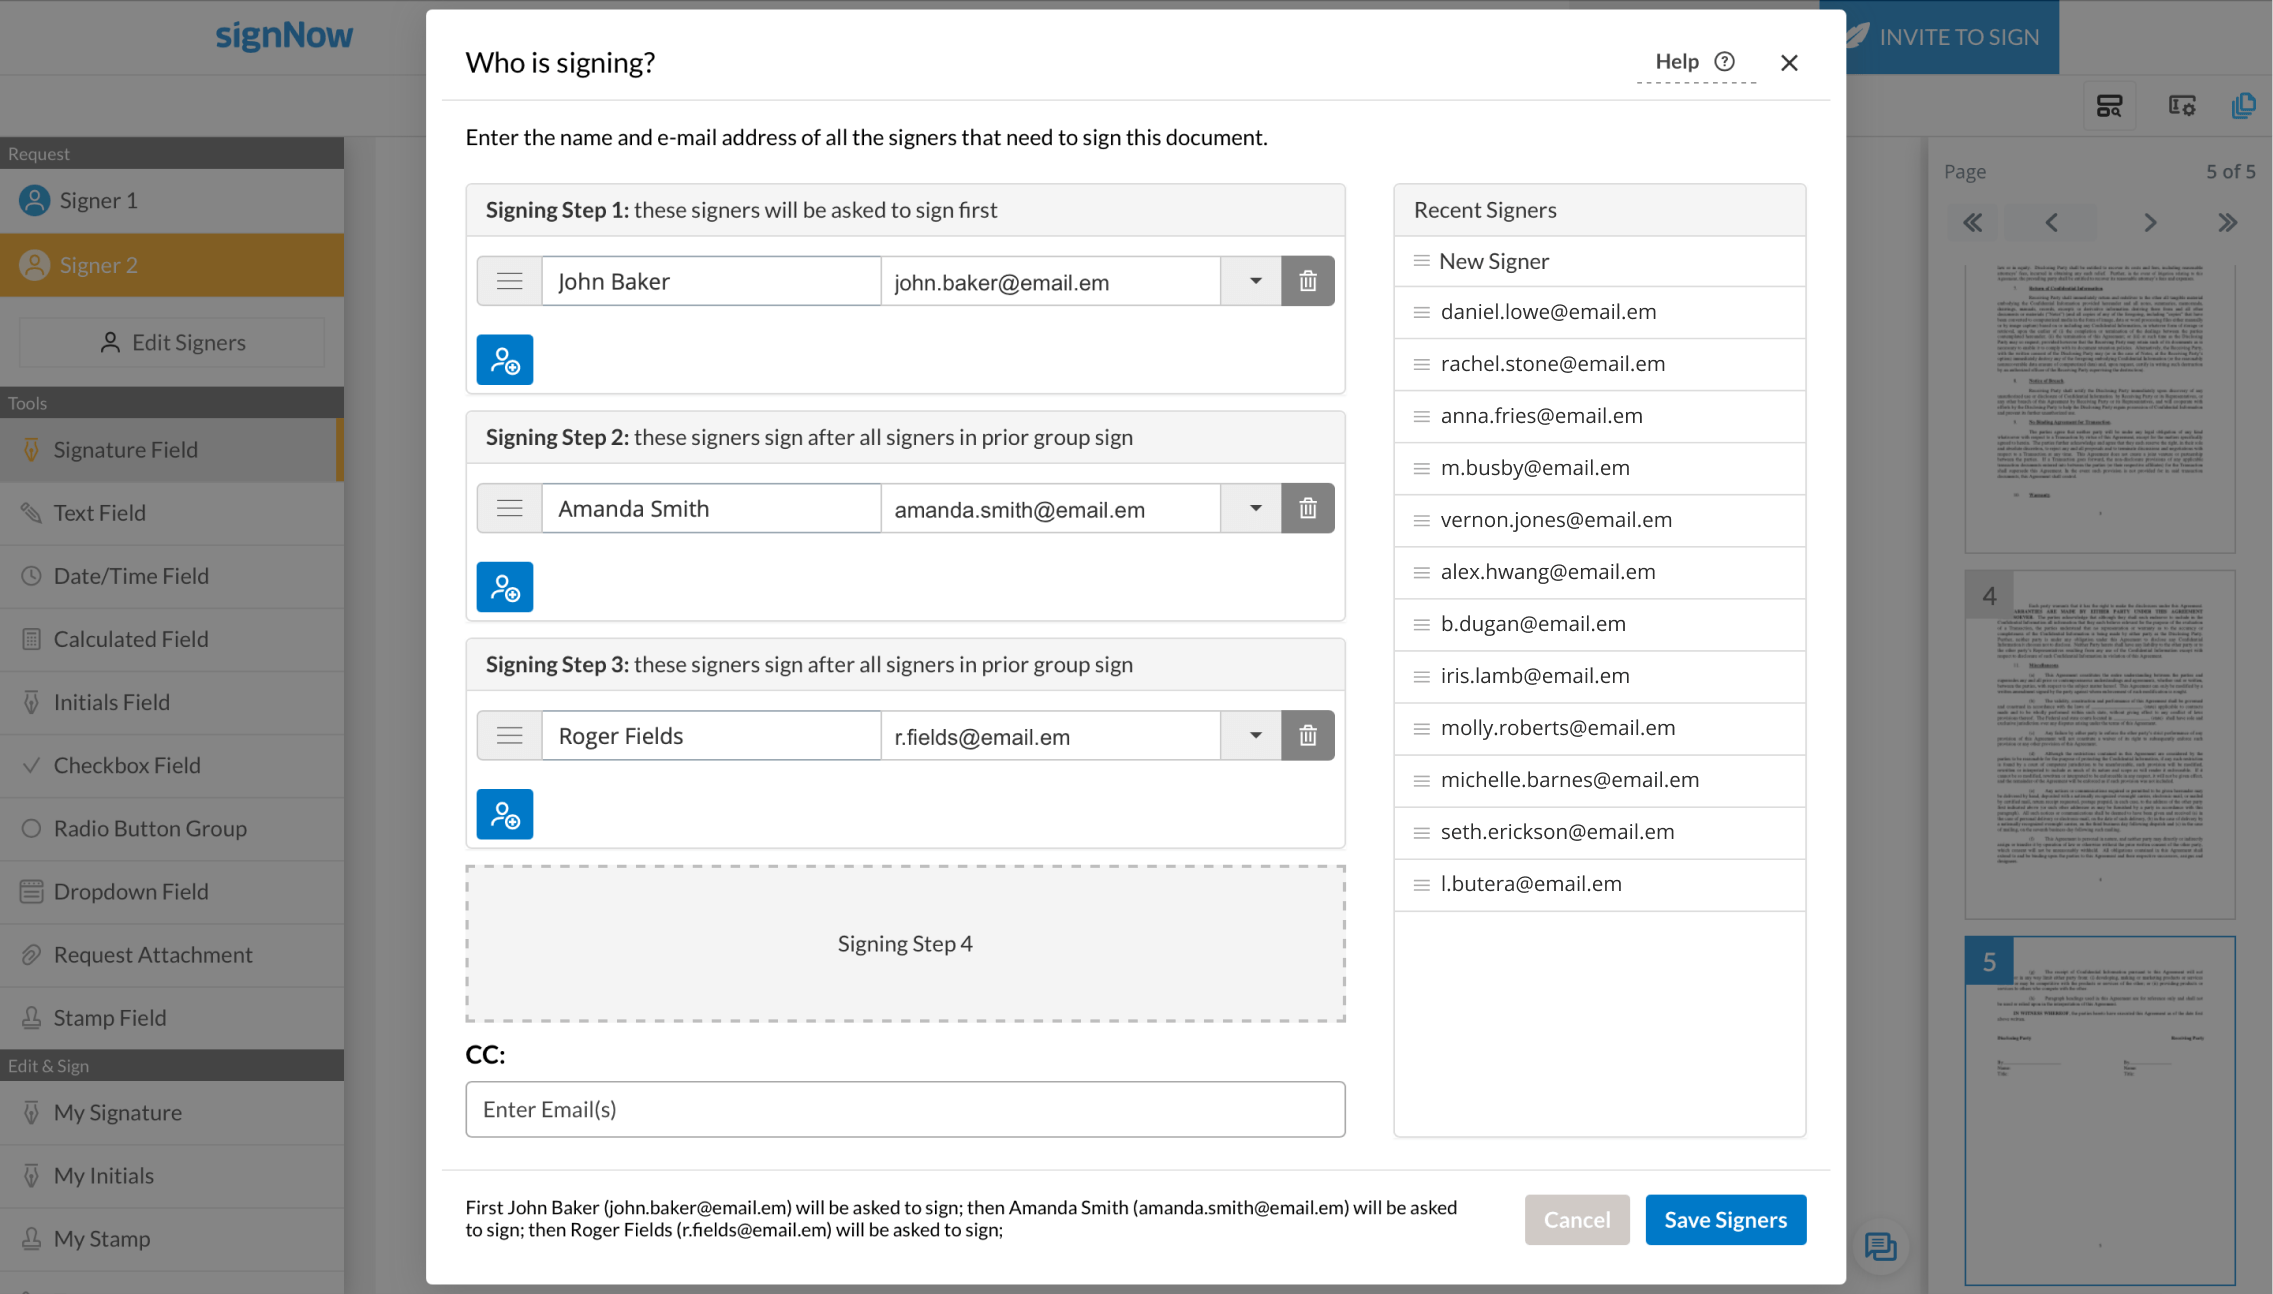
Customize signer names and enter your recipients’ email addresses in the corresponding boxes (optional). Add a new recipient within any signing step by clicking the blue silhouette icon.
To rearrange your signing steps, drag any of them to the desired position.
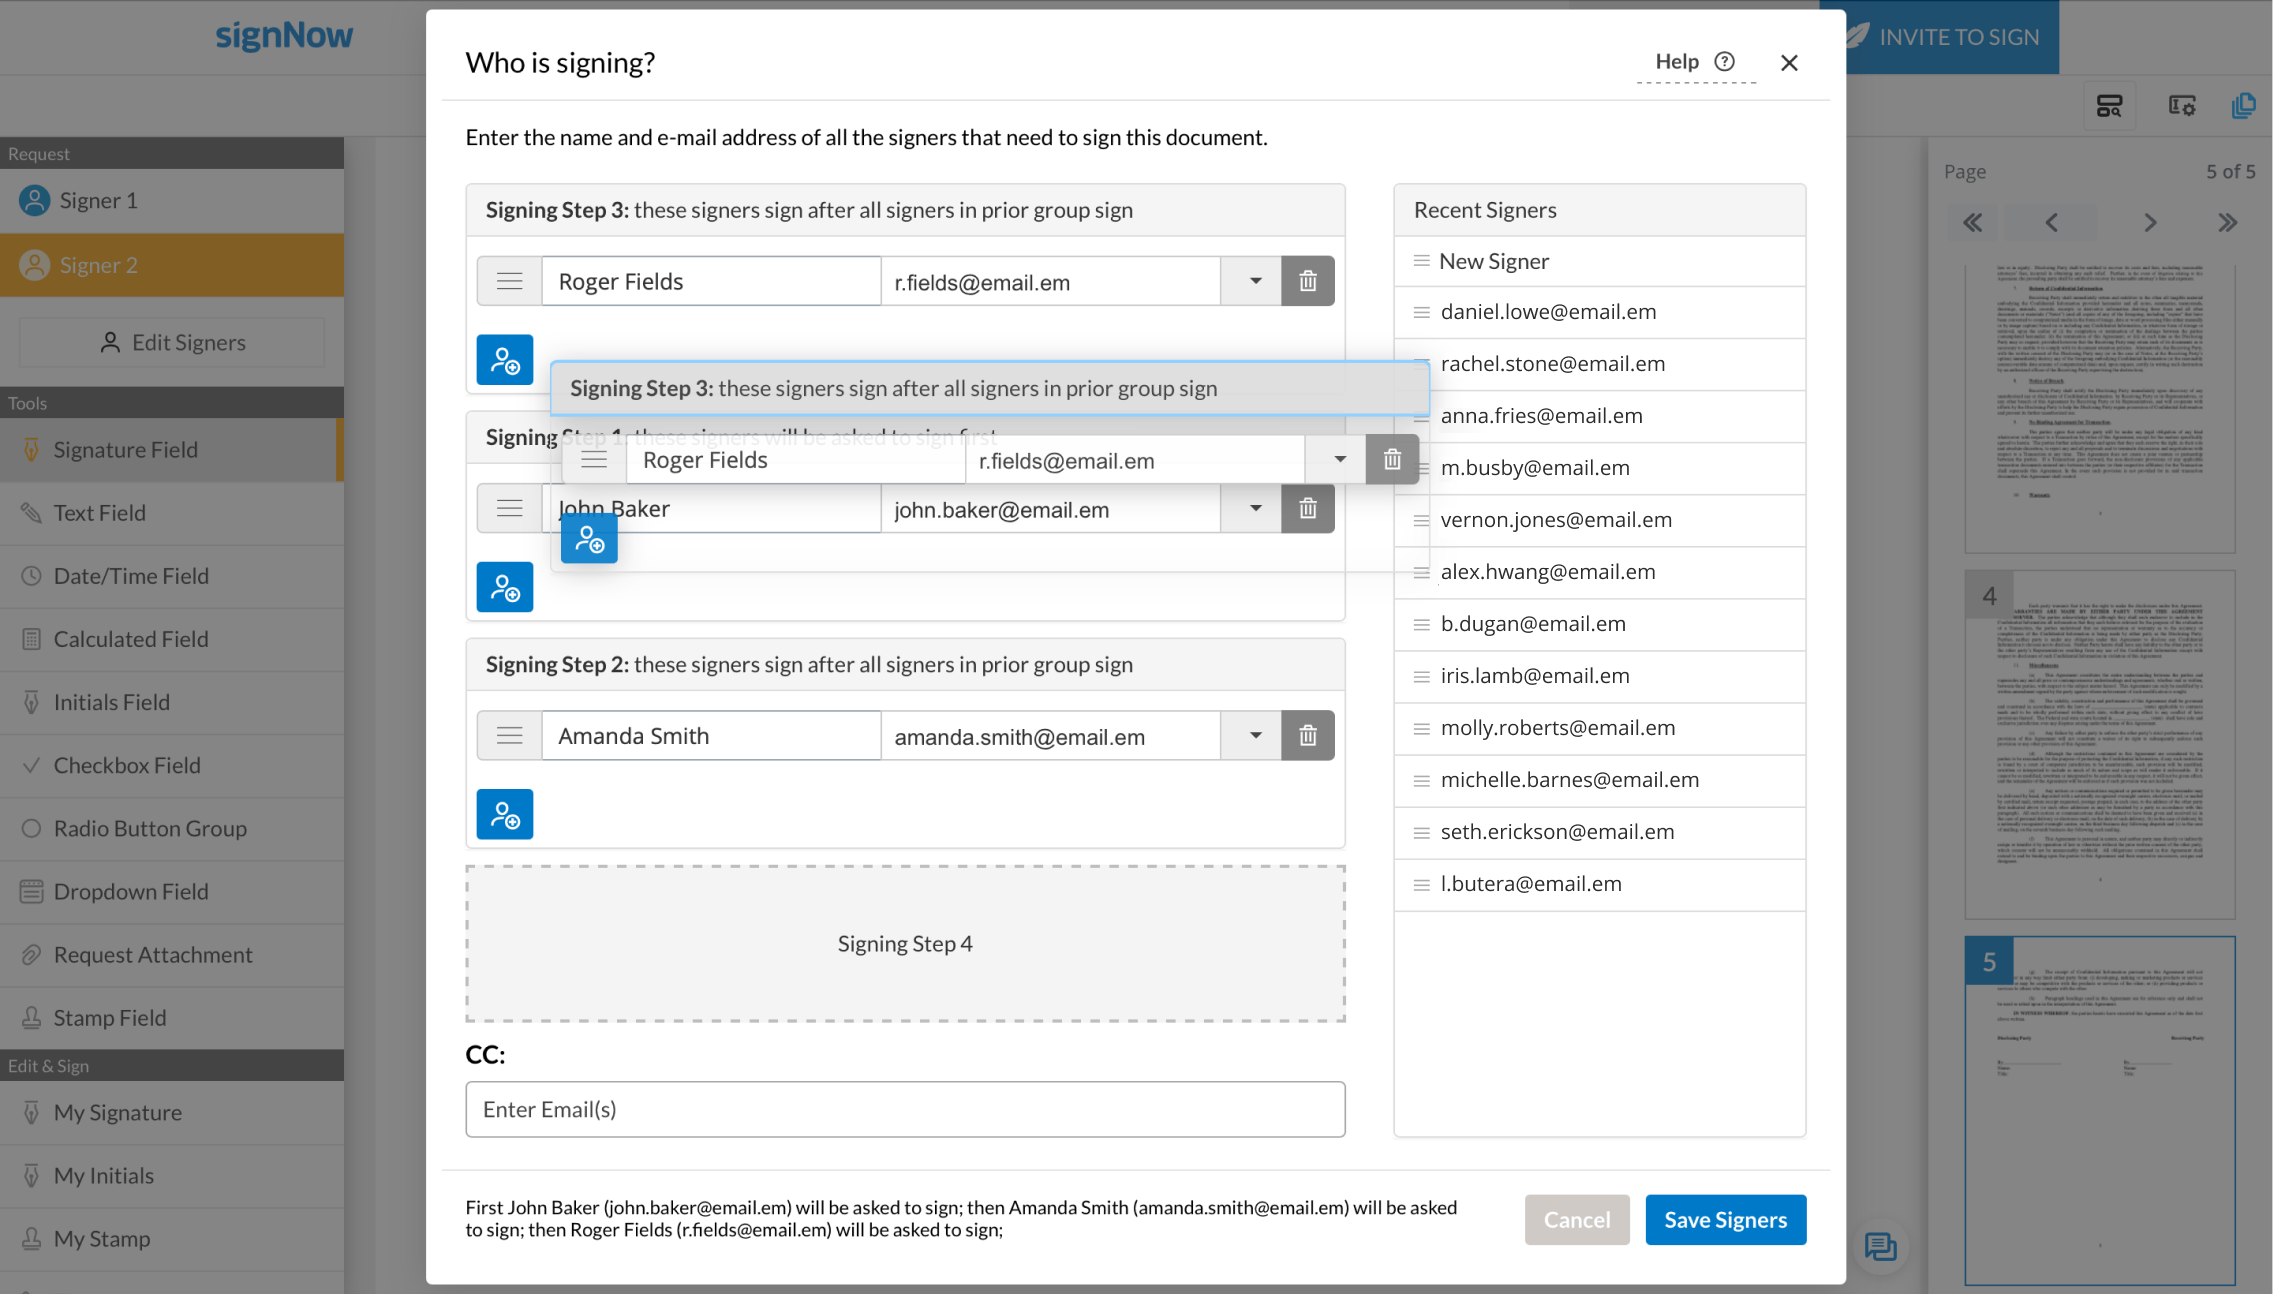
Move a recipient from one signing step to another by dragging their email box and dropping it where needed.
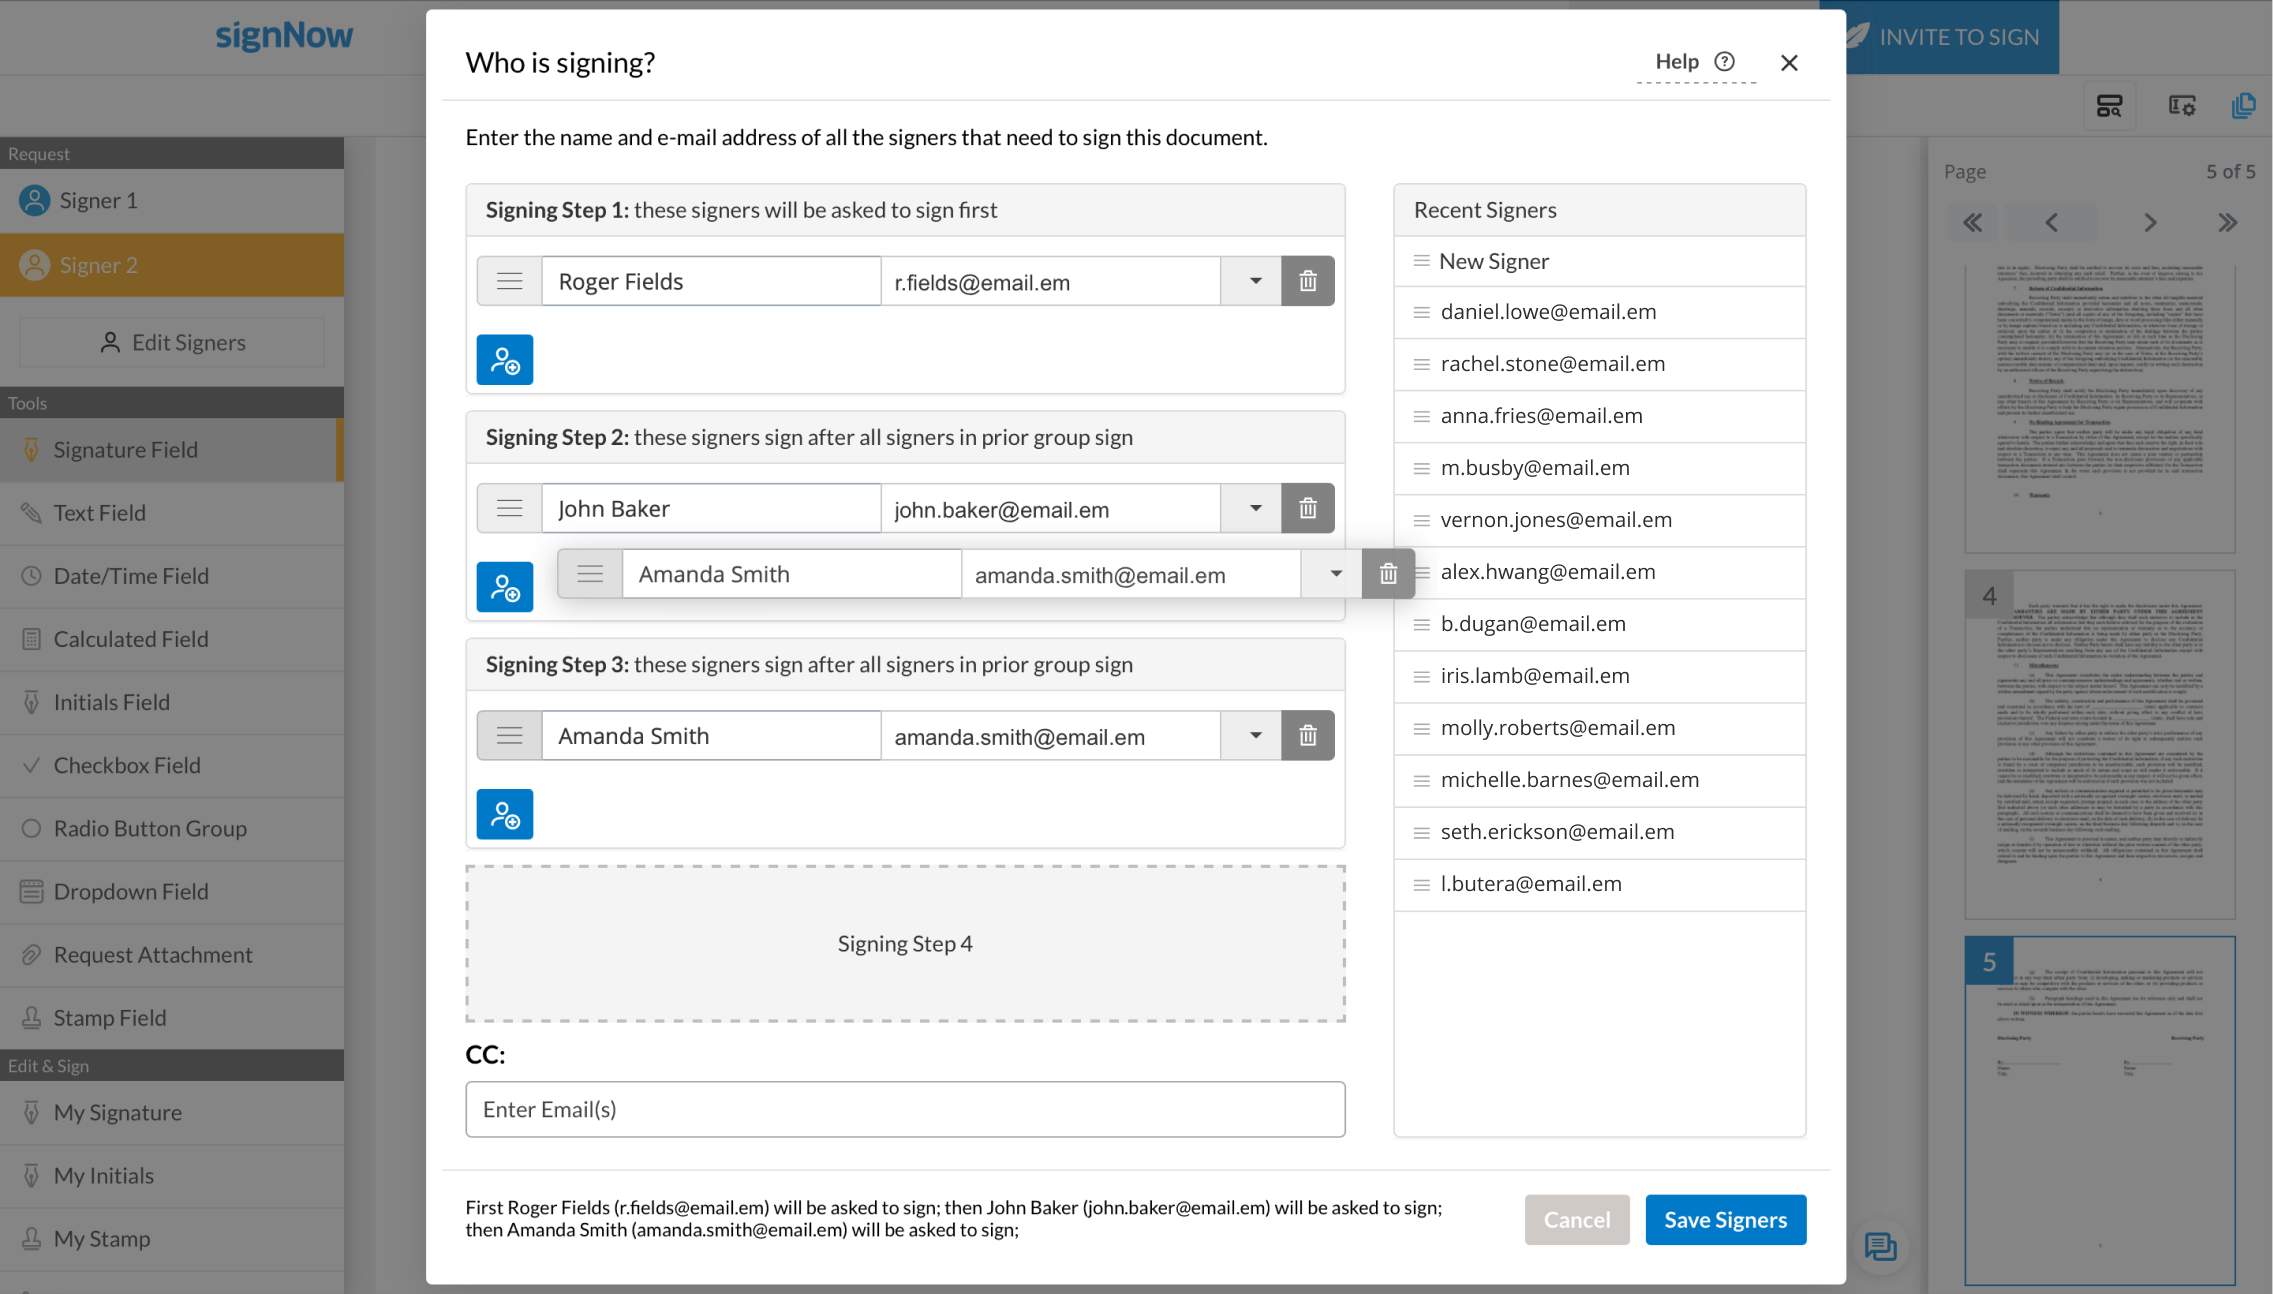
To delete a signer and/or signing step, click on the trash bin icon next to a signer email box.
When you’ve finished setting up a signing order, click the Save Signers button.
Select fillable fields from the left-hand toolbar of the editor and drop them anywhere on your document. To assign a specific role to a field, click on it, open the Role dropdown in the sidebar on the right, and select the signer you want to assign. Then, click Ok.
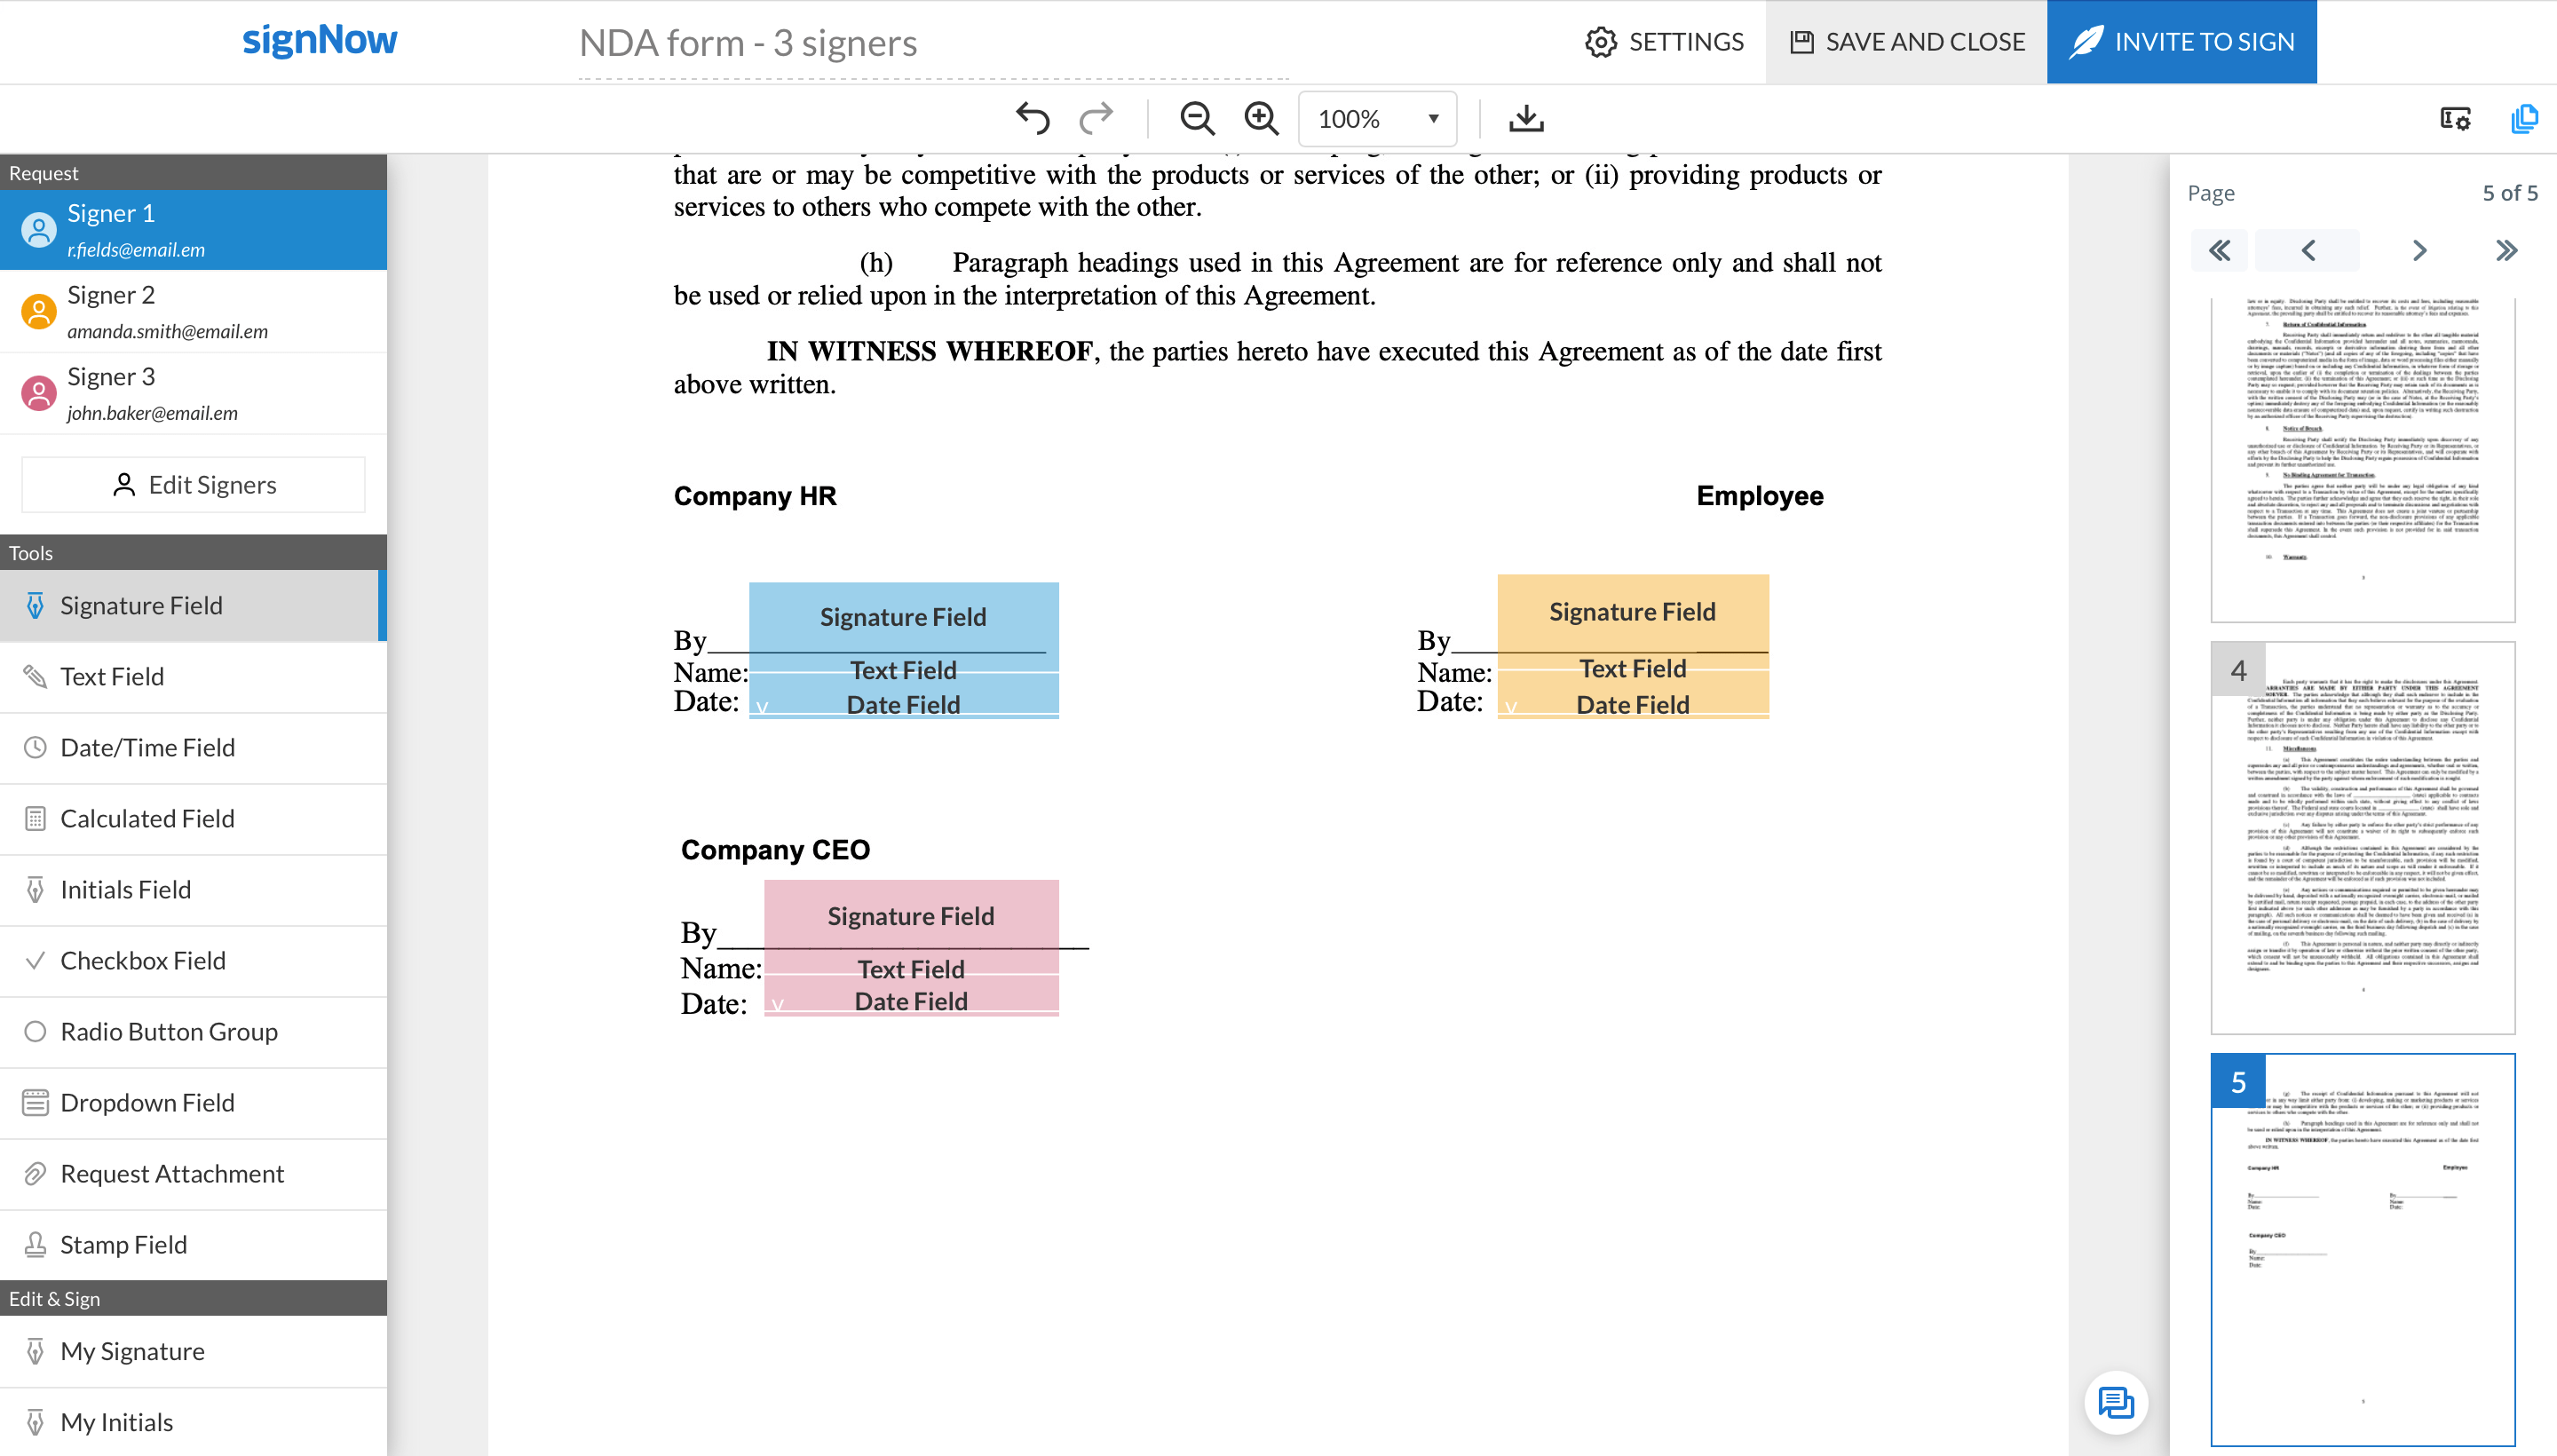
For your convenience, the fillable fields are rendered in different colors based on the signer role you assigned to them.
When you’ve finished configuring every fillable field, click Invite to Sign to send your document for eSignature.


