Establishing secure connection… Loading editor… Preparing document…
Navigation

Fill and Sign the 2013 Regional Sales Contract Washington Dc 1999 Form

Fill and Sign the 2013 Regional Sales Contract Washington Dc 1999 Form

How it works

Open the document and fill out all its fields.
Apply your legally-binding eSignature.
Save and invite other recipients to sign it.

Rate template

4.5
55 votes
QUICKEN® 2003 FOR MACINTOSH®: JPMORGAN CHASE BANK - TEXAS TO CHASE UPDATING YOUR BANK ACCOUNT ACCESS Due to an upgrade to the JPMorgan Chase Bank system, you will need to modify some information in your Quicken software. To maintain uninterrupted access to your account information, please complete the following steps before January 24, 2006. NOTE: If you wait until after January 24, 2006 to update your information, your Quicken access will not work properly. STEP 1 ENROLL AT CHASE.COM AND ACTIVATE QUICKEN To access Chase.com using your Quicken® software, you will need to get a User ID and Password for Chase.com, and then activate Quicken at Chase.com. If you have never enrolled in Chase.com - never accessed your accounts directly through the Chase.com website - then follow the directions below. Get a Chase.com User ID and Password 1. Go to Chase.com with your Internet Browser. 2. Select the blue Enroll button in the upper left hand corner. 3. Follow the Enrollment steps to create a Chase.com User ID and Password for your personal accounts, business accounts, or both. Once you have enrolled, login to Chase.com using your Chase User ID and Password and follow the directions below. Activate Quicken at Chase.com 1. Go to the Customer Center page and select the Activate Quicken, Money, etc. link. 2. Review the legal agreement page. The fee disclosure will be part of the legal agreement. You must select the I Agree button to proceed. 3. Select your primary account from the drop-down list. Select the Activate button to proceed. • If you select a Basic One or College Checking account you will be presented with the Bill Pay fee notification. You must select I accept or you will not be able to activate your PFM service. BILL PAY FEES WILL NOT APPLY IN THIS CASE. YOU WILL BE CHARGED ACCORDING TO THE PFM FEE SCHEDULE. 4. You have now activated Quicken with Chase and you will see the Confirmation page. 1 STEP 2 INSTALL THE LATEST QUICKEN® UPDATE Follow the steps in this section to determine if a Quicken update is available and to download the update if it is available. Quicken will connect to Intuit and download software updates and the new Chase brand information. 1. From the File menu choose Check for Updates. 2. If there is an update available, you will be prompted to go to http://www.intuit.com/support/quicken and follow the step-by-step instructions to update to the latest version of Quicken 2003. 3. Quit and restart Quicken. 2 STEP 3 BACK UP YOUR QUICKEN DATA 1. From the File menu, select Save a Copy, and then click OK. 3 STEP 4 DELETE ANY OUTSTANDING PAYMENT INSTRUCTIONS NOTE: If you don’t use online bill payment with your account, please skip this section and go to Step 5. If you use online bill payment with your account, you will need to delete all pending and repeating online payments that you have scheduled through JPMorgan Chase Bank. Any scheduled payment that you can’t cancel due to insufficient time will continue to be processed and paid. Any payment you cancel will not be paid, but we’ll show you how to reschedule those payments a little later. To delete pending online payments: 1. From the Online menu, select Payments, then Payment Log. 2. Select one of your JP Morgan Chase account in the Account field. Write down the outstanding payment instructions, in order to recreate these payments later. 3. Select a Payment to cancel. Click Cancel Payment. 4. Click Put in Outbox. • Cancelled payments remain in the register after you send the cancel instruction, but Quicken marks them “Cancelled”. 5. Repeat these steps for each payment in each account enabled for Online Bill Payment with JPMorgan Chase Bank - Texas. 6. Also delete any payments that have not yet been sent to JPMorgan Chase Bank Texas. • In the Account Register, select any online payments that have not yet been sent (marked SEND the Number column). • From the Edit menu, click Delete Transaction. 4 STEP 5 1. 2. 3. 4. CONNECT TO JPMORGAN CHASE BANK - TEXAS From the Online menu, select Download Transactions. Select JPMorgan Chase Bank - Texas from the Financial Institution popup. Click Send Now. Enter your JPMorgan Chase Bank - Texas PIN and click OK. During this connection, you will: • Send payment cancellations (if applicable) • Download your transaction information through the last business day prior to this connection. • Note: If an error occurs while you are online, please keep trying until you are successful. This will be the last Online Session you will make with the JP Morgan Chase – Texas bank using Quicken. 5 STEP 6 ACCEPT DOWNLOADED TRANSACTIONS AND DELETE EMAILS Accept Downloaded Transactions from JPMorgan Chase – Texas 1. After the transactions are downloaded, go through the matching process and accept all transactions into your Quicken account register. 2. Accept all transactions for each account connected to JPMorgan Chase – Texas. Delete Emails from JPMorgan Chase – Texas Select Online, then E-Mail. From the E-mail window, choose JPMorgan Chase – Texas. Make sure the Incoming Mail button is selected. Double-click with your mouse, the JPMorgan Chase – Texas message you want to delete. 5. Select the Delete Mail button. 6. Repeat steps 4 and 5 for each JPMorgan Chase – Texas email. 1. 2. 3. 4. 6 STEP 7 DISABLE YOUR ACCOUNTS WITH JPMORGAN CHASE BANK - TEXAS 1. 2. 3. 4. From the Lists menu, select Accounts. Select the account you want to disable and click Edit. Click the Enable Online Access button. You will see your Account Number, and Routing Number. Write this information down, you will need it later. 5. Deselect the Enable account access checkbox. 6. Quicken displays a warning - You are about to delete setup information for an online account… Click the Disable button. 7. Deselect Enable online payment if this option is selected. 8. Quicken displays a warning - You are about to disable a Pay Online… Click the Disable button. 9. Click Save to save these changes. 10. Repeat steps 1 through 9 until all JPMorgan Chase Bank - Texas accounts have been disabled for online services. 7 STEP 8 ACTIVATE YOUR ACCOUNTS WITH CHASE 1. From the Lists menu, select Accounts. 2. Select the account you want to re-enable for online services and click Edit. 3. Click the Enable Online Access button. This will open the Setting up online services Assistant. 4. Select the I have signed up and received my online information button and then click Next. 5. Select the appropriate account from the pop-up menu and click Next. 6. Click Go Online. Quicken will connect to the Internet and download the latest list of financial institutions. Once this is complete, click Next. 7. Scroll down the list to Chase. Select Chase and click Next. Note: Do not select JPMorgan Chase Bank - Texas. 8. Select the online services you would like to use and click Next. 9. Enter your Chase.com UserID and click Next. 10. Enter the routing number and account number. Select the account type. Click Next. 11. Read the Service Agreement and select the checkbox to indicate you accept the terms of the agreement. Click Next. 12. Review your online account information and click Go Ahead to complete online setup. 13. Repeat these steps for each account for which you want to use online banking and bill payment with Chase. 8 STEP 9 CONNECT TO CHASE Download transactions from Chase and check for duplicates. 1. From the Online menu select Download Transactions. 2. Select Chase and click Get Online Data. Quicken will retrieve the latest transactions for all accounts you have enabled for online services with Chase in this single session. 3. Be sure to use your Chase.com Password. 4. Click OK to get your data from Chase. 5. Accept the transactions into your account registers. 6. Due to our server change, you may download duplicate transactions. • Select the Duplicate transaction, then right click the mouse and select Void Transaction(s). • Click Enter on the transaction to Void the transaction. VOID will be added to the Payee Name field and the Amount will be blank for that transaction. 9 STEP 10 REVIEW AND UPDATE ONLINE PAYEE LIST NOTE: If you don’t use online bill payment, please skip sections 10 and 11, and you have completed the changes. The next time you go to pay a bill be sure to verify your payee information including the payee account number and payee address. 1. From the Quicken Online menu, select Payments, Online Payees. 2. For each payee in the list: • Click the payee. • Click Edit. • In the Edit Payee window, verify that the payee’s address matches the address on the payee’s most recent statement, make changes if needed, and then click Change. • Review the payee lead-time so that you are aware of any change and to ensure that your payment won’t be made too late. 10 STEP 11 RECREATE YOUR PAYMENT INSTRUCTIONS NOTE: If you don’t use online bill payment, please skip sections 10 and 11, and you have completed the changes. Do not perform the following steps until you have completed all preceding steps. If you canceled pending online payments earlier, recreate them now: 1. From the Online menu, select Payment, Online Payees. 2. The Payees window will appear with the list of payees that you have already set up. Select Online, Payment, Enter Payment. 3. Go to the Payees window and select the payee that you want to pay. 4. Select the Use button. The information from the selected payee will appear in the Enter Online Payment window. 5. Recreate the payment as you normally would and following the prompts within the software. 6. Put In Out Box. 7. Repeat the above steps for each payment you need to recreate. 8. Send your payments from the Out Box. 11 THANK YOU FOR MAKING THESE IMPORTANT CHANGES! If you have any questions regarding these instructions, please contact us at 1-877-5547741. You may also visit the Chase website at Chase.com, or refer to Intuit Support web site at http://www.intuit.com/support/. 12

Useful advice on finalizing your ‘2013 Regional Sales Contract Washington Dc 1999 Form’ online

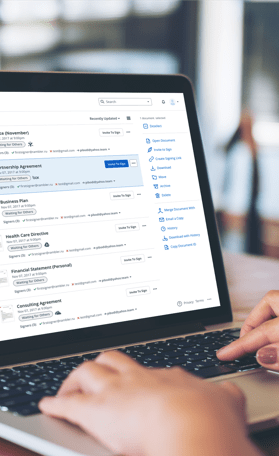
Feeling overwhelmed by paperwork? Look no further than airSlate SignNow, the premier eSignature service for individuals and organizations. Bid farewell to the monotonous task of printing and scanning documents. With airSlate SignNow, you can effortlessly complete and sign documents digitally. Take advantage of the extensive tools included in this intuitive and budget-friendly platform and transform your document management process. Whether you need to sign forms or gather electronic signatures, airSlate SignNow manages everything efficiently, needing only a few clicks.

Follow these comprehensive steps:

  1. Sign in to your account or sign up for a complimentary trial with our service.
  2. Click +Create to upload a document from your device, cloud, or our form repository.
  3. Open your ‘2013 Regional Sales Contract Washington Dc 1999 Form’ in the editor.
  4. Click Me (Fill Out Now) to set up the document on your end.
  5. Add and designate fillable sections for others (if needed).
  6. Continue with the Send Invite settings to request eSignatures from others.
  7. Save, print your version, or convert it into a reusable template.

Don’t fret if you need to collaborate with your colleagues on your 2013 Regional Sales Contract Washington Dc 1999 Form or send it for notarization—our platform has everything you need to complete these tasks. Create an account with airSlate SignNow today and elevate your document management to a new level!

Here is a list of the most common customer questions. If you can’t find an answer to your question, please don’t hesitate to reach out to us.

Need help? Contact Support
Regional sales contract washington dc form pdf
Regional sales contract washington dc form template
Regional sales contract washington dc form free
Regional sales contract washington dc form download
GCAAR Sales Contract PDF
GCAAR lease agreement dc
Washington D.C. Residential lease agreement PDF
gcaar sales contract (1301)
Sign up and try 2013 regional sales contract washington dc 1999 form
  • Close deals faster
  • Improve productivity
  • Delight customers
  • Increase revenue
  • Save time & money
  • Reduce payment cycles