How Do I Add eSign in Zapier
Contact Sales
Make the most out of your eSignature workflows with airSlate SignNow
Extensive suite of eSignature tools
Robust integration and API capabilities
Advanced security and compliance
Various collaboration tools
Enjoyable and stress-free signing experience
Extensive support
Keep your eSignature workflows on track
Our user reviews speak for themselves


Award-winning eSignature solution


How can I integrate eSign in Zapier
If you're curious about how to integrate eSign in Zapier, you're not the only one! Incorporating eSignature functions into your workflows can greatly improve your document management system. With airSlate SignNow, companies can effortlessly transmit and sign documents online, offering a smooth and cost-efficient solution for eSigning requirements.
How can I integrate eSign in Zapier
- Open your web browser and head to the airSlate SignNow site.
- Set up a free trial account or log into your current account.
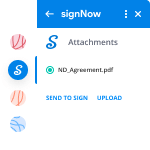
- Choose the document you want to sign or send out for signatures.
- If you intend to reuse this document, change it into a reusable template.
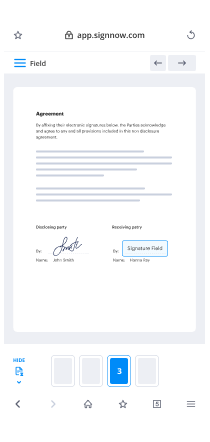
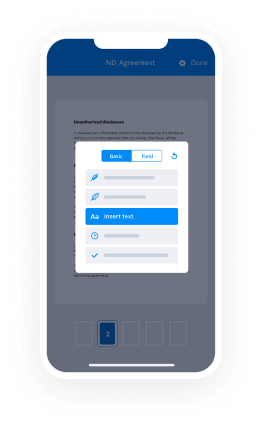
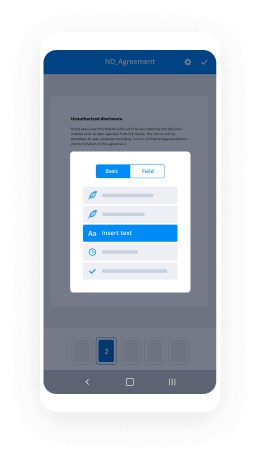
- Access your document and make necessary adjustments: add fillable fields or insert needed information.
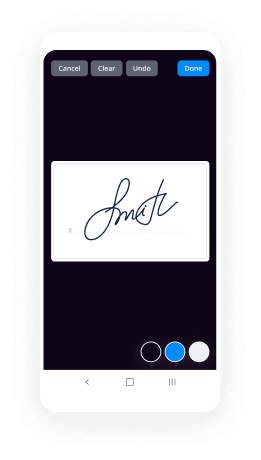
- Sign your document and assign signature fields for your recipients.
- Click 'Continue' to set up and dispatch an eSignature invitation.
In summary, airSlate SignNow provides a powerful platform that enables businesses to effectively manage document signing. With its extensive range of features, it presents great value for your investment, making it a wise choice for both small and medium-sized enterprises.
Ready to optimize your document signing workflow? Begin your free trial with airSlate SignNow today and explore the advantages of convenient eSigning!
How it works
Rate your experience
-
Best ROI. Our customers achieve an average 7x ROI within the first six months.
-
Scales with your use cases. From SMBs to mid-market, airSlate SignNow delivers results for businesses of all sizes.
-
Intuitive UI and API. Sign and send documents from your apps in minutes.
A smarter way to work: —how to industry sign banking integrate
How to eSign & fill out a document online
Document management isn't an easy task. The only thing that makes working with documents simple in today's world, is a comprehensive workflow solution. Signing and editing documents, and filling out forms is a simple task for those who utilize eSignature services. Businesses that have found reliable solutions to how do i integration e sign add zapier don't need to spend their valuable time and effort on routine and monotonous actions.
Use airSlate SignNow and how do i integration e sign add zapier online hassle-free today:
- Create your airSlate SignNow profile or use your Google account to sign up.
- Upload a document.
- Work on it; sign it, edit it and add fillable fields to it.
- Select Done and export the sample: send it or save it to your device.
As you can see, there is nothing complicated about filling out and signing documents when you have the right tool. Our advanced editor is great for getting forms and contracts exactly how you want/need them. It has a user-friendly interface and full comprehensibility, offering you full control. Create an account right now and begin increasing your eSignature workflows with efficient tools to how do i integration e sign add zapier online.

How to eSign and fill documents in Google Chrome
Google Chrome can solve more problems than you can even imagine using powerful tools called 'extensions'. There are thousands you can easily add right to your browser called ‘add-ons’ and each has a unique ability to enhance your workflow. For example, how do i integration e sign add zapier and edit docs with airSlate SignNow.
To add the airSlate SignNow extension for Google Chrome, follow the next steps:
- Go to Chrome Web Store, type in 'airSlate SignNow' and press enter. Then, hit the Add to Chrome button and wait a few seconds while it installs.
- Find a document that you need to sign, right click it and select airSlate SignNow.
- Edit and sign your document.
- Save your new file to your account, the cloud or your device.
By using this extension, you prevent wasting time on dull assignments like saving the document and importing it to an eSignature solution’s collection. Everything is close at hand, so you can quickly and conveniently how do i integration e sign add zapier.
How to eSign forms in Gmail
Gmail is probably the most popular mail service utilized by millions of people all across the world. Most likely, you and your clients also use it for personal and business communication. However, the question on a lot of people’s minds is: how can I how do i integration e sign add zapier a document that was emailed to me in Gmail? Something amazing has happened that is changing the way business is done. airSlate SignNow and Google have created an impactful add on that lets you how do i integration e sign add zapier, edit, set signing orders and much more without leaving your inbox.
Boost your workflow with a revolutionary Gmail add on from airSlate SignNow:
- Find the airSlate SignNow extension for Gmail from the Chrome Web Store and install it.
- Go to your inbox and open the email that contains the attachment that needs signing.
- Click the airSlate SignNow icon found in the right-hand toolbar.
- Work on your document; edit it, add fillable fields and even sign it yourself.
- Click Done and email the executed document to the respective parties.
With helpful extensions, manipulations to how do i integration e sign add zapier various forms are easy. The less time you spend switching browser windows, opening several profiles and scrolling through your internal records seeking a template is much more time and energy to you for other crucial duties.
How to securely sign documents in a mobile browser
Are you one of the business professionals who’ve decided to go 100% mobile in 2020? If yes, then you really need to make sure you have an effective solution for managing your document workflows from your phone, e.g., how do i integration e sign add zapier, and edit forms in real time. airSlate SignNow has one of the most exciting tools for mobile users. A web-based application. how do i integration e sign add zapier instantly from anywhere.
How to securely sign documents in a mobile browser
- Create an airSlate SignNow profile or log in using any web browser on your smartphone or tablet.
- Upload a document from the cloud or internal storage.
- Fill out and sign the sample.
- Tap Done.
- Do anything you need right from your account.
airSlate SignNow takes pride in protecting customer data. Be confident that anything you upload to your account is secured with industry-leading encryption. Auto logging out will protect your information from unwanted entry. how do i integration e sign add zapier from the mobile phone or your friend’s phone. Protection is key to our success and yours to mobile workflows.

How to sign a PDF with an iOS device
The iPhone and iPad are powerful gadgets that allow you to work not only from the office but from anywhere in the world. For example, you can finalize and sign documents or how do i integration e sign add zapier directly on your phone or tablet at the office, at home or even on the beach. iOS offers native features like the Markup tool, though it’s limiting and doesn’t have any automation. Though the airSlate SignNow application for Apple is packed with everything you need for upgrading your document workflow. how do i integration e sign add zapier, fill out and sign forms on your phone in minutes.
How to sign a PDF on an iPhone
- Go to the AppStore, find the airSlate SignNow app and download it.
- Open the application, log in or create a profile.
- Select + to upload a document from your device or import it from the cloud.
- Fill out the sample and create your electronic signature.
- Click Done to finish the editing and signing session.
When you have this application installed, you don't need to upload a file each time you get it for signing. Just open the document on your iPhone, click the Share icon and select the Sign with airSlate SignNow button. Your doc will be opened in the app. how do i integration e sign add zapier anything. Additionally, using one service for your document management requirements, everything is faster, better and cheaper Download the app today!
How to eSign a PDF document on an Android
What’s the number one rule for handling document workflows in 2020? Avoid paper chaos. Get rid of the printers, scanners and bundlers curriers. All of it! Take a new approach and manage, how do i integration e sign add zapier, and organize your records 100% paperless and 100% mobile. You only need three things; a phone/tablet, internet connection and the airSlate SignNow app for Android. Using the app, create, how do i integration e sign add zapier and execute documents right from your smartphone or tablet.
How to sign a PDF on an Android
- In the Google Play Market, search for and install the airSlate SignNow application.
- Open the program and log into your account or make one if you don’t have one already.
- Upload a document from the cloud or your device.
- Click on the opened document and start working on it. Edit it, add fillable fields and signature fields.
- Once you’ve finished, click Done and send the document to the other parties involved or download it to the cloud or your device.
airSlate SignNow allows you to sign documents and manage tasks like how do i integration e sign add zapier with ease. In addition, the security of your info is priority. File encryption and private web servers can be used as implementing the most up-to-date features in data compliance measures. Get the airSlate SignNow mobile experience and operate more efficiently.


FAQs
-
How Do I Add eSign in Zapier?
To add eSign in Zapier, start by creating a Zap and selecting airSlate SignNow as the action app. You’ll need to connect your SignNow account to Zapier, allowing you to automate document signing workflows seamlessly. Once connected, you can choose triggers from other apps to initiate eSigning processes with just a few clicks.
-
What features does airSlate SignNow offer for eSigning with Zapier?
AirSlate SignNow offers a variety of powerful features for eSigning, including customizable templates, secure document storage, and real-time tracking. When you ask, 'How Do I Add eSign in Zapier?' you can leverage these features to enhance your document management processes and improve workflow efficiency. Additionally, you can automate tasks like sending reminders and notifications.
-
Is there a cost associated with using eSign in Zapier?
Yes, while incorporating eSign in Zapier via airSlate SignNow does require a subscription, the pricing plans are designed to be cost-effective for businesses of all sizes. By asking, 'How Do I Add eSign in Zapier?' you can explore various pricing tiers that fit your needs, ensuring you get the best value for your eSigning solution.
-
Can I integrate airSlate SignNow with other applications via Zapier?
Absolutely! AirSlate SignNow can seamlessly integrate with numerous applications through Zapier. This allows you to automate workflows across platforms. When you learn 'How Do I Add eSign in Zapier?', you'll discover how easily you can connect SignNow to your favorite apps, increasing efficiency and reducing manual work.
-
What are the benefits of using eSign in Zapier with airSlate SignNow?
Using eSign in Zapier with airSlate SignNow streamlines your document signing process, saving you time and reducing errors. By asking, 'How Do I Add eSign in Zapier?', you can unlock the potential for greater productivity, allowing your team to focus on core tasks while automating repetitive signing workflows.
-
Is airSlate SignNow compliant with eSignature laws?
Yes, airSlate SignNow complies with all major eSignature laws, including ESIGN and UETA in the U.S. This ensures that your eSigning processes are secure and legally binding. When you inquire, 'How Do I Add eSign in Zapier?', rest assured that your documents will meet all legal standards for electronic signatures.
-
Can I customize my eSign documents in airSlate SignNow?
Yes, airSlate SignNow allows you to customize your eSign documents with your branding, logos, and specific fields. This flexibility enhances your professional image and ensures that the documents align with your business identity. By asking, 'How Do I Add eSign in Zapier?', you can easily integrate these customized documents into automated workflows.
-
How do I enable Signals integration in Zapier?
There's no triggers available for Signals yet, but you can see the full list of what's supported here: Signals IntegrationsTo keep tabs on any new additions, we post all new features to our updates blog: Updates - ZapierHope that helps!
-
How do I add a guest on Google Calendar automatically? How do I automate it using Zapier?
Guest access to a calendar app through gmail is done under the calendar app. First you add a user by clicking the plus button. A list of users will populate if you have any users. A check mark on the user allows a user to share and see your calendar.
-
How do I add more topics that interest me on Quora?
You add topics based on your interest by three different ways, 1. By Searching for the topic you want to follow: On your Quora home page, you see the Feeds on the left of the screen, Click on Edit present right there: As you click on Edit, it will open a pop-up on it’s right. There you will see the list of topics you already follow, and above on top of all you get a search area. Enter a topic name. for example: World: Now select any of the topic from the search results, for example: I clicked on The World: As you click on the topic name, it will automatically add it to your feed on the left: 2. The other way of searching and adding a topic to your feed: Type the name of the topic in “Ask or Search Quora” column present on top of Quora page: Once you get the search results, select any of the topic you want to add, for example: Asian Food and it will open the page related to that topic: Now click on the Follow Topic button which you get on the right of the topic page you opened: 3. The third way is to add the topics from your profile: Go to your profile: Once in the profile, you will find a portion on the right of the screen “Knows About”, there you get an option to edit the topics. Click on Edit: As you click on Edit on previous screen, it will open a pop-up allowing you to search and add topics: Start typing the name of a topic you want to add and select the topic from the search results: As you select the topic name, it will be added to your Knows About list, click on Done to close this scree: That’s all - this is how you can add the topics.
-
How can I add a contact from Highrise to my Macintosh address book? Is there a way I can do it with Zapier?
I don't have a lot of familiarity with the Apple Address Book, but when I look at mine (it's called Contacts on Yosemite), I see there's an Accounts area, which is offering to sync with my Google contacts. So, you could use the Highrise -> Google Contact zap [1], and sync your Apple contacts with Google.[1] - Create Google Contact from Highrise Contact
-
How can I boost the sale on my E-commerce website?
Whether you're a new business or have been in operation for many decades, getting more e-commerce earnings will benefit your company.Unfortunately, companies undergo plateaus and declines.These things happen, but do not get discouraged.If you are having trouble coming up with new tactics to get more customers and increase revenue, I will provide you with some pointers.Your previous methods could have worked at a stage, but the exact same old strategies could grow stale.It is essential your company is continually keeping up with new trends.Consumer customs have changed, particularly in the e-commerce market.As a marketing specialist, I have examined these trends and come up with a list of tips which will actually do the job.Here are the best 11 ways to generate more sales on your e-commerce website1. Target your Present clients:When companies have difficulty growing, they instantly think it's because they do not have enough clients.That is a frequent misconception, and thus don't leap to conclusions.Rather than focusing all of your effort on client acquisition, you need to enhance your customer retention plan.Add more items to their shopping cartsCreate more revenue Every Time they visit your Website2. Display icons which show your Website is trustworthy:Nobody will want to shop in your own e-commerce website if it seems sketchy or untrustworthy.Among the primary things you have to do is make sure your site is secure.3. Use video presentations:Consumers love vidoes.In fact, over half of the advertising experts throughout the globe say that video has the best return on investment compared to other advertising tactics.Websites which have videos can get the normal user to spend 88 percent more time on their webpages.Additionally, videos do as well as advertisements. That is how the e-commerce brand Robo generated $4.7 million in earnings running video advertisements.This makes an increase in participation as well as interest in whatever you're trying to sell.Videos resonate more with people, so it's very likely that they'll remember what they watched instead of simply reading about it.4. Use photos when you include customer testimonials:User testimonials and reviews are a terrific way to demonstrate proof of concept.However, a message from a nameless and faceless person isn't really that convincing.Require your reviews one step farther.Add a photo and include the individual's full name and name (if applicable to a product).5. Recognize your clients want to shop out of their cellular devicesJust because you have an e-commerce site doesn't mean you can assume your clients are shopping only from their computers.The reality is that people use mobile phones and tablet computers to shop online.Research shows 40% of mobile users have bought something online from their apparatus.Additionally, 63% of millennials shop in their phones.These numbers can't be discounted.Make sure your site is optimized for mobile devices.If your website isn't mobile friendly, it will turn potential sales off.For those without an optimized mobile site, it could be one of the reasons you are seeing a decline in sales.Make it a top priority on your to-do list.Something else you may consider is building a mobile app.All these reasons make things simpler for the customer.Enhancing the customer experience will help you get more sales and increase your revenue.Find a way to focus on what clients want.If your website, mobile site, and cellular application can provide these advantages, you won't have a problem getting more earnings.6- Provide more discounts:It might sound easy, although not enough businesses are offering discounts to their clients.If you are concerned about your profit margins, then simply use a promotion strategy that is as old as time.Jack up the bottom cost of every solution and then place it available.It is simple.7. Showcase your top selling items:Give your customers some leadership.Show them what folks are buying the most.I like it when websites incorporate a"best seller" class on the homepage.Perhaps not everyone browsing your website will know exactly what they're searching for.If your company sells a wide assortment of different goods, it may be overwhelming, especially to get a new customer.Whenever someone stumbles upon your website, they can get drawn to products that are popular.8- Ramp up promotions to the holidays:Specific events are a time when folks are seeking to store and spend more cash than on a normal day of this year.That's why I always tell e-commerce sites to actively promote holiday sales.You've got a little window of opportunity to get huge sales during these occasions.9. FOMO (fear of missing out)You've got to make a feeling of urgency when you're selling products on your e-commerce site.Tell your customers you've got a small number of things remaining even though that's not the case.Airlines do so all the time.Four from the 6 prices on this page show a limited quantity remaining.The lowest ticket price is for $303.20, however, there is just one ticket left at this price.This strategy can find a price sensitive customer (most people) to create an impulse buying decision.It produces a fear that if they do not buy it today, they'll end up spending more money afterwards.Another way to do this is by conducting flash sales.10. Accept different payment choices:You need to give people different options to pay for the merchandise and services on your site.If you merely accept Visa and MasterCard, you're alienating lots of possible customers.Make sure you have the capability to accept debit cards in addition to credit cards.Best Buy takes 6 distinct types of credit cards on their website.They also give clients the option of paying through PayPal.The very last thing you want is a customer who wants to make a buy but can't complete it as you do not take their primary payment method.Proceed to adapt to the new tendencies too.Alternative payment options such as Apple Pay are increasing in popularity too.In case you've got a cell application, customers can easily pay for items through Apple Pay with just a couple clicks.Making the checkout procedure as simple as possible will help you get more e-commerce earnings.11. Focus on your value proposition:What does the customer see when they access your website?Is it your contact number?Your company's mission statement?Those aren't powerful.Instead, place more emphasis on value.Tell your clients what separates your merchandise from similar items on the market.Conclusion:If sales have started to slow down or becoming stagnant, it's time to think of some creative and new ways to advertise products and services on your e-commerce site.As opposed to attempting to find new clients, focus your advertising efforts in your existing customer base.Make sure your website is protected so clients feel comfortable entering their personal information in addition to their credit card numbers.If you're currently using customer testimonials, that is fantastic.But if you would like to improve those reviews, add a photograph to them also.Offering lots of promotions and advertisements during special days of the year, like the holidays, can assist you to improve sales.Create a sense of urgency to lure customers to make an impulse buy.Do not forget about cellular users. At the minimum, your website has to be optimized for mobile devices.If you would like to go the extra mile, think about developing a mobile program.Promote your top selling items.Produce a unique and actionable value proposition.These tips will help you boost sales on your site.
-
How do I add an email sign-up form to my website?
hi friends,i use sendinblue email subscription service to capture email from my landing page.In this tutorial, i’ll show you how to create your subscription form in just a few clicks. You will be able to:customize the form as you see fitchoose the form that best suits youFirst of all Create a free Account on Sendinblue and login to your account. after logged in follow the below step.1. Creating a subscription formNavigate to the tab Contacts.Now click to Manage your forms.Now let’s choose + Create a new subscription form.Personalizing your formWe can achieve a great level of personalization by modifying:BackgroundText Fonts, Sizes & ColorsInstruction Text (directing users how to unsubscribe)Success Message (confirming that a user has successfully unsubscribed)Form fields (add as many fields as you want)New form field typesAdd additional form fields to collect information about your subscribers and populate existing contact attributes (such as a text, number or date value).You may also add a multi-list subscription field to allow subscribers to declare interests or preferences at signup and place them in corresponding lists.Each new form field will correspond to a contact attribute or contact list:Text (contact attribute)Number (contact attribute)Date (contact attribute)Multi-list subscription (contact form)CaptchaTo protect you from spam, we activate a Captcha to your form by default. To configure the Captcha that matches your website, go to Google Captcha.Once this has been set up, enter the site key in the field provided in your SendinBlue form.Editing form HTMLAfter creating the form, you can also directly edit the HTML code if you want to go further. You can find this code in the "Share" tab. Here is an example of personalization:2. Sign-up settingsThis section is where you can choose what type of confirmation message your subscribers will receive (if any).2.1 No confirmation Choose this option if you do not want SendinBlue to send a confirmation email once the person has subscribed.2.2 Simple confirmation Choose this option if you want SendinBlue to send a confirmation email to a new subscriber confirming that they will now receive your emails. Next, select the SMTP template you would like the system to use when sending the confirmation. The default template, titled "Default Template – Single Confirmation", is available and you can customize it or create another template confirmation.Note: To create a new SMTP template, navigate to Campaigns within the Email & SMS Campaigns area. In the drop down menu, select SMTP Templates and then +Create a Template. If you create a new SMTP template, be sure to activate it so that it will appear as an option when setting up a form with Simple Confirmation.2.3 Double Opt-in Confirmation The double opt-in subscription process requires the subscriber to complete two steps:Your new subscriber enters their email address into your SendinBlue sign-up form.The subscriber must click the link in a confirmation email to be added to your SendinBlue email list.The double opt-in confirmation feature allows subscribers to verify that they want to receive your emails. This feature eliminates accidental subscriptions and potential annoyances. Advantages of double opt-in confirmation:For your contacts:Allows them to verify they didn’t make a mistake in registering.For you:You have the assurance of knowing a subscriber is truly interested in receiving your emails.Since the subscriber twice confirmed their email address, you drastically reduce the number of hard bounces (invalid email addresses) in your campaigns.You have protection against malicious competitors who may provide you with phony email addresses to damage your reputation.You remain compliant with laws and regulations in some countries: the double opt-in is mandatory in several countries, including Germany.The confirmation email must be one of your SMTP templates and include double opt-in formatting (details below). You can use:The default template we provide, "Default template - Double optin confirmation"Or a new template that you create.a. Default Template The default template is simply called "Default template - Double optin confirmation". You can find and modify it in your SMTP templates.b. Custom Template You also have the ability to create or select your own template for the confirmation email. To do this, go to SMTP Templates and click "Create a Template".Create your template using one of the different newsletter editors.Next, edit the template as desired and insert this exact text as the double opt-in link: http://[DOUBLEOPTIN]Finally, save and activate the template, and return to your subscription form.c. Redirect URL (optional) Use this tool if you want your subscriber to be redirected to a specific page (i.e. a confirmation page or your website homepage) after registering.d. Final Confirmation Email (optional) Use this tool if you want your subscriber to receive a final confirmation email after he have completed the double opt-in process. As with the other confirmation emails, the default template is simply called “Default template - Final Confirmation”. You can find and modify it in your SMTP templates.e. Saving Contacts Before saving your double opt-in subscription form, you'll be required to select the list that new subscribers will be added to. This will automatically create a "Temporary Double Opt-in" list to save the contact information of the subscribers who have not yet completed the second step of the double opt-in process (confirming their email addresses).Your SendinBlue contact database will also be updated to include a new attribute (column) labeled "Double_opt -in". Contacts who are added via double opt-in will have a value of "Yes"within this column. If the contact subscribed through another type of form, this field value will be "No". If you did not use a SendinBlue subscription form to add contacts to your database, this field will be blank.3. Advanced settingsThis section is where you can choose what type of success message your subscribers will receive (if any). URL forwarding allows you to automatically redirect the user to a specific page after they have successfully completed the subscription form. For example, you may redirect your new subscriber to a landing page or to your website homepage. Pre-populating form fields is possible when your form is sent by email or shared by URL. It can be helpful to your users to fill in the form with sample information. For example, if you want to pre-populate the ‘Email’ field, you can add “/email/subscriber@email.com” to the end of your form URL. You can also pre-populate other fields on the form by following the same format and adding additional modifiers to the form URL: /field-name/sample text/.4. List selection and registration form integrationNext, select the list (or lists) where you will place the new contacts.After Saving, click on the Share tab to get the code for integrating the form into your website. There are three types of codes:Iframe code: easy to integrate, this code is a kind of mini-page you have to paste onto your website.HTML code: this code is much more customizable, with Ajax animation for messages.Simple HTML code: this is a simplified version of HTML form code that does not require calling JavaScript.Important : Captcha that requires calling JavaScript cannot be included in this form code. In addition, the forwarding URL has to be provided in order to integrate this code into you website.Finally, just paste the code on your website, and the form will appear!Hope this helps.Good Luck.
-
How do I create a trigger in Zapier, for each time a new column record is added to a Google Sheet?
Maybe this can help: You could use two apps:From Google Sheets: New spreadsheet rowTo Email (by Zapier or any other app): Send outbound email)
Trusted esignature solution— what our customers are saying


Get legally-binding signatures now!
Frequently asked questions
How do i add an electronic signature to a word document?
How to know if an electronic signature was actually signed?
How to sign a pdf when signing is not recognized?
Get more for How Do I Add eSign in Zapier
- Electronic signature Alabama Real estate sales contract template Easy
- Electronic signature Georgia Real estate purchase contract template Secure
- Electronic signature South Carolina Real estate sales contract template Mobile
- Can I Electronic signature Kentucky Residential lease contract
- Can I Electronic signature Nebraska Residential lease contract
- Electronic signature Utah New hire forms Now
- Electronic signature Texas Tenant contract Now
- How Do I Electronic signature Florida Home rental application
Find out other How Do I Add eSign in Zapier
- Rda certificate sample 2008 form
- Divos paper 2008 form
- Reportable incidents to state in tn form
- Tn visitation form
- Tennessee dental license verification 2012 form
- Resource packet assessment of language impairment form
- How to apply child support in tennessee 2012 form
- Tngovlabor wfd c40a form 2012
- Blank car title template form
- Ss 1109 form
- Form tennessee permission
- Twra marine event application form
- Intakereferral form tennessee department of transportation tdot state tn
- Tdot prequalification questionnaire form
- Types of outdoor advertising signs tn dept of transportation form
- Form 4 west virginia dept of education
- Dropout form
- Evaluation coaches form
- Estimate form
- Wv cst 240 form 2009