How Do I Edit eSign Document
Make the most out of your eSignature workflows with airSlate SignNow
Extensive suite of eSignature tools
Robust integration and API capabilities
Advanced security and compliance
Various collaboration tools
Enjoyable and stress-free signing experience
Extensive support
Keep your eSignature workflows on track
Our user reviews speak for themselves


Award-winning eSignature solution


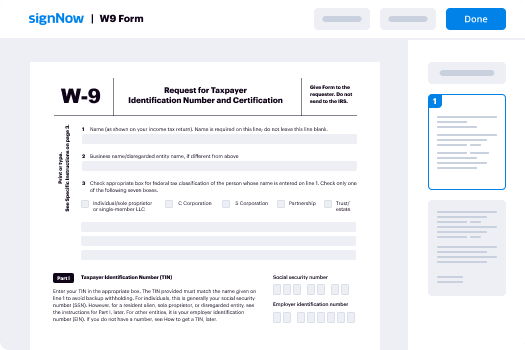
How to Modify eSign Document
If you're curious about how to modify an eSign document, airSlate SignNow provides a smooth platform to handle your documents effectively. With its intuitive interface and strong features, companies can easily send and eSign documents, making it an excellent choice for small to medium-sized businesses. Let's delve into how to begin editing your eSign document using airSlate SignNow.
How to Modify eSign Document with airSlate SignNow
- Launch your web browser and go to the airSlate SignNow homepage.
- Create a complimentary trial account or sign in to your existing account.
- Choose the document you want to sign or send out for signatures by uploading it.
- If you intend to reuse the document, transform it into a template for future reference.
- Access the uploaded file and perform necessary revisions, such as adding fillable fields or including additional information.
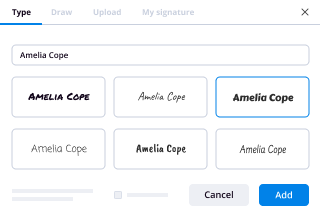
- Insert your signature and specify signature fields for recipients to complete.
- Click on 'Continue' to complete the setup and send your eSignature request.
With airSlate SignNow, businesses can benefit from a substantial return on investment due to its broad features offered at a cost-effective price. The platform is designed for simplicity and growth, making it suitable for small and mid-market enterprises.
Prepared to enhance your document signing process? Start your free trial with airSlate SignNow today and discover the advantages of clear pricing and excellent support for all your eSigning requirements!
How it works
Rate your experience
-
Best ROI. Our customers achieve an average 7x ROI within the first six months.
-
Scales with your use cases. From SMBs to mid-market, airSlate SignNow delivers results for businesses of all sizes.
-
Intuitive UI and API. Sign and send documents from your apps in minutes.
A smarter way to work: —how to industry sign banking integrate
How to electronically sign & fill out a document online
Document management isn't an easy task. The only thing that makes working with documents simple in today's world, is a comprehensive workflow solution. Signing and editing documents, and filling out forms is a simple task for those who utilize eSignature services. Businesses that have found reliable solutions to how do i functionality e sign edit document don't need to spend their valuable time and effort on routine and monotonous actions.
Use airSlate SignNow and how do i functionality e sign edit document online hassle-free today:
- Create your airSlate SignNow profile or use your Google account to sign up.
- Upload a document.
- Work on it; sign it, edit it and add fillable fields to it.
- Select Done and export the sample: send it or save it to your device.
As you can see, there is nothing complicated about filling out and signing documents when you have the right tool. Our advanced editor is great for getting forms and contracts exactly how you want/need them. It has a user-friendly interface and full comprehensibility, giving you full control. Create an account right now and begin enhancing your eSignature workflows with efficient tools to how do i functionality e sign edit document online.
How to electronically sign and fill documents in Google Chrome
Google Chrome can solve more problems than you can even imagine using powerful tools called 'extensions'. There are thousands you can easily add right to your browser called ‘add-ons’ and each has a unique ability to enhance your workflow. For example, how do i functionality e sign edit document and edit docs with airSlate SignNow.
To add the airSlate SignNow extension for Google Chrome, follow the next steps:
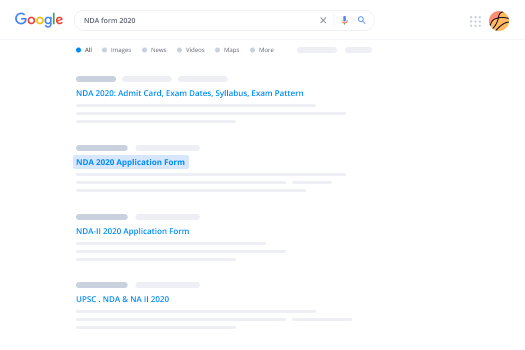
- Go to Chrome Web Store, type in 'airSlate SignNow' and press enter. Then, hit the Add to Chrome button and wait a few seconds while it installs.
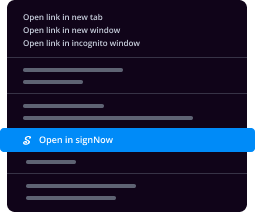
- Find a document that you need to sign, right click it and select airSlate SignNow.
- Edit and sign your document.
- Save your new file to your account, the cloud or your device.
Using this extension, you prevent wasting time on dull assignments like saving the data file and importing it to a digital signature solution’s catalogue. Everything is close at hand, so you can quickly and conveniently how do i functionality e sign edit document.
How to digitally sign docs in Gmail
Gmail is probably the most popular mail service utilized by millions of people all across the world. Most likely, you and your clients also use it for personal and business communication. However, the question on a lot of people’s minds is: how can I how do i functionality e sign edit document a document that was emailed to me in Gmail? Something amazing has happened that is changing the way business is done. airSlate SignNow and Google have created an impactful add on that lets you how do i functionality e sign edit document, edit, set signing orders and much more without leaving your inbox.
Boost your workflow with a revolutionary Gmail add on from airSlate SignNow:
- Find the airSlate SignNow extension for Gmail from the Chrome Web Store and install it.
- Go to your inbox and open the email that contains the attachment that needs signing.
- Click the airSlate SignNow icon found in the right-hand toolbar.
- Work on your document; edit it, add fillable fields and even sign it yourself.
- Click Done and email the executed document to the respective parties.
With helpful extensions, manipulations to how do i functionality e sign edit document various forms are easy. The less time you spend switching browser windows, opening several accounts and scrolling through your internal data files trying to find a doc is more time for you to you for other crucial duties.
How to securely sign documents in a mobile browser
Are you one of the business professionals who’ve decided to go 100% mobile in 2020? If yes, then you really need to make sure you have an effective solution for managing your document workflows from your phone, e.g., how do i functionality e sign edit document, and edit forms in real time. airSlate SignNow has one of the most exciting tools for mobile users. A web-based application. how do i functionality e sign edit document instantly from anywhere.
How to securely sign documents in a mobile browser
- Create an airSlate SignNow profile or log in using any web browser on your smartphone or tablet.
- Upload a document from the cloud or internal storage.
- Fill out and sign the sample.
- Tap Done.
- Do anything you need right from your account.
airSlate SignNow takes pride in protecting customer data. Be confident that anything you upload to your account is secured with industry-leading encryption. Automatic logging out will shield your account from unauthorised access. how do i functionality e sign edit document out of your mobile phone or your friend’s mobile phone. Safety is key to our success and yours to mobile workflows.
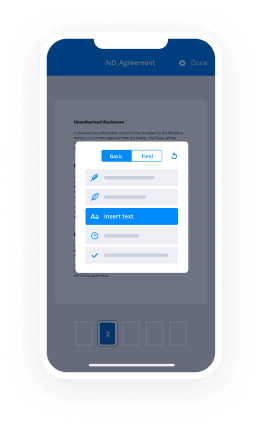
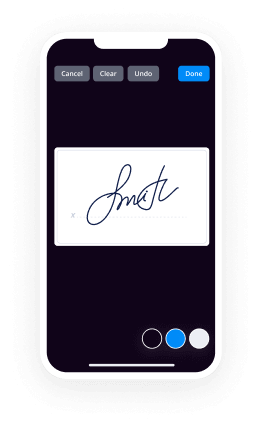
How to digitally sign a PDF document on an iPhone or iPad
The iPhone and iPad are powerful gadgets that allow you to work not only from the office but from anywhere in the world. For example, you can finalize and sign documents or how do i functionality e sign edit document directly on your phone or tablet at the office, at home or even on the beach. iOS offers native features like the Markup tool, though it’s limiting and doesn’t have any automation. Though the airSlate SignNow application for Apple is packed with everything you need for upgrading your document workflow. how do i functionality e sign edit document, fill out and sign forms on your phone in minutes.
How to sign a PDF on an iPhone
- Go to the AppStore, find the airSlate SignNow app and download it.
- Open the application, log in or create a profile.
- Select + to upload a document from your device or import it from the cloud.
- Fill out the sample and create your electronic signature.
- Click Done to finish the editing and signing session.
When you have this application installed, you don't need to upload a file each time you get it for signing. Just open the document on your iPhone, click the Share icon and select the Sign with airSlate SignNow button. Your sample will be opened in the application. how do i functionality e sign edit document anything. Plus, using one service for your document management demands, everything is easier, better and cheaper Download the app today!
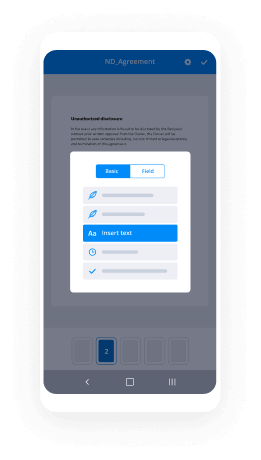
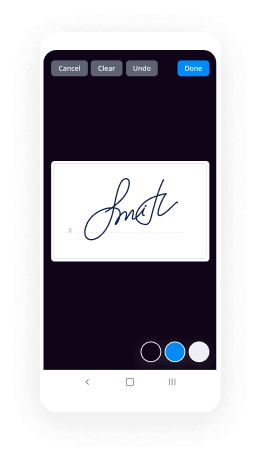
How to electronically sign a PDF file on an Android
What’s the number one rule for handling document workflows in 2020? Avoid paper chaos. Get rid of the printers, scanners and bundlers curriers. All of it! Take a new approach and manage, how do i functionality e sign edit document, and organize your records 100% paperless and 100% mobile. You only need three things; a phone/tablet, internet connection and the airSlate SignNow app for Android. Using the app, create, how do i functionality e sign edit document and execute documents right from your smartphone or tablet.
How to sign a PDF on an Android
- In the Google Play Market, search for and install the airSlate SignNow application.
- Open the program and log into your account or make one if you don’t have one already.
- Upload a document from the cloud or your device.
- Click on the opened document and start working on it. Edit it, add fillable fields and signature fields.
- Once you’ve finished, click Done and send the document to the other parties involved or download it to the cloud or your device.
airSlate SignNow allows you to sign documents and manage tasks like how do i functionality e sign edit document with ease. In addition, the security of your data is top priority. File encryption and private servers can be used for implementing the most recent capabilities in info compliance measures. Get the airSlate SignNow mobile experience and operate more efficiently.


FAQs
-
How do I edit eSign document after sending it?
To edit an eSign document after sending it, simply log into your airSlate SignNow account. Find the document in your dashboard, click on it, and select the 'Edit' option. This allows you to make necessary changes before resending it to recipients.
-
What features does airSlate SignNow offer for editing eSign documents?
airSlate SignNow provides a variety of features for editing eSign documents, including the ability to add text fields, checkboxes, and signatures. You can also rearrange pages, upload new documents, and customize your templates. These features enable you to easily tailor your documents to meet your needs.
-
Is there a cost associated with editing eSign documents in airSlate SignNow?
No additional cost is associated with editing eSign documents in airSlate SignNow. Once you subscribe to a plan, you can edit your documents as often as needed without incurring extra charges. This ensures you have a cost-effective solution for managing your documents.
-
Can I collaborate with others while editing an eSign document?
Yes, airSlate SignNow allows for collaboration while editing eSign documents. You can invite team members to review or edit the document in real-time, making it easy to gather feedback and finalize your documents efficiently. This feature enhances teamwork and speeds up the editing process.
-
How do I save changes when I edit an eSign document?
When you edit an eSign document in airSlate SignNow, changes are automatically saved. However, to ensure all modifications are applied, click the 'Save' button before exiting the editor. This will secure your updates and make them ready for the next steps.
-
What file formats can I use to edit eSign documents in airSlate SignNow?
You can edit eSign documents in various formats, including PDF, Word, and image files. airSlate SignNow supports these formats, allowing you to upload and modify documents easily. This versatility ensures you can work with the files that best suit your needs.
-
Does airSlate SignNow integrate with other tools for document editing?
Yes, airSlate SignNow offers integrations with popular tools like Google Drive, Dropbox, and Microsoft Office. These integrations facilitate seamless editing of eSign documents directly from your preferred applications. This enhances your workflow and simplifies document management.
-
What's the best way to self publish an e-book on social media, business, & self help?
I’ve been through the process of self-publishing on Kindle and learnt a few things. Now, I can share my tips, so you don’t make the same mistakes! I’m a commercially published author now, but I understand the frustrations of trying to break into conventional publishing, because it took me ten years to get my big break. [ http://graemeshimmin.com/a-kill-in-the-morning-shortlisted-for-terry-prachett-prize/ ] Before I got my publishing deal, I self-published a short story called Veronika, [ http://graemeshimmin.com/veronika-short-story/ ]using Kindle Direct Publishing (KDP) with modest success – it has been in the Amazon top 50. Self publishing does have the advantage of getting your work out there, which can lead to attracting attention and sales. Why Self Publish on Kindle? Amazon’s two main competitors, Apple and Barnes & Noble, both claim to have gained a 20+% market share of the eBook market, leaving Amazon with something like 60%. But surveys of self-published authors have shown that Amazon’s share of self-published eBook sales is much higher – more like 80-85%. Whether the true figure is 60% or as high as 85%, Amazon is the biggest market by a long way, and KDP makes the process of self publishing on Kindle relatively easy. Self publish on Kindle: Step 1 – Your Book First you’ll need to sign up for KDP. Then you start by clicking Add a Title. The important options to fill in are: 1. Book name 2. Description (up to 4,000 characters – use it to sell your book to the reader) 3. Book contributors (you as the author) 4. Categories (whichever genres you are writing in) 5. Search keywords (up to 7, add the themes of the novel, don’t duplicate the categories) These other items can just be left blank/default: Subtitle, Series, Edition Number, Publisher, Language,Publication Date, ISBN. Verify Your Publishing Rights As you are self-publishing your own work, and so you have copyright, select This is not a public domain work and I hold the necessary publishing rights. Convert your book to Kindle format KDP accepts three main formats: * Microsoft Word (.doc or .docx) * Ebook Formats (Html, Mobi, Epub) * signNow PDF It is possible to send Microsoft Word and signNow PDF documents direct to KDP, but the formatting is far from ideal if you do. If you want a really professional looking book then you should convert your book to Kindle’s HTML format yourself before uploading. I found the easiest solution was to convert the formatted manuscript [ http://graemeshimmin.com/manuscript-format-for-novel-submission/ ]into Kindle specific html. How to do this will be the subject of a separate answer. But, as we’re doing things the easy way for now, I suggest you just upload the manuscript and let Amazon reformat it for Kindle. Use Kindle Previewer If you have created an HTML format file then you can use Kindle Previewer, a downloadable Kindle emulator, to check how your book will look on various types of Kindle . What I found was that without careful tweaking, my book looked good on one type of Kindle but not on others. Kindle Previewer allows you to quickly switch between Kindle versions and see how the book will look on each type. Upload Your Book File Once you’re happy with the format, you can upload the file to KDP. The only option is Digital Rights Management. This is your choice. Choose Enable if you want to make it harder for people to copy your book, or Do Not Enable if you prefer to make your book available without restrictions. After you’ve uploaded, there’s an online previewer to check the text still looks right. Self publish on Kindle: Step 2 – Cover Photo There are two options, design your own cover or use the template-based Cover Creator. I recommend designing your own cover. The book cover is critical to attracting readers and a template based design is less likely to stand out from the crowd. The picture at the top shows what the cover I designed for Veronika looks like on the Kindle. Designing your own cover doesn’t have to be difficult. At the simplest, it’s just a question of finding a photo, making it the right size and adding the book’s title and your name to it. Find a Cover Photo There are two options: use an original photo or artwork of your own or download one from an image library. The cheapest and easiest option is to use your own photo. Make the Cover Photo the Right Size and Add the Title You’ll need some image editing software to make the cover the right size and to add the title and your name as the author. The free and easy to use image editing programs I recommend are iPiccy and Pixlr. Use the image editor to crop the photo so it is 1,563 x 2,500 pixels, as in the diagram below: The cover should also be in colour, despite the fact the most common Kindles only display black and white. This is because the Kindle Fire and the Kindle app on iPhone, Windows etc. can display colour. Both iPiccy and Pixlr have a variety of free to use fonts. Experiment with a few different ones until you find one you like. Upload the Cover This is simply a matter of clicking Browse for Image… selecting the cover you’ve designed and then clicking Upload Image. Design a cover using the Cover Creator Alternatively, if you just want a simple cover, use the Cover Creator. Step 3 – Rights and Pricing Verify Your Publishing Territories Select Worldwide rights – all territories. Your book will then appear on all the different Amazon sites around the world. Choose Your Royalty I suggest you set your price so that you receive the 70% Royalty – which means a minimum of $2.99 / £1.49 after that it’s up to you. You can set prices worldwide automatically, based on the US price, or customise your prices for different territories. It might be worth setting prices manually to exploit psychological price points like £1.99. Self publish on Kindle: Final Step – Publish! Now just click Save and Publish. That’s it. In a couple of hours your book will be on all the Amazon stores around the world. See – I told you it was easy! More Details There are more details, including links to all the tools mentioned, on my website at How to Self Publish on Kindle in Three Easy Steps [ http://graemeshimmin.com/self-publish-on-kindle/ ]
-
How can I edit a question on Quora?
From our Help Center article, How can I edit a question on Quora? [ https://help.quora.com/hc/en-us/articles/360015508172 ]: %3E You can edit a question by clicking the "..." menu and selecting "Edit Question & Source." For more information about Quora’s features and frequently asked questions, check out our Help Center [ https://www.i.quora.com/_/redirect?sig=38648d&url=https://help.quora.com/hc/en-us ].
-
How do I add a digital signature in a WhatsApp image?
All you need to do is go to Sign PDF Online with DigsignNower. Follow the instructions below and when you’re down, download the final image with the signature to your device.(Works on mobile devices as well!)1. Upload a fileStart out by simply clicking the choose file link to upload the PDF, Word, TXT, IMG, TXT or XLS document that you want to sign off. Alternatively, you can also grab it right from your desktop and drop it as shown in the image below:In just a few seconds your file will be fully available once the upload is completed.2. Apply your editsOnce you’re in, you will be able to select the type of edits you want to apply to your document.This tool is fully equipped with everything you need not only to create an electronic signature but also to fill out your forms online by adding text, selecting checkboxes, inserting the current date or even initialing where necessary.2.1 Create a free electronic signatureHover the mouse over the areas where you want to apply the edits.Feel free to sign documents the way you like. This signature maker tool offers three different options to create electronic signatures:A ) Draw an e-signature using a mouse or touchpad.B) Type your name, or scan an image of your signature.C) And last but not least, upload it to the document.2.2 Fill out the documentAs stated before, you can also add check marks, dates, text or initials in any page of your documents. Simply select the type of function you want to use, select the area and type in the information. Once you’re done click add.3. Download your document for free!When ready, clickto proceed. Our free tool will create a new file with the same format that can be downloaded completely for free without any type of registration!Click download and save the file on your computer.Here’s also a quick video demonstration on how to use this tool!
-
How can I edit a scanned document?
Use signNow to edit a scanned document [ https://www.cisdem.com/resource/how-to-edit-scanned-document.html ] directly within the program or utilize a PDF converter to make the file editable. 1. With signNow OCR [ https://www.cisdem.com/resource/perform-ocr-in-signNow-mac.html ] * Open PDF with Acrobat Acrobat DC * Go to “Edit PDF” on the right panel, signNow will automatically perform OCR on the scanned document. The scanned document is editable now, go to toolbars to add text or image, or any other editing actions. To edit a specified part, click on the part and a text field appears for editing. * Once all the editing on the scanned document has done, go to file and save. 2. Utilize PDF Converter to Make PDF editable for editing For Mac Users * Import scanned PDF document into the Cisdem PDF Software for Mac [ https://www.cisdem.com/pdf-converter-ocr-mac.html ] * Make the scanned PDF document editable. Turn the OCR function ON, select page range and language. Choose the output as PDF or any other supported editable formats. Finally click “Convert” to make the scanned document editable. * Edit scanned document on mac. If you have exported the scanned file as Word, open with Office and edit the scanned document on your mac now. For Windows Users * Add scanned document with PDFMate.Once a scanned document is uploaded to PDFMate, following prompt will appear for you to enable OCR to convert scanned PDFs. Just check the box and click OK. * Convert scanned document for editing. Choose the output format and click ‘Convert” to make scanned documents editable. If needed, enable the merger function ON to merge all these scanned documents. * Edit scanned document on Windows. Once the conversion is done, open the file in its supported editor to edit the scanned document.
-
How will my PAN card name be in the income tax database in India?
The income tax website is updated. Go to profile settings->My Profile after logging in to e-Filing Home Page, Income Tax Department, Government of India. There you will see “PAN DETAILS”. The name of assessee is mentioned there in this format:
. This is the name in database.ORGo to TIN, Select online tax payment.It will redirect to e-TAX Payment SystemThere select CHALLAN NO./ITNS 282Enter dummy details, In the next page it will ask for confirmation of the name. This is also shown in the format: Dont be surprised if your name is wrong in the database as it was the case for me.My father’s name was entered as my first name and my name was entered as my last name.Edit 1: Update PAN details.Many people have been asking if I was able to update my details.NSDL provides online service to do PAN information update. Cost is about 150 rupees.https://www.onlineservices.nsdl....They have three modes e-KYC , e-sign and by post.The e-KYC mode is supposed to get all the info from AADHAR data base and use it, but I havent been able to get this mode working. It always used to go till the end and say that aadhar verification failed and asks to create new token number.The e-sign mode requires to scan and upload identity proof, address proof, sign and photo. The application comes like a PDF at the end. There are restrictions on photo size and the documents should be in PDF etc that you can figure out. In this mode the application got submitted(Did the same for my mom and dad).After the submission of application within 5 days got response that the AADHAR authentication failed as the name mentioned is wrong. Because of this AADHAR could not be used as the document proof for identification. So this would take couple of iterations I suppose, am going to resubmit the application by taking care of these things. Make sure that the proof that you are submitting should have DOB and correct name.I did not try the post mode as it requires DD etc and I am skeptical about any updates or control over it. -
How do you edit text in a PDF file?
You need a PDF Editor for that:For Mac: You can use signNow or Master PDF Editor, both are excellent PDF editors and both of them support for filling up dynamic XFA forms (Master PDF Editor is the only PDF editor for Mac other than signNow with support for dynamic XFA forms). Truth be told all the features of signNow are available on Master PDF Editor and unlike the blood-sucking subscription of signNow you need to pay only an one time payment for $70 for Master PDF Editor. As of UI, well I like the simplistic UI of Master PDF Editor, but of course your opinion may vary from mine.For Windows: You can go for signNow, Master PDF Editor, or Nitro PDF Pro. I personally recommend Nitro PDF Pro because it not only has all the features of signNow and Master PDF editor but also has an UI that’s similar to Microsoft Office apps. Of course with a one time payment of $160 it’s pricier than Master PDF Editor but at least it’s still cheaper than the subscription plan of signNow.For Linux based distros: Master PDF Editor is the only good PDF editor for Linux, it’s the only PDF editor for Linux which has all the features of signNow, including the support for filling up dynamic XFA forms. It’s written in QT5, but it looks equally good in both KDE and GNOME3 (of course it looks better in KDE).For iOS: Just go for Wondershare PDFelements, it’s the one and only full fledged PDF editor for iOS. Just like a desktop PDF editor it lets you edit text, add or remove pages, add or remove images, reposition text or images, etc. The only thing it lacks support for dynamic XFA forms but then again none of the mobile PDF software so far have the support for dynamic XFA forms.For Windows 10 Mobile: You can go for Perfect PDF Ultimate, it’s the one and only full fledged PDF editor for Windows 10 Mobile. It’s a UWP app that works in Continuum too. It provides all the functionalities you get on a desktop PDF editor, it lets you edit text, add or remove pages, add or remove images, reposition text or images, etc. Yet again just like Wondershare PDFelements it lacks is support for dynamic XFA forms.For Android: There’re no full fledged PDF editors for Android. If you use Android then just forget it, all you can do is sign, annotate, highlight PDFs and just fill up non-dynamic PDF forms. Code-Industry, the creators of Master PDF Editor do have future plans to make their software for Android too, but right now they haven’t begun any development, but once they do it, it would not only be the first full fledged PDF editor for Android but also would be the first PDF software on a mobile platform with support for dynamic XFA forms. But as of now there’s no way to edit PDFs on Android devices.
-
How do you write a book (steps) and publish it?
I became a writer by accident, and have now published four books. So, I know what it’s like to have little writing experience, and to grow to writing a lot. I’ll start off by saying that most people have false beliefs about how a book gets written. I used to think that to write a book, you would just sit down and write a book straight through. This is probably why I hated writing until I was deep into my twenties! The steps I recommend are designed to break down what can be a painful process into smaller, less-painful steps. Step 1: Build a Tiny Writing Habit The first thing you need to do is to build a habit of writing. Many people will tell you to build a habit of 1,000 words, but that’s just insane. You might meet that goal the first day, and maybe even the second, but then what happens? You oversleep your alarm clock a few minutes or you catch a cold, and you use that little thing as an excuse to not write today. I interviewed Stanford professor and habits expert BJ Fogg on my podcast [ http://kadavy.net/blog/posts/bj-fogg-podcast/ ], and he told me about “tiny habits.” Basically, you should shoot for the smallest habit you can possibly imagine. That might be to write five words a day, fifty words a day, or even one hundred. The point is that you pick a habit that is so small, you can’t possibly make an excuse not to write. It becomes harder for you to do the habit than it is to not do the habit. If you keep writing every day, suddenly, you’ll be able to write much more, with less pain. Stick with the tiny habit, but if you write more than that target, that’s fine. Just don’t write less. Congratulate yourself just as much for writing fifty words as you do for writing 1,000 words. Step 2: Learn About Books Most of us take books for granted. We don’t think about how much thought and consideration goes into getting people to want to buy a book. Make a habit of downloading free Kindle samples of books. Read a bunch of them. Think hard about why someone would want to buy the book based upon the title and subtitle. Read the Amazon reviews. Why did someone love the book – why did someone hate it? Even more valuable, why did someone almost love the book. As you read Kindle samples, ask yourself if you’re personally compelled to keep reading as you get to the end of the book. The beginning of the book is really a part of the sales funnel, so pay close attention to it. Step 3: Build a Publishing Habit There are lots of emotional barriers to get over in writing, but also in putting your work out there. If you have a writing habit, you’re busting through those barriers for writing on a daily basis. Now you need a publishing habit. Make a habit of publishing something every day. Again, you can start with a really tiny habit. I think Medium is a good place, but you could even do here on Quora if you’re practicing for nonfiction on a topic. As you publish, pay attention to the fears that you have each time you publish. You’ll probably publish many things where you feel embarrassed or afraid, only to find out nobody really cares. You’ll also publish things that you expect people to really love, only to find out the same. I like Medium because you can see what people highlight, and the “clap” feature also helps you see what resonates. This is all very valuable information, because it helps you see in real time what resonates. Step 4: Build an Email List If you’re going to go through the trouble of writing a book, you want someone to buy it. The best way to find buyers for your book is to already have fans. Sure, you can build an audience on Twitter or Facebook or here on Quora, but you don’t really own a direct line to that audience. This is why you need an email list. You can start with a simple sign-up at the end of each post you publish with your publishing habit: “Sign up to get updates from me »” You can build up to giving bonuses for each sign up, such as a short story or a list of tips. I provide a list of tools I relied upon to 4x my writing output [ http://kadavy.net/tools ]. ConvertKit [ http://kadavy.net/convertkit ] (affiliate) is the best email provider for authors. I personally use ActiveCampaign [ http://kadavy.net/activecampaign ] (also an affiliate), which is a little more complicated. I’ve written detailed comparisons of ConvertKit vs. ActiveCampaign [ http://kadavy.net/blog/posts/convertkit-vs-activecampaign/ ], MailChimp vs. ActiveCampaign [ http://kadavy.net/blog/posts/mailchimp-vs-activecampaign/ ], and an AWeber Review [ http://kadavy.net/blog/posts/aweber-review/ ], if you want to delve into this topic in detail. Step 5: Write a Book Title That Will Sell I cringe when I think back to the book title ideas I had for my first book ideas. Heck, I cringe when I think about some book title ideas that I have currently. Coming up with a good title for your book is very important, and very difficult. You want to balance having the right keywords with having something compelling or clever. Keywords are important because people search for books on Amazon. I have a book called How to Write a Book: An 11-Step Process to Build Habits, Stop Procrastinating, Fuel Self-Motivation, Quiet Your Inner Critic, Bust Through Writer's Block, Let Your Creative Juices Flow [ http://kadavy.net/wab ]. I admit, that’s a ridiculously long title and subtitle combination, but I called it that for a reason: It’s jam-packed full of keywords that I know, through research, that people search for on Amazon. The book gets lots of organic sales! You can also attract people to your book with a clever title. But it has to be a title that is 1) clever or cool-sounding 2) conveys what the book is about in some way 3) passes the “cocktail party test.” Imagine you’re at a cocktail party, and you’re telling a friend about a book you’re reading. How does it feel to tell them you’re reading that book? Does it feel good? Does it make you look good? This is why a book like Deep Work passes the cocktail party test. It feels good to tell someone the work you do is “deep.” If a book were called The Small Penis Owner’s Handbook, that would not pass the cocktail party test. Step 6: Write an Outline for Your Book We’re halfway through the process, and we’re only now writing an outline!? If I could blame one thing for why I hated writing as a kid, it would be the outline. Every damn English teacher I had made us write an outline before we wrote a paper. Well how the hell are you supposed to know what you’re going to write about before you write it?! Through your writing and publishing habit, you’ve started to develop a “universe” in your mind on a particular topic, or a series of topics (even if you’re writing fiction). Now that you have some idea what you want to write about, you can try to give structure to that writing. I personally never have a completed outline that I stick to. I start to outline, and then if some prose comes to me on a particular bullet point, I start writing prose. The next day when I come back, I’ll start writing an outline all over again from scratch. Force yourself to write an outline of your book. Accept that it’s imperfect, then move on. Step 7: Write a First Draft of Your Book Now that you have an outline, you can write the first draft of your book. Channel your writing habit into filling out that outline. Your tiny habit will have to get a bit bigger now. Make a habit of writing 500 words a day, filling out that outline. I like a program called signNowner for writing really organized projects, but use whatever you’re comfortable with. Let yourself be sloppy here. Remember, it’s a first draft. Step 8: Read the First Draft of Your Book It’s an amazing feeling to print out your book at Office Depot and bring a stack of papers to a cafe. Sit down, shut off your mind, and try to react to your book like you’re someone who has never seen it before. Don’t bother marking down spelling and grammar mistakes here. You’re trying to feel the book as a whole. If you think about details, it will distract you from that. Step 9: Restructure Your Outline Now that you’ve read the first draft of your book, you can restructure your outline. You may need some incubation time between reading your first draft (maybe a couple of times) and restructuring your outline. Stephen King recommends to authors to not even read the first draft of their manuscripts until several weeks after finishing it. You really do need some time for your mind to make connections. If you give yourself a few weeks before you restructure your outline (while still keeping a writing habit) when you revisit, something magical happens. Try to write a new outline from scratch. You’ll probably find your ideas are more crisp than ever. Step 10: Write Your Second Draft Now that you’ve written the whole book, consumed it, and restructured it, you can rewrite everything, using that new structure as a guide. There may be lots of details you need to research. Again, keep a habit, and stick with it. You’ll find parts of the second draft come very easily to you, since you already have the first draft in your mind. Things will be more crisp. Step 11: Write Your Final Draft Now, you can start worrying about things like sentence structure, grammar, and spelling. Print out your second draft, go over it with a red pen (I prefer green). Share it with friends or your fans. (I shared the second draft of The Heart to Start [ http://kadavy.net/hts ] with my readers on Google Docs, and they crowd-edited it.) You may also want to hire an editor or proofreader. Well, that’s how you write a book. Everything I’ve written here is in more detail in a book I wrote called How to Write a Book [ http://kadavy.net/wab ]. How to publish a book? As far as how to publish a book, that part is easier, if you’re willing to self publish. People forget that you can publish a book almost as easily as you can publish a blog post. In fact, How to Write a Book was originally just a blog post, also called how to write a book [ http://kadavy.net/blog/posts/how-to-write-a-book/ ]. If you really want to get a feel for how to publish a book, I recommend you go to KDP [ http://kdp.amazon.com ], and try to publish 500 words, on literally anything, under a made-up name. Your “book” will be available in the Kindle store within hours. It’s incredibly valuable just to go through the process of publishing on Kindle, just to see how simple it is. In fact, you should publish your first “dummy” book today before you even start any of the steps I’ve laid out above. It will change the way you think about book publishing. If you’re interested in more of my thoughts on self publishing, I wrote in more detail about self publishing, specifically what I learned publishing three books in only six months [ https://writingcooperative.com/24-things-i-learned-publishing-3-books-in-only-6-months-1b8f743e9e86 ].
-
How do I edit a PDF?
If you want to edit a PDF file on Windows, you can use Win PDF Editor [ https://www.winpdfeditor.com ], which could let you remove text and add images and new text on PDF files. For Mac OS, you can use PDF Editor Mac [ https://www.pdfeditormac.com ]. Hope it helps.
-
What's the job security at Byju's for business development associate role?
Frankly speaking No Job SecurityThe company is very particular about your sales target,if you don't achieve that in the designated time period then start searching for some other job as soon as possible.Further,even before you become BDA(Business Development Associate) you will be a trainee for 1–2 months and man I swear to God,you will be working your a** day and night and still won't achieve your target.But,it is not necessary that everyone will not achieve the target but some(means 2 out of 13 who join as trainee) will.And, Sales jobs itself is not something that you will be having sales from Monday to Sunday.So,if you like to interact with people can influence them then you will innovate yourself on day to day , experience to experience basis and then there is a chance that your job Security is maintened at BYJU's.Choose it wisely.Only,if sales is your passion.Be like Steve Jobs or none.Respect to all Salespersons out there.Au Revoir!!!
Trusted esignature solution— what our customers are saying


Get legally-binding signatures now!
Frequently asked questions
How do i add an electronic signature to a word document?
How to sign with pdf escape?
Get more for How Do I Edit eSign Document
Find out other How Do I Edit eSign Document
- Student physicals form
- Sample letters and forms
- Diabetes study guide mission hospital missionhospitals form
- Primary secondary avera health avera form
- Insurance information primary secondary avera www1 avera
- New patient venous history avera form
- Baylor university medical center form
- October 09 examiner october 09 examiner med navy form
- February examiner navy medicine med navy form
- July 09 examiner navy medicine med navy form
- 1 back up all systems us department of veterans affairs va form
- Course registration form epid ai
- Poster show reg form doc utoledo
- Centers for disease control and prevention health resources and services administration cdc form
- Nc dhsr con monthly report november nc department ncdhhs form
- Nc dhsr n c semiannual dialysis report july ncdhhs form
- The bsas official uniform includes a scout shirt scout pants or scout shorts scout belt scout socks and shoes or hiking boots
- Public notice nc department of health and human services ncdhhs form
- 1 the comprehensive spine center is located at vanderbilt health mc vanderbilt form
- Idtoic registration form02 01 pdf utmb