Conditional templates
Template-level rules apply visibility logic across multiple documents, keeping large template libraries consistent and simplifying maintenance when legal or process changes occur.


Conditional show or hide behavior focuses signer attention, reduces mistakes, and shortens completion times by removing irrelevant inputs while preserving full auditability and form integrity.

A Compliance Officer configures conditional fields to surface compliance disclosures only when triggered by responses, ensuring documents meet regulatory needs while minimizing signer confusion across multi-jurisdictional forms.
A Sales Administrator uses conditional visibility to present pricing, add-ons, and signature areas based on chosen products, reducing errors and accelerating contract finalization for diverse buyer profiles.
Teams across HR, legal, sales, and compliance commonly adopt conditional visibility to simplify signer experience and reduce processing time.
Organizations scale conditional logic from simple show/hide rules to multi-step workflows, keeping forms accurate while improving completion rates.
Template-level rules apply visibility logic across multiple documents, keeping large template libraries consistent and simplifying maintenance when legal or process changes occur.
Support for nested conditional expressions and grouped logic lets authors create sophisticated branching without external scripting, useful for multi-step decision trees.
Field mapping to external data sources prepopulates trigger fields so visibility reflects CRM or HR system values at send time.
Template version control preserves previous rule sets and provides an audit trail for rule changes, supporting compliance and rollback when needed.
Consistent rendering across web, iOS, and Android ensures conditional fields behave identically for signers on different devices.
Conditional logic that adapts per-recipient when executing Bulk Send or Batch workflows, enabling personalized fields for each recipient set.
A visual rule builder simplifies construction of logical conditions, supports comparisons, Boolean operators, and nested rules so authors can define when fields appear without writing code.
Assign field visibility by recipient role so only the designated signer or reviewer sees relevant inputs, reducing exposure of unrelated data across multi-party transactions.
Integrated preview tools simulate signer inputs and role sequences, enabling validation of conditional logic across typical, edge-case, and API-driven scenarios before sending.
APIs allow external systems to set trigger values before sending, enabling CRM- or form-driven automation to prefill data and control which fields appear to recipients.

| Conditional Form Field Setting Name | Default Configuration |
|---|---|
| Visibility Trigger Expression (Logical Rule) | When checkbox X equals Yes |
| Condition Evaluation Timing (Client/Server) | Realtime client-side |
| Field Mapping and Prefill Source | CRM custom field |
| Reminder Frequency for Pending Signers | 48 hours |
| Error Handling and Fallback Behavior | Show alternative field |
Conditional field visibility must be validated across web, iOS, and Android viewers because rendering and script execution can differ between platforms.
Test conditional forms on the platforms your recipients use most often; where third-party readers are common, prefer server-side or platform-native conditional evaluations and provide guidance to signers about recommended viewers to ensure consistent behavior.
A new hire form asks employment type and displays benefit selection only for full-time hires
Resulting in faster onboarding and fewer HR follow-ups.
A quote document shows optional product configuration fields only when a checkbox for add-on services is selected
Leading to quicker approvals and cleaner contract records.
| Conditional Field Support Comparison Across Vendors | signNow (Recommended) | DocuSign | Adobe Sign |
|---|---|---|---|
| Conditional visibility support | |||
| Advanced logic and nested rules | Limited | ||
| API access to set triggers | |||
| Mobile runtime parity |
| Vendor Plans and Feature Notes | signNow (Recommended) | DocuSign | Adobe Sign | PandaDoc | HelloSign |
|---|---|---|---|---|---|
| Free trial or free tier availability | Free trial available | Free trial available | Free trial available | Free trial available | Free trial available |
| Entry-level plans with conditional features | Business plans include conditional features | Standard plans may require upgrades | Business plan available | Essentials plan supports basic logic | Essentials supports basic visibility |
| API access included | Available on business and higher plans | Available via Developer plan | Available with enterprise contracts | Available with Business plan | Available via paid plans |
| Enterprise and compliance options | Enterprise controls and HIPAA options available | Enterprise and advanced compliance | Enterprise and FedRAMP options per contract | Enterprise-focused plans | Enterprise support available |
| Support and onboarding services | Email and enterprise onboarding options | Premium support packages | Enterprise onboarding available | Dedicated onboarding for Business | Support tiers available |
If you need to send a package of documents for eSignature or review to different recipients in multiple consecutive steps, create a Document Group and set specific conditions for automatic document routing. This feature allows you to build advanced document workflows in a very straightforward way.
Let’s say you are an HR manager and you need to send several onboarding documents to a new employee and your company’s CEO for approval. Once the documents are signed by both parties, you need them forwarded to the accounting department and also back to you. Let’s build this workflow with airSlate SignNow to see how easy it is.
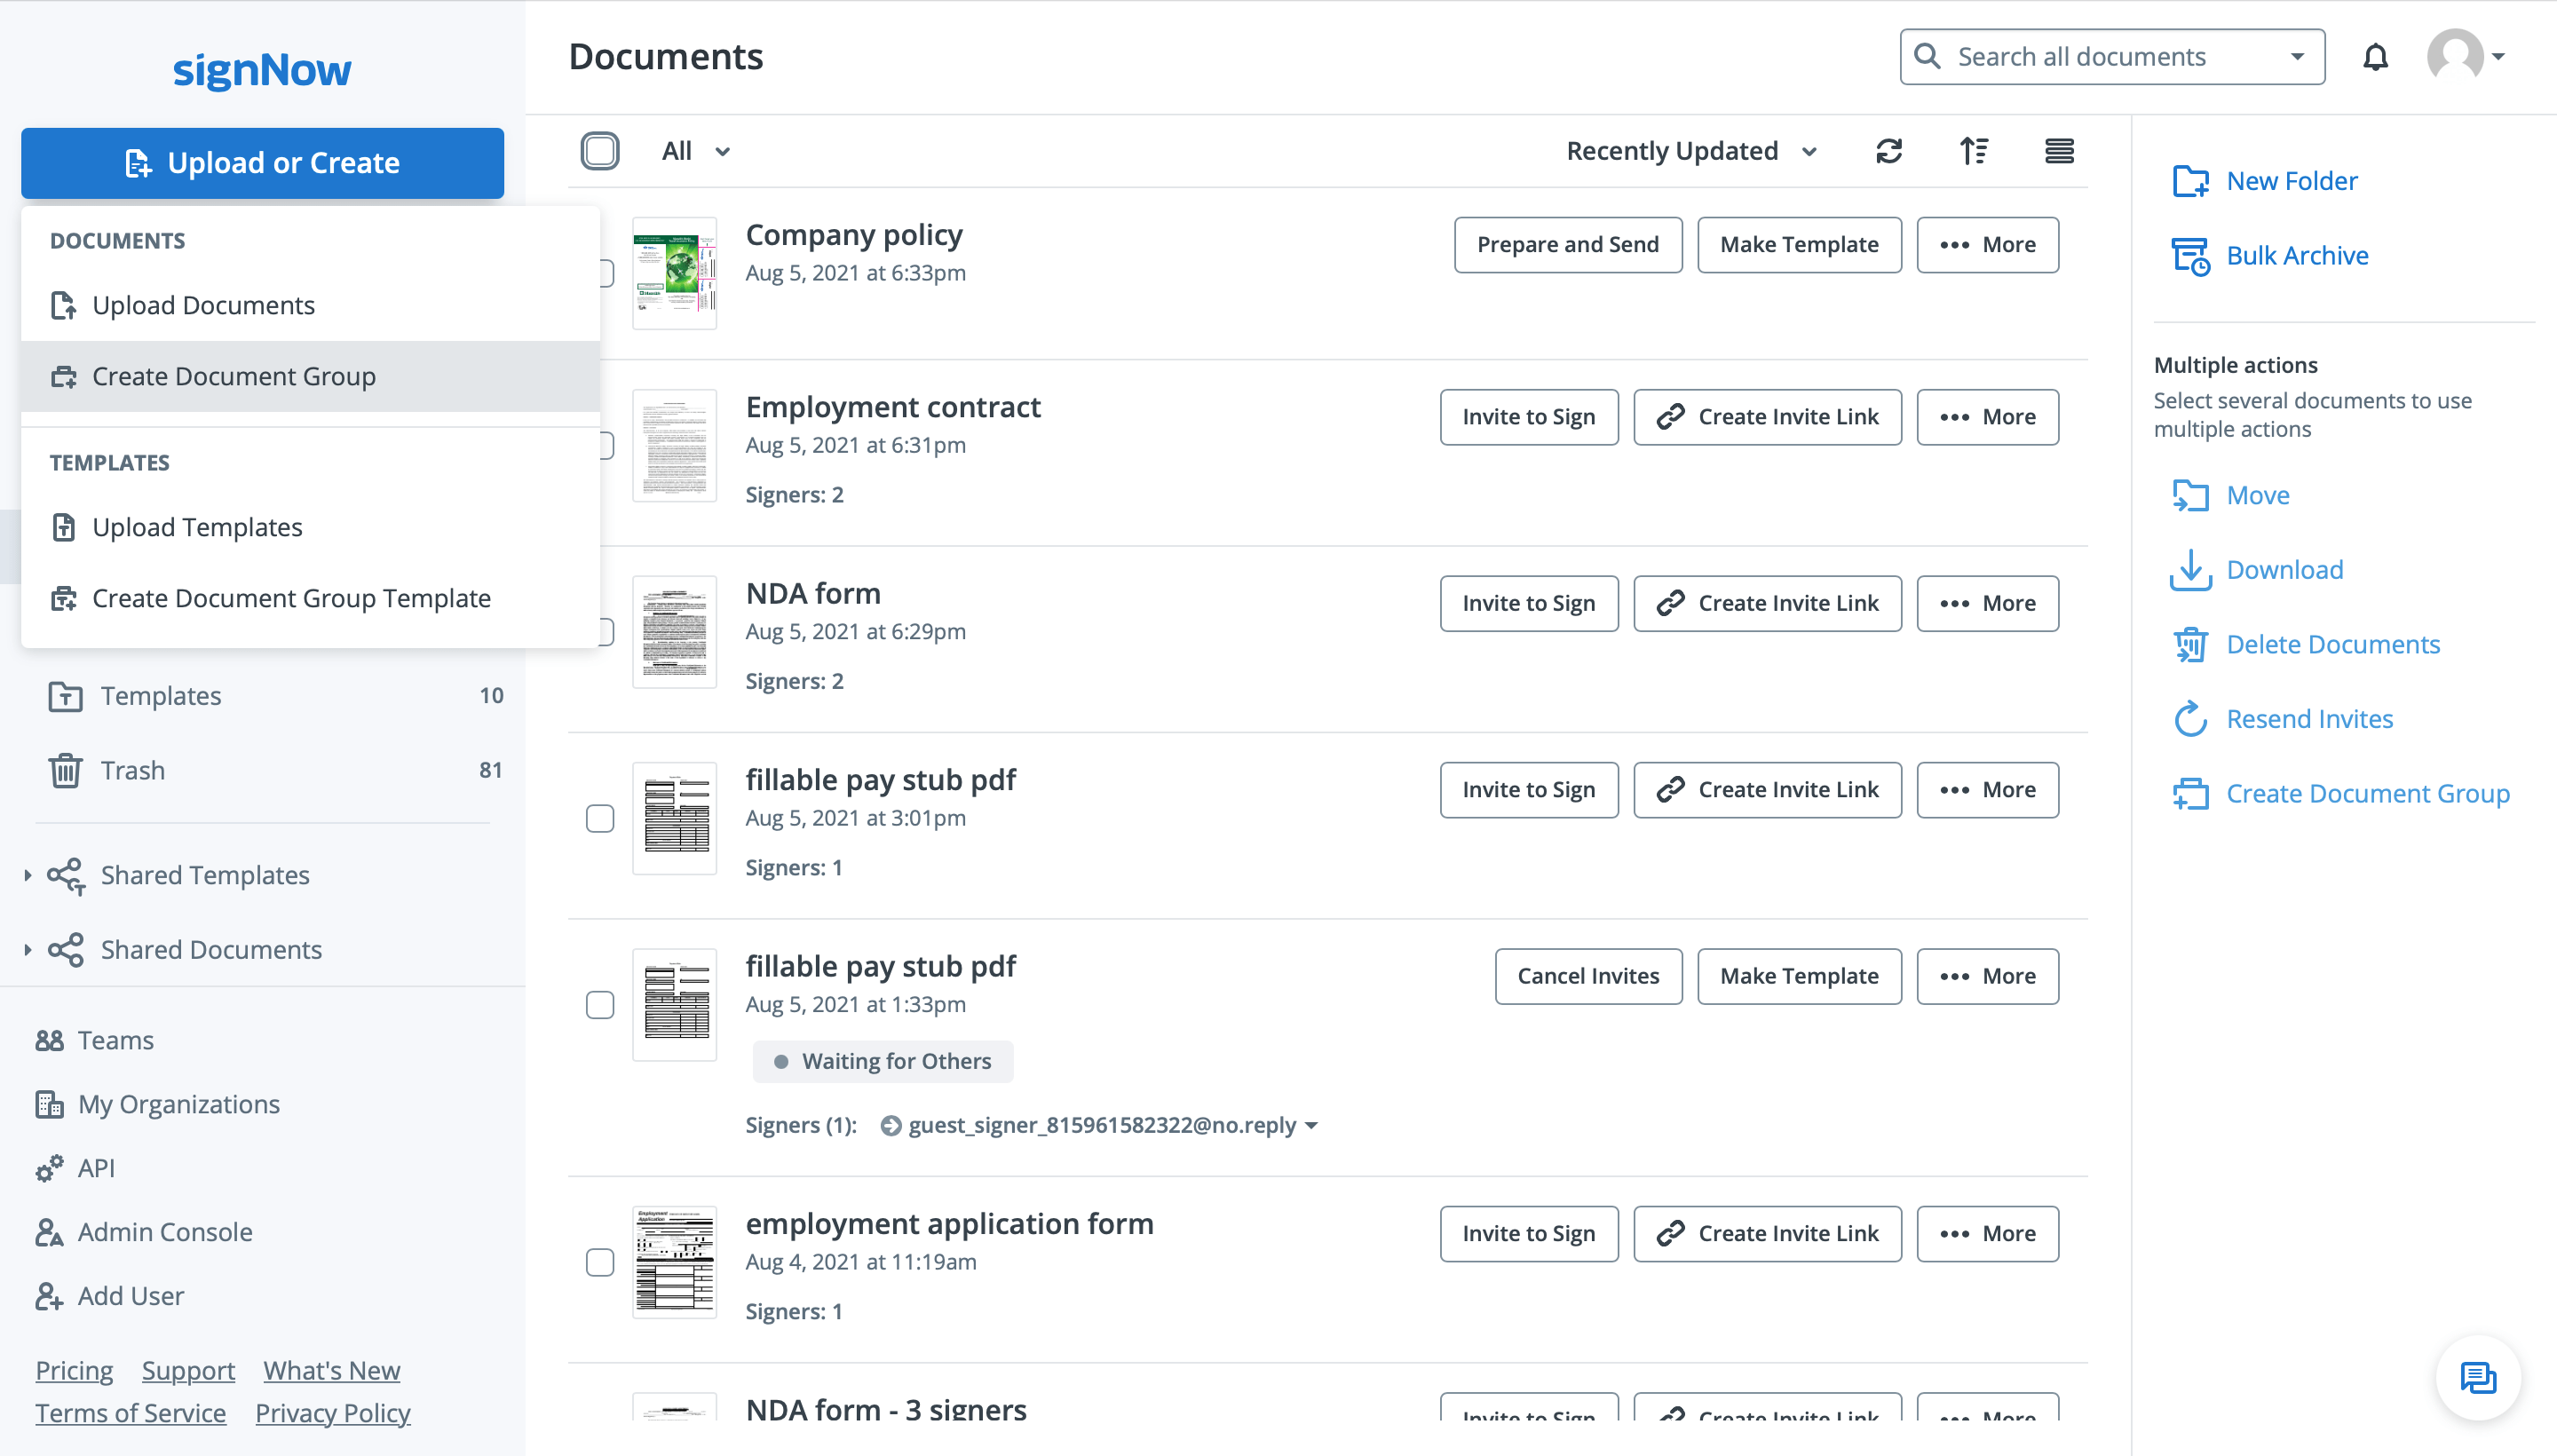
Hover over the Upload or Create button and select Create Document Group.
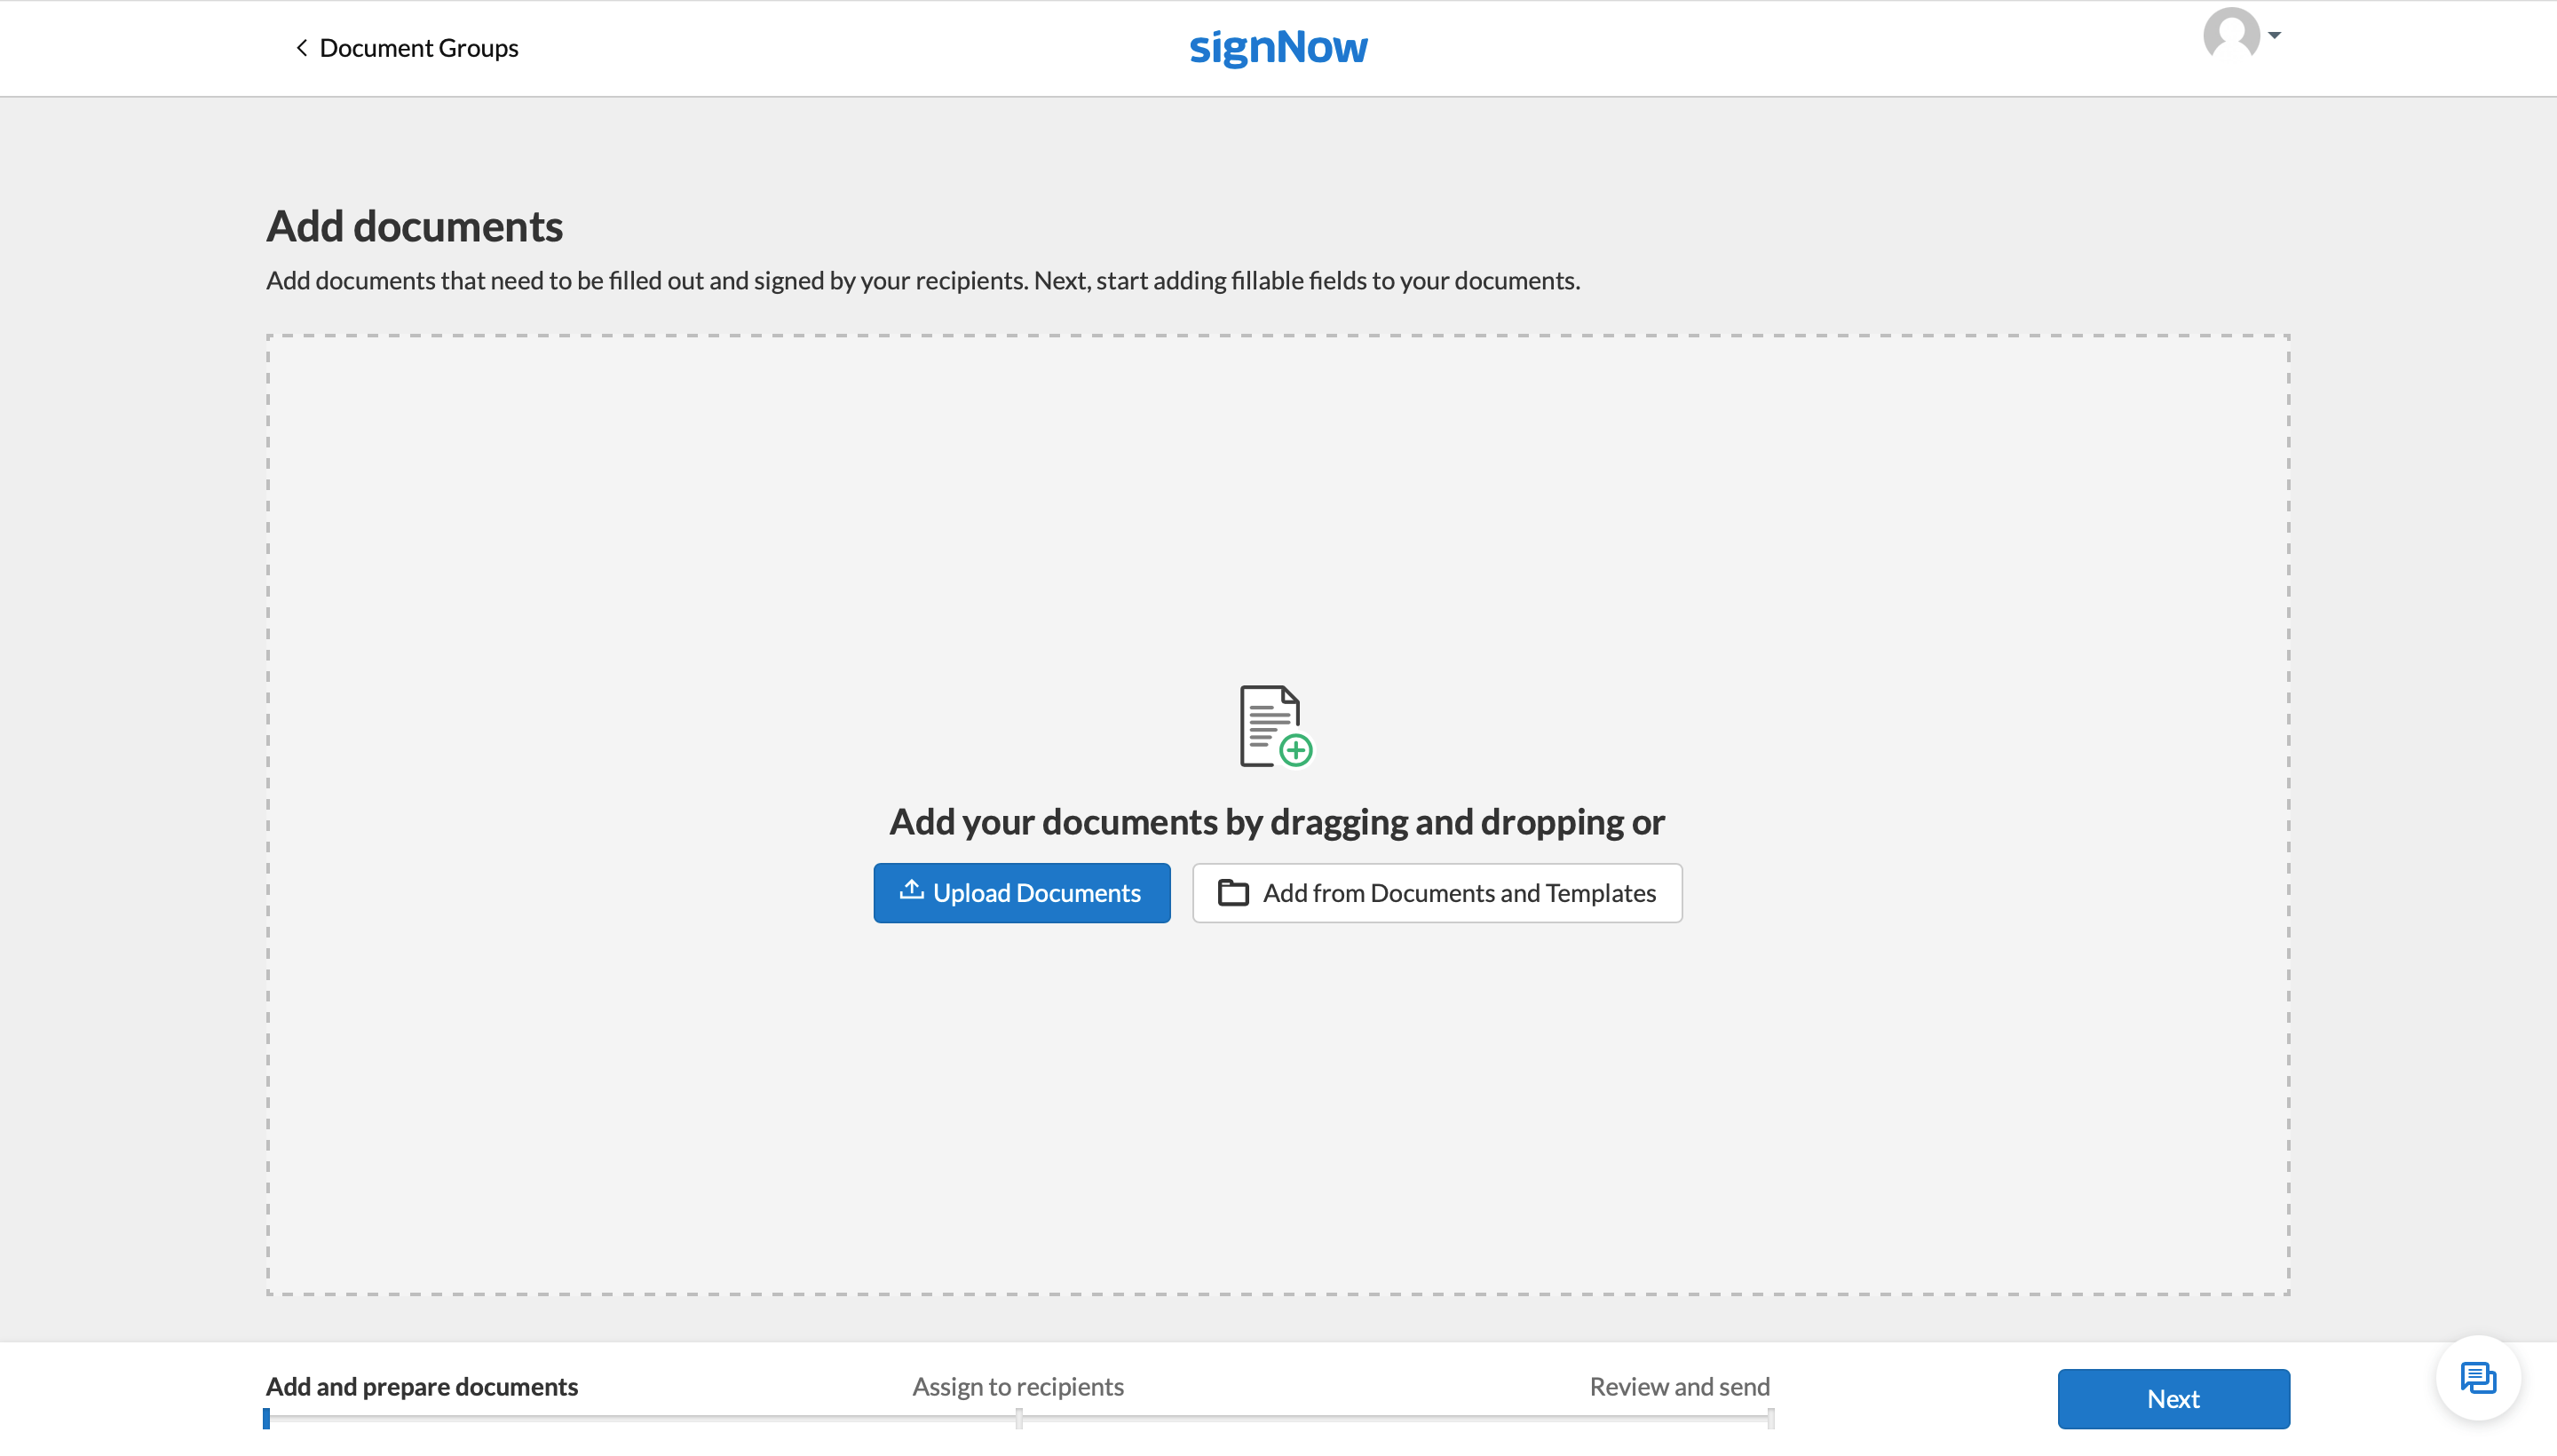
Upload documents that need to be sent from your hard drive or add them from your Documents or Templates folder on airSlate SignNow. For this example, we’ll choose the latter option.
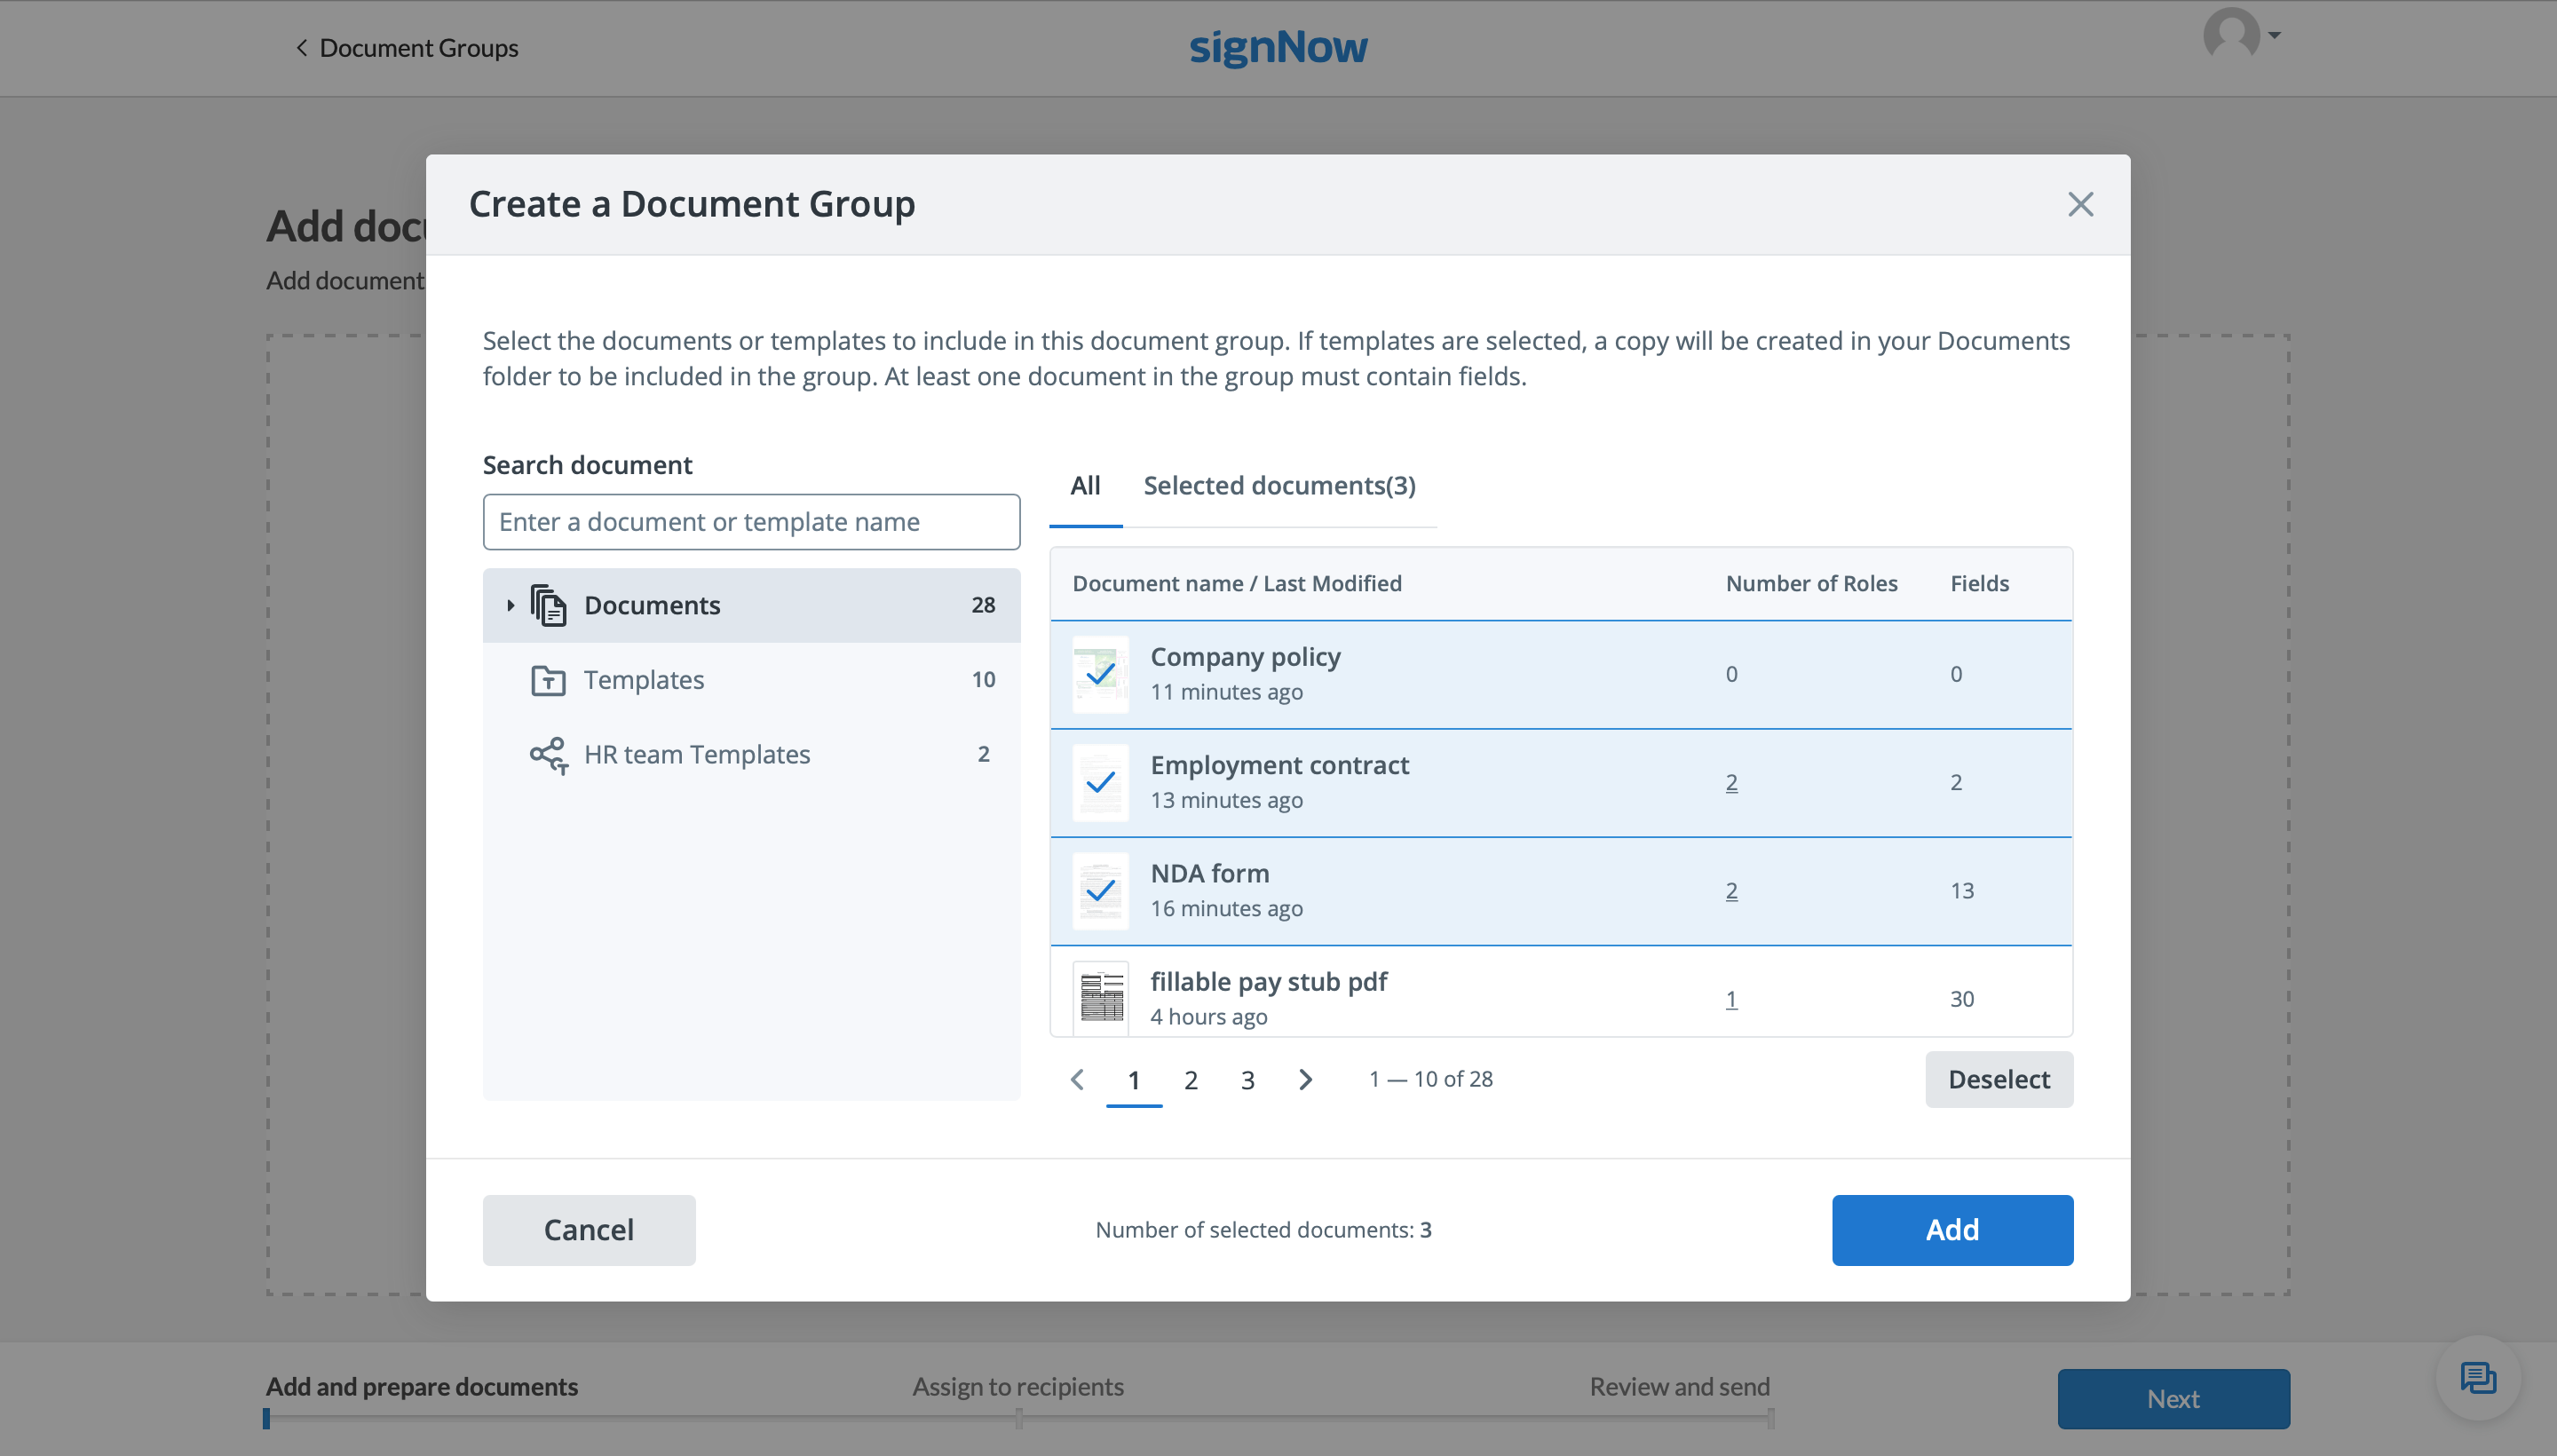
Select the documents you need from the list and click Add.
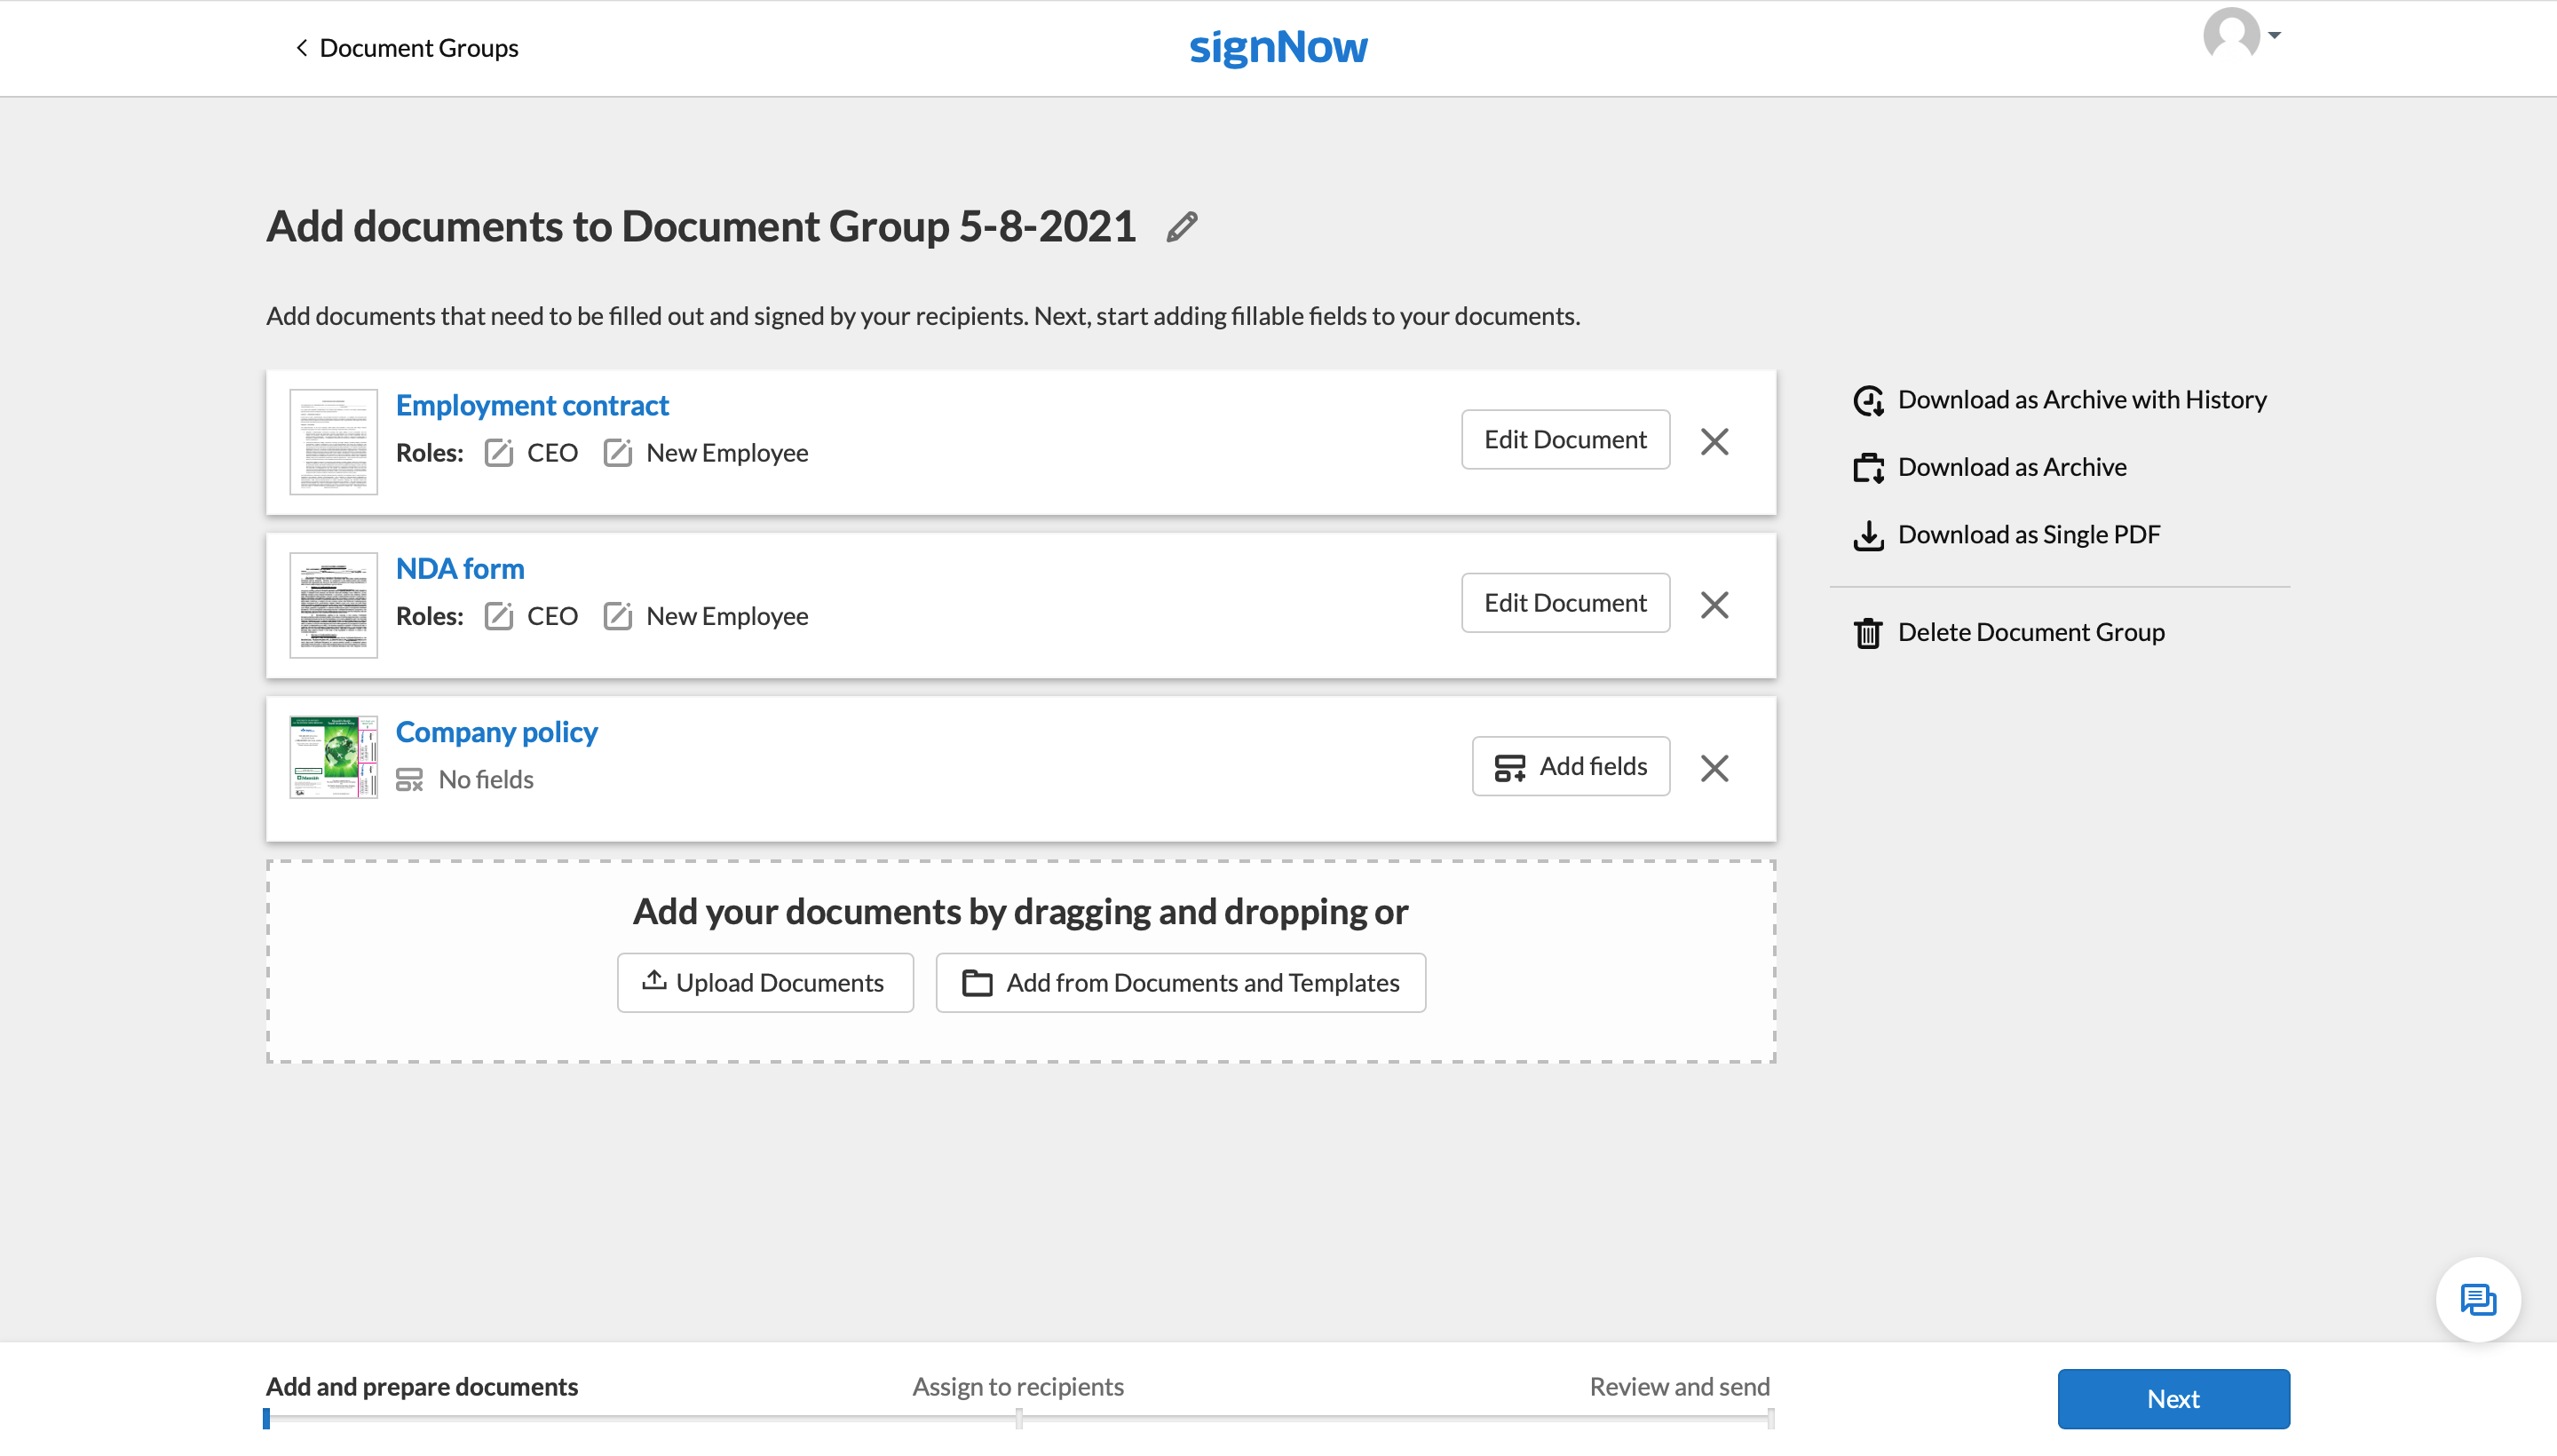
The files we’ve added to this Document Group already have fillable fields and signing roles configured (CEO and New Employee). You can make changes to any of your documents by clicking the Edit Document button. When finished, click Next.
Configure your first signing step. In our case, we need to send an employment contract, NDA, and company policy to a new employee for eSignature.
Enter your recipient’s email address and click Assign Documents and Roles. Then, select the documents you need to send and click Apply.
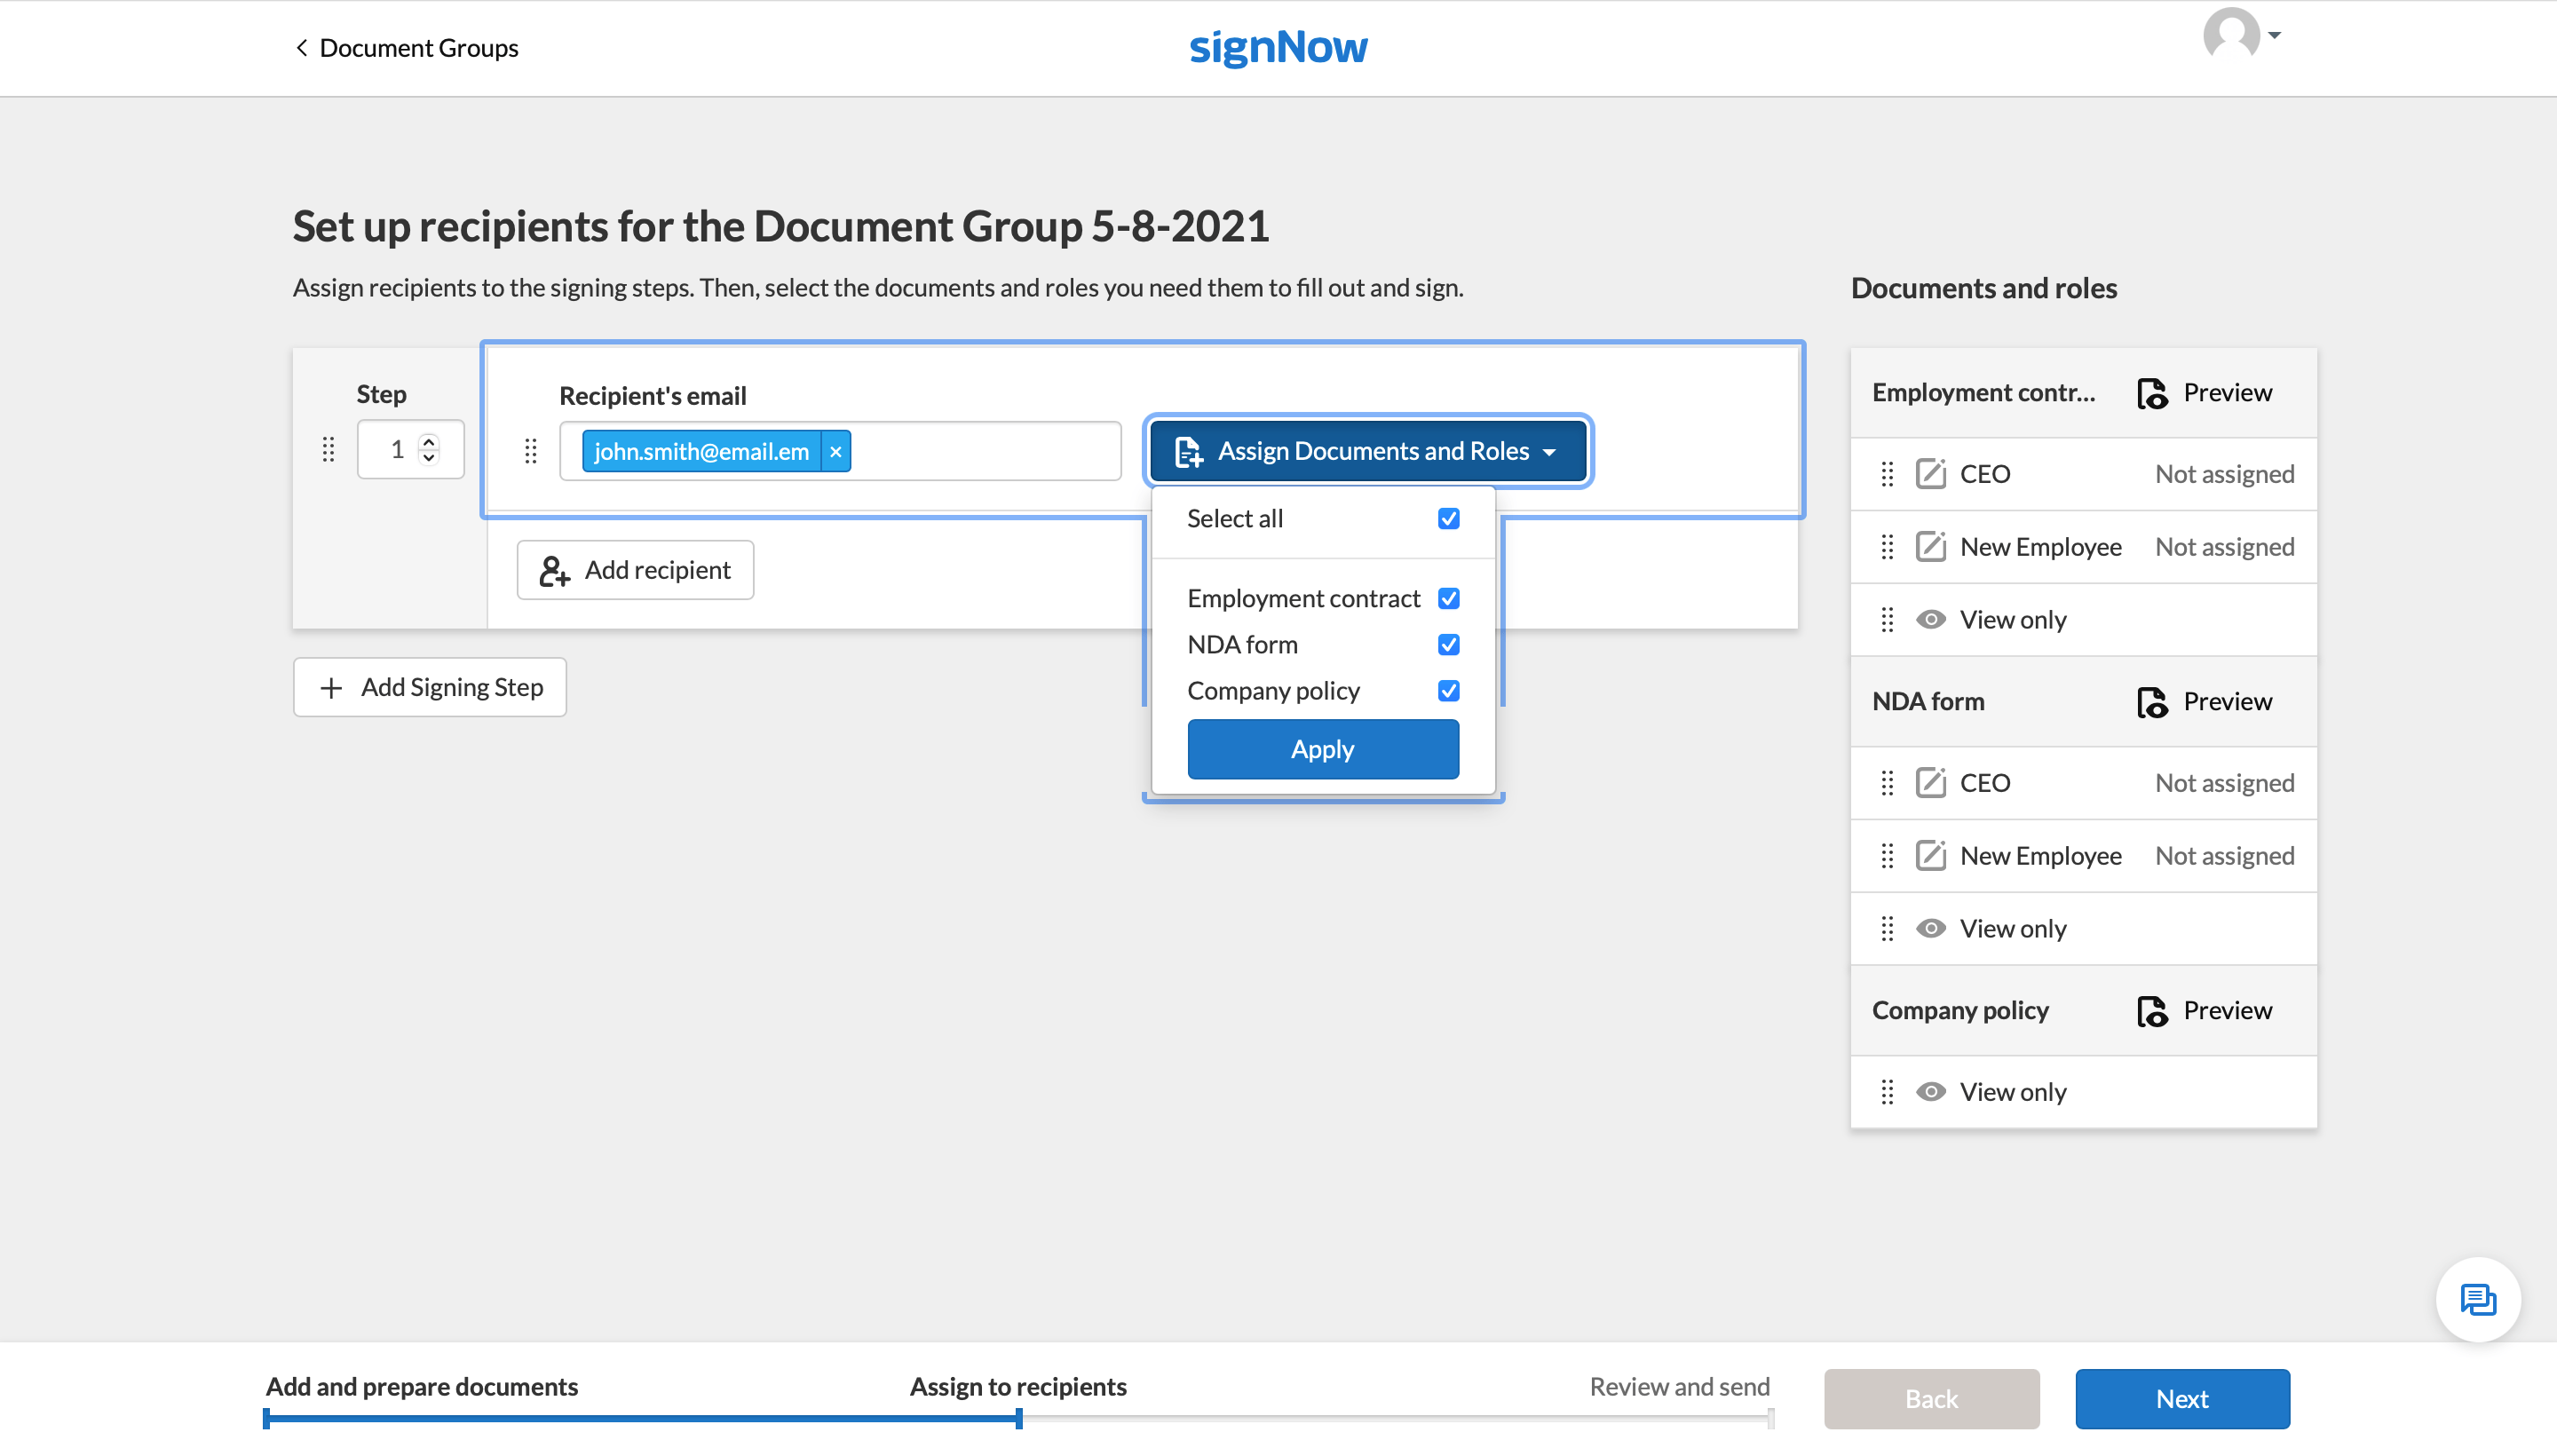
Choose a signing role for each document using the corresponding dropdowns. For this step, we’ll assign the New Employee role.

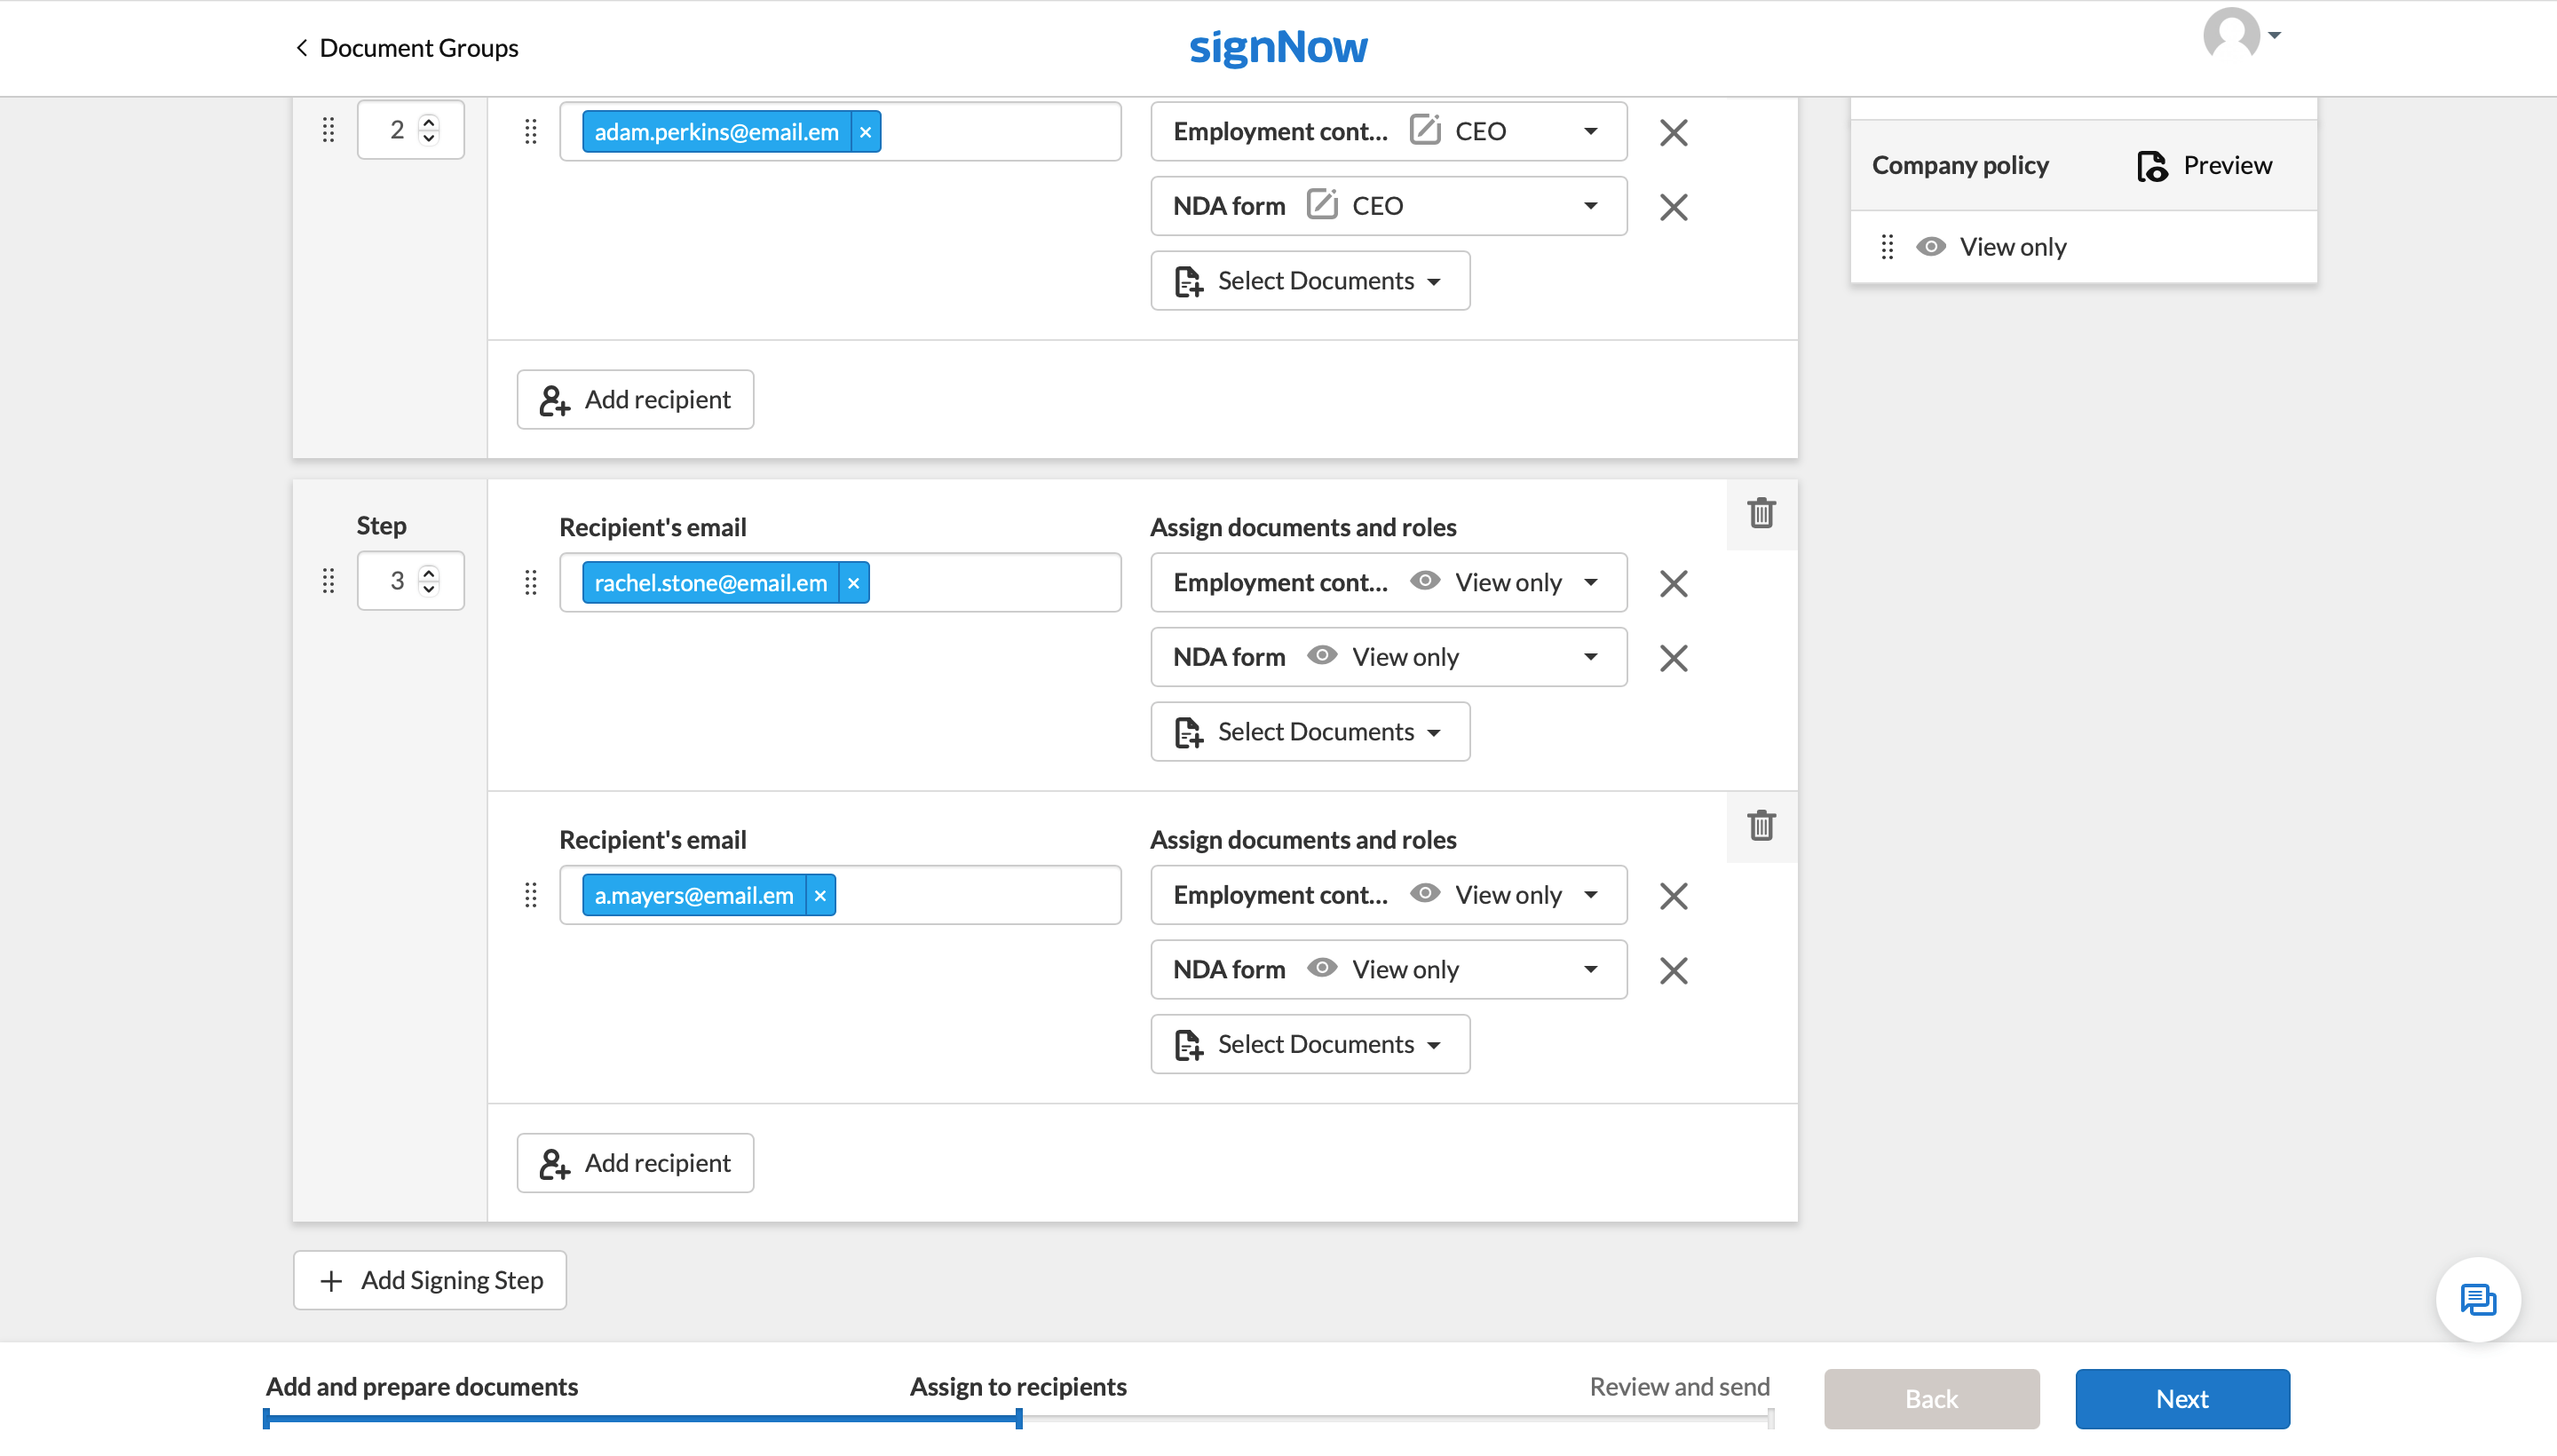
Let’s set up the second step by clicking the Add Signing Step button. Once the documents are signed by the new employee, we need them to be approved by the company CEO. So we configure the next step in a similar fashion but assign the documents to the CEO.

Now it’s time to configure the third and final step. In the end, we need airSlate SignNow to forward all these signed documents to the accounting department and HR.
First, add the accountant’s email address, and then, by clicking the Add recipient button, add the HR to this step (both recipients will receive the document package simultaneously). We don’t need the accountant and HR to sign these documents, so we choose View only in the dropdowns (you don’t need signing roles for this option).
When finished, click Next.
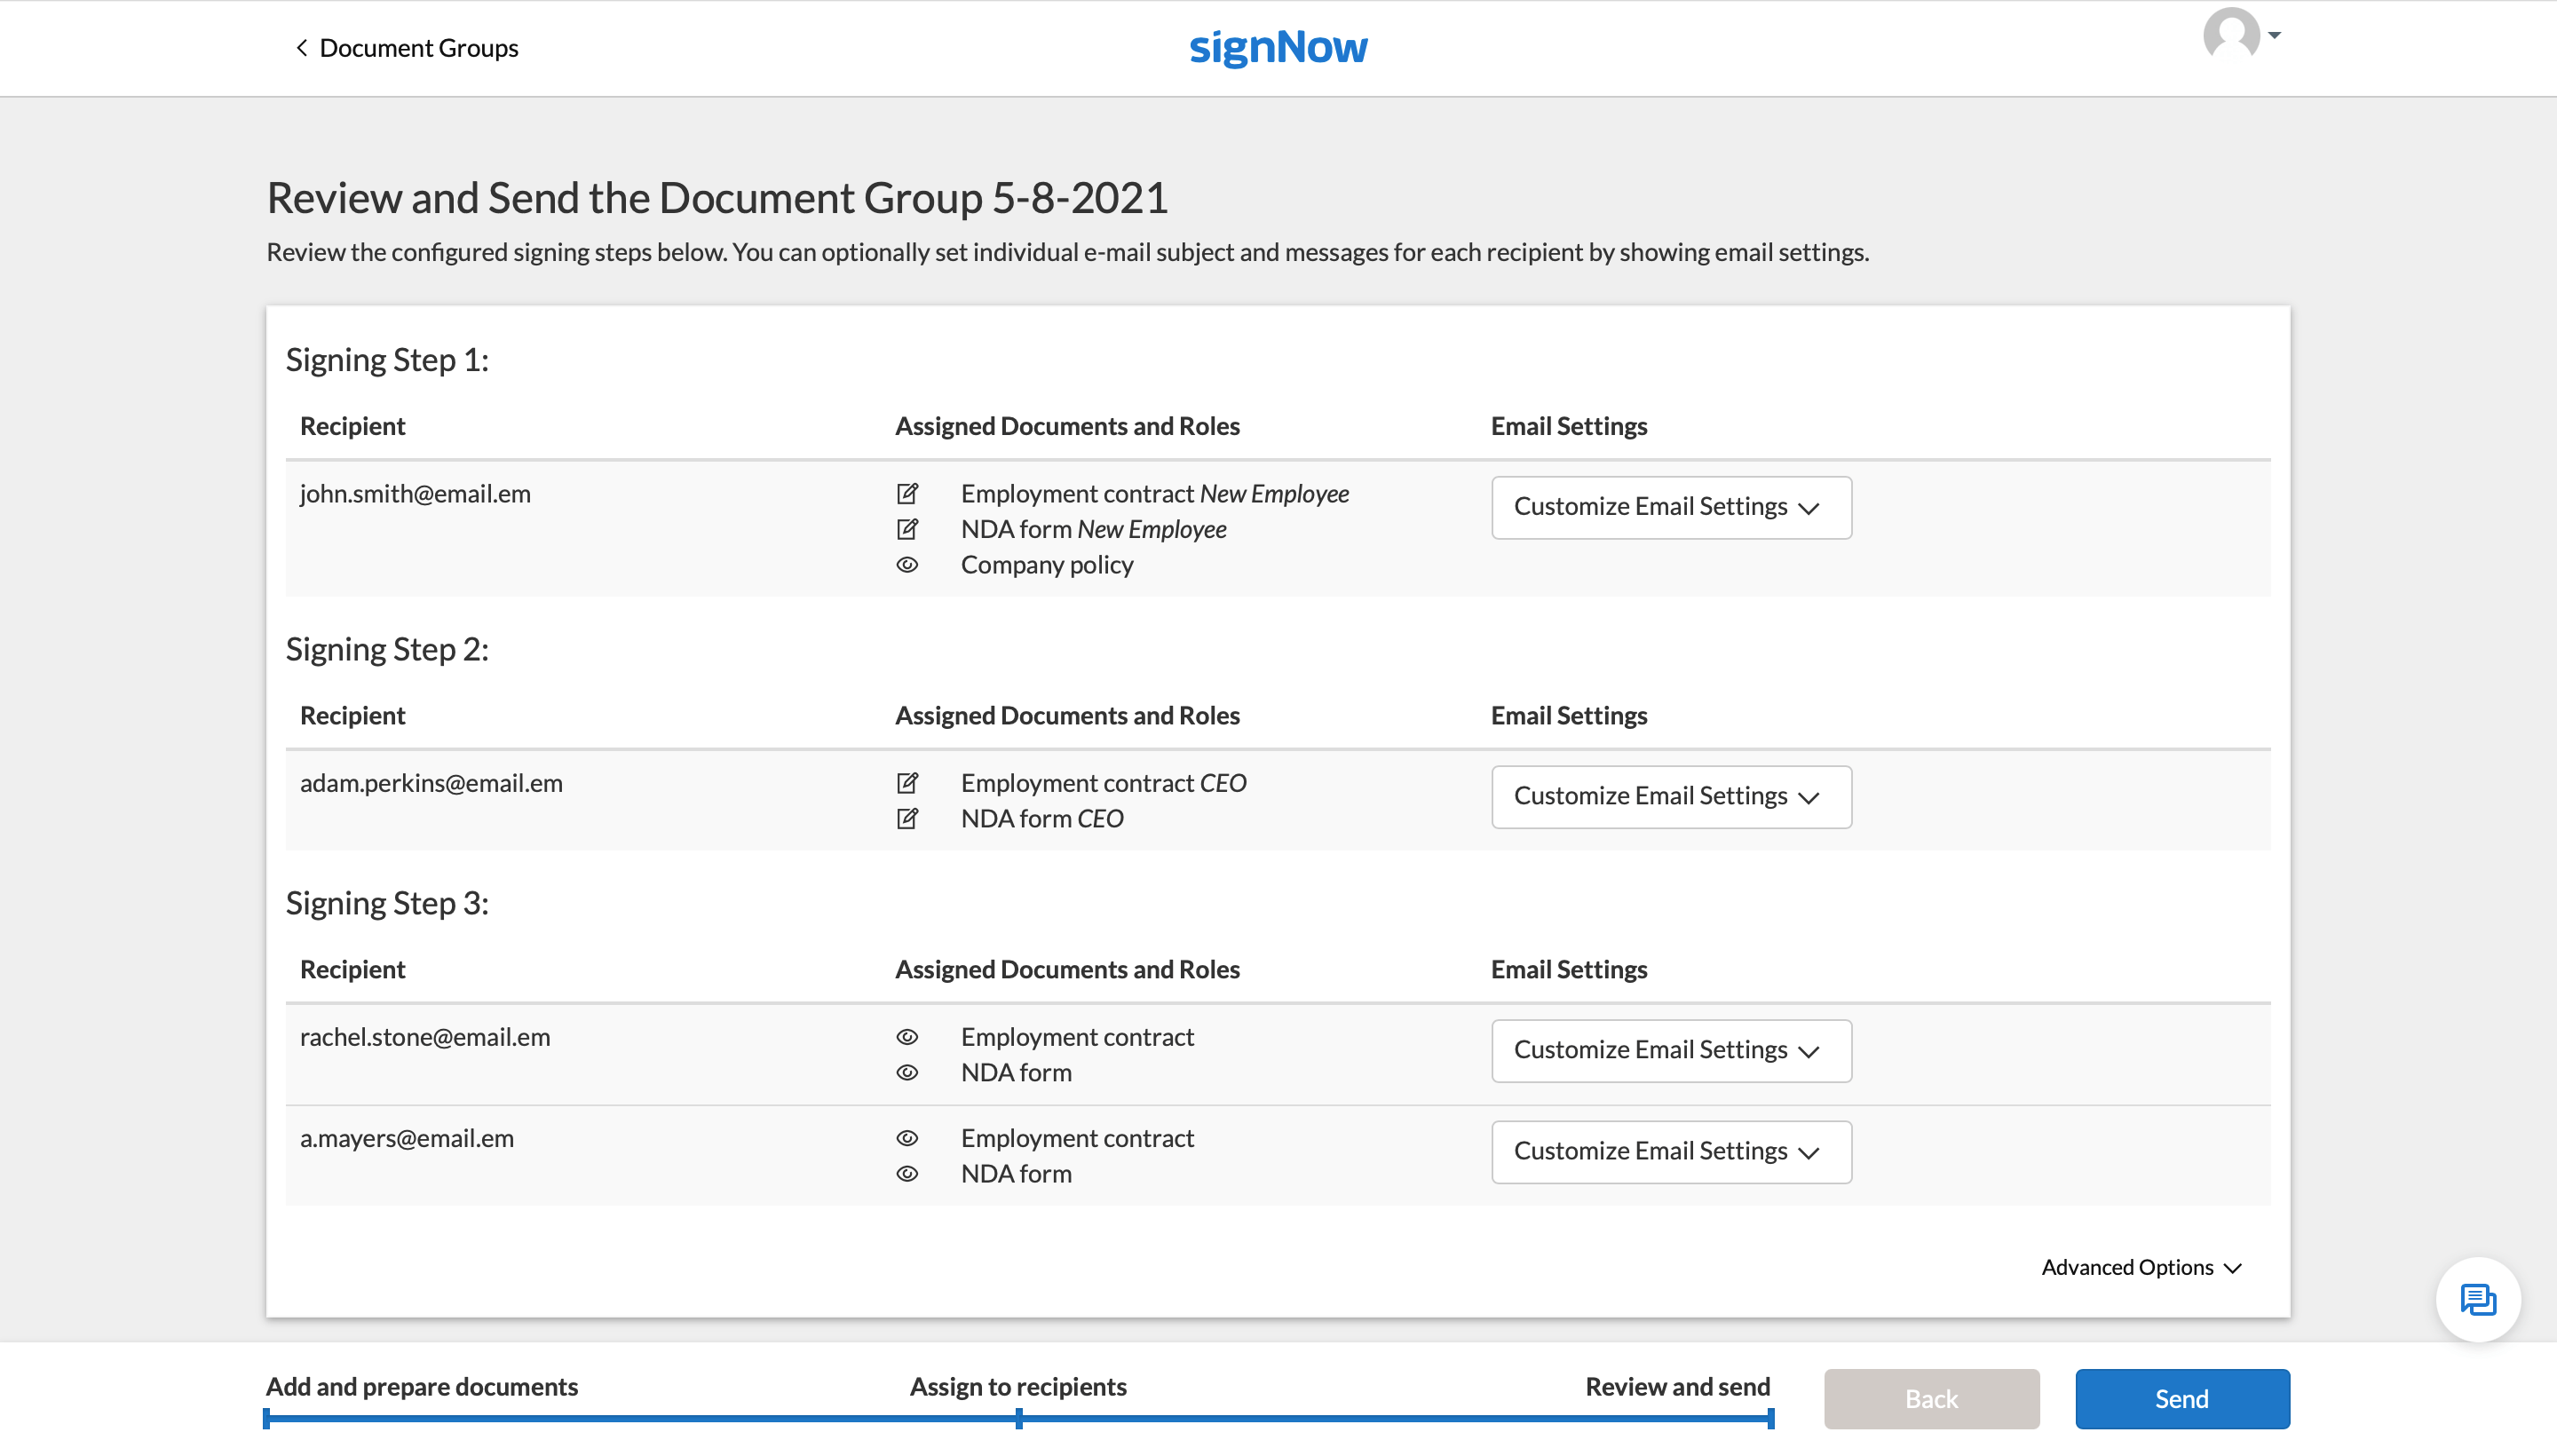
Everything is set and ready to go. All you need to do is review your signing steps and hit Send. You can also customize your email subject and message for each step, set up signer authentication, and schedule reminders by clicking Customize Email Settings.
Once your Document Group is sent, the workflow is set in motion and your documents will be automatically routed to the designated recipients.


