How Do I Install Electronic signature in Word
Contact Sales
Make the most out of your eSignature workflows with airSlate SignNow
Extensive suite of eSignature tools
Robust integration and API capabilities
Advanced security and compliance
Various collaboration tools
Enjoyable and stress-free signing experience
Extensive support
Keep your eSignature workflows on track
Our user reviews speak for themselves


Award-winning eSignature solution


How to Install Electronic Signature in Word
If you're curious about how to install electronic signature in Word, you’ve come to the right place! With airSlate SignNow, you can effortlessly incorporate electronic signatures into your documents, ensuring the signing process is seamless and effective. This platform provides numerous advantages, featuring intuitive functionalities and outstanding support, perfect for organizations of any size.
Steps to Install Electronic Signature in Word
- Launch your web browser and go to the airSlate SignNow website.
- Set up a free account or sign in to your existing account.
- Upload the document that needs a signature or is to be forwarded for signing.
- For easier future access, consider saving your document as a template.
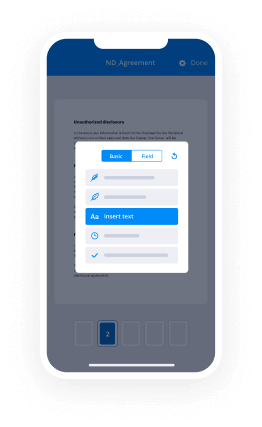
- Edit your document to include necessary changes: insert fields for completion or add relevant data.
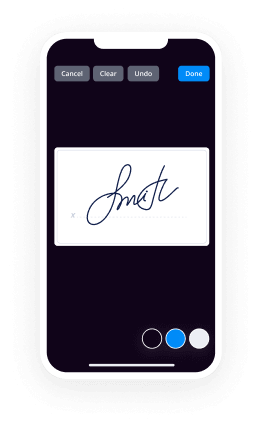
- Include your signature and specify areas for the recipients’ signatures.
- Click on 'Continue' to set up and send a request for an electronic signature.
In conclusion, implementing electronic signatures in Word through airSlate SignNow is a simple procedure that greatly improves your document management. This tool not only facilitates the sending and signing of documents but also guarantees a polished and efficient workflow.
Are you ready to elevate your document signing experience? Try airSlate SignNow now and take advantage of clear pricing, a comprehensive feature array, and round-the-clock support!
How it works
Rate your experience
-
Best ROI. Our customers achieve an average 7x ROI within the first six months.
-
Scales with your use cases. From SMBs to mid-market, airSlate SignNow delivers results for businesses of all sizes.
-
Intuitive UI and API. Sign and send documents from your apps in minutes.
A smarter way to work: —how to industry sign banking integrate
How to eSign & fill out a document online
Document management isn't an easy task. The only thing that makes working with documents simple in today's world, is a comprehensive workflow solution. Signing and editing documents, and filling out forms is a simple task for those who utilize eSignature services. Businesses that have found reliable solutions to how do i integration electronic signature install word don't need to spend their valuable time and effort on routine and monotonous actions.
Use airSlate SignNow and how do i integration electronic signature install word online hassle-free today:
- Create your airSlate SignNow profile or use your Google account to sign up.
- Upload a document.
- Work on it; sign it, edit it and add fillable fields to it.
- Select Done and export the sample: send it or save it to your device.
As you can see, there is nothing complicated about filling out and signing documents when you have the right tool. Our advanced editor is great for getting forms and contracts exactly how you want/need them. It has a user-friendly interface and full comprehensibility, supplying you with complete control. Register right now and begin enhancing your electronic signature workflows with convenient tools to how do i integration electronic signature install word online.
How to eSign and fill documents in Google Chrome
Google Chrome can solve more problems than you can even imagine using powerful tools called 'extensions'. There are thousands you can easily add right to your browser called ‘add-ons’ and each has a unique ability to enhance your workflow. For example, how do i integration electronic signature install word and edit docs with airSlate SignNow.
To add the airSlate SignNow extension for Google Chrome, follow the next steps:
- Go to Chrome Web Store, type in 'airSlate SignNow' and press enter. Then, hit the Add to Chrome button and wait a few seconds while it installs.
- Find a document that you need to sign, right click it and select airSlate SignNow.
- Edit and sign your document.
- Save your new file to your account, the cloud or your device.
By using this extension, you prevent wasting time and effort on boring assignments like downloading the data file and importing it to an eSignature solution’s collection. Everything is close at hand, so you can quickly and conveniently how do i integration electronic signature install word.
How to eSign forms in Gmail
Gmail is probably the most popular mail service utilized by millions of people all across the world. Most likely, you and your clients also use it for personal and business communication. However, the question on a lot of people’s minds is: how can I how do i integration electronic signature install word a document that was emailed to me in Gmail? Something amazing has happened that is changing the way business is done. airSlate SignNow and Google have created an impactful add on that lets you how do i integration electronic signature install word, edit, set signing orders and much more without leaving your inbox.
Boost your workflow with a revolutionary Gmail add on from airSlate SignNow:
- Find the airSlate SignNow extension for Gmail from the Chrome Web Store and install it.
- Go to your inbox and open the email that contains the attachment that needs signing.
- Click the airSlate SignNow icon found in the right-hand toolbar.
- Work on your document; edit it, add fillable fields and even sign it yourself.
- Click Done and email the executed document to the respective parties.
With helpful extensions, manipulations to how do i integration electronic signature install word various forms are easy. The less time you spend switching browser windows, opening multiple accounts and scrolling through your internal files trying to find a document is much more time to you for other significant jobs.
How to securely sign documents in a mobile browser
Are you one of the business professionals who’ve decided to go 100% mobile in 2020? If yes, then you really need to make sure you have an effective solution for managing your document workflows from your phone, e.g., how do i integration electronic signature install word, and edit forms in real time. airSlate SignNow has one of the most exciting tools for mobile users. A web-based application. how do i integration electronic signature install word instantly from anywhere.
How to securely sign documents in a mobile browser
- Create an airSlate SignNow profile or log in using any web browser on your smartphone or tablet.
- Upload a document from the cloud or internal storage.
- Fill out and sign the sample.
- Tap Done.
- Do anything you need right from your account.
airSlate SignNow takes pride in protecting customer data. Be confident that anything you upload to your account is secured with industry-leading encryption. Auto logging out will shield your user profile from unauthorised access. how do i integration electronic signature install word from your phone or your friend’s phone. Protection is key to our success and yours to mobile workflows.
How to sign a PDF with an iOS device
The iPhone and iPad are powerful gadgets that allow you to work not only from the office but from anywhere in the world. For example, you can finalize and sign documents or how do i integration electronic signature install word directly on your phone or tablet at the office, at home or even on the beach. iOS offers native features like the Markup tool, though it’s limiting and doesn’t have any automation. Though the airSlate SignNow application for Apple is packed with everything you need for upgrading your document workflow. how do i integration electronic signature install word, fill out and sign forms on your phone in minutes.
How to sign a PDF on an iPhone
- Go to the AppStore, find the airSlate SignNow app and download it.
- Open the application, log in or create a profile.
- Select + to upload a document from your device or import it from the cloud.
- Fill out the sample and create your electronic signature.
- Click Done to finish the editing and signing session.
When you have this application installed, you don't need to upload a file each time you get it for signing. Just open the document on your iPhone, click the Share icon and select the Sign with airSlate SignNow button. Your doc will be opened in the app. how do i integration electronic signature install word anything. In addition, using one service for your document management needs, things are faster, better and cheaper Download the app today!

How to eSign a PDF document on an Android
What’s the number one rule for handling document workflows in 2020? Avoid paper chaos. Get rid of the printers, scanners and bundlers curriers. All of it! Take a new approach and manage, how do i integration electronic signature install word, and organize your records 100% paperless and 100% mobile. You only need three things; a phone/tablet, internet connection and the airSlate SignNow app for Android. Using the app, create, how do i integration electronic signature install word and execute documents right from your smartphone or tablet.
How to sign a PDF on an Android
- In the Google Play Market, search for and install the airSlate SignNow application.
- Open the program and log into your account or make one if you don’t have one already.
- Upload a document from the cloud or your device.
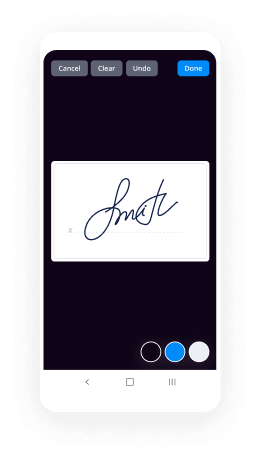
- Click on the opened document and start working on it. Edit it, add fillable fields and signature fields.
- Once you’ve finished, click Done and send the document to the other parties involved or download it to the cloud or your device.
airSlate SignNow allows you to sign documents and manage tasks like how do i integration electronic signature install word with ease. In addition, the security of your info is top priority. Encryption and private web servers can be used for implementing the latest features in data compliance measures. Get the airSlate SignNow mobile experience and operate more efficiently.


FAQs
-
How do I install electronic signature in Word using airSlate SignNow?
To install electronic signature in Word with airSlate SignNow, first, download the SignNow add-in from the Microsoft Office Store. Once installed, open Word and navigate to the 'Insert' tab to access the SignNow features. You can then easily create and insert electronic signatures directly into your documents.
-
What are the costs associated with installing electronic signature in Word?
airSlate SignNow offers a variety of pricing plans that cater to different business needs. The cost of installing electronic signature in Word is included in your subscription, which starts with a free trial for new users. Explore our pricing page to find the plan that fits your business requirements.
-
What features does airSlate SignNow offer for electronic signatures in Word?
When you install electronic signature in Word using airSlate SignNow, you gain access to features like customizable templates, secure cloud storage, and real-time tracking. Additionally, you can add multiple signatures, initials, and even form fields to enhance your document's interactivity.
-
Can I integrate airSlate SignNow with other applications besides Word?
Yes, airSlate SignNow allows seamless integration with various applications beyond Word, including Google Drive, Salesforce, and more. This flexibility enhances your workflow by enabling you to manage your documents and electronic signatures in one convenient platform.
-
How does airSlate SignNow ensure the security of my electronic signatures?
When you install electronic signature in Word through airSlate SignNow, you benefit from bank-level encryption and advanced security protocols. Our platform is compliant with industry standards such as GDPR and eIDAS, ensuring that your electronic signatures are safe and legally binding.
-
What benefits does using airSlate SignNow for electronic signatures provide?
Using airSlate SignNow to install electronic signature in Word streamlines your document signing process, saving you time and reducing paperwork. The platform enhances collaboration by allowing multiple users to sign documents quickly and efficiently, making it ideal for businesses of all sizes.
-
Is there customer support available if I need help installing electronic signature in Word?
Absolutely! airSlate SignNow provides comprehensive customer support to assist you with any questions about how to install electronic signature in Word. You can access our help center, tutorials, or contact our support team directly for personalized assistance.
-
How do you make an electronic signature in Word?
Does this option work - How to Create an Electronic Signature in Microsoft Word Documents?
-
Information Security: How much do electronic signatures cost?
signNow is an Apple & Google loved secure e-signature solution. Pricing merely depends your requirement. Check out the pricing of signNow here.
-
How do I use a signature line in Microsoft Word?
You’ve had this problem, right? You type on the underscored line but the underscore moves and then you’ve got to underline what you just typed. Then you need to delete some of the underscores. Here’s an example of the first part of a legal document done the usual way, with underscores. As soon as you start typing, this is what happens: This is obviously a pain. But there’s a much simpler way. You can create a one-line table and use separate columns for sections that need to be typed into. Here’s the same information as a table. You can see the gridlines now, but won’t when you’re done. Now all you have to do is place bottom borders in the second and fourth columns and turn off the gridline display. Now you can type onto the lines with no problem. Here’s another example of using a table for signatures: If you click on View Gridlines, it looks like this: Create one or two of these tables and copy them with other names whenever you need a signature section.
-
How do I add a digital signature in word?
To add digital signature first decide on which side of the page you want this signature, then place cursor accordingly.After that go to Insert tab click on signature line window will appear, In that insert text which you would like to appear underneath the signature line;-· Suggested signer: The name of the person signing the document· Suggested signer’s Titel: Title means Dr or Ms etc· Suggested signer’s email id: Email of person who signs the document.· Instructions to the signer: If you want to give some instruction to signer person add here.Below that there are two check boxes are self-explanatory. After that press OK. A signature will be added.
-
How are electronic signatures made?
With the choice of a right e signature app you are just a few clicks away in creating your electronic signature. Once it is built all you need to do is download the document you have been sent to sign digitally and place your signature at the desired place. This new technique of signing documents online has been leveraged by many business verticals using trusted software. The best part about E Signature is that it holds in the court of law and is safe & secure. It is to be noted that esignature solutions are often understood similar to digital signature solutions but they are different!Creating an Electronic Signature to Esign DocumentsAn Electronic signature can include anything from text to image or just initials with date. People opt for different ways in creating an e signature. Let’s have a look into available options of creating one:Draw It On The Touch screenWith the help o your finger or by using a stylus you can sign the same way you do it on paper. This is very easy when you are accessing the document on mobile or a tablet. This way you create your electronic signature on the document itself.Uploading An Image Of Your SignatureThere are many esignature solutions software that accepts the picture of your paper signature. You can upload the picture in the software and it will change it into a .png file and place it over the desired signature line in the document.Using Mouse Or TouchpadYou can also draw your signature with the help of a cursor or a touchpad. Take the cursor to the signature line where E-signature is required and draw it along the line.Using KeyboardThe simplest way is to type the spelling of your name using the keyboard, and chose the desired font that looks similar with your paper signature. It’s done; your electronic signature is made.These are some very basic and simple ways to create your distinctive electronic signature. Chose any e signature solutions matching with your requirements and you are ready to create your unique electronic signature which can be used as your identity anywhere in the online world.
-
How do I get started using Quora?
1. Quora works by having the community ask and answer questions. When you want to know more about something, Quora delivers you answers and content from people who know the answer - like real doctors, economists, screenwriters, police officers, and military veterans. * Ask questions when you have them. Here is more info on how to get your questions answered: What are some good ways to get people to answer my questions on Quora? [ https://www.quora.com/What-are-some-good-ways-to-get-people-to-answer-my-questions-on-Quora ] * Answer questions when you can! 2. Use your feed and tell Quora what you're interested in reading. * Your feed is filled with stories that interest you. You can view your feed by going to the home page. * Build a good feed by following topics and people, and taking actions in feed that tell Quora what you like. For more on this, see: How do I personalize my Quora feed? [ https://www.quora.com/How-do-I-personalize-my-Quora-feed ] * Topics: When you follow a topic [ https://www.quora.com/How-does-topic-following-on-Quora-work ], questions and answers tagged with that topic will appear in your feed * People. When you follow people [ https://www.quora.com/How-do-I-follow-someone-on-Quora-What-does-following-a-person-do ], you will see questions and answers posted by these people in your feed. * The easiest first step: start by following some topics [ https://www.quora.com/What-are-some-interesting-topics-for-new-users-to-follow ] that you care about and some people [ https://www.quora.com/Which-Quora-user-should-I-follow-on-Quora-Why ] who write about them. * You can also read some interesting questions [ https://www.quora.com/What-are-some-good-questions-for-new-Quora-users-to-check-out ] and popular answers [ https://www.quora.com/What-answers-on-Quora-have-the-most-upvotes ] to get a feel for the site. 3. Upvote answers that you think are helpful. * When you see a good answer on Quora, upvote it. * Your votes help people see good answers and make Quora better. You can learn more here: * What are some frequently asked questions for new Quora users? [ https://www.quora.com/What-are-some-frequently-asked-questions-for-new-Quora-users ] * What does a good question on Quora look like? [ https://www.quora.com/What-does-a-good-question-on-Quora-look-like-1 ] * What does a good answer on Quora look like? What does it mean to "be helpful"? [ https://www.quora.com/What-does-a-good-answer-on-Quora-look-like-What-does-it-mean-to-be-helpful ]
-
How do I enable multiple signatures in MS word without losing the previous signatures?
Add a Digital Signature Using a Signature Line 1. To add a digital signature, open your Microsoft Word document and click where you’d like to add your signature line. 2. From the Word ribbon, select the Insert tab and then click Signature Line in the Text group. 3. A Signature Setup pop-up box appears. Enter your information in the text fields and click OK. 4. Double-click the signature line. 5. A Sign pop-up box appears. At the X, type your name. Next, look at the Signing as: field. Select the signing certificate. To ensure that this is the correct certificate, click the Change button. 6. Click on Click here to view certificate properties. 7. The Certificate Details box appears. Go to the Details tab and scroll down to Key Usage. Single-click on it. The lower text box should now display Digital Signature, Non-Repudiation. If it does, then this is the right certificate. Click OK. 8. If this is the wrong certificate, click OK. Then click More Choices to see other certificates. Select another certificate and repeat these steps until you find the correct certificate. 9. Click the Sign button to sign the document. Insert your PIV card into the card reader. Enter your Smart Card (PIV) PIN and click OK. 10. The Signature Confirmation box tells you that Word saved your digital signature. Click OK. Once you've digitally signed your document, if you edit it, Word will remove the digital signature. Don't worry. You can always go back to Step 1 and digitally sign it again. Add an Invisible Digital Signature You can add an invisible digital signature to prevent your name from appearing in a document. 1. Open your document and click the File tab. 2. Click Info and then click Protect Document. 3. From the Protect Document drop-down menu, click Add a Digital Signature. 4. Select a Commitment Type, such as created and approved this document, and then click Sign. 5. Insert your PIV card into the card reader. Enter your Smart Card (PIV) PIN and click OK. 6. The Signature Confirmation box tells you that Word saved your digital signature. Click OK. 7. Add Multiple Digital Signatures Using Signature Lines Once you digitally sign a document, you can have others also digitally sign it. (Note: If you are the first approver, you should create the signature lines for all of the approvers. Then, send the document to the second approver.) 1. If you are the second (or other) approver, open the document you’ve received. Double-click your signature line to sign. Follow Steps 4-10 from Add a Digital Signature Using a Signature Line [ https://piv.idmanagement.gov/userguides/signworddoc/#add-a-digital-signature-using-a-signature-line ]. 2. A Signature Setup pop-up box appears. Enter your information in the text fields and click OK 3. Double-click your signature line. 4. A Sign pop-up box appears. At the X, type your name. 5. Next, look at the Signing as: field. You should see your name and certificate information. If you don’t, click the Change button to select a different certificate and click Sign. 6. Insert your PIV card and enter your Smart Card (PIV) PIN. Click OK. 7. The Signature Confirmation box tells you that Word saved your digital signature. Click OK. 8. Send the digitally signed document to the next approver. Each successive approver will be able to open the document and double-click the Signature Line with his/her name and complete the signing process. Add Multiple Invisible Digital Signatures Multiple approvers may digitally sign a document. Use the same procedures as you would to add one invisibile digital signature: Add an Invisible Digital Signature [ https://piv.idmanagement.gov/userguides/signworddoc/#add-an-invisible-digital-signature ]. The final approver will see multiple “invisible” signatures in the document. View Digital Signatures If you use Word 2013 and open a digitally signed Word 2007 or 2010 document, you may have compatibility issues. You can view digital signatures in an incompatible Word document in one of two ways: 1. Click the View Signatures button just below the Word ribbon. OR 1. Click the File tab and select Info. Then click View Signatures. For either option, you will be able to see the digital signature details in the Signatures box. Remove a Digital Signature 1. If you want to remove a digital signature, open your Word document and go to the signature line. 2. If there is no signature line, click the View Signatures button just below the Word ribbon. 3. From the Signatures box, select the signature you want to to delete. 4. Right-click on the signature and then click Remove Signature. 5. When prompted, click Yes. Verify Digital Signature Settings Please ask your Technical Support staff for help. Administrator privileges are required for these steps. By default, Microsoft Word uses the SHA-1 hash algorithm to generate digital signatures. The SHA-1 hash algorithm is no longer considered secure. More secure hash algorithms, such as SHA-256, should be used. (See NIST’s guidance on hash functions) [ https://csrc.nist.gov/Projects/Hash-Functions/NIST-Policy-on-Hash-Functions ] You can use either option below to verify/change the hash algorithm settings for Microsoft Office: 1. Group Policy settings: Digital Signature Settings in Office 2013 [ https://technet.microsoft.com/en-us/library/cc545900.aspx ]. (For additional information, consult Microsoft’s technical documents.) 2. Computer registry settings. Change the Microsoft Office signature algorithm, as follows: [code]Word 2010: Computer\HKEY_CURRENT_USER\Software\Policies\Microsoft\Office\14.0\common\signatures Word 2013: Computer\HKEY_CURRENT_USER\Software\Policies\Microsoft\Office\15.0\common\signatures Word 2016: Computer\HKEY_CURRENT_USER\Software\Policies\Microsoft\Office\16.0\common\signatures [/code]Enable digital signatures so that users can sign part of a form 1. On the Tools menu, click Form Options. 2. Under Category, click Digital Signatures, and then click Enable digital signatures for specific data in the form. 3. Click Add. 4. In the Set of signNow Data dialog box, type a name for the part of the form template for which you want to enable digital signatures.Tip: The name you use cannot contain any spaces. 5. Click Select XPath next to the Fields and Groups to be signed box. 6. In the Select a Field or Group dialog box, click the field or group for which you want to enable digital signatures, and then click OK. 7. Under Signature options in the Set of signNow Data dialog box, do one of the following:To allow only one signature for this part of the form template, click Allow only one signature.To allow multiple signatures that are independent of each other, and that can be added or removed without affecting the other signatures, click All the signatures are independent (co-sign).To allow multiple signatures that sign preceding signatures, click Each signature signs the preceding signatures (counter-sign). 8. In the Signature confirmation message box, type the text that you want to show the user when they sign this part of the form, and then click OK twice. 9. In the form template, associate the part of the form template for which you enabled digital signatures with a section.How?Place your cursor where you want to insert the section.If the Data Source task pane is not visible, click Data Source on the View menu.In [ http://menu.In ] the Data Source task pane, do one of the following:To add a control that is bound to a field, right-click the field, and then click the control that you want to bind to this field.To [ http://field.To ] add a section that is bound to a group, right-click the group, and then click Section with Controls.Note: If the field or group that you specified repeats, you must select a non-repeating group that contains that field or group. 10. In the form template, double-click the Section label below the section that contains the other sections or controls that you just inserted. 11. Click the Digital Signatures tab. 12. Select the Allow users to digitally sign this section check box. 13. In the Sign the following data in the form when this section is signed box, click the name of the section that you created a digital signature for in step 4. 14. To display signatures in the section as they are added, select the Show signatures in the sectioncheck box. 15. To make the controls in the section read-only once they are signed, select the When signed, make controls read-only check box. Top of Page [ https://support.office.com/en-us/article/enable-or-disable-digital-signatures-d5050d09-c39e-470f-a548-7f2b98c6e4e1#top ] Disable digital signatures 1. On the Tools menu, click Form Options. 2. Under Category, click Digital Signatures, and then do one of the following:To disable digital signatures for the entire form template, click Do not enable digital signatures.To disable digital signatures for a specific part of the form template, click Enable digital signatures for specific data in the form, click the part of the form template in the Data in the form that can be signed list that you want to disable digital signatures for, and then click Remove.
-
How do I install dictation in Word?
How to install Dictate add-in for OfficeOpen Word.Click on the File menu.Click on Account.Click the About Word button to see which version you have installed.Hello, and if you need cheap MS products, you can try our website: 100special, we’ve been selling it for years and quite steady and reliable, 50% OFF and 10% more discount for new customers!
-
How should I start learning Python?
Rather than giving you a boring step by step process of learning Python, I would share my personal journey about how I started learning Python. Here is my personal learning experience: What motivated me to start learn Python ? I fell in love with Python after reading a bunch of answers on Quora about how people were doing wonderful things with Python. Some were writing scripts to automate their Whats app messages. Some wrote a script to download their favourite songs, while some built a system to receive cricket score updates on their phones. All of this seemed very excited to me and I finally decided that I would love to learn Python. How I started learning Python ? I started learning Python from The Complete Python Masterclass: Learn Python From Scratch as it was the recommended course for beginners. I found the course to be really interesting yet simple for beginners like me. However, if you are a professional programmer then I would recommend you to learn from the official docs : 3.7.2 Documentation How much time it took to learn ? Topic: Python basics, control structures, functions. Time : - 1 Week. Learning experience: Learning Python basics is a piece of cake, it is extremely simple to get up and running with Python. Basics like variables, operators and control structures are extremely easy to learn as opposed to other languages like Java. Topic: OOP & Regular Expressions Time: 1 Week. Learning Experience: This section was a bit tough as I didn’t had a clear understanding of OOP principles. I had used OOP in Java but still was not clear about the concept but eventually with some practice I was able to understand OOP in Python, the self keyword and the init method. If you are a beginner then I would recommend you to focus on this section as it is widely used while making complex applications. You might not understand a lot of things at first, but give things time to sink in and it will make sense. Topic: Tkinter Time: 1 Week Learning experience: This was the most exciting as I finally learned how to build desktop GUI applications using Python. Learned about the Tkinter library which allowed us to build interactive GUI with Python. It felt as if everything I have learned till now started making sense. When I was finally complete with this section, I was able to build my very own calculator. Here is a screenshot of what I built: Topic:Data Analysis Time: 1 Week Learning experience: Learned about the Numpy and Pandas library which are extensively used to perform data analysis with Python. If you aspire to be a data analyst/ data scientist I say you focus on learning the basics well. I also learned how to read data from an excel/ CSV file and visualise the same data on a chart. In the process, I also learned about Jupyter notebooks which is an excellent IDE for data visualisation with Python. Here is a screenshot of me plotting some graphs: Topic: Django Time: 2 Weeks Learning experience: This was by far the most difficult topics I had ever learned. I had no previous experience learning anything related to server side web development and hence it took me a while to understand terminologies like authentication, URL routing, API and models. I had initially given up on this section as it felt very complex but I took my time and worked my way through it with patience. I took notes on pen and paper and made sure that I understand every line of code even before I use it. Eventually the efforts paid off and I finally started to understand what Django really is and how it works. It took me 2 weeks to get done with the Django basics and a lot more practice to finally complete a Django project on my own. I built my own todo app and a simple book store site using Django and a little bit of Bootstrap. Here is a screenshot of the bookstore I built: Topic: Flask & Web Crawler Time: 2 Weeks. Flask was a piece of cake after learning Django as Flask is just a micro framework. I didn’t personally dabble much with Flask as I liked and preferred Django over Flask. Building a web crawler was interesting as well, I built a crawler which was used by search engines back in the early days to crawl web pages, find links and store those links in a file. Topic: Automation with selenium Time: 1 Week. After learning almost everything about Python selenium felt pretty easy. Selenium is originally used for testing purposes but it turns out that you can automate various tasks with it. I learned how to build a Facebook auto poster with selenium. It took me around 9–10 weeks to complete and I was happy with the process and eventually learned a lot about how Python works. Note that I was dedicating 2–3 hours every day for learning. Final conclusion: It was a great experience learning Python and I now feel a lot more confident as a programmer. The main source of confidence was being able to build something of my own, however small it may be. Although my learning process might seem easy but there was a lot of struggle and moments of frustration in between. Here are a few of my tips if you want to start learning Python: 1. Have patience, if you are a beginner it will take time to let things sink in. 2. Aim at building small tools/projects, don’t just learn the syntax and jump to a new programming language. 3. Frustration and pain is a part of learning process, embrace it instead of avoiding it. 4. Errors/ issues are expected, don’t let that discourage you from learning. 5. Be consistent, if you are not consistent in learning it might take a lot more time and effort. Happy learning !
Trusted esignature solution— what our customers are saying


Get legally-binding signatures now!
Frequently asked questions
How do i add an electronic signature to a word document?
How do they know an electronic signature is actually you?
How to open pdf without sign in?
Get more for How Do I Install Electronic signature in Word
- How Can I eSignature PPT for Legal
- eSignature Presentation for Legal Simple
- eSignature Form for Legal Easy
- eSignature Word for Procurement Mobile
- eSignature Form for Legal Safe
- eSignature PDF for Procurement Mobile
- eSignature Document for Procurement Online
- How To eSignature Document for Procurement
Find out other How Do I Install Electronic signature in Word
- Form dc cv 31
- 185 insert dhhs form 1723 individuals informed consent to non
- Vidimera form
- Blank lien holder agreement form
- Family in transition 17th edition pdf form
- Gramin shiksha form
- San jose airport application form
- Chiles first lady of letters answers form
- Police report overlay form
- Community games registration forms
- Form d texas medical board
- G s 20 43 1 page 1 20 43 1 disclosure of personal information in
- Blooms taxonomy flip chart for student use pdf 21st century form
- Character reference form teaching council
- Republic of namibia form 10 document ref no social
- Shivaji university feedback form
- Therapeutic waiver form
- Yes aliens probably exist quiz scope scholastic form
- United kingdom city glasgow form
- Sample photo release form form child care aware of virginia