How To Set Up Electronic signature in CMS
Contact Sales
Make the most out of your eSignature workflows with airSlate SignNow
Extensive suite of eSignature tools
Robust integration and API capabilities
Advanced security and compliance
Various collaboration tools
Enjoyable and stress-free signing experience
Extensive support
Keep your eSignature workflows on track
Our user reviews speak for themselves


Award-winning eSignature solution


How to establish electronic signature in CMS
Establishing an electronic signature in your Content Management System (CMS) can optimize your document management workflow. With airSlate SignNow, you can effortlessly send, sign, and oversee documents without the inconvenience of printing and scanning. This guide will lead you through the steps to successfully implement your electronic signature.
How to establish electronic signature in CMS
- Access the airSlate SignNow website in your chosen web browser.
- Create a new account to start a free trial or log in to your current account.
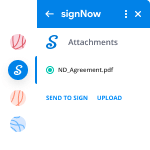
- Select the document you want to sign or send for signature by uploading it.
- If you intend to use this document again, turn it into a reusable template.
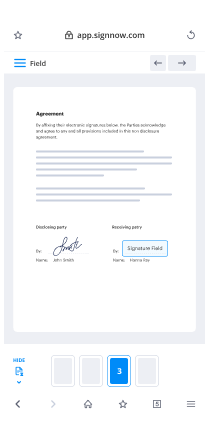
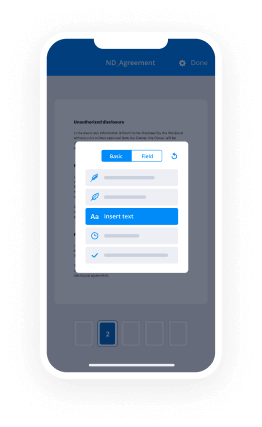
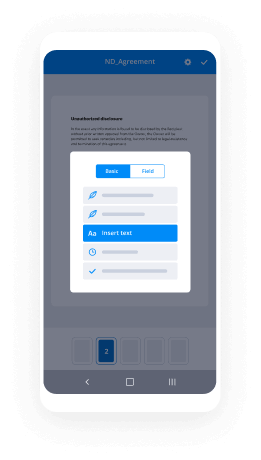
- Open the document and modify it by adding fillable fields or necessary information.
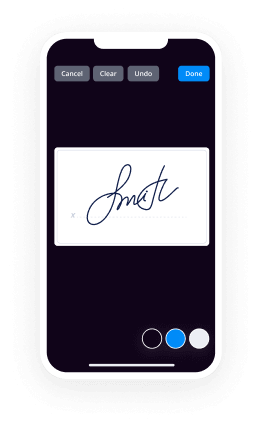
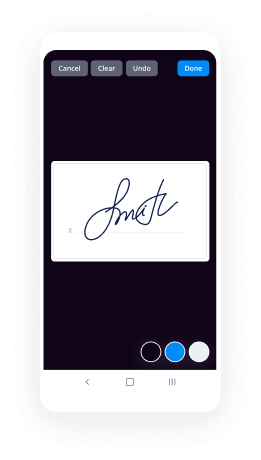
- Position your signature on the document and indicate where recipients should sign.
- Click on 'Continue' to set up and send an invitation for electronic signatures.
To summarize, airSlate SignNow offers a robust and user-friendly platform for establishing electronic signatures. Its intuitive layout and extensive features make it an excellent option for businesses aiming to improve their document management workflows.
Initiate your free trial today and discover the advantages of airSlate SignNow for yourself! Make your document signing experience efficient and effortless.
How it works
Rate your experience
-
Best ROI. Our customers achieve an average 7x ROI within the first six months.
-
Scales with your use cases. From SMBs to mid-market, airSlate SignNow delivers results for businesses of all sizes.
-
Intuitive UI and API. Sign and send documents from your apps in minutes.
A smarter way to work: —how to industry sign banking integrate
How to eSign and fill out a document online
Document management isn't an easy task. The only thing that makes working with documents simple in today's world, is a comprehensive workflow solution. Signing and editing documents, and filling out forms is a simple task for those who utilize eSignature services. Businesses that have found reliable solutions to how to integration electronic signature set up cms don't need to spend their valuable time and effort on routine and monotonous actions.
Use airSlate SignNow and how to integration electronic signature set up cms online hassle-free today:
- Create your airSlate SignNow profile or use your Google account to sign up.
- Upload a document.
- Work on it; sign it, edit it and add fillable fields to it.
- Select Done and export the sample: send it or save it to your device.
As you can see, there is nothing complicated about filling out and signing documents when you have the right tool. Our advanced editor is great for getting forms and contracts exactly how you want/need them. It has a user-friendly interface and full comprehensibility, supplying you with complete control. Create an account today and begin enhancing your eSignature workflows with effective tools to how to integration electronic signature set up cms on the web.
How to eSign and complete documents in Google Chrome
Google Chrome can solve more problems than you can even imagine using powerful tools called 'extensions'. There are thousands you can easily add right to your browser called ‘add-ons’ and each has a unique ability to enhance your workflow. For example, how to integration electronic signature set up cms and edit docs with airSlate SignNow.
To add the airSlate SignNow extension for Google Chrome, follow the next steps:
- Go to Chrome Web Store, type in 'airSlate SignNow' and press enter. Then, hit the Add to Chrome button and wait a few seconds while it installs.
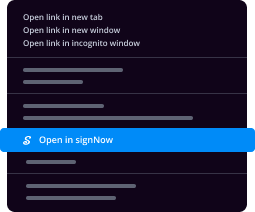
- Find a document that you need to sign, right click it and select airSlate SignNow.
- Edit and sign your document.
- Save your new file to your account, the cloud or your device.
By using this extension, you prevent wasting time and effort on boring activities like saving the document and importing it to an eSignature solution’s collection. Everything is easily accessible, so you can quickly and conveniently how to integration electronic signature set up cms.
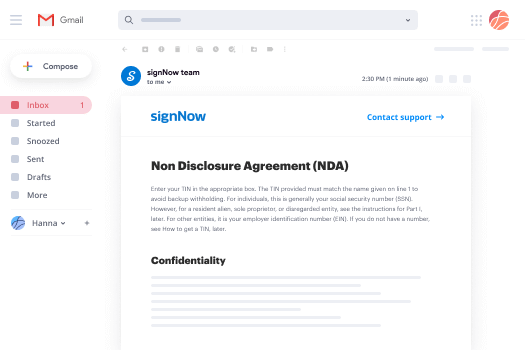
How to digitally sign documents in Gmail
Gmail is probably the most popular mail service utilized by millions of people all across the world. Most likely, you and your clients also use it for personal and business communication. However, the question on a lot of people’s minds is: how can I how to integration electronic signature set up cms a document that was emailed to me in Gmail? Something amazing has happened that is changing the way business is done. airSlate SignNow and Google have created an impactful add on that lets you how to integration electronic signature set up cms, edit, set signing orders and much more without leaving your inbox.
Boost your workflow with a revolutionary Gmail add on from airSlate SignNow:
- Find the airSlate SignNow extension for Gmail from the Chrome Web Store and install it.
- Go to your inbox and open the email that contains the attachment that needs signing.
- Click the airSlate SignNow icon found in the right-hand toolbar.
- Work on your document; edit it, add fillable fields and even sign it yourself.
- Click Done and email the executed document to the respective parties.
With helpful extensions, manipulations to how to integration electronic signature set up cms various forms are easy. The less time you spend switching browser windows, opening multiple accounts and scrolling through your internal files trying to find a template is more time to you for other essential jobs.
How to safely sign documents in a mobile browser
Are you one of the business professionals who’ve decided to go 100% mobile in 2020? If yes, then you really need to make sure you have an effective solution for managing your document workflows from your phone, e.g., how to integration electronic signature set up cms, and edit forms in real time. airSlate SignNow has one of the most exciting tools for mobile users. A web-based application. how to integration electronic signature set up cms instantly from anywhere.
How to securely sign documents in a mobile browser
- Create an airSlate SignNow profile or log in using any web browser on your smartphone or tablet.
- Upload a document from the cloud or internal storage.
- Fill out and sign the sample.
- Tap Done.
- Do anything you need right from your account.
airSlate SignNow takes pride in protecting customer data. Be confident that anything you upload to your account is secured with industry-leading encryption. Auto logging out will shield your user profile from unwanted access. how to integration electronic signature set up cms from your phone or your friend’s phone. Protection is vital to our success and yours to mobile workflows.
How to sign a PDF file on an iPhone
The iPhone and iPad are powerful gadgets that allow you to work not only from the office but from anywhere in the world. For example, you can finalize and sign documents or how to integration electronic signature set up cms directly on your phone or tablet at the office, at home or even on the beach. iOS offers native features like the Markup tool, though it’s limiting and doesn’t have any automation. Though the airSlate SignNow application for Apple is packed with everything you need for upgrading your document workflow. how to integration electronic signature set up cms, fill out and sign forms on your phone in minutes.
How to sign a PDF on an iPhone
- Go to the AppStore, find the airSlate SignNow app and download it.
- Open the application, log in or create a profile.
- Select + to upload a document from your device or import it from the cloud.
- Fill out the sample and create your electronic signature.
- Click Done to finish the editing and signing session.
When you have this application installed, you don't need to upload a file each time you get it for signing. Just open the document on your iPhone, click the Share icon and select the Sign with airSlate SignNow button. Your doc will be opened in the app. how to integration electronic signature set up cms anything. In addition, utilizing one service for all of your document management needs, things are faster, better and cheaper Download the application today!
How to electronically sign a PDF on an Android
What’s the number one rule for handling document workflows in 2020? Avoid paper chaos. Get rid of the printers, scanners and bundlers curriers. All of it! Take a new approach and manage, how to integration electronic signature set up cms, and organize your records 100% paperless and 100% mobile. You only need three things; a phone/tablet, internet connection and the airSlate SignNow app for Android. Using the app, create, how to integration electronic signature set up cms and execute documents right from your smartphone or tablet.
How to sign a PDF on an Android
- In the Google Play Market, search for and install the airSlate SignNow application.
- Open the program and log into your account or make one if you don’t have one already.
- Upload a document from the cloud or your device.
- Click on the opened document and start working on it. Edit it, add fillable fields and signature fields.
- Once you’ve finished, click Done and send the document to the other parties involved or download it to the cloud or your device.
airSlate SignNow allows you to sign documents and manage tasks like how to integration electronic signature set up cms with ease. In addition, the security of your info is top priority. Encryption and private web servers can be used as implementing the latest features in data compliance measures. Get the airSlate SignNow mobile experience and operate better.


FAQs
-
How do I set up an electronic signature in CMS using airSlate SignNow?
To set up an electronic signature in CMS using airSlate SignNow, first, log into your account and navigate to the integration settings. Select your CMS platform, and follow the on-screen instructions to connect it with airSlate SignNow. Once integrated, you can easily create and manage electronic signatures directly from your CMS.
-
What are the benefits of using airSlate SignNow for electronic signatures in CMS?
Using airSlate SignNow for electronic signatures in CMS provides a seamless experience for document management. It enhances workflow efficiency by allowing users to send and receive signed documents quickly, ensuring that your business operations run smoothly. Additionally, it offers a cost-effective solution without compromising on security.
-
Is airSlate SignNow compatible with all CMS platforms?
airSlate SignNow is designed to integrate with various popular CMS platforms, making it versatile for different users. While most major CMS systems are supported, it's best to check the specific integrations available on the airSlate SignNow website to ensure compatibility with your chosen platform.
-
What is the pricing structure for setting up electronic signatures in CMS with airSlate SignNow?
The pricing for airSlate SignNow varies based on the features and the number of users. They offer different plans, including a free trial, which allows you to explore how to set up electronic signatures in CMS before committing to a paid plan. For detailed pricing, visit the airSlate SignNow pricing page.
-
Can I customize the electronic signature process in my CMS with airSlate SignNow?
Yes, airSlate SignNow allows for customization of the electronic signature process within your CMS. You can tailor the signing workflow, add your branding, and set specific signing rules to meet the unique needs of your business, ensuring that the signatures align with your brand identity.
-
How secure is the electronic signature setup in CMS with airSlate SignNow?
airSlate SignNow prioritizes security when it comes to electronic signatures in CMS. It employs advanced encryption technologies and complies with industry standards, ensuring that your documents and signatures are safe from unauthorized access. You can trust that your sensitive information is protected throughout the signing process.
-
What features does airSlate SignNow offer for electronic signatures in CMS?
airSlate SignNow offers a robust set of features for electronic signatures in CMS, including templates for frequently used documents, real-time tracking of signature requests, and automated reminders. These features help streamline your signing process and enhance overall productivity.
-
What is a Courier Manager mobile app?
A Courier Manager Mobile App is an mobile application, which is integrated with CMS (Courier Management Software) this Mobile Application allows users (Delivery Boy) to do vital work i.e. packet pick-ups, Make deliveries or Un-deliver his process will be seen real time by customers(Consignee) while tracking his packets.Also through Courier Manager Mobile App a user can take Shipper/Packet picture and electronic signature as a proof of delivery. Moreover, using the courier tracking system you can track in real time on the map the position and the activity of each one of them. This generates ...
-
How do I find the password I used when I set up my electronic signature?
It is not possible to find the password that you have used while setting up your electronic Signature. You have to create new electronic signature.For more visit: https://www.signer.digital
-
How can I set up a recurring electronic payment to my landlord in Canada?
As of this writing in 2017, most landlords in Canada will now accept Interac e-transfers, which are direct bank-to-bank transfers between Canadian accounts. You can probably convince yours fairly easily as there is no cost to them, and it is easier than depositing a cheque.They can now be set up as recurring payments, and they take precisely 30 minutes to transfer, 24/7/365. 3 of the 5 big Canadian banks offer unlimited e-transfers for free, while the other 2 charge $1/e-transfer.Log into your bank account and enter your rent amount, the recurring date and frequency, and your landlord’s email address as well as a security question that they can answer. You don’t need any specific banking details.
-
How can we set up a CMS on LAMP in CentOS 7?
There are different content management systems (CMS) in the market, and here you can find the guides to install the CMS on Lamp in CentOS 7.Click here to learn more
-
Drupal (CMS): How do I set up Tiles like Pinterest?
I haven't seen a Drupal module that does this specifically, but I know there are javascript libraries that make this possible. My favorite is Wookmark jQuery Plugin. I've implemented it one of my own sites here JamesMcB's Bay Area Outdoor Gems.To do this on Drupal, you'd basically do the followingCreate a view with the photos you want to displayChoose unformatted displayOverride the unformatted themeIntegrate in the wookmark codeYou'd definitely need to have javascript, html, & css experience to make this possible.I hope that helps!James
-
How can I set up Magneto CMS in an Amazon AWS server?
You have to follow these steps to Install Magento on AWS:Setup a Server on AmazonInstall pre-requisite tools on the server, needed to run MagentoSetup DatabaseInstall and configure Magento on AWSEasier Way to Install Magento on AWSUp and Running with AWS Magento HostingSetup a Server on AmazonAmazon Developer ConsoleGo to Amazon and setup an account. Now, navigate to AWS Management console. You will see the following screen:Select EC2. Don’t worry if you can’t see it. Search it in Find Services and you will get it. Click on it. Now you will see the following screen:Click on Launch Instance.Select a machine with default operating system (OS), such as Linux, Ubuntu, or Windows etc.You will see the following screen. Scroll down, and you will see:Select the Ubuntu server. Most developers tend to use Linux operating system to carry out their tasks, therefore I prefer Ubuntu. If you are a Windows user, and you want to select a Windows operating system, you are more welcome to do so. The configuration is almost identical.According to the official Magento 2 system requirements you need at least 2G of RAM. However, I consider and advise to have 4GB RAM. Just to be on safe side, if you want to debug or execute a block of code, you probably won’t want to exhaust your RAM . Therefore, you must:Select Type t2 mediumClick on Configure Instance Details. Now you will see:You can configure your machine (i.e. instance). Since, there is nothing much to do, proceed ahead with add storage.Now, the system will ask you to add storage. By default, the storage size is enough, but if you want to increase, then just increase the size.Once you complete the process, it time to click on Add Tags.For now, we don’t need any tags, therefore, click on configure security group button. This is important.Now, you can add rules about which people from across the globe will access your server. Do they have to follow a protocol to signNow to a server? For now, I am making my server accessible to all traffic. Later, we can put security rules. Navigate to Type and select All traffic. In the source, click anywhere. It should look like this:Click review and launch. Then you will have the opportunity to review your configuration again. Click Launch. You will see the following prompt.Here, instead of choosing an existing key pair, select a new key pair and give it a name.You might be wondering what is a key pair? In simple words, its a key which lets you connect to your server machine securely. It consists of a public key that AWS stores, and a private key file that you store. Together, they allow you to connect to your instance securely. For Windows AMIs, you must use the private key file to obtain the login password for your instance. For Linux AMIs, the private key file allows you to login to your instance with active SSH.Download the key pair and keep it secure, as without it, you won’t be able to access your server. Now click on launch instance.A new screen will open up.Click View InstanceIn status check, you can see that it’s initializing:Ignore the old server. You might not see the name of your server. Now, navigate to the empty space and you will notice a pencil write icon. Click on it and name your server. You must wait for a while and then refresh the screen. Check your system status:Now, you must connect to your server. Before, you do that make sure you have git installed, because we will use it to connect to our server. Now, select your new server:Click Connect.Now that you know about how to connect to your new server, we will opt the easy way. Remember the key pair you downloaded earlier? Navigate to that folder. Assuming, you have git installed, right click in empty space and select git bash here option. Now copy the line, I underline just below the example which starts with ssh -I …….And paste it in git bash:Press Enter. You will get a question: Are you sure you want to connect? Enter yes. Congrats, now you are on your server. But we must fulfill the requirement to make Magento work. Therefore, it is time to set up a PHP environment. Next, we will run a few commands on git to install the prerequisite tools.Install Pre Requisite Tools on Server to Run MagentoYou will have to execute the following code on the terminal to get the required tools for Magento installation on your server.
-
How can we set up a CMS made simple v2.2 (LAMP in CentOS 7.3)?
You must have Alibaba Cloud Elastic Compute Service (ECS). If you are new user, Click Here to try the Alibaba Cloud Free Trial. I have used Alibaba Cloud ECS and CentOS 7 for this tutorial. If you don’t know about how to setup your ECS instance, you can refer to this tutorial.You should setup your server’s hostname.Access to VNC console in your Alibaba Cloud or SSH client installed in your PC.Click here to learn more.
-
How do I set up different signatures for replies and new emails in Outlook 2011 for Mac?
It's not quite as easy as in Windows Outlook.When you are composing an email, there's a "Signatures..." button which, when clicked, shows a dropdown letting you choose from the ones you created, or you can choose "Edit Signatures..." to create one.I'm sure you figured that out. The key is to not specify a "Default" signature (or rather leave the default signature as "None").Create one signature called, say "Compose" and another one called "Reply/Forward" (you may have to use another character besides "/").You'll have to manually add it yourself though each time.
Trusted esignature solution— what our customers are saying


Get legally-binding signatures now!
Frequently asked questions
How do i add an electronic signature to a word document?
How to provide authorize electronic signature?
How to edit documents and sign them?
Get more for How To Set Up Electronic signature in CMS
Find out other How To Set Up Electronic signature in CMS
- Compel responses form
- Monroe county landlord statement form
- Nh department of justice new hampshire attorney general form
- Good cause waiver missouri form
- How to file a nevada homestead declarationlaw office of form
- Idnyc complaints status and questionsnyc311idnycaccess nycstart your idnyc application new york cityidnyc complaints status and form
- Bar exam application bar application form
- Work status form f242 052 000 work status form f242 052 000
- List of approved vehicle product protection michigangov form
- Request and authority for leave da form 31 sep 2022
- Architectural compliance certificate form
- Wwwsssgovwp contentuploadsmen who are age 18 through 25 are privacy act statement form
- Application for water andor sewer service form
- Petition for certificate releasing connecticut probate fee form
- Coding and billing information with sample cms 1500 and ub
- Faa 0001a application for benefits form
- Report vehicle form
- Dl11cd form
- Request for same day protest hearings form
- Annuity contract prudential financial form