Streamline Your Workflow with Personal Contact Management Software
airSlate SignNow regularly wins awards for ease of use and setup


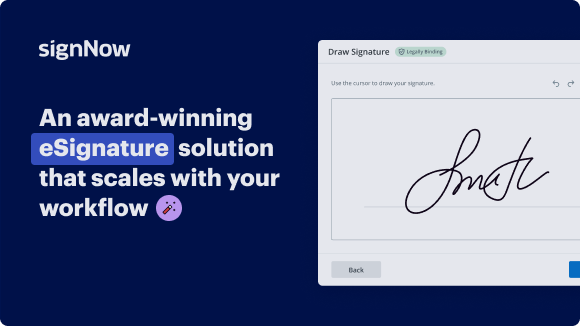
See airSlate SignNow eSignatures in action
Our user reviews speak for themselves


Why choose airSlate SignNow
-
Free 7-day trial. Choose the plan you need and try it risk-free.
-
Honest pricing for full-featured plans. airSlate SignNow offers subscription plans with no overages or hidden fees at renewal.
-
Enterprise-grade security. airSlate SignNow helps you comply with global security standards.

How to Use airSlate SignNow for Personal Contact Management Software
Follow these steps to utilize airSlate SignNow:
AirSlate SignNow offers businesses an efficient and cost-effective solution to send and eSign documents. With its rich feature set, tailored for SMBs and Mid-Market, easy scalability, transparent pricing, and superior 24/7 support, airSlate SignNow stands out in the market as a top choice for personal contact management software.
Experience the benefits of airSlate SignNow today and simplify your personal contact management processes!
airSlate SignNow features that users love


Get legally-binding signatures now!
FAQs online signature
-
Is there fully free CRM?
Zoho offers a fully-featured free edition of its flagship CRM software. That's right–robust features for sales and marketing, powerful integrations, and secure cloud storage, all for free.
-
Is there a CRM for personal use?
Monica – Best for Open Source Personal CRM Monica is an open-source CRM designed for individuals to keep track of personal connections. The thoughtfulness in its features is impressive as it lets me record information crucial to maintaining healthy relationships with customers. 9 Best Personal CRM Tools for Effortless Networking in 2024 BIGContacts https://.bigcontacts.com › blog › best-personal-crm BIGContacts https://.bigcontacts.com › blog › best-personal-crm
-
What is a personal CRM?
A personal CRM is a set of tools/features to improve efficiency and productivity by helping you organize day-to-day tasks, set up reminders, and streamline communications. Lately, a growing interest has emerged in CRM for personal use. This is known as a personal CRM solution.
-
What is personal contact management?
That's where a personal CRM, or personal relationship manager, comes in. Rather than focusing on professional connections or sales prospects for your business, a personal CRM focuses on your personal connections. These can be friends, family, service professionals, or anyone else you want to stay connected with. What is personal CRM software, and why do you need it? Jotform https://.jotform.com › Home › What is CRM Jotform https://.jotform.com › Home › What is CRM
-
What is the best free CRM for one person?
WRITTEN BY: 1 Quick Comparison. 2 HubSpot CRM: Best CRM for Single Users Needing Free Tools. 3 Zoho CRM: Best for Innovative AI Features. 4 Insightly: Best CRM for One-person Businesses That Need Project Management Tools. 5 UpHabit: Best for Personal Contact Management. 6 Freshsales: Best Built-in Telephone Features.
-
Does Microsoft have a personal CRM?
Microsoft Dynamics CRM is available as a cloud offering or an on-premises installation. As with CRM 4, this version can be highly customized using advanced extensions.
-
What is the best free CRM for one person?
WRITTEN BY: 1 Quick Comparison. 2 HubSpot CRM: Best CRM for Single Users Needing Free Tools. 3 Zoho CRM: Best for Innovative AI Features. 4 Insightly: Best CRM for One-person Businesses That Need Project Management Tools. 5 UpHabit: Best for Personal Contact Management. 6 Freshsales: Best Built-in Telephone Features. 9 Best Personal CRM Software for Single Users Fit Small Business https://fitsmallbusiness.com › best-personal-crm Fit Small Business https://fitsmallbusiness.com › best-personal-crm
-
Does Microsoft have a personal CRM?
Microsoft Dynamics CRM is available as a cloud offering or an on-premises installation. As with CRM 4, this version can be highly customized using advanced extensions. Customer Relationship Management (CRM) | Microsoft Dynamics 365 microsoft.com https://dynamics.microsoft.com › en-us › crm microsoft.com https://dynamics.microsoft.com › en-us › crm
Trusted e-signature solution — what our customers are saying


Related searches to make a sign

How to create outlook signature
hey there my name is david and i will be your lenode developer advocate for this video in fact this is the fourth video in this series that i've partnered up with lenode to show you guys a way to get into self-hosting without needing to have your own hardware [Music] so a couple of things before we jump into this first check out the description down below for a link where you can get a hundred dollars of free leno credit to try out their service for 60 days also be sure to check out at least the first couple of videos in this series so that you can get caught up to speed as far as what we're doing and why we're doing certain things but in this video what i want to show you how to do is set up a personal relationship manager think crm customer relationship manager but on a more personal level and the system we're going to look at today in this video is called monica so here is monica's website this is monica hq dot com and it's a very it's very sparse as far as design they just really want you to focus on the content rather than a lot of frills and gimmicks on their website and uh basically like it says here's your personal rolodex with everything in one place information about family work information relationships pets all kinds of information that um you wish you could keep track of if you've got a lot of people in your circle or maybe relatives that are like fourth cousins eight times removed or whatever the case is uh monica is a great way to try to better keep track of people and your relationships with them conversations you've had things like that so be sure to check out the description again for more information about monica the link to this all of that sort of stuff as well as information about their github and their hub.docker.com repository for more information there if you need that so this is a very basic installation that i just set up for the purposes of demonstrating monica and here we can see that across the top we've got last consulted really that's most recently added um you could are basically most recently updated i think most recently updated is the better way to to phrase that uh here we can see you know events in the next three months think birthdays anniversaries vacations whatever it is that is stored for an upcoming event in the next three months we'll show up right here we've got product changes over here that's kind of more application specific as far as things updates that have happened to the application from the developer perspective we've got recent phone calls notes debts and tasks where you can just kindly kind of quickly grab that information just by a quick click here we've got 45 contacts honestly i wish this was active and you could click it to go to your contacts but here we are we've got activities and gifts um basically this is a very very simple interface and i love that about it across the top of course but here we are on our dashboard we've got contacts there's actually a little journaling function in here if you wanted to keep notes uh kind of day-to-day notes things like that you've got that as well we'll talk about that here in just a moment but basically if we come over here to contacts we can give this a second to load up and we've got everything here um organized by default uh alphabetically by first name so if we just come in here to alden m ponte um here we can see that we've got an image we've got their name last activity together last known call uh how to stay in touch um and then note and then tags you can edit their contact information uh by you know updating all of this um i believe there's actually a way to add additional genders to this it's been a while since i've looked through that part of of the configuration but i do believe you can do that uh you can add additional kind of relevant information just kind of little notes about the person there if you'd like to um you can talk about their birthday you know this person's exact birthday you can put that in if you're not sure you can leave that also there is kind of a this person has passed and you can mark this person as deceased um and you can actually mark the date when they passed again for for for anniversaries and things like that for that particular event um so that's kind of the the just as far as updating personal contact information their uh our personal information um over here we've got relationships for love relationships you can add you can click there and add and then basically you can kind of say who is this person in a relationship with is it somebody new who is not in your database or is it somebody uh who who's already in your database you can click let's say maya kite there uh you can say that it's their significant other spouse date lover lots of different options here uh for love relationship family relationships friendly relationships and work relationships you can kind of choose which they happen to fall into there um so let's say that they are a significant other um and then you can just click add give that just a second here and here we can see that they've got a love relationship a significant other of maya and if i click that of course that will uh give us more information about that person uh and of course take us to that person's profile page in your monika instance so again below that we've got family and other kinds of relationships we can add information about pets if we want to keep track of pets that they've got you know for holiday gifts or just conversational purposes or whatever you can keep track of that you can keep track of emails phone numbers addresses how we met you know how you met that person so if you wanted to kind of keep that in mind there's a spot for that work information food preferences maybe you've got a friend who's a vegetarian vegan gluten free lactose intolerant peanut allergies whatever you can keep all of those notes in there as well and then of course uh then we can get into uh last time you had conversations whether it was a phone call an email a a text message or whatever all of that's over here maybe you want to talk about the last time you hung out with that person or or there was an activity whether it was a group activity a one-on-one whatever these are all great ways to keep all of this uh easily accessible so that you can go back and remember who what when where why those sorts of things and just keep track of your relationships um you can add tasks for that person gift ideas for that person uh maybe maybe you you've loaned that person money and want to keep track of that you can do all of that you can upload documents um i i can't imagine a situation where you want to keep a document for somebody outside your home but maybe you've got a spouse or or a child or something you want to keep a copy of their passport their driver's license their their medical insurance all of that kind of stuff could be uploaded as a document here for safe keeping now of course when you do that you do want to make sure that you you've got plenty of security set up on here and that's why um we will have a login that we can use to log into this we're going to put this on on a domain with an ssl and if you wanted to there are other ways that you could add an additional layer of security uh between the front facing internet and this application if you guys are interested in learning how to do that let me know i could probably make a video on adding an additional layer of security to your docker applications um but that's kind of the gist of this um it's it's very straightforward as far as how to manage your your contacts your relationships those sorts of things that here you can then go to like journaling right over here we can we can just add a journal entry and kind of keep track of how our day was this isn't just a a relationship manager with other people this is also a relationship manager for yourself to to keep track of how your days went and maybe you're in therapy and you're you're you're you're your therapist wants you to keep track of of different life events and different things that happen on different days this might be a great way to do that as well so that's kind of the front-facing uh where you're going to spend most of your time in monaco so now let's take a look at some of the settings in the back end of this so we're just going to click on the little gear icon up there at the top uh this is going to be a general information about your account now the one thing i will say is that this is kind of a single user instance if you wanted to share this with somebody you might want to set up a more generic uh user login for this but this is kind of meant to be just a these are my contacts um so it's just something to kind of keep in mind there this isn't something where you're going to have multiple users logging in and managing contacts this is kind of a single user application so you got your general information here as far as you know your information uh you can uh select yourself as a contact there the language used in the app you can kind of configure all of this this is actually wrong i want to i want to change that oh i'm going the wrong way i want to be i want to be over here um well let's just do mountain standard time that's fine time of day's reminders will be sent uh you can you can again you can set up reminders here now the thing about setting up reminders uh using things like email for instance is that you uh you will need to have access to an email server um and in order to do that you will need to open a ticket with lenode about your uh lenode instance to open the appropriate uh ports on your account for smtp whether that's you know port 25 or 460 5 or 587. it took me a minute there but you you in these cases you will need to open a ticket to get those ports open for your specific needs for this application so we're gonna go ahead and leave this i would probably set this at like you know eight o'clock in the morning so when you get up in the morning and you're drinking your coffee getting ready for the day you can kind of review any of the upcoming events you've got for the day based on your settings here layout you can you can sort this however you'd like first name last name nickname whatever um i'm just going to leave it as first name last name like so uh you could do a maximum width of 1200 pixels or you could let it go full screen again up to you how you want to handle that here you can reset your account in that case what that's going to do is delete all of your contacts all of your settings all of your pertinent information um so do it that way you will and then of course there's the option to delete your account um and that's that does exactly what it says it will do there um this is a uh if we come over here to personalization you can here we go you can add additional gender types i know that that may be a big perk for a lot of people out there who want to use this you can set reminder rules how how soon before an upcoming event do you want to be reminded uh you know this one does seven days and then and then it is a 30 days even before that uh contact field types you can add as many of those as you'd like or you can remove them you can also add protocols to this so you can click it make a phone call or click it and send an email all of that is there as well activity types uh simple activities sports food cultural activities and so there's a lot of stuff that you can go in here and customize to your liking to make sure that you can be as specific in your particular instance as you'd like to be i really do dig how well they've done this um you know you could say hey they overcame an illness they quit a habit and and having those little reminders of hey they're their sobriety date is this or or when they hit their goal weight it was this day and then you can just send them a hey congrats on your anniversary kind of thing and i love that they've got that in here as well features you can toggle you know love relationships family relationships pets addresses how you met you can toggle all of this on and off as you want to for your particular instance again i love the flexibility that the folks at monica built into this they've done a really really good job in my opinion here so let's scroll back up uh we've got storage um so here we can just kind of see uh the individual uh storage objects uh for the individual users not a lot of uh kind of this is just on a more technical end you'll probably never mess with this you can export your data if you wanted to do that you could export it via json or via sql however you want to export that to import to another system if you wanted to do that import data you can do that you can see right here that i imported a v card that i downloaded from a third-party site that i've used in the past for this exact same demonstration here but you can upload contacts via vcards if you want to simplify your life that way uh we've got users over here oh so you can invite other people so i while i said this is kind of a single user thing you can invite people to have access to this data if you'd like to again for that to work you would need an email set up for that and you would need uh to again open that that uh that ticket with lenode to get those ports opened for your instance uh we've got tag management again you can uh uh tag your friends and family like it's giving here's an example uh you can create additional tags uh api management if you wanted to uh use oauth or personal s things like that for for uh interfacing with this uh you can definitely do that you've got dav resources for calendaring audit logs and uh here you can see everything that's been done who it was done by when it was done what they did those sorts of things and then for security here you can change your password you can add a two-factor authentication which i can't suggest enough and that's kind of the basic setup and use case with monica and if you're interested in what i've shown you here uh let's actually jump over to uh to our lenode setup and uh get monica installed via docker so here we are on our lenode dashboard and here we can see the node that we've got up and running uh the really the first thing i like to do in a lot of these cases i'm not always but i like to do this when i think about it it's come over here first go to domains find the domain that you're going to use for that you've been using for your setup and click that then what we want to do is come down here to where it says add a cname record and we're just going to uh give it a sub domain that's what we're going to put in for the host domain so i'm going to put in monica like so and then i'm going to alias that to dbtech.tips so our our actual url will be monica.dbtech.tips to access our dashboard later on so we're going to go ahead and just click on save there and now we've got that cname record set up and kind of propagating in the background while we're getting everything else set up so the next thing we're going to do is head over here to portainer again if you if you're just coming into this series on this video please go back to the first video maybe in the first couple of videos and check those out if you're not familiar with portender and how to get here uh what we want to do next is actually click on stacks and we're going to add a stack what we're going to do is actually just paste that in of course it doesn't i keep having this issue here we're going to fix this there we go weird little thing there but what we're going to do next is actually just give this this stack the stalker compose a name we're just gonna name it monica just to keep things as simple as possible all right next we're actually gonna take a look through this docker compose in this stack so starting up here at the top our first couple of lines the first line it's optional but it seems to be very common so we've just got three dashes there below that we've got a version for docker sorry version 3.4 docker compose basically each different version of docker compose has different uh different things that it can do different capabilities and this is what we're going to use for this one just to make sure that everything works properly after that we've got our services listed out and basically under this services we'll put all of the different containers that we're going to have in this particular setup our first one will be app um i would actually i would probably call that monica like so um basically this is also how we can refer to other containers within the stack or the docker compose so i'm gonna change that to monica our image is going to be monica uh oftentimes you'll see you know something like uh monica oops we just do you might see something like that or you might see a url in there or whatever the case is uh because we're using the official monika image we can actually just use monica as the image for this docker compose or this or this stack the network we've talked about this in previous videos but basically what this will do is put all of our containers on the same network and it makes managing uh our our reverse proxy later on a little bit easier so that's why we've got that uh so we're declaring the network as nginx proxy manager underscore default um and and we're actually going to declare that both here in the application as well as the database and then actually here at the bottom we're going to declare it yet again and just say hey this already exists it's out there just connect to it and that's that's kind of what this down here is for so let's come back up uh we're going to have a depends on line here under the service monika basically depends on tells the application to wait for whatever it's depending on in this case it's a database it's saying hey wait for the database to come up once the database has come up and you can connect to it then start your your your procedure to get things set up otherwise you'll you'll end up having some issues it will try to deploy at the exact same time as your container or your database they won't communicate properly and this just says hey wait till that other container is ready and then you can go ahead and set yourself up um below that we've got some ports for the sake of what we're doing here uh this is just kind of a technicality um as far as this 8465 over here basically that's just uh to make sure that there's no interference with other containers on uh on your docker instance uh we're actually going to end up using port 80 once this is set up anyway but that'll uh we'll take a look at that when it's actually time to do that below that we've got some environmental variables the first one is an app key you think of this as kind of like an encryption key this should just be a random string of characters uh there's a couple of different ways you could do this uh the first one is you could just mash your keyboard um as long as there's no special characters you should be good to go uh you could also there's there's a script you could run in in the terminal and it will generate a key for you or uh you could if you've got a password manager you could just come up here uh and click on generate and um you know make it as long or as short as you need it to be uh click on copy and then just paste that in there lots of different ways you can generate a key there um it's it's just a random string of characters uh below that we've got the database host in this case this is monica db and that's actually declared in uh in the uh the second uh service that we've got listed here in the docker compose or stack um our our database username is monica our password is listed out here um if you change these and it's probably a good idea for security reasons to do that you you should whatever you change it to here you should change it to down here as well and then the app environment production um if you don't have that things won't work right so just leave that alone your volume is basically where is this going to be stored on your uh on your load if we follow the the protocol that we've used in our previous container installs we're going to do home docker monica config and then everything after the colon there leave that alone that's what the container needs to do its thing so just don't touch that below that we've got our our second oops our second container which is that monica db um and for that we're going to use the uh my sequel version 5.7 again we're going to i tell it to be on this nginx proxy manager underscore default network just to make sure that things can communicate more effectively below that we've got some environmental variables yet again um we've got a mysql random root password basically what we're doing um sometimes you'll see uh where we've actually declared a specific password um i actually like this method better because we don't typically need root access to our database and doing this kind of ads it adds an additional layer of security so that somebody can't connect to your database container without the root password if we don't know what the password is if the password's not stored here they can't use the route against you to do whatever they're going to do so um so random password true i love that setting uh the mysql database uh basically that's the name of the database and the mysql user again the same thing there and the mysql password again same thing if you change it up above change it here next we've got volumes again we went home docker monica and then put the database in its own a separate subfolder and then restart always um you could say always or unless stopped uh that's completely up to you however you want to do that definitely do your own research and figure out which setting is is best for your use case and then again as we mentioned before uh we're just saying hey we're going to use an external network and that's fine so once we've got all of this set up and ready to go next thing we can do is come down here and click on deploy the stack we'll give this a couple of minutes to deploy and then we'll come back and take a look okay so our containers have deployed we're going to go ahead and click on the stack there and here we can see that we've got our our application and our database let's take a look at the logs here just real quick so right now it is going through the process of performing the migrations on the database um and it did that already that's good that actually happened really quickly and typically when we see apache 2-d foreground that means we're good to go okay so the next thing that we want to do here is actually head over to our nginx proxy manager our reverse proxy we're going to click on hosts and then click on proxy hosts we want to add a proxy host to this so we're going to go ahead and type in the domain name which will be monica dot dbtech.tips and press enter if you don't press enter or tab and you just click out you'll have to retype it it's weird but that's how it is uh so for our forward hostname slash ip what we're going to do is come back over here and we're going to grab the ip address of our monika container there we're going to paste that in there we're going to make sure there's no additional spaces our forward port will be 80. again the we're going to use the the container port not the docker port it's a weird little thing but that's how we're going to do this we can do that because of the nginx proxy manager underscore default setting that we put in our docker compose or our stack so once we've got that we can check all of these boxes here and the next thing we want to do is come over to ssl and then select request a new ssl we're going to check some of these boxes here we don't need to use a dns challenge and then we can click on i agree and click save okay so our ssl has been installed the next thing we want to do is verify that everything is good to go so what we're going to do is click on the little three dots over here we're going to click edit we're going to click on ssl and then we're just going to recheck these boxes this happens sometimes so go ahead and click on save there and then we should in theory be able to click right here and there we go so now we're going to go ahead and create an account for ourselves okay there we go i'm going to go ahead and close that and at this point we can actually start adding or importing our contacts and building up our own personal relationship manager via monica in docker on lenode so hopefully you found this video helpful if you did do me a favor give the video a thumbs up also if you're interested in more content like this get subscribed i've got more videos coming out here very soon hopefully um and again head down to the description for more information about uh different resources available to get more information about different things you can do with monica as well as finding that link that will give you a hundred dollars in free credit on lenode for 60 days so with all of that said i'm going to go ahead and wrap this up i want to thank you for spending some of your day with me today and i will talk to you guys in the next video [Music] you
Show moreExplore other deals cases
- Unlock Success by Closing Big Deals with airSlate SignNow
- Revolutionize Your Business with airSlate SignNow's Customer Contact Management System
- Empower Your Business to Convert Traffic into Leads with airSlate SignNow
- Transform Your Deal Governance with airSlate SignNow
- Streamline Your Sales Budget Planning Effortlessly
- Revolutionize Your Sales Funnel B2C Strategy with airSlate SignNow
- Streamline Your Sales Funnel CRM with airSlate SignNow
- Streamline Your Sales Process with airSlate SignNow