Named fields
Create persistent named form fields that allow automated extraction, accurate mapping to database fields, and consistent behavior across multiple templates and versions.


Labeling PDFs streamlines data capture, reduces manual entry errors, and enables precise field mapping for integrated systems. Clear labels improve searchability and make audits and automated processing faster and more reliable.

IT administrators configure label templates, control field-level permissions, and set integration parameters so that labeled PDFs map consistently to backend systems and maintain compliance with organizational policies.
Office managers create and apply labeled templates for routine forms, ensuring users place labels correctly and that documents remain searchable and ready for automated processing or archival.
Legal, HR, sales, and operations teams frequently label PDFs to standardize data capture and streamline workflows.
Consistent labeling benefits IT and compliance teams by making automation, retention, and auditing processes simpler and more predictable.
Create persistent named form fields that allow automated extraction, accurate mapping to database fields, and consistent behavior across multiple templates and versions.
Apply show/hide or validation rules to labels so fields appear only when relevant and enforce data formats like dates, phone numbers, or numeric codes before submission.
Store labeled templates centrally to ensure repeatable use, enforce naming standards, and reduce setup time for commonly used documents across teams.
Apply labels across multiple documents or batch-send labeled templates to large recipient lists to streamline mass processing and reduce manual configuration.
Add semantic labels and alternate text to make labeled PDFs screen-reader friendly and compliant with accessibility standards used in public sector and education.
Use prebuilt connectors to push labeled field data into CRMs, ERPs, and document management systems for immediate use in downstream workflows.
Integrating labeled PDFs with Google Docs and Drive lets teams auto-populate templates, control access through Drive permissions, and sync signed documents to shared team folders for centralized management.
Connect labeled fields directly to CRM records so signatures and form data update customer profiles, create tasks, or trigger follow-up workflows without manual copy-paste operations.
Map labeled document outputs to Dropbox or other storage providers for long-term retention, standardized naming, and organized archival that aligns with retention policies.
Build and version labeled templates with placeholders, conditional fields, and role-specific labels so teams can reuse standardized documents while preserving required data capture.

| Workflow Setting or Configuration Name | Default value or sample configuration |
|---|---|
| Default Label Placement in Template | Top-left, center, or relative coordinates |
| Field Validation Rules | Required, regex, or format enforcement |
| Signer Role Assignment Rules | Role-based field locking and editing |
| Data Export Mapping | Map labels to CRM or CSV fields |
| Reminder and Expiration Settings | Reminder cadence and expiration window |
Check compatibility for desktop, tablet, and mobile before applying labels to ensure consistent placement and usability across devices.
When designing labels, preview templates in supported browsers and mobile apps to account for screen scaling, touch targets, and PDF viewer rendering differences that can shift label positions or affect usability on small screens.
Patient intake forms are labeled for name, insurance ID, and consent
Resulting in faster check-in and reduced manual entry errors for clinical workflows.
Admissions forms are labeled for student identifiers and consent choices
Leading to more accurate student records and faster enrollment workflows.
| Feature or Capability Being Compared | signNow | DocuSign | Adobe Acrobat Sign |
|---|---|---|---|
| Add labels to PDF | |||
| Bulk Send Support | |||
| Mobile form editing | Limited | ||
| Audit trail detail | Full audit trail | Full audit trail | Full audit trail |
Review templates yearly for accuracy and compliance
7 years recommended for many contracts
Follow FERPA and institutional policies
Follow HIPAA and state rules
Quarterly or annual security reviews
| Pricing Plan Comparison | signNow | DocuSign | Adobe Acrobat Sign | HelloSign | PandaDoc |
|---|---|---|---|---|---|
| Entry-level monthly price | $8/user/mo | $10/user/mo | $9.99/user/mo | $15/user/mo | $19/user/mo |
| Included signatures per month | Unlimited templates | Limited per plan | Unlimited on some plans | Limited | Limited |
| Advanced authentication | 2FA and SAML | 2FA and SAML | 2FA and SAML | 2FA only | 2FA only |
| Template library limits | Unlimited templates | Limited on basic | Included templates | Included | Included |
| Enterprise availability | Yes, enterprise plans | Yes, enterprise plans | Yes, enterprise plans | Yes | Yes |
Labels are short descriptions or tips for completing fields. They help recipients understand what information they should provide in each field. Labels also allow signers to auto-fill forms.
Open your document in the editor and insert fillable fields. Choose from different types of fields in the left-hand toolbar. Please note that labels are only available for Text fields, Date/Time fields, and Dropdown fields.
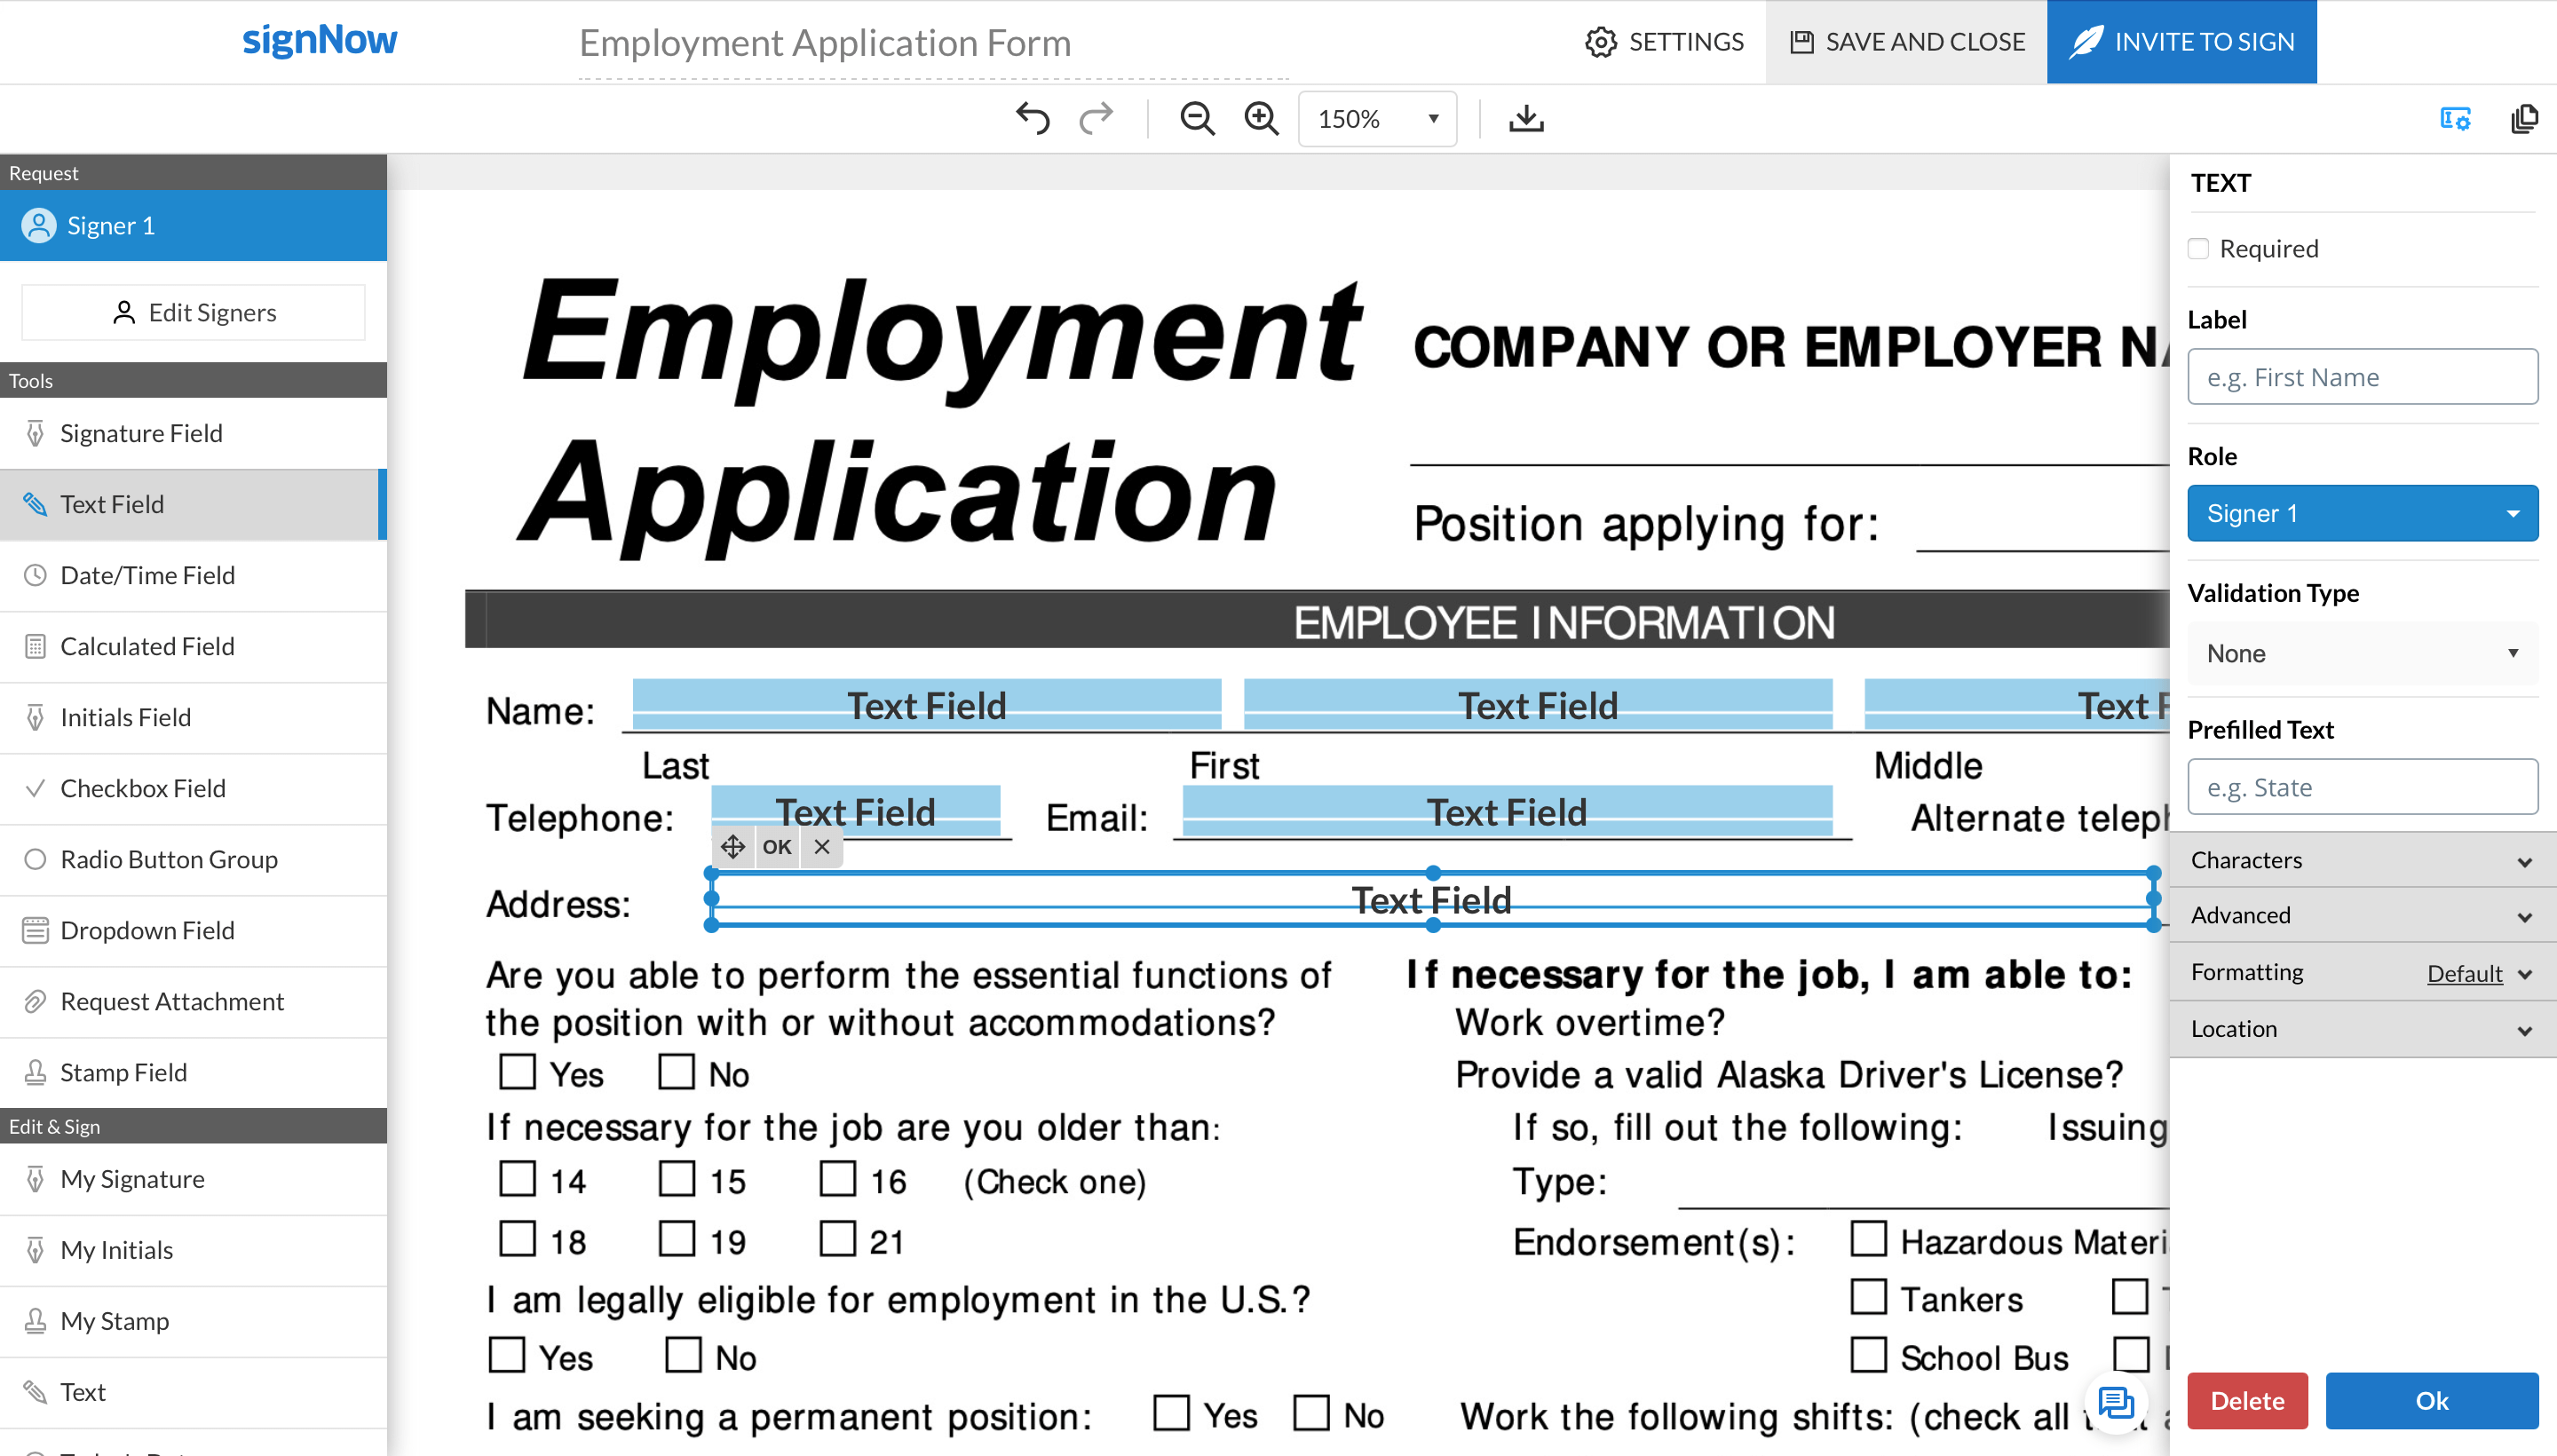
Select a Text, Date/Time, or Dropdown field in your document and enter a text label in the Label field, which appears in the settings sidebar on the right. Click Ok to save your label.
Note: Think of the most accurate and concise label you can come up with (e.g., First Name/First, MI, Last, Today’s date, Select one answer, etc.). Your label should unambiguously communicate what data needs to be provided in a field and in what format.
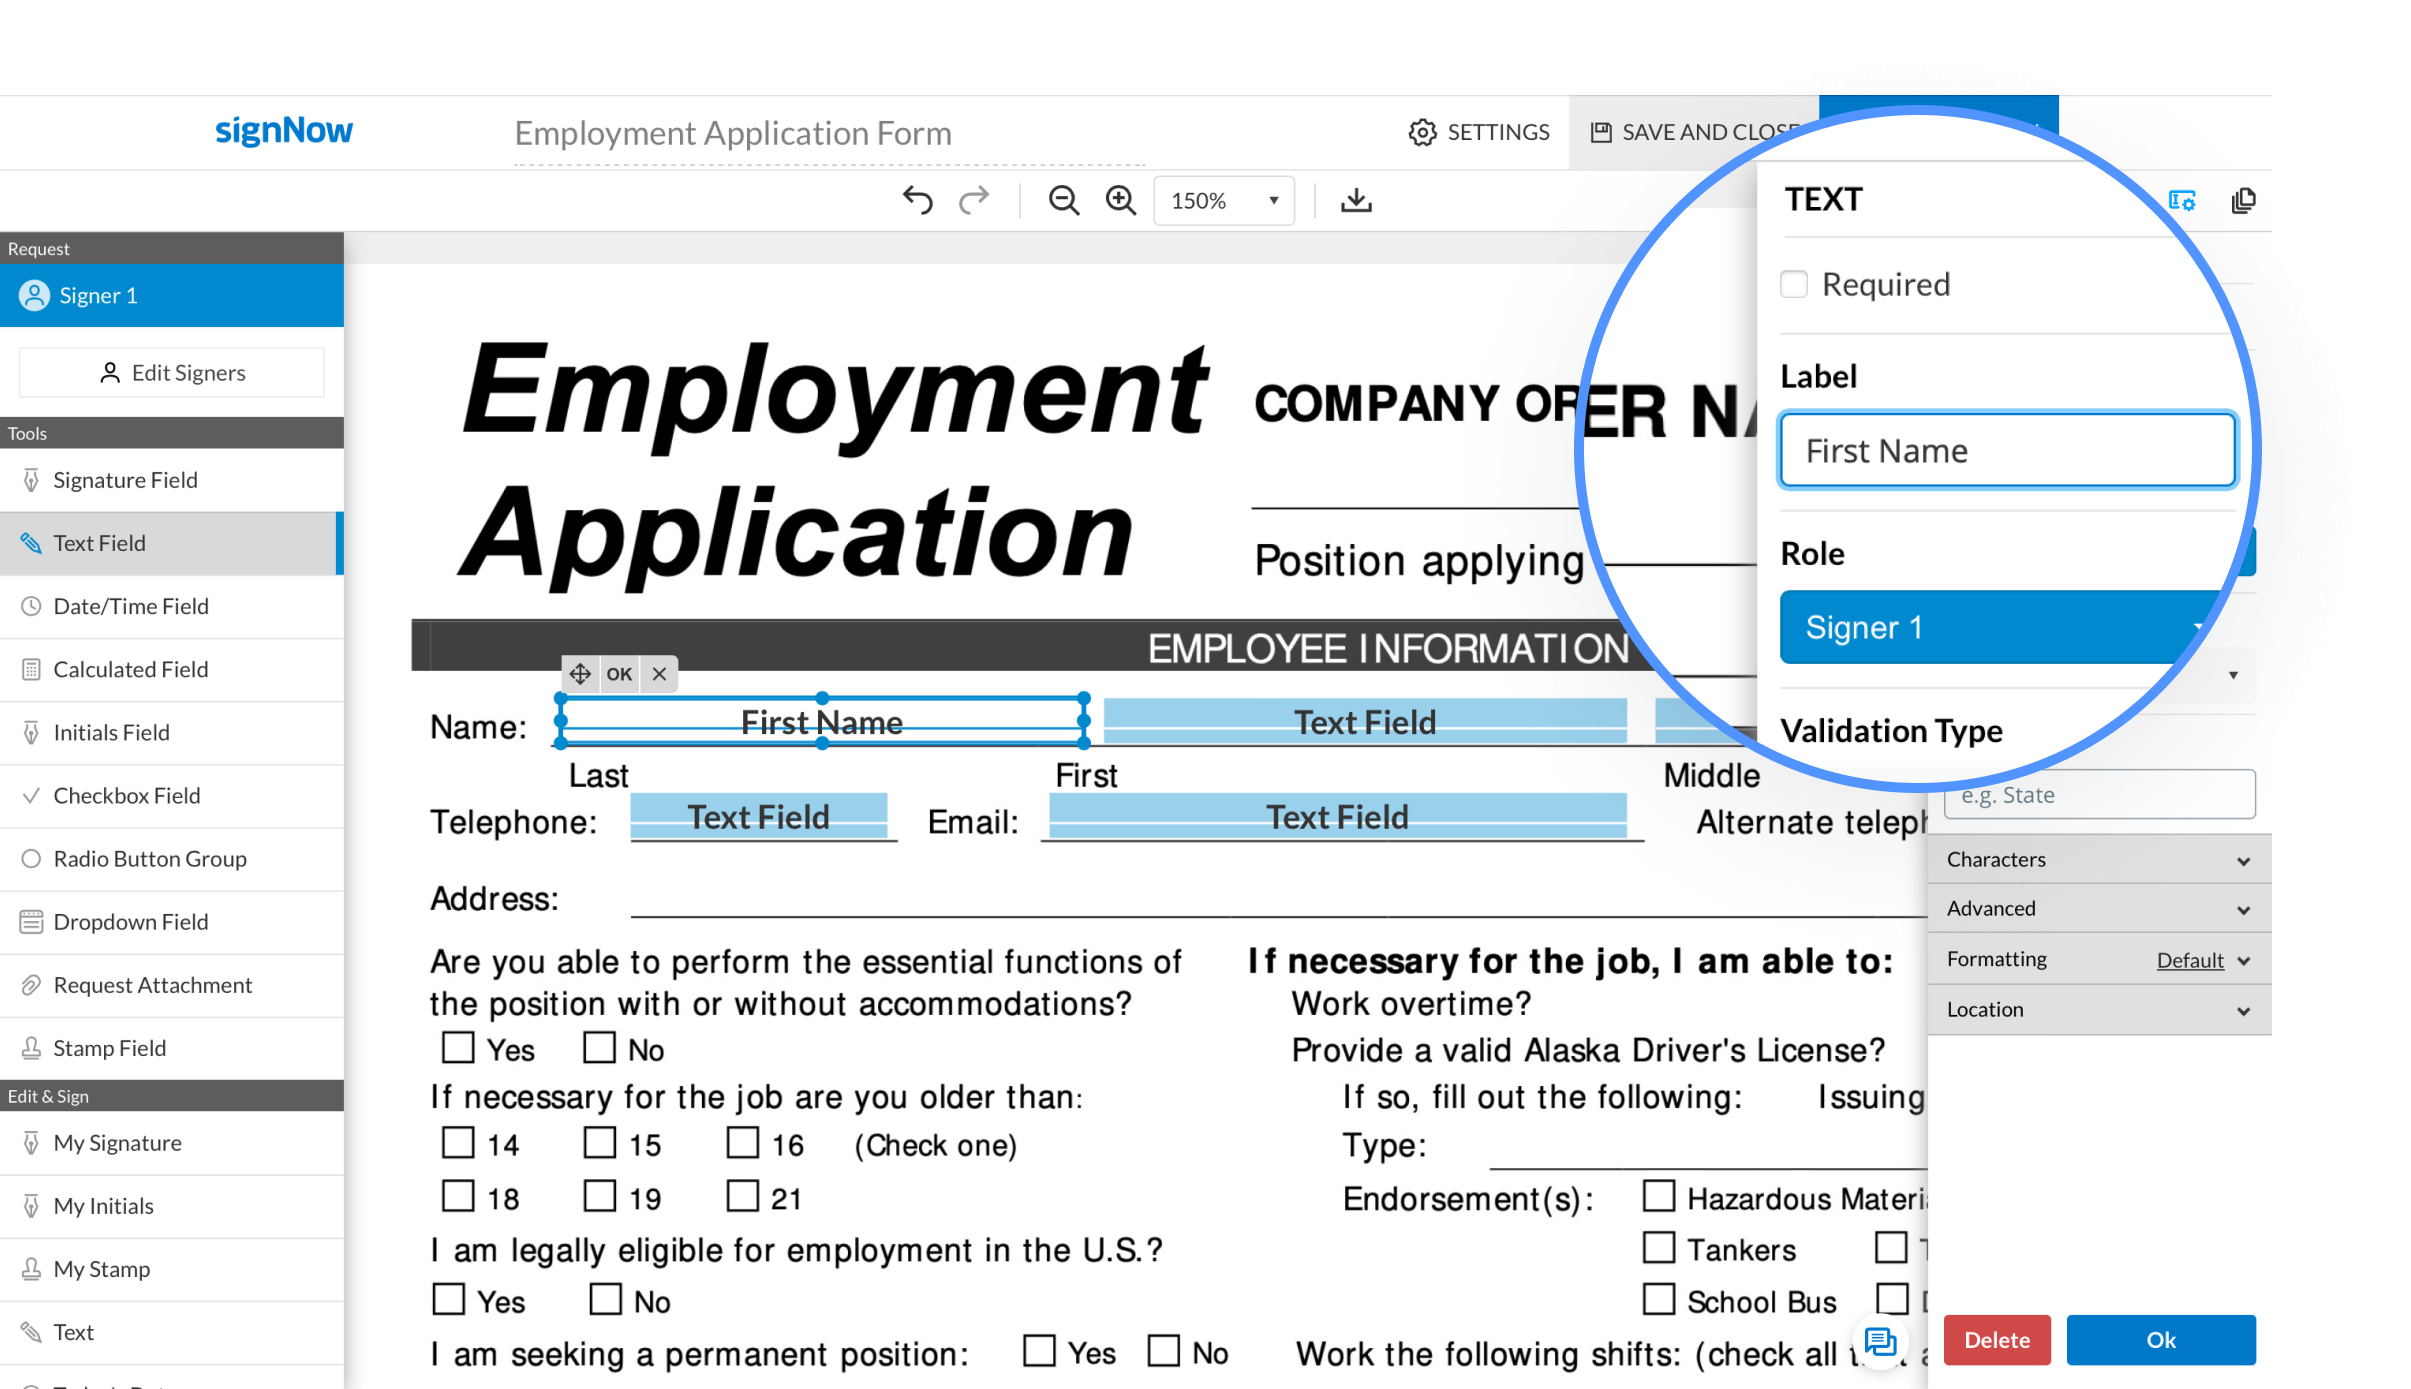
Set labels for all fillable fields in your document.
Please note that signers will be able to auto-fill identically labeled fields with one click throughout the entire document.


