Turn on Background Fetch in Your iOS Device for Seamless Document Tracking
How to turn on background fetch on iPhone or iPad
Background fetch allows airSlate SignNow to periodically “fetch” document updates from the server while the app is running in the background. With this feature turned on, you no longer need to manually refresh your Documents page to see any updates, such as signature invites, signed documents, and so on.
To activate this feature, make sure Background App Refresh is turned on in the settings of your iOS device. Then, follow these instructions to turn on background fetch:
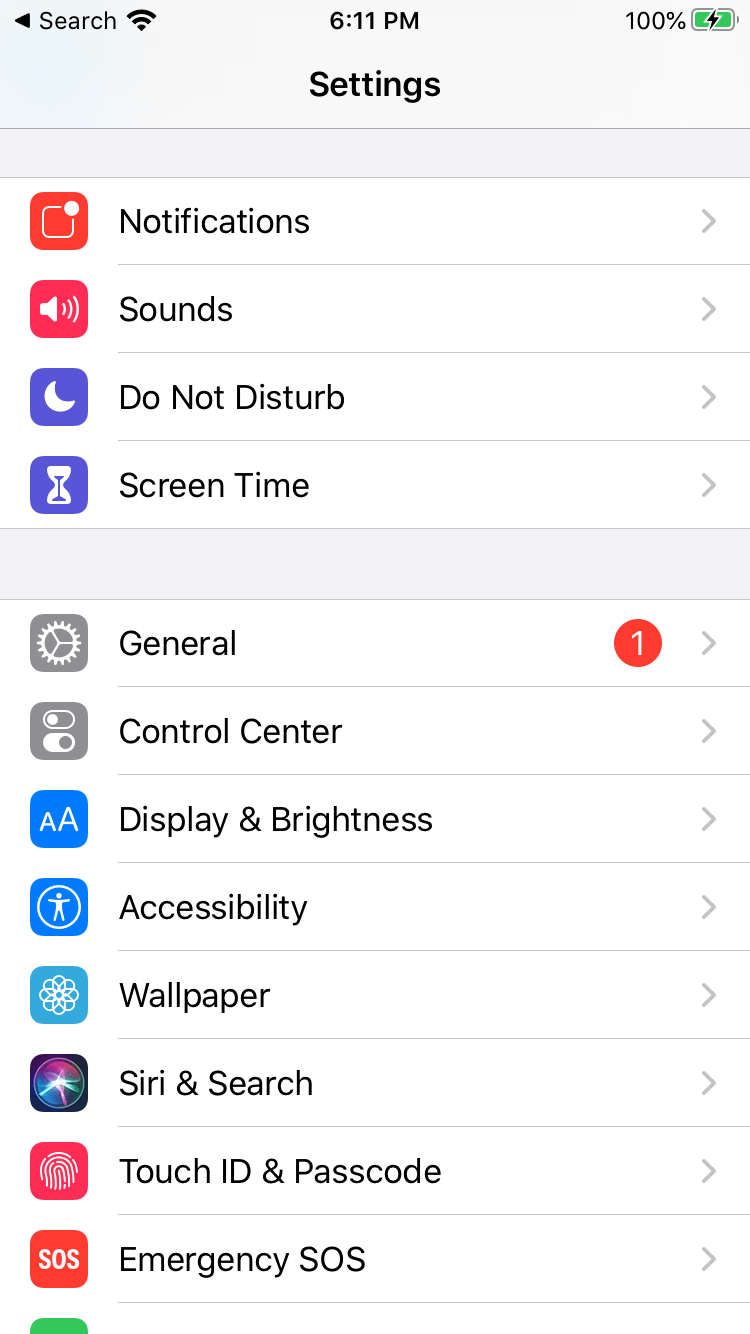
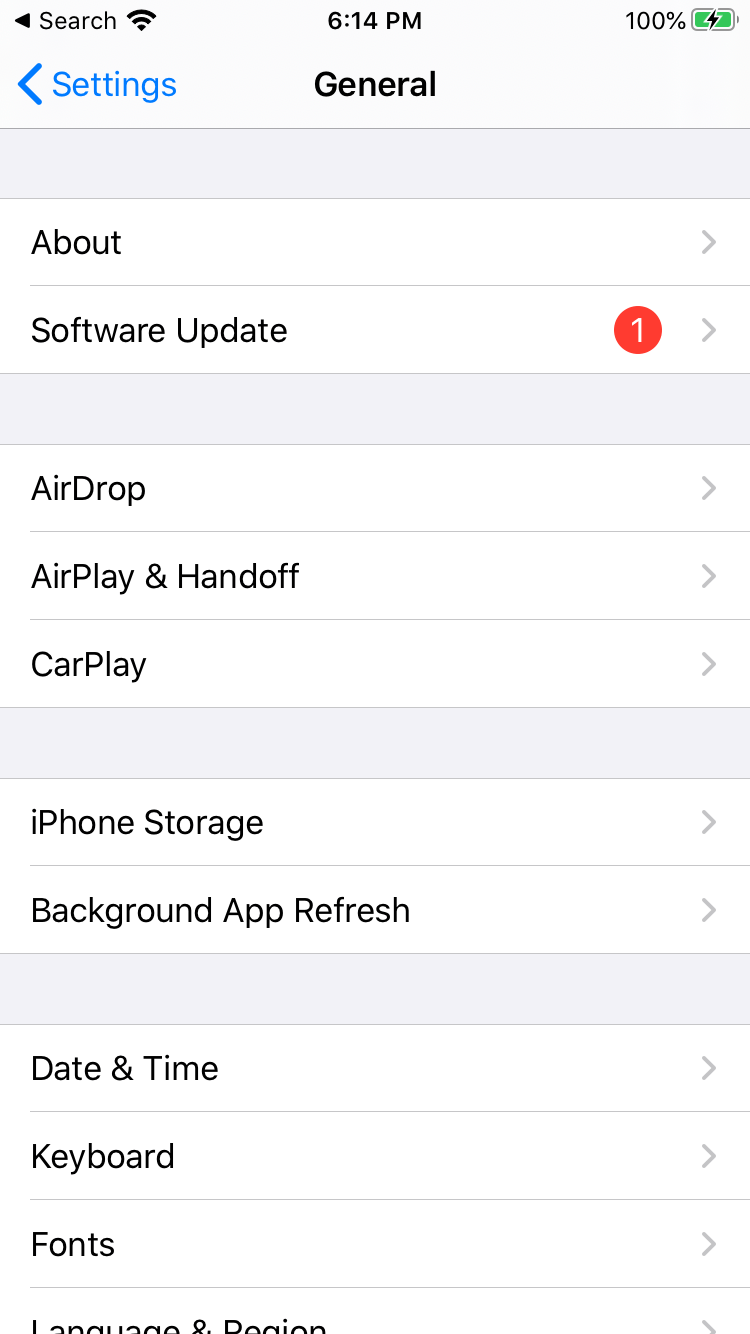
1. Go to the Settings app and select General.
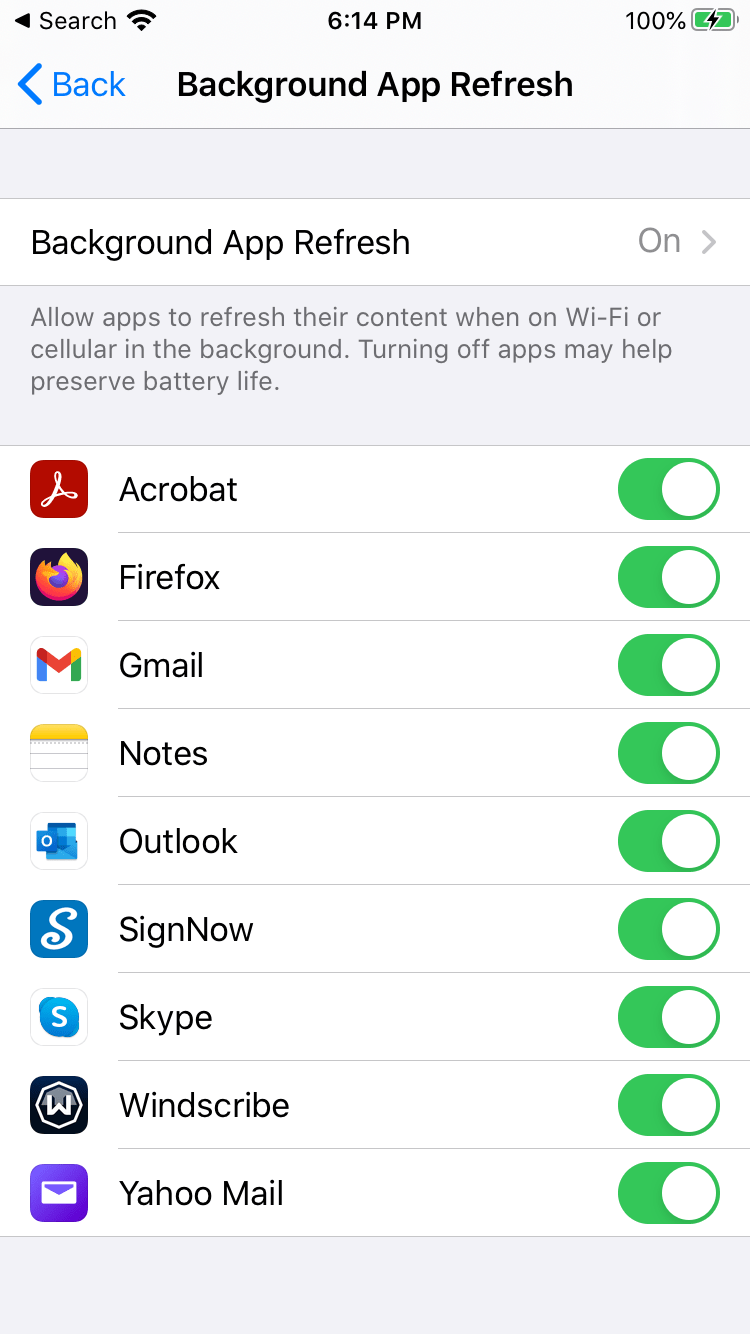
2. Select Background App Refresh.
3. Switch on the background fetch feature for the airSlate SignNow application.
See airSlate SignNow eSignatures in action
Choose a better solution
Take routine paperwork off your plate with airSlate SignNow
Online signature solution
Fillable template creator
Document templates
eSignature API
App-native integrations
Ability to turn on background fetch in your ios device
Our user reviews speak for themselves
airSlate SignNow solutions for better efficiency
Why choose airSlate SignNow
-
Free 7-day trial. Choose the plan you need and try it risk-free.
-
Honest pricing for full-featured plans. airSlate SignNow offers subscription plans with no overages or hidden fees at renewal.
-
Enterprise-grade security. airSlate SignNow helps you comply with global security standards.
Your step-by-step guide — turn on background fetch in your ios device
The crucial conceptual advantage of the airSlate SignNow eSignature solution for enterprise automation is a single data area that goes beyond the company but provides a distinctive business procedure. You may turn on the Kiosk Mode on iPad to collect signatures, give an invitation link to your companions, suppliers or teammates. Our innovative solution simplifies the analytical and audit steps. It lets you control the workflow much more flexibly without the assistance of additional . You may indirectly strengthen the relationship between partners and allow them to boost customer satisfaction.
How you can turn on the Kiosk Mode on iPad to collect signatures with airSlate SignNow:
- Create your profile free of charge or log in if you already have one particular.
- You can sign in with the Single sign-on feature if you possess the airSlate SignNow profile.|If you possess the airSlate SignNow account, you can sign in using the Single sign-on feature
- Transfer the data file from your portable or desktop gadget.
- In addition, you can upload the necessary file from your cloud storage. Our browser-based platform works with probably the most recommended repositories: Google Drive, OneDrive, DropBox.
- Easily make changes to your form sophisticated but straightforward PDF Editor.
- Type the textual content material, include graphics, leave your annotations or comments, etc..
- You can set up fillable elements of various kinds: text message or date, calculated or dropdown, and much more.
- Organize and put in place the attachment request.
- Insert the Signature Field for emailing to sign and gather in-person or multiple eSignatures. You may self-sign the form if relevant.
- Complete editing using the Done button and go on to turn on the Kiosk Mode on iPad to collect signatures.
airSlate SignNow is the best decision for automation of business procedures and solution to turn on the Kiosk Mode on iPad to collect signatures and speedy challenges concluding for companies of all levels when it comes to workers and complexity. Users can interact both externally and internally with providers and customers. Check out all of the benefits now!
How it works
See exceptional results Turn on background fetch in your iOS device for seamless document tracking
Get legally-binding signatures now!
FAQs
-
Can I eSign documents on a mobile device?
Yes, airSlate SignNow enables you to eSign and manage documents from any device, whether it is your PC or smartphone. If you are a mobile user, it is advisable to download the airSlate SignNow app for Android or iOS from the Google Play Market or Apple Store, respectively. -
Can I use airSlate SignNow without downloading the mobile app?
Sure! If you don’t want to install the mobile app, you can use the web application on your mobile device without any additional software. airSlate SignNow runs on any popular internet browser. -
How do I get the airSlate SignNow mobile app for iPhone or iPad?
If you are using an iOS device, go to the Apple Store and enter “airSlate SignNow” in the search bar. Once you find the app, tap Get. -
Can I manage my teams and access shared documents in the airSlate SignNow app for iOS?
Yes. Tap on the hamburger menu in the top left corner of the app’s dashboard and select Teams. You can then choose the team you’d like to manage, review its members, and access shared assets. -
What is Kiosk Mode?
Kiosk Mode is an exclusive feature only available in the airSlate SignNow mobile apps for iOS and Android. It allows you to get your documents signed in person at events or front desks using a tablet or smartphone. A new document copy will be automatically generated from the selected template for every new signer. Thus, the signing process is very similar to signing a physical document. -
How do I enable Kiosk Mode on an iPhone or iPad?
In the airSlate SignNow app for iOS, tap the hamburger menu in the top left corner and select Kiosk Mode. Then, choose the template that you will use to automatically generate document copies for eSigning. You will also need to create a four-digit code that will be used to exit Kiosk Mode securely. -
Will my documents be accessible in the airSlate SignNow web app if I upload them with the iOS app and vice versa?
Of course! As long as you are using the same airSlate SignNow account, you can access your documents from either app at any time. All changes are synchronized across both apps. -
How do I add my eSignature to a document on iPhone?
Upload your document to the airSlate SignNow app by tapping Create in the bottom panel. Tap on the document you have uploaded to open it in the editor. Select Signature in the bottom toolbar and tap anywhere on the document. Tap Add Signature at the bottom of the page, draw your signature, and tap Done. Your signature will appear on the document. You can then adjust its size and placement as needed. To save your document, tap Done in the top right corner of the editor’s interface. -
What does email push mean?
Push email is an email system that provides an always-on capability, in which new email is actively transferred (pushed) as it arrives by the mail delivery agent (MDA) (commonly called mail server) to the mail user agent (MUA), also called the email client. -
How do I get my email to push on my iPhone?
Launch the Settings app. Tap on Mail, Contacts, Calendars. Scroll down underneath the Account section. Click on the Fetch New Data, and see if the Push is On. Click on every Account. Choose and set the schedule to Manual, Fetch, or Push. -
How do I get email notifications to push on my iPhone?
Tap on the Settings icon from your Home Screen. Scroll to find and tap on Accounts & Passwords. Tap on Fetch New Data. Find the toggle next to Push. ... Once Push is enabled, scroll down to locate your Mail Account from within the list of accounts and tap on it. -
How do I get my emails immediately on iPhone 8?
From the Home screen, navigate: Settings > Accounts & Passwords. For iOS 12, navigate: Settings > Passwords & Accounts. Tap Fetch New Data. Tap the Push switch to turn on or off . Select an account. Select a schedule option then tap Fetch New Data (upper-left). ... Select a frequency option: -
Why is my email not pushing on my iPhone?
Firstly, when iPhone mail push is not working, you need to set the Fetch New Data feature and turn the Push option on. This will help you getting rid of the problem. Tap on 'Settings' first and go to 'Accounts & Passwords'. ... Subsequently, open the mail account and turn on the 'Push' option there too. -
How do I get my email to automatically update on my iPhone?
Launch the "Settings" app on your iPhone and tap the "Mail, Contacts, Calendars" button. Tap the "Every 15 Minutes" button to instruct your iPhone to automatically fetch new emails at 15-minute intervals. Alternatively, tap the appropriate buttons to activate "Every 30 Minutes" and "Hourly" options. -
Why does my email not automatically update on my iPhone?
Go to Settings > Accounts & Passwords. You have to scroll down to the bottom section to locate the option of Fetch New Data and ensure that you select Push for Emails. ... This will condition the iPhone to check and refresh your mail once every fifteen minutes instead of the hourly schedule on default. -
Why is my Outlook email not updating automatically?
Click Account Settings, and then click Account Settings. On the E-mail tab, click the Exchange account, and then click Change. Under Microsoft Exchange server, select or clear the Use Cached Exchange Mode check box. Exit and then restart Microsoft Outlook. -
How do I change how often my iPhone checks for email?
Open the Settings app. Go into the Passwords & Security section of the settings. Tap Fetch New Data from the bottom of the screen. Deselect Push at the top of the screen. -
How do I get my email to automatically update on my iPhone 8?
From the Home screen, navigate: Settings > Accounts & Passwords. For iOS 12, navigate: Settings > Passwords & Accounts. Tap Fetch New Data. Tap the Push switch to turn on or off . Select an account. Select a schedule option then tap Fetch New Data (upper-left). ... Select a frequency option: -
How do I make my iPhone fetch emails faster?
Open Settings and tap \u201cMail, Contacts, Calendars\u201d, then tap \u201cFetch New Data\u201d Choose the \u201cAdvanced\u201d option to see a list of mail accounts configured with Mail app in iOS and to see if they are using Push, Fetch, or Manual. -
Which is faster push or fetch?
Fetch is typically set on a timed basis, while Push happens in real time. Fetch will use up your battery faster, as it requires your device to check the email server, while Push only needs to let the email server know where to send the notifications.
What active users are saying — turn on background fetch in your ios device
Frequently asked questions
How do you generate a document and apply an electronic signature to it?
How do I add an electronic signature to a Word document?
How can I easily get an electronic signature created in Word?
Get more for turn on background fetch in your ios device
The ins and outs of eSignature
Find out other turn on background fetch in your ios device
- Unlock eSignature Legitimateness for Business Associate ...
- Unlock eSignature Legitimateness for Payroll Deduction ...
- ESignature Legality for Non-Compete Agreement in UAE
- Ensure eSignature Legality for Advertising Agreement in ...
- ESignature Lawfulness for Cease and Desist Letter in ...
- Unlock the Power of eSignature Legitimateness for ...
- ESignature Legitimateness for Business Associate ...
- ESignature Legitimateness for Non-Compete Agreement in ...
- Enhance eSignature Legitimateness for Polygraph Consent ...
- Unlock the power of eSignature licitness for Stock ...
- Unlocking the Power of Digital Signature Legality for ...
- Ensuring Compliance with Australian Digital Signature ...
- Digital Signature Legitimacy for Sick Leave Policy in ...
- Enhance Digital Signature Legitimateness for Commercial ...
- Digital Signature Legitimateness for Addressing ...
- Ensuring digital signature licitness for Toll ...
- Understanding Electronic Signature Legality for ...
- Ensuring Electronic Signature Lawfulness for Contract ...
- Understanding the Lawfulness of Electronic Signatures ...
- Unlocking the Power of Electronic Signature Legitimacy ...


