Signature Provisoire Avec airSlate SignNow
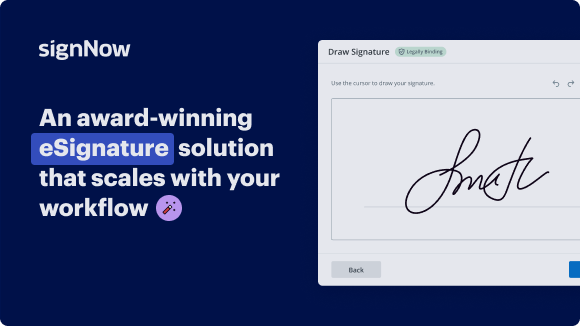
Solution eSignature primée


Obtenez les capacités de eSignature puissantes dont vous avez besoin auprès de l'entreprise en laquelle vous avez confiance
Choisissez le service professionnel conçu pour les pros
Configurez l'API eSignature facilement
Collaborez mieux ensemble
Signature provisoire, en quelques minutes
Réduisez votre délai de clôture
Gardez les données importantes en sécurité
Découvrez les signatures électroniques airSlate SignNow en action


Solutions airSlate SignNow pour une meilleure efficacité
Les avis de nos utilisateurs parlent d'eux-mêmes


Pourquoi choisir airSlate SignNow
-
Essai gratuit de 7 jours. Choisissez le forfait dont vous avez besoin et essayez-le sans risque.
-
Tarification honnête pour des forfaits complets. airSlate SignNow propose des abonnements sans frais supplémentaires ni frais cachés lors du renouvellement.
-
Sécurité de niveau entreprise. airSlate SignNow vous aide à respecter les normes de sécurité mondiales.

Votre guide étape par étape — draft signature
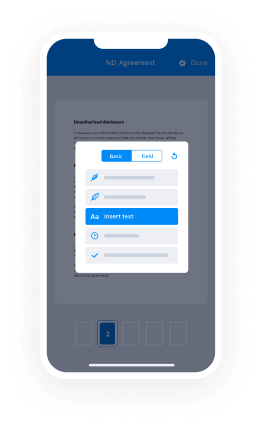
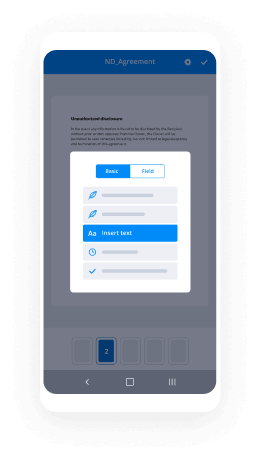
En utilisant la signature électronique d'airSlate SignNow, toute entreprise peut augmenter ses flux de signature et signer électroniquement en temps réel, offrant une meilleure expérience aux clients et aux employés. Rédigez une signature en quelques étapes simples. Nos applications mobiles portables rendent le travail en déplacement possible, même hors ligne ! Signez électroniquement depuis n'importe où dans le monde et rendez les tâches plus rapides.
Suivez le guide étape par étape pour rédiger une signature :
- Connectez-vous à votre compte airSlate SignNow.
- Trouvez votre document dans vos dossiers ou importez-en un nouveau.
- Accédez à la modification du document en utilisant la liste Outils.
- Déposez des zones à remplir, ajoutez du texte et signez-le.
- Listez plusieurs signataires en utilisant leurs e-mails, configurez la séquence de signature.
- Spécifiez quels utilisateurs peuvent recevoir une copie signée.
- Utilisez Options Avancées pour limiter l'accès au modèle et définir une date d'expiration.
- Appuyez sur Enregistrer et Fermer une fois terminé.
De plus, il existe des fonctions plus avancées pour rédiger une signature. Ajoutez des utilisateurs à votre espace de travail collaboratif, parcourez les équipes et surveillez la coopération. De nombreuses personnes aux États-Unis et en Europe reconnaissent qu'une solution qui rassemble tout en un seul endroit numérique unifié est exactement ce dont les entreprises ont besoin pour maintenir des flux de travail fluides. L'API REST d'airSlate SignNow vous permet d'intégrer des signatures électroniques dans votre application, site web, CRM ou cloud. Essayez airSlate SignNow et profitez de flux de signature électronique plus rapides, plus faciles et globalement plus efficaces !
Comment ça marche
Fonctionnalités airSlate SignNow appréciées par les utilisateurs


Découvrez des résultats exceptionnels signature provisoire avec airSlate SignNow

Comment soumettre et signer électroniquement un document en ligne
Essayez la méthode la plus rapide pour rédiger une signature. Évitez les flux de travail papier et gérez vos documents directement depuis airSlate SignNow. Remplissez et partagez vos formulaires depuis le bureau ou travaillez sans effort en déplacement. Aucune installation ou logiciel supplémentaire requis. Toutes les fonctionnalités sont disponibles en ligne, il suffit de se rendre sur signnow.com et de créer votre propre flux de signature électronique.
Un bref guide sur comment rédiger une signature en quelques minutes
- Créez un compte airSlate SignNow (si vous ne vous êtes pas encore inscrit) ou connectez-vous avec votre Google ou Facebook.
- Cliquez sur Télécharger et sélectionnez l’un de vos documents.
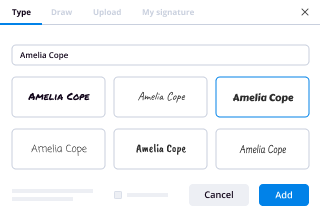
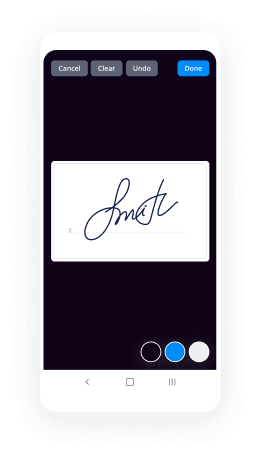
- Utilisez l’outil Ma Signature pour créer votre signature unique.
- Transformez le document en un PDF dynamique avec des champs à remplir.
- Remplissez votre nouveau formulaire et cliquez sur Terminé.
Une fois terminé, envoyez une invitation à signer à plusieurs destinataires. Obtenez un contrat exécutoire en quelques minutes, quel que soit l’appareil. Découvrez plus de fonctionnalités pour créer des PDFs professionnels ; ajoutez des champs à remplir, rédigez une signature et collaborez en équipe. La solution de signature électronique offre un processus fiable et fonctionne selon la certification SOC 2 Type II. Assurez-vous que tous vos enregistrements sont protégés et qu’aucune personne ne peut les modifier.
Comment signer électroniquement un PDF dans Google Chrome
Vous cherchez une solution pour rédiger une signature directement depuis Chrome ? L’extension airSlate SignNow pour Google Chrome est là pour vous aider. Trouvez un document et, directement depuis votre navigateur, ouvrez-le dans l’éditeur. Ajoutez des champs à remplir pour le texte et la signature. Signez le PDF et partagez-le en toute sécurité conformément au RGPD, à la certification SOC 2 Type II et plus encore.
En utilisant ce bref guide ci-dessous, étendez votre flux de travail de signature électronique dans Google et rédigez une signature :
- Allez sur le Chrome Web Store et trouvez l’extension airSlate SignNow.
- Cliquez sur Ajouter à Chrome.
- Connectez-vous à votre compte ou inscrivez-vous en un nouveau.
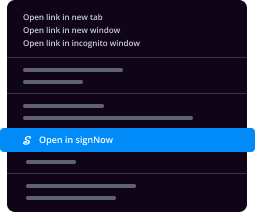
- Téléchargez un document et cliquez sur Ouvrir dans airSlate SignNow.
- Modifiez le document.
- Signez le PDF en utilisant l’outil Ma Signature.
- Cliquez sur Terminé pour enregistrer vos modifications.
- Invitez d’autres participants à signer en cliquant sur Inviter à signer et en sélectionnant leurs e-mails/noms.
Créez une signature intégrée à votre flux de travail pour rédiger une signature et faire signer des PDFs en quelques minutes. Dites adieu aux piles de papiers sur votre lieu de travail et commencez à économiser du temps et de l’argent pour des tâches plus importantes. Choisir l’extension Google airSlate SignNow est une option intelligente et pratique avec de nombreux avantages.
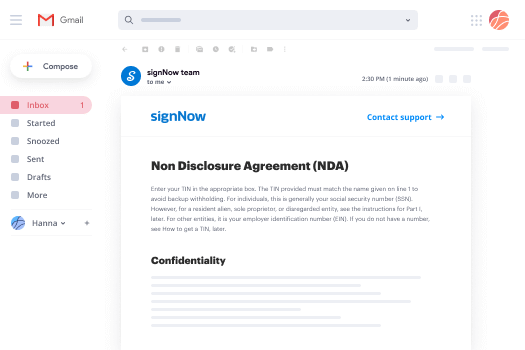
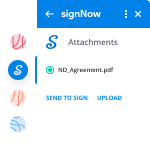

Comment signer une pièce jointe dans Gmail
Si vous êtes comme la plupart, vous avez l’habitude de télécharger les pièces jointes que vous recevez, de les imprimer puis de les signer, n’est-ce pas ? Eh bien, nous avons une bonne nouvelle pour vous. Signer des documents dans votre boîte mail devient beaucoup plus facile. L’add-on airSlate SignNow pour Gmail vous permet de rédiger une signature sans quitter votre boîte de réception. Faites tout ce dont vous avez besoin ; ajoutez des champs à remplir et envoyez des demandes de signature en quelques clics.
Comment rédiger une signature dans Gmail :
- Recherchez airSlate SignNow pour Gmail dans le G Suite Marketplace et cliquez sur Installer.
- Connectez-vous à votre compte airSlate SignNow ou créez-en un nouveau.
- Ouvrez votre e-mail avec le PDF que vous devez signer.
- Cliquez sur Télécharger pour enregistrer le document dans votre compte airSlate SignNow.
- Cliquez sur Ouvrir le document pour ouvrir l’éditeur.
- Signez le PDF en utilisant Ma Signature.
- Envoyez une demande de signature aux autres participants avec le bouton Envoyer pour signer.
- Entrez leur e-mail et appuyez sur OK.
En conséquence, les autres participants recevront des notifications leur demandant de signer le document. Pas besoin de télécharger le fichier PDF encore et encore, il suffit de rédiger une signature en quelques clics. Cet add-on est adapté à ceux qui préfèrent se concentrer sur des objectifs plus précieux plutôt que de perdre du temps inutilement. Améliorez votre routine quotidienne avec l’application de signature électronique primée.

Comment signer un modèle PDF en déplacement sans application
Pour de nombreux produits, conclure des affaires en déplacement signifie installer une application sur votre téléphone. Nous sommes heureux de dire qu’avec airSlate SignNow, la signature en déplacement est plus rapide et plus facile en éliminant le besoin d’une application mobile. Pour signer électroniquement, ouvrez votre navigateur (n’importe quel navigateur mobile) et accédez directement à airSlate SignNow et à tous ses puissants outils de signature électronique. Modifiez des documents, rédigez une signature et plus encore. Aucune installation ou logiciel supplémentaire requis. Concluez votre affaire de n’importe où.
Consultez nos instructions étape par étape qui vous apprennent comment rédiger une signature.
- Ouvrez votre navigateur et allez sur signnow.com.
- Connectez-vous ou inscrivez-vous avec un nouveau compte.
- Téléchargez ou ouvrez le document que vous souhaitez modifier.
- Ajoutez des champs à remplir pour le texte, la signature et la date.
- Tracez, tapez ou téléchargez votre signature.
- Cliquez sur Enregistrer et Fermer.
- Cliquez sur Inviter à signer et entrez l’e-mail d’un destinataire si vous souhaitez que d’autres signent le PDF.
Travailler sur mobile n’est pas différent de travailler sur un ordinateur de bureau : créez un modèle réutilisable, rédigez une signature et gérez le flux comme vous le feriez normalement. En quelques clics, obtenez un contrat exécutoire que vous pouvez télécharger sur votre appareil et envoyer aux autres. Cependant, si vous souhaitez une application, téléchargez l’application mobile airSlate SignNow. Elle est sécurisée, rapide et possède un excellent design. Profitez de flux de travail de signature électronique fluides depuis le lieu de travail, dans un taxi ou en avion.

Comment signer un fichier PDF avec un iPad
iOS est un système d’exploitation très populaire doté d’outils natifs. Il vous permet de signer et d’éditer des PDFs en utilisant Preview sans logiciel supplémentaire. Cependant, aussi géniale que soit la solution d’Apple, elle ne propose pas d’automatisation. Améliorez les capacités de votre iPhone en profitant de l’application airSlate SignNow. Utilisez votre iPhone ou iPad pour rédiger une signature et plus encore. Introduisez l’automatisation de la signature électronique dans votre flux de travail mobile.
Signer sur un iPhone n’a jamais été aussi facile :
- Recherchez l’application airSlate SignNow dans l’App Store et installez-la.
- Créez un nouveau compte ou connectez-vous avec votre Facebook ou Google.
- Cliquez sur Plus et téléchargez le fichier PDF que vous souhaitez signer.
- Tapez sur le document à l’endroit où vous souhaitez insérer votre signature.
- Explorez d’autres fonctionnalités : ajoutez des champs à remplir ou rédigez une signature.
- Utilisez le bouton Enregistrer pour appliquer les modifications.
- Partagez vos documents par e-mail ou via un lien de signature.
Créez des PDFs professionnels directement depuis votre application airSlate SignNow. Optimisez votre temps et travaillez de n’importe où ; à la maison, au bureau, dans un bus ou un avion, et même à la plage. Gérez facilement tout le flux de documents : créez des modèles réutilisables, rédigez une signature et travaillez sur des fichiers PDF avec des partenaires commerciaux. Transformez votre appareil en un outil puissant pour réaliser des transactions.
Comment signer électroniquement un fichier PDF en utilisant Android
Pour les utilisateurs Android, pour gérer des documents depuis leur téléphone, ils doivent installer un logiciel supplémentaire. Le Play Market est vaste et regorge d’options, donc trouver une bonne application n’est pas trop difficile si vous avez le temps de parcourir des centaines d’applications. Pour gagner du temps et éviter la frustration, nous suggérons airSlate SignNow pour Android. Stockez et modifiez des documents, créez des rôles de signature, et même rédigez une signature.
Les 9 étapes simples pour optimiser votre flux de travail mobile :
- Ouvrez l’application.
- Connectez-vous avec vos comptes Facebook ou Google ou inscrivez-vous si vous ne l’avez pas encore fait.
- Cliquez sur + pour ajouter un nouveau document en utilisant votre caméra, stockage interne ou cloud.
- Tapez n’importe où sur votre PDF et insérez votre signature électronique.
- Cliquez sur OK pour confirmer et signer.
- Essayez plus de fonctionnalités d’édition ; ajoutez des images, rédigez une signature, créez un modèle réutilisable, etc.
- Cliquez sur Enregistrer pour appliquer les modifications une fois terminé.
- Téléchargez le PDF ou partagez-le par e-mail.
- Utilisez la fonction Inviter à signer si vous souhaitez définir et envoyer un ordre de signature aux destinataires.
Transformez la routine en une tâche facile et fluide avec l’application airSlate SignNow pour Android. Signez et envoyez des documents pour signature depuis n’importe quel endroit connecté à Internet. Créez des PDFs attrayants et rédigez une signature en quelques clics. Mettez en place un flux de signature électronique impeccable avec seulement votre smartphone et améliorez votre productivité globale.
Obtenez des signatures juridiquement contraignantes dès maintenant !
FAQ
-
Comment puis-je faire ma signature?
Clip suggéré Comment concevoir votre propre signature incroyable - YouTubeYouTubeDébut du clip suggéré Comment concevoir votre propre signature incroyable - YouTube -
Comment créer une signature manuscrite électronique?
Utilisez le tableau "Protéger" pour signer votre nom et enregistrez le fichier de sortie en tant qu'image. Signez votre nom sur une feuille blanche avec AirSlate SignNow. Utilisez un scanner pour le numériser, ou prenez simplement une photo. Enregistrez-le en tant qu'image au format PNG ou JPG. -
Comment ajouter une signature manuscrite à un PDF?
Clip suggéré Comment signer un PDF avec une signature manuscrite - YouTubeYouTubeDébut du clip suggéré Comment signer un PDF avec une signature manuscrite - YouTube -
Comment puis-je créer une signature?
Clip suggéré Comment concevoir votre propre signature incroyable - YouTubeYouTubeDébut du clip suggéré Comment concevoir votre propre signature incroyable - YouTube -
Une signature doit-elle être manuscrite?
Vous pouvez avoir autant de signatures que vous le souhaitez, mais sur tout document donné, vous devriez vous en tenir au type de signature le mieux adapté à ce document. Ainsi, un document papier nécessiterait une signature manuscrite (humide), et un document électronique signé en ligne nécessiterait une signature électronique légalement contraignante. -
Que doit inclure une signature?
Les signatures ne doivent pas nécessairement épeler votre nom complet. Les signatures sont une marque apposée par une personne sur un document pour montrer son consentement ou son dissentiment par rapport à l'écriture de celui-ci, à condition qu'il lève la main et reconnaisse que c'est sa marque. -
Pouvez-vous changer votre signature à tout moment?
Comme le dit Gil Silberman, vous êtes libre de la changer arbitrairement quand vous le souhaitez. La réponse pratique est donc : vous voudrez remplacer votre permis de conduire/Carte d'identité d'État par votre nouvelle signature, puis aller dans chaque banque où vous avez un compte et mettre à jour votre signature dans leurs dossiers. C'est probablement tout. -
Est-il trop tard pour changer ma signature?
Il n'est jamais trop tard. Vous pouvez toujours changer votre signature plusieurs fois, mais ce serait une tâche trop impraticable et onerous, car la procédure pour obtenir une nouvelle signature est vraiment fastidieuse. ... parce que ainsi, vous n'aurez pas besoin de vous souvenir de la signature que vous avez utilisée pour chaque purpose. -
Lorsque vous changez de nom, devez-vous changer votre signature?
C'est votre souhait si vous souhaitez changer vos signatures en raison du changement de nom de famille. Il n'est pas obligatoire de changer vos signatures après votre mariage. Vous pouvez conserver vos signatures de jeune fille. La signature est une simple écriture d'une personne pour identifier cette personne. -
La signature compte-t-elle sur le passeport?
Signez votre passeport avec votre signature habituelle. Assurez-vous que l'encre est sèche avant de fermer votre passeport afin d'éviter de tacher la signature. La signature sur le passeport n'est pas requise pour la Carte de Passeport. Maintenant que vous avez signé le passeport et rendu le livre de passeport valide, ouvrez la page sept. -
Pouvons-nous changer la signature?
Oui, vous pouvez changer de signature. La signature est à peine vérifiée sauf si c'est pour des raisons bancaires. ... Donc, si vous changez votre signature dans les dossiers bancaires, le passeport, le permis de conduire et la carte PAN, envoyez une notification aux autorités concernées concernant le changement de signature. -
Votre signature peut-elle être un dessin?
En général, oui. Toute écriture destinée à être une signature *est* une signature. La section du Code Commercial Uniforme sur le commerce électronique décrit ce qu'est une signature : ... Quelles sont quelques suggestions pour identifier la signature de l'artiste sur un dessin de 1989? -
Vos signatures doivent-elles être exactement les mêmes?
Les signatures réelles sont toujours légèrement différentes et elles diffèrent à chaque fois. Si les signatures sont des copies exactes, il y a une très forte possibilité de falsification. La différence entre les signatures augmente proportionnellement avec la complexité. Les signatures simples sont moins différentes les unes des autres. -
Est-il acceptable de changer votre signature?
Une personne est libre de changer une signature, et la plupart des gens modifient la façon dont ils écrivent leurs noms entre l'enfance et l'âge adulte. Mais comme il n'y a pas de "signature légale", vous n'avez pas besoin de savoir comment changer votre signature légalement. -
Pouvez-vous changer votre signature légalement au Royaume-Uni?
Oui, vous pouvez changer votre signature quand vous le souhaitez, mais elle doit correspondre à vos documents officiels tels que le passeport, le permis de conduire, les comptes bancaires, etc., afin de ne pas avoir de problème à prouver que vous êtes bien la personne que vous dites être. UKSolicitorJA, Avocat.
Ce que disent les utilisateurs actifs — draft signature


Questions fréquemment posées
Quelle est la définition d'une signature électronique selon la loi ESIGN ?
Que dois-je faire pour signer un fichier PDF ?
Comment signer des documents au format PDF ?
Obtenez plus pour signature provisoire avec airSlate SignNow
- Formulaire 1040 cap esign
- Signature numérique détaillée du consentement médical avec airSlate SignNow
- Authorize Manufacturing Contract Digital Signature
- Modèle d'e-mail de signature pour la proposition de contrôle des nuisibles autorisée
- Authorize Transportation Proposal Template with Electronic Signature
- Authorize Commercial Photography Contract Template eSigning
- Autoriser DJ Facture initiale
- Authorize Cover Letter for Internal Position
- Formulaire d'acknowledgement de formation avec signature électronique
- Authorize Patient Intake Form Email Signature
- Authorize Simple One Page Lease Agreement Template Mark
- Mark Accounts Receivable Purchase Agreement Signed
- Mark Promissory Note Digi Sign
- Mark Willy Wonka Golden Ticket Email Signature
- Mark New Hire Press Release E Sign
- Password Employment Contract Template for Digital Signatures
- Password Adoption Certificate E Sign
- Password Promotion Letter to Employee Digi Sign
- Lettre de promotion du mot de passe à l'employé autographié
- Argue Accounts Receivable Purchase Agreement with Digi Sign
- Modèle d'Accord de Partenariat Stratégique eSign argue
- Argue Logo Design Proposal Template Initial
- Argue Free Oregon Rental Lease Agreement Template Initial
- Publish Vendor Agreement Template Signature Block
- Publier Modèle de proposition immobilière signature
- Publish Simple One Page Lease Agreement Digital Signature
- Publier la signature électronique du certificat de mariage gratuit
- Signature de lettre de passage