eSign Form Mobile
Make the most out of your eSignature workflows with airSlate SignNow
Extensive suite of eSignature tools
Robust integration and API capabilities
Advanced security and compliance
Various collaboration tools
Enjoyable and stress-free signing experience
Extensive support
Keep your eSignature workflows on track
Our user reviews speak for themselves


Award-winning eSignature solution


How to utilize eSign Form Mobile with airSlate SignNow
In the current swift-moving corporate landscape, employing an eSign Form Mobile solution such as airSlate SignNow can optimize your document signing procedure. This platform provides a user-friendly and economical method to handle eSignatures, making it a perfect selection for enterprises of all sizes.
Instructions for using eSign Form Mobile with airSlate SignNow
- Launch your web browser and access the airSlate SignNow website.
- Sign up for a complimentary trial or log in to your current account.
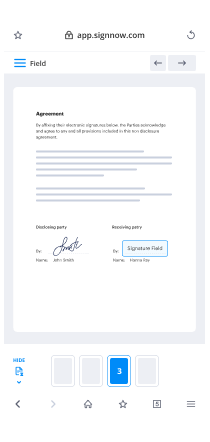
- Choose the document you want to sign or send out for signatures.
- If you intend to utilize the document multiple times, change it into a reusable template.
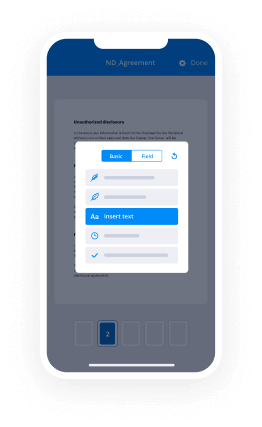
- Modify your document by incorporating fillable fields or required information.
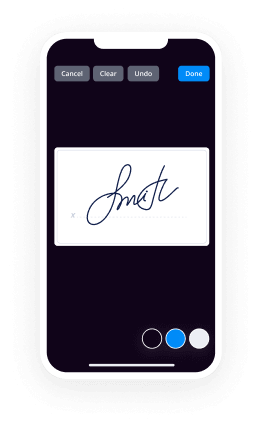
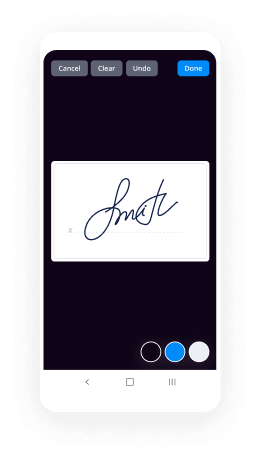
- Add your signature and assign signature fields for the recipients.
- Press 'Continue' to configure and send your eSignature invitation.
Utilizing airSlate SignNow improves your document workflow by delivering a comprehensive feature set that maximizes your investment returns. The platform is specifically tailored for small to mid-sized businesses, offering scalability and user-friendliness.
With clear pricing and no concealed charges, airSlate SignNow guarantees that you receive excellent support around the clock for all paid plans. Begin your complimentary trial today and discover how simple document signing can be!
How it works
Rate your experience
-
Best ROI. Our customers achieve an average 7x ROI within the first six months.
-
Scales with your use cases. From SMBs to mid-market, airSlate SignNow delivers results for businesses of all sizes.
-
Intuitive UI and API. Sign and send documents from your apps in minutes.
A smarter way to work: —how to industry sign banking integrate
How to sign and complete a document online
Document management isn't an easy task. The only thing that makes working with documents simple in today's world, is a comprehensive workflow solution. Signing and editing documents, and filling out forms is a simple task for those who utilize eSignature services. Businesses that have found reliable solutions to document format e sign form mobile don't need to spend their valuable time and effort on routine and monotonous actions.
Use airSlate SignNow and document format e sign form mobile online hassle-free today:
- Create your airSlate SignNow profile or use your Google account to sign up.
- Upload a document.
- Work on it; sign it, edit it and add fillable fields to it.
- Select Done and export the sample: send it or save it to your device.
As you can see, there is nothing complicated about filling out and signing documents when you have the right tool. Our advanced editor is great for getting forms and contracts exactly how you want/need them. It has a user-friendly interface and full comprehensibility, offering you full control. Sign up today and begin increasing your digital signature workflows with highly effective tools to document format e sign form mobile on-line.
How to sign and complete forms in Google Chrome
Google Chrome can solve more problems than you can even imagine using powerful tools called 'extensions'. There are thousands you can easily add right to your browser called ‘add-ons’ and each has a unique ability to enhance your workflow. For example, document format e sign form mobile and edit docs with airSlate SignNow.
To add the airSlate SignNow extension for Google Chrome, follow the next steps:
- Go to Chrome Web Store, type in 'airSlate SignNow' and press enter. Then, hit the Add to Chrome button and wait a few seconds while it installs.
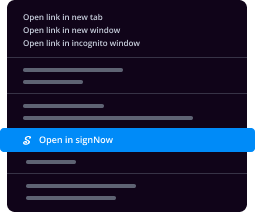
- Find a document that you need to sign, right click it and select airSlate SignNow.
- Edit and sign your document.
- Save your new file to your account, the cloud or your device.
By using this extension, you prevent wasting time on monotonous actions like downloading the data file and importing it to a digital signature solution’s library. Everything is easily accessible, so you can easily and conveniently document format e sign form mobile.
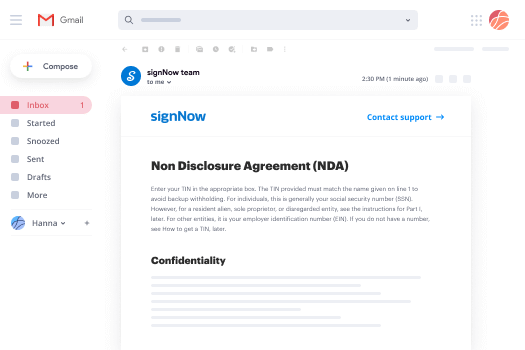
How to eSign documents in Gmail
Gmail is probably the most popular mail service utilized by millions of people all across the world. Most likely, you and your clients also use it for personal and business communication. However, the question on a lot of people’s minds is: how can I document format e sign form mobile a document that was emailed to me in Gmail? Something amazing has happened that is changing the way business is done. airSlate SignNow and Google have created an impactful add on that lets you document format e sign form mobile, edit, set signing orders and much more without leaving your inbox.
Boost your workflow with a revolutionary Gmail add on from airSlate SignNow:
- Find the airSlate SignNow extension for Gmail from the Chrome Web Store and install it.
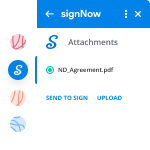
- Go to your inbox and open the email that contains the attachment that needs signing.
- Click the airSlate SignNow icon found in the right-hand toolbar.
- Work on your document; edit it, add fillable fields and even sign it yourself.
- Click Done and email the executed document to the respective parties.
With helpful extensions, manipulations to document format e sign form mobile various forms are easy. The less time you spend switching browser windows, opening several profiles and scrolling through your internal records looking for a template is a lot more time and energy to you for other crucial jobs.
How to safely sign documents using a mobile browser
Are you one of the business professionals who’ve decided to go 100% mobile in 2020? If yes, then you really need to make sure you have an effective solution for managing your document workflows from your phone, e.g., document format e sign form mobile, and edit forms in real time. airSlate SignNow has one of the most exciting tools for mobile users. A web-based application. document format e sign form mobile instantly from anywhere.
How to securely sign documents in a mobile browser
- Create an airSlate SignNow profile or log in using any web browser on your smartphone or tablet.
- Upload a document from the cloud or internal storage.
- Fill out and sign the sample.
- Tap Done.
- Do anything you need right from your account.
airSlate SignNow takes pride in protecting customer data. Be confident that anything you upload to your account is secured with industry-leading encryption. Auto logging out will protect your account from unauthorized access. document format e sign form mobile out of your phone or your friend’s phone. Security is crucial to our success and yours to mobile workflows.
How to eSign a PDF file with an iPhone
The iPhone and iPad are powerful gadgets that allow you to work not only from the office but from anywhere in the world. For example, you can finalize and sign documents or document format e sign form mobile directly on your phone or tablet at the office, at home or even on the beach. iOS offers native features like the Markup tool, though it’s limiting and doesn’t have any automation. Though the airSlate SignNow application for Apple is packed with everything you need for upgrading your document workflow. document format e sign form mobile, fill out and sign forms on your phone in minutes.
How to sign a PDF on an iPhone
- Go to the AppStore, find the airSlate SignNow app and download it.
- Open the application, log in or create a profile.
- Select + to upload a document from your device or import it from the cloud.
- Fill out the sample and create your electronic signature.
- Click Done to finish the editing and signing session.
When you have this application installed, you don't need to upload a file each time you get it for signing. Just open the document on your iPhone, click the Share icon and select the Sign with airSlate SignNow button. Your doc will be opened in the app. document format e sign form mobile anything. Plus, using one service for all your document management demands, things are faster, smoother and cheaper Download the application right now!

How to eSign a PDF on an Android
What’s the number one rule for handling document workflows in 2020? Avoid paper chaos. Get rid of the printers, scanners and bundlers curriers. All of it! Take a new approach and manage, document format e sign form mobile, and organize your records 100% paperless and 100% mobile. You only need three things; a phone/tablet, internet connection and the airSlate SignNow app for Android. Using the app, create, document format e sign form mobile and execute documents right from your smartphone or tablet.
How to sign a PDF on an Android
- In the Google Play Market, search for and install the airSlate SignNow application.
- Open the program and log into your account or make one if you don’t have one already.
- Upload a document from the cloud or your device.
- Click on the opened document and start working on it. Edit it, add fillable fields and signature fields.
- Once you’ve finished, click Done and send the document to the other parties involved or download it to the cloud or your device.
airSlate SignNow allows you to sign documents and manage tasks like document format e sign form mobile with ease. In addition, the security of your info is priority. File encryption and private servers are used for implementing the most recent functions in data compliance measures. Get the airSlate SignNow mobile experience and work more proficiently.


FAQs
-
What is airSlate SignNow's eSign Form Mobile feature?
The eSign Form Mobile feature from airSlate SignNow allows users to sign documents anytime, anywhere, directly from their mobile devices. This innovative solution ensures that businesses can efficiently manage their signing processes on the go, enhancing productivity and convenience.
-
How does eSign Form Mobile improve my workflow?
With airSlate SignNow's eSign Form Mobile, you can streamline your document signing process by allowing team members and clients to sign documents quickly, reducing delays. This feature enhances your workflow by automating the signing process, making it easy to track and manage documents from your mobile device.
-
Is there a cost associated with using eSign Form Mobile?
airSlate SignNow offers various pricing plans that include access to the eSign Form Mobile feature. The cost is determined by the specific plan you choose, which provides different levels of functionality and support to meet the needs of your business.
-
What types of documents can I eSign using the mobile app?
You can eSign a wide variety of documents using airSlate SignNow's eSign Form Mobile, including contracts, agreements, forms, and more. The mobile app supports various file formats, ensuring that you can handle any document type necessary for your business.
-
Are there any integrations available with eSign Form Mobile?
Yes, airSlate SignNow's eSign Form Mobile seamlessly integrates with numerous third-party applications, including CRM systems, cloud storage, and project management tools. This enables you to enhance functionality and improve collaboration across your existing workflows.
-
How secure is the eSign Form Mobile feature?
Security is a top priority with airSlate SignNow's eSign Form Mobile. The platform utilizes industry-standard encryption and compliance measures to ensure that your documents and signatures are protected against unauthorized access.
-
Can I track the status of my documents signed via eSign Form Mobile?
Absolutely! airSlate SignNow offers tracking features that allow you to monitor the status of documents signed through the eSign Form Mobile. You can easily see who has signed, who is pending, and receive notifications once the signing process is complete.
-
Is it possible to display a PDF form on mobile web to fill out and get e-signed?
Of course, you can try a web called eSign+ [ https://esign.wondershare.com/?utm_source=esign-forum&utm_medium=quora-Q1&utm_campaign=esign1.0 ]. This site let you upload PDF documents and do some edition eg. drag signature fields, add date and some informations. Then you can send to those, from whom you wanna get signatures.
-
How do I Register under GST in India?
GST registration process will be online through a portal maintained by Central Government of India. Govt. will also appoint GSPs (GST Suvidha Providers) to help businesses with the registration process.Based on the information provided by GSTn, registration process looks like this:The applicant, will need to submit his PAN, mobile number and email address in Part A of Form GST REG–01 on the GSTN portal or through Facilitation center (notified by board or commissioner).The PAN is verified on the GST Portal. Mobile number and E-mail address are verified with a one-time password (OTP). Once the verification is complete, applicant will receive an application reference number on the registered mobile number and via E-mail. An acknowledgement should be issued to the applicant in FORM GST REG-02 electronically.Applicant needs to fill Part- B of Form GST REG-01 and specify the application reference number. Then the form can be submitted after attaching required documents.If additional information is required, Form GST REG-03 will be issued. Applicant needs to respond in Form GST REG-04 with required information within 7 working days from the date of receipt of Form GST REG-03.If you have provided all required information via Form GST REG-01 or Form GST REG-04, the registration certificate in Form GST REG –06 for the principal place of business as well as for every additional place of business will be issued to the applicant. If the person has multiple business verticals within a state he can file a separate application for the registration in Form GST REG-01 for each business verticals.If the details submitted are not satisfactory, the registration application is rejected using Form GST REG-05.The applicant who is required to deduct TDS or collect TCS shall submit an application in Form GST REG – 07 for registration. If he is no longer liable to deduct or collect tax at source then the officer may cancel and communicate the cancel of registration.Documents required for GST registration:PAN card of the CompanyProof of constitution like partnership deed, Memorandum of Association (MOA) /Articles of Association (AOA), certificate of incorporation.Details and proof of place of business like rent agreement or electricity billCancelled cheque of your bank account showing name of account holder, MICR code, IFSC code and bank branch detailsAuthorized signatory like List of partners with their identity and address proof in case of partnership firm or List of directors with their identity and address proof in case of company.You can check this article on GST Registration Process In India. It covers 45 frequently asked questions on this topic.
-
Do pop-up newsletter sign ups actually work? Any stats?
Exit-intent popups work, there’s no doubt about that. In my experience of building email lists for my businesses over the last 12 years is that the only thing your visitor wants is information.They hate when you interrupt their quest for information on your website with an annoying popup. That’s why exit intent works. They are already done when you present a popup.Unfortunately, that’s the same reason they have low conversion rates.The best I got was around 5%.And I tried most of them, from Bounce Exchange that costs thousands of dollars per month to the free alternatives. None worked exceptionally well at collecting email leads. At least not as well as I expected.So I decided to build my own, and wrap email collection around a popular game The Wheel of Fortune. That way people are not annoyed and they like being amused, so they’ll give it a spin.I was taking advantage of a phenomenon called gambler’s high, which occurs even if a gambler loses, which I found fascinating.This proved INCREDIBLY efficient. People are not annoyed and it just works. My conversion rates on one of the websites with 7 digit monthly visits jumped from less than 4% to 17%.After that, a lot of my friends asked if they can use it, so after a while I decided to make it available to the public for FREE.You can now use my free exit intent popup: Wheel of PopupsHere’s how this exit popup looks like to your website visitors:It can be triggered after page load (you define the delay in seconds);Or after a visitor attempts to leave your website (by tracking mouse movements and scrolling behavior on mobile devices);It can also be restricted to be shown just for Mobile/Tablet or Desktop, or shown everywhere you need it;I also made it so you can brand it to your business or translate it to your language:Change colors of the wheel, text, background and buttons;Add your (small) logo on the wheel of fortune and large logo above the form on the right;Translate all text or simply change it to better fit your brand;It was important that you don’t give away too many coupon codes to visitors:Decide how big coupon codes you want to offer as a prize to visitors for spinning the wheel of fortune;Then define the probability of visitors to win a certain discount. For example, you can enter huge discount as one of the slices on the wheel, but if the probability is set to “0”, no one will ever get it, but it will serve as an added incentive for people to leave their email address;You can start using it right now and it’s completely FREE:Create a free account on Wheel of Popups;Configure the wheel to fit your brand (colors, logos, etc)Add coupon codes and probability for winnings;Enable it and it will show up on your website;Woohoo! That’s it.I hope you’ll appreciate my answer and give it a go. I am more than happy to help in any way possible.Thanks!
-
What are some useful SaaS (software as a service) tools for small businesses?
The logical route for most small businesses that are operating on tight budgets is to start with free SaaS software. There are many out there but you will find that they are limited in features and capabilities. You may want to have a mix of free tools and set aside a reasonable investment for paid solutions since there are lots of affordably priced, SMB-friendly SaaS software offerings in the market. Here’s a great resource on SaaS tools for small business you may want to check out.The following are my suggestions of software categories and the respective products that are most useful in y...
-
What is the process to do e-signature in GST?
E- sign is a new facility provided for GST enrolment. It will enable the taxpayer to sign their GST enrolement application without using DSC. It is however mandatory for some taxpayers to sign GST enrolement applicating using DSC only.Electronically signing of enrolement application using DSC is mandatory for:CompaniesForeign companiesLi mited liability partnership (LLP)Foreign limited liability partnership (FLLP’s)Only the taxpayers other than mentioned above will be able to file their enrolment application without using DSC. If you are an individual , HUF and partnership then you can file the enrolment application without DSC. You can sign the enrolment application electronically using the E- sign. It will result in cost saving as you will not have pay for the DSC. It will be easier for you as other procedure like registering DSC will also not be required.What is E- sign? How does it work?E- sign stands for electronic signature. It is an online electronic signature service that allows an Aadhaar holder to digitally sign a document. If the taxpayer opts to electronically sign the enrolement application or any other document at the GST common portal using the e- sign services.Following steps will be required to use E- signThe GST common portal prompts the taxpayer to enter the Aadhaar number of the authorized signatory.After validating the Aadhar number , the GST common portal sends a request to UIDAI system to send an OTPUIDAI system sends an OTP to e- mail address and mobile number registered against Aadhar number.the GST system prompts the taxpayer to enter the OTP.The taxpayer enters the OTP and submits the Enrollment Application or the document. The E- signing process is completed.This facility is free of cost and easy to use.It is mandatory to file your application with digital sign. This sign can be via DSC or E-sign. You will not be able to file your enrolement application without signature.
-
I lost my PAN card and I want a new one with the old PAN number. How should I proceed?
There are adequate provisions in place to cover loss of PAN card, with an option to reprint a card provided by the government. So if you have lost your PAN card and aren’t sure as to what needs to be done next, here are a few simple steps which you need to follow to get a reprinted card.Log onto the official website of TIN-NSDL and navigate to the section on online application for PAN.Once here, choose the option “Reprint of PAN card.” This option can be chosen if your PAN Card was stolen, lost or misplaced.On clicking the aforementioned link, you will be directed to a different page, where you need to click on the “Online Application for changes/correction in PAN data” link.Clicking the aforementioned link will take you to a page which highlights the guidelines as to what needs to be done next. Post reading these guidelines one can choose the type of PAN they lost (individual, company, firm, HUF, etc.).They will now be required to fill up a lost pan card application form, providing details like their lost pan number, name, communication address, telephone number, email id, etc. Documents like photographs and ID proof need to be submitted along with the lost pan card application form, with an applicant expected to sign it before submission but if you have choosen Aaadhar based ekyc option there is no any physical document is required…The lost pan card application form can be submitted either online or posted to NSDL, along with necessary documents.Payment of approx Rs 110 (if the communication address is within the country) or Rs 989 (if the communication address is outside India) should be made, either though credit / debit card, net banking or demand draft.On successful payment an acknowledgment number will be generated which can be used for further correspondence.A duplicate PAN with the same pan card number will be delivered to the address in about two weeks.
-
What is needed to get a personal loan in India?
A personal loan is an unsecured advance offered by both banks and NBFCs to any eligible individual. Personal Loans for Salaried class include people working in private or government enterprises and does Salaried Doctors working in health institutions, CAs working in companies, employees of Public listed and Private limited companies , MNCs, SMEs and Government Sector employees including public sector undertakings. Each bank has separate minimum criteria for income, age, employment type, credit score, job status, etc. You will need to meet these criteria in order to qualify for a personal loan.Personal Loan Eligibility1. Minimum and Maximum AgeThe minimum age for getting a loan is 21 Years whereas the maximum is 60 Years.2. Net Monthly IncomeFor salaried individuals, timely and regular salary credit is important to get eligible for loan. Min. Rs. 20,0003. Employment TypeSalaried customers have more choices for personal loan banks. Interest rates are typically in the range of 10.99% to 33.00% per annumPersonal loans to self-employed professionals and businessmen are classified as Business Loan4. Minimum Work Experience2 years of total work experience. Some banks also give loans with 1 year of total experience. Tenure from the current company should not be less than 6 – 12 months5. CIBIL Score for Personal LoanThe CIBIL Score for a Personal Loan should be more than650 & more credit history. The more the Credit Score the more chance for getting a LoanDocumentation RequiredDuly-filled and signed application form2 passport-size photographsCheque – Processing feeProof of Identity – Voter ID/ Passport Copy/ Driving License / PAN Card (any one)Address – Passport Copy/ Utility Bill (Electricity, Water)/ Rental Agreement/ Ration Card (any one)Income (depending on type of employment) – Latest Salary Slips (3 months) / Bank Statements (3 – 6 months) / Passbook (3 – 6 months)/ Current Salary Certificate (any one)Tax paid – Latest Form 16/ Income Tax ReturnKYC Documents – Address Proof, proof of Date of Birth, Identity Proof.How Income determines your Eligibility?Monthly Income to get personal loan should be at least Rs. 25,000. However, some banks give loans to individuals with salary less than Rs. 25,000. Banks also follow different limit to calculate the ratio of fixed obligations to monthly income.Suppose, your income is Rs. 25,000, then bank calculates your eligibility such that fixed obligations do not exceed 50% of your income. However, if your income is more than Rs. 35,000 per month, then banks will allow higher fixed obligations to income ratio of 65%, which means that your fixed expenses (including rent and other EMIs) can be up to 65% of your income to be eligible for a loan from a bank. Higher the income, better are the chances to get high loan amount.How to improve your eligibility for personal loan?You can improve your eligibility for personal loan by doing following things:To increase your eligibility, pay off your running debts firstPay your EMIs or other obligations on time to improve credit history and to negotiate with banks in future to get high loan amountTransfer your existing loans to lower rate to reduce your existing EMI and to get new loan of higher amount.FundsTiger can arrange loans from all the banks we can help you to get all types of loans and also balance transfers on existing loans and can also help you to giving free credit consultation.
-
How do I transfer car ownership in Pune?
All RTO services are available online ( no need to catch Agent)Online Process:Before starting transfer process online, keep all the details of seller, buyer and vehicle details handy (like pan number, Aadhar number, address, engine number, chassis number, insurance details)1. Go to VAHAN 4.0 (Beta) , Select the state other than Delhi and add the vehicle registration number (i.e. MH1X99XX) and proceed.2. Go to Online Services >> Misc (Ownership transfer)3. Enter vehicle chassis number (last 5 digits) and mobile number to receive OTP4. After successful OTP verifcation it will navigate to ownership transfer form, fill all required details of seller, purchaser, and vehicle.5. Cross check the details and proceed further to payment page .6. Rs. 550/- is the fee for Car ownership transfer, it may differ for other type of vehicle7. Pay the fee online and it will generate Form 29, Form 30 and E-payment receipt (download all this forms, Form 29 requires two copies to be downloaded)8. Make signature of seller and buyer wherever mentioned on all of these forms.Considering vehicle belongs to same RTO, below documents are required_Signed Form 29, Form 30 and E-payment receiptId proof and Address proof of seller and buyer, if buyer does not have permanent address from Pune, he/she needs to provide registered rent agreement with police verification.Original RC document from sellerLatest PUC certificate from sellerPencil print of chassis(5 copies), you can find chassis number below driver seat.Insurance details copy from seller.One passport size photograph of buyer.Lastly visit RTO office along with all the mentioned documents and submit it.In next 4–7 days, your application of vehicle ownership transfer gets approved and transferred. (RTO will notify this through SMS).It will take 10 - 30 days for RC smart card to get delivered to your mentioned address.As RC smart card take time to get delivered, you can download your RC particulars online for Fee of 50Rs. (RC particulars is the document you can provide for insurance transfer and other vehicle related transactions also its valid document when you do not have the RC smart card)To downlaod RC particulars _1. Go to VAHAN 4.0 (Beta), Select the state other than Delhi and add the vehicle registration number (i.e. MH1X99XX) and proceed.2. Go to Online Services >> RC Particulars3. Enter vehicle chassis number (last 5 digits) and mobile number to receive OTP4. After successful OTP verification click on show details , it will show one form with restricted vehicle details.5. Below that form it will ask to pay Rs. 50/- 6. After successful online payment it will generate RC particular form which you can download and use it as valid RC document until you get RC smart card.(remember to download the RC particulars otherwise, next time also you need to pay Rs. 50/- to generate it again.)If you thought my answer was helpful, it would mean a lot to me if you could press the light blue upvote button below.
-
After applying for a PAN card online, how will I get the main plastic PAN card?
You can make an application for E-Pan card which will be sent to you by mail or you can also apply for a physical PAN card.The applicant is only required to fill and submit the online application form along with online payment of the respective processing fee.Steps to apply for PAN cardVisit the NSDL websiteSelect "New PAN- India Citizen (form 49A)” as your application type and fill your status (i.e individual or company or firm) under the head category.Fill in rest of the information asked such as name, and date of birth. Information marked with an asterisk sign has to be filled in mandatorily. It is mandatory to mention the email id in case of application for an E-PAN card.A token number will be generated and same will be sent to your email id (But the same must be noted ). Click on continue with your Application.A new page will appear on your screen. There will be three options asking you how you want to proceed with your application. To apply for E-PAN you must select No to the question “Whether Physical Pan is required?”. ( Please check Note)Enter your details such as Aadhaar number, parents name, etc. Aadhaar number is mandatory if you have choosed e sign and e KYC as an option.Once you have filled all the relevant data, click on 'Next'. A new page will appear asking you to fill in details of the type of income earned by you. In the same page you will be required to mention your communication details.After you have filled in the same you will be required to enter your AO code. The Ao code can be searched from the dialog box given below. As shown in the image you will be required to fill the details and then scroll down the list to check the AO on the basis of the description mentioned.After you have filled the same you will be asked for document that you will submit as proof.You will be required to give a declaration . Then you have to click submit.You will be ask to recheck your application and you will be asked to make payment .You can pay using your debit or credit cards, Net banking .Once you have made the payment, you will be required to undergo the Aadhaar authentication process. If your Aadhaar authentication process is successful,then a 15 digit unique acknowledgement number will be generated.You will receive E PAN on your email after your application is processed or the physical PAN will be sent to your addressNote-There is a paperless facility called e-KYC and e-sign where your Aadhaar details will be used. You don't have to upload images such as photo, signature or other supporting documents. Your Aadhaar photograph will appear in your PAN if you use the e-KYC and e-sign facility.There is a second method which is a standalone e-sign facility where you are required to upload your photograph, signature (in black ink) and specified supporting documents in a prescribed format.
Trusted esignature solution— what our customers are saying


Get legally-binding signatures now!
Frequently asked questions
How do i add an electronic signature to a word document?
How to use electronic signature paint?
What is my esign password for ssc?
Get more for eSign Form Mobile
- eSign Car Dealer Form Georgia Simple
- eSign Florida Car Dealer Profit And Loss Statement Myself
- eSign Georgia Car Dealer POA Mobile
- Sign Nebraska Courts Warranty Deed Online
- Sign Nebraska Courts Limited Power Of Attorney Now
- eSign Car Dealer Form Idaho Online
- How To eSign Hawaii Car Dealer Contract
- How To eSign Hawaii Car Dealer Living Will
Find out other eSign Form Mobile
- Stopping inbound and outbound threats with juniper networks ibm form
- Trend micro interscan viruswall 6 for linux http form
- Marshal8e6 security threats email and web threats form
- Identity thieves raid mailboxes for credit card form
- In this issue 1 ten ways to protect your identity on campus www1 ccny cuny form
- Midwifery market application including w9 and ca seller39s midwife form
- Safe computing pdf delta form
- Operating systems security cse wustl form
- Symantec intelligence report september symantec cloud form
- Return path39s postmaster network checkbox form
- Best practices lightspeed systems form
- Qcs review life lock blogs qcs form
- How can the semantic web improve the acquisition and sharing of cse fau form
- Instructions for the requester of form w 9 10internal
- Are you looking to become a vendor with the city of jacksonville jacksonvillebeach form
- Completing the tax determination form csus
- The best software of article date 04 04 11 by eric twinsburglibrary form
- Pipe operator 60 hashtag prompt 51 7 zip 91 form
- Summarizing relational databases vldb endowment inc vldb form
- Microsoft migration project software compatibility luc form