Complete Sign Word Fast
Make the most out of your eSignature workflows with airSlate SignNow
Extensive suite of eSignature tools
Robust integration and API capabilities
Advanced security and compliance
Various collaboration tools
Enjoyable and stress-free signing experience
Extensive support
Keep your eSignature workflows on track
Our user reviews speak for themselves


Award-winning eSignature solution


Finalize sign documents quickly
If you aim to optimize your document signing experience, airSlate SignNow is the perfect choice. This platform enables users to finalize sign documents quickly with its intuitive interface, rendering document management effective and economical for enterprises of any size.
Finalize sign documents quickly with these steps
- Launch your web browser and go to the airSlate SignNow homepage.
- Sign up for a free trial account or access your current account.
- Choose and upload the document you want to sign or send for signatures.
- For documents you intend to reuse, convert them into templates for effortless retrieval.
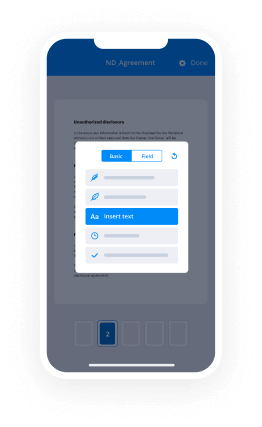
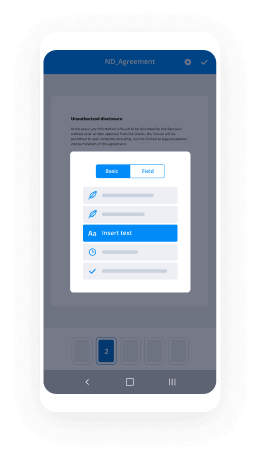
- Open the uploaded document to perform essential edits: add fillable fields or specific details as required.
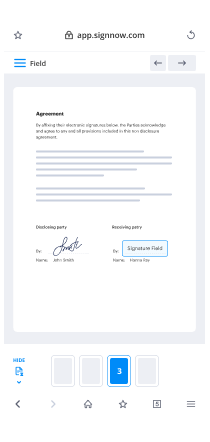
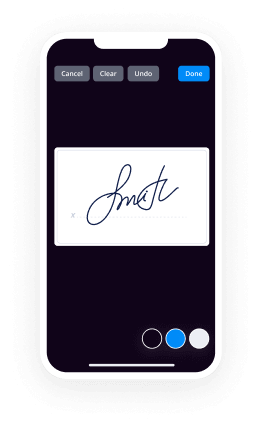
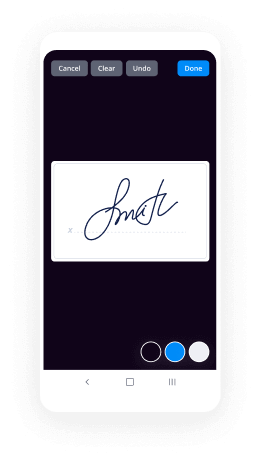
- Affix your signature and insert signature fields for others to sign.
- Select 'Continue' to set up your eSignature request and dispatch it.
By adhering to these steps, you can effectively oversee your document signing tasks with airSlate SignNow. The platform not only streamlines eSigning but also boosts your overall efficiency.
Experience the advantages of airSlate SignNow today! Register for a free trial and explore how this robust tool can revolutionize your document workflow and save you time.
How it works
Rate your experience
-
Best ROI. Our customers achieve an average 7x ROI within the first six months.
-
Scales with your use cases. From SMBs to mid-market, airSlate SignNow delivers results for businesses of all sizes.
-
Intuitive UI and API. Sign and send documents from your apps in minutes.
A smarter way to work: —how to industry sign banking integrate
How to sign & complete a document online
Document management isn't an easy task. The only thing that makes working with documents simple in today's world, is a comprehensive workflow solution. Signing and editing documents, and filling out forms is a simple task for those who utilize eSignature services. Businesses that have found reliable solutions to functionality sign complete word fast don't need to spend their valuable time and effort on routine and monotonous actions.
Use airSlate SignNow and functionality sign complete word fast online hassle-free today:
- Create your airSlate SignNow profile or use your Google account to sign up.
- Upload a document.
- Work on it; sign it, edit it and add fillable fields to it.
- Select Done and export the sample: send it or save it to your device.
As you can see, there is nothing complicated about filling out and signing documents when you have the right tool. Our advanced editor is great for getting forms and contracts exactly how you want/need them. It has a user-friendly interface and full comprehensibility, giving you complete control. Create an account today and begin enhancing your digital signature workflows with highly effective tools to functionality sign complete word fast on the internet.


How to sign and fill forms in Google Chrome
Google Chrome can solve more problems than you can even imagine using powerful tools called 'extensions'. There are thousands you can easily add right to your browser called ‘add-ons’ and each has a unique ability to enhance your workflow. For example, functionality sign complete word fast and edit docs with airSlate SignNow.
To add the airSlate SignNow extension for Google Chrome, follow the next steps:
- Go to Chrome Web Store, type in 'airSlate SignNow' and press enter. Then, hit the Add to Chrome button and wait a few seconds while it installs.
- Find a document that you need to sign, right click it and select airSlate SignNow.
- Edit and sign your document.
- Save your new file to your account, the cloud or your device.
Using this extension, you avoid wasting time on dull actions like saving the data file and importing it to an electronic signature solution’s library. Everything is close at hand, so you can easily and conveniently functionality sign complete word fast.
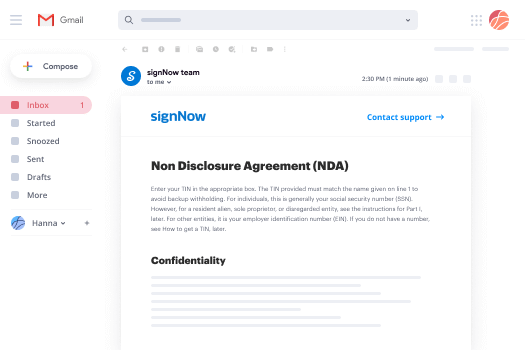
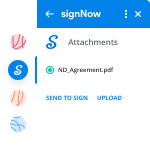
How to sign forms in Gmail
Gmail is probably the most popular mail service utilized by millions of people all across the world. Most likely, you and your clients also use it for personal and business communication. However, the question on a lot of people’s minds is: how can I functionality sign complete word fast a document that was emailed to me in Gmail? Something amazing has happened that is changing the way business is done. airSlate SignNow and Google have created an impactful add on that lets you functionality sign complete word fast, edit, set signing orders and much more without leaving your inbox.
Boost your workflow with a revolutionary Gmail add on from airSlate SignNow:
- Find the airSlate SignNow extension for Gmail from the Chrome Web Store and install it.
- Go to your inbox and open the email that contains the attachment that needs signing.
- Click the airSlate SignNow icon found in the right-hand toolbar.
- Work on your document; edit it, add fillable fields and even sign it yourself.
- Click Done and email the executed document to the respective parties.
With helpful extensions, manipulations to functionality sign complete word fast various forms are easy. The less time you spend switching browser windows, opening several accounts and scrolling through your internal files trying to find a template is more time and energy to you for other essential assignments.
How to securely sign documents using a mobile browser
Are you one of the business professionals who’ve decided to go 100% mobile in 2020? If yes, then you really need to make sure you have an effective solution for managing your document workflows from your phone, e.g., functionality sign complete word fast, and edit forms in real time. airSlate SignNow has one of the most exciting tools for mobile users. A web-based application. functionality sign complete word fast instantly from anywhere.
How to securely sign documents in a mobile browser
- Create an airSlate SignNow profile or log in using any web browser on your smartphone or tablet.
- Upload a document from the cloud or internal storage.
- Fill out and sign the sample.
- Tap Done.
- Do anything you need right from your account.
airSlate SignNow takes pride in protecting customer data. Be confident that anything you upload to your account is secured with industry-leading encryption. Automatic logging out will protect your user profile from unwanted access. functionality sign complete word fast from the phone or your friend’s phone. Security is essential to our success and yours to mobile workflows.
How to electronically sign a PDF document on an iOS device
The iPhone and iPad are powerful gadgets that allow you to work not only from the office but from anywhere in the world. For example, you can finalize and sign documents or functionality sign complete word fast directly on your phone or tablet at the office, at home or even on the beach. iOS offers native features like the Markup tool, though it’s limiting and doesn’t have any automation. Though the airSlate SignNow application for Apple is packed with everything you need for upgrading your document workflow. functionality sign complete word fast, fill out and sign forms on your phone in minutes.
How to sign a PDF on an iPhone
- Go to the AppStore, find the airSlate SignNow app and download it.
- Open the application, log in or create a profile.
- Select + to upload a document from your device or import it from the cloud.
- Fill out the sample and create your electronic signature.
- Click Done to finish the editing and signing session.
When you have this application installed, you don't need to upload a file each time you get it for signing. Just open the document on your iPhone, click the Share icon and select the Sign with airSlate SignNow button. Your sample will be opened in the app. functionality sign complete word fast anything. Additionally, using one service for all of your document management requirements, things are faster, smoother and cheaper Download the app right now!
How to sign a PDF document on an Android
What’s the number one rule for handling document workflows in 2020? Avoid paper chaos. Get rid of the printers, scanners and bundlers curriers. All of it! Take a new approach and manage, functionality sign complete word fast, and organize your records 100% paperless and 100% mobile. You only need three things; a phone/tablet, internet connection and the airSlate SignNow app for Android. Using the app, create, functionality sign complete word fast and execute documents right from your smartphone or tablet.
How to sign a PDF on an Android
- In the Google Play Market, search for and install the airSlate SignNow application.
- Open the program and log into your account or make one if you don’t have one already.
- Upload a document from the cloud or your device.
- Click on the opened document and start working on it. Edit it, add fillable fields and signature fields.
- Once you’ve finished, click Done and send the document to the other parties involved or download it to the cloud or your device.
airSlate SignNow allows you to sign documents and manage tasks like functionality sign complete word fast with ease. In addition, the security of your data is priority. Encryption and private web servers can be used as implementing the latest capabilities in data compliance measures. Get the airSlate SignNow mobile experience and work more effectively.


FAQs
-
What features does airSlate SignNow offer to help me complete sign word fast?
airSlate SignNow provides a user-friendly platform that allows you to complete sign word fast with features like customizable templates, automated workflows, and real-time tracking. These tools streamline the signing process, ensuring that your documents are signed quickly and efficiently.
-
How does airSlate SignNow ensure the security of my documents when I complete sign word fast?
When you complete sign word fast with airSlate SignNow, your documents are protected by advanced encryption and secure cloud storage. We prioritize your data security, complying with industry standards to ensure that your information remains confidential and safe.
-
Is there a free trial available for airSlate SignNow to complete sign word fast?
Yes, airSlate SignNow offers a free trial that allows you to explore all features and capabilities to complete sign word fast. This trial period enables you to assess how our solution can enhance your document signing process without any initial investment.
-
Can I integrate airSlate SignNow with other software to complete sign word fast?
Absolutely! airSlate SignNow seamlessly integrates with various applications such as Google Drive, Salesforce, and Microsoft Office, allowing you to complete sign word fast within your existing workflows. These integrations help enhance productivity and ensure a smooth signing experience.
-
What are the pricing options for airSlate SignNow to complete sign word fast?
airSlate SignNow offers flexible pricing plans designed for businesses of all sizes. You can choose from monthly or annual subscriptions, ensuring that you can find a plan that fits your budget while enabling you to complete sign word fast.
-
How can airSlate SignNow help my business complete sign word fast?
airSlate SignNow helps businesses complete sign word fast by providing an intuitive platform that eliminates the need for printing and mailing documents. With features like eSigning and document management, you can expedite your processes, allowing for quicker turnaround times.
-
What types of documents can I sign using airSlate SignNow to complete sign word fast?
With airSlate SignNow, you can complete sign word fast on a variety of document types including contracts, agreements, NDAs, and more. Our platform supports multiple formats ensuring you can handle all your signing needs efficiently.
-
How does breaking writing into paragraphs work?
A paragraph is a block of text that addresses a certain topic in one or several sentences. Typically, a paragraph is as long or as short as it needs to be for its purpose, with sentences more or less as thoughts, and the paragraph collecting thoughts on the same topic. This paragraph here has introduced the idea behind breaking text into paragraphs and is now discussing their structure in a more specific sense. It won't go on for much longer, because the idea itself is pretty general. What I want to do is give you clear examples of use.See what happened there? I started on the general idea, broke it into a bit of detail and followed it down to where it naturally led to a different idea. This is actually part of the fun and creativity of writing: there are rules; some strict, some less so. You could even say that most of them are often just guides, with the goal being that what you produce is clear and readable.In other words, it has to be written with the reader in mind.While short paragraphs can serve a purpose, one of my favourite books of all time has paragraphs that go for longer than a page. Don't worry, I won't replicate that here! I just hope that this discussion gives you some food for thought.Best of luck!
-
Did India give up the thorium reactor in the exchange of civil nuclear deal with the USA?
NO, NOT A CHANCE.Civil nuclear deal was never signed, nor it is signed right now, it always remained a MoU not a firm deal. What exists between US and India is something other than the CIVIL NUCLEAR DEAL. CND was a Sheet filled with $hit unloaded by US that only took care of interests of US and completely sidelined India, hence the deal never happened and remained a MoU.India has Three Stage Nuclear Programme in place.STAGE I: PHWR i.e Pressurised Heavy Water Reactor;India has already achieved self-reliance in this.(NOTE: Please don’t ask if ours is better than this or that, this not a mobile phone, this is nuclear reactor). 16 More indigenous Reactors has been sanctioned last year, 4 more under construction. This stage has been successfully completed.STAGE II: FBR i.e FAST BREEDER REACTOR;This uses a mixture of Uranuim and Plutonium( Final Product from Stage I) as it’s fuel. This plant is made in Kalpakkam and is set to go online tentatively by first quarter of 2018. This plant is almost ready. Although a prototype functional reactor already exists in IGCAR since 1985. The Stage II of Indian has always been kept under tight wraps and it still is least discussed.STAGE III: THORIUM BASED REACTORS;This will be the worlds envy, hence the least talked about and the most secretive.Now,The BARC AHWR a.k.a Advanced Heavy Water Reactor design to use Thorium was already approved by AERB and NPCIL in 2014 and in early 2017, GoI gave approval for contruction of 300 MWe reactor in Tarapur.So we silently don’t give $hit about US when it comes to future our nuclear field. They are as useless as the word “EA” in “TEA”.In the end all thanks to this Genius, who planned all this:Mr. Homi Jehangir Bhabha
-
Have you ever asked someone (who later passed away) to give you proof of an afterlife? For example, a word/gesture that only you
In my late teens and early twenties, my boyfriend would always tell me he was going to die young or live forever. I would tell him to stop saying that because he couldn’t possibly live forever. He would laugh, so unaffected by the thought of dying young. So one night after he’d said it again while we were lying in bed I jabbed him in the ribs. He laughed yelled “ow!” and said what was that for? I told him every time he said it from now on I was going to poke him right between the ribs and make him wish he was dead. He laughed and turned on me, poking me in the ribs where I was most ticklish. He said “alright then, then after I’m good and young and dead I’m going to haunt your ass and jab you every time you annoy me!” This turned into a ridiculous sort of assaulting tickle fight. A night I remember fondly.A few months later, I was 21 and he was 24. We’d spent the day watching movies with my best friend. It was June 22, 2007. A beautiful summer Friday evening. We decided to go be outside somewhere. Enjoy the weather. So we gathered some friends and dogs and skateboards and took off. The first part of the evening was full of laughter and summer sweat. But less than two hours after we left my house, the night was full of screams and too much blood. We had been jumped on an elementary school playground in Baltimore County and in trying to protect me my boyfriend was brutally assaulted in front of me, beaten by three men with baseball bats.The moments between the actual attack and getting to shock trauma are flashes. There’s the flash of me holding his broken body, begging him not to leave me. Flashes of his grip on my hand weakening. His eyes rolling back into his head if I stopped talking to him long enough to scream at the two women who had stopped to call 911, demanding why it was taking so long. There’s the flash of the EMTs arriving, telling me not to let him go yet as they secured his neck. Me begging them to tell me he was going to be okay and their refusal to speak or look at me. Flashes of the wind of the helicopter landing and of him being loaded into it, me falling to the ground so hard my knees bled for days, praying to a god I didn’t even believe in. Flashes of flying down the highway to get to Hopkins. Apparently the entire way I rocked and sobbed “please don’t take him away from me,” though I don’t remember.I was numb and in shock and already experiencing PTSD from what I saw. I was questioned by police, shuffled from waiting room to interview room and back. Numb. Sticky. Staring at the blood on my hands I’d refused to let the firefighters wash off, so afraid they’d be washing him away for good. I sat in a small chair in the waiting area, covered in his vomit and so much blood that had poured from his broken body, namely the large opening in his skull, that it looked like motor oil. Looking back this time is a blur, I have only two clear memories of the wait to go see him. I remember a fly buzzing around the vomit on my knee. Then I remember running people. Crying people. I remember glancing up to see a very famous skateboarder sitting in the chair next me. Tears streaming down his face. I watched the tears for a moment before went back to staring at the fly on my knee.A day later while my boyfriend was in a drug induced coma I learned that at the exact moment my boyfriend was being jumped, Stephen Murray was taking his turn on the Baltimore stop of the BMX Dew Tour. He was flying through the air, attempting a double back flip, turning the wrong way and landing even worse on his neck. He was flown into shock trauma just seconds after my boyfriend. They didn’t know if either man would make it. I spent the next week numbly spending time with Stephen’s at the time wife, who was also named Melissa. We swapped pills we’d been prescribed to try to get through what was happening around us, chain smoked outside and she invited me over for spaghetti to the empty home the Dew Tour had set her up in down the street. I came to know his family and friends. In fact the moment I learned my boyfriend was having part of his skull removed to try to accommodate the swelling in his brain, I stepped off the elevator and there stood Stephen’s mother Cynthia and his brother. She took one look at my face and wrapped me in her arms. Holding me as I sobbed before asking in her unbelievably soothing English accent, “do you have a mum here?” I’ll never forget that woman, that hug or that voice. Warmth I latched onto in that cold sterile hallway.Stephen survived his accident a Quadriplegic and my boyfriend died July 10. Eighteen days after the attack and on my baby brother’s seventeenth birthday. The days after I barely remember. I recall I picked out the clothes he would be buried in but couldn’t go to the funeral. I couldn’t see him in a casket, the hospital had been bad enough. After the funeral many of my friends came to my door to check on me. One of them was one of the kindest most unbelievably genuine people I’d ever know, named Mark. Mark would continue to check on me every day after we the others all faded away, unsure how to talk to or be around me. But not Mark. He texted, called or just showed up for months to make sure I was at bare minimal surviving.Two weeks ago yesterday I stood at the podium at Mark’s viewing, looking down on him in his own casket, sharing that very story. While standing there I mentioned my boyfriend. I mentioned how he and Mark and I spent one summer together. I mentioned how Mark had been there for after the murder and I mentioned that they were together now.After I sat down and began listening to another person share a story about Mark, I thought back to Mark sitting next to me on my front step a month after the murder. He’d shown up at my door and dragged me out into the sun. I began crying that day. Mark jokingly told me to stop being a cry baby that my boyfriend would hate it. At that exact moment I felt Mark jab me between the ribs. I jumped and went to swat his hand away but his hands were in front of him. Mark looked at me funny and asked what was wrong. I told him what my boyfriend had said about poking me in the ribs. Mark laughed his huge laugh from his beautiful shit eating grin and said he totally believed my boyfriend was jabbing me in the ribs for being a cry baby. He’d have done the same thing he said before playfully shoving my shoulder and wrapping an arm around me.Two weeks ago yesterday I sat on a small love seat across from Mark in his casket with my current fiancé, in a room swollen full of young people and I thought back to that moment and I began to sob again. Next to me my fiancé shifted in his seat, my eyes were locked on Mark in his casket, and I felt a jab between my ribs. I flinched and looked to my fiancé, my eyes wide, but he was leaning away from me signNowing for a tissue. I looked back to Mark, remember his big shit eating grin saying of course it was my boyfriend jabbing me in the ribs for being a cry baby, he would do the same thing!And all I could do was smile.
-
What are the biggest signs that someone has narcissistic personality disorder?
Narcissists move VERY fast in relationships. It's not uncommon to hear, “I love you" and/or be bombarded with love songs/texts/memes a few weeks after meeting them. By rushing into sex/intimacy, they can fast-forward the relationship. They get their targets to fall for them faster without realizing something is amiss. This is also the reason they tend to be VERY good lovers. It's usually the “hook” in toxic relationships.Narcissists lack genuine personalities. So, they mirror their targets. If you find you have “so much in common" with a new person and your likes are their likes and your dislikes are coincidentally their dislikes as well, raise your antennas! They may be mirroring you. This is the “soulmates" hook… You'll also notice that they'll spend more time telling you who they are verses showing you. As time goes on, you'll notice the words they use to describe themselves do not fit their personality — at all. But, they will fit YOURS!!!Passive aggressive behavior and irrational/unexplained anger are also major red flags. Pay attention to how a person treats you the first time you say, “No”, and/or, when things don't go their way… If they give you the silent treatment, grow cold, and/or, pull away, do not overlook it! Most importantly, if someone pulls away, or, goes silent after you set a boundary, DO NOT pursue them! This is how they groom you to be the chaser in the relationship. It's emotional abuse/manipulation!Pay close attention to people who portray themselves as victims. NOTHING is EVER their fault! EVERYONE (including the family pet) has done them wrong… ALL of their ex's are “crazy” and mistreated them… Simply put, it's bullshit! No one should have a laundry list of bad experiences. If they do, RUN, because they're the common denominator! Narcissists tend to have a history of failed/short-term relationships. Believe it or not, it's hard for Narcissists to find people to deal with them long term due to their instability and poor behavior…Superficial relationships/friendships. I've noticed they don't have anyone they're genuinely close to. This is due to their inability to bond and form true attachments to people. Their relationships are shallow and based on surface-level bs. They'll refer to someone as their bestfriend, but you’ll notice they barely speak. Or, that the person is never really around. Or, only shows up when it's time to party, etc. They may also speak down on/poorly of said “bestfriend” behind their back. They tend to be very condescending, two-faced and downright mean.In my experience, they cannot talk about deep subjects like their feelings/emotions. Or, how a situation made them feel. Or, what their childhood was like in detail… They don't want to go there. I suspect it's because they can't. They don't know themselves. They can't connect with themselves, either. They live in a world of dishonesty. They're very dishonest with themselves about who they truly are.A poor relationship with their Mother/primary caregiver. Underlying issues between Narcissists and their Mother's (abuse, neglect, don’t get along, etc.) seems to be common. People that I've known who've displayed strong Narcissistic tendencies, ALL had bad relationships with their Mothers! I think it's worth mentioning that their Mother's also displayed strong Narcissistic traits… I'm fully aware and understand that there are healthy adults who have toxic Mother's. However, if you're spotting several red flags in an individual, including this one, pay closer attention!They're selfish! Some are selfish from the very beginning. Some start out generous and slowly begin witholding. Some act helpless and needy. They manipulate people into doing things for them. But, they never give back. It's not only financial and material selfishness. They're selfish emotionally, affectionately, conversationally. sexually and with their attention. They slowly withhold validation and support. EVERYTHING is about them, their needs, their wants... Everything happens on their terms. Anger, rage, silent treatments and disappearing acts are common when they don't get their way.Pathological lying. Narcissists are professional liars. It's their second nature. If you call them out, they'll take no issue with staring deep into your eyes and telling another lie to cover the one you called them out on. You'll never get the truth. Even with unchallengeable proof of the truth, they'll hold on to the lie. It's actually quite fascinating to watch them in action - once you know what your dealing with. They also have the uncanny ability to provoke doubt in their victims (even when you KNOW the truth), because their lies are so convincing.Beware of people who do not seek conflict resolution. Many Narcissists enjoy drama/chaos! Remember, these are high-conflict personalities. Many of them NEED to argue and fight! Peace to them, is what chaos is to us - unsettling. This is why they repeat behaviors that trigger a negative response. They need tension, anger and high/out of control emotions. They're known for calling people crazy, filled with drama, insecure, etc., when you attempt to discuss/resolve something THEY said/did. They're extremely disrespectful and rude people who lack self-awareness. They have an issue with being called on their behavior and project/deflect to avoid accountability. Normal people want to get along. They seek a fair compromise. Narcissists want to win. Conflict wears normal people down. This is how Narcissists get their way.Immaturity. It’s one thing to be playful and lighthearted (in appropriate settings) as an adult. It’s something completely different to be immature. Narcissists suffer from arrested development. They do not know how to respond to situations/people/stress/life appropriately. They have a child-like mindset. They truly believe everything is about them and have no concept of the needs of others. By nature, children are takers. They have no concept of reciprocation. They believe their Parents (and everyone else) exists to meet their needs. When their needs aren’t met, or, when they don’t get what they want/their way, they get mean and throw tantrums. They cannot think outside of themselves and their wants/needs in the moment. Narcissists are like children. They’re completely unaware that people are individuals with their own agency, needs, wants, opinions... They truly believe people exist to serve them. They believe their job is to receive. They really are children trapped in adult bodies who cannot consider anything/anyone other than themselves.Above everything I've stated, trust your intuition. Narcissists give off an uneasy vibe. They try to appear cool, calm and collected on the surface, but you can feel their energy. It's very off-putting. They have far more negative qualities than most people - and, they're noticeable. But, you have to stop justifying and making excuses in order to see people for who they really are. Accept people for who they are and not who you want them to be. Observe, listen and trust yourself. No one should be allowed to grant themselves a position in your life. Vet people and YOU decide if they'll be a liability, or, an asset to you. Lastly, take cues from your body. If you ever feel your mood change, feel anxious or feel your stomach knot up in the company of someone, don't ignore it. It could be a sign that you're in bad company!!!
-
When did you realize you're an asshole?
Just today I had an arsehole moment and disgraced myself in such a way that I almost don't want to tell this… but I will because Quora makes for a nice confessional.Today, I drove to work in my people mover van. It's ratty-tatty as can be but I love that old, slowly decaying bastard. Never lets me down.As I drove up into the parking lot, I noticed that there weren’t a lot of free parking spaces.In my hunt for something close to the building, I spied a car that had been parked crooked, occupying two spaces, making it impossible to fit any other vehicle.So I had to park my gigantic ugly van out on the road and walk uphill to get to my destination. Boohoo, eh? How will I manage?As I was passing by the truck, I clicked my tongue in disapproval and said, “You fucking inconsiderate cunt.”All of a sudden, the driver of the vehicle popped out from the other side. It was a lady putting some bags in her car that I hadn't seen as I was passing by and she looked at me with her jaw dropped. I had wound both my windows down so she would have gotten the full blast.I instantly felt terrible! I ruined her day over something as trifling as a parking space. Go, me.I'm so sorry, bad-parking lady! Thanks for not dragging me out of my car and walloping me. I would not have blamed you.Oh well. Chalk up another arsehole point. Apparently shitty people live longer, so I've got that going for me.Here's a photo of me in 50 years, dumping the heart of the ocean into the sea because I'm probably still going to be a mega-arsehole that survives on bitterness and the blood of virgins.
-
What should every person be knowledgeable about or be proficient in by the age of 20? Can we please create an answer wiki for th
A big part of the answer to this question depends on the place and society this 'every' person belongs to. However, I would try to give a more universal answer here:Driving and basic car upkeepManaging resources and budgeting; money, time, health, energyManaging people, creating and taking care of relationships; friends, family, colleagues etc., how to treat a lady wellLogic and critical thinkingBasic usage of computer and internet; how to use at least one OS, some necessary applications (word processor, spreadsheet etc.), how to Google Everyday mathematicsThe fact that you can never be good enoughThe fact that hardwork is more important than intelligence and good fortuneHow to make independent/wise choices and prioritizingBasic survival skills; building a fire, cooking, basic first aid (CPR and Heimlich maneuver)When to fight and how to do itPacking lightRecognizing one's limits; alcohol/drug usage, frankness with people, independence of speech and action, when you are a guest somewhereBasic physical training; push-ups, sit-upsHow to play at least one sportGeography; names and locations of major countries, cities, physical features of the world and especially of the little bubble you live inHow to smileBehavioral control; when to promise, how to negotiate, how to be a good house guestTaking basic security precautions; physical and onlineTaking care of one's physical, mental, emotional health
-
What is your experience with the SSC CHSL typing test?
To be honest, it was going to be a tough task to increase my typing speed from near about 20 wpm (that too looking at the keyboard) to the required mandate of 35 wpm. Tough because I started practicing typing only till the month of November arrived (the result of Tier II exam was declared on 13 October 2017). So I had roughly around a month to increase my speed nearly two-fold. And I took up the challenge.But very soon after my initial efforts I realised that no matter how hard I try, if I practice looking at the keyboard, the speed was always going to be not more than 30 wpm. So I decided to look online for some website that would help me learn typing without looking at the keyboard. And luckily I came across one such website and started practicing. The initial phase was very frustating and tough. And I thought that I won’t be able to keep up. Still kept practicing for at least an hour a day, and slowly improved.Then came the month of December. The DV was scheduled to be on the 4th at the SSC Office and the Skill Test on the 6th at Saket in New Delhi. I arrived in New Delhi on the 3rd and went for DV the next day. It was a quick process and completed within half an hour as it just required us to fill a few forms in our dossiers, verification of our marksheets and filling up of the preferences.I had nothing to do on the 5th and thus decided to go to watch the then ongoing Test between India and Sri Lanka at the Ferozshah Kotla. It was my first experience watching a match at the venue. And I wasn’t disappointed at all after a great fourth day’s play.Then came the day of the Skill Test. The test was scheduled to be at 09:30 am, which was the first shift of the day. There were a large number of candidates waiting outside the center as I signNowed there. Entry started at 09:30 am and after verification of hall ticket and other formalities, we were alloted a system each for the test. We had a Dell notebook laptop waiting along with QHMPL keyboard for the test. A candidate could use any of these keyboards as convenient. A sample passage was provided to be typed within two minutes by the candidates which was intended to get a feel of the available keyboards. Thereafter, as soon as the two minutes got over. We were required to type the main test passage within the stipulated time of ten minutes. A countdown timer was present on the top right of the screen to keep a track of the remaining time for the test. There were approximately around 1700+ characters and I was just able to complete the work 15 seconds ahead of the alloted time. This enabled me to correct two mistakes by the full time ended. At the end of the test I counted that there were 13 spelling mistakes in the whole script. A better keyboard would have probably resulted in lesser number of mistakes (I found the keys a bit too loose).After the test, I did not give up on typing practice. Slowly, unsteadily moving with practice. But kept moving. And today I am able to type this answer at around 40 wpm. And very happy that I was able to learn something new.Final result: Selected as PA/SA.Thank you for reading.
-
I took my car to Midas for a new muffler. Later they called to say my brakes needed machining and they could not release the car
I just finished my associates in auto tech, and they covered situations like this specifically — at least for the state of Ohio — and what they are doing is NOT legal.The repair shop CANNOT hold your car and keep you from taking it even if they think the thing is going to blow up or throw a tire or run you straight into the telephone pole across the street. Holding your car against your wishes is theft, and a call to the cops will get it released to you right quick.* See, you have the right as a consumer to get a second opinion, and even if the car is not drivable (for whatever reason) the right to have it towed to another shop or even home to sit in your driveway.If your car is in fact dangerous to drive (and this isn’t a scam), then what they ARE required to do is put in writing (in the work order) specifically what they think is wrong with the car, what the expected result of driving it will be, and that in their explicit experienced and informed professional opinion it should not be driven off the lot. Then, to cover their asses, they should have you sign it stating that you acknowledge that you have been told the condition of your car and the likely result of driving it. The repair tech will then sign it and likely a manager will witness it as well.At that point they hand you a copy of the work order and your keys and wish you the best of luck. If you do get into an accident and then try to sue the repair shop, they’ll whip out that work order with your signature on it proving that they warned you of the dangers and you will lose your case and probably wind up paying a buttload in the countersuit for fees and such.Now MY advice would be to tell the shop to complete the muffler repair and put their concerns about the brakes in writing, including their refusal to let you have the car. If they still try to keep your car, politely call your local police station in front of them and report your car as stolen (and under what conditions) and see how fast those keys are placed in your hand. Then, making no threats, take your car to your nearest dealership (who will be experts on your particular make and model so there will be no confusion about specs) and pay for them to do a full brake inspection. Pay for a brake inspection, do not take just a free one where they peek around the tires to see if you still have adequate brake pad thickness. You want to know if there is anything wrong with any part of your braking system, but especially the rotors, which are what the Midas guys were saying needed to be machined. I’m pretty sure that they are not going to find rotors worn to the point where the car is unable to be driven. If that is indeed the case, take that report from the dealership and contact the Midas corporate office with a politely worded email (for a paper trail) explaining how they tried to deceive you and hold your car hostage to further repairs. You decide if you want to ask for any sort of compensation at that point. Oh, and a State Inspector General might also find the complaint interesting, since if they’re doing it to you, they’ve done it to others. Perhaps also drop a word in the ear of your local TV news consumer advocates; they love stories like this.It’s jackasses like these guys who give honest mechanics a bad name, and — if they are indeed lying — they deserve to be hammered into the ground for pulling scams like this.*In the case of someone who doesn’t pay their repair bill, the shop still cannot keep the car. They have to get a mechanic’s lien on it in order to try to get their money back. Just keeping it is not an option without going to court.Edited for spelling errors.
-
What was the nicest thing you did for someone and they completely screwed you over right after?
This was not done to me but Mum. I have a brother whose father never accepted him from the time he was born. He is mum’s first born and the only boy. Well, mum raised him on her own. Mum got married to Dad and had us. In general my brother is a mean, stingy person. He easily gets jealous, is a male chauvinist( in a nutshell a cheapskate). We used to wonder what kind of woman would even risk her happiness to be with him because he is not an easy person unfortunately. One day he informed mum that he had got some lady pregnant. Well mum knew the kind of son she had so she decided to chip in so did my big sisters, I was in high school by then. They covered the biggest percentage of the expenses for the woman from the time she conceived to the time she gave birth. One day our sister in law called one of my sisters, crying-she was reporting my brother for beating her. Imagine he dared to hit an expectant lady. My sisters and mum could not believe it. Mum had done her very best to raise us right. My brother grew up with us and i believe my father was an exemplary father figure to him. Not once did Dad ever raise his hand to us nor mum. So we wonder where my brother picked up such vices. My sisters and mum scolded him so much and comforted our sister in law as much as they could-my sisters and mum became the shoulder for our sister in law, unfortunately she did not appreciate it. It is a tradition to go visit the family of a pregnant lady in my tribe in case the couple is not married. So the preparations for that were mainly covered by Mum and my elder sisters. Mum knew that her son is a miser and did not want to get embarrassed so she ensured she got her daughter in law and the mother in law befitting gifts. My siblings and mum technically covered the most of the costs of the visit. They kept taking care of her until the baby was five/six months old. With time, mum separated from Dad. We all left Dad alone in the house and rented a house. My brother suggested that we moved into one of his houses he had built so that we could support him(this meant we would pay the rent to him). We moved in and ensured we paid our rent before the due date. By then our nephew was over a year old. So since the parents were working mum offered to be baby sitting him for free of course. But then one day suddenly, the boy was taken to our neighbours in stead of being given to mum. He was no longer allowed to associate with us(his aunties and grandma). This hurt mum, she did not know why that had been done but she endured it quietly. We noticed with time that our neighbours were giving us weird vibes(negative attitude), we would see people pointing at us as we passed by(it was kind of a populated area-and everyone knew everyone). Mum had given a gomesi(traditional wear for my tribe) to her daughter in law as a gift but one morning, Mum found my brother when he had dug a hole and was going to to bury the gomesi, she took it away from him of course, why would i bury a gift that was given to me in good faith! Mum asked why and he said his wife and him did not want anything from mum. She did not understand where this was coming from considering 90% of everything in their house was bought by Mum or my siblings(Yes my brother is lousy but mum over the years tried to show him that he needed to upgrade and also encouraged her daughter in law to upgrade her son(my brother)). Anyway one issue after another arose, he started asking us to pay more for water and electricity bills besides other tenants, he kept giving us more rules which did not apply to other tenants. Certain parts of the compound were out of bounds for us which did not apply to other tenants. We were supposed to burn our own rubbish but other tenants were not. The wife stopped talking to us and with time so did my brother. Neighbours and relatives were avoiding us. Mum kept questioning herself and wondered where she went wrong. We paid rent on time(at times even before the due date), we paid all the other bills on time as well. We kept the compound clean and always tried to stay inside the house(yes Mum kinda made it a rule to keep inside the house as much as possible, she didn't encourage us to associate with neighbours considering how vulgar and dangerous some would be). We obeyed all the rules(even the one we didnot agree with because we tried to avoid conflicts of any sort and it was the right thing to do.) Mum could not bear it anymore. She confronted them one day and oh my God, it got ugly(no blows exchanged but it was horrible). The next morning, my brother reported mum to police that she was threating his wife’s life and safety and he asked us to leave with immediate effect. Fortunately by this time, I had just got a job, so us sisters could afford the rent with mum. It has been over three years now and we have not talked to him since then. We see him once in a while on functions and he does not look well. Lately he keeps asking our eldest sister to advocate for him to mum but she keeps asking him to man-up and do it himself just the way he got the balls to ditch us and Mum. When we left, our cousins and aunties started revealing to us how our sister in law and brother had been spreading weird rumours about us in the entire family-no wonder we used to get bog-looks from people at functions. Mum did the mumly things anyone would do for her son but her son and his wife boldly ditched her, spread wrong rumours about her, psychologically tortured her and she definitely did not deserve it.
Trusted esignature solution— what our customers are saying


Get legally-binding signatures now!
Frequently asked questions
How do i add an electronic signature to a word document?
How esign works?
What is authenticity page for electronic signature?
Get more for Complete Sign Word Fast
Find out other Complete Sign Word Fast
- Terms conditions amp information for st marks church stmarks org
- Wedding liturgies saint marks church stmarks org form
- Marriage licence goderich goderich form
- Business plans the legislative assembly of ontario ospace scholarsportal form
- Marriage application 02 25 09 losalamosnm form
- Marriage license requirements requirements to obtain a marriage license in kitsap county form
- Requirements for applying for a marriage license residence if form
- Application for marriage at holy cross episcopal church holycrosstryon form
- Requirements for entering into a marriage for two neptunetownship form
- 30 001 marriage ceremonies brochure indd form
- Full marriage application rjpmedia co form
- In genious indgensoc form
- Additional requirements for all categories consdetroit esteri form
- Lois e allyn skamania county skamaniacounty form
- Marriage application preparation worksheet form
- Marriage in europe hohenfels army form
- Ffi washoe county co washoe nv form
- Marriage application and record tate file number cumberlandco form
- Vital records amp statistics state office does not issue health nv form
- Banns of marriage application combertonchurch co form