How To Add Sign in Box
Contact Sales
Make the most out of your eSignature workflows with airSlate SignNow
Extensive suite of eSignature tools
Robust integration and API capabilities
Advanced security and compliance
Various collaboration tools
Enjoyable and stress-free signing experience
Extensive support
Keep your eSignature workflows on track
Our user reviews speak for themselves


Award-winning eSignature solution


How to incorporate a sign in box
If you're aiming to optimize your document signing workflow, understanding how to incorporate a sign in box using airSlate SignNow is crucial. This platform not only streamlines e-signatures but also improves collaboration, making it a preferred choice among businesses looking for efficiency. Here, we’ll walk you through the steps required to incorporate a sign in box into your documents using airSlate SignNow.
How to incorporate a sign in box: a step-by-step guide
- Open your web browser and go to the airSlate SignNow homepage.
- Create a complimentary account or sign into your current one.
- Select the document you wish to sign or send for signature by uploading it.
- If you intend to use this document regularly, create a template for future reference.
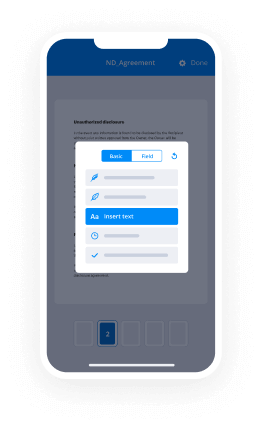
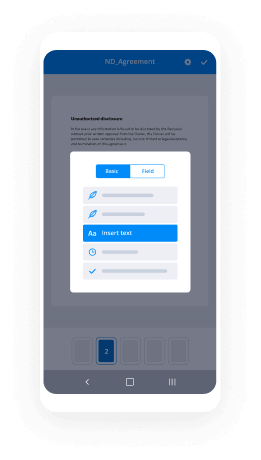
- Access your uploaded document and edit it as necessary by adding fillable fields or inserting data.
- Add signature fields for yourself and your recipients to ensure all parties can sign.
- Click on 'Continue' to set up and send an eSignature request.
By following these straightforward steps, you can successfully integrate a sign in box into your documents, enhancing the signing process for everyone involved. airSlate SignNow offers a powerful solution designed for small to mid-sized businesses, providing excellent returns on investment with its extensive features and clear pricing.
Begin improving your document workflow today! Register for airSlate SignNow and discover seamless e-signature solutions with exceptional support.
How it works
Rate your experience
-
Best ROI. Our customers achieve an average 7x ROI within the first six months.
-
Scales with your use cases. From SMBs to mid-market, airSlate SignNow delivers results for businesses of all sizes.
-
Intuitive UI and API. Sign and send documents from your apps in minutes.
A smarter way to work: —how to industry sign banking integrate
How to electronically sign & fill out a document online
Document management isn't an easy task. The only thing that makes working with documents simple in today's world, is a comprehensive workflow solution. Signing and editing documents, and filling out forms is a simple task for those who utilize eSignature services. Businesses that have found reliable solutions to how to integration sign add box don't need to spend their valuable time and effort on routine and monotonous actions.
Use airSlate SignNow and how to integration sign add box online hassle-free today:
- Create your airSlate SignNow profile or use your Google account to sign up.
- Upload a document.
- Work on it; sign it, edit it and add fillable fields to it.
- Select Done and export the sample: send it or save it to your device.
As you can see, there is nothing complicated about filling out and signing documents when you have the right tool. Our advanced editor is great for getting forms and contracts exactly how you want/need them. It has a user-friendly interface and full comprehensibility, offering you full control. Register today and begin enhancing your eSign workflows with powerful tools to how to integration sign add box online.
How to electronically sign and fill documents in Google Chrome
Google Chrome can solve more problems than you can even imagine using powerful tools called 'extensions'. There are thousands you can easily add right to your browser called ‘add-ons’ and each has a unique ability to enhance your workflow. For example, how to integration sign add box and edit docs with airSlate SignNow.
To add the airSlate SignNow extension for Google Chrome, follow the next steps:
- Go to Chrome Web Store, type in 'airSlate SignNow' and press enter. Then, hit the Add to Chrome button and wait a few seconds while it installs.
- Find a document that you need to sign, right click it and select airSlate SignNow.
- Edit and sign your document.
- Save your new file to your account, the cloud or your device.
By using this extension, you prevent wasting time on boring actions like downloading the file and importing it to an electronic signature solution’s catalogue. Everything is close at hand, so you can quickly and conveniently how to integration sign add box.
How to digitally sign docs in Gmail
Gmail is probably the most popular mail service utilized by millions of people all across the world. Most likely, you and your clients also use it for personal and business communication. However, the question on a lot of people’s minds is: how can I how to integration sign add box a document that was emailed to me in Gmail? Something amazing has happened that is changing the way business is done. airSlate SignNow and Google have created an impactful add on that lets you how to integration sign add box, edit, set signing orders and much more without leaving your inbox.
Boost your workflow with a revolutionary Gmail add on from airSlate SignNow:
- Find the airSlate SignNow extension for Gmail from the Chrome Web Store and install it.
- Go to your inbox and open the email that contains the attachment that needs signing.
- Click the airSlate SignNow icon found in the right-hand toolbar.
- Work on your document; edit it, add fillable fields and even sign it yourself.
- Click Done and email the executed document to the respective parties.
With helpful extensions, manipulations to how to integration sign add box various forms are easy. The less time you spend switching browser windows, opening several profiles and scrolling through your internal records trying to find a document is more time for you to you for other important tasks.
How to securely sign documents in a mobile browser
Are you one of the business professionals who’ve decided to go 100% mobile in 2020? If yes, then you really need to make sure you have an effective solution for managing your document workflows from your phone, e.g., how to integration sign add box, and edit forms in real time. airSlate SignNow has one of the most exciting tools for mobile users. A web-based application. how to integration sign add box instantly from anywhere.
How to securely sign documents in a mobile browser
- Create an airSlate SignNow profile or log in using any web browser on your smartphone or tablet.
- Upload a document from the cloud or internal storage.
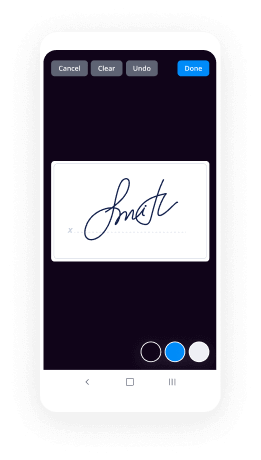
- Fill out and sign the sample.
- Tap Done.
- Do anything you need right from your account.
airSlate SignNow takes pride in protecting customer data. Be confident that anything you upload to your account is secured with industry-leading encryption. Auto logging out will protect your account from unwanted access. how to integration sign add box from the mobile phone or your friend’s mobile phone. Safety is key to our success and yours to mobile workflows.

How to eSign a PDF on an iPhone or iPad
The iPhone and iPad are powerful gadgets that allow you to work not only from the office but from anywhere in the world. For example, you can finalize and sign documents or how to integration sign add box directly on your phone or tablet at the office, at home or even on the beach. iOS offers native features like the Markup tool, though it’s limiting and doesn’t have any automation. Though the airSlate SignNow application for Apple is packed with everything you need for upgrading your document workflow. how to integration sign add box, fill out and sign forms on your phone in minutes.
How to sign a PDF on an iPhone
- Go to the AppStore, find the airSlate SignNow app and download it.
- Open the application, log in or create a profile.
- Select + to upload a document from your device or import it from the cloud.
- Fill out the sample and create your electronic signature.
- Click Done to finish the editing and signing session.
When you have this application installed, you don't need to upload a file each time you get it for signing. Just open the document on your iPhone, click the Share icon and select the Sign with airSlate SignNow button. Your doc will be opened in the app. how to integration sign add box anything. Plus, utilizing one service for all of your document management requirements, everything is easier, better and cheaper Download the app today!
How to electronically sign a PDF file on an Android
What’s the number one rule for handling document workflows in 2020? Avoid paper chaos. Get rid of the printers, scanners and bundlers curriers. All of it! Take a new approach and manage, how to integration sign add box, and organize your records 100% paperless and 100% mobile. You only need three things; a phone/tablet, internet connection and the airSlate SignNow app for Android. Using the app, create, how to integration sign add box and execute documents right from your smartphone or tablet.
How to sign a PDF on an Android
- In the Google Play Market, search for and install the airSlate SignNow application.
- Open the program and log into your account or make one if you don’t have one already.
- Upload a document from the cloud or your device.
- Click on the opened document and start working on it. Edit it, add fillable fields and signature fields.
- Once you’ve finished, click Done and send the document to the other parties involved or download it to the cloud or your device.
airSlate SignNow allows you to sign documents and manage tasks like how to integration sign add box with ease. In addition, the security of your info is priority. File encryption and private servers can be used as implementing the most recent features in info compliance measures. Get the airSlate SignNow mobile experience and operate more efficiently.


FAQs
-
What is the process of How To Add Sign in Box in airSlate SignNow?
To learn How To Add Sign in Box in airSlate SignNow, start by opening your document in the editor. Click on 'Add Fields' and select the 'Signature' option, then drag and drop the Sign in Box to your desired location. Finally, customize the box settings and save your document.
-
Are there any costs associated with adding a Sign in Box in airSlate SignNow?
Using airSlate SignNow to add a Sign in Box is part of our subscription plans, which are priced affordably for businesses of all sizes. You can choose from various plans based on your needs, ensuring you get the best value for your investment. Our pricing includes all features related to adding Sign in Boxes and more.
-
What features does airSlate SignNow offer for adding a Sign in Box?
airSlate SignNow provides a user-friendly interface to easily add a Sign in Box. Features include customizable fields, drag-and-drop functionality, and the ability to set signing order and notifications. This makes it simple to manage your documents and enhance the signing experience.
-
Can I integrate other tools while adding a Sign in Box in airSlate SignNow?
Yes, airSlate SignNow allows seamless integrations with various applications, enabling you to enhance your document workflows. When adding a Sign in Box, you can connect with CRM systems, cloud storage, and collaboration tools for a more efficient process. This integration capability helps streamline operations.
-
What are the benefits of using airSlate SignNow to add a Sign in Box?
The primary benefits of using airSlate SignNow to add a Sign in Box include increased efficiency and reduced turnaround time for document signing. It also enhances security with encrypted signatures and provides a professional appearance to your documents. This solution empowers your business to operate smoothly and effectively.
-
Is there a mobile version for adding a Sign in Box in airSlate SignNow?
Yes, airSlate SignNow offers a mobile app that allows you to add a Sign in Box on-the-go. This feature is perfect for businesses that require flexibility and quick access to document signing from anywhere. The mobile version maintains the same functionality as the desktop application, ensuring consistency.
-
How secure is the Sign in Box feature in airSlate SignNow?
The Sign in Box feature in airSlate SignNow is built with the highest security standards, ensuring that all documents and signatures are encrypted. This protects your sensitive information and provides a secure signing environment. With airSlate SignNow, you can trust that your documents are safe and compliant.
-
How do I add or change my home address on Google Maps?
Unfortunately Google maps doesn’t allow any independent houses on maps as this would be against the policies drafted for it, it can only be listed if it is attached with some historical significance or prominence in real world. Though you could add it now, it will be removed eventually as all newly added places will be scrutinized thoroughly by the experts policy holders of maps.Hope that was a convincing answer !P.S. As i work for google maps, i am eligible to answer this !
-
How can one create a new SoundCloud account?
SoundCloud is a popular audio streaming website that enables users to select and play their favorite music. Users can record music, upload their own music track, share and promote their own music track. It was founded by Alexander Ljung and Eric Wahlforss with the primary objective of helping musicians share their audio tracks with each other. The music streaming website is based in Berlin, Germany. How to Log into SoundCloud AccountSoundCloud is accessed by over 350 people every month worldwide. It is easy to log into SoundCloud, users can log in using their Facebook, Google or profile URL. Read on to find a detailed explanation of the SoundCloud login procedure.How to login Other Social Networking SitesHow To Login WhatsApp Web | WhatsApp Web LoginHow To Instagram Online Login | Instagram Online Login | instagram.comHow To Login Badoo | Badoo LoginHow to Log into Emodo AccountHow to login meez account Meez Account Login | www.meez.comHow to login Twoo Account | Twoo Account Login | www.twoo.comHow to Log into SoundCloudStep 1– Existing members of SoundCloud must go to the sign homepage. Look for the ‘sign in’ section at the center of the web page.Step 2– You can click on the “Continue with Facebook” or “Continue with Google” button if you are willing to sign in through social networking sites. Else provide your email address or Profile URL in blank space.Step 3– Enter the password in the respective space and you are successfully logged in.Forgot PasswordLost your account login password? Follow the password reset instructions below to retrieve your account.Step 1– Proceed to the ‘sign in homepage‘ of Sound Cloud and click on the “Need help?” link found at the bottom right of the sign in section, as it appears in the picture below.Step 2– Select a sign in problem which applies to you and provide the requested information.How to Create SoundCloud AccountWilling users of SoundCloud can create a new account using their social networking account or email account. You can register using the sign in page and begin using SoundCloud.
-
How do I become an Amazon seller?
Amazon signNowed $100 billion in annual sales this year, but there’s something else you may not have heard: Over 40 percent of merchandise sales are attributed to third-party sellers.That means that over $40 billion in sales is going to outside merchants.Amazon may be the largest Internet retailer in North America, but it’s the merchants who are pocketing the most money. That’s not the only surprise you may learn about the ecommerce behemoth.So, if you’re interested in getting your own chunk of the Amazon pie, here area few myths about Amazon illustrating that it may not be exactly what you thought:1. That Amazon is 'just another website'Amazon is the king of ecommerce websites. Social-media butterflies use Facebook to engage with friends. Internet users search Google for answers to questions. Online shoppers go to Amazon to do one thing: buy.Given that $100 billion in expected annual sales, Amazon is the king of online markets. It has built-in trust, its buyers' payment information is already saved and Prime members receive two-day shipping on all Prime-eligible orders. So Amazon can’t be beat when it comes to choosing an ecommerce platform to sell on.If you’re serious about succeeding in ecommerce, chances are you stand to gain by selling on Amazon.2. That selling on Amazon has to be difficultYou may think it’s difficult to switch from fulfilling your own orders to selling on Amazon, but for many merchants, the site actually makes their lives easier. Amazon has streamlined the fulfillment process through its Fulfillment by Amazon program.For a small fee, Amazon will handle the majority of fulfilment and customer support tasks, which means zero phone calls, no shipping problems and less hassle for you, the merchant. All you have to do is ship your product, and Amazon will take care of the rest.3. That you can’t be successful selling on Amazon todayThere are multiple success stories of sellers going from zero to five figures a month in just a few weeks' time.If you think you’ve missed the boat on selling on Amazon, you’re wrong. The boat is still very much in the harbor, and there’s still time for you to get on board.First, setup an Amazon seller account. For the time being, you can select the option to ‘Sell as an Individual’ and avoid the monthly fee. Next, add FBA to your seller account.Round up your ‘valuable goods’ and, if possible, pack them up into individual boxes. Doing so will prepare you for the next step, which is setting up and managing where your shipped stuff will live on Amazon.Sign in at Amazon Seller Central and go to the Inventory menu. Choose to ‘Add a listing.’ Because Amazon stores and tracks inventory in marked boxes, you will also need to create a new box for each individual box you send.Hopefully, your inventory items will have easily identifiable codes like a UPC or ISSN, but if not, you can also search on an identical item using Amazon’s search function. When you find a match, click ‘Sell Yours.’After adding some product descriptors, be sure to check off that the item is going to be sold through FBA. Also, you should switch from the default Individual to Case-Packed Items mode. Why?You will inevitably be shipping multiple identical items of something (e.g., DVDs), and you will want Amazon to track these multiple items separately. FBA does this by assigning cases. For example, if you have only one DVD to ship, you’d mark it as 1 unit (i.e., article type) per case and 1 number per case. But if you have three of the same DVD to ship, you’d mark them as 1 unit per case and 3 numbers per case.Keep hitting ‘Add a Listing’ until all your boxed items are cataloged. Now, click ‘Work on Shipment.’ This will allow you to create and print shipping labels for your box(es). Choose SPD (small parcel delivery) as your shipping option unless your boxed items weigh over 150 lbs. The other options are LTL (Less-Than-Truckload) and FTL (Full Truckload), and hopefully you won’t need to worry about these massive haul options for now.Select UPS as your carrier because it partners with Amazon; in other words, using UPS gives you a shipping discount.Now you can start printing out your packing slips and shipping labels. To this end, it helps if you have an at-home scale that will immediately weigh your boxes. If not, you can input the dimensions of your box(es) online and have it weighed out at your local UPS. Just be sure you eventually print out your labels using FBA and not your local UPS- Amazon’s reduced shipping rates will amaze you (sorry about the pun).Once you’ve mailed your box(es), you can track your shipments, and eventually your unpacked inventory, via Amazon.There might be an Amazon App for thatNot all of us are blessed with a smartphone, but if you do have one, you can easily scan your goods and determine their immediate value using either an iOS or Android-based price checker Amazon app on your smartphone. This is useful if you’re dealing with a lot of inventory or prone to checking out store clearance sales for additional merchandise.One free iPhone-based Amazon app is Amazon Seller. The FBAScan app is available for both types of phone systems but requires an Amazon Pro Seller account for activation.Some things to keep in mind1. You pay for shipping. As hinted at above, you are responsible for your own shipping charges to Amazon. This is something to keep in mind as you’re considering packing away Grandma’s 50’s era glassware or your priceless 8-track collection.2. Seller fees. Amazon still takes about a 15% cut on all your sales through FBA. If you can sell your items more profitably through a garage sale or private listing on Ebay, then do so.3. Additional fees. Amazon has a fee schedule for item pickup (basically, anytime Amazon employees must handle your product to stock or ship it) and storage as well as weight-based fees for item shipping. Nothing is free here. Amazon also recently instituted a Long Term Storage fee for items stored longer than one year.4. Co-mingling issues. Because Amazon has numerous distribution centers, it uses the distribution center located closest to the customer when shipping product. As a result, the product you end up selling may not actually be your own if you agree to co-mingle your merchandise. This can happen easily if, say, you are selling a DVD or book that another Amazon seller may also have listed.The advantage of using co-mingling is that you sell more of your stuff faster. The disadvantage is that you can’t exactly vouch for the quality and legality of another seller’s merchandise. This can lead to problems or even Amazon account closure because of pirated goods.5. Sales tax. You may live in a state that requires you to report your sales tax (e.g., Missouri). Alternately, your items might be shipped off to a state that charges sales tax. However, when you work with FBA, you have no good way of knowing which warehouse is stocking your items (especially if you’re comingling) and to which state(s) they are being shipped. While most state ecommerce tax collection has not been aggressively enforced, it may become so in the future.6. Competition. With FBA, you’re not just competing with other third-party merchants on price and selection, you’re also competing with Amazon itself. This is possibly the biggest strike against FBA versus a selling service like Ebay or Etsy. Definitely check Amazon prices for comparable goods before sending your own stuff to FBA.The Best Training Course We’ve FoundJim Cockrum’s Proven Amazon Course is ideal for anyone who wants to order products wholesale from other countries. Jim also offers an online community, additional strategy guides and online tools- among other goodies. Jim’s course looks to be a highly reviewed, cost affordable program for those looking to get started with selling on Amazon using a proven method.
-
How can I add MailChimp sign up box to WordPress.com?
Getting your content to the reader is supper important to grow your business. If you want to increase traffic to your website, I suggest you to start looking at different strategies to collect subscriber email. There are many ways to obtain new emails, but the best plugin I use today is MailChimp. The current theme I am using is NewsPaper9 by tagDiv. You can purchase this theme for a reasonable price of $59 on ThemeForest.net. I love this theme so far and today I will document how I incorporate Mailchimp with Newspaper9 theme. Step 1: Install/Activate TagDiv Newspaper Plugin This premium Newsletter plugin came with the theme. All I had to do is to activate it under Plugin tab. Once it is activated, you can see it under External Shortcodes and I can just have to drag it to the column on the right. Located in the External Shortcodes I can edit tittle, description, color or name of the button Click on the column and you can see the editing Step 2: Download MailChimp Plugin MailChimp is FREE. All you have to do is to go to Plugins–Add New. After successfully download MailChimp Plugin, I had to import an API key from MailChimp. To get an API key, I created an account with MailChimp. [ https://mailchimp.com/ ]The picture below is the result of after adding API key. API key requirement Step 3: Create an account with MailChimp and obtain API key To get the API key: 1. Login to Mailchimp. 2. Click your profile name to expand the Account Panel and choose Account 3. Click the Extras menu and choose API keys 4. Paste the key back on the plugin on WordPress API key instruction There are 2 more steps you need to follow to complete this task. Please read it at my blog HOW TO ADD MAILCHIMP TO NEWSPAPER9 WORDPRESS THEME - TheMoneyTools [ https://www.themoneytools.org/how-to-add-mailchimp-to-newspaper9-wordpress-theme/ ] to find out more.
-
How do I import PST to Office 365 OWA?
It has now become easier and simplified for the users to import PST files to Office 365 email account just with the help of Outlook PST Migrator from here:Import PST to Office 365 OWAYou can directly upload PST file to OWA (Outlook.com), just follow these simple steps:Run the application and load PST files.Choose Office 365 from Saving options and enter OWA account Login credentials.Click on Convert button and process will initialize to upload PST data to Outlook.Thanks!!!
-
Rich Text Editor (Quora feature): How can I type a literal @ symbol in one of my answers or a wiki summary?
For English-keyboard users with the similar problem: Using an English keyboard, the @ symbol is actually shift + , (somewhere on the left hand side!) and '' is shift 2. When I shift 2 for a quote symbol ('') the auto-completion dialogue pops up, so my problem is being unable to type '' without typing ' twice. Anyway the twist is that when I press ESC or ENTER it comes up with @ rather than ''. The only way I can do it is, as I say, to type ' twice...! Though to be honest, that's probably less hassle anyway!
-
What keyboard shortcuts should Quora add?
Keyboard shortcuts, as a feature, are only helpful for power/pro/maven users. Maven users require tight control over their experience, while casual users have enough trouble with the existing Quora paradigms. This said, shortcuts are sorely needed. Ideally, they'll be baked into the product instead of shoved into a browser extension. My 2¢:Feed/Page navigationj & k : Progress down & up the feed (alt.: n & p, preferably not ↓ & ↑)Add pointer next to selected question. e.g., ▻ (Unicode 9659)+ or = : Upvote selection- : Downvote selectionm : Expand a teaser selection (the "more" link)o or enter : Enter question's full viewf : Follow question/personr : Respond (add answer to question)h : Share (should be merged with "Ask to Answer" IMO)Site-wide/ : Jump to Quora (search) barg then h : Go homeg then i : Go to inboxg then p : Go to profileg then d : Go to draftsg then g : Go to topic groups? : Pull up cheat sheet in lightbox overlay (show markup shortcuts too)Esc : Exits active field or dialog boxRich text editorBrowser standards:⌘ + b : Bold text⌘ + i : Italicize text⌘ + u : Underline textThe rest aren't shortcuts, but proposed markup when editing:>> for blockquote, e.g.,>> For blockquote* for bulleted list* Bullet 1* Bullet 2Automatic 1. 2. 3. numbering should make a list only when used consecutively1. Blah2. Blah3. BlahReviewer feed navigationshift + r : Toggles reviewer toolse : Edit selection (question or answer)When editing a question, topics, question, and details fields should all expand for editing.Admin feed navigation (and random review mode)a, s, d : Approve, skip, deny (can also be adapted for normal feed nav)g then r : Go to review pageOther considerationsPerhaps most importantly, "tab" must be implemented to jump to submit and cancel buttons and between fields, for both ease-of-use and web accessibility standards.Make these keys customizable from Settings (accessibility).Modifier keys should be avoided at all costs (inter-browser compatibility).Don't default to search focus on the home page.This basic set can be expanded as usage paradigms are established. Feature creep is a silent killer—you're on a website in a browser, not in Vim (text editor)!
-
What is the best way to add MailChimp e-mail sign up boxes to a Genesis child theme, but be able to easily style the forms?
I use Gravity Forms, one of the most popular form builder plugins for WordPress, to build capture forms. There is an add-on for MailChimp, so that you can use a Gravity Form to create a capture for that service. If you have some CSS skills, you can do the following:1. Use Google Chrome's Developer Tools (View > Developer Tools) to view your site's HTML/CSS and learn what the class or id is of a particular element on a page.2. Install JetPack by Automattic and turn on it's CSS Editing feature, which will then allow you to write a few styles that will override the default styles in your theme.Some theme frameworks do give you a field to override CSS as well, so whether you override using JetPack or your theme frameworks CSS field, is up to you. You shouldn't have to modify the theme's CSS file in the theme's installed directory. You can simply modify using the abovementioned process.
-
How can I build a secure login/signup system on AWS?
Building secure signup/login system is not easy. So let the experts handle security and scalability.We are using AWS Cognito User Pool with AWS Cogniot Federated Identity to implement the signup/login and we are happy with it because it integrates well with other AWS resourcesFor example, you can allow a logged in user to have read access to specific columns and rows in a table in DynamoDB where the key is his user id. Or, give permission to invoke an API Gateway methodThere are many ready solutions that works out of the box and you can start for free on most of themAuth0StormPathAWS CognitoThe reason you should NOT build your own signup/login is integration with other login providerUsing an existing solution will make it easy for you to add sign in by google, facebook, amazon m, etc. when the time comes
Trusted esignature solution— what our customers are saying


Get legally-binding signatures now!
Frequently asked questions
How do i add an electronic signature to a word document?
What is a live electronic signature?
How to esign a dtloop document?
Find out other How To Add Sign in Box
- Sajili laini kenya form
- Printable womens ministry survey form
- Shared housing form
- Passport application form 15987537
- Payroll report sample form
- Wwwxx form
- Phs 838 form
- Application letter for jamaica fire brigade form
- 1040 pr form
- Form 8b
- Financial assistance for ignition interlock form
- Basic skin assessment form
- Job application rubric form
- Australian passport renewal application form
- Safety program templates form
- Kelly hashway form
- Harris predator ii form
- School id card form pdf
- Domestic relations verified financial information form
- Bestuurders verklaring gericht aan abn amro bank nv form