Sign Form for IT Secure
Make the most out of your eSignature workflows with airSlate SignNow
Extensive suite of eSignature tools
Robust integration and API capabilities
Advanced security and compliance
Various collaboration tools
Enjoyable and stress-free signing experience
Extensive support
Keep your eSignature workflows on track
Our user reviews speak for themselves


Award-winning eSignature solution


Document Signing for IT Security
To guarantee that your IT operations are safe, it is crucial to employ a dependable eSignature service. The 'Document Signing for IT Security' with airSlate SignNow provides a smooth method to handle your paperwork digitally while ensuring compliance and safety. With user-friendly functionalities and strong support, airSlate SignNow is a perfect option for organizations aiming to optimize their signing workflows.
Procedure to sign document for IT security using airSlate SignNow
- Launch your preferred internet browser and visit the airSlate SignNow website.
- Register for a new account with a complimentary trial or log in if you are a current user.
- Choose the file you wish to upload for signing or sharing.
- If you intend to use the document again, transform it into a template for later purposes.
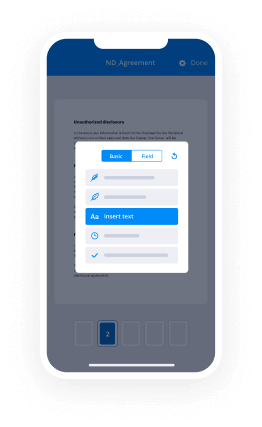
- Open your uploaded document to modify it: insert fillable fields or specific details as required.
- Sign your file and assign signature fields for additional recipients.
- Click on 'Continue' to set up and dispatch the eSignature invitation.
In summary, airSlate SignNow offers a thorough solution for securely managing electronic signatures. Its user-friendly interface and wide-ranging functionalities make document management straightforward, allowing businesses to concentrate on what truly matters.
Don't hesitate any longer to improve your document signing method. Begin your free trial with airSlate SignNow today and enjoy the advantages of a secure and effective eSignature service!
How it works
Rate your experience
-
Best ROI. Our customers achieve an average 7x ROI within the first six months.
-
Scales with your use cases. From SMBs to mid-market, airSlate SignNow delivers results for businesses of all sizes.
-
Intuitive UI and API. Sign and send documents from your apps in minutes.
A smarter way to work: —how to industry sign banking integrate
How to eSign & complete a document online
Document management isn't an easy task. The only thing that makes working with documents simple in today's world, is a comprehensive workflow solution. Signing and editing documents, and filling out forms is a simple task for those who utilize eSignature services. Businesses that have found reliable solutions to department sign it form secure don't need to spend their valuable time and effort on routine and monotonous actions.
Use airSlate SignNow and department sign it form secure online hassle-free today:
- Create your airSlate SignNow profile or use your Google account to sign up.
- Upload a document.
- Work on it; sign it, edit it and add fillable fields to it.
- Select Done and export the sample: send it or save it to your device.
As you can see, there is nothing complicated about filling out and signing documents when you have the right tool. Our advanced editor is great for getting forms and contracts exactly how you want/need them. It has a user-friendly interface and full comprehensibility, offering you total control. Sign up today and start enhancing your eSignature workflows with convenient tools to department sign it form secure on the internet.
How to eSign and fill forms in Google Chrome
Google Chrome can solve more problems than you can even imagine using powerful tools called 'extensions'. There are thousands you can easily add right to your browser called ‘add-ons’ and each has a unique ability to enhance your workflow. For example, department sign it form secure and edit docs with airSlate SignNow.
To add the airSlate SignNow extension for Google Chrome, follow the next steps:
- Go to Chrome Web Store, type in 'airSlate SignNow' and press enter. Then, hit the Add to Chrome button and wait a few seconds while it installs.
- Find a document that you need to sign, right click it and select airSlate SignNow.
- Edit and sign your document.
- Save your new file to your account, the cloud or your device.
By using this extension, you avoid wasting time on dull activities like downloading the document and importing it to a digital signature solution’s collection. Everything is close at hand, so you can easily and conveniently department sign it form secure.
How to eSign docs in Gmail
Gmail is probably the most popular mail service utilized by millions of people all across the world. Most likely, you and your clients also use it for personal and business communication. However, the question on a lot of people’s minds is: how can I department sign it form secure a document that was emailed to me in Gmail? Something amazing has happened that is changing the way business is done. airSlate SignNow and Google have created an impactful add on that lets you department sign it form secure, edit, set signing orders and much more without leaving your inbox.
Boost your workflow with a revolutionary Gmail add on from airSlate SignNow:
- Find the airSlate SignNow extension for Gmail from the Chrome Web Store and install it.
- Go to your inbox and open the email that contains the attachment that needs signing.
- Click the airSlate SignNow icon found in the right-hand toolbar.
- Work on your document; edit it, add fillable fields and even sign it yourself.
- Click Done and email the executed document to the respective parties.
With helpful extensions, manipulations to department sign it form secure various forms are easy. The less time you spend switching browser windows, opening several profiles and scrolling through your internal data files looking for a template is a lot more time to you for other significant duties.
How to securely sign documents using a mobile browser
Are you one of the business professionals who’ve decided to go 100% mobile in 2020? If yes, then you really need to make sure you have an effective solution for managing your document workflows from your phone, e.g., department sign it form secure, and edit forms in real time. airSlate SignNow has one of the most exciting tools for mobile users. A web-based application. department sign it form secure instantly from anywhere.
How to securely sign documents in a mobile browser
- Create an airSlate SignNow profile or log in using any web browser on your smartphone or tablet.
- Upload a document from the cloud or internal storage.
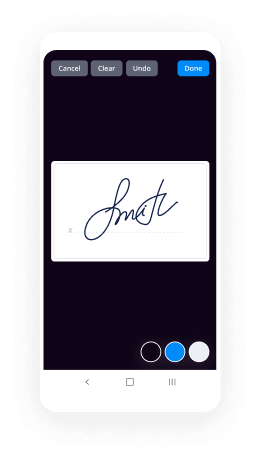
- Fill out and sign the sample.
- Tap Done.
- Do anything you need right from your account.
airSlate SignNow takes pride in protecting customer data. Be confident that anything you upload to your account is secured with industry-leading encryption. Automated logging out will shield your information from unauthorised entry. department sign it form secure from the phone or your friend’s mobile phone. Protection is essential to our success and yours to mobile workflows.
How to digitally sign a PDF file with an iPhone or iPad
The iPhone and iPad are powerful gadgets that allow you to work not only from the office but from anywhere in the world. For example, you can finalize and sign documents or department sign it form secure directly on your phone or tablet at the office, at home or even on the beach. iOS offers native features like the Markup tool, though it’s limiting and doesn’t have any automation. Though the airSlate SignNow application for Apple is packed with everything you need for upgrading your document workflow. department sign it form secure, fill out and sign forms on your phone in minutes.
How to sign a PDF on an iPhone
- Go to the AppStore, find the airSlate SignNow app and download it.
- Open the application, log in or create a profile.
- Select + to upload a document from your device or import it from the cloud.
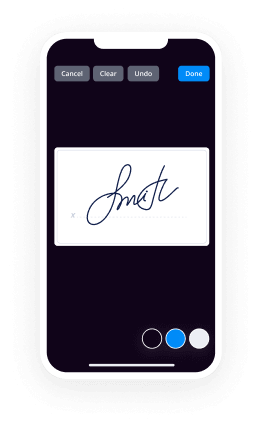
- Fill out the sample and create your electronic signature.
- Click Done to finish the editing and signing session.
When you have this application installed, you don't need to upload a file each time you get it for signing. Just open the document on your iPhone, click the Share icon and select the Sign with airSlate SignNow button. Your sample will be opened in the mobile app. department sign it form secure anything. In addition, utilizing one service for all your document management requirements, things are easier, smoother and cheaper Download the app right now!

How to eSign a PDF file on an Android
What’s the number one rule for handling document workflows in 2020? Avoid paper chaos. Get rid of the printers, scanners and bundlers curriers. All of it! Take a new approach and manage, department sign it form secure, and organize your records 100% paperless and 100% mobile. You only need three things; a phone/tablet, internet connection and the airSlate SignNow app for Android. Using the app, create, department sign it form secure and execute documents right from your smartphone or tablet.
How to sign a PDF on an Android
- In the Google Play Market, search for and install the airSlate SignNow application.
- Open the program and log into your account or make one if you don’t have one already.
- Upload a document from the cloud or your device.
- Click on the opened document and start working on it. Edit it, add fillable fields and signature fields.
- Once you’ve finished, click Done and send the document to the other parties involved or download it to the cloud or your device.
airSlate SignNow allows you to sign documents and manage tasks like department sign it form secure with ease. In addition, the security of your information is top priority. File encryption and private web servers can be used for implementing the newest capabilities in info compliance measures. Get the airSlate SignNow mobile experience and work more effectively.


FAQs
-
What is the best way to Sign Form for IT Secure?
The best way to Sign Form for IT Secure is by using airSlate SignNow, which offers a user-friendly interface and robust security features. With our platform, you can easily upload your document, add signature fields, and invite others to sign. This ensures that your forms are signed securely and efficiently.
-
How much does it cost to Sign Form for IT Secure with airSlate SignNow?
airSlate SignNow offers competitive pricing plans tailored to fit various business needs when you Sign Form for IT Secure. Our plans start at an affordable rate, allowing businesses to choose the level of service that best suits their requirements. Plus, you can take advantage of a free trial to explore our features.
-
What features does airSlate SignNow provide for signing forms securely?
When you Sign Form for IT Secure using airSlate SignNow, you benefit from features like advanced encryption, multi-factor authentication, and audit trails. These features ensure that your documents are secure and compliant with industry standards. Additionally, our platform allows for easy document tracking and management.
-
Can I integrate airSlate SignNow with other applications for signing forms?
Yes, airSlate SignNow allows you to integrate seamlessly with various applications, enhancing your ability to Sign Form for IT Secure. You can connect with CRM systems, cloud storage services, and productivity tools to streamline your workflow. This ensures that signing forms fits seamlessly into your existing processes.
-
Is it easy to get started with airSlate SignNow to Sign Form for IT Secure?
Absolutely! Getting started with airSlate SignNow to Sign Form for IT Secure is quick and easy. Simply sign up for an account, and you’ll have access to our intuitive platform where you can upload documents, customize signature fields, and send them for signing within minutes.
-
What are the benefits of using airSlate SignNow for signing forms?
Using airSlate SignNow to Sign Form for IT Secure offers numerous benefits, including improved efficiency, reduced turnaround time, and enhanced security. Our platform simplifies the signing process, allowing you to focus on your core business activities while ensuring that your documents are handled securely and professionally.
-
Is airSlate SignNow compliant with legal standards when signing forms?
Yes, airSlate SignNow is fully compliant with legal standards, ensuring that when you Sign Form for IT Secure, your documents are legally binding. Our platform adheres to regulations such as ESIGN and UETA, making it a trusted choice for businesses looking for a secure eSignature solution.
-
What is the best electronic signature (eSignature / eSign) software for small businesses?
I use signNow. Its has great features and potential to use API when i need to.You have few others that are good and established. signNow Echosign is great.signNow - is another option. They also have stripe integration for payment.All of them will track responses ..like you can see who viewed and who signed.Gather your requirements :a) How many documents do you want to get signed every month?b) Does the content vary? if not you can create one template.c) Do you need API or can you fill the variables like name and address for a template and send it ?d) Do you want someone to pay when they sign? or is there a separate payment process - Right now out of box its only signNow ( AFAIK) or You can do Zapier integration if you have resources to help you with.Most of them start at low price and cost adds up when you want more than one template or you exceed maximum documents signed.Until you do a complete API integration, you can easily replace one with another. So you can start off with FREE plan and try it out and upgrade to basic plan and see if it meets your need and try the other vendor.If you know your numbers upfront, you can talk to the sales team.
-
Why in 2014 there are still companies and organizations that require printing, scanning, and signing documents? Aren't secure we
Encrypting a form or data transfer over the internet doesnt prove you were the one filling out a form or executing (signing) a document.Organizations have legal responsibilities to make sure they can authenticate who is filling out the documents.There are various levels and standards of this. You might, for certain purposes like a passport be required to get several guarantors. Sometimes you might need a notiary. Sometimes originals have to be signed only, with separate copies for each party. Sometimes online doc signing is good enough. Sometimes fax is okay. Or online forms with email or facebook/google/oauth authentication. So it all depends on how important it is for the 3rd part to know it ia you AND how much infrastrucutre they have to manage things like electronic signing.Think: how would a regular office keep files if some docs are physical and others electronic?
-
If one becomes disabled, as in doctors won't sign a medical release form to allow the patient to return to work, but those same
You asked: If one becomes disabled, as in doctors won't sign a medical release form to allow the patient to return to work, but those same doctors argue over a diagnosis and thus are unable to name the disability, can one file for Social Security disability?What a great question!!! Thanks for the request to answer! Here goes:With little exception, Social Security Disability claim approval is not solely based on a diagnosis. If you look closely at the forms for application of benefits as well as the others that support the primary app, the plethora of info sought is substantial. Your claim should be evaluated on, for example:Your age, education, skills, job historyYour medical conditions….PLURAL. (While you may think that you left work because of a specific condition, that condition is likely the straw that broke the camel’s back…..what other conditions are there and what treatments, medications, etc. do you take for them?)How long you have been out of work and how long the condition(s) are expected to lastDoes your medical record (the sum of all your doctors, tests, RXs, etc.) demonstrate compliance with care and an active desire to treat and signNow medical improvement or, at least, stability?Whether you can work at all, part-time, with accommodations, etc.While Social Security Disability may be a tough bar to signNow, it may not be insurmountable. Why not place a call to a couple of Social Security Representatives who can help you evaluate your specific issues. What I do not recommend is going at the claim alone. Folks who represent claimants before the Social Security Administration have an arsenal of forms we regularly give to treating physicians to help them help Social Security understand their patient’s issues, restrictions, limitations. Think of your representative as the person who puts the pieces of the puzzle together, for you, for your doctors, for your claims.While you are at it, make sure you have copies of ALL plans and documents from work. Once you have been out of the loop for a time, it can become difficult to get copies of data that was in place on the last day you worked.Good luck!Meet me at LinkedIn: http://linkedin.com/in/carynmont...Or at Twitter: Caryn Montague (@LTDclaims) | Twitter#
-
How do I bypass the two-step verification of my Google Account?
Try it1. Go to Sign in - Google Accounts and click on Security. 2. Under 2-step verification section click on the "Settings" button. 3. Now under the "Application-specific passwords" section select "Manage application -specific passwords" (you might be required to enter your password again for security purposes). 4. Now just enter a descriptive name for the application you want to use the password for (in this case probably something like "Live Writer" and click the "Generate password" button. 5. Copy the newly generated password, then use it as your Google account password on Live Writer instead of your real password. I hope this helps.www.icognix.net
-
When an elderly parent signs power of attorney forms in the US for health/welfare or financial matters to make an adult child th
A2AMy wife and I recently went through an estate planning exercise during which we executed durable powers of attorney. This answer is based upon our experience as well as online research.Especially when the agent (attorney-in-fact) is a child, there is no need for the POA to identify the agent other than by name. Neither is there any need for the principal to be identified other than by name. The first answer’s statement that identifying numbers must appear in the POA is incorrect.The principal’s signature must be signNowd, and it can be helpful to have the agent’s consent to act as agent signNowd. The notary typically will (must, in some states) request a signatory’s government identification, such as a driver’s license, and will record that number in the notary’s journal. The first answer’s statement that a social security number must be provided is incorrect.As concerns a notary’s tasks, please see 5 Steps To A Proper Notarization and How To Determine If An ID Card Is Acceptable For Notarization.
-
How can I sign up for WeChat on my Mac without owning a phone?
For all you Mac users with Mac OS X 10.7 (Lion) or later, simply download WeChat for Mac in the App Store and scan the QR code to log in. Along with being able to chat with WeChat friends and groups on your desktop, the Mac App makes it easy to transfer files from your mobile device to your desktop and vice versa with the “File Transfer” capability. Just drag and drop your photos, media and other files into the “File Transfer” folder. Or upload desktop files directly within a chat to send to friends. As long as you’re logged into WeChat for Mac, alerts will pop up on your computer’s menu bar without notifications on your phone. WeChat for Mac also supports Sight videos, allows users to view chat histories forwarded by friends and search contacts as well as groups. So whether you’re chatting on your desktop, iPad, or smartphone device, WeChat constantly aims to innovate and deliver you the best cross-platform social communications experience possible.
Trusted esignature solution— what our customers are saying


Get legally-binding signatures now!
Frequently asked questions
How do i add an electronic signature to a word document?
How to create an electronic signature pic?
How to edit sign a pdf?
Get more for Sign Form for IT Secure
- How Can I Sign Illinois Doctors PPT
- How To Sign Texas Doctors PDF
- Help Me With Sign Arizona Education PDF
- How To Sign Georgia Education Form
- How To Sign Iowa Education PDF
- Help Me With Sign Michigan Education Document
- How Can I Sign Michigan Education Document
- How Do I Sign South Carolina Education Form
Find out other Sign Form for IT Secure
- Q r s t form
- Registration form toctwd d umn
- 200402newsletter pub annualreportfy09 d umn form
- Library connection university of minnesota duluth d umn form
- Directable behavior models for virtual driving scenarios james d umn form
- The form 17 path d umn
- Promoting physical activity form
- Department of social work college of education ampamp d umn form
- Abbreviation and acronym disambiguation in clinical discourse form
- Rv blue heron form
- Pre cwh removal post cwh removal university of minnesota d umn form
- Tmc traffic data automation for mndot39s traffic university of d umn form
- Umd chemical engineering newsletter for alumni amp friends d umn form
- Student employment policy university of minnesota duluth d umn form
- Prenatal history form
- University of minnesota duluth d umn form
- Umd msw field program field agency questionnaire d umn form
- Academic hiring affirmative action summary university of form
- Rutherford international student scholarship application d umn form
- Department of social work college of education ampamp d umn 13600423 form