Create Sign Document Mac
Make the most out of your eSignature workflows with airSlate SignNow
Extensive suite of eSignature tools
Robust integration and API capabilities
Advanced security and compliance
Various collaboration tools
Enjoyable and stress-free signing experience
Extensive support
Keep your eSignature workflows on track
Our user reviews speak for themselves


Award-winning eSignature solution


Generate Signature Document on Mac
Generating a signature document on your Mac is straightforward and effective with airSlate SignNow. This robust platform optimizes the eSignature workflow, enabling you to effortlessly oversee your documents while conserving time and resources. Featuring user-friendly capabilities and clear pricing, it’s an excellent selection for enterprises aiming to improve their document processes.
Procedure to Generate Signature Document on Mac Using airSlate SignNow
- Launch the airSlate SignNow website in your chosen browser.
- Sign up for a complimentary trial or log into your existing account.
- Choose the document you intend to sign or distribute for signatures.
- If you plan to utilize this document again, transform it into a template for future usage.
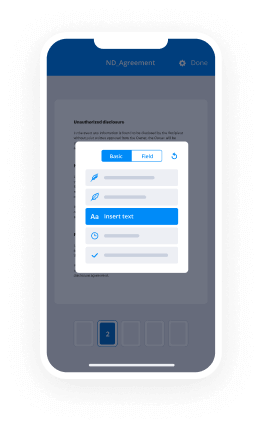
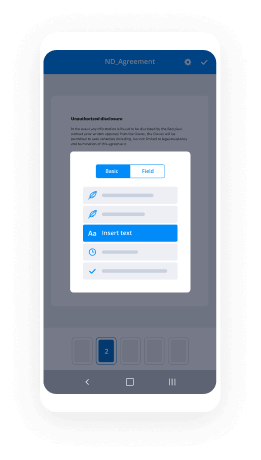
- Open your file to make necessary adjustments: add fillable sections or extra details as needed.
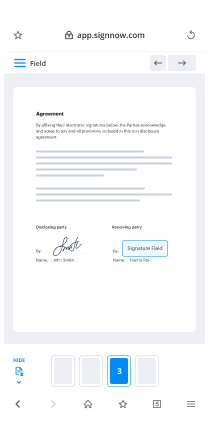
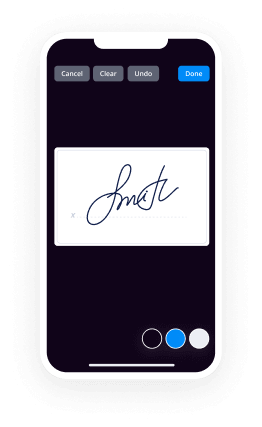
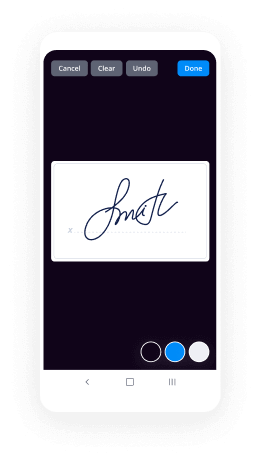
- Place your signature and assign signature fields for any recipients.
- Click 'Continue' to set up and send an eSignature request.
By adhering to these steps, you can seamlessly generate and manage signature documents on your Mac. airSlate SignNow not only simplifies the signature procedure but also allows for straightforward scalability and personalization, making it ideal for small to medium-sized enterprises.
Prepared to improve your document management process? Enroll in airSlate SignNow today and discover the advantages of exceptional support and a comprehensive array of features designed to deliver outstanding ROI.
How it works
Rate your experience
-
Best ROI. Our customers achieve an average 7x ROI within the first six months.
-
Scales with your use cases. From SMBs to mid-market, airSlate SignNow delivers results for businesses of all sizes.
-
Intuitive UI and API. Sign and send documents from your apps in minutes.
A smarter way to work: —how to industry sign banking integrate
How to eSign and fill out a document online
Document management isn't an easy task. The only thing that makes working with documents simple in today's world, is a comprehensive workflow solution. Signing and editing documents, and filling out forms is a simple task for those who utilize eSignature services. Businesses that have found reliable solutions to functionality sign create document mac don't need to spend their valuable time and effort on routine and monotonous actions.
Use airSlate SignNow and functionality sign create document mac online hassle-free today:
- Create your airSlate SignNow profile or use your Google account to sign up.
- Upload a document.
- Work on it; sign it, edit it and add fillable fields to it.
- Select Done and export the sample: send it or save it to your device.
As you can see, there is nothing complicated about filling out and signing documents when you have the right tool. Our advanced editor is great for getting forms and contracts exactly how you want/need them. It has a user-friendly interface and full comprehensibility, giving you total control. Create an account today and begin enhancing your eSignature workflows with convenient tools to functionality sign create document mac on the web.
How to eSign and complete documents in Google Chrome
Google Chrome can solve more problems than you can even imagine using powerful tools called 'extensions'. There are thousands you can easily add right to your browser called ‘add-ons’ and each has a unique ability to enhance your workflow. For example, functionality sign create document mac and edit docs with airSlate SignNow.
To add the airSlate SignNow extension for Google Chrome, follow the next steps:
- Go to Chrome Web Store, type in 'airSlate SignNow' and press enter. Then, hit the Add to Chrome button and wait a few seconds while it installs.
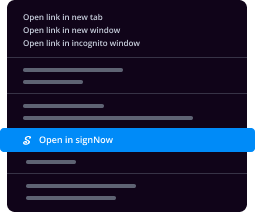
- Find a document that you need to sign, right click it and select airSlate SignNow.
- Edit and sign your document.
- Save your new file to your account, the cloud or your device.
Using this extension, you avoid wasting time and effort on dull actions like saving the file and importing it to a digital signature solution’s collection. Everything is easily accessible, so you can quickly and conveniently functionality sign create document mac.
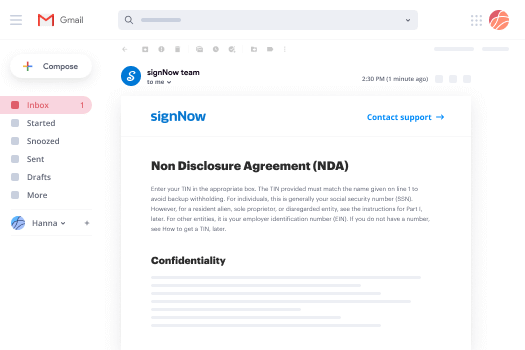
How to digitally sign documents in Gmail
Gmail is probably the most popular mail service utilized by millions of people all across the world. Most likely, you and your clients also use it for personal and business communication. However, the question on a lot of people’s minds is: how can I functionality sign create document mac a document that was emailed to me in Gmail? Something amazing has happened that is changing the way business is done. airSlate SignNow and Google have created an impactful add on that lets you functionality sign create document mac, edit, set signing orders and much more without leaving your inbox.
Boost your workflow with a revolutionary Gmail add on from airSlate SignNow:
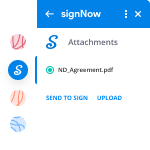
- Find the airSlate SignNow extension for Gmail from the Chrome Web Store and install it.
- Go to your inbox and open the email that contains the attachment that needs signing.
- Click the airSlate SignNow icon found in the right-hand toolbar.
- Work on your document; edit it, add fillable fields and even sign it yourself.
- Click Done and email the executed document to the respective parties.
With helpful extensions, manipulations to functionality sign create document mac various forms are easy. The less time you spend switching browser windows, opening several accounts and scrolling through your internal samples trying to find a document is a lot more time to you for other significant activities.
How to safely sign documents in a mobile browser
Are you one of the business professionals who’ve decided to go 100% mobile in 2020? If yes, then you really need to make sure you have an effective solution for managing your document workflows from your phone, e.g., functionality sign create document mac, and edit forms in real time. airSlate SignNow has one of the most exciting tools for mobile users. A web-based application. functionality sign create document mac instantly from anywhere.
How to securely sign documents in a mobile browser
- Create an airSlate SignNow profile or log in using any web browser on your smartphone or tablet.
- Upload a document from the cloud or internal storage.
- Fill out and sign the sample.
- Tap Done.
- Do anything you need right from your account.
airSlate SignNow takes pride in protecting customer data. Be confident that anything you upload to your account is secured with industry-leading encryption. Automatic logging out will protect your information from unwanted entry. functionality sign create document mac from the phone or your friend’s mobile phone. Protection is vital to our success and yours to mobile workflows.
How to digitally sign a PDF document on an iPhone
The iPhone and iPad are powerful gadgets that allow you to work not only from the office but from anywhere in the world. For example, you can finalize and sign documents or functionality sign create document mac directly on your phone or tablet at the office, at home or even on the beach. iOS offers native features like the Markup tool, though it’s limiting and doesn’t have any automation. Though the airSlate SignNow application for Apple is packed with everything you need for upgrading your document workflow. functionality sign create document mac, fill out and sign forms on your phone in minutes.
How to sign a PDF on an iPhone
- Go to the AppStore, find the airSlate SignNow app and download it.
- Open the application, log in or create a profile.
- Select + to upload a document from your device or import it from the cloud.
- Fill out the sample and create your electronic signature.
- Click Done to finish the editing and signing session.
When you have this application installed, you don't need to upload a file each time you get it for signing. Just open the document on your iPhone, click the Share icon and select the Sign with airSlate SignNow button. Your sample will be opened in the app. functionality sign create document mac anything. In addition, utilizing one service for your document management requirements, things are easier, smoother and cheaper Download the application today!
How to electronically sign a PDF on an Android
What’s the number one rule for handling document workflows in 2020? Avoid paper chaos. Get rid of the printers, scanners and bundlers curriers. All of it! Take a new approach and manage, functionality sign create document mac, and organize your records 100% paperless and 100% mobile. You only need three things; a phone/tablet, internet connection and the airSlate SignNow app for Android. Using the app, create, functionality sign create document mac and execute documents right from your smartphone or tablet.
How to sign a PDF on an Android
- In the Google Play Market, search for and install the airSlate SignNow application.
- Open the program and log into your account or make one if you don’t have one already.
- Upload a document from the cloud or your device.
- Click on the opened document and start working on it. Edit it, add fillable fields and signature fields.
- Once you’ve finished, click Done and send the document to the other parties involved or download it to the cloud or your device.
airSlate SignNow allows you to sign documents and manage tasks like functionality sign create document mac with ease. In addition, the security of your data is priority. File encryption and private web servers can be used as implementing the newest capabilities in info compliance measures. Get the airSlate SignNow mobile experience and work better.


FAQs
-
How do I create a sign document on my Mac with airSlate SignNow?
To create a sign document on your Mac using airSlate SignNow, simply log in to your account, upload the document you need to sign, and use the intuitive interface to add signatures and other fields. The process is straightforward, allowing you to efficiently create and send documents for signing.
-
What features does airSlate SignNow offer for creating sign documents on Mac?
airSlate SignNow offers a range of features for creating sign documents on Mac, including customizable templates, bulk sending options, and real-time tracking of document status. These features enhance your document workflow, making it easier to manage and sign documents online.
-
Is airSlate SignNow affordable for small businesses wanting to create sign documents?
Yes, airSlate SignNow provides cost-effective pricing plans tailored for small businesses that want to create sign documents. With various subscription options, you can choose a plan that fits your budget while enjoying powerful e-signature features.
-
Can I integrate airSlate SignNow with other applications on my Mac?
Absolutely! airSlate SignNow can be easily integrated with various applications on your Mac, including Google Drive, Dropbox, and Salesforce. This integration allows you to streamline your document management and enhance your workflow when creating sign documents.
-
What are the benefits of using airSlate SignNow to create sign documents on Mac?
Using airSlate SignNow to create sign documents on Mac provides numerous benefits, including increased efficiency, improved security, and the convenience of eSigning from anywhere. This solution helps you save time and resources while ensuring that your documents are signed quickly and securely.
-
Is it possible to create sign documents offline on Mac with airSlate SignNow?
While airSlate SignNow primarily operates online, you can prepare documents for signing offline and then upload them once you regain internet access. This flexibility allows you to create sign documents on your Mac even when you're not connected to the internet.
-
Are there any limits on the number of documents I can create and sign with airSlate SignNow?
The limits on the number of documents you can create and sign with airSlate SignNow depend on the subscription plan you choose. Each plan offers a different quota, so you can select one that meets your needs for creating sign documents on Mac.
-
What is the easiest method for signing documents digitally?
You can use websites like signNow or Google's Hello Sign. You can just type your name and they are legally accepted digital signatures. The Word doc gets automatically converted to PDF. Some entities don't accept scanned copies of signatures, they want 'wet' signatures.
-
How do I create a very simple (just text and pictures, programmed in HTML) free web?
Open a text editor. On a Windows computer, you'll usually use Notepad, or Notepad++ whereas Mac users will use TextEdit:Windows - Open Start , type in notepad, or notepad++and click Notepad or "Notepad++" at the top of the window.Mac - Click Spotlight , type in textedit, and double-click TextEdit at the top of the results.Set up your document type for HTML. Type in and press ↵ Enter, then type in and press ↵ Enter again. Finally, type in and press ↵ Enter. The top of your document should resemble the following:[1] Add a tab title for your web page. This is the title which will appear on the browser tab when you open the page (e.g., "Facebook"). Type in
, enter your web page's tab title, and type in . You'll then add the closing "Head" tag, which is , on its own line. The title section should look like this:My Web Page Indicate the beginning of your page's body text. Type in below the closed "Head" tag. This ensures that the rest of your document's text will be considered website text until you close the "Body" tag. You should have the following: Create a page heading. Your page heading is the title which will appear at the top of your website. To create one, type in, add your heading, and then close the tag with
. For example:Welcome to My Page!
Add additional headings as you go. There are six different headings that you can create by using the through tags. For example, to create three different-sized headings in succession, you might write the following:Welcome to My Page!
My name is Bob.
I hope you like it here.
Create a paragraph. Paragraph tags are used to create distinct blocks of text. To place text in a paragraph, type inand type in your text, then type in
to close the tag:This is my paragraph.
You can add multiple paragraph lines in a row in order to create a series of paragraphs under one heading.Change text color. You can change the color of any text by framing the text with the tags, making sure to type your preferred color into the "color" section (you'll keep the quotes). For example, to turn a paragraph's text blue, you would write the following:[2]Whales are majestic creatures.
You can turn any text (e.g., headers) into a different color with this set of tags.HTML supports a surprisingly large number of colors, so feel free to experiment with different color names.Format text with bold, italic, or underlining. Bold text, italic text, and underlined text can be created with the tags, the tags, and the tags respectively. You can also create subscript text (used for things like numbers before square roots) and superscript text (used for things like squaring numbers):[3]Bold text Italic text Underlined text Subscript text Superscript textAdd a picture to your page. You can use thetags to embed an existing image in your web page. For example, if the image's URL is "http://www.mypicture.com/lake", you would write the following:
Link to another page. You can add an link to another website by using the link text tag set, where link is the URL for the website to which you want to link and link text is the text that will act as the link. For example, to link to Facebook, you would type the following:[4]This is the link to Facebook's website.Close the web page's tags. As with any tag in HTML, you'll have to close the and tags that are at the top of your document by typing in the following at the bottom of the document: Review your web page. You can add more paragraphs, headings, and text anywhere on the page in between the tags if needed. One example of a completed web page is as follows:
wikiHow Fan Page Welcome to My Page!
This is a fan page for wikiHow. Make yourself at home!
Important Dates
January 15, 2019 - wikiHow's Birthday
Links
Here is a link to wikiHow: How to do anything
Make any last-minute changes. If you see any errors in your code, correct them before proceeding. Once you're certain that your HTML accurately reflects your expectations, you can proceed to the next part.Part2Saving and Opening Your Web PageConvert your document to plain text on a Mac. If you're using a Mac, click the Format menu item at the top of the screen, then click Make Plain Text in the resulting drop-down menu.This step is neither necessary nor possible on Windows.Open the "Save" menu. Since you created a new text document in order to write your web page, you can press Ctrl+S (Windows) or ⌘ Command+S (Mac) to do so.You can also click File and then click Save As in the resulting drop-down menu. This works on both Windows and Mac computers.Enter a name for your HTML document. Type whatever you want to name your document into the "File name" (Windows) or "Name" (Mac) text box.Change the document's file type. You'll need to change the document from a text file to an HTML file:Windows - Click the "Save as type" drop-down box, click All Files, and then type .html at the end of the file's name.Mac - Replace the .txt at the end of the file's name with .html instead.Click Save. It's at the bottom of the window. Doing so will create an HTML file.HTML files typically open with your default web browser.Close your text editor. At this point, you're ready to open your HTML file in your browser so that you can view your web page.Open the HTML document with your browser. In most cases, you'll be able to double-click the HTML document to do this. If double-clicking the document results in an error, do the following:Windows - Right-click the document, select Open with, and click your preferred browser.Mac - Click the document once, click File, select Open With, and click your preferred browser.Edit the HTML document if needed. You may notice an error in your HTML page. To change it, you can edit the HTML document's text:On Windows, you can right-click the document and click Edit in the resulting drop-down menu (if you have Notepad++ installed, this will say Edit with Notepad++instead).On Mac, you'll want to click the document to select it, click File, select Open With, and click TextEdit. You can also drag the document into TextEdit.Source: How to Create a Simple Web Page with HTMLHope this helps!Deeksha AgarwalProduct Growth Specialist at LambdaTest -
Which are the only Mac apps you need for a productive 2018?
I’ve been in a productive 2018 with only the applications that came with macOS. While I’m retired I’m the volunteer secretary for the local arts society. I use Contacts and smartlist lists to send mail using the Mail app to all or selected subgroups of the nearly 100 members. I use Pages to create meeting agendas, the meeting minutes, and the newsletter. I post to Facebook using Safari. I use Photos to manage photos of art works, members doing something interesting, and other things for the newsletter. Occasionally workshop tutors and others will send Microsoft Word documents which are handled adequately by Pages and Excel spreadsheets which are handled by Numbers. I use Preview for PDF files. I use Numbers to record things like details of artworks entered in our exhibitions and rosters of members to look after the exhibition space. I export PDF files from Contacts, Pages, and Numbers to send to people and for archiving. I scan old paper documents using Image Capture for archiving. I use iCloud to store all of these documents.In summary, the only applications I need are Contacts, Mail, Pages, Safari, Photos, Preview, Numbers, and Image Capture to be productive in 2018 and into the future.
-
What is the best app to edit PDF files? I always come up with requirements like reducing number of papers and making new files?
I have tried using various applications such as PDFelement for Mac and signNow to edit PDF files. However, PDFelement for Mac gave me the best experience and so it is the most preferable app for PDF editing.It is normal to have multiple requirements now and then, such as making new files and reducing the paper numbers. The frequency of such occurrences requires you to have a reliable app that can come in handy at any moment.In my experience, PDFelement for Mac is the only reliable PDF editor as it makes new files in multiple ways. For instance, you can create new files by combining other PDF files. The software also provides templates, which help you to make new files faster, especially if you are not experienced.I would also recommend it if you are trying to reduce the number of papers in your office. The only extra requirement is a scanner. PDFelement for Mac converts scanned paper work into PDF files, which you can access more easily and edit to change content.You should not hesitate to make new files or reduce paper work since PDFelement for Mac can handle both tasks quickly and give you great and quality results.
-
How can I get the most out of OS X Lion?
Take advantage of the new window resizing features in Lion. In previous versions of OS X, you only had one drag-handle at the bottom-right corner of he window, but no longer! In Lion, you can drag from any edge of the window. What's more? Hold Shift while dragging the edge of a window and the aspect ratio of the window will be preserved as you resize it. Hold Option while dragging the edge to drag the opposite edge in the opposite direction (dragging to the right from the right side will also stretch it out towards the left from the left side, for example).Embrace the changes as much as possible, even if they seem annoying at first. Inverted scrolling may feel entirely unnatural at first, but give it a few hours or a few days, and you won't be able to go back!Try out the full-screen mode (Command-Shift-F, or click the full-screen icon in the top-right corner of the window) on your favorite apps. I wasn't much of a full-screen fan, but I've kept Mail and Calendar (iOS/Mac App) in full-screen mode constantly since I installed Lion. With Mission Control and ⌃→, it's a surprisingly functional and focused experience. Not too many third-party apps have implemented full-screen modes yet (see Which third-party Mac apps support Lion's built-in full-screen feature?), but the list is certainly growing.Use a trackpad. The new gestures are great. I especially like the zoom gestures features in Safari, except on a very small number of sites like Google Maps where they don't work as you'd expect yet. I can't imagine using new organizational features like Mission Control if I wasn't using a trackpad (or Magic Mouse).Use small icons in the Finder's sidebar. This goes against what I said earlier about embracing the changes, but if the huge icons in the Finder's sidebar are driving you crazy, you can switch them back to small icons in System Preferences. Just go into the General pane of System Preferences and select Sidebar icon size: Small.If you're still on a pre-Lion OS, make sure you aren't relying on any PowerPC applications. PowerPC applications are no longer supported in Lion, so if you haven't upgraded yet, make sure the software you use isn't PowerPC-only. Microsoft Office 2004 (and earlier) and Photoshop CS2 (and earlier) are two popular examples of PowerPC applications you may still be using if you haven't bothered to pay for an upgrade yet. You'll have to upgrade to a newer (Intel) version to run on Lion.Try out the new text-to-speech voices. Lion contains support for a bunch of nice Nuance voices. These voices are starting to sound quite natural, and they have a variety of accents and languages. Open up the Speech pane in System Preferences and then go to Text to Speech > System Voice > Customize. If you select a Nuance voice, it'll automatically be downloaded by Software Update for free (they're about 300MB each).
-
What are some of the best personal productivity apps that people use?
Everyone wants to be more productive. With modern technology, there are plenty of ways to make your life a little easier. There are tons of productivity apps out there, and I've used a lot of them. With so many apps to choose from, it is sometimes difficult to find the best productivity apps. Everyone uses them in a slightly different way and not every app is available on all the platforms. I can't tell everyone what will work best for them, but I can show you what my best productivity apps are. Here are my top 10 favorites:1. 2DoAs far as productivity apps go, my personal favorite would have to be 2Do.Available on Apple App Store here.Available on Google Play Store here.I’ve had this app for over 5 years and I’ve tried plenty of other apps that have come and gone since then. I always come back to 2Do.You can use it for something as simple as entering a quick list of things you need to remember, like a shopping or to-do list, or you can use it as a full-on task and life manager.Here are a few of the features I like the most:Lists and groups - Create any amount of groups, and those groups can have any number of lists within. Then your lists have tasks, checklists, or projects, which all can have tons of details like start date, due date, notes, tags, attachments, and more. Even with all this, it’s a very simple process to create a task and just get going.Sorting - With 2Do, you can sort however you want, by status, priority, start date, due date, creation date, modified date, alphabetical, manually, and more. Again, with all those options you would think things would get complicated. With 2Do, everything is very well designed and laid out in the best way I can imagine.Batch editing - If you want to make the same change to multiple tasks, 2Do has a batch editing tool that allows you to do just that. It makes life a whole lot easier when I want to add a tag to all my morning tasks or move all my project steps into another list.Smart lists - We mentioned lists above, but there’s a special kind of list called a smart list. Using their powerful search tool, which can search for tags, titles, dates, etc. you can then create a smart list based on your search terms. Anytime you create a new task that fits within those parameters, it is automatically added to the smart list.Those are my favorite features, but here’s even more:Tasks by location - get notified when you’re within the area.Cloud sync and automatic backups - instant updates on all your devices.Security - lock the app or any list individually with a password or your fingerprint.Localizations - app is available in 15 languages and counting.There is also an iPad, Apple Watch, Mac, and Android version of 2Do. It has features specific to each device to help round out the experience to work the best on whatever device you’re using. Visit their website to learn more.2. TrelloAvailable on the Apple App Store here.Available on the Google Play Store here.If you're a visual thinker, Trello is the productivity app for you. It's so feature-filled you can use it to manage basically anything.The features I love the most are:Customization - Organize and customize your boards, lists, and cards however you want. Because everyone is different, no one manages their projects exactly the same, and Trello allows for that freedom where other apps fall short.Collaboration - Work solo or work with a team. You can invite other people to specific boards while you keep your personal boards private. Assign tasks to other people, make notes, and get real-time updates as the team is getting things done.Work Offline - This one is a biggy for me. I can't stand when I go into an app while I'm riding the train and I can't use it because there's no cell service. With Trello, you have full functionality offline, and then everything syncs as soon as you have a connection.Attachments - Attach photos, videos, or other files to your lists. Like I said, this app is great for visual thinkers, and I love using this feature.Those are my favorites, but here are some other important ones you might be interested in:Checklists - Add checklists for your to-do items, set a due date, and check them off when complete.Calendar View - See your cards in calendar view to see what's coming up next.Totally free - I know there is some sort of subscription for more features, but I've never felt like any features were missing, so I'm perfectly happy with the fully-functional free version.Trello is available on iPhone, iPad, Apple Watch, Android, and Web, so no matter what device you're using, you can access and manage your life with Trello. Learn more on their website.3. Scanner ProAvailable on the Apple App Store here.This app is not available on the Google Play Store, but there are plenty of other scanner apps to choose from.This app will scan your documents and help you digitize and store all your paperwork. I use it to make a digital backup copy of important documents.The features I love the most are:Automatic Scanning - Hover the app over a document and it will automatically detect the edges and scan it for you. No need to press the scan button, although you can if you want. This feature makes scanning twice as fast in my experience.Text Recognition - Scanner Pro lets you search for certain text within your scanned pages. I don't know how it's possible to read text from an image, but this app can do it, which makes finding certain documents much easier and faster.Search Photos for Scans - Before I got this app, I used to just take pictures of any documents I wanted to save. When I finally got Scanner Pro, I wanted to transfer the photos over and it automatically scanned my photo library and found the ones that looked like documents and presented them to me so I could select and organize them into one PDF file with multiples pages.Those are my favorite features, and here are a few more you might find useful:Share to everything - Scanner Pro can share with virtually any online storage system as well as any other PDF or image viewing app you have on your phone. You can set it to automatically upload new documents to you online storage.Password protection - Set a password so no one else can access your personal documents.Undo/Redo - Sometimes I make a mistake on a document. Rather than re-scanning 400 pages, Scanner Pro keeps track of every single change made to any documents and lets you undo accidental or unwanted changes.Learn more about Scanner Pro and other Readdle apps on their website.4. Day One JournalAvailable on the Apple App Store here.Available on the Google Play Store here.Day One is perfect for keeping a daily journal. It really feels personal and almost like a good friend that you can tell anything to.The features I love the most are:Automatic Details - Day One adds metadata automatically when you make an entry. They track date and time (obviously), location, weather, and a couple other things. It is really neat to go back to a journal entry from a year ago and remember what the weather was like that day or where I was at.Photos - The ability to add photos to journal entries is one of my favorite things about this journal app. Others allow photos too, but the way Day One does it just feels so nice and perfect. I don't really know how to explain it, but basically they've built it in a way that makes the photos and the text flow smoothly and compliment each other.Exporting and Printing - You can export you journals to PDF, HTML, or JSON, and you can also print them in an actual book that will be delivered to your house. Imagine showing your grandkids a book full of your memories and good times.Those are my favorites, but there are tons of great features. A couple more are:Search - Search by calendar, timeline, maps, or photos. There's a solution for everyone.Security - Lock your journals with a password, and back them up on Day One's secure servers so you'll never lose them.Day One Journal is available on iPhone, iPad, Apple Watch, Mac, and Android devices. Learn more about Day One on their website.5. OneNoteAvailable on the Apple App Store here.Available on the Google Play Store here.Microsoft OneNote is the best note-taking app I've ever used, and yes I've tried Evernote. The thing I like about OneNote is the robust features of the desktop version. I mostly use it on my PC, but when I'm on the go, the mobile version is perfect, and surprisingly it has many of the high-end features included in the desktop version as well.Here are some of my favorite features:Organization - I'm a logical thinker, and I like my stuff organized in a particular way. With OneNote, I can organize my notes any way I want. I can have folders and sections, I can have notes indented under other notes. I'm free to do it how I want, and I love that.Handwritten Notes - On iPad and any touch-screen PC, you can write or draw with a pen or finger. You can even turn on a setting for notebook paper lines to keep things clean and straight. And then if you need to find a specific note later, you can even search for text in your handwritten notes.Access Anywhere - OneNote syncs using OneDrive and you can access your notes on any device. The app is available on pretty much every mobile, laptop, or desktop device, so you'll never not be able to have it when you need it.Other nice features include:Attachments - Attach photos, videos, web clippings, record audio, etc.Priority and to-do - Make checklists and set priorities and tags for better organization.Security - Put a password on your private notes.Microsoft OneNote is available on iPhone, iPad, Apple Watch, Mac, Windows, Android, and Web. Learn more about it here.6. aTimeLogger 2Available on the Apple App Store here.Available on the Google Play Store here.This is one of my favorite apps because it tells me where all my time goes. If you use this app the right way, the things you spend your time on will no longer be a mystery. It is so satisfying to open this app at the end of the week and see how close my actual time was to my scheduled time. I can make adjustments and changes based on real-world scenarios rather than just playing a new guessing game every time something doesn't work out perfectly. It's a really nice tool to have, and it's so easy to set up and use.My absolute favorite features are:Custom Categories - aTimeLogger 2 comes with some common categories you will probably use, but it also lets you customize it however you want. It even lets you make general categories and then put more specific categories within those ones. I use this to organize my time in categories of importance, but you can do it however you want.Today Widget - I've never used the Android version, but the iPhone version has a Today widget so you don't even have to open the app to check in and out of different activities. It's literally one-tap to start and stop activities. This makes it so easy to just quickly check out and check in when switching activities. Then at the end of the day or week or month you can open the app and see detailed reports about what you've been spending your time on.Goals - I love setting goals. With aTimeLogger 2, you can set goals for you scheduled time. If you want to spend 40 hours working, set the goal and monitor it throughout the week to make sure you achieve it. If you want to limit your TV time to 1 hour a day, set the goal and it will let you know when you've hit 1 hour.Those features are the great ones, but there are a few more good ones that help to round out and complete the experience:Multiple activities - You can have multiple activities going at once. This is great for when I'm driving, because I'm often listening to podcasts at the same time, and I want to track the time spent on both of those activities.Pause/Resume - This may seem like a no-brainer, but I can't tell you how many time-tracking apps I've tried that won't let you pause an activity and resume it later. This one has that simple but valuable feature.Detailed reports - After you've tracked your time for a while, take a look at the detailed charts and graphs this app offers. I guarantee you will be surprised where your time actually goes compared to what you thought you were spending your time on all month.This app is available on iPhone, iPad, Apple Watch, and Android. Visit their website to learn more.7. 1PasswordAvailable on the Apple App Store here.Available on the Google Play Store here.I heard all the 1Password rage from my buddies for about a year before I finally decided to get it myself. I figured I could get away with just memorizing all my passwords in my head. Well, let me tell you, ever since downloading 1Password it has been such a relief not to worry about remembering the correct password. All I have to do is open this awesome password manager, and I enter in the correct password first try every time.The top features should be obvious, but I'll list my favorites anyway:Store Passwords - Yeah, this is what this app does. And it does it very well. I have over 50 passwords stored in here. Other people I know have hundreds. It's easy to enter a new password and super easy to find a password even in a list of 50 or 100 different passwords.Secure Notes - I love that I can enter a secure note and not have to worry about someone spying through my Notes app and seeing my private stuff. 1Password manages these very well too.Those are the only two features I use, and even by themselves they make the app worth it (especially since it's free), but here are a couple other nice features that you might find useful:Tags, favorites, and Spotlight - With everything you store in 1Password, you can add tags to help when searching. You can favorite your most-used logins so they'll always be easily accessible. On iPhone and iPad, you can even use Spotlight search to find things within 1Password.Store anything - You can store so much more than just passwords and notes with 1Password. You can also store credit card info, addresses, contacts, bank accounts, drivers licenses, passports, and more.1Password is available on iPhone, iPad, Apple Watch, Mac, and Android. Visit their website to learn more.8. HomeBudgetAvailable on the Apple App Store here.Available on the Google Play Store here.Manage your budget and even sync with your family so everyone can see where the money is going. With HomeBudget, like with aTimeLogger 2, you will never have to wonder where your money disappears to every month. This app lets you easily track every penny and even lets you sync with your family to monitor the entire household spending, not just yours.My favorite features are:Total Money Tracking - Tracks everything to do with money: bills, income, expenses, bank accounts, credit cards, etc. This app lets you easily track and move your money between all your accounts.Budgeting - Budget fixed and variable expenses. Set it for monthly or bi-monthly or something different. Even budget yearly expenses for birthdays, anniversaries, and holidays.Reports - If you haven't guessed already, I love reports. I love seeing a clear picture of what is happening. With HomeBudget, you get detailed reports about where your money is coming from, where it's going, how close you are to your budget, and more.This app has all the major features required for any money-management app, but they throw in some pretty neat tools that are easy to miss if you're used to the more basic offerings. Some of those nifty little features are:Budget rollover - If you don't spend your money, you can set it to rollover to next month and you'll have extra if you need it.Sync - Sync with multiple devices or even multiple users. Great if you're trying to manage money for the whole family.Multiple currencies - Supports entries in multiple currencies and automatically converts to your chosen currency.HomeBudget is available on iPhone, iPad, Apple Watch, Mac, Windows, and Android. Visit their website to learn more.9. ListMasterAvailable on the Apple App Store here.Available on the Google Play Store here.Keep records of stuff; basically create lists about anything. I like ListMaster because it acts as a mobile database of sorts. Of course, it doesn't have all the features and functions of a desktop database like Microsoft Access, but it is the best mobile solution I've found for creating custom tables and storing records.Here are the features I love the most:Custom Tables - With ListMaster, I can create a grocery list and store the name of the product, the price, a picture of the product, and a quantity (how many I need). Or maybe I want to create a list of restaurants I like. I can store the restaurant name, the location, the price range, and my favorite menu item. There is no limit to the customization you can do with your tables.Field Types - There are tons of field types you can choose from, including: text, long-form text, address, picture, phone number, date, currency, website, email, time, contact, and more. Like I said, customization options are huge.Lists Within Lists - If I want to, say, create an inventory list, I can create a separate list of rooms in my home, and then in the inventory list I can set a field to allow me to pick a value from the Rooms list for that field. I know that might be confusing, but basically it makes things way easier because you don't have to reenter the same values over and over. If you're going to use a value more than once, put it in a different list and just set your field to pick from that list.Some other nice features include:Calculated columns - Columns where you don't enter a value, but it auto-fills based on a calculation you entered.Backup, sharing, import/export - Save, share, or backup your lists however and whenever you want.Custom everything - Color your lists, color your columns, size your columns, pick custom icons, and much more customization options.ListMaster is available on iPhone, iPad, and Android. Visit their website to learn more.10. OneDriveAvailable on the Apple App Store here.Available on the Google Play Store here.Access all your important documents anywhere in the world. There are a few online storage apps that do basically the same thing. Dropbox and Google Drive are the other two popular ones, but the reason I like OneDrive is because I get 1TB (1,000GB) of storage with my Microsoft Office subscription. For only $99/year, I can have Microsoft Office on 5 computers (PC or Mac) and 5 mobile devices, plus 1TB of OneDrive space for me and up to 4 friends (so 5TB of space in total). I don't usually like subscriptions, but this one seems worth it. I'm not trying to sell you on a subscription; you can use OneDrive for free up to 5GB, which is enough to store hundreds of documents. What I'm saying is an online storage app like OneDrive or Dropbox or Google Drive is a must-have for anyone who travels beyond their home office.Some of my favorite features offered by these online storage apps are:Access Anywhere - I basically don't use hard drive space to store files anymore. I store everything I possibly can on OneDrive. Because of that, I can access it from anywhere on any device. All I have to do is sign in and I can work on the document, save my changes, and they're waiting for me when I get back to my home computer. With OneDrive, you can even edit Word, Excel, and PowerPoint documents on the web, so the computer you're using doesn't even have to have Office installed. It's pretty sweet no matter how you look at it.Automatic Photo Backup - I've used both OneDrive and Dropbox to automatically backup photos taken on my iPhone. I didn't realize how important this feature was until my phone broke and I hadn't backed it up to my computer for over a month. Because everything was stored on OneDrive and because my photos were automatically being backed up as soon as they were taken, I didn't lose any important files or photos. That's when I was truly sold on the whole online storage idea.Team Sharing - Share your documents with other people and get an alert anytime someone makes an edit. You can share a copy for them to edit separately from the original, or you can all edit the same document and see each other's changes.Some other nice features I've found in OneDrive are:Organization - The way the app and files are organized makes it easy to find whatever you're looking for, even if you have hundreds of folders and thousands of files.Search - Search on Windows 10 is amazing, as anyone who has used it can testify, and they've transferred this easy search to their mobile apps. You can even search for text on a photo and it will find the correct photo.PDF - Highlight, annotate, and sign PDF documents right inside the OneDrive app.Scanning - If you don't already have an app like Scanner Pro, OneDrive comes with a scanner built-in.This app is available on virtually every device out these days. You can be sure it is available on any mobile or desktop device you'll ever use. Visit their website to learn more.Bonus: MindNodeAvailable on the Apple App Store here.This app is an Apple exclusive, but you can find other mind-mapping apps on Google Play Store here.Brainstorm your next great idea with this great app. I've only recently started using MindNode, so I'm including it as a bonus here at the end and we'll see if it ends up somewhere on the list for 2019. So far I really like it. There are actually 2 main versions out right now, MindNode 4 and MindNode 5. Like I said, I don't really like subscriptions, and MindNode 5 is subscription-based, so I opted to shell out a few bucks for MindNode 4. As far as features go, there aren't many differences, and MindNode 4 is still a fully-fledged mind-mapping solution for brainstorming ideas.Here are the things I love the most:Design - Looking at the app icon, you can tell design is important to the developers of MindNode. That love for good design shows all throughout the app. Mind maps look beautiful no matter how you style them (which can be customized in many different ways), the animations are simple, subtle, and perfect, and the colors mesh so well together.Unlimited Creativity - Let your ideas grow, and the app will grow with them. With self-expanding mind maps, you don't have to worry about throwing too many ideas out there. The app doesn't limit your creativity.Automatic Organization - Our minds are complicated, and by extension our mind maps can get a little complicated along the way. MindNode has automatic organization so you don't get lost in your own mind map. With Smart Layout, it shows you what you need to see right now and lets you see the rest when your'e ready.Other nice features include:Share and expand - Export and share your mind maps to multiple apps and formats for further editing or expanding. You can also import to MindNode from multiple apps and formats.Attachments - Attach photos, stickers, and notes to any node.Accessibility - Actions in MindNode can be done with just your voice, and it also include other accessibility features.MindNode is available on iPhone, iPad, Apple Watch, and Mac. Learn more on their website.And that's it! Those are my top 10 (plus 1 bonus) favorite productivity apps, and, in my opinion, the best productivity apps for 2018. I use most of these apps every day and all of them at least once a week. They have helped make my life easier, more organized, more productive, and happier. I've been using most of these apps for years and they've never let me down.One of the best things about all these apps is they get updated regularly. Most of the time the updates aren’t huge feature updates (although sometimes they are), but it’s nice to know you can count on a small update every time there’s a new device or OS release just to make sure the app is still bug-free and running smoothly.Visit Built to Live for more productivity tools & tips.
-
Apple Design: Why are the icons of many built-in Mac applications slanted to the left?
Traditionally Mac application icons are on an angle, while document and folder icons are horizontal. Originally application icons were an angled document with a hand and pen, while those elements be customized for each application. The differentiated shape makes the different types of files more distinguishable. Think of a street sign, the shape helps tell you what kind of message is on it. Apple's Human Interface Guidelines from 1995:"Because applications are usually used to create documents, the application icon uses a tilted document page to represent the documents the application creates. In this way, a relationship is established. The hand is also part of the default application icon."http://interface.free.fr/Archive...Apple's most recent Human Interface Guidelines:"An application icon depicts an object that looks like it is sitting on a desk in front of you.""Traditionally, a document icon looks like a piece of paper with its top-right corner folded down. This distinctive appearance makes it easy for users to distinguish their documents from their apps and other content, even when the icon sizes are small."http://developer.apple.com/libra...
-
Would you ever go back to using a non Mac computer after experiencing just how good Macs are?
Would you ever go back to using a non Mac computer after experiencing just how good Mac's are? A while ago I was starting a new job and was given the option to choose between an MBP or a Thinkpad. Those were my only two options, no configuration allowed. I looked at the specs and the MBP had the Thinkpad beat in absolutely every aspect by a factor of 2x. It was a no brainer, and since I wasn’t the one footing the bill, I ordered one, to the envious looks of my colleagues who were stuck with their old Thinkpads (Macs had just been introduced as an option.)I took my Mac out of the box (in itself a wonderful experience) and stood in awe as I was using it not 15 minutes later. No updates...
-
How do I make my digital signature for signing a document?
In-order to obtain Digital Signature [ https://business.sify.com/services/digital-certificate ] one must apply it from an issuer. Below are a few steps to get a Digital Signature Step 1. You need to acquire the DSC(Digital Signature Certificate) [ https://business.sify.com/services/digital-certificate ] application form from sify and fill it, you also need to mention the type of entity for which you want to apply DSC for. Applicant Choice Usage Type (Drop down) MCA Efilling, Income tax, E tender, Foreign Trade, Multipurpose, Others Class Type Class 2 or Class 3 or Document Signer User Type Individual or Organization Certificate Type Signature or Encryption or Both Certificate Validity 1,2,3 Years Back Up USB token (Sent to applicant address given by the applicant) Yes (Extra Charges) or No Applicant details Applicant details Name Gender DOB Address District Pin code State Country PAN Nationality Email Contact No If Organization (Additional) Company Name Department / Industry Step 2. Provide all the necessary documents such as address proof, identity proof Document Details Identification Document : PAN Card, Passport, Aadhar, Photo ID (MHA), Driving license, Photo Id issued by govt, Post office Id, Bank passbook with photo Identification Document No: Respective Doc No Address Proof Document Organization Type Proof : Partnership firm, Company, Proprietor, AOP/BOI,LLP,NGO/Trust (If user is an organization) (Attested) Step 3. All the document provided for address proof & identity proof must be attested by an attesting officer. Documents Validation The documents mentioned by the user are validated by the business in 2 ways: 1. Online - Using Aadhar number, user has to enter the Aadhar number and respective mobile number to get an OTP, he has to input the OTP on the website to get verified or validated (if users selects organization type, online using Aadhar card will not be available) 2. Offline – Where the user can courier the attested documents to Specified address mentioned (Mentioning the time frame for validating the same) (Attested : Self and Attesting officer) Attested by from Company Secretary OR Bank Manager OR Post Master OR Gazetted Officer OR Registration Authority . Only option for organization to get documents validated. Step 4. For payment, you can visit Sify - Digital Sales Portal and pay the necessary amount online. Payment / Delivery Post online verification of the documents the user is taken to payment gateway to make the payment (GST Details requested) using Paytm or Net banking or Credit cards. Once the payment is successful the admin team gets notified and delivers the credentials Final Confirmation The User account gets auto created along this process while filling the contact form. Confirmation email and sms sent to respective email id and mobile no mentioning the Unique Id, Login credentials, Payment details and Status
Trusted esignature solution— what our customers are saying


Get legally-binding signatures now!
Frequently asked questions
How do i add an electronic signature to a word document?
How do you do an electronic signature in good docs?
How to sign a non savable pdf?
Get more for Create Sign Document Mac
- Electronic signature Document for Legal Simple
- Electronic signature Document for Legal Easy
- Electronic signature Document for Legal Safe
- Electronic signature Form for Legal Mobile
- Electronic signature PPT for Legal Online
- Electronic signature Word for Legal Fast
- Electronic signature Form for Legal Now
- How Can I Electronic signature PPT for Legal
Find out other Create Sign Document Mac
- Exercising option purchase 497321510 form
- Assignment of lease and rent from borrower to lender new york form
- Ny assignment form
- Ny lanlord tenant guest law form
- Guaranty or guarantee of payment of rent new york form
- Letter from landlord to tenant as notice of default on commercial lease new york form
- Residential or rental lease extension agreement new york form
- New york rental form
- Apartment lease rental application questionnaire new york form
- Residential rental lease application new york form
- Salary verification form for potential lease new york
- Landlord agreement tenant form
- Notice default lease form
- Landlord tenant lease co signer agreement new york form
- Application for sublease new york form
- Inventory and condition of leased premises for pre lease and post lease new york form
- Letter from landlord to tenant with directions regarding cleaning and procedures for move out new york form
- Property manager agreement new york form
- Partial rent payments form
- Tenants maintenance repair request form new york