Create Custom Invoice for Accounting with SignNow
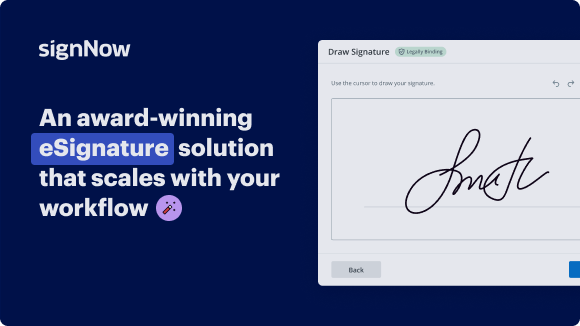
Award-winning eSignature solution


Move your business forward with the airSlate SignNow eSignature solution
Add your legally binding signature
Integrate via API
Send conditional documents
Share documents via an invite link
Save time with reusable templates
Improve team collaboration
See airSlate SignNow eSignatures in action


airSlate SignNow solutions for better efficiency
Our user reviews speak for themselves


Why choose airSlate SignNow
-
Free 7-day trial. Choose the plan you need and try it risk-free.
-
Honest pricing for full-featured plans. airSlate SignNow offers subscription plans with no overages or hidden fees at renewal.
-
Enterprise-grade security. airSlate SignNow helps you comply with global security standards.

How to create custom invoice for Accounting
Creating custom invoices for your accounting needs is vital for maintaining clear financial records. Utilizing airSlate SignNow can streamline this process, allowing businesses to generate, send, and receive signed documents effortlessly. This guide will walk you through the steps to create an invoice tailored to your specifications.
Steps to create custom invoice for Accounting
- Open your browser and navigate to the airSlate SignNow website.
- Create a new account with a free trial or log into your existing account.
- Select the document you wish to sign or send it for signing.
- If you find yourself needing the document repeatedly, save it as a template.
- Access your document and make necessary adjustments by adding fillable fields or updating information.
- Sign the document and set up signature fields for your recipients.
- Click on Continue to configure and dispatch the eSignature invitation.
By leveraging airSlate SignNow, businesses can enjoy a robust toolkit at a cost-effective price, resulting in excellent return on investment. The platform is designed for both small and mid-market businesses, ensuring ease of use and scalability.
With clear pricing, free of hidden fees, and superior support available round the clock for all paid plans, airSlate SignNow is an exceptional choice for your invoicing needs. Start utilizing it today to enhance your accounting processes!
How it works
airSlate SignNow features that users love


Get legally-binding signatures now!
FAQs
-
How can I create a custom invoice for accounting using airSlate SignNow?
To create a custom invoice for accounting with airSlate SignNow, simply log into your account, select the invoice template, and customize it to your needs. You can easily add your logo, adjust fields, and personalize the content. Once satisfied, you can send it for eSignature or download it as a PDF. -
What are the pricing options for using airSlate SignNow to create custom invoices?
airSlate SignNow offers several pricing plans, allowing you to choose the option that best fits your business needs. Whether you're a small business or a large organization, you can find a plan that includes features to help you create custom invoices for accounting. Visit our pricing page for detailed information on each plan. -
Can I integrate airSlate SignNow with my accounting software to streamline creating invoices?
Yes, airSlate SignNow supports various integrations, allowing you to connect with your accounting software seamlessly. This integration enables you to create custom invoices for accounting directly from your existing system, enhancing your workflow and saving you time. -
Are there any features that specifically help in creating custom invoices for accounting purposes?
Absolutely! airSlate SignNow offers features like editable templates, automated fields, and digital signatures that simplify the process of creating custom invoices for accounting. These tools ensure that your invoices are professional, accurate, and compliant with accounting standards. -
Is it easy to collaborate with others when creating custom invoices for accounting in airSlate SignNow?
Yes, airSlate SignNow is designed for team collaboration. Users can share drafts of custom invoices for accounting with colleagues or clients for feedback before finalization. This collaborative approach enhances accuracy and ensures everyone is on the same page. -
What are the benefits of using airSlate SignNow to create custom invoices for accounting?
Using airSlate SignNow to create custom invoices for accounting provides numerous benefits, including time savings, improved accuracy, and a professional presentation. Additionally, the ability to eSign documents expedites the approval process, helping you get paid faster. -
Can I customize my invoice templates for different clients when creating invoices?
Yes, you can absolutely create custom invoice templates tailored to each client in airSlate SignNow. This feature enables you to maintain consistency while also addressing specific client needs, making it easier to create custom invoices for accounting that resonate with various audiences.
What active users are saying — create custom invoice for accounting


Get more for create custom invoice for accounting
- Supplier Invoice Template for Human Resources
- Business Receipt Template Word for Nonprofit
- Project Management Invoice Template for Communications Media
- Project Management Invoice Template for Construction Industry
- Project Management Invoice Template for Government
- Project Management Invoice Template for Legal Services
- Create Custom Receipt for Banking
- Plantilla de Factura de Alojamiento para la Industria de la Construcción
Find out other create custom invoice for accounting
- Unlock the Power of eSignature Legality for Purchasing ...
- Unlocking the Power of eSignature Legality for Support ...
- The Definitive Guide to Digital Signature Legality for ...
- Unlock the Power of Digital Signature Legality for ...
- Digital Signature Legality for Quality Assurance in ...
- Digital Signature Legitimacy for Procurement in United ...
- Unlock Digital Signature Legitimateness for Procurement ...
- Electronic Signature Legality for IT in Canada - ...
- Unlocking the Power of Electronic Signature Legality ...
- Electronic Signature Legality for Sales in United ...
- Electronic Signature Legality for Quality Assurance in ...
- Unlock Electronic Signature Legitimacy for Accounting ...
- Boost Sales with Electronic Signature Legitimateness in ...
- Unlock Electronic Signature Legitimateness for ...
- Unlock the Power of Online Signature Legality for ...
- Enhance Online Signature Lawfulness for Technical ...
- Unlock the Power of Online Signature Legitimateness for ...
- Boost Your Procurement Process with Legitimate Online ...
- Unlock the Power of Online Signature Legality for ...
- Unlock the Power of eSignature Legality for Independent ...