Discover the Dhaba Bill Format in Word for Seamless Document Management
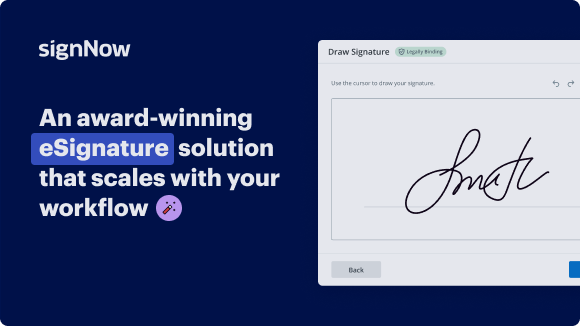
Award-winning eSignature solution


Move your business forward with the airSlate SignNow eSignature solution
Add your legally binding signature
Integrate via API
Send conditional documents
Share documents via an invite link
Save time with reusable templates
Improve team collaboration
See airSlate SignNow eSignatures in action


Understanding the Dhaba Bill Format
The dhaba bill format is a crucial document for restaurants and food service businesses, particularly those operating in informal settings. This format typically includes essential details such as the name of the establishment, date of service, items ordered, quantities, prices, and the total amount due. By using a structured bill format, businesses can ensure clarity and professionalism in their transactions.
Creating a Dhaba Bill in Word
To create a dhaba bill format in Word, start by opening a new document. You can use tables to organize the information neatly. Include columns for item descriptions, quantities, unit prices, and total prices. This structured approach helps in maintaining an easy-to-read format. After entering the necessary details, you can save the document for future use or make adjustments as needed.
Customizing the Dhaba Bill Format
Customization of the dhaba bill format allows businesses to reflect their branding. You can add your logo at the top of the bill, choose specific fonts, and adjust colors to match your restaurant's theme. This not only enhances the visual appeal but also reinforces brand identity. Using airSlate SignNow, you can easily edit and save your customized bill for consistent use.
Filling Out the Dhaba Bill
When filling out the dhaba bill, ensure that all information is accurate. Start with the date and customer details, followed by the items ordered. For each item, list the quantity and price, then calculate the total. This attention to detail helps avoid discrepancies and ensures customer satisfaction. Using digital tools like airSlate SignNow can streamline this process, making it quicker and more efficient.
Sharing the Dhaba Bill Securely
Once the dhaba bill is completed, sharing it securely is essential. You can use airSlate SignNow to send the document electronically to customers, ensuring that it is received promptly. This method not only saves time but also provides a record of the transaction. Digital sharing reduces the risk of loss or damage associated with physical documents.
Benefits of Using a Digital Dhaba Bill Format
Adopting a digital dhaba bill format offers numerous advantages. It simplifies the billing process, reduces paper waste, and enhances record-keeping. Digital bills can be easily edited and updated, allowing for quick adjustments if needed. Additionally, using airSlate SignNow ensures that your documents are securely stored and accessible whenever required, promoting efficiency in your business operations.
airSlate SignNow solutions for better efficiency
Our user reviews speak for themselves


Why choose airSlate SignNow
-
Free 7-day trial. Choose the plan you need and try it risk-free.
-
Honest pricing for full-featured plans. airSlate SignNow offers subscription plans with no overages or hidden fees at renewal.
-
Enterprise-grade security. airSlate SignNow helps you comply with global security standards.

How to utilize dhaba bill format in Word
Generating a dhaba bill format in Word can simplify your billing workflow and improve professionalism. With airSlate SignNow, you can effortlessly organize your documents, ensuring they are endorsed and dispatched effectively. This guide will take you through the procedures to apply airSlate SignNow for your dhaba bill format in Word.
Procedures to establish a dhaba bill format in Word
- Launch your web browser and go to the airSlate SignNow site.
- Set up a free trial account or log in if you already possess one.
- Upload the file you want to endorse or send for endorsements.
- If you intend to reuse this file, transform it into a reusable template.
- Access your file and perform necessary modifications, such as adding fillable fields or incorporating specific details.
- Endorse the file and incorporate signature fields for the recipients.
- Click 'Continue' to set up and dispatch an eSignature invitation.
By utilizing airSlate SignNow, organizations can reap a signNow return on investment due to its extensive features compared to cost. The platform is crafted for user-friendliness and scalability, making it perfect for small to medium-sized enterprises.
With transparent pricing and no concealed charges, airSlate SignNow also provides outstanding 24/7 assistance for all paid plans. Begin enhancing your document management today!
How it works
airSlate SignNow features that users love


Get legally-binding signatures now!
FAQs
-
How to create a bill in PC?
To create an invoice from an Excel template on a Windows PC, follow these steps: Open Microsoft Excel. ... Search for an Invoice Template. ... Choose Your Template. ... Open the Invoice Template. ... Customize the Invoice. ... Save the Invoice. ... Send the Invoice. -
How to create a bill in Word?
Here's everything you need to know about creating a Microsoft Word invoice from scratch: Open a New Blank Document. ... Create an Invoice Header. ... Add the Invoice Date. ... Include a Unique Invoice Number. ... Include Your Client's Contact Details. ... Create an Itemized List of Products or Services. ... Display the Total Amount Due. -
How do you write a simple bill?
Each step aligns with the numerical box shown in the invoice below. Select a Professional Invoice Template. ... Add Your Branding and Company Information. ... Include All Necessary Invoice Details. ... Add a Line Item for Each Charge. ... Add Tax and Sum All Charges. ... Include a Personal Note if Necessary. ... Add Payment Options. -
How to prepare a food bill?
A restaurant bill format should include the restaurant details/logo, contact details, client information field(if applicable), empty fields to enter ordered items with quantities and prices, subtotal, taxes, tips, total payment figure and the payment terms. -
How to create bill format in Word?
Here's everything you need to know about creating a Microsoft Word invoice from scratch: Open a New Blank Document. ... Create an Invoice Header. ... Add the Invoice Date. ... Include a Unique Invoice Number. ... Include Your Client's Contact Details. ... Create an Itemized List of Products or Services. ... Display the Total Amount Due. -
How can I generate a bill?
Let's look at the 10 key elements which are included in all professional invoices. Header & logo. ... Invoice Number. ... Name and details of client. ... Company name and details. ... Date of sending invoice. ... Description of goods sold or services rendered. ... Cost per unit or product. ... Tax rates and fees. -
How to create a bill format?
Invoice format Business Information. The business's logo, name, and address; and the customer's contact information. Invoice Details. The invoice number, invoice date, and the due date. Itemized List. The item names, descriptions, quantities, and rates. Payment Summary. ... Notes and Terms.
What active users are saying — dhaba bill format in word


Find out other dhaba bill format in word
- Easily add signature to PDF without Acrobat for ...
- Discover free methods to sign a PDF document online ...
- How to add electronic signature to PDF on iPhone with ...
- How to sign PDF files electronically on Windows with ...
- How to sign a PDF file on phone with airSlate SignNow
- Experience seamless signing with the iPhone app for ...
- Easily sign PDF without Acrobat for seamless document ...
- Easily email a document with a signature using airSlate ...
- How to sign a document online and email it with ...
- How to use digital signature certificate on PDF ...
- How to use e-signature in Acrobat for effortless ...
- How to use digital signature on MacBook with airSlate ...
- Discover effective methods to sign a PDF online with ...
- Effortlessly sign PDFs with the linux pdf sign command
- Easily sign PDF documents on Windows with airSlate ...
- Easily sign a PDF file and email it back with airSlate ...
- Effortlessly sign PDF documents on phone
- Sign PDF document with certificate effortlessly
- Easily signing a PDF document on my iPhone
- Sign PDF online with electronic signature easily and ...