Complete Sign Form Android
Make the most out of your eSignature workflows with airSlate SignNow
Extensive suite of eSignature tools
Robust integration and API capabilities
Advanced security and compliance
Various collaboration tools
Enjoyable and stress-free signing experience
Extensive support
Keep your eSignature workflows on track
Our user reviews speak for themselves


Award-winning eSignature solution


Fill Out Sign Form on Android
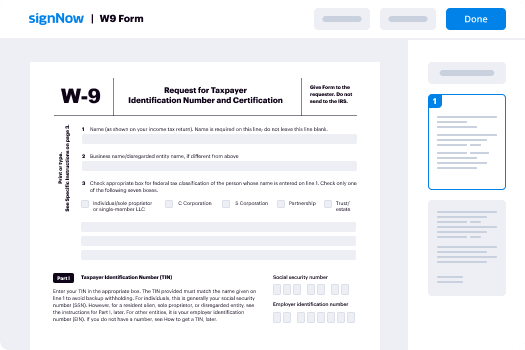
Filling out a sign form on Android becomes simple with airSlate SignNow. This powerful application provides an intuitive experience for handling eSignatures, enabling companies to optimize their document processes effectively. Whether you're executing a contract or gathering signatures from clients, airSlate SignNow offers a perfect answer that enhances efficiency and reduces expenses.
Instructions to Complete Sign Form on Android Using airSlate SignNow
- Launch your preferred web browser and go to the airSlate SignNow website.
- Sign up for a complimentary trial or log into your current account.
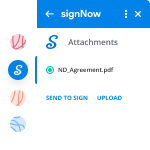
- Choose the document you intend to sign or send for signatures.
- If you plan to utilize this document again, turn it into a reusable template.
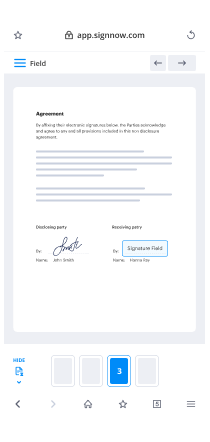
- Open your file to edit it by incorporating fillable fields or required information.
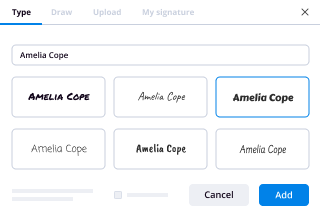
- Add your signature and assign signature fields for the recipients.
- Click Continue to complete the setup and dispatch the eSignature request.
By using airSlate SignNow, businesses can experience a signNow return on investment thanks to its wide-ranging features at a favorable price point. This platform is especially advantageous for small to mid-sized enterprises seeking a user-friendly solution that adapts to their requirements.
Discover the advantages of airSlate SignNow today! Register for a free trial and see how this platform can improve your document signing experience.
How it works
Rate your experience
-
Best ROI. Our customers achieve an average 7x ROI within the first six months.
-
Scales with your use cases. From SMBs to mid-market, airSlate SignNow delivers results for businesses of all sizes.
-
Intuitive UI and API. Sign and send documents from your apps in minutes.
A smarter way to work: —how to industry sign banking integrate
How to electronically sign and complete a document online
Document management isn't an easy task. The only thing that makes working with documents simple in today's world, is a comprehensive workflow solution. Signing and editing documents, and filling out forms is a simple task for those who utilize eSignature services. Businesses that have found reliable solutions to functionality sign complete form android don't need to spend their valuable time and effort on routine and monotonous actions.
Use airSlate SignNow and functionality sign complete form android online hassle-free today:
- Create your airSlate SignNow profile or use your Google account to sign up.
- Upload a document.
- Work on it; sign it, edit it and add fillable fields to it.
- Select Done and export the sample: send it or save it to your device.
As you can see, there is nothing complicated about filling out and signing documents when you have the right tool. Our advanced editor is great for getting forms and contracts exactly how you want/need them. It has a user-friendly interface and full comprehensibility, giving you complete control. Create an account today and begin increasing your eSignature workflows with efficient tools to functionality sign complete form android on-line.
How to electronically sign and complete forms in Google Chrome
Google Chrome can solve more problems than you can even imagine using powerful tools called 'extensions'. There are thousands you can easily add right to your browser called ‘add-ons’ and each has a unique ability to enhance your workflow. For example, functionality sign complete form android and edit docs with airSlate SignNow.
To add the airSlate SignNow extension for Google Chrome, follow the next steps:
- Go to Chrome Web Store, type in 'airSlate SignNow' and press enter. Then, hit the Add to Chrome button and wait a few seconds while it installs.
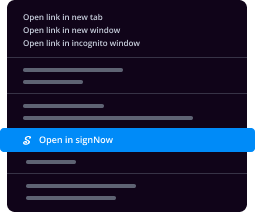
- Find a document that you need to sign, right click it and select airSlate SignNow.
- Edit and sign your document.
- Save your new file to your account, the cloud or your device.
Using this extension, you avoid wasting time on dull assignments like downloading the file and importing it to an electronic signature solution’s catalogue. Everything is easily accessible, so you can easily and conveniently functionality sign complete form android.
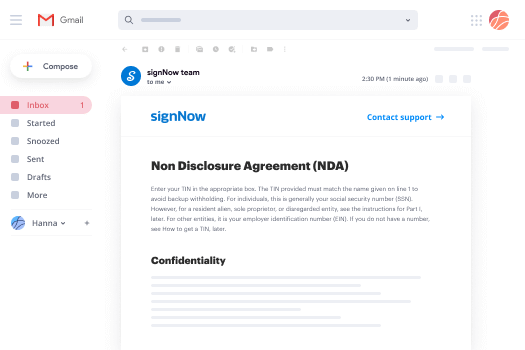
How to electronically sign docs in Gmail
Gmail is probably the most popular mail service utilized by millions of people all across the world. Most likely, you and your clients also use it for personal and business communication. However, the question on a lot of people’s minds is: how can I functionality sign complete form android a document that was emailed to me in Gmail? Something amazing has happened that is changing the way business is done. airSlate SignNow and Google have created an impactful add on that lets you functionality sign complete form android, edit, set signing orders and much more without leaving your inbox.
Boost your workflow with a revolutionary Gmail add on from airSlate SignNow:
- Find the airSlate SignNow extension for Gmail from the Chrome Web Store and install it.
- Go to your inbox and open the email that contains the attachment that needs signing.
- Click the airSlate SignNow icon found in the right-hand toolbar.
- Work on your document; edit it, add fillable fields and even sign it yourself.
- Click Done and email the executed document to the respective parties.
With helpful extensions, manipulations to functionality sign complete form android various forms are easy. The less time you spend switching browser windows, opening several accounts and scrolling through your internal files trying to find a template is much more time for you to you for other significant tasks.
How to safely sign documents using a mobile browser
Are you one of the business professionals who’ve decided to go 100% mobile in 2020? If yes, then you really need to make sure you have an effective solution for managing your document workflows from your phone, e.g., functionality sign complete form android, and edit forms in real time. airSlate SignNow has one of the most exciting tools for mobile users. A web-based application. functionality sign complete form android instantly from anywhere.
How to securely sign documents in a mobile browser
- Create an airSlate SignNow profile or log in using any web browser on your smartphone or tablet.
- Upload a document from the cloud or internal storage.
- Fill out and sign the sample.
- Tap Done.
- Do anything you need right from your account.
airSlate SignNow takes pride in protecting customer data. Be confident that anything you upload to your account is secured with industry-leading encryption. Automatic logging out will protect your user profile from unwanted access. functionality sign complete form android from the mobile phone or your friend’s mobile phone. Safety is crucial to our success and yours to mobile workflows.
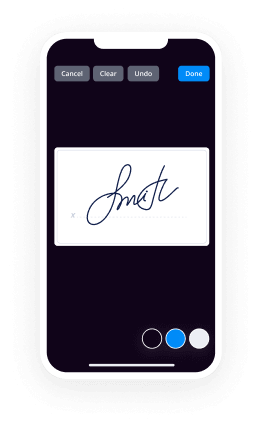
How to eSign a PDF with an iPhone or iPad
The iPhone and iPad are powerful gadgets that allow you to work not only from the office but from anywhere in the world. For example, you can finalize and sign documents or functionality sign complete form android directly on your phone or tablet at the office, at home or even on the beach. iOS offers native features like the Markup tool, though it’s limiting and doesn’t have any automation. Though the airSlate SignNow application for Apple is packed with everything you need for upgrading your document workflow. functionality sign complete form android, fill out and sign forms on your phone in minutes.
How to sign a PDF on an iPhone
- Go to the AppStore, find the airSlate SignNow app and download it.
- Open the application, log in or create a profile.
- Select + to upload a document from your device or import it from the cloud.
- Fill out the sample and create your electronic signature.
- Click Done to finish the editing and signing session.
When you have this application installed, you don't need to upload a file each time you get it for signing. Just open the document on your iPhone, click the Share icon and select the Sign with airSlate SignNow button. Your sample will be opened in the app. functionality sign complete form android anything. Additionally, using one service for all of your document management requirements, everything is easier, better and cheaper Download the application right now!

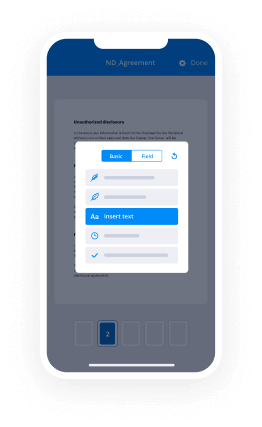
How to digitally sign a PDF file on an Android
What’s the number one rule for handling document workflows in 2020? Avoid paper chaos. Get rid of the printers, scanners and bundlers curriers. All of it! Take a new approach and manage, functionality sign complete form android, and organize your records 100% paperless and 100% mobile. You only need three things; a phone/tablet, internet connection and the airSlate SignNow app for Android. Using the app, create, functionality sign complete form android and execute documents right from your smartphone or tablet.
How to sign a PDF on an Android
- In the Google Play Market, search for and install the airSlate SignNow application.
- Open the program and log into your account or make one if you don’t have one already.
- Upload a document from the cloud or your device.
- Click on the opened document and start working on it. Edit it, add fillable fields and signature fields.
- Once you’ve finished, click Done and send the document to the other parties involved or download it to the cloud or your device.
airSlate SignNow allows you to sign documents and manage tasks like functionality sign complete form android with ease. In addition, the security of your data is priority. Encryption and private web servers can be used as implementing the most recent features in info compliance measures. Get the airSlate SignNow mobile experience and operate more proficiently.


FAQs
-
How can I complete a sign form on Android using airSlate SignNow?
To complete a sign form on Android using airSlate SignNow, simply download the app from the Google Play Store. Once installed, you can easily upload your document, add signature fields, and send it for signing. The app's intuitive interface makes it straightforward to navigate and complete sign forms on the go.
-
What features does airSlate SignNow offer for completing sign forms on Android?
airSlate SignNow provides a range of features for completing sign forms on Android, including customizable templates, real-time document tracking, and the ability to add multiple signers. Additionally, the app supports in-app signing, ensuring a seamless and efficient signing experience from your Android device.
-
Is airSlate SignNow a cost-effective solution for completing sign forms on Android?
Yes, airSlate SignNow is a cost-effective solution for completing sign forms on Android. With various pricing plans available, businesses can choose an option that fits their budget while still enjoying powerful features. This flexibility makes it ideal for small businesses and enterprises alike.
-
Can I integrate airSlate SignNow with other applications while completing sign forms on Android?
Absolutely! airSlate SignNow allows for seamless integrations with numerous applications such as Google Drive, Dropbox, and Salesforce. This means you can easily access documents and complete sign forms on Android without switching between different apps.
-
What are the benefits of using airSlate SignNow to complete sign forms on Android?
Using airSlate SignNow to complete sign forms on Android offers numerous benefits, including mobility, ease of use, and enhanced security. Users can sign documents anytime, anywhere, making it perfect for busy professionals who need to manage their paperwork on the go.
-
Is it secure to complete sign forms on Android with airSlate SignNow?
Yes, it is secure to complete sign forms on Android with airSlate SignNow. The platform utilizes advanced encryption protocols to protect your documents and personal information. This ensures that your data remains safe during the signing process.
-
Can I track the status of my completed sign forms on Android?
Yes, airSlate SignNow allows you to track the status of your completed sign forms on Android. You can receive notifications when a document is viewed, signed, and finalized, giving you peace of mind and helping you stay organized.
-
How do I bypass the two-step verification of my Google Account?
Try it1. Go to Sign in - Google Accounts and click on Security. 2. Under 2-step verification section click on the "Settings" button. 3. Now under the "Application-specific passwords" section select "Manage application -specific passwords" (you might be required to enter your password again for security purposes). 4. Now just enter a descriptive name for the application you want to use the password for (in this case probably something like "Live Writer" and click the "Generate password" button. 5. Copy the newly generated password, then use it as your Google account password on Live Writer instead of your real password. I hope this helps.www.icognix.net
-
What is the best alternative to Loyal3 now that it is shutting down?
Come to Stockpile.com!As a licensed fractional shares brokerage, we're here to help you transition from Loyal3 so you can continue investing for your future without missing a beat.Top 10 things you can do at Stockpile:Buy and sell fractional shares of your favorite stocksGive e-gifts or physical gift cards for stock to loved onesMore than 1,000 stocks, ETFs, and ADRs to choose from99¢ trades with no monthly fees or account minimumsPay with your credit card, debit card, or cash in your accountGet cash from your bank instantly using your debit cardReinvest your dividends for freeKids & teens can place trades on their own, which you approveDownload the iOS and Android app for an awesome mobile experienceRefer your friends or other Loyal3 customers and get $5 of free stock!3 easy steps to transfer your stock to Stockpile:Sign up for a Stockpile accountEmail your most recent Loyal3 account statement to support@stockpile.comWe'll send you a form that's mostly pre-filled — just complete, sign, and upload!We'll make sure your assets (your whole shares, fractional shares, and cash) arrive at Stockpile safe and sound.We don't charge anything for incoming transfers and carry virtually every stock Loyal3 carries. The only exceptions we're aware of are Frontier and Nokia — just sell those stocks at Loyal3 before you do your transfer.We're excited to have you join us at Stockpile! Sign up today, so your stocks don't end up somewhere they don't want to be.Sign upWishing you many happy returns!
-
I want to change my career. What should I do to be an Android Developer? I am 29 years old.
Making a career shift isn’t an easy decision but if you are thinking to start a career in android, you are doing the best thing tbh and its not too late. To start learning Android Development, follow just these steps:Start Learning Java or React Native - Java is probably the best and easiest to learn programming language. Concepts are easy to implement and also, mostly android apps are made in either Java or React Native. But React is a better choice in my opinion because it can be used for both IOS and Android Development but Java can only be used in Android Dev (but its easier to get started in Java than React).Start a learning path course online. There are so many options out there (Udacity Nanodegree, EdX, Coursera). I found Udacity the best of the lot. The best way to learn is to actually utilise the structured learning path so i’d strongly recommend you to join a learning path from above options. (Research and choose which one suits you the best).After when you are a bit comfortable in making apps, just try to think of a new “IDEA” and start working on it. There are so many android developers out there and they know how to make android apps but why there are only few apps that are best sellers? Because the idea behind those apps was new and unique. It can be simple but must be something new that someone never worked upon.An example of this would be Flappy Bird game.In just a few weeks, the mobile app Flappy Bird became a global phenomenon. It was a simple game, but frustrating, endless and last but not the least, unique. It's safe to say Flappy Bird took over the web. The game was designed and built by Dong Nguyen.I am sure many of us played that game and if you notice the interface of that game is really simple. Simple controls, 2D game and not so good graphics. But the idea was unique and it clicked exceptionally well in android users and it jumped to #7 in the list of most downloaded android apps. Nguyen earned millions just by creating a simple app but a Unique one.Whatsapp took the world by storm when released. And currently its the most used chat app by android users. The idea was unique. But after whatsapp release, many developers followed the same idea and made apps like (Viber, We Chat,etc) but never got success like whatsapp. Because the idea was unique. So my point is really simple, just think of something unique and start working on it. Who knows, may be its gonna be the next big thing in android apps world ;)Best of Luck!-Mujahid
-
What will happen to iOS as a result of Jony? I’ve taken over interface design at Apple. What are the signs/gestures/behavioural
The biggest concern I have is whether the design skews (har har) to a completely different type of uniformity, or sacrifices too much function for form. Android has--in the past--gone down a completely different road, with new features typically exposed with seemingly little design refinement. Recent releases, and most prominently Google Now and the Quick Settings, have shown more up front work in the design language to accommodate features first. In fact, Google Now is representative of exactly the kind of iterative release that Apple should have been delivering. With Siri and Passbook we get these beautiful, highly refined experiences, with each result card (as an example) uniquely designed and, yes, skeuomorphic. The upside is a delightful experience, but the downside is if there aren't good pre-designed results formats for a search, you basically get nothing. In the meantime, Google Now settled on a gorgeous, simple design for cards that is nigh infinitely expandable, and certainly easily to update/adapt for new situations and results. So one of the many challenges I see Sir Jony facing is just how exacting and refined an experience he feels the HI needs to deliver. iOS is a platform that needs to speed up the pace of release and features, and it's now squarely (hah) in the hands of a man who has a unique skill for dragging designs through endless iterations to get them JUST right. (A very very admirable trait and skill for hardware that must live on for years, but quite possibly very detrimental to what is supposed to be a fluid software platform and delivery model.)Apple itself is now in a precarious position that I think of as "Kits, Kits, everywhere". They have provided an amazing foundation of services and SDK features, but they have become guilty of leveraging the TECHNOLOGY of the platform, and not the DATA of the user. Again, this is where Google Now has gotten a dangerous headstart. Take Facebook and Twitter as an example: in iOS6 users and apps can post to Twitter, and use Twitter/FB accounts without having to sign in again. Fantastic, we've saved ourselves a tap or two to accomplish this. On Android, Google "understands" and tracks the users's data, including those social media accounts and email, and provides bidirectional value from its analysis. Widgets can display Facebook/Twitter data, any app can share to the services regardless of using a "Kit" or plugin (systemwide share sheets), alerts and intents can be triggered (and new results surfaced like photos, directions, etc in Google Now and other apps). So iOS was rapidly in danger of becoming the stately, polished dictator/curator of experience, to Android's "grassroots intelligence in your device" strategy. We are finally on the cusp of realizing the dreams of the first generation of truly "personal digital assistants", decades after the fact. Whoever can balance those goals with an enjoyable user experience is going to maintain a leadership position. The question we now wait to have answered is just how much of that experience Ive is a master at visualizing and delivering. If he can make a tablet that feels at home in the hand, maybe he can deliver an "omniscient" phone that feels at home in your subconscious.
-
What should every person be knowledgeable about or be proficient in by the age of 20? Can we please create an answer wiki for th
A big part of the answer to this question depends on the place and society this 'every' person belongs to. However, I would try to give a more universal answer here:Driving and basic car upkeepManaging resources and budgeting; money, time, health, energyManaging people, creating and taking care of relationships; friends, family, colleagues etc., how to treat a lady wellLogic and critical thinkingBasic usage of computer and internet; how to use at least one OS, some necessary applications (word processor, spreadsheet etc.), how to Google Everyday mathematicsThe fact that you can never be good enoughThe fact that hardwork is more important than intelligence and good fortuneHow to make independent/wise choices and prioritizingBasic survival skills; building a fire, cooking, basic first aid (CPR and Heimlich maneuver)When to fight and how to do itPacking lightRecognizing one's limits; alcohol/drug usage, frankness with people, independence of speech and action, when you are a guest somewhereBasic physical training; push-ups, sit-upsHow to play at least one sportGeography; names and locations of major countries, cities, physical features of the world and especially of the little bubble you live inHow to smileBehavioral control; when to promise, how to negotiate, how to be a good house guestTaking basic security precautions; physical and onlineTaking care of one's physical, mental, emotional health
-
If I have been injured in a car accident, what should I do first?
If you got injured in car accident first thing to do is:Check on Yourself:- After Accident its obviously to get panic but try to clam down. Take care of yourself and make sure everyone involved in the accident is okay. If there is an injury, call an ambulance right away.Call the police and file a report:- After that if there is major property damage, serious injury, or death, you need to call the police.Take notes:- Take photos like Damage to your vehicle, Accident location with your android or any device u have. This may be valuable when negotiating a settlement with an insurance company o...
-
How do you display PDF files inside an Android application instead of loading in WebView by appending PDF URL with a Google DOCs
Hello, Download the source code from here (Display PDF file inside my android application [ https://deepshikhapuri.wordpress.com/2017/02/15/display-pdf-file-inside-my-android-application/ ]). Add this dependency in your gradle file: [code]compile 'com.github.barteksc:android-pdf-viewer:2.0.3' [/code]activity_main.xml: [code]%3CRelativeLayout android:layout_width="match_parent" android:layout_height="match_parent" android:background="#ffffff" xmlns:android="http://schemas.android.com/apk/res/android" %3E %3CTextView android:layout_width="match_parent" android:layout_height="40dp" android:background="@color/colorPrimaryDark" android:text="View PDF" android:textColor="#ffffff" android:id="@+id/tv_header" android:textSize="18dp" android:gravity="center"%3E%3C/TextView%3E %3Ccom.github.barteksc.pdfviewer.PDFView android:id="@+id/pdfView" android:layout_below="@+id/tv_header" android:layout_width="match_parent" android:layout_height="match_parent"/%3E %3C/RelativeLayout%3E [/code]MainActivity.java [code]package pdfviewer.pdfviewer; import android.app.Activity; import android.os.Bundle; import android.util.Log; import com.github.barteksc.pdfviewer.PDFView; import com.github.barteksc.pdfviewer.listener.OnLoadCompleteListener; import com.github.barteksc.pdfviewer.listener.OnPageChangeListener; import com.github.barteksc.pdfviewer.scroll.DefaultScrollHandle; import com.shockwave.pdfium.PdfDocument; import java.util.List; public class MainActivity extends Activity implements OnPageChangeListener,OnLoadCompleteListener{ private static final String TAG = MainActivity.class.getSimpleName(); public static final String SAMPLE_FILE = "android_tutorial.pdf"; PDFView pdfView; Integer pageNumber = 0; String pdfFileName; @Override protected void onCreate(Bundle savedInstanceState) { super.onCreate(savedInstanceState); setContentView(R.layout.activity_main); pdfView= (PDFView)findViewById(R.id.pdfView); displayFromAsset(SAMPLE_FILE); } private void displayFromAsset(String assetFileName) { pdfFileName = assetFileName; pdfView.fromAsset(SAMPLE_FILE) .defaultPage(pageNumber) .enableSwipe(true) .swipeHorizontal(false) .onPageChange(this) .enableAnnotationRendering(true) .onLoad(this) .scrollHandle(new DefaultScrollHandle(this)) .load(); } @Override public void onPageChanged(int page, int pageCount) { pageNumber = page; setTitle(String.format("%s %s / %s", pdfFileName, page + 1, pageCount)); } @Override public void loadComplete(int nbPages) { PdfDocument.Meta meta = pdfView.getDocumentMeta(); printBookmarksTree(pdfView.getTableOfContents(), "-"); } public void printBookmarksTree(List%3CPdfDocument.Bookmark%3E tree, String sep) { for (PdfDocument.Bookmark b : tree) { Log.e(TAG, String.format("%s %s, p %d", sep, b.getTitle(), b.getPageIdx())); if (b.hasChildren()) { printBookmarksTree(b.getChildren(), sep + "-"); } } } } [/code]
-
What is MasterPass?
Masterpass is a digital wallet that simplifies the checkout process with one secure account. Masterpass works across channels - online, in apps and in stores - on any device - desktop, tablet and mobile. It allows your cards and shipping information to be stored together to save you from filling out a form. You can sign up for Masterpass here masterpass.com.Manually completing checkout forms is extremely tedious at best, and error prone at worst. Time to checkout is a proven indicator of checkout abandonment and data entry errors cause payment declines. Wallets like Masterpass make it easier for a shopper to pay and merchant to accept funds. It will also cut down on Fraud for both merchants and shoppers.At BlueSnap - Global Payment Gateway and Best E-commerce Solutions | BlueSnap we support PayPal, Visa Checkout, Masterpass and ApplePay. Support for Android Pay, and Amex Checkout are coming soon.You can learn more about mobile wallets here: Grow Your Sales With Mobile Wallets | BlueSnapIf you want to have a more detailed discussion, hit our contact page: Get Started | BlueSnap or sales@bluesnap.com.
-
How easy/difficult it is to create an iOS application, if I had just finished building an Android application?
Personally, I had to transition form android development. The one thing I can say after is that iOS is amazing, better in every single way.Transitioning at first will be tough, you are going to have to learn a completely new coding language. Right know the best option for beginners would be Swift for sure. It’s always great to have some Objective-C knowledge from my experience. You see, when I made the transition it was in 2014 and Swift was really new. At the time, I’d tried learning Objective-C but it was just way too confusing for me but Swift was perfect. It was so easy, simple and logical. It was cleaner and not at all verbose. Since swift was really, really new - there was hardly any tutorials for Swift and as a begginer I depended on tutorials. They were all in objective-c so I found myself slowly learning it. Eventually within only 6 months, I was semi-fluent. Able to code my own things in either language without following any tutorials. Learning iOS was quite easy, a seamless transition.There’s a completely different structure though between the two OS’s and SDK’s. iOS works with UIKit - UIViews and UIViewControllers for the UI alongside AutoLayout, NSConstraints, IBDesignNows whereas android uses Activites, XML, Fragments, RelativeLayout etc. for the UI. It takes some getting used to but from my experinece, iOS is much more easier and logical. You’ll also be using two completely different IDE’s. Xcode is much more simpler and easier to understand than Android Studio. In general, many things are different. Signing, profiles, debugging, building - just about everything. The hardest part though is just understanding how things work but once you do it’s simple.A lot of things are different and some are similar. The transition won't be easy at start but eventually will become second nature. I don’t know if I captured things the best but I hope you understand.
Trusted esignature solution— what our customers are saying


Get legally-binding signatures now!
Frequently asked questions
How do i add an electronic signature to a word document?
How esign works?
How to electronically sign a pdf tax?
Get more for Complete Sign Form Android
Find out other Complete Sign Form Android
- Midterm one form b 1200 blue and green university of north unc
- The world economy in the 1990s a long run perspective unc form
- Build and price a new car nadaguides com unc form
- Applications the university of north carolina at greensboro uncg form
- Wake co uncg form
- Notes for official use only uncg form
- Visa status information form uncg
- Faculty interest form uncg
- Academic year the university of north carolina at uncg form
- Glp tracking sheet track your progress in the form
- Safety and health policy and procedure manual personal form
- Student must present a photo id in person and the required documentation for the type of change as detailed below form
- Business associate agreement the university of north carolina at form
- Student date of birth correction request form
- Section 0170 fire emergency procedures the university of north form
- Arc welcomes new director the university of north carolina at uncg form
- Review of reclaim findings uncg form
- Print form financial certificate academic year return with application or by fax to 336 334 5406 to be completed by the student
- Algorithmic combinatorics on words the university of north uncg form
- Kindergarten teacher education handbook the university of north uncg form