Create Your Own Online Bill Format in Word for Production
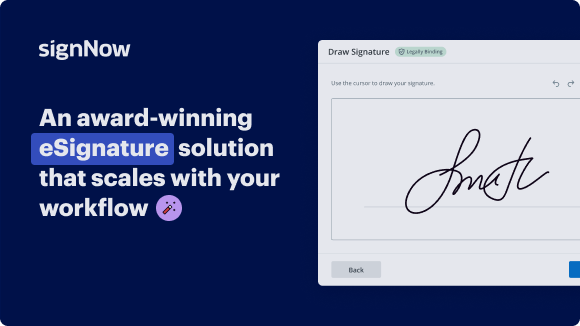
 Effortlessly
Move your business forward with the airSlate SignNow eSignature solution
Add your legally binding signature
Integrate via API
Send conditional documents
Share documents via an invite link
Save time with reusable templates
Improve team collaboration
See airSlate SignNow eSignatures in action
airSlate SignNow solutions for better efficiency
Our user reviews speak for themselves
Why choose airSlate SignNow
-
Free 7-day trial. Choose the plan you need and try it risk-free.
-
Honest pricing for full-featured plans. airSlate SignNow offers subscription plans with no overages or hidden fees at renewal.
-
Enterprise-grade security. airSlate SignNow helps you comply with global security standards.
Online bill format in word for Production
Creating an online bill format in Word for Production can streamline your invoicing and improve the transaction process for customers. With airSlate SignNow, you can easily generate, sign, and send documents, ensuring a faster and more efficient workflow. This guide will walk you through the steps needed to utilize this effective tool for your business.
Steps to create an online bill format in word for Production
- Open your web browser and navigate to the airSlate SignNow website.
- Create a new account for a free trial or log in to your existing account.
- Select the document you wish to have signed or that you need to send out for signatures.
- To reuse your current document down the line, convert it into a reusable template.
- Access your document and customize it: insert fillable fields or necessary information.
- Complete the signing by placing signature fields for recipients to fill out.
- Click on 'Continue' to arrange and dispatch the eSignature request.
airSlate SignNow offers numerous advantages, such as high ROI, providing a rich feature set at a budget-friendly cost. The platform is designed to be user-friendly and scalable, making it suitable for small to mid-sized businesses.
Moreover, it boasts transparent pricing with no unforeseen support costs, alongside exceptional 24/7 customer support for all paid plans. Start transforming your document workflows today with airSlate SignNow!
How it works
airSlate SignNow features that users love
Get legally-binding signatures now!
FAQs
-
What is the online bill format in word for Production?
The online bill format in word for Production is a customizable document template designed to streamline billing processes. This format allows businesses to easily input their transaction details and services, facilitating efficient record-keeping and payment processing. Utilizing this format can enhance productivity within your production workflows. -
How does airSlate SignNow support the online bill format in word for Production?
airSlate SignNow fully supports the online bill format in word for Production by providing an intuitive platform for document signing and management. You can create, edit, and send your billing documents directly within the application, ensuring a seamless experience. The integration of eSignatures also accelerates the approval process. -
What features are included with the online bill format in word for Production?
The online bill format in word for Production comes with features such as customizable templates, electronic signatures, and cloud storage options. This combination allows for greater flexibility and accessibility, enabling your team to manage billing documents efficiently. Furthermore, the user-friendly design makes it easy to adapt the format to your specific business needs. -
Is the online bill format in word for Production user-friendly?
Yes, the online bill format in word for Production is designed with user experience in mind. The simple interface allows users of all skill levels to create and manage documents effortlessly. Additionally, comprehensive guides and customer support enhance usability, ensuring a smooth operation for your team. -
What integrations does airSlate SignNow offer for the online bill format in word for Production?
airSlate SignNow offers various integrations with popular applications, enhancing the functionality of the online bill format in word for Production. You can connect with tools like Google Drive, Salesforce, and Dropbox, allowing for streamlined document management and collaboration. These integrations signNowly improve your workflow efficiency. -
How does airSlate SignNow ensure security when using the online bill format in word for Production?
Security is a top priority at airSlate SignNow, especially when using the online bill format in word for Production. The platform employs advanced encryption protocols and secure servers to protect your sensitive billing information. Regular audits and compliance with industry standards also ensure your documents remain safe. -
What is the pricing structure for using the online bill format in word for Production?
The pricing structure for using the online bill format in word for Production is competitive and tailored to businesses of all sizes. airSlate SignNow offers various subscription plans, each designed to meet different needs and budgets. This flexibility ensures that you can find a plan that suits your company’s specific billing and document management requirements. -
Can the online bill format in word for Production help speed up my billing process?
Absolutely! The online bill format in word for Production is specifically designed to enhance efficiency in your billing processes. By utilizing customizable templates and eSignature capabilities, you can reduce the time spent on creating and processing invoices, ultimately speeding up your cash flow.
What active users are saying — online bill format in word for production
Related searches to Create your own online bill format in word for production effortlessly
Online bill format in word for Production
in this video i'm going to show you how to create an invoice in microsoft word and this is exactly what we'll achieve by the end of this video so if you want to learn how to create your very own custom invoice keep watching hello guys this is online office teacher where i help you manage your data and information through online video just like this one so if you are new here consider subscribing that's it let's jump into the video having open word i go over to the insert tab and i click on table and i'm going to go ahead and insert a table of two columns three rows so i have two columns then i go down to the third row then i click to insert my table in the first cell i'm going to go ahead and insert a logo so i go over to the insert tab again take note my insertion point is inside the first cell then i click on pictures this device i have my logo right here i just selected click on insert it is too big i'll go ahead and reduce the size like this match in the next cell towards the right i enter code i'll make it capital letters in this cell below i enter the name of my company upper web and i hit enter and i'm going to go ahead and enter my slogan in here i enter invoice number so i'll just get a sample number i'll make it in thousands perfect hit enter then i enter date so with the date if i want i can insert an automated date such that anytime i open the invoice i'll get a current date but you don't have to do this if you don't want that i just want to show you the possibilities so to insert an automated date i go over to inset then i go over to date and time i'll go ahead and choose this format and make sure update automatically is checked then click on ok so each time this document is open you get a current date perfect in the last row on the first cell i enter my address okay i've entered my address finally in this cell i'll enter expiration date and with this expiration date cannot be automated date for this date you always have to enter it now just go ahead and enter in some dates so that it will be blank awesome i exist out of this table and i'm going to set a new table first of all i hit enter then i go over to insert click on table this time around i need a table of two columns one row just like that so in here i enter two in the next cell i enter the details of the client so the name of the client is john doe hit enter his company name jd company limited hit enter if the street address you can enter his phone number enter if you use customer id you can go ahead and add that maybe some numbers next i exit out of this table and i hit enter now go ahead and insert a new table by going to insert table in this camera i'll insert a table of four columns two rows like this in the first cell i enter sales person next job followed by payment times and finally due date all these fields are simple to get maybe the payment times can be due on receipt i exit out of this table and i hit enter next i insert my final table so i go over to insert then i click on table this table is going to be four columns 15 rows and in here i wouldn't be able to get that so to be able to insert the exact number of columns and rows i need to click on insert table number of columns i enter for the number of rows i enter 15 then i click on ok perfect then i go ahead and enter in my text so first i have quantity description unit price and finally amount and the unit price going to the last three cells in here i enter subtotal going down i enter sales tax and finally grant total or you can just call it twitter whichever way you like it next i exit out of this table and i hit enter then i enter quotation preferred by maybe i can provide some line here i just hold down shift and i press the dash key hit enter another enter next i enter in some acceptance texts to accept this quotation sign here and return i'll provide another line perfect and finally i'll enter thank you for your business so all my information is entered the next thing i'm going to do is go ahead and format my tables starting from top first of all i don't need these lines on the table so i select the entire table by clicking on the cross icon right here then i go over to table tools table design under borders i click on borders that i choose no border meanwhile you see that i still have some lines these are only grid lines if i print the invoice these lines will not show they are only here to guide me so for you to be able to see this grid line you need to make sure that you go to borders and make sure view grid line is selected so if i click on it the grid lines will go off so i'll go back and make sure they are enabled perfect next i click on this text you really need to click on it then go over to layout then i'll align it to top right so that will be at this corner meanwhile i'll increase the size by going to home and i'll go ahead and increase the start from here 28 is cool i can make it boil it next i click in this cell and i go back to layout and i'm going to go ahead and align it to bottom left meanwhile i'll increase the size of the name of my company i go to home increase the size to 26 whatever size you'll get here will depend upon how lengthy your company name is next i select the slogan and i'm going to go ahead and make it idealize i'm still in this cell next i go over to layout and the table tools and i'm going to go ahead and increase the height to 2 centimeters next i click anywhere in this cell and i'll go ahead and align it bottom right perfect next i click in here and make sure it is aligned top left and in here top right next is this table all that i need to do here is move this line make sure you get these two headed arrows when you point on the line and the vertical bar then you take it to this match and i'm going to go ahead and take off the lines so i select the entire table then i go over to table design borders no border next is this table i make sure everything is selected then i go over to layout and i'll increase the height to 0.7 centimeters the table is just selected i'll align everything to the center perfect maybe i want to change the thickness of the line on top so i'll go to table design then i go over to line weight at the moment it is half pt do i choose maybe to cortez after choosing the line you see that border painter is highlighted or selected so all what i need to do is come right here make sure the tip of the brush is on the line then click on it and drag to the end perfect so once the brush is still active maybe i want to do the same thing to this particular line on top awesome to disable the brush i click on water painter and the brush is disabled next i format this table by selecting it so if i click in here i click on the cross icon then i go over to layout and i'll increase the height to 0.7 centimeters now i'll format individual cells so first of all the row on top i highlight everything then i align everything to the center the whole of this column i'll align it to left center the same goes to this particular column and here under unit price and amount since we are going to be talking about money they should be aligned to the right so i highlight everything in here then i click on align center right next i'm going to go ahead and adjust the columns so starting from here i move it this much i'll decrease the amount make sure you remove the highlighting like this much and i'll decrease the unit price column as well so that there will be enough space for discretion next thing i'm going to do is remove some lines here i don't want starting from this side i don't need all the inner lines so i highlight them up then i go over to table design and i choose no other but you can see that the line here is off meanwhile we need it and the line here as well so what we can do is i can highlight here that is the three cells here then i go over to borders then i choose left border oops it is so using the line weight i selected earlier i'll take it back to half and i'll go back to borders then i choose left border next i'll go ahead and highlight these three cells then i go to brothers this area i'll choose bottom border maybe i can add some more flavor to my tables by making the headings bullet perfect everything is set however you see that i have two pages which i don't want so what i'm going to go ahead and do is i want to decrease the margin down here below so to do that i go to the ruler right here then i hover in between the white area and the gray area i'll get these two headed arrows i click and drag down like this i'll go up and do the same thing so that i'll have one page i still have to pay this i cancel go up a bit now i have one page perfect one thing i can also do is select this text then i make it void italic and align it to the center now let's take a preview of it and see how it will come up when we try to print it okay so this is how my invoice will look like very neat and clean i go back so with this you can go ahead and save it as a template so that each time you open the template it will give you a new document instead of distracting the main template so let me show you how you can save this as a template to do that i go over to file then i click on save as you can choose whichever location you want i'll choose document and see what i'll get in the end then the file name i call it invoice and then save as type i drop down the arrow then i'll go ahead and choose web template and it will take me off from the documents folder and now redirect it to the custom office templates next i click on save and my invoice template is saved so that's it on how to create an invoice in microsoft word i hope this video was helpful if you found value candela hit the like button subscribe and also enable the notification bell so that each time i post a new video on this channel you will be the first to know keep watching and i will see you in the next video [Music] you
Show moreGet more for online bill format in word for production
- Bootstrap 5 invoice template for Insurance Industry
- Bootstrap 5 Invoice Template for Legal Services
- Bootstrap 5 invoice template for Life Sciences
- Bootstrap 5 Invoice Template for Mortgage
- Bootstrap 5 invoice template for Nonprofit
- Bootstrap 5 Invoice Template for Real Estate
- Bootstrap 5 invoice template for Retail Trade
- Bootstrap 5 Invoice Template for Staffing
Find out other online bill format in word for production
- Unlock the Power of eSignature Legality for Sublease ...
- ESignature Legality for Sublease Agreement in India - ...
- ESignature Legality for Sublease Agreement in United ...
- ESignature Legality for Roommate Rental Agreement in ...
- Unlocking the Power of eSignature Legality for Roommate ...
- ESignature Legality for Roommate Rental Agreement in ...
- Exploring the eSignature Legality for Roommate Rental ...
- Ensure eSignature Legality for Lodger Agreement in ...
- ESignature Legality for Lodger Agreement in Mexico
- ESignature Legality for Lodger Agreement in European ...
- ESignature Legality for Lodger Agreements in United ...
- Unlocking the Potential of eSignature Legality for ...
- ESignature Legality for Lodger Agreement in UAE
- ESignature Legality for Lodger Agreement in India: ...
- Ensuring eSignature Legality for Lodger Agreement in ...
- ESignature Legality for Storage Rental Agreement in ...