How Do I Validate eSignature Word
Make the most out of your eSignature workflows with airSlate SignNow
Extensive suite of eSignature tools
Robust integration and API capabilities
Advanced security and compliance
Various collaboration tools
Enjoyable and stress-free signing experience
Extensive support
Keep your eSignature workflows on track
Our user reviews speak for themselves


Award-winning eSignature solution


How to Authenticate eSignature in Word
Authenticating eSignatures in Word files can be challenging, but with tools such as airSlate SignNow, it turns into a smooth task. This platform not only makes the eSigning experience easier but also enriches the overall interaction with its easy-to-use features tailored for organizations of all sizes. In this guide, we will guide you through the process of properly authenticating eSignatures using airSlate SignNow.
How to Authenticate eSignature in Word
- Launch your web browser and go to the airSlate SignNow website.
- Establish a free account or sign into your current one.
- Choose the document you want to authenticate by uploading it to the platform.
- If you intend to utilize this document in the future, think about transforming it into a reusable template.
- Open the document to perform any required modifications, such as adding fillable fields or including specific details.
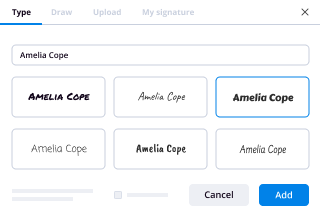
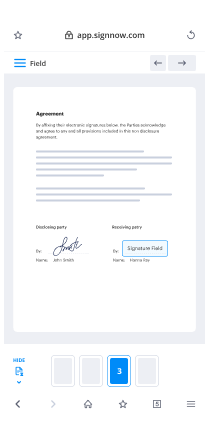
- Add your signature to the document and assign signature fields for your recipients.
- Click on 'Continue' to set up the eSignature invitation and dispatch it.
In summary, airSlate SignNow delivers a thorough and effective solution for authenticating eSignatures in Word files. Its user-friendly interface and powerful features guarantee that you can handle your eSigning requirements effortlessly.
Ready to enhance your document management workflow? Register for airSlate SignNow today and enjoy transparent pricing, outstanding ROI, and around-the-clock support tailored for your enterprise!
How it works
Rate your experience
-
Best ROI. Our customers achieve an average 7x ROI within the first six months.
-
Scales with your use cases. From SMBs to mid-market, airSlate SignNow delivers results for businesses of all sizes.
-
Intuitive UI and API. Sign and send documents from your apps in minutes.
A smarter way to work: —how to industry sign banking integrate
How to electronically sign & fill out a document online
Document management isn't an easy task. The only thing that makes working with documents simple in today's world, is a comprehensive workflow solution. Signing and editing documents, and filling out forms is a simple task for those who utilize eSignature services. Businesses that have found reliable solutions to how do i functionality e signature validate word don't need to spend their valuable time and effort on routine and monotonous actions.
Use airSlate SignNow and how do i functionality e signature validate word online hassle-free today:
- Create your airSlate SignNow profile or use your Google account to sign up.
- Upload a document.
- Work on it; sign it, edit it and add fillable fields to it.
- Select Done and export the sample: send it or save it to your device.
As you can see, there is nothing complicated about filling out and signing documents when you have the right tool. Our advanced editor is great for getting forms and contracts exactly how you want/need them. It has a user-friendly interface and full comprehensibility, providing you with total control. Sign up right now and start increasing your eSignature workflows with effective tools to how do i functionality e signature validate word online.
How to electronically sign and fill documents in Google Chrome
Google Chrome can solve more problems than you can even imagine using powerful tools called 'extensions'. There are thousands you can easily add right to your browser called ‘add-ons’ and each has a unique ability to enhance your workflow. For example, how do i functionality e signature validate word and edit docs with airSlate SignNow.
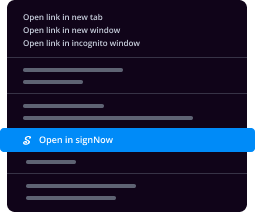
To add the airSlate SignNow extension for Google Chrome, follow the next steps:
- Go to Chrome Web Store, type in 'airSlate SignNow' and press enter. Then, hit the Add to Chrome button and wait a few seconds while it installs.
- Find a document that you need to sign, right click it and select airSlate SignNow.
- Edit and sign your document.
- Save your new file to your account, the cloud or your device.
Using this extension, you eliminate wasting time on monotonous assignments like downloading the data file and importing it to an electronic signature solution’s catalogue. Everything is close at hand, so you can quickly and conveniently how do i functionality e signature validate word.
How to digitally sign docs in Gmail
Gmail is probably the most popular mail service utilized by millions of people all across the world. Most likely, you and your clients also use it for personal and business communication. However, the question on a lot of people’s minds is: how can I how do i functionality e signature validate word a document that was emailed to me in Gmail? Something amazing has happened that is changing the way business is done. airSlate SignNow and Google have created an impactful add on that lets you how do i functionality e signature validate word, edit, set signing orders and much more without leaving your inbox.
Boost your workflow with a revolutionary Gmail add on from airSlate SignNow:
- Find the airSlate SignNow extension for Gmail from the Chrome Web Store and install it.
- Go to your inbox and open the email that contains the attachment that needs signing.
- Click the airSlate SignNow icon found in the right-hand toolbar.
- Work on your document; edit it, add fillable fields and even sign it yourself.
- Click Done and email the executed document to the respective parties.
With helpful extensions, manipulations to how do i functionality e signature validate word various forms are easy. The less time you spend switching browser windows, opening several accounts and scrolling through your internal records trying to find a template is a lot more time and energy to you for other important assignments.
How to securely sign documents in a mobile browser
Are you one of the business professionals who’ve decided to go 100% mobile in 2020? If yes, then you really need to make sure you have an effective solution for managing your document workflows from your phone, e.g., how do i functionality e signature validate word, and edit forms in real time. airSlate SignNow has one of the most exciting tools for mobile users. A web-based application. how do i functionality e signature validate word instantly from anywhere.
How to securely sign documents in a mobile browser
- Create an airSlate SignNow profile or log in using any web browser on your smartphone or tablet.
- Upload a document from the cloud or internal storage.
- Fill out and sign the sample.
- Tap Done.
- Do anything you need right from your account.
airSlate SignNow takes pride in protecting customer data. Be confident that anything you upload to your account is secured with industry-leading encryption. Automated logging out will protect your user profile from unauthorised access. how do i functionality e signature validate word from your phone or your friend’s mobile phone. Safety is key to our success and yours to mobile workflows.
How to eSign a PDF on an iPhone or iPad
The iPhone and iPad are powerful gadgets that allow you to work not only from the office but from anywhere in the world. For example, you can finalize and sign documents or how do i functionality e signature validate word directly on your phone or tablet at the office, at home or even on the beach. iOS offers native features like the Markup tool, though it’s limiting and doesn’t have any automation. Though the airSlate SignNow application for Apple is packed with everything you need for upgrading your document workflow. how do i functionality e signature validate word, fill out and sign forms on your phone in minutes.
How to sign a PDF on an iPhone
- Go to the AppStore, find the airSlate SignNow app and download it.
- Open the application, log in or create a profile.
- Select + to upload a document from your device or import it from the cloud.
- Fill out the sample and create your electronic signature.
- Click Done to finish the editing and signing session.
When you have this application installed, you don't need to upload a file each time you get it for signing. Just open the document on your iPhone, click the Share icon and select the Sign with airSlate SignNow button. Your sample will be opened in the application. how do i functionality e signature validate word anything. In addition, using one service for your document management needs, things are easier, better and cheaper Download the app today!
How to electronically sign a PDF file on an Android
What’s the number one rule for handling document workflows in 2020? Avoid paper chaos. Get rid of the printers, scanners and bundlers curriers. All of it! Take a new approach and manage, how do i functionality e signature validate word, and organize your records 100% paperless and 100% mobile. You only need three things; a phone/tablet, internet connection and the airSlate SignNow app for Android. Using the app, create, how do i functionality e signature validate word and execute documents right from your smartphone or tablet.
How to sign a PDF on an Android
- In the Google Play Market, search for and install the airSlate SignNow application.
- Open the program and log into your account or make one if you don’t have one already.
- Upload a document from the cloud or your device.
- Click on the opened document and start working on it. Edit it, add fillable fields and signature fields.
- Once you’ve finished, click Done and send the document to the other parties involved or download it to the cloud or your device.
airSlate SignNow allows you to sign documents and manage tasks like how do i functionality e signature validate word with ease. In addition, the security of your information is priority. Encryption and private web servers can be used for implementing the latest features in info compliance measures. Get the airSlate SignNow mobile experience and operate more efficiently.


FAQs
-
How Do I Validate eSignature Word within airSlate SignNow?
To validate an eSignature in Word using airSlate SignNow, you simply need to upload your document, apply your eSignature, and then save it. The platform provides an audit trail and verification details that confirm the authenticity of the signature, ensuring compliance with legal standards. This process is designed to be user-friendly, allowing you to easily validate your eSignatures without hassle.
-
What are the features of airSlate SignNow related to eSignature validation?
airSlate SignNow offers a range of features that streamline the eSignature validation process. These include secure storage, an audit trail for tracking signature activity, and customizable templates for repeated use. By understanding how to validate eSignature Word documents, you can ensure your agreements are legally binding and easily accessible.
-
Is there a cost associated with validating eSignatures in Word using airSlate SignNow?
airSlate SignNow provides a cost-effective solution for validating eSignatures in Word, with flexible pricing plans based on your business needs. Each plan includes features that facilitate the validation process, ensuring you get the best value. To find out more about pricing and features, visit our pricing page for details.
-
What benefits does airSlate SignNow offer for eSignature validation?
The primary benefit of using airSlate SignNow for eSignature validation is its ease of use and comprehensive security features. By knowing how to validate eSignature Word documents, you can confidently sign and send important contracts without worrying about compliance. Additionally, the platform enhances workflow efficiency, saving time and resources.
-
Can I integrate airSlate SignNow with other software for eSignature validation?
Yes, airSlate SignNow seamlessly integrates with various software applications to enhance your document management processes, including eSignature validation. This integration allows you to validate eSignatures directly within the tools you already use, improving efficiency and collaboration. Check our integrations page for a complete list of compatible software.
-
What types of documents can I validate using airSlate SignNow?
With airSlate SignNow, you can validate various document types, including contracts, agreements, and forms in Word format. The platform is versatile, allowing for a wide range of document types to be securely signed and validated. This flexibility is essential for businesses looking to streamline their eSignature processes.
-
How secure is the eSignature validation process in airSlate SignNow?
The eSignature validation process in airSlate SignNow is highly secure, utilizing encryption and compliance with industry standards. When you ask, 'How do I validate eSignature Word?', rest assured that your data is protected throughout the signing process. This commitment to security helps maintain the integrity of your documents.
-
How do I validate digital signature in my e-aadhar?
Yes, you can confidently validate it.(n)Code is one of the licensed CA (signNowing Authority) by the CCA (Controller of signNowing Authorities), Government of India. Therefore you can go-ahead and validate that signature - whose DSC has been issued by (n)Code.You can also find the list of licensed CA’s by the CCA from the following link: Licensed CAs | CCA
-
How do the Echosign / signNow widgets produce valid e-signatures?
signNow embedded signing is a scenario where the host application and signNow service share authentication responsibility. Additional forms of authentication like RSA knowledge base authentication, Phone authentication and others can be added for additional evidence that the signer is who they say they are. If you think about it the access to the e-mail address is also a piece of evidence, in this case we are just allowing the host application to verify access to e-mail. Next and very important point is that signNow certifies all of our API integrations and during that certification we ensure that the integrated apps adhere to code and compliance standards. I am not sure if other companies do it, but it would be great if everyone made sure that these embedded scenarios always had a minimum bar of compliance.
-
How do I validate the digital signature after downloading an e-Aadhaar?
How do I validate the digital signature after downloading an e-Aadhaar?When you download the eadhar card, you will find a question mark in signature field of digital signature. I understand this is what you are talking about. Just right click on the same, you will get an option of validating digital signature. Click on that option. The digital signature will be validated, the question mark will be replaced by a green right mark.CA. Bhavesh Savlawww.cabks.in
-
What amazed you today?
My son amazed me today…and not for the better.I received a phone call from the school today asking me to pick up my son.When I arrived, I had a very unpleasant discussion with the dean about how my son organized a “fascist uprising” at his school.Apparently, my son has a physics teacher who allows her students to eat lunch in her classroom while they complete any missing work they have to hand in.My son—being the busy and disorganized boy that he is—was in that classroom during lunch very often.One day, he and a couple of other hooligans were working on a class project together at lunch when they decided to take a break. What did they do during this break time? Well, what any normal teenagers would do…write a political manifesto.So they take one of those mini white boards lying around the classroom and begin writing their manifesto. Now for privacy reasons, let’s assume that my son and I live in an imaginary town called Terrytown (our town also has the word “town” at the end—just a different prefix).Now the way the school system works in our district is that the Terry School District begins with many different elementary schools, then these elementary school students blend into a few larger middle schools, and these larger middle schools blend into one giant high school.Terrytown High SchoolThe majority of the students at the school live in Terrytown, but there is one other location where students come from called Terry Plains.So my son and his idiot friends begin writing this manifesto which (according to my son) was meant to mock Adolf Hitler and the Nazi Party.You see, for those of you that don’t know, the word “Nazi” is an abbreviation for the NSDAP, which standed for “Nationalsozialistische Deutsche Arbeiterpartei” or the “National Socialist German Workers Party”.So to mock them, my son and his idiot friends begin writing their manifesto on the mini-whiteboard, titling it “The Townist Socialist Party of Terrytown”.Now you would think that a far-right activist would begin writing racist things about illegal immigrants, or Jews, or African-Americans or something like that…no…no…no.My son and his idiot friends write this manifesto as an emulation of Mein Kampf, except instead of having the antagonist be the Jews, they make the antagonists the kids from Terry Plains. They wrote about how Terrytown High School students lack the honor in their distinction, and that only kids who were born within Terrytown should be allowed to attend the high school…meaning the Terry Plains kids have to go.The manifesto began to go in-depth about more garbage regarding how they were going to get rid of the Terry Plains kids. First, they were gonna make all of them wear a patch on their shirt which said “Terry Plains”. Second, they were gonna confiscate their lockers and school issued computers. And lastly, they were gonna round them all up on the school buses and “deport” them to the former middle schools which they attended in Terry Plains.I was always a bit of an edgelord myself, so I suppose I could understand the joke. But my son and his idiot friends were dumb enough to write this manifesto and to not erase it!The physics teacher (who according to my son was an “SJW”) ended up finding the manifesto. Horrified, she immediately turned it over to the Dean of Students at Terrytown High School.The problem with my son is that similarly to me, he can let a joke carry him away. So he and his idiot friends actually began recruiting people to his non-existent political party. His school uses an online based server called Google Drive which allows students to share documents amongst themselves, and my son made a document which had the list of over 100 people who decided to join his political party as a joke.Now I can only imagine how awkward of a conversation it was for my son when he had to explain to his Dean of Students that he wasn’t actually a fascist, and that he didn’t actually intend to deport the Terry Plains kids because they were municipally inferior—or something like that?Am I proud of it? No.Am I amazed by it? Believe it.
-
How do I validate the digital signature after downloading an e-Aadhaar in a mobile?
Please see my answer in Partha Chattopadhyay's answer to How do I verify a digital signature in Aadhaar downloaded in mobile?
-
How do I validate and verify a digital signature?
There are so many options one of them is Please follow these steps to verify the digital certificates and digital signatures received from trusted sources: Open the PDF file in PDF Converter Professional. Left-click on the Digital Signature field. Click "Verify Signature". Click "Properties". Click "Verify Identity". Add "Contact information for certificate owner:". Click "Add to List". Click "Close". Click "Verify Signature". The "Validity Status" should now show "Signature is valid". Click "Close". Digital Signature should now display a check mark and "Signature Valid". However this can be google too
-
What are the best ways to validate a startup idea?
Validating your business idea is crucial before you shell out thousands of dollars into building a product, setting up the business and hiring people. I recently spoke to Sam Hysell, he's worked with the Lean Startup team and now works with new entrepreneurs to help them validate their ideas, you can find the interview here: http://apple.co/1LNPWnM. I'll go into brief detail about what we've covered below.The best thing about the time period that we're living in is that technology has enabled entrepreneurs to able to validate their idea at a nominal cost. It has never been cheaper to start an internet business.Here's how I would validate it:1) Set up a landing page. Before you go out and shell out thousands of dollars on hiring a developer, just see if people would even be into the idea by creating a very clear and concise landing page. The landing page should describe what the product is, how it works (3 clear steps) and a sign up button where someone can submit their name to be added to the wait list. Take a look at http://quickmvp.com you can literally set up a landing page in five minutes that contains a clear call to action. You can even test interest levels based on different price points to see if customers would be willing to pay for your service. This is a great tool to help validate your idea and you get great analytics to see how engaged people are with your idea.2) Find out who's interested and bring people towards your landing page to see if people would sign up. If you're getting a lot of signups your steps closer to validating your idea. With Quickvp you could spend $30 on Google ads. I also like this one tool called Http://flutter-app. I use this all the time to test out new features for LawTrades. You can follow accounts that contain your ideal customers very quickly with a few clicks. For instance, if I was opening up a new taco shop, I can use Flutter-app to follow people that follow Chipotle, or Taco bell since my ideal customers are probably following those accounts. Doing this manually would take forever, but you can do this with Flutter very quickly. Make sure your Twitter bio has a link to your landing page so people know what to click on. If a few days go by and your landing page is getting traffic but no signups then tweak the landing page.3) Make sure you're going to Meetup Events and meeting new people face to face to talk to them about the idea! If you're shy, then you MUST come out of your comfort zone. Just find out where your target customers are hanging out and what Meetup Events are they apart of and go there to ask for feedback on your idea. If they like it then have them sign up. Build up the hype! If they sign up, these are going to be the people that your in communication with as your building out your platform, leave an awesome impression so they come back when your platform/service is ready.4) After you have some signups, I would interview them and talk to them about the idea. See what they like about it and why they want to use it. Make sure you also ask them about their feedback about various price points that you have in mind. Interviewing is key because you'll get the feedback you need to build it out. Once you talk to potential users you can fine tune your elevator pitch and really be able to figure out the actual problems that your customers care about.All of these things can help you gauge user interest for what you're doing and I've seen some pretty successful entrepreneurs implement these strategies. You should also visit http://Leanstartupmachine.com they host awesome weekend workshops to help you validate your business idea.I'd love to hear about all the new ideas that are on this question. Feel free to message me! You can always check me out at LawTrades.
-
How do I enable multiple signatures in MS word without losing the previous signatures?
Add a Digital Signature Using a Signature Line 1. To add a digital signature, open your Microsoft Word document and click where you’d like to add your signature line. 2. From the Word ribbon, select the Insert tab and then click Signature Line in the Text group. 3. A Signature Setup pop-up box appears. Enter your information in the text fields and click OK. 4. Double-click the signature line. 5. A Sign pop-up box appears. At the X, type your name. Next, look at the Signing as: field. Select the signing certificate. To ensure that this is the correct certificate, click the Change button. 6. Click on Click here to view certificate properties. 7. The Certificate Details box appears. Go to the Details tab and scroll down to Key Usage. Single-click on it. The lower text box should now display Digital Signature, Non-Repudiation. If it does, then this is the right certificate. Click OK. 8. If this is the wrong certificate, click OK. Then click More Choices to see other certificates. Select another certificate and repeat these steps until you find the correct certificate. 9. Click the Sign button to sign the document. Insert your PIV card into the card reader. Enter your Smart Card (PIV) PIN and click OK. 10. The Signature Confirmation box tells you that Word saved your digital signature. Click OK. Once you've digitally signed your document, if you edit it, Word will remove the digital signature. Don't worry. You can always go back to Step 1 and digitally sign it again. Add an Invisible Digital Signature You can add an invisible digital signature to prevent your name from appearing in a document. 1. Open your document and click the File tab. 2. Click Info and then click Protect Document. 3. From the Protect Document drop-down menu, click Add a Digital Signature. 4. Select a Commitment Type, such as created and approved this document, and then click Sign. 5. Insert your PIV card into the card reader. Enter your Smart Card (PIV) PIN and click OK. 6. The Signature Confirmation box tells you that Word saved your digital signature. Click OK. 7. Add Multiple Digital Signatures Using Signature Lines Once you digitally sign a document, you can have others also digitally sign it. (Note: If you are the first approver, you should create the signature lines for all of the approvers. Then, send the document to the second approver.) 1. If you are the second (or other) approver, open the document you’ve received. Double-click your signature line to sign. Follow Steps 4-10 from Add a Digital Signature Using a Signature Line [ https://piv.idmanagement.gov/userguides/signworddoc/#add-a-digital-signature-using-a-signature-line ]. 2. A Signature Setup pop-up box appears. Enter your information in the text fields and click OK 3. Double-click your signature line. 4. A Sign pop-up box appears. At the X, type your name. 5. Next, look at the Signing as: field. You should see your name and certificate information. If you don’t, click the Change button to select a different certificate and click Sign. 6. Insert your PIV card and enter your Smart Card (PIV) PIN. Click OK. 7. The Signature Confirmation box tells you that Word saved your digital signature. Click OK. 8. Send the digitally signed document to the next approver. Each successive approver will be able to open the document and double-click the Signature Line with his/her name and complete the signing process. Add Multiple Invisible Digital Signatures Multiple approvers may digitally sign a document. Use the same procedures as you would to add one invisibile digital signature: Add an Invisible Digital Signature [ https://piv.idmanagement.gov/userguides/signworddoc/#add-an-invisible-digital-signature ]. The final approver will see multiple “invisible” signatures in the document. View Digital Signatures If you use Word 2013 and open a digitally signed Word 2007 or 2010 document, you may have compatibility issues. You can view digital signatures in an incompatible Word document in one of two ways: 1. Click the View Signatures button just below the Word ribbon. OR 1. Click the File tab and select Info. Then click View Signatures. For either option, you will be able to see the digital signature details in the Signatures box. Remove a Digital Signature 1. If you want to remove a digital signature, open your Word document and go to the signature line. 2. If there is no signature line, click the View Signatures button just below the Word ribbon. 3. From the Signatures box, select the signature you want to to delete. 4. Right-click on the signature and then click Remove Signature. 5. When prompted, click Yes. Verify Digital Signature Settings Please ask your Technical Support staff for help. Administrator privileges are required for these steps. By default, Microsoft Word uses the SHA-1 hash algorithm to generate digital signatures. The SHA-1 hash algorithm is no longer considered secure. More secure hash algorithms, such as SHA-256, should be used. (See NIST’s guidance on hash functions) [ https://csrc.nist.gov/Projects/Hash-Functions/NIST-Policy-on-Hash-Functions ] You can use either option below to verify/change the hash algorithm settings for Microsoft Office: 1. Group Policy settings: Digital Signature Settings in Office 2013 [ https://technet.microsoft.com/en-us/library/cc545900.aspx ]. (For additional information, consult Microsoft’s technical documents.) 2. Computer registry settings. Change the Microsoft Office signature algorithm, as follows: [code]Word 2010: Computer\HKEY_CURRENT_USER\Software\Policies\Microsoft\Office\14.0\common\signatures Word 2013: Computer\HKEY_CURRENT_USER\Software\Policies\Microsoft\Office\15.0\common\signatures Word 2016: Computer\HKEY_CURRENT_USER\Software\Policies\Microsoft\Office\16.0\common\signatures [/code]Enable digital signatures so that users can sign part of a form 1. On the Tools menu, click Form Options. 2. Under Category, click Digital Signatures, and then click Enable digital signatures for specific data in the form. 3. Click Add. 4. In the Set of signNow Data dialog box, type a name for the part of the form template for which you want to enable digital signatures.Tip: The name you use cannot contain any spaces. 5. Click Select XPath next to the Fields and Groups to be signed box. 6. In the Select a Field or Group dialog box, click the field or group for which you want to enable digital signatures, and then click OK. 7. Under Signature options in the Set of signNow Data dialog box, do one of the following:To allow only one signature for this part of the form template, click Allow only one signature.To allow multiple signatures that are independent of each other, and that can be added or removed without affecting the other signatures, click All the signatures are independent (co-sign).To allow multiple signatures that sign preceding signatures, click Each signature signs the preceding signatures (counter-sign). 8. In the Signature confirmation message box, type the text that you want to show the user when they sign this part of the form, and then click OK twice. 9. In the form template, associate the part of the form template for which you enabled digital signatures with a section.How?Place your cursor where you want to insert the section.If the Data Source task pane is not visible, click Data Source on the View menu.In [ http://menu.In ] the Data Source task pane, do one of the following:To add a control that is bound to a field, right-click the field, and then click the control that you want to bind to this field.To [ http://field.To ] add a section that is bound to a group, right-click the group, and then click Section with Controls.Note: If the field or group that you specified repeats, you must select a non-repeating group that contains that field or group. 10. In the form template, double-click the Section label below the section that contains the other sections or controls that you just inserted. 11. Click the Digital Signatures tab. 12. Select the Allow users to digitally sign this section check box. 13. In the Sign the following data in the form when this section is signed box, click the name of the section that you created a digital signature for in step 4. 14. To display signatures in the section as they are added, select the Show signatures in the sectioncheck box. 15. To make the controls in the section read-only once they are signed, select the When signed, make controls read-only check box. Top of Page [ https://support.office.com/en-us/article/enable-or-disable-digital-signatures-d5050d09-c39e-470f-a548-7f2b98c6e4e1#top ] Disable digital signatures 1. On the Tools menu, click Form Options. 2. Under Category, click Digital Signatures, and then do one of the following:To disable digital signatures for the entire form template, click Do not enable digital signatures.To disable digital signatures for a specific part of the form template, click Enable digital signatures for specific data in the form, click the part of the form template in the Data in the form that can be signed list that you want to disable digital signatures for, and then click Remove.
Trusted esignature solution— what our customers are saying


Get legally-binding signatures now!
Frequently asked questions
How do i add an electronic signature to a word document?
How to make a pdf editable for esign?
Lock pdf document when sending for sign?
Get more for How Do I Validate eSignature Word
- Sign Kansas Affidavit of Heirship Free
- How To Sign Kentucky Affidavit of Heirship
- Can I Sign Louisiana Affidavit of Heirship
- How To Sign New Jersey Affidavit of Heirship
- Sign Oklahoma Affidavit of Heirship Myself
- Sign Washington Affidavit of Death Easy
- Help Me With Sign Pennsylvania Cohabitation Agreement
- Sign Montana Child Support Modification Online
Find out other How Do I Validate eSignature Word
- D 2848 instructions form
- Org19 form
- Rainbow six siege map layouts pdf form
- Ef enrolment form
- Illinois state police firearms services bureau foid appeal form
- Form fda 3674 certification of compliance under 42 u s c 282j5b with requirements of clinicaltrials gov data bank
- Fet mmu form
- Recordsrequest elkgrovepd org form
- Supplier release checklist automotive industry form
- E 101 general notes notes electrical power plan symbols legend form
- Riverside police department alarm users permit application form
- Verification form ontario cicb gov on
- Alberta student number 29575275 form
- Mini mu math competition form
- 55 66 3 release of deed of trust or other lien virginia law form
- City of stanford net profit license fee return please attach a copy stanfordky form
- Where do i find the form for depth of usable quaality groundwater to be protected sc letter request form
- Guest house form
- Va health department confidentiality morbidity report form
- Youthdale referral form 325977710