How Do I Remove eSignature Word
Make the most out of your eSignature workflows with airSlate SignNow
Extensive suite of eSignature tools
Robust integration and API capabilities
Advanced security and compliance
Various collaboration tools
Enjoyable and stress-free signing experience
Extensive support
Keep your eSignature workflows on track
Our user reviews speak for themselves


Award-winning eSignature solution


How to Eliminate eSignature Word
If you're curious about how to eliminate eSignature Word from your files, you’re in good company. Numerous users aim to handle their digital signatures effectively, especially when utilizing services like airSlate SignNow. This guide will take you through the procedure to remove eSignatures while emphasizing the advantages of this powerful document management tool.
Steps to Remove eSignature Word
- Launch your web browser and go to the airSlate SignNow homepage.
- Sign up for a free trial account or log in to your current account.
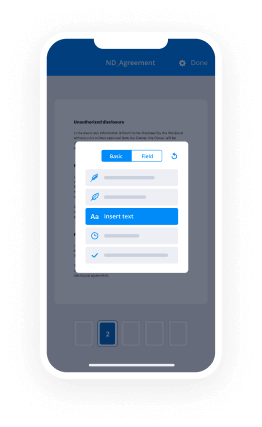
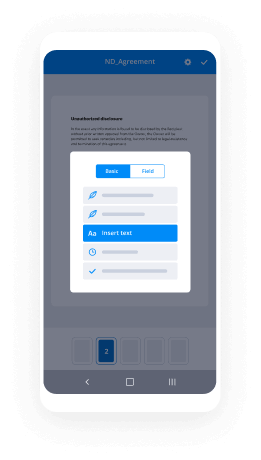
- Upload the file from which you wish to eliminate the eSignature.
- If you intend to use this file again, you might want to transform it into a reusable template.
- Open your file to make the needed adjustments, such as getting rid of any signature fields.
- Complete your modifications and make sure that the eSignature is no longer available.
- Click 'Continue' to affirm your changes and save the revised file.
By adhering to these steps, you can effortlessly remove eSignatures from your files using airSlate SignNow. This platform not only simplifies the signing process but also provides an array of features intended to boost productivity.
Eager to optimize your document management? Register for airSlate SignNow today and enjoy outstanding support, clear pricing, and a comprehensive feature set that delivers remarkable ROI.
How it works
Rate your experience
-
Best ROI. Our customers achieve an average 7x ROI within the first six months.
-
Scales with your use cases. From SMBs to mid-market, airSlate SignNow delivers results for businesses of all sizes.
-
Intuitive UI and API. Sign and send documents from your apps in minutes.
A smarter way to work: —how to industry sign banking integrate
How to electronically sign & fill out a document online
Document management isn't an easy task. The only thing that makes working with documents simple in today's world, is a comprehensive workflow solution. Signing and editing documents, and filling out forms is a simple task for those who utilize eSignature services. Businesses that have found reliable solutions to how do i functionality e signature remove word don't need to spend their valuable time and effort on routine and monotonous actions.
Use airSlate SignNow and how do i functionality e signature remove word online hassle-free today:
- Create your airSlate SignNow profile or use your Google account to sign up.
- Upload a document.
- Work on it; sign it, edit it and add fillable fields to it.
- Select Done and export the sample: send it or save it to your device.
As you can see, there is nothing complicated about filling out and signing documents when you have the right tool. Our advanced editor is great for getting forms and contracts exactly how you want/need them. It has a user-friendly interface and full comprehensibility, providing you with total control. Sign up today and begin enhancing your eSignature workflows with convenient tools to how do i functionality e signature remove word online.
How to electronically sign and fill documents in Google Chrome
Google Chrome can solve more problems than you can even imagine using powerful tools called 'extensions'. There are thousands you can easily add right to your browser called ‘add-ons’ and each has a unique ability to enhance your workflow. For example, how do i functionality e signature remove word and edit docs with airSlate SignNow.
To add the airSlate SignNow extension for Google Chrome, follow the next steps:
- Go to Chrome Web Store, type in 'airSlate SignNow' and press enter. Then, hit the Add to Chrome button and wait a few seconds while it installs.
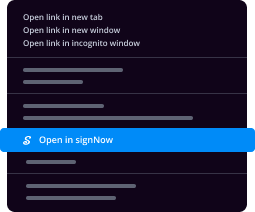
- Find a document that you need to sign, right click it and select airSlate SignNow.
- Edit and sign your document.
- Save your new file to your account, the cloud or your device.
Using this extension, you eliminate wasting time on monotonous actions like downloading the data file and importing it to an eSignature solution’s catalogue. Everything is close at hand, so you can quickly and conveniently how do i functionality e signature remove word.
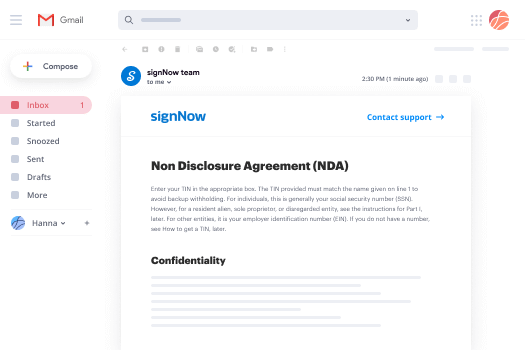
How to digitally sign docs in Gmail
Gmail is probably the most popular mail service utilized by millions of people all across the world. Most likely, you and your clients also use it for personal and business communication. However, the question on a lot of people’s minds is: how can I how do i functionality e signature remove word a document that was emailed to me in Gmail? Something amazing has happened that is changing the way business is done. airSlate SignNow and Google have created an impactful add on that lets you how do i functionality e signature remove word, edit, set signing orders and much more without leaving your inbox.
Boost your workflow with a revolutionary Gmail add on from airSlate SignNow:
- Find the airSlate SignNow extension for Gmail from the Chrome Web Store and install it.
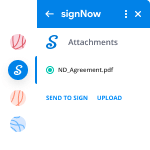
- Go to your inbox and open the email that contains the attachment that needs signing.
- Click the airSlate SignNow icon found in the right-hand toolbar.
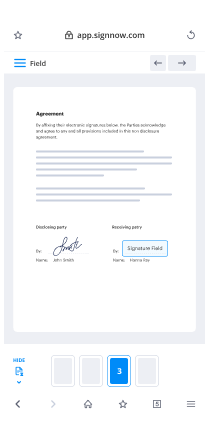
- Work on your document; edit it, add fillable fields and even sign it yourself.
- Click Done and email the executed document to the respective parties.
With helpful extensions, manipulations to how do i functionality e signature remove word various forms are easy. The less time you spend switching browser windows, opening several accounts and scrolling through your internal records trying to find a doc is much more time and energy to you for other significant jobs.
How to securely sign documents in a mobile browser
Are you one of the business professionals who’ve decided to go 100% mobile in 2020? If yes, then you really need to make sure you have an effective solution for managing your document workflows from your phone, e.g., how do i functionality e signature remove word, and edit forms in real time. airSlate SignNow has one of the most exciting tools for mobile users. A web-based application. how do i functionality e signature remove word instantly from anywhere.
How to securely sign documents in a mobile browser
- Create an airSlate SignNow profile or log in using any web browser on your smartphone or tablet.
- Upload a document from the cloud or internal storage.
- Fill out and sign the sample.
- Tap Done.
- Do anything you need right from your account.
airSlate SignNow takes pride in protecting customer data. Be confident that anything you upload to your account is secured with industry-leading encryption. Automated logging out will protect your user profile from unauthorized access. how do i functionality e signature remove word from the mobile phone or your friend’s phone. Safety is key to our success and yours to mobile workflows.
How to sign a PDF file on an iPhone or iPad
The iPhone and iPad are powerful gadgets that allow you to work not only from the office but from anywhere in the world. For example, you can finalize and sign documents or how do i functionality e signature remove word directly on your phone or tablet at the office, at home or even on the beach. iOS offers native features like the Markup tool, though it’s limiting and doesn’t have any automation. Though the airSlate SignNow application for Apple is packed with everything you need for upgrading your document workflow. how do i functionality e signature remove word, fill out and sign forms on your phone in minutes.
How to sign a PDF on an iPhone
- Go to the AppStore, find the airSlate SignNow app and download it.
- Open the application, log in or create a profile.
- Select + to upload a document from your device or import it from the cloud.
- Fill out the sample and create your electronic signature.
- Click Done to finish the editing and signing session.
When you have this application installed, you don't need to upload a file each time you get it for signing. Just open the document on your iPhone, click the Share icon and select the Sign with airSlate SignNow button. Your sample will be opened in the application. how do i functionality e signature remove word anything. In addition, using one service for all your document management requirements, everything is quicker, smoother and cheaper Download the app today!
How to electronically sign a PDF file on an Android
What’s the number one rule for handling document workflows in 2020? Avoid paper chaos. Get rid of the printers, scanners and bundlers curriers. All of it! Take a new approach and manage, how do i functionality e signature remove word, and organize your records 100% paperless and 100% mobile. You only need three things; a phone/tablet, internet connection and the airSlate SignNow app for Android. Using the app, create, how do i functionality e signature remove word and execute documents right from your smartphone or tablet.
How to sign a PDF on an Android
- In the Google Play Market, search for and install the airSlate SignNow application.
- Open the program and log into your account or make one if you don’t have one already.
- Upload a document from the cloud or your device.
- Click on the opened document and start working on it. Edit it, add fillable fields and signature fields.
- Once you’ve finished, click Done and send the document to the other parties involved or download it to the cloud or your device.
airSlate SignNow allows you to sign documents and manage tasks like how do i functionality e signature remove word with ease. In addition, the security of your information is priority. Encryption and private web servers are used for implementing the most recent features in information compliance measures. Get the airSlate SignNow mobile experience and work more efficiently.


FAQs
-
How Do I Remove eSignature Word from my documents?
To remove the eSignature Word from your documents in airSlate SignNow, simply open the document, go to the signature field, and select the option to clear or remove the signature. This will enable you to adjust the document as needed. If you encounter any issues, consult our help center for detailed guidance.
-
What is the pricing structure for airSlate SignNow?
airSlate SignNow offers flexible pricing plans that cater to various business needs. You can choose from monthly or annual subscriptions, with options that include features like unlimited document signing. For specific costs and to find out how to remove eSignature Word from your plan, visit our pricing page.
-
Can I integrate airSlate SignNow with other applications?
Yes, airSlate SignNow seamlessly integrates with numerous applications, including CRM systems and cloud storage services. This allows you to streamline your document management processes. For instance, if you're asking how do I remove eSignature Word, our integrations make it easy to manage and edit documents across platforms.
-
What features does airSlate SignNow offer for document management?
airSlate SignNow provides a comprehensive suite of features, including document templates, customizable workflows, and advanced security measures. These tools enhance your document management experience. If you’re looking to learn how do I remove eSignature Word from templates, our features will guide you through the process.
-
Is airSlate SignNow user-friendly for beginners?
Absolutely! airSlate SignNow is designed with user experience in mind, making it easy for beginners to navigate the platform. Whether you need to send documents or learn how do I remove eSignature Word, our intuitive interface and support resources ensure a smooth experience.
-
What are the benefits of using airSlate SignNow for eSigning?
Using airSlate SignNow for eSigning offers numerous benefits, such as enhanced efficiency and reduced paperwork. You can quickly send, sign, and manage documents from anywhere. If you’re wondering how do I remove eSignature Word, our platform simplifies the process, allowing for quick edits and updates.
-
Does airSlate SignNow provide customer support?
Yes, airSlate SignNow offers robust customer support to assist you with any questions or issues. You can signNow out via chat, email, or phone. If you need help understanding how do I remove eSignature Word, our support team is ready to guide you through the steps.
-
How do I enable multiple signatures in MS word without losing the previous signatures?
Add a Digital Signature Using a Signature Line 1. To add a digital signature, open your Microsoft Word document and click where you’d like to add your signature line. 2. From the Word ribbon, select the Insert tab and then click Signature Line in the Text group. 3. A Signature Setup pop-up box appears. Enter your information in the text fields and click OK. 4. Double-click the signature line. 5. A Sign pop-up box appears. At the X, type your name. Next, look at the Signing as: field. Select the signing certificate. To ensure that this is the correct certificate, click the Change button. 6. Click on Click here to view certificate properties. 7. The Certificate Details box appears. Go to the Details tab and scroll down to Key Usage. Single-click on it. The lower text box should now display Digital Signature, Non-Repudiation. If it does, then this is the right certificate. Click OK. 8. If this is the wrong certificate, click OK. Then click More Choices to see other certificates. Select another certificate and repeat these steps until you find the correct certificate. 9. Click the Sign button to sign the document. Insert your PIV card into the card reader. Enter your Smart Card (PIV) PIN and click OK. 10. The Signature Confirmation box tells you that Word saved your digital signature. Click OK. Once you've digitally signed your document, if you edit it, Word will remove the digital signature. Don't worry. You can always go back to Step 1 and digitally sign it again. Add an Invisible Digital Signature You can add an invisible digital signature to prevent your name from appearing in a document. 1. Open your document and click the File tab. 2. Click Info and then click Protect Document. 3. From the Protect Document drop-down menu, click Add a Digital Signature. 4. Select a Commitment Type, such as created and approved this document, and then click Sign. 5. Insert your PIV card into the card reader. Enter your Smart Card (PIV) PIN and click OK. 6. The Signature Confirmation box tells you that Word saved your digital signature. Click OK. 7. Add Multiple Digital Signatures Using Signature Lines Once you digitally sign a document, you can have others also digitally sign it. (Note: If you are the first approver, you should create the signature lines for all of the approvers. Then, send the document to the second approver.) 1. If you are the second (or other) approver, open the document you’ve received. Double-click your signature line to sign. Follow Steps 4-10 from Add a Digital Signature Using a Signature Line [ https://piv.idmanagement.gov/userguides/signworddoc/#add-a-digital-signature-using-a-signature-line ]. 2. A Signature Setup pop-up box appears. Enter your information in the text fields and click OK 3. Double-click your signature line. 4. A Sign pop-up box appears. At the X, type your name. 5. Next, look at the Signing as: field. You should see your name and certificate information. If you don’t, click the Change button to select a different certificate and click Sign. 6. Insert your PIV card and enter your Smart Card (PIV) PIN. Click OK. 7. The Signature Confirmation box tells you that Word saved your digital signature. Click OK. 8. Send the digitally signed document to the next approver. Each successive approver will be able to open the document and double-click the Signature Line with his/her name and complete the signing process. Add Multiple Invisible Digital Signatures Multiple approvers may digitally sign a document. Use the same procedures as you would to add one invisibile digital signature: Add an Invisible Digital Signature [ https://piv.idmanagement.gov/userguides/signworddoc/#add-an-invisible-digital-signature ]. The final approver will see multiple “invisible” signatures in the document. View Digital Signatures If you use Word 2013 and open a digitally signed Word 2007 or 2010 document, you may have compatibility issues. You can view digital signatures in an incompatible Word document in one of two ways: 1. Click the View Signatures button just below the Word ribbon. OR 1. Click the File tab and select Info. Then click View Signatures. For either option, you will be able to see the digital signature details in the Signatures box. Remove a Digital Signature 1. If you want to remove a digital signature, open your Word document and go to the signature line. 2. If there is no signature line, click the View Signatures button just below the Word ribbon. 3. From the Signatures box, select the signature you want to to delete. 4. Right-click on the signature and then click Remove Signature. 5. When prompted, click Yes. Verify Digital Signature Settings Please ask your Technical Support staff for help. Administrator privileges are required for these steps. By default, Microsoft Word uses the SHA-1 hash algorithm to generate digital signatures. The SHA-1 hash algorithm is no longer considered secure. More secure hash algorithms, such as SHA-256, should be used. (See NIST’s guidance on hash functions) [ https://csrc.nist.gov/Projects/Hash-Functions/NIST-Policy-on-Hash-Functions ] You can use either option below to verify/change the hash algorithm settings for Microsoft Office: 1. Group Policy settings: Digital Signature Settings in Office 2013 [ https://technet.microsoft.com/en-us/library/cc545900.aspx ]. (For additional information, consult Microsoft’s technical documents.) 2. Computer registry settings. Change the Microsoft Office signature algorithm, as follows: [code]Word 2010: Computer\HKEY_CURRENT_USER\Software\Policies\Microsoft\Office\14.0\common\signatures Word 2013: Computer\HKEY_CURRENT_USER\Software\Policies\Microsoft\Office\15.0\common\signatures Word 2016: Computer\HKEY_CURRENT_USER\Software\Policies\Microsoft\Office\16.0\common\signatures [/code]Enable digital signatures so that users can sign part of a form 1. On the Tools menu, click Form Options. 2. Under Category, click Digital Signatures, and then click Enable digital signatures for specific data in the form. 3. Click Add. 4. In the Set of signNow Data dialog box, type a name for the part of the form template for which you want to enable digital signatures.Tip: The name you use cannot contain any spaces. 5. Click Select XPath next to the Fields and Groups to be signed box. 6. In the Select a Field or Group dialog box, click the field or group for which you want to enable digital signatures, and then click OK. 7. Under Signature options in the Set of signNow Data dialog box, do one of the following:To allow only one signature for this part of the form template, click Allow only one signature.To allow multiple signatures that are independent of each other, and that can be added or removed without affecting the other signatures, click All the signatures are independent (co-sign).To allow multiple signatures that sign preceding signatures, click Each signature signs the preceding signatures (counter-sign). 8. In the Signature confirmation message box, type the text that you want to show the user when they sign this part of the form, and then click OK twice. 9. In the form template, associate the part of the form template for which you enabled digital signatures with a section.How?Place your cursor where you want to insert the section.If the Data Source task pane is not visible, click Data Source on the View menu.In [ http://menu.In ] the Data Source task pane, do one of the following:To add a control that is bound to a field, right-click the field, and then click the control that you want to bind to this field.To [ http://field.To ] add a section that is bound to a group, right-click the group, and then click Section with Controls.Note: If the field or group that you specified repeats, you must select a non-repeating group that contains that field or group. 10. In the form template, double-click the Section label below the section that contains the other sections or controls that you just inserted. 11. Click the Digital Signatures tab. 12. Select the Allow users to digitally sign this section check box. 13. In the Sign the following data in the form when this section is signed box, click the name of the section that you created a digital signature for in step 4. 14. To display signatures in the section as they are added, select the Show signatures in the sectioncheck box. 15. To make the controls in the section read-only once they are signed, select the When signed, make controls read-only check box. Top of Page [ https://support.office.com/en-us/article/enable-or-disable-digital-signatures-d5050d09-c39e-470f-a548-7f2b98c6e4e1#top ] Disable digital signatures 1. On the Tools menu, click Form Options. 2. Under Category, click Digital Signatures, and then do one of the following:To disable digital signatures for the entire form template, click Do not enable digital signatures.To disable digital signatures for a specific part of the form template, click Enable digital signatures for specific data in the form, click the part of the form template in the Data in the form that can be signed list that you want to disable digital signatures for, and then click Remove.
-
How do I remove an unwanted email signature in Gmail?
Remove the Email Signature From GmailTo stop Gmail from automatically adding a signature to every email you compose:Click the Settings gear icon (⚙) in Gmail's navigation bar.Select Settings from the menu that has appeared.Go the general tab.Make sure No Signature is selected under Signature. Gmail will save any signatures you have set up for your accounts; you do not have to re-enter them when you turn on email signatures again.Click Save Changes.Source: Google Images
-
How can I hide "online status" in WhatsApp messenger?
Writing it in short and simple way as I m lazy asf, If you want to read all messages and don't want yourself to be online then On home screen, pinch the home screen or hold for few seconds on empty space and then you will see home screen option Tap on add widget Look for WhatsApp & place it on home screen Now each unread message will appear in it, if you want to reply any just disconnect your internet and then open WhatsApp to reply any message, After sending messages close WhatsApp and enable your internet connection again, your time stamp will remain same and all messages will be sent , There may be third party all available but I will say keep away from them as you are risking your privacy
-
How do I add a signature into a word document?
First, be aware that this solution will add a signature image — and not a “digital signature” that may be required for legal reasons. Best to check what is required first.Signature images will look more authentic shown in color, and if they appear to have been “written” over the letter content.I recommend scanning (or photographing) a good color version of the letter-writer’s signature written on a white sheet. Save it as a GIF or PNG format image with the white background chosen as the “color” to be transparent. (Many image-editing applications can do this; search for a “transparency” opti...
-
How do you make an electronic signature in Word?
Does this option work - How to Create an Electronic Signature in Microsoft Word Documents?
Trusted esignature solution— what our customers are saying


Get legally-binding signatures now!
Frequently asked questions
How do i add an electronic signature to a word document?
How to esign a filable pdf file?
How to make an esign document expire?
Get more for How Do I Remove eSignature Word
- How Can I Sign Mississippi Electrical Services Contract
- Help Me With Sign West Virginia Electrical Services Contract
- Can I Sign Wyoming Electrical Services Contract
- Sign Ohio Non-Solicitation Agreement Now
- How Can I Sign Alaska Travel Agency Agreement
- How Can I Sign Missouri Travel Agency Agreement
- How Can I Sign Alabama Amendment to an LLC Operating Agreement
- Can I Sign Alabama Amendment to an LLC Operating Agreement
Find out other How Do I Remove eSignature Word
- Certification of reasons for which the taxpayer is not required by law form
- Fl 676 info information sheet for request for judicial determination of support arrearages or adjustment of arrearages due to
- Fin 506 2014 2019 form
- 8700 191 form
- Dcjs complaint form
- Application agency license 2014 2019 form
- Nc form vl 2014 2019
- Tceq 0724 2013 2019 form
- Indiana state form 44237
- Standardized credentialing form part b agency aws
- Form tc the state education department transportation unit
- 4809pdf reset form missouri department of
- Mo 1040a 2019 individual income tax return singlemarried one income form
- Certification of sales under special conditions form
- Certification of reasons for which the taxpayer is not hacienda pr form
- Adem form 8700 12
- Do you know what a bunker delivery note includes form
- Incidentaccidentdeath report form
- How to become a mercy general hospital volunteer dignity form
- Is todays visit work related form