Agree Text Field with airSlate SignNow
Award-winning eSignature solution


Improve your document workflow with airSlate SignNow
Versatile eSignature workflows
Fast visibility into document status
Simple and fast integration set up
Agree text field on any device
Detailed Audit Trail
Rigorous protection requirements
See airSlate SignNow eSignatures in action


airSlate SignNow solutions for better efficiency
Our user reviews speak for themselves


Why choose airSlate SignNow
-
Free 7-day trial. Choose the plan you need and try it risk-free.
-
Honest pricing for full-featured plans. airSlate SignNow offers subscription plans with no overages or hidden fees at renewal.
-
Enterprise-grade security. airSlate SignNow helps you comply with global security standards.

Your step-by-step guide — agree text field
Using airSlate SignNow’s electronic signature any organization can enhance signature workflows and eSign in real-time, delivering a better experience to customers and workers. agree text field in a couple of easy steps. Our handheld mobile apps make operating on the move possible, even while offline! Sign contracts from any place worldwide and close up deals quicker.
Take a stepwise guide to agree text field:
- Log in to your airSlate SignNow account.
- Find your record in your folders or import a new one.
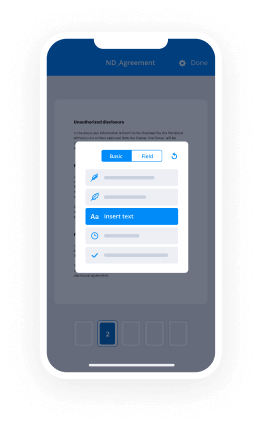
- Open the template and edit content using the Tools menu.
- Drop fillable areas, type textual content and sign it.
- Add numerous signers by emails and set up the signing order.
- Indicate which recipients will get an signed version.
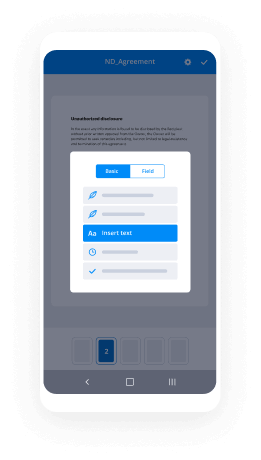
- Use Advanced Options to reduce access to the document and set an expiration date.
- Click Save and Close when completed.
Additionally, there are more extended tools accessible to agree text field. Include users to your collaborative digital workplace, browse teams, and keep track of collaboration. Numerous users across the US and Europe agree that a system that brings people together in one unified digital location, is what enterprises need to keep workflows working smoothly. The airSlate SignNow REST API allows you to integrate eSignatures into your application, internet site, CRM or cloud. Check out airSlate SignNow and enjoy quicker, smoother and overall more effective eSignature workflows!
How it works
airSlate SignNow features that users love


See exceptional results agree text field with airSlate SignNow
How to fill out and sign a PDF online
Try out the fastest way to agree text field. Avoid paper-based workflows and manage documents right from airSlate SignNow. Complete and share your forms from the office or seamlessly work on-the-go. No installation or additional software required. All features are available online, just go to signnow.com and create your own eSignature flow.
A brief guide on how to agree text field in minutes
- Create an airSlate SignNow account (if you haven’t registered yet) or log in using your Google or Facebook.
- Click Upload and select one of your documents.
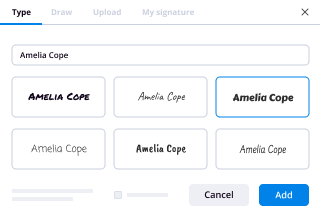
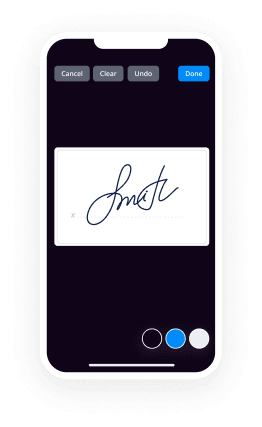
- Use the My Signature tool to create your unique signature.
- Turn the document into a dynamic PDF with fillable fields.
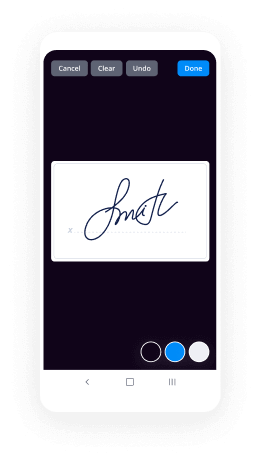
- Fill out your new form and click Done.
Once finished, send an invite to sign to multiple recipients. Get an enforceable contract in minutes using any device. Explore more features for making professional PDFs; add fillable fields agree text field and collaborate in teams. The eSignature solution gives a secure workflow and works in accordance with SOC 2 Type II Certification. Be sure that all of your information are protected so no one can edit them.
How to eSign a PDF template in Google Chrome
Are you looking for a solution to agree text field directly from Chrome? The airSlate SignNow extension for Google is here to help. Find a document and right from your browser easily open it in the editor. Add fillable fields for text and signature. Sign the PDF and share it safely according to GDPR, SOC 2 Type II Certification and more.
Using this brief how-to guide below, expand your eSignature workflow into Google and agree text field:
- Go to the Chrome web store and find the airSlate SignNow extension.
- Click Add to Chrome.
- Log in to your account or register a new one.
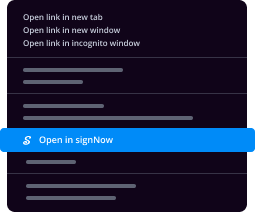
- Upload a document and click Open in airSlate SignNow.
- Modify the document.
- Sign the PDF using the My Signature tool.
- Click Done to save your edits.
- Invite other participants to sign by clicking Invite to Sign and selecting their emails/names.
Create a signature that’s built in to your workflow to agree text field and get PDFs eSigned in minutes. Say goodbye to the piles of papers on your desk and start saving money and time for additional important duties. Choosing the airSlate SignNow Google extension is an awesome convenient option with lots of benefits.

How to eSign an attachment in Gmail
If you’re like most, you’re used to downloading the attachments you get, printing them out and then signing them, right? Well, we have good news for you. Signing documents in your inbox just got a lot easier. The airSlate SignNow add-on for Gmail allows you to agree text field without leaving your mailbox. Do everything you need; add fillable fields and send signing requests in clicks.
How to agree text field in Gmail:
- Find airSlate SignNow for Gmail in the G Suite Marketplace and click Install.
- Log in to your airSlate SignNow account or create a new one.
- Open up your email with the PDF you need to sign.
- Click Upload to save the document to your airSlate SignNow account.
- Click Open document to open the editor.
- Sign the PDF using My Signature.
- Send a signing request to the other participants with the Send to Sign button.
- Enter their email and press OK.
As a result, the other participants will receive notifications telling them to sign the document. No need to download the PDF file over and over again, just agree text field in clicks. This add-one is suitable for those who like focusing on more significant things instead of wasting time for practically nothing. Improve your daily compulsory labour with the award-winning eSignature solution.
How to sign a PDF file on the go without an mobile app
For many products, getting deals done on the go means installing an app on your phone. We’re happy to say at airSlate SignNow we’ve made singing on the go faster and easier by eliminating the need for a mobile app. To eSign, open your browser (any mobile browser) and get direct access to airSlate SignNow and all its powerful eSignature tools. Edit docs, agree text field and more. No installation or additional software required. Close your deal from anywhere.
Take a look at our step-by-step instructions that teach you how to agree text field.
- Open your browser and go to signnow.com.
- Log in or register a new account.
- Upload or open the document you want to edit.
- Add fillable fields for text, signature and date.
- Draw, type or upload your signature.
- Click Save and Close.
- Click Invite to Sign and enter a recipient’s email if you need others to sign the PDF.
Working on mobile is no different than on a desktop: create a reusable template, agree text field and manage the flow as you would normally. In a couple of clicks, get an enforceable contract that you can download to your device and send to others. Yet, if you want a software, download the airSlate SignNow mobile app. It’s comfortable, quick and has a great interface. Take advantage of in easy eSignature workflows from your workplace, in a taxi or on a plane.
How to sign a PDF using an iPhone
iOS is a very popular operating system packed with native tools. It allows you to sign and edit PDFs using Preview without any additional software. However, as great as Apple’s solution is, it doesn't provide any automation. Enhance your iPhone’s capabilities by taking advantage of the airSlate SignNow app. Utilize your iPhone or iPad to agree text field and more. Introduce eSignature automation to your mobile workflow.
Signing on an iPhone has never been easier:
- Find the airSlate SignNow app in the AppStore and install it.
- Create a new account or log in with your Facebook or Google.
- Click Plus and upload the PDF file you want to sign.
- Tap on the document where you want to insert your signature.
- Explore other features: add fillable fields or agree text field.
- Use the Save button to apply the changes.
- Share your documents via email or a singing link.
Make a professional PDFs right from your airSlate SignNow app. Get the most out of your time and work from anywhere; at home, in the office, on a bus or plane, and even at the beach. Manage an entire record workflow effortlessly: build reusable templates, agree text field and work on PDFs with business partners. Turn your device right into a potent business instrument for closing contracts.
How to sign a PDF taking advantage of an Android
For Android users to manage documents from their phone, they have to install additional software. The Play Market is vast and plump with options, so finding a good application isn’t too hard if you have time to browse through hundreds of apps. To save time and prevent frustration, we suggest airSlate SignNow for Android. Store and edit documents, create signing roles, and even agree text field.
The 9 simple steps to optimizing your mobile workflow:
- Open the app.
- Log in using your Facebook or Google accounts or register if you haven’t authorized already.
- Click on + to add a new document using your camera, internal or cloud storages.
- Tap anywhere on your PDF and insert your eSignature.
- Click OK to confirm and sign.
- Try more editing features; add images, agree text field, create a reusable template, etc.
- Click Save to apply changes once you finish.
- Download the PDF or share it via email.
- Use the Invite to sign function if you want to set & send a signing order to recipients.
Turn the mundane and routine into easy and smooth with the airSlate SignNow app for Android. Sign and send documents for signature from any place you’re connected to the internet. Generate professional-looking PDFs and agree text field with couple of clicks. Come up with a perfect eSignature process using only your smartphone and increase your total productiveness.
Get legally-binding signatures now!
What active users are saying — agree text field


Related searches to agree text field with airSlate airSlate SignNow

Agree text field
Hi, Alex here from rebeloper.com and welcome back to the channel. Now in this tutorial series, yes it is a series and this is the first video in the series. We are going to talk about validation. Yes that is correct. Text field validation in Swift. So without further ado let's get right into it. Okay, let me just show you what the testing project is all about. So let's build and run and we are calling this regex mania because this validation is based on regex. Now regex is quite hard to understand but we are going to handle this in this video. So it says type in your age. So let's type in not an age so Alex, not a valid age and that is correct. Now let's type in 12. It is a valid age, great. Now how does this really work? Well we want to have a two-digit number and that is what we are looking for here maybe you want to have an 8 that is greater than 18 that can be added to but this is just for validation. If I type in test here this is not a valid age. Now this is what we are going to implement today in this video. In the next videos we are going to implement validation of emails passwords and websites. So go ahead and do be on the lookout for the next videos in this episode series, okay. So what we are going to do now is start from the starter project, start from the starter project that is really funny. Now what you need to do is go ahead and click the link down in the description you will be taken to our YouTube resources page where you will be able to find the link to our github repository and once you clone or download that repository you will find yourself with this structure. Well you will not have the pods and the pod file lock but you will have a pod file. Now all you have to do is update the pod file, so open up terminal here. Let's make that a little bigger like so and all you have to do is type in cd a space and grab the root folder of your project and hit drag and drop it on to the terminal window and hit return. Now finally you need to type in pod update and that will update all of the pods in your project. I won't do this because it takes quite a while but once you do that you will have all of your pods installed well there is only one pod and that is tiny constraints and of course that is for constraining our views. I always use tiny constraints in my projects. Go ahead and take a look at my video on how to use tiny constraints on the channel, okay. And now once you open that up you will find yourself with this structure. We have an app delegate that has our root view controller inside a navigation controller. Here we have our root view controller with the text field and a label and a navigation item title and a handle text change and that is the selector of our text field, okay. And we will print out the text and I have an extensions file here. You can take a look at the rejects expressions cheat sheet here, it will come really handy to understand all of the regexes that we are going to create in these episodes, okay. Now what we are going to do now is let's just build and run and see what happens. Well basically we will have our text field with type in your age and that is it. If we type in anything so hello there you will find that all of this is typed out into, it is printed out into the console and that is it. Now let's get down to business and create our regexes. So we want to validate these text fields text and that text field text is a string. So now that we want to validate this text that is a string we might as well create an extension for it. So let's go and select the extensions dot Swift file and go ahead and create a string extension here and that is it we want to have a function let's call this function something like and it will return a bool value. And that is it. Once you do have this of course we have to have a return value let's this to true for now so we can get rid of this error. So if we go back to our root view controller and let's say if text dot is where I need to hit command B so we get the completions here. So is valid then let's print out valid text, okay. And otherwise it is not valid. So that is what we are going to add in here and of course we want to have more validation types so let's create an enum here of validity type, okay. Enum ... there we go. Enum validity type and the first case is age and in the next videos we are going to talk about emails so we might as well type in here email just so we know that we have more than one cases I will comment this out we will talk about that in the next video. Okay, now we want to check if is valid and we are going to add in here of validity type and it will be of type validity type. I will make this small v and now we need to return something according to this validity type, okay. Now let us just take a look at how regex works. And we are going to return here an NSPredicate and we are going to use this format with arguments, okay. And format, the format will be some sort of strings so let's create a format here, let format equals and I will add in here empty string adjust for. Now and the argument is actually the regex. So let's create our regex here and I will make this a variable of course again another empty string because the variable will be changed according to our validity type and what we want to do next is type in a dot evaluate weight and self because self is the string that we are adding in here, okay. Now it says the rejects has was never mutated. So let's fix this by adding here a switch statement, switch and value is validity type and the pattern for now it is age and dot age and that's all to it right now we will add in later on for email password and website but for now the age regex will be so let's type in here regex equals to and some other value. Now let's talk about the format and regex. Now the format and I will need to copy and paste this because I don't want to have typos here. Now the format will be like so. So it does match the regex, okay let me just paste that in. I will try to write this out. Let me just I believe it is like zero till nine and let's say two till twenty or something like that, six or rather yet two to till two. So what does this mean and as you can see I am stumbling with and I will really make sure that we do have the correct rejects and that is it. I will just copy and paste it here and I let me just explain what this does. Well basically we want to have characters ranging from 0 till 9 and the minimum character count like the strings count is set to be two and the maximum count for the string has to be two like it has to be a two-digit number and that is the regex here and for ease of use I will create another enum here and that will be called regex and the case and it will be a string enum and for the case age I will just copy and paste, cut and paste all of this here and for the regex now I will call upon a regex dot age dot raw value, okay. Let's hit command B so we know that nothing has been written wrong and it says it's missing argument in parameter and that is correct. Let add that in here and string validity type and that is dot age, okay. And let us just go ahead and take a look at this one and I believe this is quite okay and we are done with the extension so let's talk about the route view controllers handle text change. Now here we have the text and first of all let's create a validity type constant or rather yet let's put it out all the way up here let and it will be of type string dot validity type and it will have the value of age. That's it so we will be able to change this to email and so on with a really clarified way, okay. And now all we have to do here is change this to validity type. But I don't want to have only an if statement we want to check for our validity type according to there let's say email or age value. So what we want to do here is type in here switch and validity type and in case of dot age we want to do the following and I will remove the default value here because this switch statement will be exhausted. Now let's take a look at if the text is valid and let just cut this out and paste it in there then we want to add this text to our label. But in a way that let's say text is a valid so we want to have our labels text to say valid and we are not going to type in here age or email or something like that. We are going to use the validity type. So validity type and that's it otherwise we are going to set the labels text to be not valid and age or email and so on. So that will be there, or rather come to think about it we are not using this age property so, and let me just cut this out and it'll simply get rid of this switch statement I just made up my mind that's how coding is. And one last thing that we might want to add here here in the placeholder of our textview we have all this age written out in raw string. So what we want to add here again is the validity type. So hopefully that wasn't a that hard, so let's build and run and test this out. Okay, type in your age. Works really well with the age and let's type in Alex and not valid age rather yet let's change this to not a valid age let's build and run again. So Alex not a valid age. Let's say four it's still not a valid age. Now let's say 25, valid age. Great, but let's say if you wanted to type in like three hundred and sixty-seven. Well that is not a valid age. Or what about ninety nine still a valid age. 100, well not a valid age. Not many people get to have 100 years over their life, okay. So that is validation of our age. Now in the next video you are going to talk about email validation. As you can see here we have our regex. It is pretty simple but for the email we need to make some complicated stuff with the regex. Go ahead take a look at the emailregex.com cheat sheet just simply hit command and click on the link here and I hope you enjoyed this video if you did go ahead and give it a thumbs up subscribe to the channel and hit that notification bell and if you liked this video go ahead and comment down below what are you using validations for and as always I will see you in the next one.
Show more