Assure Digital Sign Template with airSlate SignNow
Award-winning eSignature solution


Upgrade your document workflow with airSlate SignNow
Versatile eSignature workflows
Instant visibility into document status
Easy and fast integration set up
Assure digital sign template on any device
Detailed Audit Trail
Strict safety requirements
See airSlate SignNow eSignatures in action


airSlate SignNow solutions for better efficiency
Our user reviews speak for themselves


Why choose airSlate SignNow
-
Free 7-day trial. Choose the plan you need and try it risk-free.
-
Honest pricing for full-featured plans. airSlate SignNow offers subscription plans with no overages or hidden fees at renewal.
-
Enterprise-grade security. airSlate SignNow helps you comply with global security standards.

Your step-by-step guide — assure digital sign template
Using airSlate SignNow’s eSignature any organization can increase signature workflows and eSign in real-time, giving a greater experience to consumers and employees. assure digital sign template in a couple of simple actions. Our handheld mobile apps make operating on the run achievable, even while offline! Sign documents from any place in the world and close deals quicker.
Take a step-by-step instruction to assure digital sign template:
- Sign in to your airSlate SignNow profile.
- Find your needed form in your folders or import a new one.
- Access the record and edit content using the Tools list.
- Drag & drop fillable boxes, type textual content and eSign it.
- List numerous signers by emails and set up the signing order.
- Indicate which users will receive an executed copy.
- Use Advanced Options to restrict access to the record and set an expiration date.
- Press Save and Close when done.
Furthermore, there are more enhanced features available to assure digital sign template. List users to your common workspace, view teams, and keep track of teamwork. Millions of users across the US and Europe agree that a system that brings people together in a single holistic work area, is what organizations need to keep workflows functioning easily. The airSlate SignNow REST API allows you to embed eSignatures into your application, internet site, CRM or cloud. Try out airSlate SignNow and enjoy faster, smoother and overall more efficient eSignature workflows!
How it works
airSlate SignNow features that users love


See exceptional results assure digital sign template with airSlate SignNow
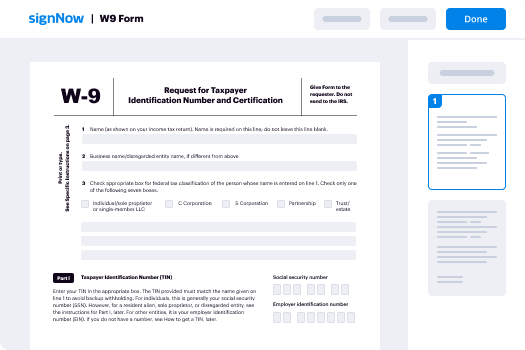

How to submit and eSign a document online
Try out the fastest way to assure digital sign template. Avoid paper-based workflows and manage documents right from airSlate SignNow. Complete and share your forms from the office or seamlessly work on-the-go. No installation or additional software required. All features are available online, just go to signnow.com and create your own eSignature flow.
A brief guide on how to assure digital sign template in minutes
- Create an airSlate SignNow account (if you haven’t registered yet) or log in using your Google or Facebook.
- Click Upload and select one of your documents.
- Use the My Signature tool to create your unique signature.
- Turn the document into a dynamic PDF with fillable fields.
- Fill out your new form and click Done.
Once finished, send an invite to sign to multiple recipients. Get an enforceable contract in minutes using any device. Explore more features for making professional PDFs; add fillable fields assure digital sign template and collaborate in teams. The eSignature solution gives a secure process and functions based on SOC 2 Type II Certification. Make sure that your information are protected and that no person can change them.
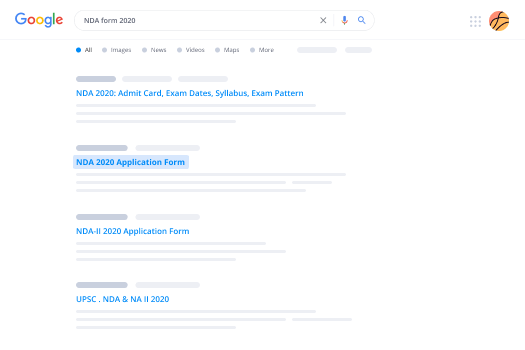
How to eSign a PDF in Google Chrome
Are you looking for a solution to assure digital sign template directly from Chrome? The airSlate SignNow extension for Google is here to help. Find a document and right from your browser easily open it in the editor. Add fillable fields for text and signature. Sign the PDF and share it safely according to GDPR, SOC 2 Type II Certification and more.
Using this brief how-to guide below, expand your eSignature workflow into Google and assure digital sign template:
- Go to the Chrome web store and find the airSlate SignNow extension.
- Click Add to Chrome.
- Log in to your account or register a new one.
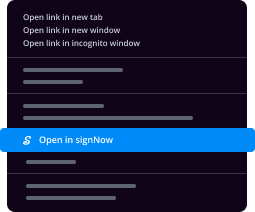
- Upload a document and click Open in airSlate SignNow.
- Modify the document.
- Sign the PDF using the My Signature tool.
- Click Done to save your edits.
- Invite other participants to sign by clicking Invite to Sign and selecting their emails/names.
Create a signature that’s built in to your workflow to assure digital sign template and get PDFs eSigned in minutes. Say goodbye to the piles of papers on your desk and start saving money and time for extra important tasks. Picking out the airSlate SignNow Google extension is a smart practical option with many different advantages.
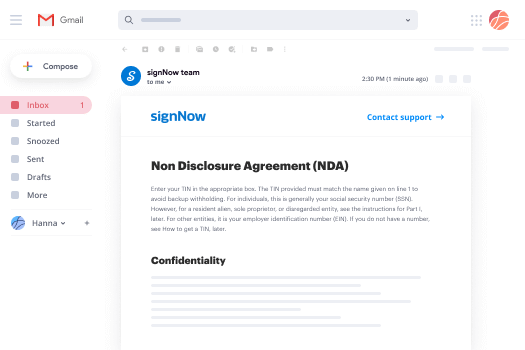

How to sign an attachment in Gmail
If you’re like most, you’re used to downloading the attachments you get, printing them out and then signing them, right? Well, we have good news for you. Signing documents in your inbox just got a lot easier. The airSlate SignNow add-on for Gmail allows you to assure digital sign template without leaving your mailbox. Do everything you need; add fillable fields and send signing requests in clicks.
How to assure digital sign template in Gmail:
- Find airSlate SignNow for Gmail in the G Suite Marketplace and click Install.
- Log in to your airSlate SignNow account or create a new one.
- Open up your email with the PDF you need to sign.
- Click Upload to save the document to your airSlate SignNow account.
- Click Open document to open the editor.
- Sign the PDF using My Signature.
- Send a signing request to the other participants with the Send to Sign button.
- Enter their email and press OK.
As a result, the other participants will receive notifications telling them to sign the document. No need to download the PDF file over and over again, just assure digital sign template in clicks. This add-one is suitable for those who like concentrating on more important tasks instead of burning time for practically nothing. Boost your day-to-day routine with the award-winning eSignature application.
How to sign a PDF on the go with no app
For many products, getting deals done on the go means installing an app on your phone. We’re happy to say at airSlate SignNow we’ve made singing on the go faster and easier by eliminating the need for a mobile app. To eSign, open your browser (any mobile browser) and get direct access to airSlate SignNow and all its powerful eSignature tools. Edit docs, assure digital sign template and more. No installation or additional software required. Close your deal from anywhere.
Take a look at our step-by-step instructions that teach you how to assure digital sign template.
- Open your browser and go to signnow.com.
- Log in or register a new account.
- Upload or open the document you want to edit.
- Add fillable fields for text, signature and date.
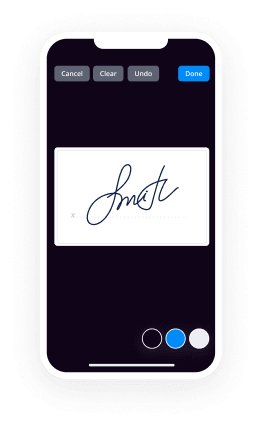
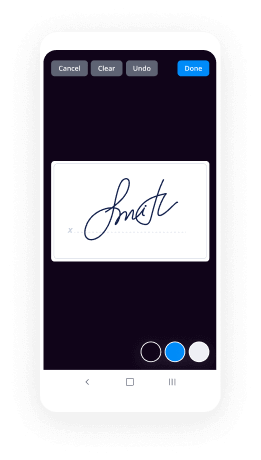
- Draw, type or upload your signature.
- Click Save and Close.
- Click Invite to Sign and enter a recipient’s email if you need others to sign the PDF.
Working on mobile is no different than on a desktop: create a reusable template, assure digital sign template and manage the flow as you would normally. In a couple of clicks, get an enforceable contract that you can download to your device and send to others. Yet, if you truly want an application, download the airSlate SignNow app. It’s comfortable, fast and has an excellent design. Try out smooth eSignature workflows from the workplace, in a taxi or on an airplane.
How to sign a PDF file having an iPad
iOS is a very popular operating system packed with native tools. It allows you to sign and edit PDFs using Preview without any additional software. However, as great as Apple’s solution is, it doesn't provide any automation. Enhance your iPhone’s capabilities by taking advantage of the airSlate SignNow app. Utilize your iPhone or iPad to assure digital sign template and more. Introduce eSignature automation to your mobile workflow.
Signing on an iPhone has never been easier:
- Find the airSlate SignNow app in the AppStore and install it.
- Create a new account or log in with your Facebook or Google.
- Click Plus and upload the PDF file you want to sign.
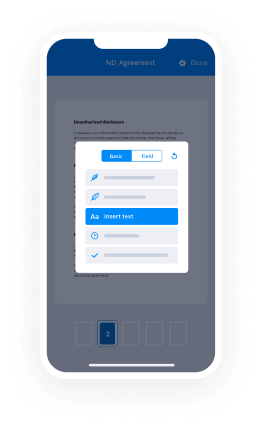
- Tap on the document where you want to insert your signature.
- Explore other features: add fillable fields or assure digital sign template.
- Use the Save button to apply the changes.
- Share your documents via email or a singing link.
Make a professional PDFs right from your airSlate SignNow app. Get the most out of your time and work from anywhere; at home, in the office, on a bus or plane, and even at the beach. Manage an entire record workflow effortlessly: generate reusable templates, assure digital sign template and work on PDFs with business partners. Transform your device into a potent enterprise tool for executing deals.
How to eSign a PDF file using an Android
For Android users to manage documents from their phone, they have to install additional software. The Play Market is vast and plump with options, so finding a good application isn’t too hard if you have time to browse through hundreds of apps. To save time and prevent frustration, we suggest airSlate SignNow for Android. Store and edit documents, create signing roles, and even assure digital sign template.
The 9 simple steps to optimizing your mobile workflow:
- Open the app.
- Log in using your Facebook or Google accounts or register if you haven’t authorized already.
- Click on + to add a new document using your camera, internal or cloud storages.
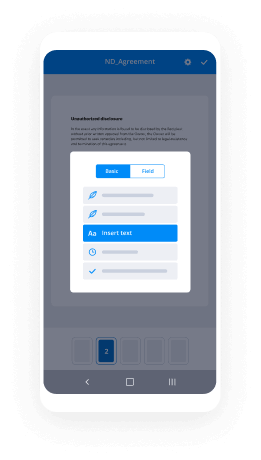
- Tap anywhere on your PDF and insert your eSignature.
- Click OK to confirm and sign.
- Try more editing features; add images, assure digital sign template, create a reusable template, etc.
- Click Save to apply changes once you finish.
- Download the PDF or share it via email.
- Use the Invite to sign function if you want to set & send a signing order to recipients.
Turn the mundane and routine into easy and smooth with the airSlate SignNow app for Android. Sign and send documents for signature from any place you’re connected to the internet. Generate professional PDFs and assure digital sign template with a few clicks. Put together a flawless eSignature process with just your mobile phone and increase your general productivity.
Get legally-binding signatures now!
FAQs
-
How do you make a digital sign?
Click the link. ... Agree to electronic signing. ... Click each tag and follow the instructions to add your digital signature. Verify your identity and follow the instructions to add your digital signature. -
How does a digital screen work?
Digital displays are essentially flat panel screens that rely on different technologies to present multimedia content to an audience. The most common are LCD screens which use liquid crystal cells to display content and LED screens that are based on Light Emitting Diode technology. -
How does digital billboard work?
A digital billboard uses light emitting diodes (LEDs) to display bright, colorful, and, most importantly, eye-catching messages. ... Both allow for vivid designs, but only digital billboards allow you to place multiple advertising messages on the same billboard in one day. You'll see your return on investment much sooner. -
What is the image on the screen of electronic devices?
An electronic visual display, informally a screen, is a display device for presentation of images, text, or video transmitted electronically, without producing a permanent record. Electronic visual displays include television sets, computer monitors, and digital signage. -
How do you create a digital signage?
Step 1: Create a Google Drive Slideshow. Go and create a google drive slideshow however you want. ... Step 2: Set up a computer/screen. ... Step 3: Publish to the Web. ... Step 4: Publish. ... Step 5: Create the file. ... Step 6: Open the created HTML file and full screen it. -
How do digital signage systems work?
How does digital signage work? Digital signage's content is powered by a media player or system-on-a-chip which pushes content to a display. Users can then manage the content with a content management system, either on-site or within the cloud to change up content on the fly. -
What is digital signage used for?
Digital signage is used during exhibitions or marketing events to entice passersby. Digital signage aims to attract crowds to events and enhance visitor experience by making the experience memorable. Exhibitions use digital signage to create branding experiences. -
What is digital signage content?
Digital signage is a centrally controlled, content distribution platform by which to playback digital content to one or many displays or screens. ... 'Digital signage is best explained as a form of electronic display that shows television programming, menus, information, advertising, and other messages. -
What is digital signage software?
Digital signage software is a tool that enables users to manage their digital signage content and screens. With digital signage software, users can schedule content, create playlists, organize their screens into groups, and even diagnose playback issues that occur with remote screens. -
How do you make a digital signage on Raspberry Pi?
Suggested clip Open Source and Easy to use Raspberry Pi Digital Signage System ...YouTubeStart of suggested clipEnd of suggested clip Open Source and Easy to use Raspberry Pi Digital Signage System ... -
How do I make digital signage content?
6 Guidelines For Creating Great Digital Signage Content. ... Simplicity Always Works In Everyone's Favor. ... Have Someone Proofread and Edit Your Content. ... Support Your Message With Graphics and Designs. ... Rotate Your Content. ... Add Calls to Action. -
How can I use my TV as a digital signage?
Any TV with a HDMI port will work. So, using your TV for digital signage is as simple as plugging in a digital signage player with a HDMI cable, for example, Cenareo's Plug & Play player. This lets you control the TV from your content management system and start showing content. -
Can you use a commercial TV at home?
Consumer TVs are designed to operate for the few hours a day someone is home, relaxing in front of TV shows, movies, or video games. Commercial televisions, by contrast, are specifically engineered to continuously operate between 16 and 24 hours per day, and up to 7 days per week. -
How do you make a DAKboard?
Use DAKBoard to create an interactive wall display Click on the networking icon in the Menu bar and choose your wireless network. Now open the Chromium web browser and set up an account at dakboard.com. You'll be taken to the DAKboard app interface. Before going any further, click the Options tab in DAKboard. -
How do I connect my DAKboard to WIFI?
Suggested clip DAKboard Initial Setup and Configuration - YouTubeYouTubeStart of suggested clipEnd of suggested clip DAKboard Initial Setup and Configuration - YouTube
What active users are saying — assure digital sign template


Related searches to assure digital sign template with airSlate airSlate SignNow

Comment digital sign template
hi guys this is Eve from easy CMS today we're gonna discuss how to create content for free for digital signage so you certainly heard already content is king and it's true content for digital signage is really important so you need to get this right but unfortunately it's not always possible for everybody to hire a designer motion designer graphic designer to do the job so most of the people who try to do it themselves and it's not always easy so today we're gonna discover how to do it yourself how to do it for free and how to make it like a professional so let's get started [Music] hi guys so here we are let's get started so the first thing to do is to sign up to piktochart if you're not already signed up the easiest way is to just use Google Facebook or you can just do it with your email so I will personally use Google and just say that I'm 16 years old so here we go I already had an account so I'm in the first thing to do is to go to create new here and then choose poster hey you already have some templates but for the moment we'll not use them we just start from a blank template here and here we go so the user interface is very you know very simple so as you can see this main menu here on the left so me news here for photos and other things and here's where you have some controls for the main layout and you can download a final design over here so let's start first by adjusting the settings here the resolution of the canva ah so layout and I will input simply a full resolution HD display so they say that we're creating content for an LCD display I will click back here and I will zoom a little bit yeah here we go and you can see here we've got our first early-out empty and it's ready to go so let's get started by adding some background picture hey I go to photos and 40s example we'll use a bakery example because it's you know it's more fun and you got some very nice pictures here so we're gonna make it easy so we'll add a background image so to make sure that your images are kind of keeping the sighs just keep shift you know and it will resize accordingly keeping the proportions here we go so you have some guys included as you can see so here's a line the orange line is actually indicating the middle of the canva so let's do this I will lock this layer and on the top of it I will add some [Music] shape basic shape a rectangle here we go I will place it here make it take some space here we go we leave some space on the side and I will reduce your passage each around 40 can in put it here manually if I want to okay I will lock just layers one up it's done now what I will do is add some text to it so here I have the text option and I can scroll you see I already have some very nice examples of text that I could use and I will select this one here or there here we go I will place it here I will change the color of the text make it white gonna stand out more here we go and here as well make it white you got it not change it for the moment I will add some graphics to it as well so here my semi new I will go to the ship's an icon I will type wet and here we they have some really cool icons I can select I will select this one if you like they very nice I will zoom in here we go and I will place it here on the top here we go make it a bit bigger oh yeah it looks great so I'm just gonna change the colors one and put it white and then I get white to use a multi bit make sure that in the center of the canva just to look nice this one as well okay some questions here you know here we go I got my text make sure it's centered and I will add as well some of the graphics I will add a line at the bottom so it's here I'll make it slightly bigger I will change the color - here we go I will change the style so I can make it slightly bigger and I will make it dotted here we go I will make it slightly smaller now here we go so we'll change the text I will say fresh bread we bake for the long here we go so he already have my first layout so simple image and it's working it's working very fine so I will duplicate this I will click on the clone black icon and I will remove this because for this content here I will do something slightly different I will actually keep the text make it a bit smaller here we go and I will add the picture but I will put this picture in the frame so I will just call here so this is these are frames it's like a mask to actually mask some images as you can see so you can mask with letters so you have quite a lot of functions here we go down and I will select this one like this one is very simple make it bigger here we go slightly smaller maybe here we go what I will do is select the text that is in this layout and I will yeah delete it here we go so of course I don't run the picture of a girl so I'm just gonna change it for some bread images and here I've got quite a lot of choice again you know got this one and got this one so just simply gonna choose this one like it just gonna adjust it make it a bit bigger to see that it's some blond bread really done here we go and I will say here I'll change my text if I manage to do it here here we go I will lock this layer actually to make it easier and I will change my text here save on red and just a little tagline underneath very healthy for you here we go so I got my picture it was very nice born bred can make it a bit bigger here hopefully I can movie I can even use the arrow to actually move things over place it in the center maybe but the up but this below and so hey what I would like to do is to add some some price to it of course to make sure that you know people see how much I'm sending this product for and I will go to shapes and icon I will not search for bread I'll go for basic shapes and I will not just not here I'm gonna just say shape here and I will scroll and I will try to find the shape I want here we go like this one we put it here so sometimes you can see there is a little kind of a bird over here somehow it's not really kind of keeping its I would save and I will go back to the main menu here we go and we enter and it will solve this yeah here we go is back in there in the mask so no I will add my little price tag here here we go I will change the color to make it kind of pop out a bit make it orange and I would like to arrange to bring its backward slightly here we go behind this layer now I will make it slightly bigger there we go I will adjust it she wants to up perfect and I will add the price I would go to text title and here we go I will say it's 2.5 lures for example I don't know much but could cost eventually and that kind of fantasy bakery but let's assume that it's to us I will use a font which is very visible as well this one I like here we go and I will use a white color for it to stand out or is select it again color white doesn't cooperate here color white here we go and we'll adjust it here we go so here I have in five minutes already some very nice content that I can use I will again duplicate this here we go and here I will put another product so for example I go back to graphics go back to photo and I say okay I'm not listening bad I'm sitting croissants well here we go no not cross cross sound here we go yeah very nice I got some very nice pictures of cross over here that this one I got this one so yeah basically I just choose a picture I want let's say this is a blue one here to add some color here we go I want to make it a bit bigger up done and I will simply change here twice I would say it's one year oh and ten cents for one question and I will say I go fresh so okay so here we go I'll of course and by the way it's quit and I will again to picket this no before that I will unlock this and I will actually change because I'm not trying to picture wet behind my croissant I actually want a picture of croissant so what I will do is use background that will match is this and I will maybe use I'm just checking what is good to use here and it's plenty difficult to choose I always if you take the first one maybe here we go I'll make sure it's it's at the back so I will click here and I will send to the back and I will make it very big this one try to make it a bit bigger come on yeah very good I will make sure it's to the back and here we go it looks great Wow mmm very nice I will maybe bring my picture of course on slightly lower yeah here we go I will duplicate this page and I will add an extra information here I will duplicate this click it and just copy paste here put this here and I will say for example - for make it slightly smaller here we go - for two euros great so like that I can add some little promotion here and maybe some graphic for example so Mauro to kind of point to this direction okay for example let's say what would be good here to use let's choose a nice I would that would match the design what could we use first one is nice [Music] they don't mean that this one really cool as well not this one let's say up alright make it bigger with tragical put it in orange up I will rotate it slightly here we go and I will flip it up and to actually make it visible I would like to extend this here we go - for two years let make it slightly so now I have my three images and they're looking very nice it's all you know perfect for my digital signage I will simply export it hey PNG is fine normal is fine I will download this block so to make sure every image is separated I would wait for the download to take place and I will get my images in a zip folder the zip folder what I will do is it is simply unzip it and I will upload it to easy semi so I'm just going to show you how to do that just now hey I'm back so here we go so I got the export ready so it's great I've got my first image my second image my third image and my last image so loo it's looking great really I did it in 10 minutes and it's really looking perfect for any any title signage so I will delete that is this a little piktochart logo I will head to my easy CMS here we go I'm gonna go to my layouts and I will just simply utterly out bakery picked up shot demo so the rest is fine leave it as it is I do the check out here we go and I just have now to add the images I would just go to image and here I will add the files and I'll just go to my desktop here select my images choose and start the upload piktochart is exporting pictures which are slightly heavy so it's five megabytes four megabytes so in the best case I will reduce it using Photoshop or any other tool to actually reduce the size but five megabyte fine image is still decent still okay here we go and I have now all my images so what have we do is we organized it because I uploaded in the wrong direction so here we go 0 1 2 & 3 0 1 2 3 so here we go we got the images in the right order that's perfect first class on everything I can just check it here yeah looks great so that's it i think that was restored but very you know interesting introduction to how to create content yourself so as you can see piktochart is completely free is very easy to use and it can allow you to create content very easily so yeah if you have any question don't hesitate to us by comment by email don't forget to subscribe I'm available to answer your questions and get creating thank you
Show moreFrequently asked questions
How do I create and add an electronic signature in iWork?
How can I add an electronic signature to a document?
How can I make an electronic signature on a PC?
Get more for assure digital sign template with airSlate SignNow
- Esign SE
- Prove electronically signed Reservation Template for Gala
- Endorse digisign Home Services Contract
- Authorize electronically sign Website Maintenance Proposal Template
- Anneal mark Simple Resume
- Justify esign Teacher Evaluation Survey
- Try countersign Catering Quote
- Add Subordination Agreement digisign
- Send Computer Service Contract Template electronic signature
- Fax MBA Recommendation Letter signed electronically
- Seal Sales Report sign
- Password Form W2 electronically signing
- Pass Financial Affidavit mark
- Renew Car Rental Agreement eSignature
- Test Sales Receipt autograph
- Require Asset Purchase Agreement Template digital sign
- Print customer eSign
- Champion client initials
- Call for creditor signatory
- Void Tolling Agreement template signature service
- Adopt Proprietary Information Agreement template countersign
- Vouch Free Marriage Certificate template sign
- Establish Spa Gift Certificate template initials
- Clear Recruitment Proposal Template template eSign
- Complete Auto Repair Work Order template eSignature
- Force Mobile Marketing Proposal Template template esigning
- Permit Professional Resume template digisign
- Customize Affidavit of Residence template electronic signature