Authorize Byline with airSlate SignNow
Award-winning eSignature solution


Do more online with a globally-trusted eSignature platform
Standout signing experience
Reliable reporting and analytics
Mobile eSigning in person and remotely
Industry rules and conformity
Authorize byline, faster than ever
Helpful eSignature add-ons
See airSlate SignNow eSignatures in action


airSlate SignNow solutions for better efficiency
Our user reviews speak for themselves


Why choose airSlate SignNow
-
Free 7-day trial. Choose the plan you need and try it risk-free.
-
Honest pricing for full-featured plans. airSlate SignNow offers subscription plans with no overages or hidden fees at renewal.
-
Enterprise-grade security. airSlate SignNow helps you comply with global security standards.

Your step-by-step guide — authorize byline
Using airSlate SignNow’s eSignature any company can enhance signature workflows and eSign in real-time, delivering a greater experience to clients and employees. authorize byline in a few easy steps. Our mobile-first apps make working on the go possible, even while off the internet! Sign contracts from any place in the world and make tasks faster.
Take a step-by-step guideline to authorize byline:
- Sign in to your airSlate SignNow account.
- Find your record within your folders or upload a new one.
- Open the document and edit content using the Tools list.
- Drop fillable boxes, type text and sign it.
- List multiple signees via emails and set the signing sequence.
- Specify which users will receive an completed doc.
- Use Advanced Options to reduce access to the document and set an expiration date.
- Press Save and Close when completed.
Moreover, there are more innovative capabilities open to authorize byline. List users to your shared work enviroment, browse teams, and keep track of collaboration. Numerous users across the US and Europe agree that a system that brings people together in a single unified work area, is exactly what enterprises need to keep workflows performing easily. The airSlate SignNow REST API allows you to integrate eSignatures into your application, website, CRM or cloud. Check out airSlate SignNow and get faster, smoother and overall more effective eSignature workflows!
How it works
airSlate SignNow features that users love


See exceptional results authorize byline with airSlate SignNow
How to fill in and sign a PDF online
Try out the fastest way to authorize byline. Avoid paper-based workflows and manage documents right from airSlate SignNow. Complete and share your forms from the office or seamlessly work on-the-go. No installation or additional software required. All features are available online, just go to signnow.com and create your own eSignature flow.
A brief guide on how to authorize byline in minutes
- Create an airSlate SignNow account (if you haven’t registered yet) or log in using your Google or Facebook.
- Click Upload and select one of your documents.
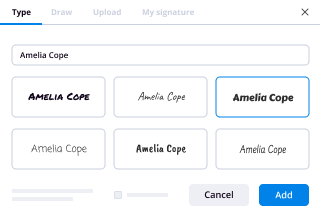
- Use the My Signature tool to create your unique signature.
- Turn the document into a dynamic PDF with fillable fields.
- Fill out your new form and click Done.
Once finished, send an invite to sign to multiple recipients. Get an enforceable contract in minutes using any device. Explore more features for making professional PDFs; add fillable fields authorize byline and collaborate in teams. The eSignature solution supplies a reliable process and functions in accordance with SOC 2 Type II Certification. Ensure that all your data are guarded and therefore no one can edit them.
How to eSign a PDF template in Google Chrome
Are you looking for a solution to authorize byline directly from Chrome? The airSlate SignNow extension for Google is here to help. Find a document and right from your browser easily open it in the editor. Add fillable fields for text and signature. Sign the PDF and share it safely according to GDPR, SOC 2 Type II Certification and more.
Using this brief how-to guide below, expand your eSignature workflow into Google and authorize byline:
- Go to the Chrome web store and find the airSlate SignNow extension.
- Click Add to Chrome.
- Log in to your account or register a new one.
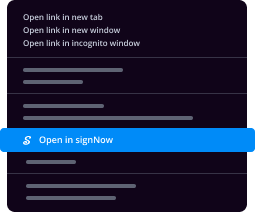
- Upload a document and click Open in airSlate SignNow.
- Modify the document.
- Sign the PDF using the My Signature tool.
- Click Done to save your edits.
- Invite other participants to sign by clicking Invite to Sign and selecting their emails/names.
Create a signature that’s built in to your workflow to authorize byline and get PDFs eSigned in minutes. Say goodbye to the piles of papers sitting on your workplace and begin saving time and money for extra important activities. Choosing the airSlate SignNow Google extension is a great practical option with lots of benefits.

How to eSign an attachment in Gmail
If you’re like most, you’re used to downloading the attachments you get, printing them out and then signing them, right? Well, we have good news for you. Signing documents in your inbox just got a lot easier. The airSlate SignNow add-on for Gmail allows you to authorize byline without leaving your mailbox. Do everything you need; add fillable fields and send signing requests in clicks.
How to authorize byline in Gmail:
- Find airSlate SignNow for Gmail in the G Suite Marketplace and click Install.
- Log in to your airSlate SignNow account or create a new one.
- Open up your email with the PDF you need to sign.
- Click Upload to save the document to your airSlate SignNow account.
- Click Open document to open the editor.
- Sign the PDF using My Signature.
- Send a signing request to the other participants with the Send to Sign button.
- Enter their email and press OK.
As a result, the other participants will receive notifications telling them to sign the document. No need to download the PDF file over and over again, just authorize byline in clicks. This add-one is suitable for those who like focusing on more valuable aims rather than burning up time for practically nothing. Boost your daily compulsory labour with the award-winning eSignature solution.
How to eSign a PDF template on the go without an mobile app
For many products, getting deals done on the go means installing an app on your phone. We’re happy to say at airSlate SignNow we’ve made singing on the go faster and easier by eliminating the need for a mobile app. To eSign, open your browser (any mobile browser) and get direct access to airSlate SignNow and all its powerful eSignature tools. Edit docs, authorize byline and more. No installation or additional software required. Close your deal from anywhere.
Take a look at our step-by-step instructions that teach you how to authorize byline.
- Open your browser and go to signnow.com.
- Log in or register a new account.
- Upload or open the document you want to edit.
- Add fillable fields for text, signature and date.
- Draw, type or upload your signature.
- Click Save and Close.
- Click Invite to Sign and enter a recipient’s email if you need others to sign the PDF.
Working on mobile is no different than on a desktop: create a reusable template, authorize byline and manage the flow as you would normally. In a couple of clicks, get an enforceable contract that you can download to your device and send to others. Yet, if you want an application, download the airSlate SignNow mobile app. It’s secure, fast and has an intuitive interface. Experience seamless eSignature workflows from your workplace, in a taxi or on a plane.
How to sign a PDF file using an iPhone
iOS is a very popular operating system packed with native tools. It allows you to sign and edit PDFs using Preview without any additional software. However, as great as Apple’s solution is, it doesn't provide any automation. Enhance your iPhone’s capabilities by taking advantage of the airSlate SignNow app. Utilize your iPhone or iPad to authorize byline and more. Introduce eSignature automation to your mobile workflow.
Signing on an iPhone has never been easier:
- Find the airSlate SignNow app in the AppStore and install it.
- Create a new account or log in with your Facebook or Google.
- Click Plus and upload the PDF file you want to sign.
- Tap on the document where you want to insert your signature.
- Explore other features: add fillable fields or authorize byline.
- Use the Save button to apply the changes.
- Share your documents via email or a singing link.
Make a professional PDFs right from your airSlate SignNow app. Get the most out of your time and work from anywhere; at home, in the office, on a bus or plane, and even at the beach. Manage an entire record workflow easily: make reusable templates, authorize byline and work on PDF files with partners. Turn your device right into a potent company for closing contracts.
How to sign a PDF taking advantage of an Android
For Android users to manage documents from their phone, they have to install additional software. The Play Market is vast and plump with options, so finding a good application isn’t too hard if you have time to browse through hundreds of apps. To save time and prevent frustration, we suggest airSlate SignNow for Android. Store and edit documents, create signing roles, and even authorize byline.
The 9 simple steps to optimizing your mobile workflow:
- Open the app.
- Log in using your Facebook or Google accounts or register if you haven’t authorized already.
- Click on + to add a new document using your camera, internal or cloud storages.
- Tap anywhere on your PDF and insert your eSignature.
- Click OK to confirm and sign.
- Try more editing features; add images, authorize byline, create a reusable template, etc.
- Click Save to apply changes once you finish.
- Download the PDF or share it via email.
- Use the Invite to sign function if you want to set & send a signing order to recipients.
Turn the mundane and routine into easy and smooth with the airSlate SignNow app for Android. Sign and send documents for signature from any place you’re connected to the internet. Build good-looking PDFs and authorize byline with couple of clicks. Created a flawless eSignature workflow with only your smartphone and enhance your general productiveness.
Get legally-binding signatures now!
What active users are saying — authorize byline


Related searches to authorize byline with airSlate airSlate SignNow

Electronically signed hotel receipt template
welcome to the authorize.net new merchant webinar my name is Caleb and today I'd like to present an overview of the credit card process and authorize.net role in that process this overview is designed for new merchants and will hopefully answer basic questions you might have about the service that authorized.net offers today's webinar will address the following the credit card process which explains how payments work and the different transaction types authorized.net uses authorized Mets homepage and how to log in navigation in the merchant interface and how to process transactions manually settings including security options authorize.net offers declined transactions versus transactions that return an error a quick overview of our additional services including the authorized net mobile app authorize.net self-help tools and finally we will introduce a site and resources that will help you or your developer integrate your website to authorize net we also offer a wide variety of video demos that can walk you through features that will be discussed in this presentation as well as many that are not covered today these videos can be found at WWF through net forward slash videos we highly recommend viewing these videos at your convenience as they are an excellent visual resource for merchants let's get started with a short video that presents a high-level overview of how credit card payments work how credit card payments work paying with a credit card has many benefits including convenience easy tracking and security and when merchants use authorized.net they can accept all major credit card brands on their website mobile device or retail store paying with a credit card has three basic steps authorization capture and settlement if you've purchased something using a credit card then you've seen authorization at work when your card is swiped at the checkout counter or when you click Submit on the checkout form online authorized.net manages the process of checking to make sure you have sufficient funds available for the purchase this is authorization after verifying that funds are available a hold is placed on the money this is capture once the funds are captured the merchant can hand over or ship the goods and be confident that they'll be paid however the merchant doesn't have their money yet the process of transferring money from the customers credit card or bank account to the merchants bank account is called settlement settlement usually occurs once each business day during settlement the banks connect to each other authorized net begins the settlement process by aggregating the daily transaction details and sending them to the merchants Bank the payment network then handles the settlement once settlement is complete the buyers money is transferred to the merchants bank account meanwhile the customers bank posts a charge on the customer's account the transaction is now complete and the purchase will show up on the customers credit card statement to further clarify authorized.net obtains the authorization for transactions by communicating with the processor that is set up by a merchants merchant service provider a variety of checks are done by authorized net including address card code and any additional fraud settings the merchant has selected we will cover these settings later in the presentation once the merchant service provider receives the batch they are responsible for funding you the merchant for the transaction they also determine how long it takes to fund you once the transaction has settled for almost all funding related questions you will want to contact your merchant service provider each transaction has a transaction type I'll go over the major ones and how they are used authorized with Auto capture is the default transaction type this will authorize a transaction and then capture it so that it will settle with the next batch these transactions are assigned the status of captured pending settlement in the unsettled transactions area authorized only will authorize a transaction but will not capture it the status of these transactions are authorized pending capture you will need to go to the unsettled transactions area of your merchant interface to capture it before it will settle you only have 30 days in which to capture this type of transaction before it expires if it expires you can no longer capture those funds and would have to reprocess the card examples of businesses that might use this type of transaction are hotels car rentals or any other businesses that will capture funds when they actually ship the product or offer the service a void allows you to cancel any transaction that has still not been batched out if the transaction has already been settled you cannot avoid it you would have to refund it which brings us to the last transaction type we'll talk about a credit or refund this allows you to return funds to the original credit card bear in mind that there are a few requirements to issue a refund it must go back to the same card for the original amount or less the credit must happen within 120 days of the original transaction and the original transaction needs to have ran through the authorized net account you are trying to refund through these requirements help protect you from fraudulent or accidental refunds the authorized.net home page has useful content for both new merchants and those who may already be familiar with our service to get to the home page navigate to wwo arthur eyes net you will see several options on the top of the page most of what is contained in these links is covered in today's webinar scrolling to the bottom of the page you will notice several more links including the support link which take you to our online knowledge base where you can find answers to almost any question you have regarding your account the developer center directs users to an authorized net resource for website developers to help them integrate a merchants website with authorized net you can also find options to take you to our video tutorials certified developers that can help you integrate your website and other third-party partners that we work with like shopping carts and point of sale software finally our Status page can be located by clicking on status this page provides real-time 24/7 updates in the event of any downtime or other system updates now let's log into your account logging into your account is easy from the authorize.net homepage hover over sign in and select merchants this will take you to the merchants interface login page enter your login ID and password and click the login button if you ever forget your login ID or password you can use the corresponding links to retrieve those items but you will need to know the email address associated with your profile as well as the answer to your security question if you aren't signed in already go ahead and do so now if you are unable to sign in you may contact our customer support team at eight seven seven four four seven three nine three eight and they will be happy to assist you after activating your gateway the account is automatically put in test mode this can be seen by the orange banner in the merchant interface that says the account is in test mode while an account is in test mode if a transaction is submitted it will always generate a successful response however no transaction data is actually recorded or processed this means that any transaction information is lost when test mode is active to disable test mode simply click the test mode link in the orange bar and move the slider to live test mode must be disabled to process real transactions if transactions were submitted while in test mode they will need to be resubmitted in live mode to receive payment you can toggle between test and live mode if you ever need to do so by clicking on the account tab in the merchant interface and locating the test mode link the authorize.net virtual terminal allows you to charge or refund a credit card or bank account you can access this feature by clicking on the tools tab at the top of your screen or by selecting virtual terminal from the homepage on the left side menu as discussed previously in this presentation there are several transactions types to choose from most of our merchants will select the default authorizing capture capture only is only used when you have previously obtained an authorization from a voice authorization line and need to capture that authorization based on business needs continue on by filling out whatever information you would like to capture at the very minimum the credit card number expiration date and amount are required though most merchants prefer to capture more data once all the customer data is entered click Submit at the bottom of the page your transaction result will appear on the next page this transaction has been accepted indicates a successful authorization was obtained this transaction has been declined indicates a problem you can find out why the transaction was declined by clicking on the transaction ID the transaction details page can be accessed by clicking on any transaction ID within the merchant interface this page displays the result of the transaction an option to print a receipt authorization information which includes the authorization code if the transaction is approved the address verification and card code verification status the customer IP address if submitted via website and other details relating to the authorization of that transaction payment information is used to identify the card type and last four digits of the card number and order information and customer billing information display the name address and contact information of your customer if it was entered when the transaction was processed address verification service or AVS compares the billing address on the transaction to the address on file with the credit card company when authorize.net receives the transaction authorization back without ABS code we will decline it or accept it based on the settings that have been selected in the merchant interface the merchant can customize their AVS settings and determine which AVS codes to decline or accept we strongly encourage merchants to look at their AVS settings and make sure they are set correctly based on their business needs please note abs settings may need to be adjusted if you plan to accept transactions from certain countries please contact our merchants support team to learn more AVS only checks the numerical data in the address and zip code in other words it does not check the street name or other non numerical data after the address is checked your processor will assign an AVS code to the transaction in this example the processor signed an AVS code of Z because the address did not match the biz if code did the card code value is the three-digit number located on the back of your credit card or four digits located on the front of an American Express card similar to the address verification service the processor compares the card code in the transaction with the card code on file with the credit card company and assigns a CCD value to the transaction authorize.net then accepts or declines that transaction based on the settings that the merchant sets in the merchant interface to change these settings visit the account tab and click on card code verification it is important to note that declines are not errors when a card is declined it is declined for a specific reason to locate the reason please look at the transaction details page for that specific transaction in the merchant interface some of the more common reasons for declines are general declines this is when the transaction did not get approved by the card issuing bank authorize.net does not know why the transaction was declined and to get specifics on this decline the customer would need to contact their card issuing bank AVS or CCV mismatch this happens when the transaction was declined due to the settings that have been selected in the merchant interface AVS or CCV declines may result in the fund still being on hold with the customer's bank normally the funds are released within one to three business days depending on the bank to expedite the release of those funds merchants can contact the bank with the authorization code and their merchant ID to request the release of those funds however it is still up to the discretion of the bank whether or not those funds will be released in an expedited manner API errors if a transaction has an error there will be an error number or reason response code associated with it use our reason response code tool reach out to your developer or contact our customer support team to troubleshoot these errors general errors will occur when authorize.net does not have a valid connection to your merchant service providers processor for these errors you will want to first contact your merchant service provider to ensure your account is in good standing and that you have the correct processing configuration feel free to also reach out to our merchants support team for assistance with these errors authorize.net offers several ways to search for your transactions if the transaction was processed the same day you are attempting to locate it you would simply click unsettled transactions from the left-side menu of the home screen this will take you to a list of all the transactions that have processed since your last cut off time another way to search is by clicking on a search tab across the top of every page in the merchants interface here you have the option to search by settlement date or date range the last four digits of the customers card or bank account number the customers name or ID or the transaction or invoice number keep in mind if the transaction was processed that day you would need to locate at any unsettled transactions it will not show up by search in the search by batch page as previously discussed authorized.net sends a batch of transactions to your processor automatically once per day at a time set by the merchant both the time zone and the cutoff time can be changed within the merchant interface under the account tab but by default the cut off time is three o'clock Pacific keep in mind that changes may not take effect immediately it can take up to 24 hours for changes to be applied which could potentially cause an account to skip a batch for a particular day because of this it is recommended merchants change the cutoff time as infrequently as possible authorised net provides a variety of additional services we will outline these services and reasons why you may want to add them to your account starting with a check net a check net is a service that allows you to electronically charge a bank account whether it be a checking savings or business checking account this ability can increase your customer base by allowing more options for payment by your customers also a check transactions have lower fees and rates applied to them when compared with credit-card transactions to apply for each check net simply fill out the online application found in the merchant interface under the each action the advanced fraud detection suite or a FDS allows you to set specific filters to help protect you from fraud for example you can set amount limits for your transactions you can determine a limit for the number of transactions you process per hour or day and you can choose to accept or decline transactions from certain areas of the world these are just some of the many filters available to merchants that sign up for a FDS you not only determine what transactions are caught but you can also decide what you want authorized net to do with transactions that have triggered those filters you can accept them you can accept them and request an email that the filter was triggered be sent to you decline them authorize them but hold them for review or hold them for review before authorizing them in some cases you may also be able to choose a variety of those options a FDS is a powerful service for those concerns with fraudulent activity to learn more or sign up for a FDS login to the merchant interface and click the fraud detection link automated recurring billing or ARB is a service that allows you to set up subscriptions for your customers the subscription will automatically charge your customer a specified amount at regular intervals whether it be monthly bi-weekly or yearly merchants determine how often the subscription charges their customers and how long the subscription lasts this service is great for any merchant that would like to charge their customers a recurring amount at regular intervals examples of companies that might use this service are companies that offer magazine subscriptions online gaming subscriptions Book of the Month clubs etc like a FDS and a check you can find out more and sign up for a our be in the merchants interface customer information manager or CI M is a service that allows you to store your customers billing information on our secure servers allowing you to charge or refund a credit card or bank account at any a time for any amount this service is great for any merchant that would like to charge their customers different amounts on a regular basis for example cell phone companies utility companies etc this service can also be used to allow customers to create payment profiles themselves if you integrate this service with your website customers would be able to shop again and again without having to put in their billing information every time they shop on your site information and signup is located in the merchant interface the free authorize.net mobile application allows you to securely accept payments anywhere you want this could potentially increase your sales by providing an easy way to accept payments on the go using your authorized net payment gateway account available for Apple iOS and Android devices the application has a free download and no additional cost to use card readers can be purchased for an even easier way to accept transactions the card readers must be purchased through our authorized retailer in order to work with our app you are able to charge refund and void transactions through the app as well as view transaction history almost all merchants will integrate their website with authorized net if you would like to integrate your website with authorized net but don't know how you can find a certified developer or shopping cart on our authorized.net homepage these are third-party vendors that have experience with the integration methods offered by authorized net if you are a developer or will not be using one of our certified developers we provide a great resource for you to integrate using various integration methods to help you with integration please go to developer or a net on this site we have extensive integration guides for you to use we also have many sample codes in various scripting languages that can help get you started the response reason code tool is also available to help you troubleshoot any errors you might receive when submitting transactions although we offer numerous ways to integrate your website with authorized net for all integration methods you will need to know your API login ID and transaction key there is also a developer community forum located at community developer authorized.net this forum is designed to help developers get answers to questions they might have if you have trouble integrating with authorized net this is an excellent option to find support you're authorize.net API login ID and transaction key can be found under the account tab within your merchant interface you will need to know the answer to your secret question in order to obtain these credentials once obtained you will be able to view the API login ID whenever you'd like by coming back into the section as the login ID never changes however the transaction key is only viewable once and must be reset if you need it again only one transaction key is valid at any given time so if you reset your transaction key you must update your site's code or shopping cart with the most current key in order to continue processing payments through your online store authorize.net provides a number of self-help resources as we have discussed integration self-help options like the response reason code tool can be found on our developer site the authorize.net also offers a Support Center it can be found at support authorize.net you can search by questions you have or specific terms you can also view popular or recent articles that other merchants viewed the Support Center is a great tool to get answers to almost anything related to your authorize.net account if authorize.net experiences incidents such as slow processing times or down times our Status page located at status authorize.net is updated immediately to reflect that this is a great site to bookmark and quickly check before contacting support to inquire about potential issues if our self-help resources can't answer your questions and you'd like to contact us please log into the merchant interface click the contact us link at the top of the page here you will be presented with a variety of options that you can use to contact us including chat e ticket and phone our award-winning merchants support line is open 24 hours a day seven days a week closed major holidays if you have a question or update that is not urgent the e-ticket option is a great way to get help thank you for attending the authorize.net new merchant webinar feel free to bookmark this page and come back later to review anything that has been covered today we appreciate your time and business and welcome to authorized net
Show moreFrequently asked questions
What is the definition of an electronic signature according to the ESIGN Act?
How can I incorporate an electronic signature solution into my workflow?
How can I copy and paste an electronic signature to a PDF?
Get more for authorize byline with airSlate SignNow
- Print electronically sign Training Course Proposal Template
- Prove electronically signing Animal Shelter Intake Form
- Endorse digi-sign Personnel Daily Report
- Authorize signature service Volunteer Confidentiality Agreement
- Anneal mark Consignment Agreement Template
- Justify esign Asset Purchase Agreement
- Try initial Acupuncture Medical Consent
- Add Deposit Agreement initial
- Send Plumbing Proposal Template signature
- Fax Equipment List email signature
- Seal Patient Medical History digital signature
- Password Deferred Compensation Plan electronically signed
- Pass Corporate Bylaws byline
- Renew Divorce Settlement Agreement esign
- Test Video Production Order signature block
- Require Child Custody Agreement Template signature service
- Comment attester digi-sign
- Boost bystander signed
- Compel spectator mark
- Void Cleaning Service Contract Template template electronically sign
- Adopt Incentive Agreement template countersignature
- Vouch Interior Design Quote template digital signature
- Establish Church Membership Certificate template signed
- Clear Mobile Application Development Agreement Template template digi-sign
- Complete Basketball League Registration Event template esign
- Force Stock Transfer Form Template template digital sign
- Permit Go To Market Strategy template initial
- Customize Business Purchase Agreement template signature