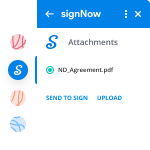
Back Default Field with airSlate SignNow
Award-winning eSignature solution


Do more online with a globally-trusted eSignature platform
Remarkable signing experience
Reliable reports and analytics
Mobile eSigning in person and remotely
Industry regulations and compliance
Back default field, quicker than ever before
Useful eSignature extensions
See airSlate SignNow eSignatures in action


airSlate SignNow solutions for better efficiency
Our user reviews speak for themselves


Why choose airSlate SignNow
-
Free 7-day trial. Choose the plan you need and try it risk-free.
-
Honest pricing for full-featured plans. airSlate SignNow offers subscription plans with no overages or hidden fees at renewal.
-
Enterprise-grade security. airSlate SignNow helps you comply with global security standards.

Your step-by-step guide — back default field
Adopting airSlate SignNow’s electronic signature any organization can speed up signature workflows and eSign in real-time, delivering an improved experience to clients and staff members. back default field in a few easy steps. Our mobile apps make work on the run achievable, even while offline! Sign contracts from anywhere in the world and complete tasks in no time.
Keep to the walk-through guideline to back default field:
- Sign in to your airSlate SignNow account.
- Find your record within your folders or import a new one.
- the document and make edits using the Tools menu.
- Drag & drop fillable areas, add text and eSign it.
- Add multiple signees using their emails and set up the signing order.
- Indicate which individuals will receive an completed copy.
- Use Advanced Options to limit access to the document and set up an expiry date.
- Tap Save and Close when completed.
Additionally, there are more advanced features accessible to back default field. List users to your shared workspace, browse teams, and track collaboration. Numerous people across the US and Europe agree that a solution that brings everything together in a single cohesive enviroment, is exactly what enterprises need to keep workflows performing smoothly. The airSlate SignNow REST API allows you to integrate eSignatures into your app, website, CRM or cloud. Try out airSlate SignNow and enjoy faster, easier and overall more efficient eSignature workflows!
How it works
airSlate SignNow features that users love


See exceptional results back default field with airSlate SignNow


How to complete and eSign a PDF online
Try out the fastest way to back default field. Avoid paper-based workflows and manage documents right from airSlate SignNow. Complete and share your forms from the office or seamlessly work on-the-go. No installation or additional software required. All features are available online, just go to signnow.com and create your own eSignature flow.
A brief guide on how to back default field in minutes
- Create an airSlate SignNow account (if you haven’t registered yet) or log in using your Google or Facebook.
- Click Upload and select one of your documents.
- Use the My Signature tool to create your unique signature.
- Turn the document into a dynamic PDF with fillable fields.
- Fill out your new form and click Done.
Once finished, send an invite to sign to multiple recipients. Get an enforceable contract in minutes using any device. Explore more features for making professional PDFs; add fillable fields back default field and collaborate in teams. The eSignature solution gives a secure workflow and runs in accordance with SOC 2 Type II Certification. Make sure that all of your information are guarded and therefore no person can take them.


How to eSign a PDF file in Google Chrome
Are you looking for a solution to back default field directly from Chrome? The airSlate SignNow extension for Google is here to help. Find a document and right from your browser easily open it in the editor. Add fillable fields for text and signature. Sign the PDF and share it safely according to GDPR, SOC 2 Type II Certification and more.
Using this brief how-to guide below, expand your eSignature workflow into Google and back default field:
- Go to the Chrome web store and find the airSlate SignNow extension.
- Click Add to Chrome.
- Log in to your account or register a new one.
- Upload a document and click Open in airSlate SignNow.
- Modify the document.
- Sign the PDF using the My Signature tool.
- Click Done to save your edits.
- Invite other participants to sign by clicking Invite to Sign and selecting their emails/names.
Create a signature that’s built in to your workflow to back default field and get PDFs eSigned in minutes. Say goodbye to the piles of papers on your desk and start saving money and time for additional essential duties. Selecting the airSlate SignNow Google extension is a smart handy decision with many different benefits.


How to eSign an attachment in Gmail
If you’re like most, you’re used to downloading the attachments you get, printing them out and then signing them, right? Well, we have good news for you. Signing documents in your inbox just got a lot easier. The airSlate SignNow add-on for Gmail allows you to back default field without leaving your mailbox. Do everything you need; add fillable fields and send signing requests in clicks.
How to back default field in Gmail:
- Find airSlate SignNow for Gmail in the G Suite Marketplace and click Install.
- Log in to your airSlate SignNow account or create a new one.
- Open up your email with the PDF you need to sign.
- Click Upload to save the document to your airSlate SignNow account.
- Click Open document to open the editor.
- Sign the PDF using My Signature.
- Send a signing request to the other participants with the Send to Sign button.
- Enter their email and press OK.
As a result, the other participants will receive notifications telling them to sign the document. No need to download the PDF file over and over again, just back default field in clicks. This add-one is suitable for those who like concentrating on more important goals instead of burning up time for practically nothing. Enhance your day-to-day compulsory labour with the award-winning eSignature platform.


How to eSign a PDF template on the go with no application
For many products, getting deals done on the go means installing an app on your phone. We’re happy to say at airSlate SignNow we’ve made singing on the go faster and easier by eliminating the need for a mobile app. To eSign, open your browser (any mobile browser) and get direct access to airSlate SignNow and all its powerful eSignature tools. Edit docs, back default field and more. No installation or additional software required. Close your deal from anywhere.
Take a look at our step-by-step instructions that teach you how to back default field.
- Open your browser and go to signnow.com.
- Log in or register a new account.
- Upload or open the document you want to edit.
- Add fillable fields for text, signature and date.
- Draw, type or upload your signature.
- Click Save and Close.
- Click Invite to Sign and enter a recipient’s email if you need others to sign the PDF.
Working on mobile is no different than on a desktop: create a reusable template, back default field and manage the flow as you would normally. In a couple of clicks, get an enforceable contract that you can download to your device and send to others. Yet, if you want a software, download the airSlate SignNow mobile app. It’s secure, fast and has a great interface. Take advantage of in smooth eSignature workflows from your business office, in a taxi or on a plane.


How to sign a PDF having an iPhone
iOS is a very popular operating system packed with native tools. It allows you to sign and edit PDFs using Preview without any additional software. However, as great as Apple’s solution is, it doesn't provide any automation. Enhance your iPhone’s capabilities by taking advantage of the airSlate SignNow app. Utilize your iPhone or iPad to back default field and more. Introduce eSignature automation to your mobile workflow.
Signing on an iPhone has never been easier:
- Find the airSlate SignNow app in the AppStore and install it.
- Create a new account or log in with your Facebook or Google.
- Click Plus and upload the PDF file you want to sign.
- Tap on the document where you want to insert your signature.
- Explore other features: add fillable fields or back default field.
- Use the Save button to apply the changes.
- Share your documents via email or a singing link.
Make a professional PDFs right from your airSlate SignNow app. Get the most out of your time and work from anywhere; at home, in the office, on a bus or plane, and even at the beach. Manage an entire record workflow effortlessly: generate reusable templates, back default field and work on documents with business partners. Turn your device right into a highly effective organization for executing offers.


How to sign a PDF file Android
For Android users to manage documents from their phone, they have to install additional software. The Play Market is vast and plump with options, so finding a good application isn’t too hard if you have time to browse through hundreds of apps. To save time and prevent frustration, we suggest airSlate SignNow for Android. Store and edit documents, create signing roles, and even back default field.
The 9 simple steps to optimizing your mobile workflow:
- Open the app.
- Log in using your Facebook or Google accounts or register if you haven’t authorized already.
- Click on + to add a new document using your camera, internal or cloud storages.
- Tap anywhere on your PDF and insert your eSignature.
- Click OK to confirm and sign.
- Try more editing features; add images, back default field, create a reusable template, etc.
- Click Save to apply changes once you finish.
- Download the PDF or share it via email.
- Use the Invite to sign function if you want to set & send a signing order to recipients.
Turn the mundane and routine into easy and smooth with the airSlate SignNow app for Android. Sign and send documents for signature from any place you’re connected to the internet. Generate professional-looking PDFs and back default field with just a few clicks. Put together a perfect eSignature workflow with just your mobile phone and enhance your total efficiency.
Get legally-binding signatures now!
FAQs
-
How do I set a default field in access?
In the Navigation Pane, right-click the table that you want to change, and then click Design View. Select the field that you want to change. On the General tab, type a value in the Default Value property box. ... Save your changes. -
What is the meaning of default settings?
Default. Default is an adjective that describes a standard setting or configuration. While it is not specific to computers, it is commonly used in IT terminology. ... In software, "default" describes preset settings. For example, when you install a program for the first time, it will load the default preferences. -
How do I change a column heading in access?
In the Navigation Pane, double-click the table in which you want to rename the field. The table is opened in Datasheet view. Right-click the column heading for the field that you want to rename, and then click Rename Field on the shortcut menu. Type the new name for the field and then press ENTER. -
What is a default value?
Default values, in the context of databases, are preset values defined for a column type. Default values are used when many records hold similar data. -
What is a default value in access?
The Default Value is the value that a new record starts out with. You can change it if you want, but Access will create new records with this value. You can set the Default Value to a static value. For example, if most of your customers are from New York, you could set the Default Value for a State field to �NY�. -
How do I change the default value in SQL?
In Object Explorer, right-click the table with columns for which you want to change the scale and click Design. Select the column for which you want to specify a default value. In the Column Properties tab, enter the new default value in the Default Value or Binding property. -
What do you mean by default value explain with the help of an example?
In computer technology, a default (noun, pronounced dee-FAWLT ) is a predesigned value or setting that is used by a computer program when a value or setting is not specified by the program user. ... The program is said to default when it uses a default value or setting. -
How do you change the name of a field in access?
In the Navigation Pane, double-click the table in which you want to rename the field. ... Right-click the column heading for the field that you want to rename, and then click Rename Field on the shortcut menu. Type the new name for the field and then press ENTER. -
What is the purpose of default value Field property?
Typically, you add a default value to your table fields. You add the value by opening the table in Design view and then entering a value in the Default Value property for the field. If you set a default value for a table field, Access applies your value to any controls that you base on that field. -
How do I change the default date in access?
Open the Orders table in Design View. Click on the Date field. In the Table Properties window, click in the Default text box and enter Date(). Click the drop-down arrow of the Format text box and select Short Date (Figure A).
What active users are saying — back default field


Related searches to back default field with airSlate airSlate SignNow

Back default field
hey everyone welcome back it's so nice to see your faces in the middle of this pandemic today we're going to be talking about a really exciting feature called stencil layers now if you have a bit of a vfx background and you've used render layers before then you know exactly what i'm talking about so render layers and stencil layers are more or less the same thing there's a few key differences here but i'm going to go over that in this video so the reason this is so exciting is because contrary to crypto mat or object id stencil layers actually support depth of field and motion blur right out of the box so you get a perfect alpha mask right in the exr file and and you get way more control over how you want to split your scene up contrary to kryptomat so without further ado let's just get started all right so now that we're in unreal i've got a very simple setup here i'm using the unreal apartment scene very simple camera nothing too fancy so the purpose of this lesson is to jump into render layers and how we would set these up okay so in this case i'm going to want to separate both the foreground and the background so everything that's on the table here is going to be one render layer and everything that's in the background will be its own layer as well so before we get started i'm going to assume that you know how to use the movie render queue if you don't know how i suggest you go watch this video up here right above because i don't want you to get lost okay so i'm going to be going a little bit fast if you've never used movie render queue before so go check that video out so you know what i'm talking about before we get started so moving on let's go to the window tab up here go to cinematics movie render queue so i've opened a movie render queue i've already added my sequence i'm going to go to the settings tab here now what you want to do okay in this start setting up your render layers is you're going to go to the deferred rendering tab click on this and in there's going to be a stencil clip layers tab here okay you're going to want to click on the stencil layers and click on the little plus okay that's adds element okay so it's going to say none click on none and you can do browse layers this brings up the layers tab up in the top right hand corner here once that's there you're gonna see there's nothing there so you're gonna right click and create empty layer and i'm gonna call this layer foreground right so let's hit accept and close the movie render queue now i'm going to select everything in my scene that i want to be part of the foreground okay so i'm going to collect these plants like these like this the books and this i'm going to go up to the foreground right click click add selected actors to selected layers click on this now just to make sure that everything works you can click the little toggle visibility here click a little i and you'll see oh whoops see i forgot the one of these plants here here and here i'm going to add these to myself like the layer and you know just for good measure i'm going to add this chair as well to my foreground layer all right so now we've got my whole background here and we've got the foreground layer here okay so what we need to do next let's go back to the movie render queue go to cinematics movie render queue back to our settings deferred rendering and in the none layer here click on foreground the layer that we just created okay now it's also very important to have accumulator includes alpha checked right here you may need to adjust one in your project setting it's going to tell you a message is going to pop up saying like hey this project that needs to be enabled make sure we go ahead and do that now you may think that you need to go ahead and add another render layer for your background fortunately you don't need to do this so if you see here it says add default layer and you check this what this does is everything that's not in a layer it's going to be rendered as its own thing as its own layer so let's say for example in your background you have hundreds of thousands of other objects you don't need to select all of those and add those to a new background layer okay so just checking this it understands that if something is not in a layer it's going to be part of its own default layer so very handy tip to know so before we hit accept there's one more thing we need to add okay so we need to go to the settings tab up here and we need to add color output click on this now color output here it may be minimized at first click on this and you want to click on disable tone curve okay so the reason for this is epic states that if you don't disable the tone curve you're going to have some black haloing or some black halos happening around the render layers in your mass and your alpha is not going to come out right okay so it's very important to disable the tone curve this means that your image will be rendered in linear srgb space which is great for compositing you should be compositing in linear space to begin with so once that's done okay i've already set up my console variables for sub sampling i've got my anti-aliasings temporal sample count set to eight override anti-aliasing set to none exr 16-bit it has to be exr it's not going to work if you just use png or jpeg or whatever so make sure esr sequence is checked with multi-layer and the output tab make sure that you have your output path set correctly and once again okay going back to the deferred rendering tab here make sure the accumulator includes alpha super important otherwise your masks are not going to work so a few caveats that you should know about here so using stencil clip layers drastically increases your render times okay so for each layer for each extra layer that you have it's going to increase your render times by 100 because it needs to render the entire scene for each individual layer so in this case we've got the foreground and we've got the default layer so it's going to take already by default two times longer to render on top of which it takes even longer because you're including the alpha this can increase it says here this adds 30 percent to cost to the accumulation so you should not enable it unless necessary okay so it's going to take 30 longer because of the alpha and it's going to take 200 percent longer because you've got two render layers all right so now that all of this is set up we can click the accept button we're going to render local and we're going to send this over to nuke i'll be using nuke but you can probably use any compositing package of your choice it can be fusion or after effects whatever so here are a few things that you are really good to know these are the best practices when it comes to using the stencil layers you should be assigning your desired actors to your layers you should be adding the layers to the stencil layers in the deferred renderer tab so selecting default layer checkbox will contain everything that is not in the specified layer each layer increases render time by 100 you need to disable the tone curve in the color output tab because layers will not add together correctly in nuke if the tone curve is applied a black halo will appear around the edges and generally will not look very good at all you also should ensure that you disable auto exposure in the post process volume you should also disable screen percentage or set it to 100 because using a screen percentage resizing does not support passing the alpha channel through to your renders so some of the pros of using the stencil layer include the scene remaining visually stable between many many layers okay the main advantage here is that the stencil layer is a much better alternative to object ids or kryptomat because it supports depth of field motion blur etc cryptomat or object id do not support these things and you need to render separate depth passive motion vector paths and assemble this in nuke afterwards it's a lot of trouble and if you don't have nuke it's a real pain to work with another advantage is the alpha channel contains a mask of pixels that are actually written to a given layer and you have much better control over what layers get written compared to object ids which have zero control you can assign whatever actor or shape or object that you want to any given layer whereas the object ids you have no control over what gets assigned to what now the cons however is that the render time increases with each additional layer and if not possible to get an exact match to what you see in the engine there is no perfect way to convert back to unreal's look when you're working in post-production in nuke or any other compositor this has been stated by epic time and time again if it comes from them i'm going to take their word for it okay so we're in nuke now and i've already brought in my new render here that i just got from the movie reniq so the first thing you'll notice is the colors might seem off and this is totally normal because we disabled the tone curve which means we're getting a linear srgb image okay so and you have a tendency of linearizing everything you bring into it so don't be surprised this the render the colors look a bit different that's fine the first thing you want to do we got our exr file here so we want to add two shuffle nodes next okay we need one shuffle note per render layer so i'm going to go shuffle bring one here and shuffle again bring to the next one here so i'll get double click my shuffle layer here now i'm in my input layer i'm going to select on rgb i'm going to go to final image default layer and here i'm going to click on final image foreground because the foreground is the render layer that we created that's how i named it so it'll be named whatever you named it in unreal now this click so you'll see right away we've got render layer a and render layer b so we got the foreground and we've got the background we got nicely separated elements here so if i could click the alpha we got a perfect alpha for both of our renders so this works fantastically we can see right away this is a great way of combining things together now the next thing you want to do is we're going to create a merge node okay so i'm going to do foreground over background and you'll see right now this looks pretty good but there's a major thing that you should know about unreal states that you need to be merging with plus and not over so right now we said this by default it's set to over and you'll see in theory the results should look the same for under beauty pass so here we've got a beauty path and here we've got our merge node so you'll see you've got this we've got this odd haloing over the basically over everything around everything this is because we're using over and not plus so epic clearly states you need to use plus so we're going to go ahead on my merge node i'm going to click on this i'm going to set this to plus okay and right away now we're getting a better much more similar result now it's not perfect it's not exactly the same toggling between the two are beauty pass and our merged nodes this is normal epic themselves has clearly stated in their live stream on twitch that the results are never going to be a perfect match okay so i'm putting a link to this twitch stream in the description below this is where epic clearly tells us that things are never going to be a perfect match okay so don't take it from me take it from epic as always when it comes to compositing and post-production with unreal footage it's always a compromise it's it's not there yet um there's it's unreal still has a long way to go but for you know proper compositing work but they said themselves sorry epic has said themselves that you know it's not perfect but it's good enough so as you can see comparing again it is in fact you know not too bad okay and i'm pretty sure that an advanced compositor who's not me i and then by all means not a professional compositor okay i barely know my way around nuke but someone who's very good in nuke or any you know a full-time compositor will probably know how to work with these alphas a lot better than i do so so one of the major advantages of using the merge node here is the following so i'm gonna just for simplicity thing i'm gonna set this merge node back to over okay if you can deal with the black haloing around the edges which to be honest if i didn't know where to look i probably wouldn't notice if i hadn't if i didn't have the comparison with the original beauty pass it would probably be okay and like i said earlier an advanced compositor is probably going to know how to work around with this because i'm a dumbass when it comes to compositing work i'm not very good i know the basics but i'm not going to pretend that i know what i'm talking about when it comes to compositing so we're going to just first just for fun here i'm going to go add some text so i've got some text here with hello world written and i'm going to go ahead and merge this okay with our background okay so i got this overlaid on top of our background i'm going to uh move it around a bit i'm going to move it like right here let's say and i'm going to merge this over this and now you'll see this is the one the major advantage you can go ahead and like sandwich some text or other elements between both of your render layers and you get a pretty nice alpha so you can kind of see here the text you get the perfect alpha cutout between the text so if i want to add you know a person in there between the table and the back of the living room i could do that so this is just one of many reasons why i prefer using stencil layers over kryptomat because you have full control over how you can split your scene up so once again just moving this around and it's it's pretty nice to just have this really nice alpha especially you know it kind of fades in nicely it's pretty good it's not bad right so the stencil layers feature here really start bringing unreal one step closer to vfx territory some of the main things you should know when recombining these layers in nuke is that you should color correct each individual layer by using the alpha channel as a mask for each color grade node and when you're merging the layers you really need to merge with plus or also known as add merging will plus will provide a much more accurate result but the typical over a over b can be used in some cases if you know the result is acceptable it is totally your call you have to use your creative judgment on this so if i wanted to go ahead and grade the foreground separately i'm going to add another shuffle node okay and i'm going to set this here set this to foreground and i'm going to go ahead and add a grade node right here for my foreground so in the mask i need to make sure i connect my grade to the mask of my foreground layer here and in mask here i'm going to select final image foreground alpha now in my gray node i can go ahead and add a tint you know make this blue i'll make my whole foreground layer blue or you know orange whatever but we get a nice masking right so this is uh how you would grade it because we're using a plus node and not over or it's not a correct merge it's not a over b it's a plus b um you need to use masks on any of your grade notes okay that's just something you should probably keep in mind so using render layers is almost more powerful than using unreal's new crypto mat because it supports that the field that supports motion blur all those post process effects will be rendered correctly in your render layer passes okay well whereas kryptomat or object ids with the movie render queue will not support depth of field they won't support motion blur or any other post process effects like that so you need to actually render a death path you need to render motion vectors and to get the kryptomat masks to deform correctly having rental layers is also super beneficial because it allows you to actually choose what kind of id you want so you can choose i want if i wanted just to plant just the plants to be in one layer if i wanted a flower pot to be in the render layer you can do that okay so i'm going to delete this because it's really ugly but this is how you would go ahead and setting up your render layers in unreal engine this is a very powerful new tool super handy it's not perfect epic themselves has clearly stated that it's not perfect you're never going to get a perfect one-to-one match but you know what it's it's a great start it's something that i can work with so guys once again i hope you've learned a little something i hope this has helped you out leave a comment down below if you have any questions whatsoever don't forget to like and subscribe and i'll see you guys next week in the next video
Show moreFrequently asked questions
How do I add an electronic signature to a PDF in Google Chrome?
What is considered an electronic signature?
What counts as an electronic signature?
Get more for back default field with airSlate SignNow
- ESignature doc
- Prove electronically signed Free Loan Agreement
- Endorse digisign Painting Proposal Template
- Authorize electronically sign Coffee Shop Business Plan Template
- Anneal mark Supervisor Evaluation
- Justify esign Golden Ticket
- Try countersign Room Rental Agreement
- Add Consulting Agreement signatory
- Send Interior Design Contract Template initials
- Fax Professional Letter of Recommendation eSign
- Seal Client Progress Report esigning
- Password Accounting Proposal Template digisign
- Pass Employment Verification Letter electronic signature
- Renew Music Tour Itinerary countersign
- Test Hotel Receipt sign
- Require Compromise Agreement Template electronically signing
- Print heir signature service
- Champion company signature block
- Call for caller esign
- Void HIPAA Business Associate Agreement template electronically signed
- Adopt Labor Agreement template byline
- Vouch Reservation Template for Gala template esigning
- Establish Restaurant Gift Certificate template signature block
- Clear Landscaping Services Contract Template template signature service
- Complete Work Completion Record template countersign
- Force Equipment Purchase Proposal Template template email signature
- Permit Corporate Resolution Form template signatory
- Customize Durable Power of Attorney template initials