Byline Powerpoint Made Easy
Award-winning eSignature solution


Get the powerful eSignature capabilities you need from the solution you trust
Select the pro platform made for pros
Set up eSignature API with ease
Collaborate better together
Byline powerpoint, within a few minutes
Reduce your closing time
Maintain sensitive information safe
See airSlate SignNow eSignatures in action


airSlate SignNow solutions for better efficiency
Our user reviews speak for themselves


Why choose airSlate SignNow
-
Free 7-day trial. Choose the plan you need and try it risk-free.
-
Honest pricing for full-featured plans. airSlate SignNow offers subscription plans with no overages or hidden fees at renewal.
-
Enterprise-grade security. airSlate SignNow helps you comply with global security standards.

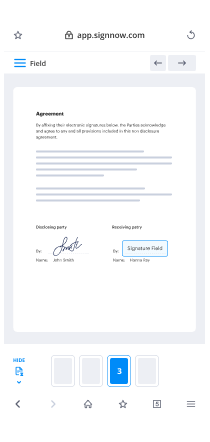
Your step-by-step guide — byline powerpoint
Employing airSlate SignNow’s electronic signature any business can increase signature workflows and sign online in real-time, supplying an improved experience to clients and employees. Use byline powerpoint in a few simple actions. Our mobile apps make working on the move achievable, even while offline! eSign documents from any place in the world and close up trades faster.
Follow the stepwise instruction for using byline powerpoint:
- Log on to your airSlate SignNow account.
- Find your needed form in your folders or upload a new one.
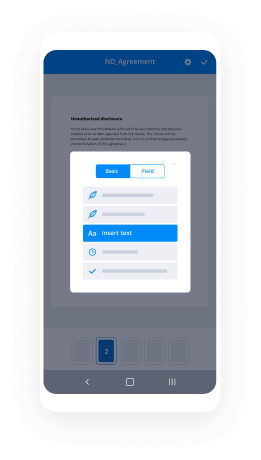
- Open the record and edit content using the Tools menu.
- Drag & drop fillable boxes, type text and sign it.
- Include numerous signees by emails and set up the signing order.
- Indicate which individuals can get an executed doc.
- Use Advanced Options to reduce access to the document and set up an expiry date.
- Click on Save and Close when finished.
Additionally, there are more enhanced features open for byline powerpoint. Include users to your shared work enviroment, browse teams, and track cooperation. Millions of consumers across the US and Europe concur that a solution that brings everything together in a single cohesive workspace, is exactly what businesses need to keep workflows working easily. The airSlate SignNow REST API enables you to embed eSignatures into your app, website, CRM or cloud storage. Check out airSlate SignNow and enjoy quicker, smoother and overall more efficient eSignature workflows!
How it works
airSlate SignNow features that users love


See exceptional results byline powerpoint made easy

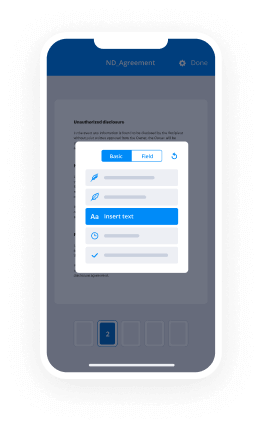
How to fill out and eSign a document online
Try out the fastest way to byline powerpoint. Avoid paper-based workflows and manage documents right from airSlate SignNow. Complete and share your forms from the office or seamlessly work on-the-go. No installation or additional software required. All features are available online, just go to signnow.com and create your own eSignature flow.
A brief guide on how to byline powerpoint in minutes
- Create an airSlate SignNow account (if you haven’t registered yet) or log in using your Google or Facebook.
- Click Upload and select one of your documents.
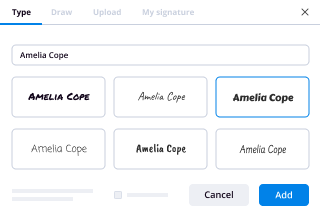
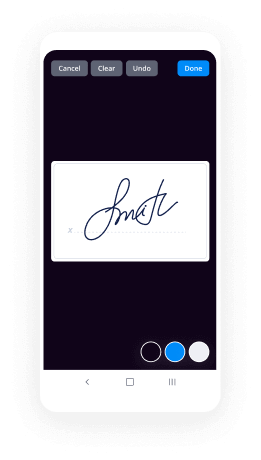
- Use the My Signature tool to create your unique signature.
- Turn the document into a dynamic PDF with fillable fields.
- Fill out your new form and click Done.
Once finished, send an invite to sign to multiple recipients. Get an enforceable contract in minutes using any device. Explore more features for making professional PDFs; add fillable fields byline powerpoint and collaborate in teams. The eSignature solution supplies a safe process and runs according to SOC 2 Type II Certification. Be sure that all of your data are protected so no person can edit them.

How to eSign a PDF template in Google Chrome
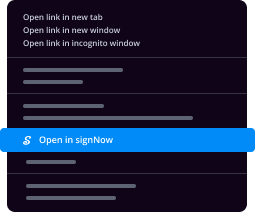
Are you looking for a solution to byline powerpoint directly from Chrome? The airSlate SignNow extension for Google is here to help. Find a document and right from your browser easily open it in the editor. Add fillable fields for text and signature. Sign the PDF and share it safely according to GDPR, SOC 2 Type II Certification and more.
Using this brief how-to guide below, expand your eSignature workflow into Google and byline powerpoint:
- Go to the Chrome web store and find the airSlate SignNow extension.
- Click Add to Chrome.
- Log in to your account or register a new one.
- Upload a document and click Open in airSlate SignNow.
- Modify the document.
- Sign the PDF using the My Signature tool.
- Click Done to save your edits.
- Invite other participants to sign by clicking Invite to Sign and selecting their emails/names.
Create a signature that’s built in to your workflow to byline powerpoint and get PDFs eSigned in minutes. Say goodbye to the piles of papers sitting on your workplace and start saving time and money for extra crucial activities. Selecting the airSlate SignNow Google extension is a great convenient option with a lot of advantages.

How to sign an attachment in Gmail
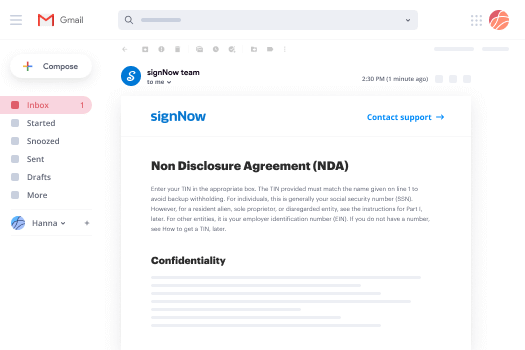
If you’re like most, you’re used to downloading the attachments you get, printing them out and then signing them, right? Well, we have good news for you. Signing documents in your inbox just got a lot easier. The airSlate SignNow add-on for Gmail allows you to byline powerpoint without leaving your mailbox. Do everything you need; add fillable fields and send signing requests in clicks.
How to byline powerpoint in Gmail:
- Find airSlate SignNow for Gmail in the G Suite Marketplace and click Install.
- Log in to your airSlate SignNow account or create a new one.
- Open up your email with the PDF you need to sign.
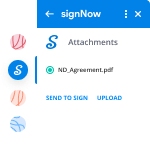
- Click Upload to save the document to your airSlate SignNow account.
- Click Open document to open the editor.
- Sign the PDF using My Signature.
- Send a signing request to the other participants with the Send to Sign button.
- Enter their email and press OK.
As a result, the other participants will receive notifications telling them to sign the document. No need to download the PDF file over and over again, just byline powerpoint in clicks. This add-one is suitable for those who choose working on more valuable aims instead of burning up time for practically nothing. Improve your daily compulsory labour with the award-winning eSignature application.
How to sign a PDF file on the go with no mobile app
For many products, getting deals done on the go means installing an app on your phone. We’re happy to say at airSlate SignNow we’ve made singing on the go faster and easier by eliminating the need for a mobile app. To eSign, open your browser (any mobile browser) and get direct access to airSlate SignNow and all its powerful eSignature tools. Edit docs, byline powerpoint and more. No installation or additional software required. Close your deal from anywhere.
Take a look at our step-by-step instructions that teach you how to byline powerpoint.
- Open your browser and go to signnow.com.
- Log in or register a new account.
- Upload or open the document you want to edit.
- Add fillable fields for text, signature and date.
- Draw, type or upload your signature.
- Click Save and Close.
- Click Invite to Sign and enter a recipient’s email if you need others to sign the PDF.
Working on mobile is no different than on a desktop: create a reusable template, byline powerpoint and manage the flow as you would normally. In a couple of clicks, get an enforceable contract that you can download to your device and send to others. Yet, if you really want an application, download the airSlate SignNow mobile app. It’s comfortable, fast and has an excellent design. Enjoy easy eSignature workflows from your business office, in a taxi or on an airplane.

How to sign a PDF utilizing an iPad
iOS is a very popular operating system packed with native tools. It allows you to sign and edit PDFs using Preview without any additional software. However, as great as Apple’s solution is, it doesn't provide any automation. Enhance your iPhone’s capabilities by taking advantage of the airSlate SignNow app. Utilize your iPhone or iPad to byline powerpoint and more. Introduce eSignature automation to your mobile workflow.
Signing on an iPhone has never been easier:
- Find the airSlate SignNow app in the AppStore and install it.
- Create a new account or log in with your Facebook or Google.
- Click Plus and upload the PDF file you want to sign.
- Tap on the document where you want to insert your signature.
- Explore other features: add fillable fields or byline powerpoint.
- Use the Save button to apply the changes.
- Share your documents via email or a singing link.
Make a professional PDFs right from your airSlate SignNow app. Get the most out of your time and work from anywhere; at home, in the office, on a bus or plane, and even at the beach. Manage an entire record workflow seamlessly: build reusable templates, byline powerpoint and work on PDF files with business partners. Transform your device into a potent business instrument for executing contracts.
How to sign a PDF file taking advantage of an Android
For Android users to manage documents from their phone, they have to install additional software. The Play Market is vast and plump with options, so finding a good application isn’t too hard if you have time to browse through hundreds of apps. To save time and prevent frustration, we suggest airSlate SignNow for Android. Store and edit documents, create signing roles, and even byline powerpoint.
The 9 simple steps to optimizing your mobile workflow:
- Open the app.
- Log in using your Facebook or Google accounts or register if you haven’t authorized already.
- Click on + to add a new document using your camera, internal or cloud storages.
- Tap anywhere on your PDF and insert your eSignature.
- Click OK to confirm and sign.
- Try more editing features; add images, byline powerpoint, create a reusable template, etc.
- Click Save to apply changes once you finish.
- Download the PDF or share it via email.
- Use the Invite to sign function if you want to set & send a signing order to recipients.
Turn the mundane and routine into easy and smooth with the airSlate SignNow app for Android. Sign and send documents for signature from any place you’re connected to the internet. Create good-looking PDFs and byline powerpoint with just a few clicks. Come up with a perfect eSignature workflow with only your smartphone and improve your overall productiveness.
Get legally-binding signatures now!
FAQs
-
How do you digitally sign a PowerPoint slide?
Click the File tab. Click Info. Click Protect Document, Protect Workbook or Protect Presentation. Click Add a Digital Signature. Read the Word, Excel, or PowerPoint message, and then click OK. -
How do I create a digital signature?
Click the link. ... Agree to electronic signing. ... Click each tag and follow the instructions to add your digital signature. Verify your identity and follow the instructions to add your digital signature. -
How do I create a digital signature in Outlook 365?
Click the settings gear menu in the upper right corner. Select Options. Under Mail > Layout, select Email signature. In the text box, create your signature. -
Where do you put your name in PowerPoint?
Open PowerPoint and scroll to the slide to add the signature. Click a text box on the slide or add one by clicking the \u201cInsert\u201d tab, clicking the text box button and dragging the mouse to form the text box. Type the phrase \u201cCreated by\u201d in the text box. Click the \u201cInsert\u201d tab. -
What is the first slide in a presentation called?
Title Slide The first slide should have the title of the presentation and the full name. It will be displayed until the presentation starts and allows the audience to prepare itself for your talk. -
How do I create an electronic signature?
Suggested clip How to Create Electronic and Digital Signature and Sign PDF and ...YouTubeStart of suggested clipEnd of suggested clip How to Create Electronic and Digital Signature and Sign PDF and ... -
How do I add an electronic signature to a PDF?
Open the PDF file in airSlate SignNow Reader. Click on Fill & Sign in the Tools pane on the right. Click Sign, and then select Add Signature. A popup will open, giving you three options\u2014Type, Draw, and Image. Once you're done, click the Apply button. Drag, resize and position the signature inside your PDF file. -
How do I turn a PowerPoint into an article?
Write an outline for the article. Use paragraph topic sentences and section subheads to guide you. ... Open Powerpoint. ... Enter the outline into subsequent slides. ... Copy the portion of the article that corresponds to the portion of the outline on each slide into the "Notes" area under that slide. -
Can I convert a PowerPoint to Word?
Convert PowerPoint to Word File You can use Microsoft PowerPoint itself to convert a PowerPoint to a Word doc or docx file. ... Then, click the "File" tab on the ribbon menu and then click "Export." Click "Create Handouts." A box will pop up, titled, "__Send to Microsoft Word." -
How do I turn a PowerPoint into a handout?
Click the \u201cFile\u201d tab on the PowerPoint command ribbon to open the list of commands. Click \u201cSave & Send\u201d to display the list of \u201cFile Types\u201d on the large pane. Click \u201cCreate Handouts\u201d in the File Types section to bring up the \u201cCreate Handouts in Microsoft Word\u201d pane to the right. -
How do I change the margins in PowerPoint handouts?
Click the \u201cFile\u201d menu and select the \u201cPage Setup\u201d option, which will launch a separate dialog window. Click the \u201cSlides Sized For\u201d menu and select the \u201cCustom\u201d option. Type the desired margin measurements in the \u201cHeight\u201d and \u201cWidth\u201d fields, according to the page size. -
How do you sign a PowerPoint presentation?
In Microsoft Word, Excel, or PowerPoint, open the document that you want to sign. In the selected Microsoft application, click File. Click Protect Document > Add a Digital Signature. Click Protect Workbook > Add a Digital Signature. -
How do you add a digital signature to PowerPoint?
Click the File tab. Click Info. Click Protect Document, Protect Workbook or Protect Presentation. Click Add a Digital Signature. Read the Word, Excel, or PowerPoint message, and then click OK. -
How do I do an electronic signature in Word?
To add a digital signature, open your Microsoft Word document and click where you'd like to add your signature line. From the Word ribbon, select the Insert tab and then click Signature Line in the Text group. A Signature Setup pop-up box appears. Enter your information in the text fields and click OK. -
How do I sign in PowerPoint 2010?
Microsoft Word. Click Protect Document > Add a Digital Signature. Microsoft Excel. Click Protect Workbook > Add a Digital Signature. Microsoft PowerPoint. Click Protect Presentation > Add a Digital Signature.
What active users are saying — byline powerpoint


Byline powerpoint
welcome to this complete beginners guides to Microsoft PowerPoint it's the most popular presentation software in the world being widely used in the business and academic sectors but if you're here watching this tutorial to learn PowerPoint you probably already know that so it doesn't need any other introduction my name is Edward sting up from Video plasti and let's get started with this tutorial all right so this PowerPoint tutorial is recorded currently on my macbook but if you're in a Windows machine don't worry at all because PowerPoint looks and acts exactly the same the same thing if you are working on an older version of PowerPoint or maybe even a newer one than the one in this video again nothing to worry about because PowerPoint and all the principles behind it are exactly the same as in this video so whenever you start PowerPoint you're gonna be welcomed by this home screen where you can see all your recent projects like for example I have this PowerPoint I saved a couple of minutes ago but we don't want to open a previous project we want to create a new one from scratch so just go where it says new and you're gonna be able to see a lot of different templates like this and the main difference between the templates is that they use different backgrounds sometimes different images fonts colors and sometimes even different layouts like this one for example the title screen is even at an angle as you can see here if for whatever reason the themes that PowerPoint comes with don't really satisfy you and you want something else you can go here on the search bar and just search for let's say business and you can find a lot more different themes like this and if even this is not enough you can definitely go online and find a lot more even purchase some super professional and good-looking ones but for the sake of this tutorial let's go and use this one here called parcel all right so first I want to show you the interface of PowerPoint so here on the top we have a few different elements like this which are called tabs and you can click on either one of those tabs to open up a lot more different options and they're all grouped very logically like this here on the Left we have the list of the slides but currently we only have one slide open here and here in the middle is where we can edit the slide and preview how it looks so let's start editing this slide you just have to click anywhere on those elements and start entering your own text like this and now we have our title screen and let's say we want to add a few more slides and to add slides you can go here on the slide list on the Left sidebar and you can either right click here and add a new slide like this which is going to be the default new slide or you can go here on the Home tab and use this button here that says new slide and if you go here on this arrow it's gonna show you a couple of more different options like this so we have the title slide which is the first one and then we just added a new slide which was the title and content and there are a few more templates available so let's just add a couple more slides like this and just write some random text here for example you can also add one here called comparison let's say comparison and ancient Greece and then here with our bullet points you can just write a lot of different bullet points to compare two things which is super useful in some cases so other different templates that we can use is a blank one which I'm going to show you in a bit but let's just say picture with caption so for example they say Acropolis some information here and then here on the right is where we can add a picture and as it says here click icon to add pictures so we're gonna click this icon here in the middle and it's going to ask us to navigate somewhere on our computer to find a picture so I already have a couple of pictures selected for this tutorial so I'll just use this one right here alright let's just say we're not happy with the PowerPoint 15 that we selected in the beginning and it's actually super simple to change it for all those slides here in the middle of editing it and to do that you go here on the design tab on top and there you have quite a few options here and to see even more options you just click this arrow to expand and I don't even know just just try a couple like this click on it and it's gonna change it like this and as you can see it changes all the other slides as well so to preview them is super simple just click on it and see if you like out of one of those but right now I'm not really a big fan of the one we selected and to go back to revert the changes you can either use this button here to undo or hit ctrl Z or command Z on your keyboard like this and it's gonna undo the changes the same thing maybe you want to redo the changes you can then use this arrow to go forward and history of the changes but I'll just go up back to our previous theme because I actually really enjoy it and now let me add a new blank slide and show you how we can add a lot of elements yourself and design the slide in any way you want so to do that we'll go here to the Home tab add a new slide from here and just add a blank slide like this so the first element that I want to show you how you can add is obviously the text so to add any sort of text you'll have to double click anywhere in the template and enter your own text here what you can also do is here on the Home tab you can also use this button here that says text box to draw a text box like this I will just write some random text in here to show you the text area and how it works so basically the text area like this pretty much makes the text fit only in that area and you can also adjust it like this and the text is gonna adjust its layout like that or maybe I can expand it like this and the text will never leave the text area which is super useful if you want to the text in just a small part of your slide next I want to show you how we can insert a couple of other elements and to do that we have to go here on the insert tab on top so the one that I want to show you first is this one right here with a table so the other table just click on this button and it will ask you for the size of the table so let's say we want it to be free by free like this and there you go but it now covers our text so I want to move it around and to move any sort of element around you just have to navigate here to the edge of it until the cursor changes like this with arrows and then just hold down the mouse click so we'll just move it out of the way and now to add some information in the table you just click anywhere in either one of those cells like this and just say heading 1 heading 2 and then enter some data and a table like this and as you can see it already has a predefined style and the headers are in a different font so it stands out on this background and then the data has a different color of the font here so it all works really well and if you have the table selected like this you can go here on the top and it's going to have the table design tab open and you can change a lot of different settings for the table but the one that I want to show you which is probably the most useful one is to just change the style of the table like this the same way you would change the design of the entire PowerPoint presentation and just click on either one of those and it's gonna preview how it looks like this until you find something that you are happy with alright next I will add a new blank slide like this because I want to show you how you can insert pictures and again we're gonna go here on the insert tab and here where it says pictures just click on this and you'll see you have a few different options so the ones that I will show you is inserting a picture from your local computer using this button and of course you will navigate somewhere on your computer to select a few images that you have saved and you can grab the image you're on the edge when the cursor turns to this to resize it like this and then you can move it around like this the other way to insert a picture is to go here insert tab and pictures and you can insert pictures from the internet like this and now we have this sidebar here on the right and it's gonna allow you to search the internet using the Bing search engine obviously because it's Microsoft and let's just say ancient Greece and see what we find so those are some big images that we find here and I don't even know let's say we want to use this image you can select a couple of images like this and then insert all of them together but I actually only want to insert those two images and click this button and now I will close this sidebar and as you can see now those images overlap one another so it's time to select the first image on top move it here to the right and then resize it like this and do the same thing for this one in the middle here and here we have the license of the image and if you don't want to keep this you just select the element like this but make sure when you select the element if you click inside it it's only gonna allow you to add it to the text but if you want to select the entire element and not the text just click wherever you see the cursor turn into this shape so if I select it now and hit backspace on my keyboard it's gonna remove the whole element and the same thing for this other one here all right now let's add a few more elements but to do that we need a couple of new blank slides like this so next I want to show you how you can insert a video into your presentation and to do that again you go here under the insert tab and here on the right it says video and same as before you can add a video from the internet like this using online film and you have to copy paste a link so for example let's assume you want to add a YouTube video I already have the link copied in my clipboard so I'll just insert it like this and as you can see we now have the video here but maybe you want to insert a video from your computer which you can do again by using this button right here video from file and it's going to ask you to navigate on your computer to search for the video file so I'll just do that right now and select the video like this and insert it into my presentation and right now the video fills up the whole screen so I will actually move it out of the way select the other video remove it using the backspace key on my keyboard and then I will put this back where it was so now as you can see whenever you have the video selected you have a player here on the bottom which you can use to play or pause the video alright now let's insert a blank slide so I can show you a few more elements and one that's incredibly useful is to add something that is called a chart whenever you're presenting data this is incredibly useful so again here under the insert tab you go here where it says chart and PowerPoint has quite a few options you can add column charts line charts pie charts and a lot of different other ones as well but personally I really like pie charts so let's just say we add this 2d pie all right so as you can see PowerPoint open Excel when I added that pie chart because the way to edit the data inside the pie chart is by using Excel so I'll go back to PowerPoint first and exit full-screen mode so we can actually see both of them on the screen like this so I will make this a tiny bit smaller so as you can see now we have sales and column one here so let's just go ahead and edit some of this data to see how it updates in real time here in PowerPoint so let's just change sales to revenue like this change this to let's say q1 q2 q3 q4 and for the revenue you can just add your own data like this 124 87 92 and I don't know 23 and as you can see PowerPoint updates this in real time and it's incredibly easy to use so I'll just go ahead and close Microsoft Excel and just make this full screen again so now the same as with all the other elements I can grab this like this move it around and also resize it if I want to and if I ever want to open Excel again to edit some of the data that I have here all I have to do is have the element selected like this and if you go here on the chart design tab you can go here where it says edit data in Excel and it's gonna open Excel again but now let's assume we don't like the pie chart in which case we can go here where it says change chart type and I can use a column 1 for example or maybe a line 1 or pretty much anything that I like you can also edit the exact style of the chart by going here it's the same as changing the design of table or of the entire PowerPoint theme so let's just open this to see a lot more different ones and just preview out of one of those until you find one that you like so let's just say I want to use this one which is pretty cool I like it alright so the next thing that I want to show you how you can insert is a shape or an icon which can be super useful so let's just move this out of the way a little bit like this to have some space and here on their shapes you can add quite a few simple shapes like this like arrows and other various ones you can see here but the ones that I actually like a lot more are called icons so as you can see it opens this sidebar here with a lot of different icons and you can just scroll down and see a lot of them or you can just use the search bar to search for something specific so I will just select this one to add to the slide and as with the images from the internet you can select multiple ones and then insert them in the slide but I'll just select a single one and insert it like this and now it's time to move it out of the way and put it here alright so now let me show you how we can format the text and change its properties to something else so for example let's just I don't know let's use this slide right here so to add a text and changes properties first of all you have to have the entire text selected like this and to change it you go here under the Home tab and you have all the font settings here so I will just change the font to something else like this for example and then you can increase the size as well make it bold italic underline strikethrough anything you want you can find it here here for example you can change the color of the font to make it red I'll just remove the strikethrough because it doesn't look good and for example if you have a paragraph you can use those buttons to align left middle right and for example if we go to this slide where we have a couple of bullet points you can select all of the bullet points like this and if you want to change the bullet style again here on their home tab you can do so here and use something else like this or maybe you don't want to use bullet points you can make it a numbered list like this with one two three and of course you can also change the style to something else using ABC or roman numbers or anything else all right now let me show you how you can format an element and change its properties so for example let's go back to this slide where we just added this icon or shape and as you can see now it's black so it doesn't really work in our current context so to change that you have to double click on it and it's gonna open this format sidebar here and it has a few different options fill effect size and properties and a few properties for picture so let's just open this one with fill and let's change the color to orange so it works much better in this context and of course there are other settings as well like the transparency if you want to make it disappear but I don't see why you would do that so to show you how to edit a few more properties let's go to this slide with photos and if I select either one of those images you can see here format picture but for example if that thing is closed and you want to open it again you can either double click on a picture like this or the other way to do it is your right-click on the element and go here where it says format picture and again if I click on this it's gonna open the same sidebar so now for picture we pretty much don't want to use this one to fill it with a color because we have a picture so there's no point to do that so I'll show you some of the effects you can use the shadow to drop a tiny bit of a shadow like that make it a tiny bit blurry so it kind of stands out a little bit more and maybe you want to add a reflection as well so let's just do that add a bit of blur and as you can see if you change those settings and play around with them until you find something nice you actually end up with something that looks pretty cool like this and the other options that you have here are the exact size and positioning if you want to go very precise you can do that as well and if you go here to picture you can do some picture color Corrections so for example I don't know let's go with this one in the middle you can adjust the sharpness and make it a bit blurry or make it incredibly sharp like that change the brightness if the picture is not bright enough where it's too bright or change the contrast if you have to this all depends on your picture and how good it is if it looks good you don't have to change any of that also if you go here on the bottom where it says saturation maybe you want to make the picture black and white in which case you can reduce the saturation like this and it's gonna make it grayscale like this and what we're here on this picture is slide let me show you how we can also crop an image so let's say we want to make this one rectangular like all those other ones here in which case you can select the image you need to have it selected and here under picture formats tab you go here on the right where it says crop so I'll just click crop and now you see here we have those controls so I can just pull them like this pull it from this side as well and when I'm done with it just click anywhere outside of it and as you can see now it cropped our image so I can move it around like this resize it and it's a very similar shape like the other two images here so it looks much better in this context if you want to change the order of the slides you can do so here on this panel here with all the slides here and to do that you just click and drag it out of position and move it to where you want it to be like this and for example if you want to remove any of the slides you just right-click on it and go here where it says delete slide so now when you're done editing all of your slides and all the content and you want to present it to the world to do that you go to slideshow mode and to enter slideshow mode and make everything fullscreen you go here on the top where it says slideshow and open this tab right here and you can either click this button which says play from start or alternatively you can go here on the bottom and use this button to enter slideshow mode add the current slide so once you enter the slideshow mode then you want to navigate from one slide to another you can use this spacebar key on your keyboard or use the right or down arrow key on your keyboard and for example if you reach the end or if you want to go backwards and talk about a previous slide you can also navigate backwards by using the left arrow key or up arrow key on your keyboard to exit a slideshow all you have to do is click the Escape key on your keyboard but now as you probably noticed moving from one slide to another was pretty abrupt because there was no transition between slides and to add a transition it's actually incredibly simple all you have to do is select the slide that you want to add a transition to so let's start with the first light here and if you go here under the transitions tab on top it's actually super simple to do so I have the slide selected and now it's just a matter of selecting either one of those transitions and if you click on either one of those it's going to preview the transition for you and there are some pretty complex ones and if it's the first time you're using PowerPoint feel free to explore to see what sort of different transitions PowerPoint has but if you ask me personally I prefer to go with super simple ones like fade and for this one let's say we use a push and for this one let's say we use a wipe but right now as you can see it's pretty fast so it was a bit hard to actually see the transition and you can also adjust the duration of the transition by going here on the top right where it says duration and let's make this I know two seconds and let's make this outer one two seconds like this and this first one I want to make it two seconds as well and if you want to preview how it looks and just preview this one slide you can hit this button here on the left that says preview transitions but now I actually want to enter slideshow mode so I'll click this button on the bottom because now I want to show you how it looks in slideshow mode and as you can see it already looks much much nicer and way more elegant than before so I highly recommend you use transitions for your slides so the same way we added a transition animation to the entire slide I want to show you now how you can add an animation to one particular element so you can add animations either to images or text or any sort of element that you have and you want to animate it individually you can do that as well so the best slide to show you that is this one right here with a few different images so if I go here on the animations tab I can select either one of those elements so I'll just start with the first image and if you look here on the animations tab we have three different categories one category here is the appear animations this is to highlight it in the middle of the slide and when you're done talking about the element you can also make it disappear using those animations here but to be honest personally I always use just those appear animations because the way I see there's no point to use it disappear animation because we already have a transition animation to move to the next slide when we're done talking about it but if you have a very specific case where you want to make an element disappear just know it's possible and it's here so let's just add a few different appear animations like this and as before feel free to explore because there are quite a few different ones like this some of them are pretty ridiculous and again personally I prefer to go with super simple ones like I know fly in something like this or maybe even better I just use a dissolve and just keep things simple and as before you can adjust the duration of the animation so I'll just make it one second twenty five like that and as you probably noticed now we have those numbers here so number one two and three and that shows you the order of the animations and now to change the duration for the other two animations I actually have to go here on the right where we have the animations tab here open in the sidebar and just click on the animation number two which is this one and now I can go here on their duration and change it to 1:25 go to the first one here and change this one to 1:25 as well so now when I enter slideshow mode like this and I navigate for example from this slide to the one with the images now there's nothing on-screen because every new animation start on click so you have to press the spacebar or the right arrow key on your keyboard to trigger those animations to start and have those elements appear on-screen all right so now for example let's say we want to change the order of the animations and that's super simple to do so here on the right I can just grab this one which is number 1 in order and move it all the way to the end and as you can see now it changed its number from number one to number three and I can do the same one with this one for example right now it's number one and it's here so I can just move it here and make it second so now the order is pretty much immersed and let's go to slideshow and see how it looks so as you can expected we start from the right and go to the left and that's how you change the order of the animations another useful thing to know is when you trigger the animation so for example let's select this first one right here and as I said it only appears when you click spacebar or the right arrow key on your keyboard but let's say for example I want to start the slide and the animation at the same time with a slide so to do that here where it says start which is the animation timing you can either select on click which is with spacebar for example or just do it with previous and the previous one is obviously going to be the slide transition so now let's move to the previous slide like this and enter slideshow mode so we move from this slide for example now to the next slide and as you can see I didn't even press the button it just started animating as soon as we started this slide all right so when it's all said and done it's time to save and export your presentation and to do that you can either click this button to save this presentation or go here on the many where it says file and just click save and it's gonna ask you where you want to save it on your computer on a Windows this probably looks a tiny bit different but the principle is the same navigate to where you want to save it on your computer give it a file name and for file format make sure to leave it as it is pptx because the other ones are super old formats that nobody uses anymore and then just click Save and now you saved and exported your PowerPoint presentation to your computer thank you so much for watching all the way to the end I hope you learned a lot of things from this tutorial and if you got to this point please leave a comment to let me know I would also appreciate it if you could gently have the like button doing both of these things really helps with a youtube algorithm so that I can continue to make more content like this for royalty free animated stock gifs that work incredibly well in PowerPoint please visit video class be calm and if you want to see more tutorials like this one and other amazing video marketing content subscribe to my channel right now don't forget to add me on Instagram as well to keep in touch this was Edward Stinger from video plastic and I'll see you soon [Music] you
Show moreFrequently asked questions
How do I eSign a document before sending it?
How do I get a PDF ready for others to electronically sign it?
How can I virtually sign a PDF file?
Get more for byline powerpoint made easy
- Signature service in-person
- Prove email signature Travel Planning Registration
- Endorse eSign Office Supplies Inventory
- Authorize digital sign Boat Slip Lease Agreement
- Anneal signatory Manufacturing Contract
- Empower electronically signed Framing Inspection Checklist
- Try digisign Job Report 2020
- Add Conversion Agreement eSignature
- Send Photography Proposal Template autograph
- Fax Award Certificate digital sign
- Seal Hardship Letter signed electronically
- Password Settlement Agreement electronically sign
- Pass Freelance Graphic Design Contract Template countersignature
- Renew Deed of Trust mark
- Test Trainee Daily Progress Report signed
- Require IRS Form 1040-ES digi-sign
- Send gawker email signature
- Accredit peitioner signature
- Compel assignee initial
- Void Painting Quote Template template digisign
- Adopt catalog template electronic signature
- Vouch Colorado Rental Agreement template signed electronically
- Establish Web Design Quote template sign
- Clear Compromise Agreement Template template electronically signing
- Complete Camper Health History template mark
- Force NDA Template template eSign
- Permit New Transcription Project Form template eSignature
- Customize Wedding Photography Contract Template template autograph