Carbon Copy Zip Code Field with airSlate SignNow
Award-winning eSignature solution


Do more online with a globally-trusted eSignature platform
Remarkable signing experience
Trusted reports and analytics
Mobile eSigning in person and remotely
Industry polices and conformity
Carbon copy zip code field, faster than ever
Handy eSignature add-ons
See airSlate SignNow eSignatures in action


airSlate SignNow solutions for better efficiency
Our user reviews speak for themselves


Why choose airSlate SignNow
-
Free 7-day trial. Choose the plan you need and try it risk-free.
-
Honest pricing for full-featured plans. airSlate SignNow offers subscription plans with no overages or hidden fees at renewal.
-
Enterprise-grade security. airSlate SignNow helps you comply with global security standards.

Your step-by-step guide — carbon copy zip code field
Using airSlate SignNow’s electronic signature any company can enhance signature workflows and sign online in real-time, supplying a better experience to consumers and workers. carbon copy zip code field in a couple of simple steps. Our handheld mobile apps make operating on the go achievable, even while off-line! Sign signNows from anywhere in the world and complete tasks quicker.
Keep to the walk-through instruction to carbon copy zip code field:
- Sign in to your airSlate SignNow account.
- Find your document in your folders or upload a new one.
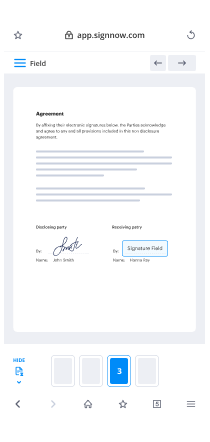
- Open up the record adjust using the Tools menu.
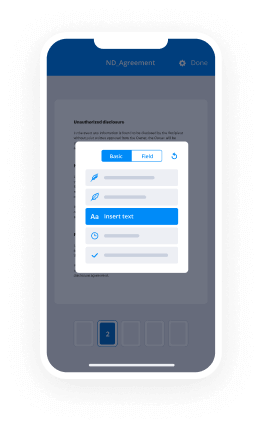
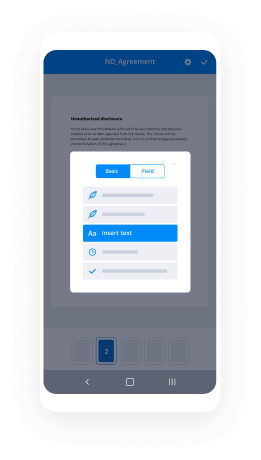
- Drop fillable areas, add text and eSign it.
- Include several signees via emails and set up the signing sequence.
- Indicate which recipients will receive an signed version.
- Use Advanced Options to restrict access to the record add an expiration date.
- Tap Save and Close when completed.
Furthermore, there are more innovative capabilities available to carbon copy zip code field. List users to your common digital workplace, browse teams, and monitor cooperation. Numerous customers all over the US and Europe recognize that a system that brings everything together in a single unified workspace, is the thing that organizations need to keep workflows functioning effortlessly. The airSlate SignNow REST API allows you to integrate eSignatures into your application, website, CRM or cloud. Try out airSlate SignNow and get faster, easier and overall more effective eSignature workflows!
How it works
airSlate SignNow features that users love


See exceptional results carbon copy zip code field with airSlate SignNow

How to fill in and sign a document online
Try out the fastest way to carbon copy zip code field. Avoid paper-based workflows and manage documents right from airSlate SignNow. Complete and share your forms from the office or seamlessly work on-the-go. No installation or additional software required. All features are available online, just go to signnow.com and create your own eSignature flow.
A brief guide on how to carbon copy zip code field in minutes
- Create an airSlate SignNow account (if you haven’t registered yet) or log in using your Google or Facebook.
- Click Upload and select one of your documents.
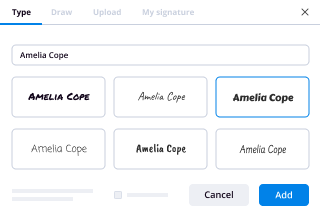
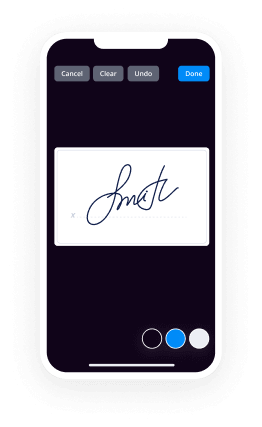
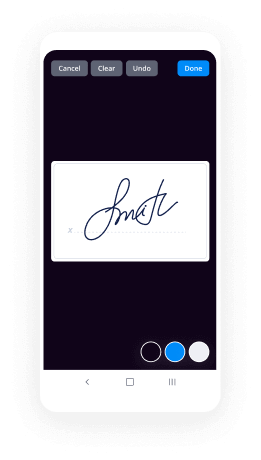
- Use the My Signature tool to create your unique signature.
- Turn the document into a dynamic PDF with fillable fields.
- Fill out your new form and click Done.
Once finished, send an invite to sign to multiple recipients. Get an enforceable contract in minutes using any device. Explore more features for making professional PDFs; add fillable fields carbon copy zip code field and collaborate in teams. The eSignature solution gives a secure workflow and works based on SOC 2 Type II Certification. Be sure that your information are guarded and therefore no person can change them.
How to eSign a PDF in Google Chrome
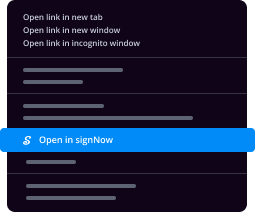
Are you looking for a solution to carbon copy zip code field directly from Chrome? The airSlate SignNow extension for Google is here to help. Find a document and right from your browser easily open it in the editor. Add fillable fields for text and signature. Sign the PDF and share it safely according to GDPR, SOC 2 Type II Certification and more.
Using this brief how-to guide below, expand your eSignature workflow into Google and carbon copy zip code field:
- Go to the Chrome web store and find the airSlate SignNow extension.
- Click Add to Chrome.
- Log in to your account or register a new one.
- Upload a document and click Open in airSlate SignNow.
- Modify the document.
- Sign the PDF using the My Signature tool.
- Click Done to save your edits.
- Invite other participants to sign by clicking Invite to Sign and selecting their emails/names.
Create a signature that’s built in to your workflow to carbon copy zip code field and get PDFs eSigned in minutes. Say goodbye to the piles of papers on your desk and start saving money and time for more significant activities. Selecting the airSlate SignNow Google extension is an awesome practical option with lots of advantages.
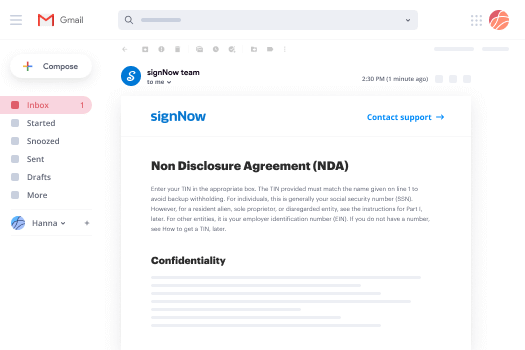
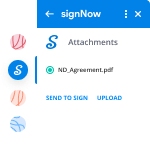

How to sign an attachment in Gmail
If you’re like most, you’re used to downloading the attachments you get, printing them out and then signing them, right? Well, we have good news for you. Signing documents in your inbox just got a lot easier. The airSlate SignNow add-on for Gmail allows you to carbon copy zip code field without leaving your mailbox. Do everything you need; add fillable fields and send signing requests in clicks.
How to carbon copy zip code field in Gmail:
- Find airSlate SignNow for Gmail in the G Suite Marketplace and click Install.
- Log in to your airSlate SignNow account or create a new one.
- Open up your email with the PDF you need to sign.
- Click Upload to save the document to your airSlate SignNow account.
- Click Open document to open the editor.
- Sign the PDF using My Signature.
- Send a signing request to the other participants with the Send to Sign button.
- Enter their email and press OK.
As a result, the other participants will receive notifications telling them to sign the document. No need to download the PDF file over and over again, just carbon copy zip code field in clicks. This add-one is suitable for those who like focusing on more significant tasks as an alternative to wasting time for practically nothing. Boost your daily compulsory labour with the award-winning eSignature service.
How to eSign a PDF template on the go with no app
For many products, getting deals done on the go means installing an app on your phone. We’re happy to say at airSlate SignNow we’ve made singing on the go faster and easier by eliminating the need for a mobile app. To eSign, open your browser (any mobile browser) and get direct access to airSlate SignNow and all its powerful eSignature tools. Edit docs, carbon copy zip code field and more. No installation or additional software required. Close your deal from anywhere.
Take a look at our step-by-step instructions that teach you how to carbon copy zip code field.
- Open your browser and go to signnow.com.
- Log in or register a new account.
- Upload or open the document you want to edit.
- Add fillable fields for text, signature and date.
- Draw, type or upload your signature.
- Click Save and Close.
- Click Invite to Sign and enter a recipient’s email if you need others to sign the PDF.
Working on mobile is no different than on a desktop: create a reusable template, carbon copy zip code field and manage the flow as you would normally. In a couple of clicks, get an enforceable contract that you can download to your device and send to others. Yet, if you want a software, download the airSlate SignNow mobile app. It’s comfortable, fast and has an incredible design. Try out seamless eSignature workflows from your workplace, in a taxi or on an airplane.
How to sign a PDF file using an iPad
iOS is a very popular operating system packed with native tools. It allows you to sign and edit PDFs using Preview without any additional software. However, as great as Apple’s solution is, it doesn't provide any automation. Enhance your iPhone’s capabilities by taking advantage of the airSlate SignNow app. Utilize your iPhone or iPad to carbon copy zip code field and more. Introduce eSignature automation to your mobile workflow.
Signing on an iPhone has never been easier:
- Find the airSlate SignNow app in the AppStore and install it.
- Create a new account or log in with your Facebook or Google.
- Click Plus and upload the PDF file you want to sign.
- Tap on the document where you want to insert your signature.
- Explore other features: add fillable fields or carbon copy zip code field.
- Use the Save button to apply the changes.
- Share your documents via email or a singing link.
Make a professional PDFs right from your airSlate SignNow app. Get the most out of your time and work from anywhere; at home, in the office, on a bus or plane, and even at the beach. Manage an entire record workflow effortlessly: build reusable templates, carbon copy zip code field and work on PDF files with partners. Transform your device into a potent company for executing deals.
How to sign a PDF file using an Android
For Android users to manage documents from their phone, they have to install additional software. The Play Market is vast and plump with options, so finding a good application isn’t too hard if you have time to browse through hundreds of apps. To save time and prevent frustration, we suggest airSlate SignNow for Android. Store and edit documents, create signing roles, and even carbon copy zip code field.
The 9 simple steps to optimizing your mobile workflow:
- Open the app.
- Log in using your Facebook or Google accounts or register if you haven’t authorized already.
- Click on + to add a new document using your camera, internal or cloud storages.
- Tap anywhere on your PDF and insert your eSignature.
- Click OK to confirm and sign.
- Try more editing features; add images, carbon copy zip code field, create a reusable template, etc.
- Click Save to apply changes once you finish.
- Download the PDF or share it via email.
- Use the Invite to sign function if you want to set & send a signing order to recipients.
Turn the mundane and routine into easy and smooth with the airSlate SignNow app for Android. Sign and send documents for signature from any place you’re connected to the internet. Generate professional-looking PDFs and carbon copy zip code field with couple of clicks. Assembled a faultless eSignature process using only your smartphone and enhance your total productivity.
Get legally-binding signatures now!
FAQs
-
Is BCC really hidden?
BCC stands for \u201cblind carbon copy.\u201d Unlike with CC, no one but the sender can see the list of BCC recipients. ... However, the BCC list is secret\u2014no one can see this list except the sender. If a person is on the BCC list, they'll see only their own email on the BCC list. -
What are the 4 digits after my zip code?
The first part is the first five digits of the zip code which indicates the destination post office or delivery area. The last 4 digits of the nine-digit ZIP Code represents a specific delivery route within that overall delivery area. All 9-digits of full zip codes assist the USPS in effectively sorting the mail. -
What happens if someone replies to a BCC email?
The BCC recipient can only choose to reply to you. They have no other option. The \u201cTo\u201d and \u201cCC\u201d recipients can still choose reply to all. They cannot reply to the \u201cBCC\u201d recipient - they don't know he/she got the email. -
What is the nine digit zip code for my address?
The first part is the first five digits of the zip code which indicates the destination post office or delivery area. The last 4 digits of the nine-digit ZIP Code represents a specific delivery route within that overall delivery area. All 9 digits of a full zip code assist the USPS in effectively sorting the mail. -
When you BCC someone what do they see?
BCC stands for Blind Carbon Copy. Normally when you send an email, recipients can see who else received the email because they can see the To and CC fields. But they cannot see the BCC field which means that if you BCC someone on an email, the other people who received the same email will not know. -
What is your zip or postal code?
What's the difference between Zip Code and Postal Code. ANSWER: The two codes are essentially the same in their purpose, but the term Zip code is mainly used in the USA; Postal Code is commonly used in other countries. -
How can you tell if someone was BCC in Outlook?
As you know, recipients can't tell who you included in the BCC field, or even if you used the BCC field at all. But that doesn't mean you can't. To see who you BCC'd in a previous email, just open the Sent mail folder and open the message. You'll see the BCC field preserved for future reference. -
How do I find my ZIP code plus 4?
Easy, just visit USPS.com, hover over the Mail & Ship top menu tab, and select Look Up a ZIP Code. Enter your address (with apartment number, if any), hit Find, and your full address with ZIP+4 will display. -
How do you say CC D in an email?
Suggested clip Copying (cc'ing) Others on Email in English - Tips and Useful ...YouTubeStart of suggested clipEnd of suggested clip Copying (cc'ing) Others on Email in English - Tips and Useful ... -
What is meant by zip code?
A ZIP Code is a postal code used by the United States Postal Service (USPS). ... The term ZIP is an acronym for Zone Improvement Plan; it was chosen to suggest that the mail travels more efficiently and quickly (zipping along) when senders use the code in the postal address. -
How do you use CC D in a sentence?
verb (used with object), cc'ed or cc'd, cc·'ing. to send a duplicate of a document, email, or the like to: I always cc my boss when I write a memo to my staff. to send (a duplicate of a document, email, or the like) to someone: Jim, please cc this to each of the department heads. -
What does CC D mean in text?
verb (used with object), cc'ed or cc'd, cc·'ing. to send a duplicate of a document, email, or the like to: I always cc my boss when I write a memo to my staff. -
Is CC a word?
You use cc when referring to the volume or capacity of something such as the size of a car engine. cc is an abbreviation for 'cubic centimeters.
What active users are saying — carbon copy zip code field


Related searches to carbon copy zip code field with airSlate airSlate SignNow

Carbon copy zip code field
[Music] welcome to another edition of tech tuesday presented by delta media group where we develop software that will open the podbay doors when asked so today we are going to take a look at lead settings now last week i think it was last week we went over notification settings specifically so this was or this is a page that covers all of the settings that pertain to any notices that you'll get by the system regardless of whether those are specifically lead notices or not now this lead settings page includes the lead notification settings but in addition to that it includes a variety of other settings that have to do with how leads are handled and what leads are created for and just kind of customer interaction settings so we'll take a look at that page as a whole because we have ads added a few more options to it so you can see how those work so first off to get there i'm going to click on this settings link up here in the top right i'll just click that button that takes me to my settings page and then here i have a tile for lead settings that will take me into my lead settings keep in mind that there are a variety of settings that are hidden on this page by default so you can use this search settings tab or field up here and type it in and it will narrow the settings down or bring up any hidden settings that match what you type in so we'll close that out also if you wanted to get to this lead settings page you can use this quick actions box up here in the top left you would just type in lead settings and it would come up in an autocompleter where you could click on it and go through to the page and then lastly if you are on delta net 5 instead of a delta net 6 you would get to the lead settings page by just clicking on leads over here in the side navigation and then just going down to settings so i'm going to go ahead and click on our lead settings tile here and we will just start going to the settings so first off we have the broadcast availability setting now this is if at the company level the broadcast system is turned on so there are broadcast leads going out and you want to opt out of receiving those the best example here is the one we display that says if you're leaving on vacation so you wouldn't be able to handle those leads anyway it is a good time to opt out of those and the thought is that you would go here opt out temporarily and then opt back in when you get back but you can use this to opt out of those broadcast lead opportunities for any reason you would just check the box and hit save and that would opt you out of broadcast leads and the next setting we have here are the text message short codes what this is for is again this is something that has to be turned on at the company level if it is turned on what it allows your customers to do is text a code to this 79842 short code number and then they will get back a text message that will have information on it depending on what code they texted over so what i would do here is i would say okay we have listing which is really multiple listings we have detail and we have open house so i would create a code for each of the three of these so i'd say harley's listings details and open houses or open house that's all the characters it'll let me use and you can see it does a check to make sure those don't exist now by putting those in what the system will do is if a customer is standing outside one of my listings and i have this up on a sign that says text harley's listings to 79842 to get more information what would happen is the customer would text that in and they would get back a text message that would have a link to the website that would basically show all the properties closest to their current location now there's another one for details so for details it'll send them a link not to a map search page that shows the listings around them but rather a link to the specific detail page for the listing that is closest to them so the idea is they would be standing by a yard sign that has this information on it which would be in front of the listing so if they do text from there it'll know that the closest listing to them is the one they're standing in the yard of so that's the link to the detail page they'll get so it's just a nice convenient way that a customer can pull out their phone send in a text message and get back more information on the property that's right next to them or the properties around them so this is just a map search centered on their location the properties around them that have upcoming open houses again this opens up a map search that will um be centered on their current location but instead of showing all listings around them it'll just show listings up with upcoming open houses so just a few different text message options that they can send out to get back more information about what's around them now the next thing you can do here is you can have the system notify you whenever one of your text message short codes are used and that's what this setting here would do so from here you can choose to get an email a text message or both every time somebody uses one of your short codes so go ahead and close that out so the next piece we have here are the zip code settings this again pertains to whether or not the company has the broadcast lead settings turned on if they do and they're choosing to use these zip code settings what it'll do is the system will include you in broadcast notices when a lead comes in on a listing that matches one of your zip codes here so if you have a listing that's in one of your zip codes you'd have a chance of getting that broadcast opportunity this is where you define what zip codes you cover thereby defining what listings you want to receive broadcast opportunities for now next we have requests on your own listings it is possible for you to opt out of requests that are below a certain price on your own listings so if you have a listing that is you know say an 80 000 listing but you only want to get buyer requests on your own listings if they're over 150 000 for example i could go ahead and check that box and i could put in a value here of 150 000 and now it's going to allow me to only get requests if the price is over that particular price and then as it says here i can also set this to zero so basically i would say i don't want any of the leads on my own listings or any of the buyer leads on my own listings i should say uh the next one we have here is an opt-me out of setting again this setting will only be available if it's turned on at the company level but if it is you will have the ability to opt out of avm leads so those will be leads that come in through the avm tool on your own website or you can opt out of any leads on your own website so if you didn't want to receive any of those leads you just want them to go off to other agents you would have the options here to opt out of receiving those now next we have the automatic home finder settings so what this will do is just as it says it will copy you on any emails that are sent to your customers from the automatic home finder so the idea would be if a customer saves a search and they're getting these saved search emails every time new listings come up that match their search criteria if you have this option checked you'll be carbon copied on all those emails now the next one we have here is for market watch reports that is exactly the same setting as above only it's for market watch reports instead of home finders so you have any customers that are signed up for those market watches this would ensure that you get carbon copied on all of those market watch emails that go out to them now next we have here are the avm door knock settings so this allows you to turn off door knock leads from the avm system what those are is if a customer comes to your website and they put just a property address into the what's my home worth box on your home page or if they go directly to that avm page put the address in there it'll take them through to a valuation page for their property what it also does is it creates a new lead that just has their property address on it so we call it a door knock lead because it doesn't have any other contact information so if you wanted to reach out to them you would have to you know either send them a physical mailer or actually go and knock on their door hence we call it a door knock lead now if you don't want to receive those leads because you just don't have a plan set up to handle those or to reach out to those customers then you can check this box and that would disable those leads so that they are not created when a customer first just goes and enters their um their property address you'll still get a lead if the customer gets to that page and once there they go in and fill out one of the contact forms or fill out the marketwatch form on the avm page so you'll still get a lead if the customer does provide contact information you just won't get that initial lead that is just a property address as most of the people using that system do just enter a property address and see their valuation and kind of move on now the next piece we have here are the email and sms settings now these are the same settings that exist in the lead notification settings page that we took a look at last week so here you have the ability to set alternate addresses where you would want to get your lead notifications or even multiple addresses so if you wanted your lead notices instead of going to your public email address to go to a different email address and then maybe an assistant's email address or a team member's email address you can put multiple addresses in here separated by commas so i would just put a comma here and then email two and you can just separate those by commas and put as many as you need to there that way your lead notices go to more than one place if you need them to do that next this is where you can control your um default signature that goes on all of your kind of autoresponders and things like that so um you know not only does it go on the autoresponders when a customer is assigned to you and they get an autoresponder that goes on your behalf but this will also be the default signature on things like email blasts or e-cards or even lead processing replies so those are all some different places where this will go and this allows you to customize that so you can show some different things in here you can see we have a full wysiwyg editor here so if you wanted to put graphics or links or anything in your signature you are able to do that now the next piece we have here is you can convert the social links into icons for the html portions of the email so if you did go over here and say i wanted to add a facebook link to my email signature there we go and i'll just grab my facebook and say insert link and you can see it drops in the icon this is kind of a legacy setting where if you did have the url laid out instead of the icon the system would automatically turn the url into an icon in a link like that now the next piece you can add here is you can put in phone numbers now this is an upgrade only feature um but you can put in your cell phone number if you want to get text messages whenever you have a lead notice you just click add new number put your phone number in there and then you can hit a button to get yourself a text a test message and it's a good idea to do that just to make sure that it is working the way that it should but once you have your number in there you just hit save any of the save preferences buttons will all save it and then in addition to getting an email every time a new lead is assigned to you you will also get a text message keep in mind here that you can add more than one so if i have you know team members or assistants that i also want to receive text messages there i can just hit add new number and then i can put in additional numbers here now the next piece we have are the email form options so this gives you a uh a few different ways that you can decide kind of what is required on some of your different email forms and you can also control some of the virtual showing options here so first off you can decide whether you want to require the phone number or the daytime phone number on your contact form the same goes for the my portfolio sign up form so these are just the different forms on the website now for the showing request form in addition to requiring the daytime phone like the other settings you can also choose if you want to hide the virtual showing options if those options are made available at the company level so all the virtual showing stuff has to be turned on at the company level but if it is turned on you'll have the default virtual showing options so these are the ones chosen by the company kind of checked for you by default here but if you know that you don't want to accept a facetime virtual showing then you can uncheck that and that removes that option from your detail pages when the customer is on your website as opposed to the company website so that they don't have the option of requesting a virtual showing via facetime so you can control which ones of those are available there or you can hide them all altogether so we'll close out that one now the next one we have here is the share my leads options so this is also typically a team related setting but the idea here is that if you have other agents that you're working with and you want to share your leads with them you can share your unprocessed leads so a lead comes in and you haven't processed it yet you can choose agents where those that those will be visible to or you can go down here and you can choose processed leads to share so the idea is that if you're sharing all leads with them overall you have to share both different lead types otherwise once the lead is processed so let's say we'll take andy agent here and i'll hit share and that moves him over here so now i know that andy agent has access to my unprocessed leads and what that means is when a new lead comes in before it's been processed and the agent will be able to see it but once it's processed because i'm not sharing my process leads with him he will not be able to see it anymore and i can go the other way let's say i want to process all of my leads personally but i want other members of my team to be able to go in and access those leads and correspond with them after the fact i could do the opposite so i could remove andy agent from there and i could add him down here i will add amy agent because i it's one that i see toward the top so now amy agent would only have access to the leads after they've been processed and not before so i would process them myself and then they would be able to correspond with them after that or alternatively you can obviously go in and you can share both at the same time so those would be people that have access to all of your leads both before and after they've been processed and i'll just select them and click remove and that removes them also keep in mind that i can click through here and i can grab more than one so i can share with multiples at once and the same thing to remove also the next thing we have here is the my portfolio and home finder lead settings so these settings will determine whether or not a new lead is created that would need to be processed again depending on lead settings whenever a customer goes to your website and doesn't make a request but just creates an account or saves a search so a portfolio account would mean they just went in and they chose to sign up for an account or they saved a property say they saw a property that they liked so they clicked the heart to save that and they created an account that way if you just want them to have an account but not really a lead that needs to be processed then you would have this unchecked and then it won't actually create a new lead for those so their account will still exist you'll still have access to it in here but it won't come up as a new lead that you would need to go in and mark as processed the same goes for my portfolio home searches the only difference here is that this would be an account that was created by saving a search so i went to your website i ran a search for properties that i'm interested in and then i hit the save button to save that search so i could get notifications with this unchecked that won't result in the lead that'll go to you that you'll need that you'll need to actually go in and process um but like i said it will still create an account for them so they'll still get the notifications they'll still be able to log into it save properties save searches all those things and you'll still be able to go into their account through the delta net and see their history see the kind of properties they've been looking at things like that now the next piece here are the my portfolio safe search and save listing change notifications so this determines whether or not you'll be notified when a customer that is assigned to you goes in and makes changes to a saved search you can see ads changes or deletes a saved search so with these checked when they go in if they make any of those changes you'll get a notification also you can be notified when a customer goes to your website and saves a listing so that is what this second check box is for now next we have the ability for you to go in and edit your custom labels or add additional labels so these are labels that you can attach to your customers just for organization within the delta net you can go in here you can create custom labels you can change the order of these and that'll be what order they appear in the the drop down menu for those you can hit the delete button to remove some of these labels if they're not useful to you you can hit edit that allows you to change the title or the color associated with that label or you can add all new ones altogether now anything you add here just becomes a label that is selectable for customers these are not the same as the pipeline system labels so the the sales pipeline manager uses its own labels that are defined at the company level these would just be your own labels for your own customer organization and then lastly here we have the brand new settings these are customer specific settings the first one here default to create birthday event for customers to check so what that will do is create an event on your calendar for your customers birthday if they do have a birthday in there so if we check that that will default that create an event option to on for all those customers next we have send a weekly report to customers of listings they have viewed that have had a price reduction so what this will do is it keeps track of all of the listings that customers viewed when they're on your website and if there's a price reduction in any of those listings it'll send a notification out to that customer every week just letting them know that there were price reductions on the listings that they've taken a look at it's just another way to kind of engage with them and you know notify them of their changes on listings that they've shown interest in now next it will automatically create a saved search for customers based on their activity so what this will do is when a customer goes to the website when they visit a listing detail page if the setting is activated the system can automatically create a saved search for them based on a property that they viewed it's kind of a quick and easy way to get them to sign up for a saved search and you know kind of start that correspondence going with them now one thing of note here is that it does say it'll only happen once per customer which is a good thing that way if they don't have a saved search it can set one up for them automatically if they already have one it's not going to set up new saved searches over and over again as they bounce around the website it's just going to set up the one and then next we can have the system automatically create tasks based on the activity and or based on your activity and your customers activity so you can see it labels out here exactly what it will do but it will create follow-up tasks for customers when certain activities have taken place and you can kind of look through these to see what each of those activities are but if you wanted the system to do that for you you would just check this box and then hit the save preferences button over here and then that would save those preferences so that those would automatically be set up for you there we go we had a bit of a delay so you would have those checked and hit any of these save preferences buttons and that will set that setting for you so that those tasks are created automatically the only other thing of note about this page is that all of these save preferences buttons save all of the settings on the page so if i hit save down here at the bottom even if i've changed things in three different sections hitting save will save the changes in all of those sections so all these buttons up here are more for convenience so if you're halfway down the page for example and you make changes here then you don't have to scroll all the way to the bottom to hit save you can just hit it here so there you have it that is the lead settings page with our additional settings and hopefully some some clarification on what a lot of those settings do if you have any questions concerns comments feel free to send an email into support delta group dot com or give us a call and we'll be happy to help you out with whatever you need so thanks a lot and i will talk to you again next week you
Show moreFrequently asked questions
How do I add an electronic signature to a PDF in Google Chrome?
How can I add an electronic signature to a document?
How can I electronically sign a PDF document on my phone?
Get more for carbon copy zip code field with airSlate SignNow
- Trustworthy electronically sign
- Prove electronically signed Gardening Contract Template
- Endorse digisign Network Installation Proposal
- Authorize electronically sign Stock Purchase Agreement Template
- Anneal mark IT Service Request
- Justify esign Standard Lease Rental Agreement
- Try countersign Photography Session Contract Template
- Add Asset Purchase Agreement esigning
- Send Receipt Book Template digisign
- Fax Letter to Manager for Promotion electronic signature
- Seal Nonprofit Press Release countersign
- Password Sales Quote Template sign
- Pass Bill of Sale electronically signing
- Renew Vehicle Service Contract eSign
- Test Payment Receipt eSignature
- Require Sublet Agreement Template autograph
- Comment petitioner initials
- Champion successor signatory
- Call for roomer email signature
- Void Affidavit of Service template signature block
- Adopt Tax Sharing Agreement template signature service
- Vouch Drink Ticket template countersign
- Establish Business Gift Certificate template signatory
- Clear Architecture Firm Proposal Template template initials
- Complete Website Design Inquiry template eSign
- Force Deed of Indemnity Template template byline
- Permit Daily Safety Inspection Report template esigning
- Customize Employment Verification Letter template digisign