Comment Resume Collection with airSlate SignNow
Award-winning eSignature solution


Upgrade your document workflow with airSlate SignNow
Agile eSignature workflows
Instant visibility into document status
Easy and fast integration set up
Comment resume collection on any device
Advanced Audit Trail
Strict security requirements
See airSlate SignNow eSignatures in action


airSlate SignNow solutions for better efficiency
Our user reviews speak for themselves


Why choose airSlate SignNow
-
Free 7-day trial. Choose the plan you need and try it risk-free.
-
Honest pricing for full-featured plans. airSlate SignNow offers subscription plans with no overages or hidden fees at renewal.
-
Enterprise-grade security. airSlate SignNow helps you comply with global security standards.

Your step-by-step guide — comment resume collection
Leveraging airSlate SignNow’s eSignature any business can enhance signature workflows and sign online in real-time, supplying an improved experience to clients and staff members. comment Resume Collection in a few simple actions. Our mobile apps make working on the run possible, even while off-line! Sign signNows from any place worldwide and close tasks in no time.
Keep to the step-by-step guide to comment Resume Collection:
- Sign in to your airSlate SignNow profile.
- Find your document within your folders or upload a new one.
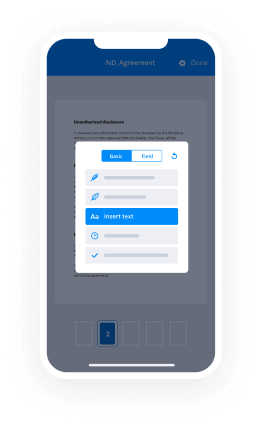
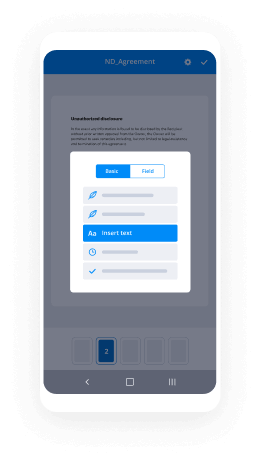
- Open the template adjust using the Tools menu.
- Drop fillable boxes, type text and eSign it.
- Add numerous signees by emails and set up the signing sequence.
- Specify which individuals will receive an signed version.
- Use Advanced Options to reduce access to the document add an expiration date.
- Tap Save and Close when done.
Furthermore, there are more enhanced capabilities accessible to comment Resume Collection. List users to your common workspace, browse teams, and monitor cooperation. Numerous users across the US and Europe agree that a solution that brings people together in a single holistic work area, is what enterprises need to keep workflows performing smoothly. The airSlate SignNow REST API allows you to integrate eSignatures into your application, website, CRM or cloud. Check out airSlate SignNow and get faster, smoother and overall more productive eSignature workflows!
How it works
airSlate SignNow features that users love


See exceptional results comment Resume Collection with airSlate SignNow
How to fill out and eSign a document online
Try out the fastest way to comment Resume Collection. Avoid paper-based workflows and manage documents right from airSlate SignNow. Complete and share your forms from the office or seamlessly work on-the-go. No installation or additional software required. All features are available online, just go to signnow.com and create your own eSignature flow.
A brief guide on how to comment Resume Collection in minutes
- Create an airSlate SignNow account (if you haven’t registered yet) or log in using your Google or Facebook.
- Click Upload and select one of your documents.
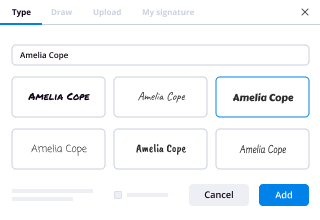
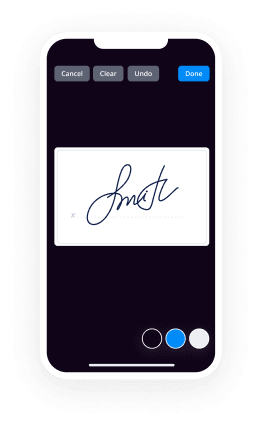
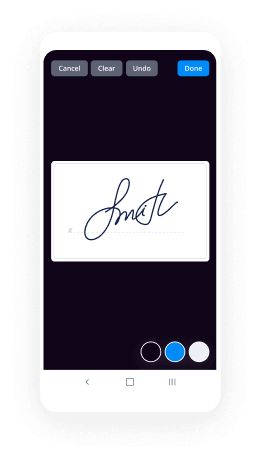
- Use the My Signature tool to create your unique signature.
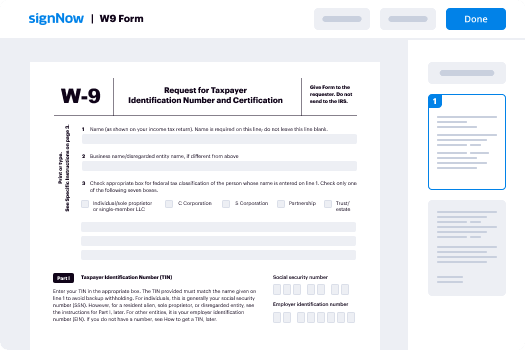
- Turn the document into a dynamic PDF with fillable fields.
- Fill out your new form and click Done.
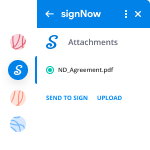
Once finished, send an invite to sign to multiple recipients. Get an enforceable contract in minutes using any device. Explore more features for making professional PDFs; add fillable fields comment Resume Collection and collaborate in teams. The eSignature solution supplies a reliable process and functions according to SOC 2 Type II Certification. Be sure that all of your data are guarded and that no one can take them.

How to eSign a PDF file in Google Chrome
Are you looking for a solution to comment Resume Collection directly from Chrome? The airSlate SignNow extension for Google is here to help. Find a document and right from your browser easily open it in the editor. Add fillable fields for text and signature. Sign the PDF and share it safely according to GDPR, SOC 2 Type II Certification and more.
Using this brief how-to guide below, expand your eSignature workflow into Google and comment Resume Collection:
- Go to the Chrome web store and find the airSlate SignNow extension.
- Click Add to Chrome.
- Log in to your account or register a new one.
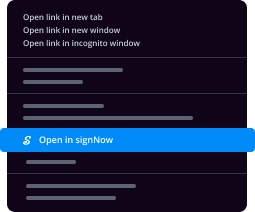
- Upload a document and click Open in airSlate SignNow.
- Modify the document.
- Sign the PDF using the My Signature tool.
- Click Done to save your edits.
- Invite other participants to sign by clicking Invite to Sign and selecting their emails/names.
Create a signature that’s built in to your workflow to comment Resume Collection and get PDFs eSigned in minutes. Say goodbye to the piles of papers sitting on your workplace and begin saving time and money for additional significant activities. Selecting the airSlate SignNow Google extension is a great convenient decision with a lot of advantages.
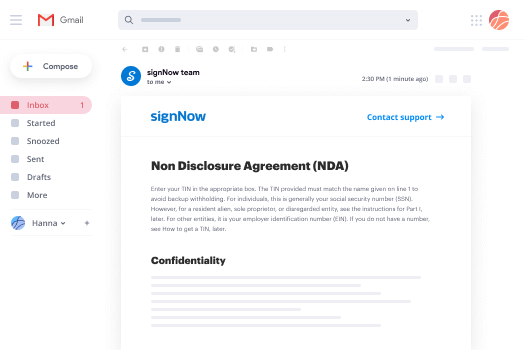

How to sign an attachment in Gmail
If you’re like most, you’re used to downloading the attachments you get, printing them out and then signing them, right? Well, we have good news for you. Signing documents in your inbox just got a lot easier. The airSlate SignNow add-on for Gmail allows you to comment Resume Collection without leaving your mailbox. Do everything you need; add fillable fields and send signing requests in clicks.
How to comment Resume Collection in Gmail:
- Find airSlate SignNow for Gmail in the G Suite Marketplace and click Install.
- Log in to your airSlate SignNow account or create a new one.
- Open up your email with the PDF you need to sign.
- Click Upload to save the document to your airSlate SignNow account.
- Click Open document to open the editor.
- Sign the PDF using My Signature.
- Send a signing request to the other participants with the Send to Sign button.
- Enter their email and press OK.
As a result, the other participants will receive notifications telling them to sign the document. No need to download the PDF file over and over again, just comment Resume Collection in clicks. This add-one is suitable for those who like focusing on more valuable goals as an alternative to wasting time for absolutely nothing. Boost your day-to-day monotonous tasks with the award-winning eSignature application.
How to eSign a PDF on the go without an application
For many products, getting deals done on the go means installing an app on your phone. We’re happy to say at airSlate SignNow we’ve made singing on the go faster and easier by eliminating the need for a mobile app. To eSign, open your browser (any mobile browser) and get direct access to airSlate SignNow and all its powerful eSignature tools. Edit docs, comment Resume Collection and more. No installation or additional software required. Close your deal from anywhere.
Take a look at our step-by-step instructions that teach you how to comment Resume Collection.
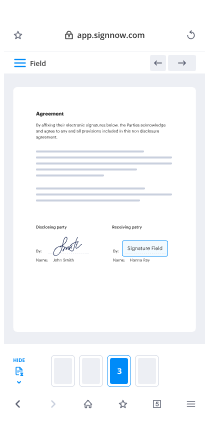
- Open your browser and go to signnow.com.
- Log in or register a new account.
- Upload or open the document you want to edit.
- Add fillable fields for text, signature and date.
- Draw, type or upload your signature.
- Click Save and Close.
- Click Invite to Sign and enter a recipient’s email if you need others to sign the PDF.
Working on mobile is no different than on a desktop: create a reusable template, comment Resume Collection and manage the flow as you would normally. In a couple of clicks, get an enforceable contract that you can download to your device and send to others. Yet, if you want an application, download the airSlate SignNow mobile app. It’s secure, fast and has a great layout. Experience smooth eSignature workflows from your office, in a taxi or on an airplane.
How to sign a PDF utilizing an iPad
iOS is a very popular operating system packed with native tools. It allows you to sign and edit PDFs using Preview without any additional software. However, as great as Apple’s solution is, it doesn't provide any automation. Enhance your iPhone’s capabilities by taking advantage of the airSlate SignNow app. Utilize your iPhone or iPad to comment Resume Collection and more. Introduce eSignature automation to your mobile workflow.
Signing on an iPhone has never been easier:
- Find the airSlate SignNow app in the AppStore and install it.
- Create a new account or log in with your Facebook or Google.
- Click Plus and upload the PDF file you want to sign.
- Tap on the document where you want to insert your signature.
- Explore other features: add fillable fields or comment Resume Collection.
- Use the Save button to apply the changes.
- Share your documents via email or a singing link.
Make a professional PDFs right from your airSlate SignNow app. Get the most out of your time and work from anywhere; at home, in the office, on a bus or plane, and even at the beach. Manage an entire record workflow easily: make reusable templates, comment Resume Collection and work on PDF files with business partners. Turn your device into a highly effective company tool for closing offers.
How to sign a PDF Android
For Android users to manage documents from their phone, they have to install additional software. The Play Market is vast and plump with options, so finding a good application isn’t too hard if you have time to browse through hundreds of apps. To save time and prevent frustration, we suggest airSlate SignNow for Android. Store and edit documents, create signing roles, and even comment Resume Collection.
The 9 simple steps to optimizing your mobile workflow:
- Open the app.
- Log in using your Facebook or Google accounts or register if you haven’t authorized already.
- Click on + to add a new document using your camera, internal or cloud storages.
- Tap anywhere on your PDF and insert your eSignature.
- Click OK to confirm and sign.
- Try more editing features; add images, comment Resume Collection, create a reusable template, etc.
- Click Save to apply changes once you finish.
- Download the PDF or share it via email.
- Use the Invite to sign function if you want to set & send a signing order to recipients.
Turn the mundane and routine into easy and smooth with the airSlate SignNow app for Android. Sign and send documents for signature from any place you’re connected to the internet. Build good-looking PDFs and comment Resume Collection with couple of clicks. Assembled a faultless eSignature process with only your smartphone and boost your overall efficiency.
Get legally-binding signatures now!
FAQs
-
How can I make my resume stand out examples?
Tailor your resume to the job you're applying for. ... Use industry keywords when appropriate. ... Use a header. ... Back up your skills. ... Show how you've grown by telling a story. ... Add a cover letter to truly stand out. ... Proofread before hitting send. -
How can I make my resume stand out?
Respond Directly to the Job Description. ... Describe Accomplishments, Not Responsibilities. ... Quantify Your Accomplishments. ... Use the Summary Section for Distinguishing Details. ... Ignore Irrelevant Information. -
Which format do most employers prefer for resumés?
The chronological resume seems to be the most popular resume format used. This type of resume usually contains an objective and/or career summary statement and a chronological listing (from most recent to past) of all your employers along with related accomplishments. -
Is it worth paying someone to write your resume?
Benefits of a resume-writing service If you have a hard time putting words down on airSlate SignNow, it might make sense to pay someone else to do it for you. The benefit of using a resume service is that you'll get high-quality writing that you can't pull off yourself. -
How do I make my resume stand out with no experience?
Include a summary statement. ... Decide on a resume format. ... Pay attention to technical details. ... Take stock of your achievements and activities. ... Focus on your education and skills. ... Internships, internships, internships. ... Include any extracurricular activities or volunteer work. -
How do you write dollar amounts on resume?
Contrary to the rules of grammar, EXCEPT for academic resumes, it is best to use numerals in a resume rather than spell out the number, even when that number is 10 or under. I know that grammatically, we are taught to spell out numbers like three, five, seven, etc., and write 12, 14, 16, etc. -
How do you write numbers on a resume?
Contrary to the rules of grammar, EXCEPT for academic resumes, it is best to use numerals in a resume rather than spell out the number, even when that number is 10 or under. I know that grammatically, we are taught to spell out numbers like three, five, seven, etc., and write 12, 14, 16, etc. -
What is the correct way to write numbers?
A simple rule for using numbers in writing is that small numbers ranging from one to ten (or one to nine, depending on the style guide) should generally be spelled out. Larger numbers (i.e., above ten) are written as numerals. -
Do you capitalize numbers in a sentence?
Capitalize the first word of a sentence, personal titles, and names of people. ... Capitalize initials; also, letters in abbreviations if the letters would be capitalized when the words are spelled out. Number Rules. Spell a number that begins a sentence even when other numbers in the sentence are shown in figures. -
Do you write a resume in first person?
Resumes should never be written in third person. Use first person and choose the present or past tense to showcase the most important and relevant information to your employment goals. -
Can you write I in a resume?
Use of first person and possessive pronouns. The words "I", "me", "my", "mine", or "our" should never, ever appear in a resume. Instead of making empty claims to demonstrate your work ethic, use brief, specific examples to demonstrate your skills. In other words, show, don't tell. -
How do you list sales numbers on a resume?
Placement of Numbers Statements If a sales associate only has one or two numbers statements, include them with the specific job position under the experience section of the resume. -
How do you make a sales job sound good on a resume?
Use keywords. Look carefully at the job listing for any keywords\u2014important skills or qualifications\u2014included in the listing. ... Use action words. ... Emphasize your related skills. ... Quantify your skills. ... Emphasize any related academic experiences. ... Edit, edit, edit.
What active users are saying — comment resume collection


Related searches to comment Resume Collection with airSlate airSlate SignNow

Comment resume collection
hello everyone my name is sagan i am a part of the represented alumni um council and we're just gonna bring you the first ever represented alumni fun shop series okay this entire resume um fun shop is going to be really based on making sure you all have the tools to at least like make your resume impactful through design we have three things that we want to teach um when it comes to design so what's gonna really make your resume impactful is readability and scanability because we know through representatives course that um every recruiter is probably spending six seconds on your resume so we want to make sure that it's scannable which means that you can see immediately where it um things are it's readable meaning not everything is bunched together close you know you're going to really be looking to see um something clean and concise right we're also gonna go into how to draw attention using hierarchy and formatting which are like you know different using different weights different type um fonts different bold uh types of things italics even if you want to get fancy with it um and then we're going to go into personalizing your resume so how we can use colors to our advantage how we can use brand guidelines to our advantage those are a lot of the things that we're going to be looking at today you're going to be seeing it which is what we're going to be going into now so my own resume um i've really like i think that i've personally grown a lot using my resume from the initial point which you'll be seeing it's kind of embarrassing but it's okay um you'll see how like the growth of that resume looks right um what i did to grow my resume and to really like adapt it to the jobs that i was applying for was again through networking through using what represented kind of taught us and making sure that we um follow up right like so i went to a networking what you're seeing right now is i went to a networking kind of thing it was a networking workshop type of thing right for people of color in oakland and square was one of the um the hosts right um and so what i did was i got their uh their contact information i let them know hey uh these were recruiters at square who were at the workshop so they already had that you know they were already inclined to help and i wanted to basically ask them you know their opinions on my resume um and so like you know i sent them a follow-up email i went ahead and sent them this right so like just right off the bat you can tell it's not really not really easy to read i would say that um a lot of it is coming from the distractions and this is also the feedback that i got right so people from square had told me that you know there's too many colors happening right like there's i don't know where to look um there's a lot of wasted space they didn't necessarily say this but like when you're reformatting your s um sorry english major when you're reformatting your resume you want to make sure that visually people know where to go um and here because of the space and the divide you don't really know where to start and what means you know what really means the most in this right um and then there's also like not enough space so if you look here on the right side of my resume it's very like clunked you can only see really what i'm talking about if i zoom in but like when you zoom out very hard to kind of discern what's happening and it's like too clunked together you know i that's the best way i can describe it um and that's some of the most important content on the resume right like your experience people want to know your experience that's pretty much the most important part but it's so clogged and so from that feedback i was able to just kind of grow and continuously like reformat this resume into becoming this one it's simple quick clean and easy right so we're gonna go you know from this hopefully it's not at that but like we can take it from this to this right and this is what i'm going to share with you okay so um before we get started i did want to say that what i'm going to be going over for the next few minutes is really going to be um kind of beginner level it's going to be about layers and basically creating guides so this is all the foundational stuff um but if you know adobe in a you know in your pretty intermediate i would just suggest like skipping to the time stamp that um we have either in the description box or you know an accompanying text um i also did want to plug that you know we gotta we wanna do more of this workshop so if y'all really are like invested in um learning and we wanna see more of this like let us know send us a dm um but also uh follow us on at represented underscore alum um and find out you know like give us some suggestions as well we want to know what you want um what you want to learn or what you want to kind of if you need help on anything like we'd be like really down to just share what we know also say like you go through this like entire indesign workshop and you're like i don't really i don't really get it i don't want to do all this like this is too much it's no worries um we're also gonna have a word version and have a timestamp for that as well um and we're also going to create a template based off of what we're learning today so what you will be able to do is if you follow us we'll probably have the link in the bio um and we'll be able to get you a template of what we're making so for the most part that's it again i would like to say like follow us at represented underscore alum and send us some suggestions for future workshops this is kind of what you'll see immediately after you go and open up like say you go and search indesign you open it up and what you want to do is just kind of name your file this is the area where you're naming basically the entire file into your layout um and from here what we're doing basically is just creating the the height and the width of your page basically your canvas what you're going to be designing your project on right um so because a resume is usually in half by 11 inches as a standard piece of paper um we're gonna make sure that it says 8.5 inches and one of the cool things that uh that indesign does is it will automatically translate it to whatever unit uh so as you can see 8.5 inches is going to be 51 picos so you know you can keep going and stay like 11 because we're gonna do eight and a half by eleven um 11 inches and that'll translate to 66 because uh you want to make sure the orientation is in portrait mode um and that's just like right here you make sure the man is like like that um you want to make sure that it's one page the start number is correct we don't want to mess with anything right now especially in terms of columns or gutters we're going to keep it the same and we want to make sure like the margins we're going to keep them the same for now but like again uh three pizzas is basically half an inch right so you'll see the translation again and it'll do it all the way around so right now we're going to have a page with a half inch border all around um and i know you probably can't see it but there is a create button here create a new page and a new document so once you have everything already click that create button it's bright blue and you'll end up with this page out of everything here there's going to be two pretty important tools so that's going to be the selection tool which is just like you know it can select anything or and not or and the type tool this is all i know this is probably pretty new but i would just play around like take five minutes play around with it uh when you're done feel free to come back over so with layers um this is pretty foundational stuff when it comes to like just any kind of adobe product um layers are super super useful so if you want to make a layer because what we're going to be doing is going into we're gonna be recreating this from scratch basically so um as you can see i have my layers here and you can see what a layer is by this icon and if you don't have it here you can always go to window and go to layers and have it active so say like i i don't have the layers here or i accidentally close it out right you can go to window go to layers and it'll open back up so you have that window so when you're creating a new layer because as you can see here we want to make a second one right for the text you go to this section here right down here and click create new layer and it'll pop up if you accidentally make too many layers like say oh no i made like two layers on accident you can easily delete the selected layers by just selecting them and pressing the delete button um there's a little trash can at the bottom so we're gonna rename these right like we want them to look at least a little bit like this so for layer one we're gonna call it guides and layer two we're going to call text and when renaming you can either double click so it gives you this you can also change the color if you like something better um you can rename it here by changing the name say i want to call it grid instead of guides or you can just wait a second click it's like a click wait a second click type of thing where you like are changing the file name or something and yeah now we have our layers down right um we want to make sure we're selecting the grid when we are about to do this next part because this next part is setting up um the guides for this specific project right so for the resume um as you can see here if i put it on normal view like this is all of the there's like a bunch of guides right like if i don't look at the grid you don't see all of the guides but if you do you can see them right there like that so we're going to make those and what that's going to look like is we're going to go to layout and then we're going to click create guides and we also have to make sure that we're selected on the grid layer because the whole point of this is putting them on the grid layer right you can also call it guides if you want um so we create the number of rows and what's important is kind of keeping it proportionate so i'm keeping it eight to four and this is going to be like the columns so you can see where it divides into four different pieces um from the margins area which means that you can basically split this inside into four different areas so you know like from here to here is 25 right of this page space um it helps when you're visualizing space it'll help you understand where to move things where the margin is so everything is equal um and that kind of stuff so um if you want to know what like what a gutter does basically like if you can see the moving area in between a gutter is just what's in between like two different sets of guides like a two different rows and it helps provide like even spacing between the different sections and you can see like how changing the gutter size will change the different widths so yeah just make sure that all of this is fit to your margins because we're going to be working within this margin space and if you really want it to be fit to page size you can always increase it later and we're going to click ok um and once that's selected you'll have all of your grid guides so you can see they're on this grid you can press this right here toggle whether you see the guides or not which is what's pretty important for us so like say you don't know where the hell the your guides went or like they're not proportionate and you messed up right what we just do is go back to layout make sure this is still selected go to layout we're going to create guides again and we're going to click remove existing ruler guides and so from there you can remake and retry as many rows in different proportions as you want so you can click ok and you're back at it you don't have to worry about um losing that guides the guides that you set up right after this we're going to lock it and that was basically like a pretty basic tutorial on what indesign can do and how you're going to set your foundation for your project watch some other youtube videos and stuff and see what you can really get out of it especially once you start like realizing everything isn't as bad as you initially thought you can make some pretty sick stuff so we've gotten to the point where we have our grid set right um we have it locked we can see whether we have it or not the next thing is just getting text onto the page right and so generally like what i would advise doing is having like a hold work like a separate word doc with like uh your master resume um and basically that would just look like where all of your experience is um all of your projects that you wanted to take from and you can uh basically use this as a reference point right so this is my word doc and what we're going to do is first start by creating your name right um and so this is when we're going to start getting into we got to make sure that the text layer is clicked when we're going to start getting into um size when we're gonna start getting into um formatting and hierarchy and really how to make the best impact on your resume so these are gonna be like design tips that will get you from you know having something that isn't as scannable or as readable into something that's quick to read and easy um that is not my last name so we're gonna change that and basically like whenever you type into a text tool it's going to be like the the default text what you want to do is be able to um change it right so i have this selected and i can go to character and that's one of the windows where you can change the text you can change what it look like what it's going to be so let's say like i wanted to look bigger i want to bold it like this is where you can go right so this is the font part it gives you all of the fonts and then if you i mean we won't go into finding more for now but basically this is all the area to get it um all of the fonts that are saved onto your computer and this is usually where you can pick the the weight um whether you can pick it as bold italic or just regular what else can you do from here you change the font size so this is changing font size say you want to go 72 um so you i mean for now we're just going to keep it at like 24. this here is what is the spacing between them so like say i have it like this this should be spacing in between from the lowest point to the other lowest point within the text there's an end point and right here this is the lowest point and this is the lowest point so that's what it's separating right now um this one will separate spacing in between characters so you can increase that if you want to look a little like you know modern you can have like some spacing in between um and yeah i think those are like kind of the most important from now these are just kind of dealing with the proportion of the actual text which i wouldn't recommend messing around with because um and we're trying to keep things simple so you don't want it to go all the way like you don't want too much spacing right that'll just end up looking like a little distracting and that kind of stuff we just want like some little hints if you're going to end up doing that and you really want to keep it like as close to simple as possible um so yeah so like here's an example of what your name can look like where we can go to actually center and understand like how the text can work is go to properties and usually i just end up going to properties for everything because it ends up having character embedded into the tool so starting from the beginning like it shows the text frame it shows the style and it shows the color like you can change the color of it if you want i wouldn't recommend it though at least not yet and you can add stroke which is basically just like increasing the line weight it would make it bolder um and you can change it from here too so if i wanted to go ariel i could go ariel if i wanted to go century gothic i can uh and yeah but what i want to get into right now is paragraph so with each of these you can see this would be aligning it to center so you know in word where you know you can kind of say justify left justify middle just by center justify right this is exactly what that is except you know it's called the line center align right um and there's other things as well but we'll get into it later but for now we're just going to know how to do just align left align center and align right we're also going to be getting into this one later but what that is so we're going to align center and say like i have i want to show you i want to like separate these more right if we do that all we have to do is add space in between lines and it'll increase the line spacing and it's just only for that line so that's like a little brief overview of what properties is to get to properties again you can pretty much go into window and click on properties and it will pop up so like again i don't have the properties where is it we go to window we go to properties and it'll pop back up i usually like to keep it at the top because that's what i mainly use um one of the things that i kept here is um keeping this all caps and so what that does like see right here right if i keep this all caps and i add one more text here just to kind of have my information there so let's go usually you can just copy and paste into this let's go to character and let's keep these like the same right so this is sentry gothic this is century gothic so while i'm fiddling with this like you know go ahead and add another text box for your contact information same way uh as adding the text box here you click text box add it and add another one here right so let's like not even make this even just so we can show you how to do that so when talking about bolding is that it's one of the key things that has to do with um creating a readable scannable resume so we're gonna go through this blog by chris gunners i don't know who he is but like i thought that the points kind of matched up with what i was trying to say and we're gonna go through how to use each of these little aspects that he's talking about in the resume itself so he's actually talking about it in the context of like ui text and web copy but a lot of this can actually also go into when you're making a resume what we want to do is use a clear readable font because at the very beginning like to scan something or even just making something you know accessible to people who maybe have like different reading styles or have dyslexia like you never know right one of the things that he ends up talking about is using a clear and readable font um so what he kind of shows is that there's two different types of weapons right so serif fonts are fonts with small lines called serifs attached this is like a times new roman type of font and there's sans serif and so those are the ones where it's like just kind of no serifs attached that's what um sans serif literally means is without serif and um you can kind of see which one would be more readable because at the end of the day these serifs although they were like created for that purpose they end up bleeding um into each other so these small spaces actually make it a lot harder to read for people especially for people who have dyslexia um so like a sound serif can uh really help with that i think that even there's probably even still problems with sans serifs but um for now that's what a lot of like the tech industry is using because it's starting to become like a like a standard practice and a best practice for design so one of these sans serif fonts is sentry gothic and that's kind of what i end up using um just generally or try to use um let's click that so like all of these would be like kind of acceptable when i'm uh designing because i just like them better too so one of the other things outside of font choice that will really help um your resume being readable and scannable is a hierarchy right um and that is basically going to be as what homeboy states is like all about font size and width and let's just start putting in more text right like let's just start adding the different areas of um of your resume so let's like go into our word let's take out like let's make this a section right we're going to have experience as a section as a text box just to help understand how we're going to separate this out um we're going to have a header let's call this header 1 experience right let's also i just copied and pasted that so control v controls ctrl c ctrl v we're also gonna make a header two which is going to be place of work so job company and we're going to again i just cut ctrl um c control v and we're going to make a header three for job position and for uh dates so roll slash position and however you want to separate it right like you do a comma you can do one of these things which is just a shift a forward slash or backslash one of those so like it could be month day year but one of the most important things is the year people will probably care about that the most so this is the three headers right here and i have the body text so let's make one more of these we'll call it body text which is going to be bullets okay so this is how i have my resume set up i have header one header two and header three um as you can see here they're all different in terms of uh what they look like header one only occurs three times throughout my resume as you can see experience education skills so that's kind of how i have it separated out in my head those are what i think a recruiter wants to see almost immediately for header two i just put company um and you can see like in the place of education it's the the school that i was at you could see projects and that kind of stuff i have additional notes here and then header three is also important information but you end up knowing it's going to reoccur so i placed it as a header three thing just because i know that um when they're going through their checklist they're usually looking where it happened and when so you kind of answer that question at the same time and then i have the body text so it ends up looking like that so let's just like copy and paste everything and start with just one job heading right like so let's start with my most recent experience we'll do this we'll put this into a company this into header one i just like to call that one experience but um a lot of people can also put like work history or that kind of stuff i'll put header three in just like how i ended up doing that and we'll also copy and paste this body text okay so right now it's all the same we aren't even looking at the guides right now it's completely okay okay this this is fine we're gonna we're gonna be here in no time okay um one of the things that i like to do is just figure out what i want the hierarchy to look like throughout the the page um and so one of the things i like to do is just like go into header one because that's generally going to be the second most thing after my name that i want to draw attention to the most so how we're going to do that is following homeboy's recommendation of using an appropriate font size and content with basically what the sizes should be right um i think that indesign is pretty chill in terms of like using as a word processor but what ends up happening is you don't really know like the actual size of the font like you do in word because we kind of are set up to like understand like what word or pages looks like in terms of a font but like you know right now this is at 12 point font right and this right here is at 16 right so it changes based on like if i'm zoomed in or not you know and that's one of the things that's kind of like oh you kind of have to do like a trial and error kind of thing and so i don't necessarily worry about how big the font is um what we can do is actually copy the size of this right here and i'm gonna use century gothic just because i know that everyone will probably have this font um but as again like what i was using here i ended up using gilroy because i just i like that font and i ended up using that as well for here so this is kind of how you can mess around with the the weights and the fonts right like so i'm going to keep this bold right because i have it bolded here and i'm going to keep going and keep copying basically the different um weights so from this to the second header is like minus two points and i try to keep it at least a little um proportional so like this is at 16 this is at 14. this would be at 12 but i'm not sure what i have it here at yeah so i keep it going down two uh two sizes and then you keep going down two sizes and it creates that hierarchy so you end up creating the steps down as you go so this is 12 and then making the body text like 10 right um one other thing that you can do is erase the bullet points if you already have them i would just recommend just like getting rid of those because indesign has its own bullet point yeah okay in between header one and header two i switched up fonts and this is another way that you can really like bring hierarchy to a different level let's say i am still going to choose a sans-serif font right but let's say i like choose let's use i'm trying to find something that everyone would have okay let's just use calorie because i'm pretty sure everyone would have calorie okay so one of the things to help with hierarchy is uh changing fonts so here you can see like experience as header one header two header three header four um you wanna kind of design down so we went from 16 to 14 to 12 to 10 right so another way to do that is with varying fonts um you don't want to use any more than i would say especially for your resume you don't want to use any more than two max three fonts using a lot of these different tips too much ends up becoming distracting like how my previous resume was um so you don't want to use any more than two different fonts but make sure that they match in a way you can use to your advantage um so one of the other things that we can use is color and also weight which is you know whether something is bolded or not and so i'm just going to keep going i'm going to keep using calibri because we want it to blend together if that makes sense so we're going to go into calibri again and make this calibri and i'm just gonna also bold this though now because as you can see here i went from having this bold to having it not mold to having it bold again but because this is still at a 10-point font it doesn't look to be more important than this it just looks to be another important thing and you want to use bold you want to bull things that are important to the recruiter right you don't want to overbold things because now they don't know where to look they want to know where your experience is they're looking they have six seconds to look through the page they want to know where experiences if you bold experience they know where to look then they you have another six seconds to show them when and what you did your role because a lot of the times especially for internships they're really looking at when your grad date is or how long your experience was and we're gonna go into here so let's go here and find another i mean for now i'm gonna keep it at calibre but we might change it later so yeah that's basically job one done right you have a header one you have a header two you have a header three and you have the body text you also have everything um at varying weights to con to create contrast in various sizes right what i'm going to go over next is some indesign um basics in terms of alignment and in terms of keeping everything organized into your guides what we've just discussed was basically font hierarchy how to make something readable by bolding and we went over how to use different fonts how to use different font sizes proportions all of that right oh that was a lot of information i would like go ahead get some rest drink some water you know because what we're going to talk about now is setting it all to the guides we made um so if you go here you can always push everything back that was the properties tab just push it back you can go into layers [Music] and what i have to do is set this to normal okay so we see our grid and we're like what everything is in in the middle like if you look at it and i just press control minus to zoom out but like now we see what our guides are like but we don't necessarily know where to put everything right so what i did here was immediately just keep everything to the left so what i do is i because we already have margins set up just all the automatically justify everything to the left um and one way you can do that this is going to be an important tool especially when working with text boxes anything that you want to adjust to be perfect center or perfect left or perfect right you go into the align tool basically just you can go to window you should be able to find it in objects and object and layout and click here so this is like aligning left this is aligning center and what it's doing right now is it's aligning to the selection which is everything within that's highlighted here but when we're working we want to align it to margins for now so we're going to when we hit this it's like hitting the utmost margin right to the left if we hit that it's going to hit the right margin all the way to the to the right if we hit center this is going to be everything centered so for now we're going to put it there and what we're going to do is choose this and we're going to make sure it's a line of margins and make sure it's centered we're also going to do the same here align the margins center and so now everything like say we aren't looking at the layers now everything is adjusted to an area right okay so right now we're going to consolidate everything that we just did it'll continue it'll keep its size so we're gonna keep it on experience make this bigger we're gonna copy and paste ctrl c ctrl v just do an enter ctrl c ctrl v [Music] ctrl c ctrl v and we can just delete these because this is going to be probably the easiest to understand if everything is in just one text box after everything is one in one text box we're gonna make sure that the spaces are the same one thing we're going to do right now is show you how to put in bullet points and get rid of hyphens because you don't want the writing to be fragmented because that's not scannable right so we're going to go into properties and we're going to go all the way down to paragraph which is basically what's happening in this text box and we're going to uncheck hyphenate and i'm also going to click this bulleted list so under bullets and numbering you're going to click bullet enlist and there you go pretty much it right um so the difference now between this and this is spacing like spacing can do so much for hierarchy can do so much for contrast and it really helps someone scan something if not everything is clunked together you don't end up associating it all in once and it's not hard to find when you add spacing and add white space it really helps identify a specific area that you want to draw it in attention to let's go to properties and let's go to [Music] should be in paragraph okay so i think i introduced this before but it's called space before right and what it's doing is this is considered a paragraph this is considered a paragraph this is considered a paragraph it's just adding space before the paragraph start so you can add as much space as you think is good usually you want to keep it proportional and you want to make sure that um the spacing isn't too even right so when things are spaced closer together they're associated together you want this spacing to be closer together than from to here so we're gonna also add what right here we're gonna look at the spacing right so from here i have a nine i have nine pica spaces before right and so i'm gonna add this to b9 and right here from okay whoops okay so from so from here if i'm looking here i have nine spaces before let's add nine um from here i have five spaces and what i'm going to do is keep this proportional right so from here to here is an additional four spaces so from here i will nine plus four it which would be one point two what we can do is keep this proportional in that way so basically right now i have this body text 0.5 5 points away from this which is 10 points away from this which is basically 15 points away from this so it's in increments of three and five um and like we can just even look at how this is looking now right we can go into preview mode and this is already looking a lot more hierarchy based and it's aligned right so from here we're gonna copy pretty much everything and use the same um header styles and fonts for everything we're gonna copy in the rest of our experience and start doing that all right just probably speed it up and so for right now this is all what it's going to look like um with your current bold and weights we're going to get started on creating the other side so you can either copy this just as like a ctrl v ctrl c ctrl v type of thing you can also make sure that this is going to align and making sure it is aligned right and we're going to make it a little smaller um because we are going to put this section here so i added a section for projects um if you don't have it don't feel like you don't you don't need it and um i added skills as a particular section because a lot of people um want to jump straight to there to make sure that somebody has those skills and i have another section called additional notes so this isn't pretty necessary these two but i just kind of keep them in there to fill out the space um but also to make sure that i can add some things in that show a little bit of my personality so we can do that and we'll when we keep it the same in terms of the spacing and making sure that everything is the same size right because we've already established what the spacing looks like here in between those different things um yeah let's keep it going so this is the project section we also have skills so now this is going to be its own section um so we're going to have a header one here let's make it ctrl c ctrl v and the way that i do the skills is by um [Music] pretty much the same way that i do the projects in terms of spacing so we're going to copy these [Music] paste and right now i'm just copying and pasting everything so that's what our goal is right now okay so we're gonna make sure these are all evenly spaced in comparison to what a heading two would be and yeah we're gonna make sure everything is the same this is why like choosing the same fonts is actually a little bit easier because you don't have to spend a lot of time adjusting according to that so you see how hyphenated it's checked here we just gotta re-click that make sure it's not hyphenated and yeah we basically done a good 50 of what the resume is you know what we're going to end up doing is aligning everything and choosing the styles and that kind of stuff with our guide so as you can see like it's it's still kind of like you know it's not the same as what's happening here right and what we want to do is understand what the recruiter wants to see first right and to me in my understanding i think that the recruiter wants to see experience the most probably out of everything else that um we're working with and the projects the skills since it's already kind of you know it's not necessarily like bulky but it's it's less information than what's happening over here so i'm making this a little longer um and we're going to put it probably like just a little like midway through we'll just keep messing around with it but i like to like because this section we've we've cornered it off into eighths i like to just kind of wrap things up make sure everything this is the header this is the footer um just kind of keep everything within the design and try to wrap everything up if that makes sense um one thing that's important is just making sure that these are aligned because that just helps visually you like can look at experience first and not have to worry about what does what is projects you know what i mean so like if you're looking at a preview projects won't stand out as much if it's up there but if you put it down here and kind of align it to where zero waste solutions my first um header two is it ends up flowing a lot easier um and yeah oh and i forgot to paste in my uh we'll make a new one uh my education which is like what but let's do that right now um so you just go ahead get the type tool create a box and we're gonna go here copy education and make sure it lines up with everything so i'm just going to speed through this part i think that the only difference is probably this which is that 10 point font um and this can be a 10 point font since it'll match whatever the bolt is right here and so you see how it's left justified if you just center it it'll be centered you know just make sure that this is centered your actual paragraph and the text inside of it um yeah this is like pretty close to our end product um next we're going to be talking about how to personalize your uh resume so what we're going to be focusing on when personalizing your resume to a specific company is going to be one the colors and two the font so i'm going to take us to a specific company um most of them will have some specific set of brand guidelines that they follow internally but also externally right um i'll be able to see like all of their brand resources so you can go to a company like facebook and see their brand resource center right and generally like you can find the colors the typography they use um one of the things that i'm going to go into is atlassian and go to their design guidelines um because i like the way that they uh they have documentation for it so we can go into color and see the exact colors that they use for all of their brands um you see you can see their primary palette you can get the um the hex codes from here so what we're going to do is we're going to personalize this resume and how i like to do that is when using color so when we're adding color you just go to whatever you want specifically highlight it so you can add color in two ways the formatting can affect the container or it can affect the actual text so you want to make sure that this text symbol is um is selected before you do it just because it might just end up like filling in the container itself so what you do and i kind of have trouble with it myself but i just end up playing around with it enough to get to that specific area so if i click onto this and this is within properties so i click the fill and make sure you see it it says t for text i double click on that and you can see right here there's like a hashtag sign symbol um you just take the hex code that they have here for their main blue pacific bridge and you paste it and press okay and now that text is specific blue and you're like all right i just i can keep going i guess and so what i like to do is just like highlight my name and that um i like to keep going let's see there's a lot that you can do with colors um but i'm trying to keep it simple right now and not add swatches or anything like that but um right now if you just have it copied you just keep pasting it and you can go into like see each one and we're gonna add double click change that press okay and we're gonna keep going down the line cool all right we're pretty close to being done um now there's a lot of awkward space right here i have an additional notes section so like i add in like some things about myself here what you can do to fill that space up is use it for education you can like keep your education here [Music] i try to keep this with space because i know as a template it's going to be everyone has different levels of writing and different levels as text so it's the easiest to just have two columns in this way and let y'all go ham i would recommend no more than five to six bullet points on each of your job descriptions and trying to get rid of like this is again called an orphan so i would just try to get rid of those you can see in comparison to our guides that we are at a pretty good spot like we're right within this section here so i went ahead and called this the header part this is the footer so if you want to add a footer if you want to um add your contact information at the bottom of the page instead of having it at the front you can go ahead and add it again here so it's all good to go you can see how it is in normal form and that is all centered yeah we've got it pretty close to this um this is also going to end up being the template that everyone uses so this is going to be transferred into word and we'll have the word section there one final thing you want to do before exporting is checking out errors right so right here it says i have one error um and how we see what the error error is is hold on there's like a whole pane for this so you go to this right here and it's called the preflight menu and you want to open the preflight panel and what this will tell you about is like text that isn't showing and i can just show you what this is like in action so like say i have this writing here right everything is good because it's showing within the container but if i have it just a little bit off where there's one word coming out you can see that there's an error now but if i expand it to where all of the text is showing no errors so you'll know um if you have made any mistakes in the process of copying and pasting just by checking your uh preflight panel or by doing a spell check so to do a spell check you end up going to edit and you go into [Music] spelling and you press check spelling the shortcut is also control i um so as of course like my name is popping up as being um for check spelling so i'm gonna skip that these are all good to go i think that see that's showing that i don't have a space in between there so that was a good catch and you press done when it's over so i'm basically going to end this tutorial here for indesign the next few minutes will be the exporting and basically how to change this into a word text and um how to basically go from there okay so if you've stuck with me for this long like kudos to you this was long ass process for me i was like we're at the final stage this is the last little section of this tutorial the rest will be just kind of streamlining using what we've created here and exporting it to word format and this is going to be the template that's included in the package that we have link in bio you can go to represented underscore alum and you'll see that there on instagram give us suggestions like put some suggestions in the comments like what what should we do what should we do next we're gonna export now um this is all done um we're gonna go to here file we're going to go to export and we're going to take this i'm just going to put this on the desktop or like let's make this a pdf because that's usually i'm gonna click view pdf because i don't want to click it right uh and press export and so this is what the resume looks like all done incomplete like this is kind of off but it's okay we'll fix it later for the template um but for the most part like this is it this is what we're working with so how i create a word from here is i export here click microsoft word and press export and we can save that here too right but yeah um i'm gonna go ahead and make this all pretty much template ready and include this as a package so this is the end of our first fun shop series so feel free to like you know let me know what's up if you have any questions we can go through this um and yeah if you have any suggestions again follow us on instagram so we can get your suggestions and also subscribe to us on youtube to get more helpful tips helpful tips
Show moreFrequently asked questions
What is the definition of an electronic signature according to the ESIGN Act?
How do I sign a PDF electronically?
How can I sign a PDF?
Get more for comment Resume Collection with airSlate SignNow
- Print electronically sign Sponsorship Agreement Template
- Prove electronically signing Recommendation Letter for Promotion
- Endorse digi-sign Patient Satisfaction Survey
- Authorize signature service Boarding Pass
- Anneal mark Restaurant Partnership Agreement Template
- Justify esign Rights Agreement
- Try initial Honeymoon Reservation Record
- Add Assumption Agreement eSign
- Send Website Maintenance Proposal Template eSignature
- Fax Alcohol Inventory autograph
- Seal Sports Camp Registration electronic signature
- Password Investment Plan signed electronically
- Pass Assignment of Partnership Interest electronically sign
- Renew Wedding Ceremony Contract electronically signing
- Test Work Completion Record mark
- Require Divorce Settlement Agreement Template signed
- Comment endorser sign
- Boost attestor countersign
- Compel onlooker signature service
- Void Release of Liability Template template esigning
- Adopt Succession Agreement template digisign
- Vouch Cleaning Quote template electronic signature
- Establish Evaluation Form template countersign
- Clear Cancellation of Lease Agreement Template template sign
- Complete New Transcription Project Form template electronically signing
- Force Budget Proposal Template template initials
- Permit Creative Brief template eSign
- Customize Amendment to LLC Operating Agreement template eSignature